Faking Purdy Locks: The Modern Hairstyle goes Regency

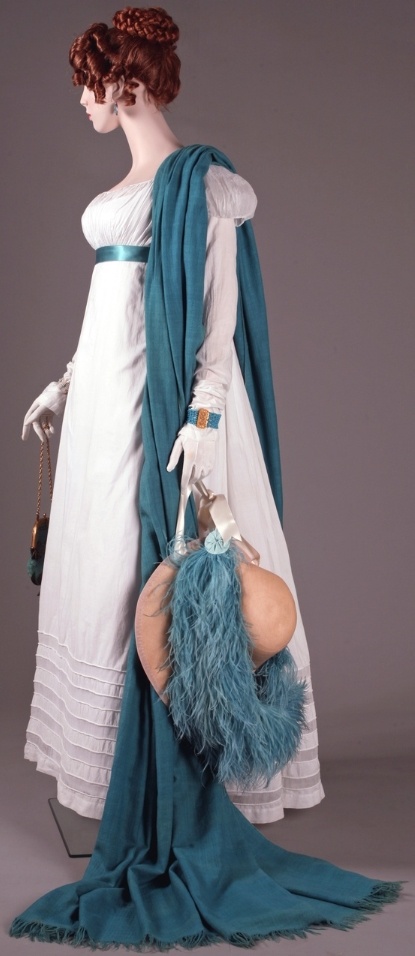
When my hair was long, the best up-do I could accomplish myself was the Olive Oyl look when attempting even the simplest bun! Now it’s cut in an angled bob, and the good news is the front is a nice length for some Regency curls around my face.

The most common Regency hair styles are centre-parted, with several ringlets close to the face and a fancy up-do. If you never had to take off your hat, the ringlets would be all you’d need. But if you go indoors, hats come off, so for me and other short-haired gals, other options are a must!

Jacoba Vetter--Charles Howard Hodges

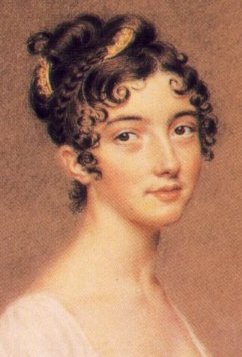
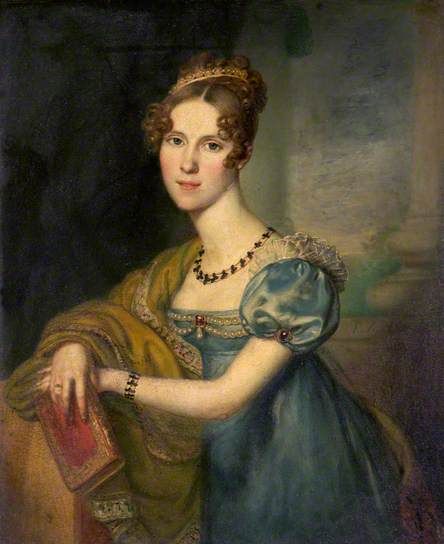
Jacoba Vetter–Charles Howard Hodges


William Affleck

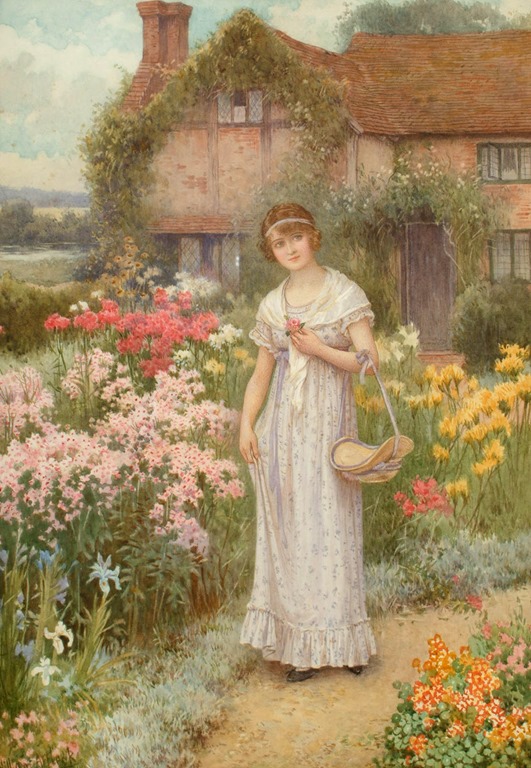
The Old Manse Garden–William Affleck

Even though most Regency women had long hair, worn up in public and taken down for nighttime,some had short haircuts. These tended to be combed forward and decorated with a ribbon or bandeau. Update below.

The balance of this post will focus on creating the illusion of the full Regency up-do.

Click on the thumbnails to see larger images that enhance the text of this post.

~

Planning the Grand Tour--Emil Brack

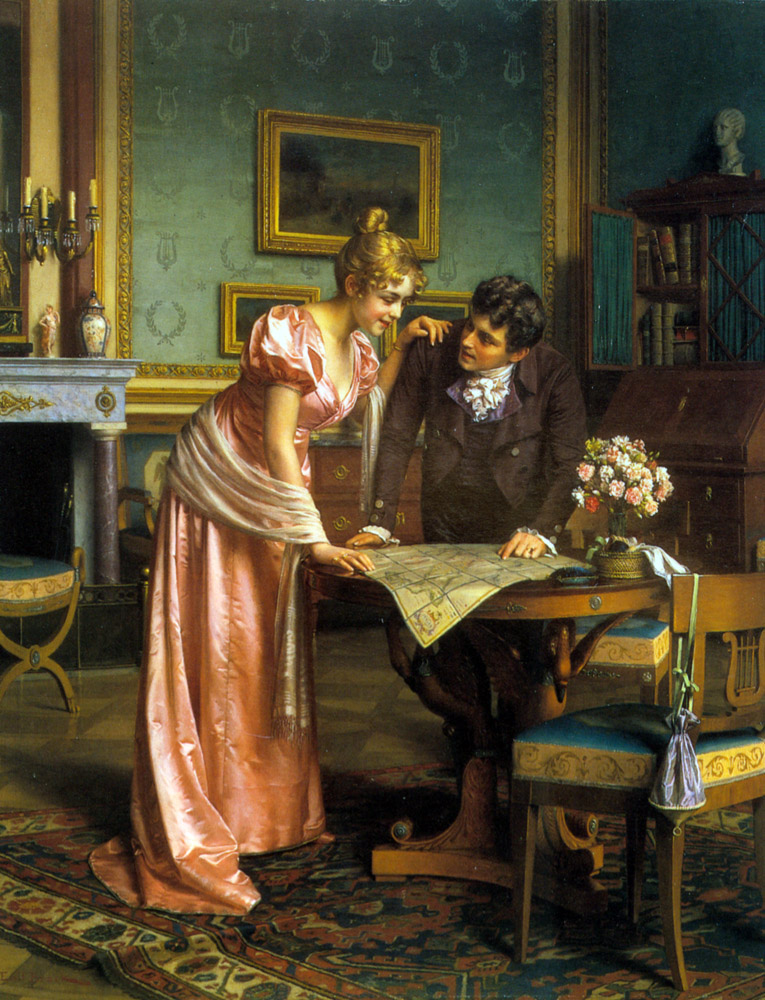
Planning the Grand Tour–Emil Brack


The Ringlets:

How to Style your Medium to Long Bangs into Ringlets

Your hair is straight or almost straight:

  • Part clean, damp hair in middle
  • Separate hair hold the rest back (a hairband can help):
    o If your hair suits curls that sit side-by-side like soldiers, separate in front of your ears.
    o If you have tapered bangs, your curls will drop like stair-steps down the side of the face, so separate about one inch back.
  • Starting at the back (or part for stair-steps), separate a section about 1” by 1”or finger-sized when gathered.
  • Spray the first section liberally with hair spray and roll into a cylinder using a curling iron or small-diameter hot roller.
  • If you have foam hair rollers the diameter of your finger or so, roll the curl off the iron and onto these, otherwise, secure to your other hair with bobby pins underneath each curl at each end. You can also use rags like the Bennet girls.
  • Repeat for all curls, at least two on each side.
    o You can also choose to have more curls, asymmetric ones, and/or a couple of curls at the base of your neck.
    o The curls can be fatter if you like. Just take a little more hair and use slightly larger roller.
    • Let cool and dry completely, then spray again lightly.
    • Loosen and drop one curl.
    o If it falls too long (long and/or very straight hair), re-attach to the hair underneath with a bobby pin each end and spray liberally with hair spray.
    o Make sure the pins are well-hidden since you’re going to leave them in for your event.
The Squire S Arrival--Mary E. Harding

The Squire S Arrival–Mary E. Harding

Your hair is wavy or curly:

  • Start with very wet hair: lightly pat wet hair with towel only until it no longer drips.
  • Separate and spray as above.
  • Spin hair section around your finger until it’s a medium-loose curl.
  • If desired, dry to damp with a diffuser. It will help to set the curl.
  • Spray generously again.
  • When my hair is done like this, it lasts through a couple of sleeps!
  • In the image, the women have allowed their hair to curl naturally.

How to Make Curls in your Short Bangs
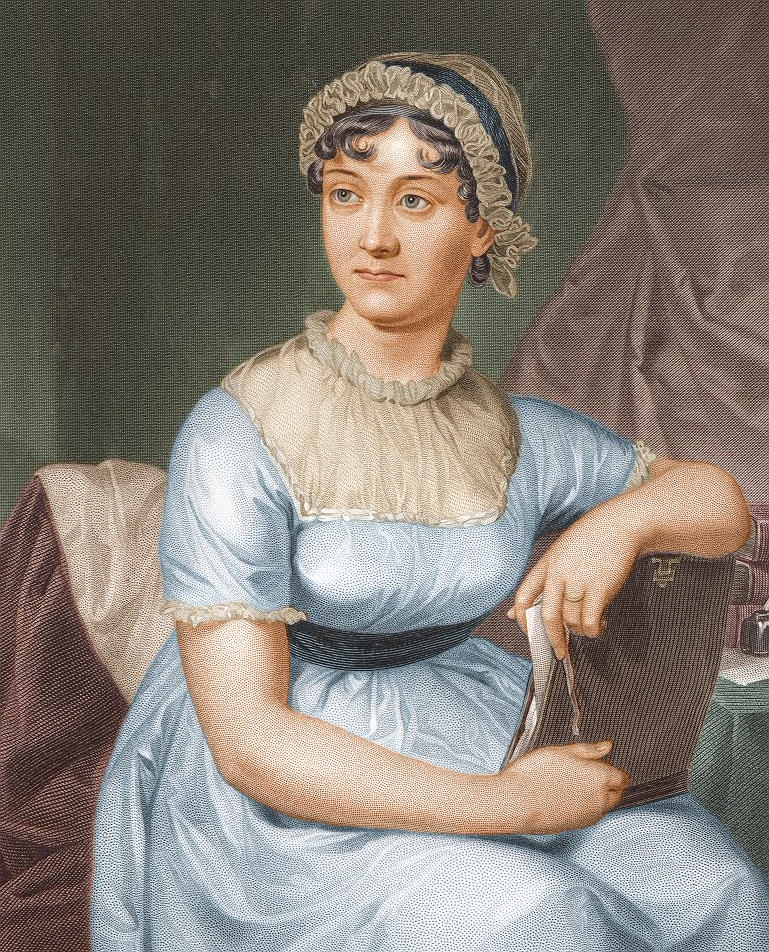
Jane Austen

Jane Austen

Elizabeth Burney--George Smart

Elizabeth Burney–George Smart

Jane Austen wore little curls flat on her forehead.

  • Apply an “extreme hold” hair product.
  • Pin the curls, then scotch-tape the ends to your face. Remove carefully when dry.
  • If you have trouble getting the curl to stay:
    o Use a stronger-hold hair product, or
    o Learn from Punk rock—yes, you heard that right, Punk in a Regency blog!—by putting a small dab of water-soluble household glue (white glue, art glue, carpenter’s glue) in your wet hand, mix with a few drops of water and/or or your hair product, and then use it instead of gel.
    • To remove, soak with a wet cloth until fairly soft, then carefully shampoo out.
    • Do not tug too hard, instead, repeat wetting if it does not all come out.
  • Curls can be made after up-do is formed or headwear is secured, whichever you prefer.
    The Maiden Sweetly Fair and Pale--Rosa Koberwein

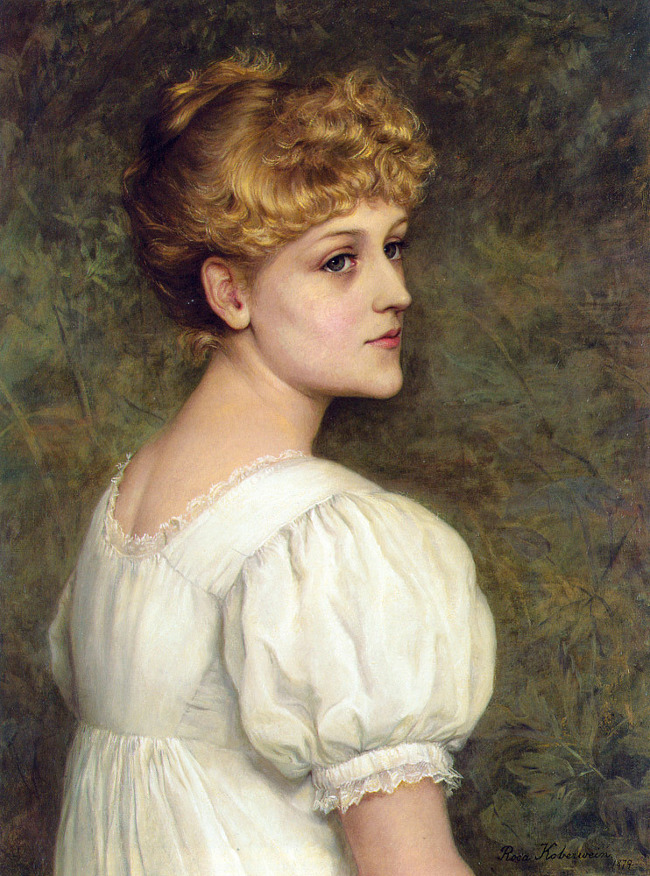
    The Maiden Sweetly Fair and Pale–Rosa Koberwein

    Roses--George Dunlop

    Roses–George Dunlop

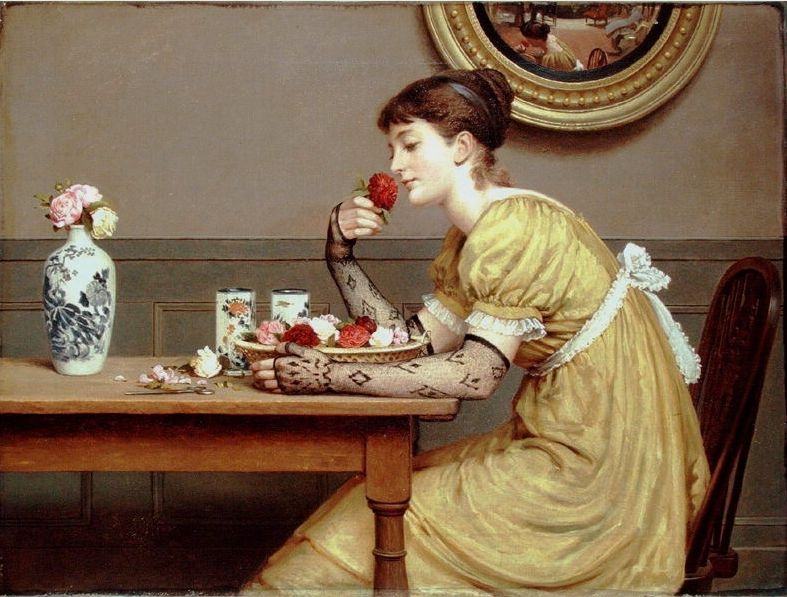
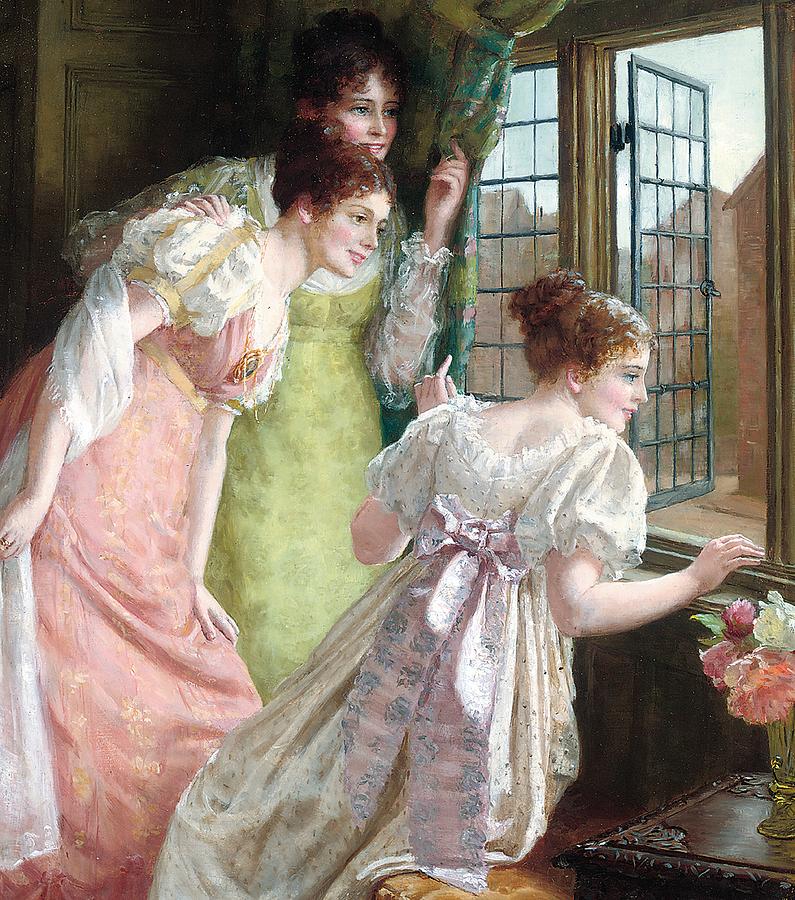
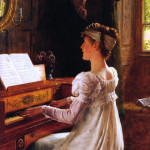
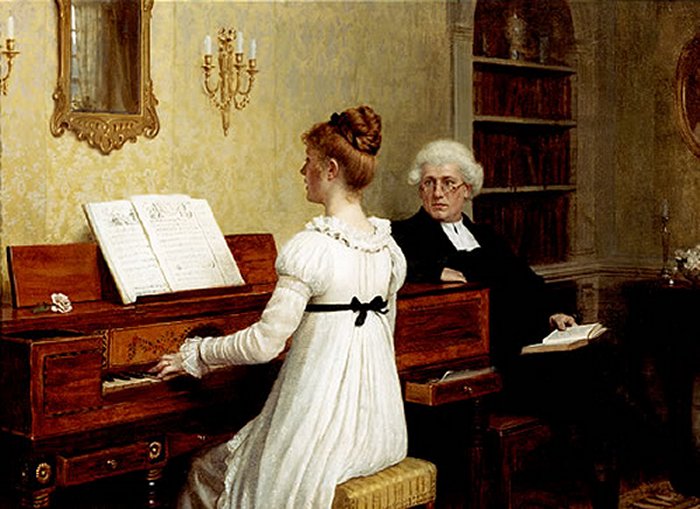
As ubiquitous as they were, curls at the face were not mandatory. Note the two examples of styles where there are no tight curls at the face.

How to Fake Face Curls When You have No Bangs

Long hair, high hairlines, and super-short haircuts are not suited to Regency ringlets.

  • A Regency hairpiece seller on Etsy sells ringlets with an alligator clip for $10 each. That adds up if you want a pair or more on each side!
  • Curls of hair can be removed from one of those dolls with the “real” hair and “porcelain” face meant to be displayed rather than played with; they’re $8-12 at thrift stores.
    o Wrap tape around each curl, close to the doll’s scalp, and snip off. Leave tape in place.
    o Pin to your real hair in stair-steps fashion down the side of your hairline, OR tape individual curls to the underside of a hair band, leaving a slight space between each.
    o Cover pins/hair band with your long hair, a bandeau, or a turban.
    o With a turban, you could even select a new hair colour!
  • Update at the end of post!
  • An alternative: don’t worry about ringlets, and wear a fantastic hair band or turban to distract!

~

The Up-do:

How to Fake it on a Budget when your Hair is too Short for an Up-do

The Regency hair style was long hair dressed close to the head, without any poufy parts other than ringlets.

To get that long hair look, wigs, falls, or hairpieces can be pricey. An Etsy seller has attractive Regency hair pieces in 12 colours, starting at $10 for a single clip-on ringlet, with several styles of full Regency wig with lots of curls for $92. There’s also a $39 curly back bun, and $53 will buy a swirly, pretty one.

Accessories stores have fake hair:

  • $12 falls at Claire’s are straight, but can separated with lots of hair spray, then looped and pinned. Hide the ends with a fake braid ($7) from the same store, in four super-basic colours.
  • A bun maker ($3) and 1-3 braids work with a short ponytail. Bun hair will be an extra $5.
    o Braids can be roped around the bun’s base and then threaded out the centre and left dangly.
    o Braid material can be used to make some droops like Jane Bennet in P&P 1995.
    o You could wrap a braid around your head, behind your ringlets, like a hairband. This would hide the edges of fake ringlets.
  • Courtship--Edmund Blair Leighton

    Courtship–Edmund Blair Leighton

    For bobbed hair, hide wispy hair in back with a wide fillet or hairband tied behind your ringlets, then make certain the rest of your hair is arranged to appear as part of the up-do, perhaps pony-tailed into the bun.

  • Slightly longer hair at the hairline that won’t go into a ponytail can be made into additional pin-curls.
  • You can also opt to wear a turban, which is covered in the next post. It can be as simple as a pair of intertwined silk scarves, a brooch, and a fancy feather ($20-$50).
Kitty Packe--William Beechey

Kitty Packe–William Beechey

You’re Lucky if you have Long Hair!

You can do pretty much anything, including re-creating the styles above without a bun maker or pre-made braids, because you have enough hair yourself.

  • Assuming that like me, you can struggle through ringlets, but an up-do behind your head is near impossible, know that we have options!
    o The bun-maker with your long hair, plus braid ideas as above.
    o Tie your hair in multiple small ponytails and pin to your head, then wear a turban.
    o A simple style as in some in the first link below. #1 and #5 are basically ringlets in a ponytail, then loosely pinned around the ponytail.
    o I could also manage #6 of the first link below. It would probably end up as a pointy bun like Olive Oyl, which I have seen in some Regency photos.

Online Regency Hair Tutorials:
Seven styles, some harder than others. Please consider putting curls around your face, even if the style you’ve chosen doesn’t have it in the tutorial. You don’t need as many as the first example.

Video; again, make ringlets around the face.

More difficult, and for long hair with no bangs, made with long ringlets. This would be better if they had done a photo or two for each step.

A video for a complicated but beautiful long hairdo.

~

Henrietta Fane (c.1785–1856), Countess de Salis--F. Van Donne

Henrietta Fane (c.1785–1856), Countess de Salis–F. Van Donne

The Accessories

Your hair can be dressed up with accessories regardless of whether you’re using them to hide pins or fake bangs. Fillets, bandeaus, ribbons, combs, flowers, and feathers are the simpler ones, and tiaras, diadems, and jewels were the upscale effects for the best ballrooms!hair decor and sleevetumblr_na3t53ZkSc1s5i6ido4_1280 
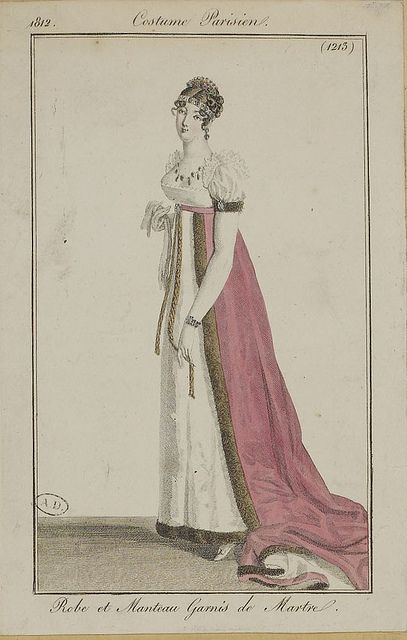
As you see in the variety of images in this post, they are optional.

~

Here are more style ideas and just plain beautiful artwork. Also note the ideas for gowns in all the images! (Click on the thumbnails for larger images.)

Les Trois Graces--Alexandre Jean Dubois Drahonet

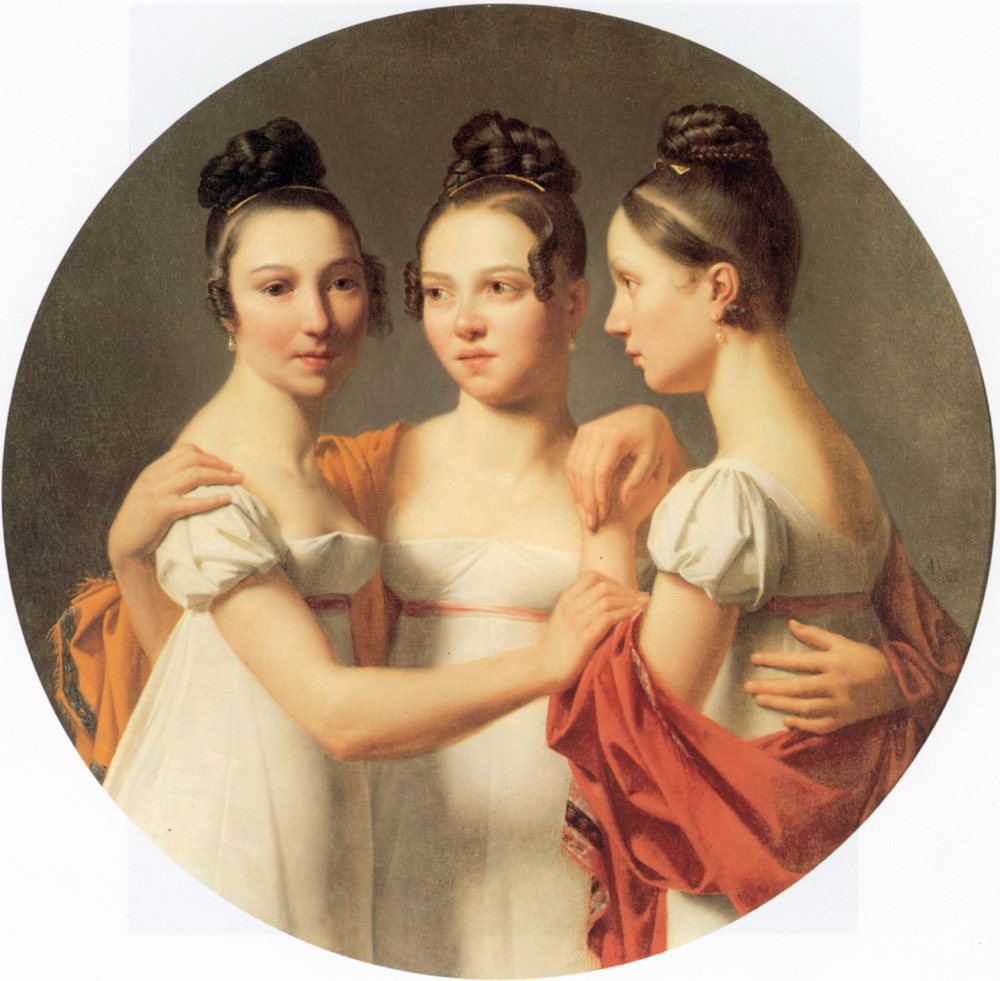
Les Trois Graces–Alexandre Jean Dubois Drahonet

Singing to the Reverend--Edmund Blair Leighton

Singing to the Reverend–Edmund Blair Leighton


~

With luck and good timing, I’ll be able to register for the JASNA AGM in Louisville, Kentucky on October 8-11, 2015; the previous AGM sold out quickly. The theme is “Living in Jane Austen’s World,” and I’m excited about the seminars about her times. That’s where I’ll be wearing the items I’ve collected and re-purposed for this blog.

I’ve had no expert advice during this “Experiment.” “The Boss of Food” from my local JASNA, who’s sewn many a Regency outfit, expressed an interest; I’m sure she would have saved me some mistakes.

Instead, I learned all I know on my own from Regency and other historical web pages, images of real period clothing from museums, and artwork from the time. I felt it made the challenge “real” and helped me communicate through the eyes of a newbie to costuming. Had I not made the mistakes and owned to them, this would not be the blog series it is!

But now, I’m keen to attend some costuming seminars at the AGM. I want to see the Regency clothing construction “up close and in person” for the first time!

I’m in the middle of making my hat, and you’ll be walked through that process in a future post. For the ball, I’ll wear a turban, and I’ve tested out my ability to install one on my own head. We can safely say I won’t embarrass myself too badly! I’ll try a second design for my NEXT POST.

Before the JASNA event, there are a number of Austenesque events to dress up for, and the soonest one just came to my attention: the Regency Springtime Ball in Calgary, Alberta, Canada. It’s the second annual event, organized by Austen-inspired author Melanie Kerr. Her novel Follies Past takes place prior to the start of Pride and Prejudice, with scenes at Ramsgate, similar to my upcoming Letter from Ramsgate.

I wish I’d known of this event sooner, since my sister lives in Calgary, and during my vintage store visits I found several dresses suitable for Regency gowns that were too small for me, but would suit her and my 17-year-old niece. I’d bribe them to join me to the ball. A Regency gown is a good bribe, don’t you think?

~~~

Amalie Wolff-Malcolmi by Johann Friedrich August Tischbein, 1805

A Young Lady by Henry Jacob Burch

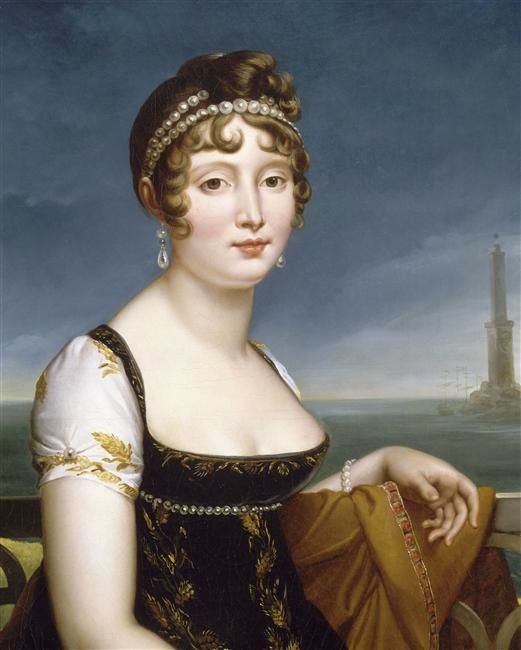
Caroline Bonaparte-Murat by François-Pascal-Simon Gérard, 1808

Updates:

1. Some more short hair ideas. The style is called the “Titus,” and it was worn by both men and women.


2. A blogger, Places in Time has a tutorial on how to make your own ringlets from inexpensive fake hair! It looks like you can make a nice set of three ringlets for each side of your face, plus more for the up-do, for around $12.

3. Author and blogger Rachel Knowles has a page dedicated to Headdresses and Hairstyles for Regency on her blog, Regency History. The images, sorted with 4 per year, are from La Belle Assemblée and Ackermann’s Repository for Art and include descriptions from those periodicals.

Were Regency gowns worn on the Titanic?

Hey! There’s an Alfred Angelo prom dress at “Vinny’s Second Wife’s Closet” in your favourite colour! But before you buy it, rip it apart and remake it, check the prices of custom-made Regency gowns. They start at just under $100, and an appropriate, good-quality morning dress can be purchased for $150-250, a pretty ball gown will cost around $200-450, breathtaking concoctions go for up to $1000, and the sky’s the limit for exact reproductions of specialty gowns.

All of a sudden your $200 used, strapless polyester with the fitted waist and sequined empire bodice seems a bit dear. Think of the fun, though! Trying to adjust it to get gathers in back, shopping for fabric that’s a reasonable match for sleeves, never mind re-working the bodice to attach them. And you just cut a hole in the nipple area while removing that sequin!

One thing I learned is that a suitable re-purposed dress is not that easy to find in thrift and vintage stores, in fact, that’s how I made the list of what not to buy: those dresses were in the majority. In order to make this blog as authentic as possible, I didn’t depend on others and stuck to my “rules.” But the reader can freely ask friends and relatives to raid their attics, get advice or assistance from a seamstress, or buy a product.

I set my upper limit for a used gown at $100 for a dress with little modification required. The most I’ve spent so far was $50 for a pelisse gown, which I admit was a bad purchase. My morning gown cost under $35, and needs less than $10 worth of modifications, plus my time, and though not perfect, it will be close enough in style, with better fabric and yards more lace than a $150 made-to-order one on eBay or Etsy.

As with anything, you get what you pay for, and the cheapest purpose-made Regency gowns are not worth buying. Gowns under $150 are usually machine-made using inexpensive fabric and simple construction, are not fitted properly—and are being sold as Victorian/Regency/Steampunk/Pioneer/Hippie/Jane Austen/Titanic dresses! What happened to Downton Abbey? Author Melanie Schertz found one with that on the list, too!

idea for accessories with morning gownHowever, a strict budget and no time to shop in vintage stores changes things; if so, buy a simple pre-made Regency gown and augment it. For example, a white dress with simple gathered neckline and sleeves can be dressed up with ribbon and lace and pretty accessories. An overdress or robe can be purchased in a colour you like to make it into evening wear.1813 la belle assemblee evening gown1812 Costume Parisien Dress and manteau (train) trimmed with marten (fur) (Click on thumbnails to enlarge.)


I still love the idea of vintage, though, because it affords a budget opportunity to have a gown that doesn’t look like it would be at home on the Titanic! In addition, I have a bit of a crush on Colin Firth, and his wife, green fashion advocate Livia Guiggioli, would approve of a re-purposed gown. She’d approve of Pemberley, too. Maybe he’ll buy it for her!

In an earlier post, I had a list of items to avoid in purchasing a vintage dress or re-using a dress from your closet. This time, we look at what to shop for and examples of good vintage dresses.

When I shop for a potential Regency gown in a vintage or thrift store, I walk down the dress aisles looking at the floor. Depending on the hanger bar height, if the dress touches or puddles on the floor compared to its neighbours, it has length. If the fabric and colour look okay, I pick up the skirt. Often the fabric looks okay from farther back, but is knit, and I drop it. Then I look at the whole dress, evaluating for necessary modifications. I’d guess that 90% get rejected due to unworkable designs.

The last thing is size. As we all know, marked sizes are inconsistent. In a second-hand situation, a clerk may have guessed for the tag, and the dress may have been taken in or home-made. I’ve always had problems with size, because my bust is a good size larger than the rest of me, so if the shoulders fit, the bust doesn’t. It’s important to try it on. I know it sounds creepy, but it’s rare for anything to be smelly, and I wash the clothing as soon as I get it home!

Ideal characteristics for re-purposing a gown:

  • Minimum 8” wide extra fabric at the bra-band level as you pull it out flat while wearing the dress (16” actual length since the fabric is doubled up) for back gathering; more is better. The early Regency hem brushes the tops of the shoes, so if a fitted dress is too long with your ballet flats, pull up the skirt to see if this gains extra fabric width for gathers at the top.
  • Regency fabrics or visually reasonable facsimiles (Jessamyn’s Regency Costume Companion has some great examples).
  • If no Empire waistline, there should be no sewn waistline front or back, or if so, the skirt should be long enough when pulled up under the bust. Later Regency was ankle length, and ribbon or lace can be used to add a couple of inches.
  • Bodice should be a close fit, but not too tight—you should be able to remove visible zippers and replace with ties, laces, or buttons and loops.
  • Puffed sleeves about 3-6” long (underarm) that don’t puff high. This is the most difficult requirement, as they were only common for short spurts a few times in our history. See photos below for alternatives that work and, in a later post, I’ll show some examples for faux-puffed sleeves using minimal spare fabric from your gown.
  • Non-Regency details should be easy to remove, hide with trim, or modify without being obvious.

Other details for Regency:

  • Back bodice either flat and fitted or gathered to mirror the skirt.
  • Front bodice style varies a great deal in Regency.

I’ve shown a few bodice examples, and while you’re looking at them, enjoy the sleeve style variety, too. You can click on the thumbnails to enlarge the image.

Evening dress 1818-20 cream silk and wool mix trimmed with green satin1810 cropped1810 cotton metallic thread met interesting neckline croppedcan do this with the net for blue dress croppedThe Rendezvous Reginald Edward Arnold croppedFrench School XIX century A young lady with a lyre cropped.met museum 1815 bodice and sleeve detail1810 orange croppedcotton muslin 1820 note back closures1805-1810 muslin with metal star embroidery and back ties croppedback bodice 1811


Dress, 1810-15, French, cotton, The Met cropped


Dresses requiring very little modification:

  • Hippie dresses.
  • Empire waist “round” dresses: gathered all around.
  • 80’s dresses, though the puffed sleeve may be large and high and the dress may not be long enough—but there’s nothing wrong with adding lace to the hemline, and we’ll look at other tricks in a later post.
  • Empire-waist gowns with straight skirts, but not fitted and flared. Then another dress can be used for an overlay or robe for the skirt with the gathering at back, and perhaps sleeves.
  • Regular-waisted dresses, if the skirt is long enough to be lifted up to under the bust and still barely brush the tops of the shoes.
  • Gowns that work otherwise, with sleeves large enough to be made into puffed sleeves.

The Thrift Shop Regency Costume Experiment is intended to be a minimal-sewing project, but in case some readers have greater ambition, there are more gowns that will work.

Sewing and fitting will be required:

  • Caftans, with a single fabric, not too heavily patterned. You’ll have to fit the bodice, modify the sleeves, and gather the “skirt” fabric in the centre back.
  • Too-large evening gowns, if the top of the skirt is big enough to make gathers in the back and the bodice suits being pulled into back-gathers with the skirt, or you do not mind fitting the bodice.
  • Sleeveless or strapless gowns with enough skirt fabric for empire with back gathers, plus other extra fabric for sleeves (a matching shawl or wrap, a bodice overlay that can be removed leaving an attractive bodice, a lining, or extra skirt fabric). It’s difficult to buy a coordinating blouse or fabric to make sleeves, because it’s almost impossible to match colour and texture.
  • A skirt from one dress and bodice from a blouse or a short dress—it’s better if the darker colour is on top.

Some bodice enlargement insert ideas (click on thumbnails to enlarge):1810 evening dress V and A cropped1805 croppedidea for bugle lace


To add a few inches to get extra fabric for gathering (click on thumbnails to enlarge):1812-July-Evening-Dress-blueRed gauze dress with chenille embroidery. A light open weave fabric woven in Scotland, gauze or leno, ca 1808

Notes on adding trim:

  • If you want to tie a bow in a waist ribbon, it needs to be about five feet longer than your waist measurement. If it is a wider ribbon, you can attach it to the dress to keep it flat, but I recommend a loose whip stitch unless you never want to change it for another look. An alternative is reinforce it with a second ribbon or stiff fabric of matching width an inch short of your waist size, attached on both edges with fabric tape in the middle section of the ribbon, to keep it from folding over.
  • If you intend to add lace to the bottom of the skirt, it can be flat or gathered. Pre-gathered lace can be bought in several widths, though colours are limited. If you find flat lace you want gathered, you need 2½ to three times the length of your hemline. Run a baste stitch and gather (hand sew ½” long stitches near the top edge for about 2-3 foot intervals; tighten the baste stitches uniformly to match the skirt edge). Attach with the fabric tape. If you attach outside, you should then attach a ribbon with fabric tape over the top edge to hide it. Overlap the ends the width of the fabric tape and secure.

~

That’s it for the three-post introductory series on Gowns. My initial plan for this Experiment involved one complete outfit by the end of June, so I have success with my morning gown, and we’ll see the rest of the items in future posts. I also said if I had time, I’d include a ball gown. Counting forward, and knowing I can’t post every week, my time is tight! But I will continue posting my projects beyond the initial Experiment, and a ball gown and spencer are in my plans!

NEXT POST:  HEADWEAR AND HAIR, WHICH WILL LIKELY BE 2-3 POSTS. I HAVEN’T ENOUGH COURAGE TO TACKLE LYDIA’S HAT YET, BUT THERE WAS A SNEAK PEEK AT MY FIRST TRY AT A CAPOTE WITH THE WHITE MORNING GOWN LAST WEEK!

~

Cool links:

Fashion examples from 1808 to 1828 from E.K. Duncan.

The Repository of arts, literature, commerce, manufactures, fashions and politics, published in 1809 by R. Ackermann

The Mirror of the Graces, a ladies’ etiquette book from 1811.

~

Images are from Pinterest, most originating from museum pages. If interested in the source of any particular image, contact me for more details.

Update: