Louisville JASNA Costume One: Familiar to Followers

An American flag coloured morning gown was suitable for the first official day of the 2015 Louisville JASNA AGM because I planned to be at sessions until about 4 pm, the end of the morning in the Regency period, at least in the city. Austen herself commented about rising at 9am, and many slept until 10am, since balls and social life ended in the wee hours the night before–kind of like it does for many people attending this conference!

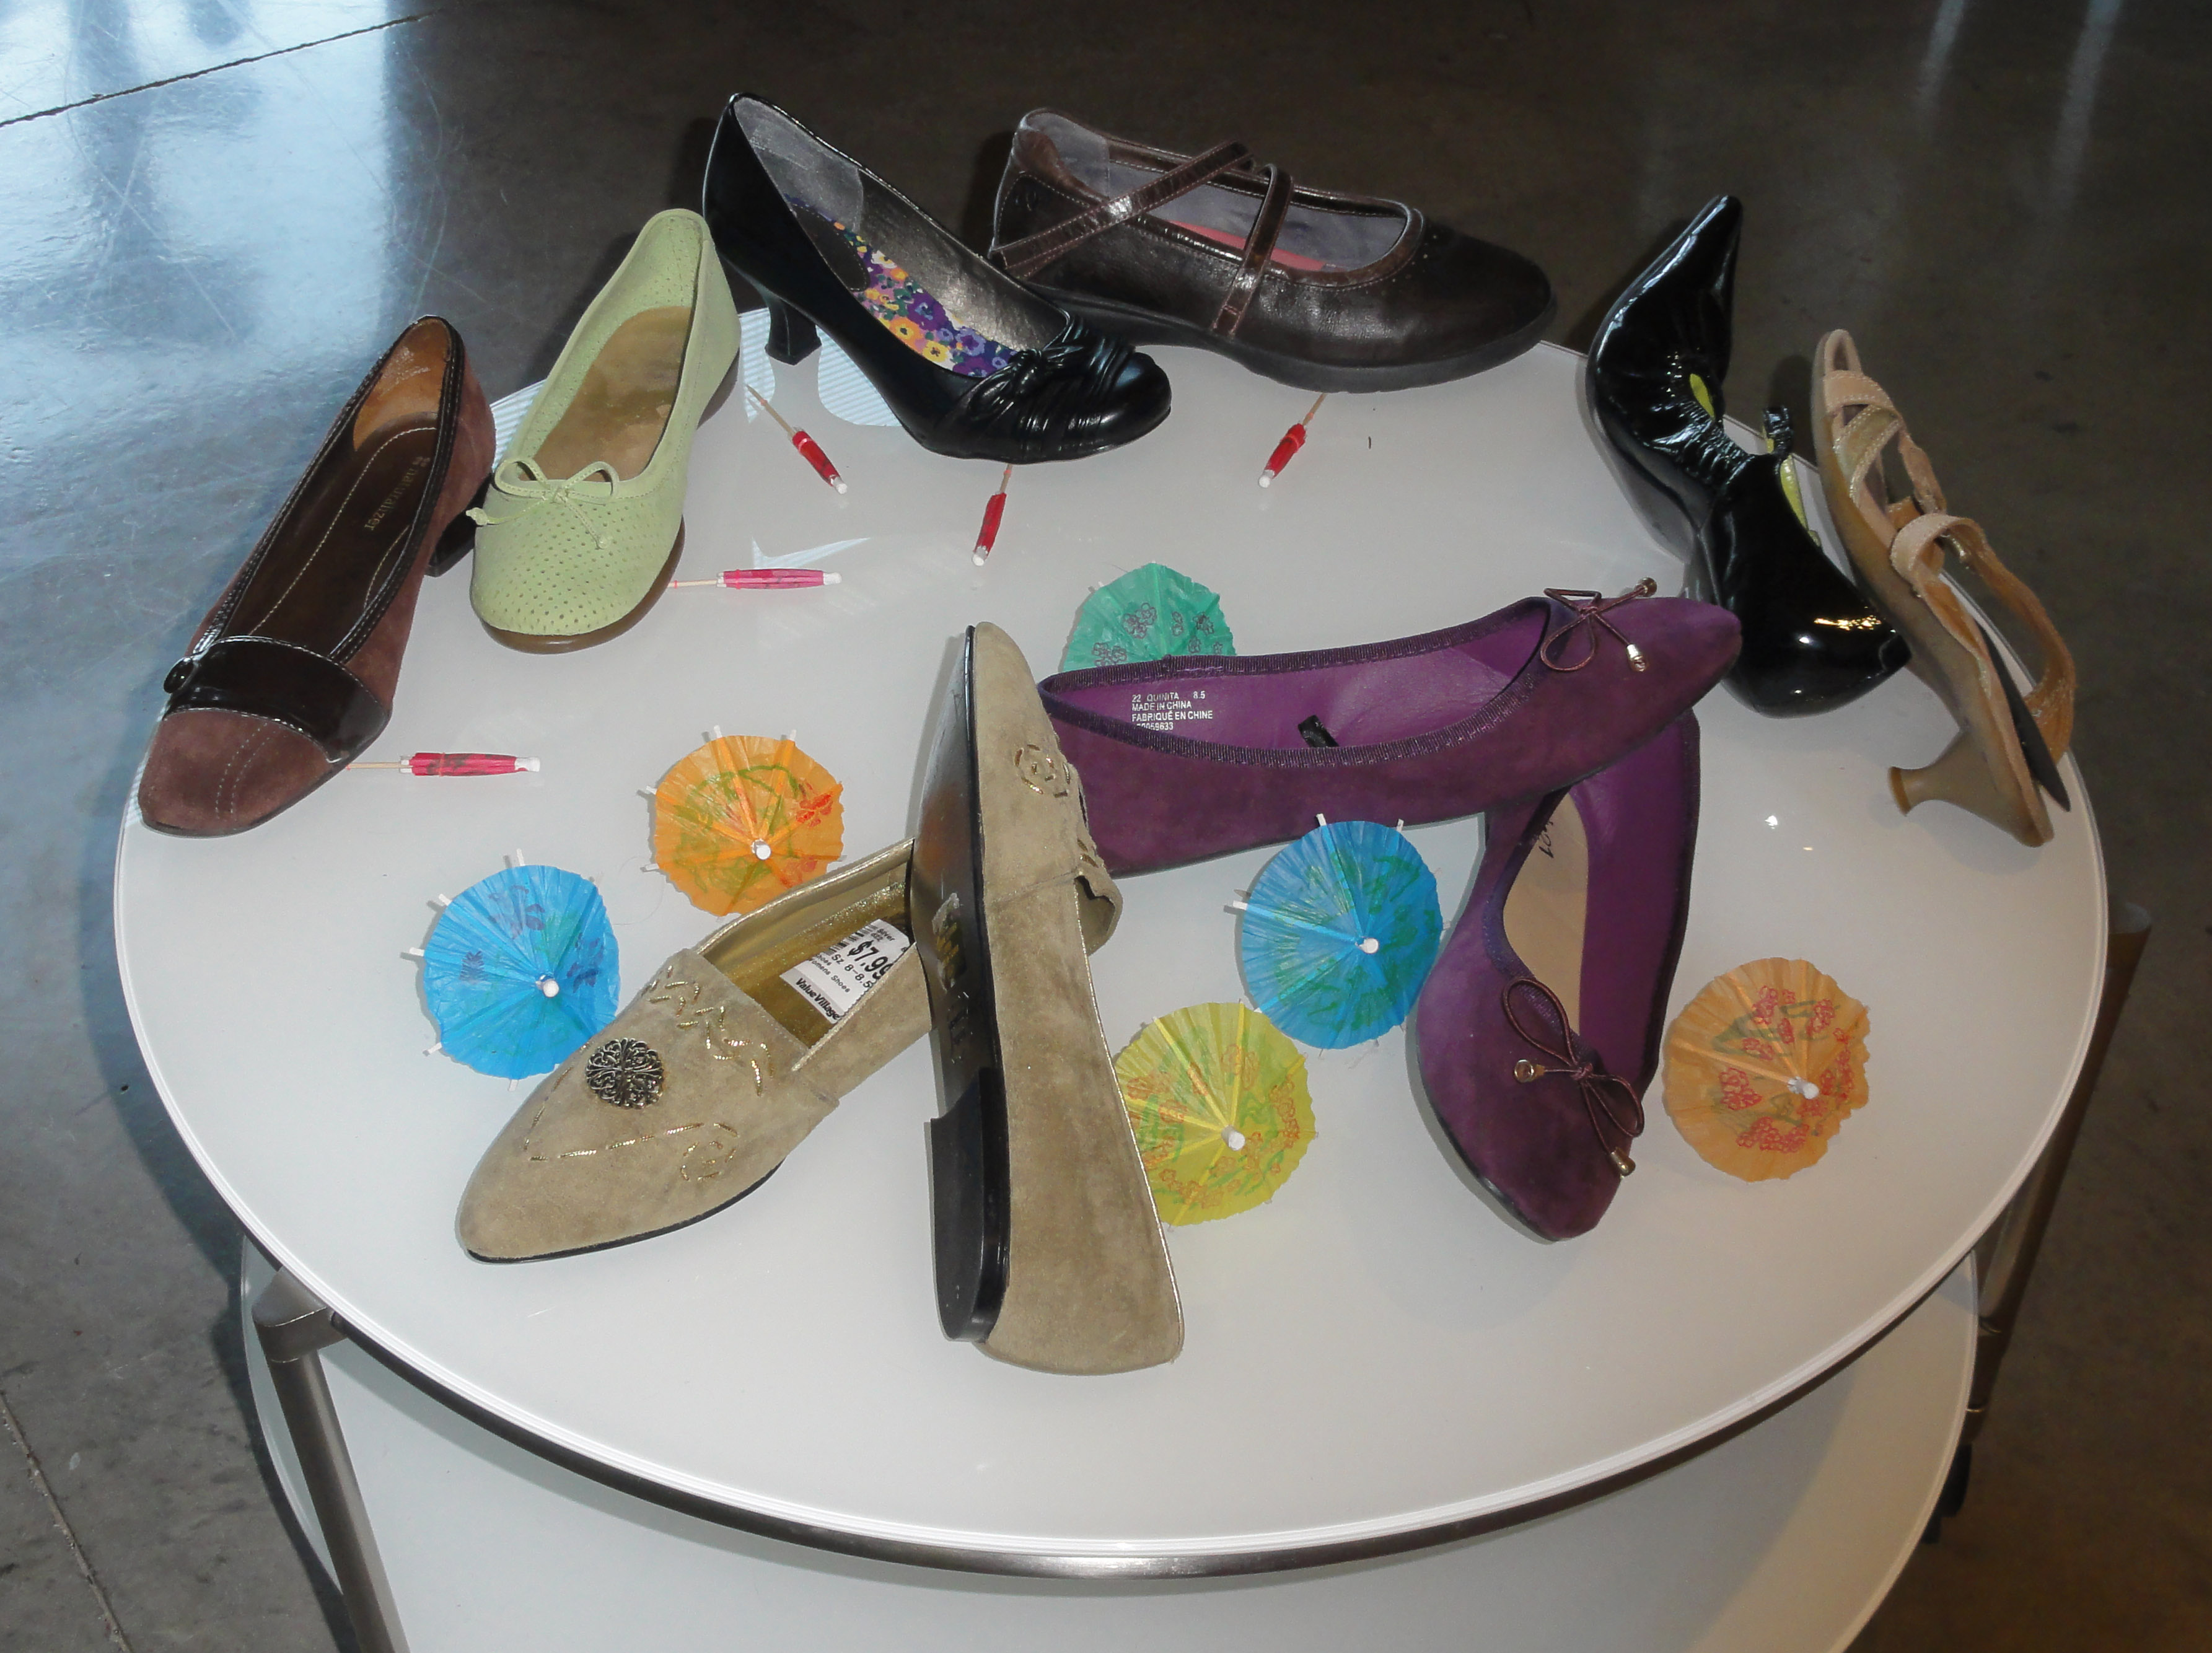
We were overtaken today compared to our quiet little pre-conference activity days! Many, many glorious gowns and hats appeared on ladies, and a good half-dozen more costumed gents now hovered about them as they priced out ribbon. I had already been confused and intimidated about purchasing these unique, quality products. Can you imagine having Ms. Silk Reddingote in front of you, passing things to Mr. Custom Top Hat? The “Quality” has come.

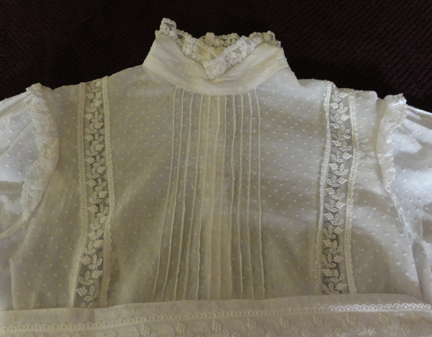
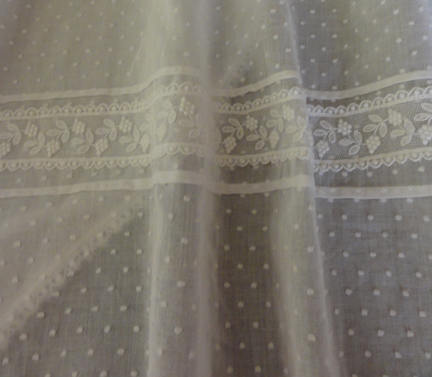
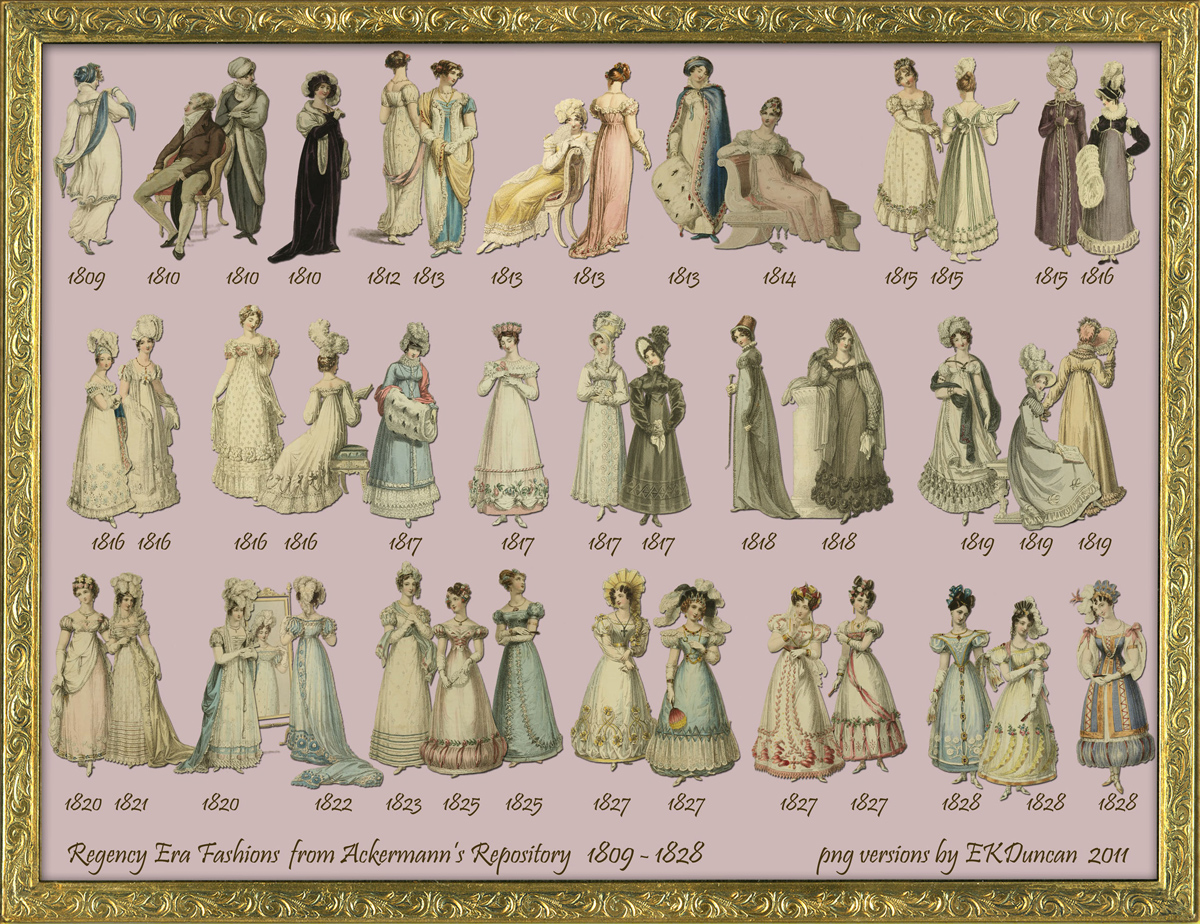
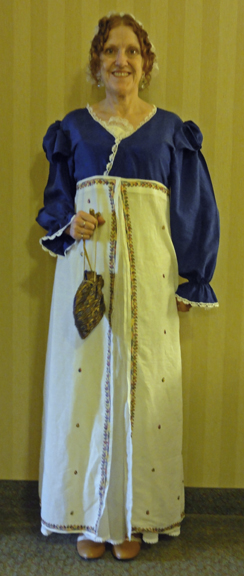
I have a cold and a stomach upset of some sort, and since I’ve already been here three days, I’m tired, so I kept Regency hours. Regency ladies breakfasted at nine, took callers or made calls from 2-4, thus the length of the morning. The morning dress should cover the arms and chest during those hours, thus long sleeves and chemisettes, fichus, or lace tuckers were in order.

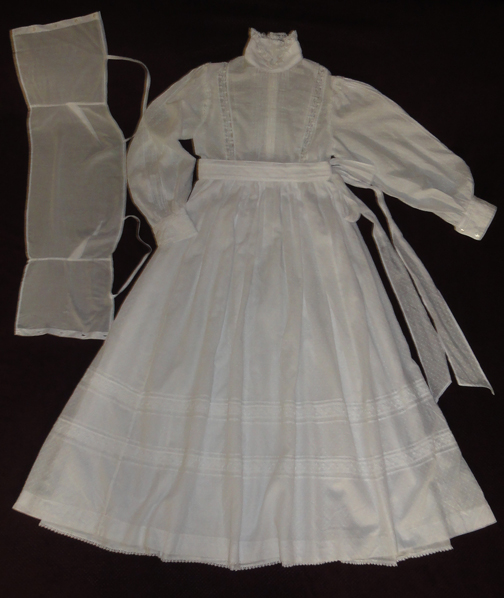
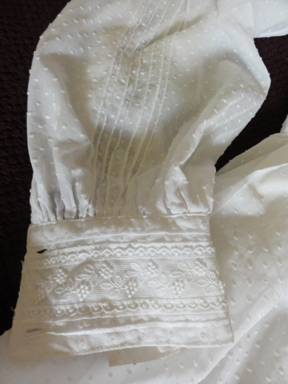
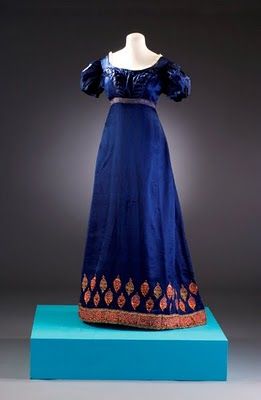
I wore the same outfit you saw in an earlier post, which I refer to as my “emergency” gown since I put it together in a few days for a Jane Austen Tea put on by my local JASNA in early September.

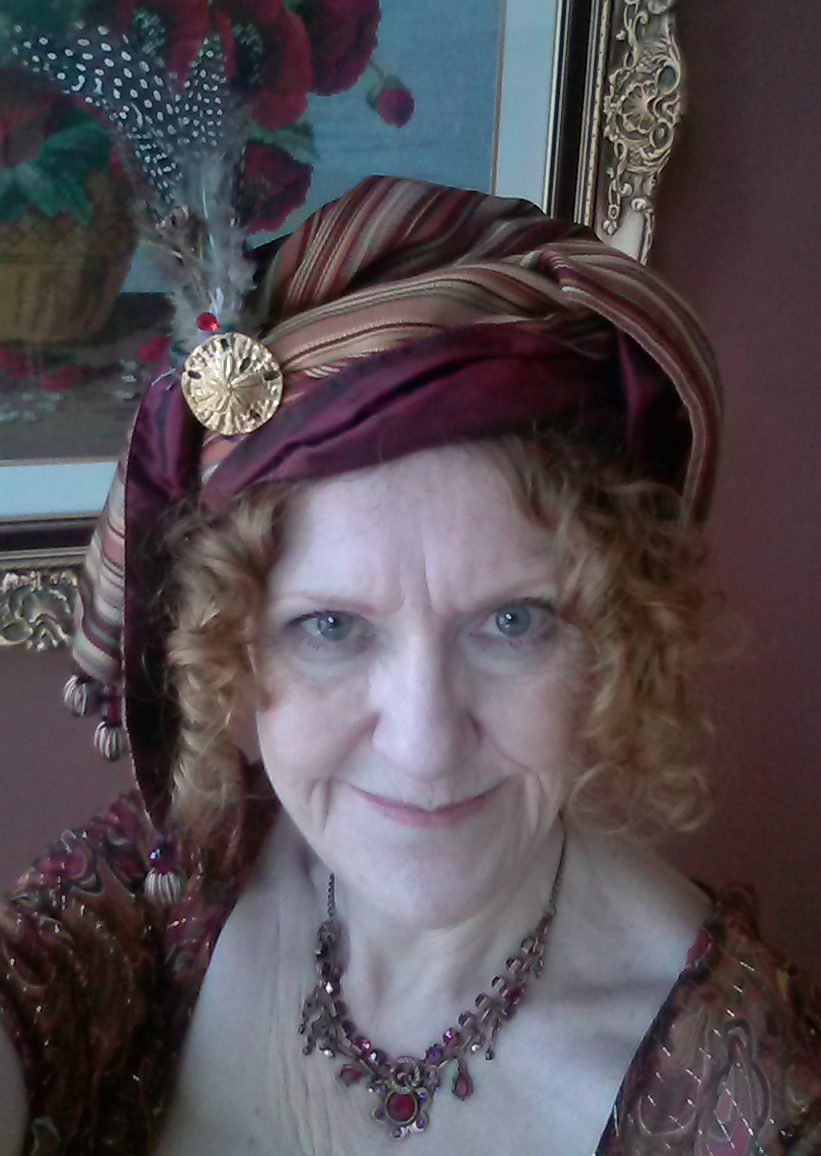
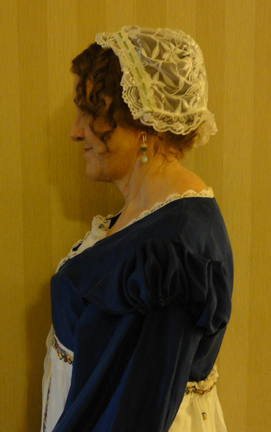
Here I am again, with more photos so you can see the back and my little “grown up lady’s” cap better. My ringlets turned out nice today. I cheated and used the tiniest amount of makeup, as I’m like Mr. Darcy in MP author Karalynne Mackrory’s book (ghostly complexion) otherwise!

louisville 15 friday louisville 15 friday backlouisville 15 friday sidelouisville 15 friday boot


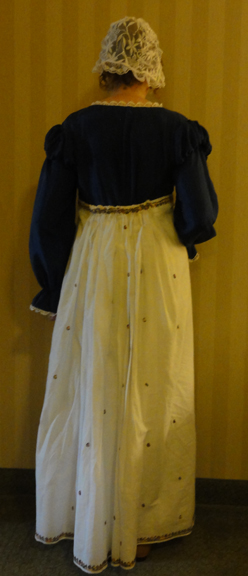
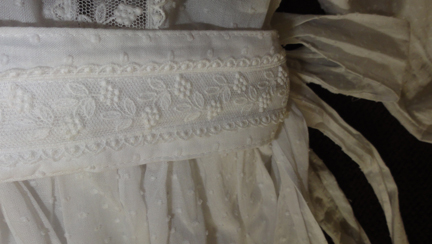
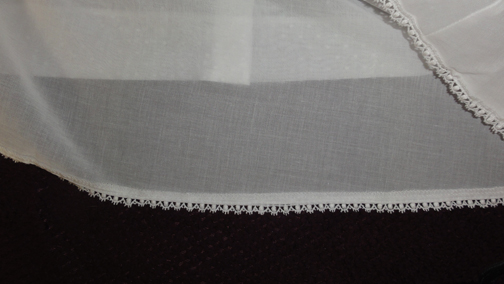
One area of difficulty is I’d originally sewn nothing more than a no-fray finish on the top edge of the petticoats the first time, but lately, I added a narrow waist band with hooks and eyes to close it in back. It has back gathers to match any gown it would be worn with.

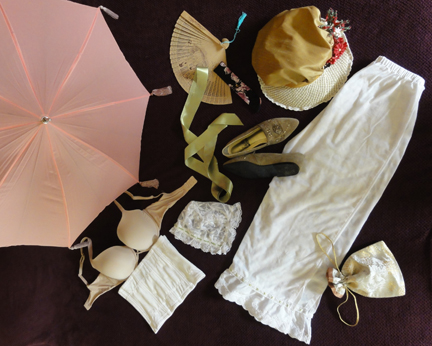
When I made the waist band, I measured myself under a regular bra. As you may recall, I’m using a bustier from years back when I was heavier as a corset. With the cups folded in and stitched down, its shape is good and it pushes the girls up well. Its boning is similar to a busk.

It turns out this bustier reduces my rib cage about an inch! I had to safety pin the petticoat to my bustier, and after about an hour, nearly tripped on it, as it was hanging a good eight inches low on one side! Two pins had become undone, as well as the back hooks and eyes! When I tried to fix them without being noticed, I jabbed myself instead! I returned to my hotel room to add more pins and close them with care this time!

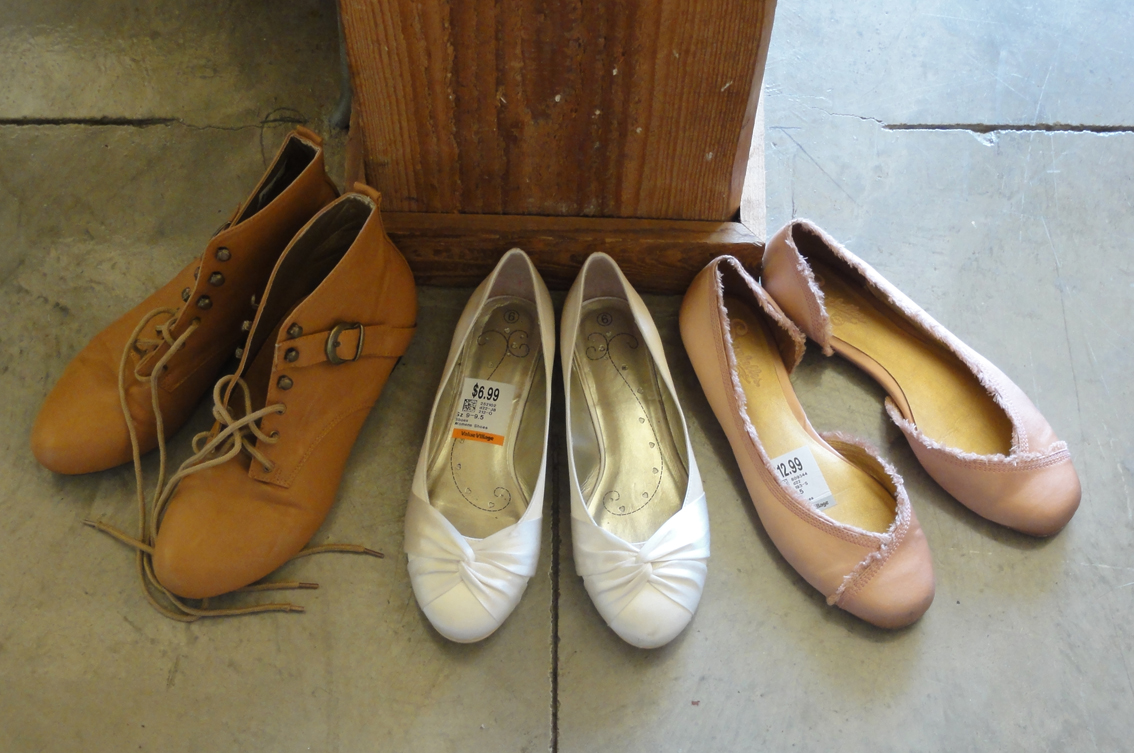
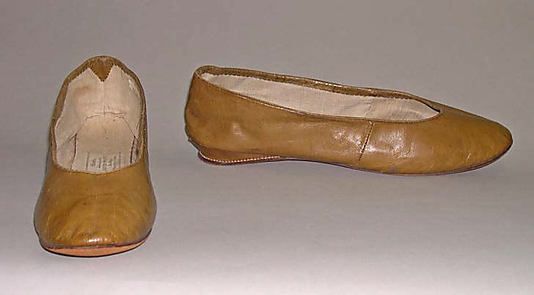
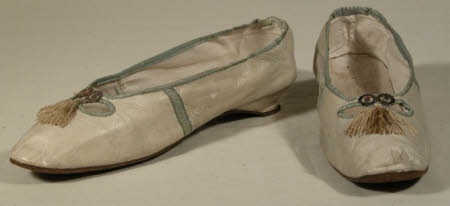
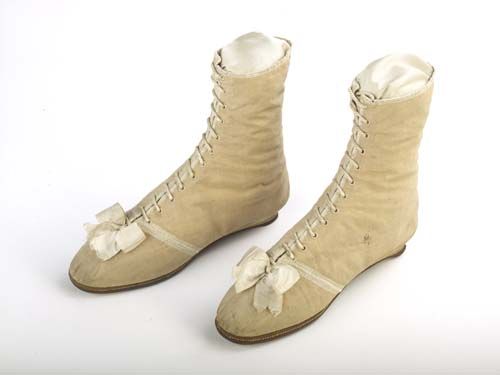
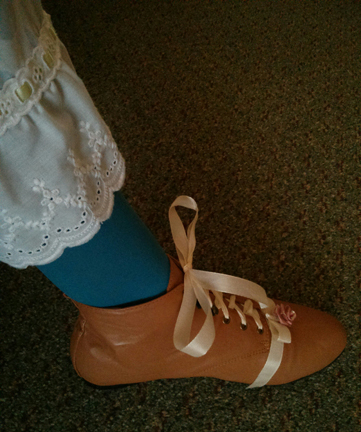
The half boots have been enhanced since the other function, and coloured stockings were worn for fun. Please don’t ogle my pantalettes, necessary to keep the dark colour from being seen through two layers of super fine cotton skirts!

I got a generous number of compliments on various aspects of the costume, and several ladies were quite taken by those little boots. They’re a half size larger than my normal shoe size, so I could fit my custom orthotics inside, and save myself from knee pain. They also liked the little blue and gold reticule I got in Cottage Grove, OR on vacation last year.

It surprised me that many ladies wore their spencers or pelisses and hats indoors all day. It wouldn’t have been done in Austen’s time!

Judging from the vendor prices at the conference’s Regency Emporium, some of those big Lady Catherine hats with exotic feathers cost close to $500. I guess they want to get as much mileage out of them as they can, so “screw the idea of wearing just a lace cap indoors!” Similarly, a pretty spencer that took hours (or dollars) to complete should be shown off!

I think I may do the same tomorrow or one of the later days this weekend!

I wasn’t the only one in a cap, as several had lace or fine muslin versions. Some long-haired ladies had not done a Regency hairdo, and had a bare head with their hair down. This all takes time, and we have to cut corners to get to the seminars we waited so long for!

My favourite seminar of the day was on Regency plumbing and how it (and water systems) evolved before and after the Regency. The speaker, Janet Fahey is a P.E. like me! Not much was new to me, as toilets have always fascinated me, but it was a good seminar, and I learned about John Snow, the father of epidemiology, who effectively created the first spreadsheets.

I know, boring compared to big hats and silk riding wear! I’ll try to remember to take some photos for you all to see!

But I have to sew more lacy on my “emergency ball gown” before tomorrow night, so that’s it for this post!

Remember to comment here or on my Facebook page, or to approach me at the conference with a mention of the Thrift Shop Regency Costume Experiment for give-aways of reticules, embroidered handkerchiefs, bling, and more. I have extra prizes, so everyone’s a winner!

Conference delegates, come by the Authors’ signing tables tomorrow at 3:45pm to say “Hi!” to me and Linda Beutler! Better yet, buy a copy of Alias Thomas Bennet from the Jane Austen Books booth at the Emporium, and I’ll sign it for you!

Also, watch for free and sale books from Meryton Press this week, as Managing Editor Michele Reed is at the Southern Festival of Books in Nashville, TN!

What quality of Regency dress do you get for $33.95?

If it weren’t for that elusive short-puffed-sleeve dress that was only a ribbon from Regency, I could have stopped shopping for a gown in February when I found my wonderful white dress for use as a morning gown.

Why did I continue for four more months? What made me keep seeking out a long gown in a pretty print, or similar in a smooth silk for a ball gown, that needed nothing more than to gather its extra fabric at the back and tie a ribbon about its empire waist? I believed in its existence, that’s why.

Several of the overview web sites listed in the “Cheat Sheet” post implied I’d find it with ease, and I was determined to! I saw many dresses that were close. Too short, too small, too much trouble removing panels of non-Regency trim, and mostly, polyester knit. Drat. Double drat.

In addition, some key accessories were found later on: my shawl was found in May, and the fan, half boots, and better ball slippers in June. I was still trying to find a better fan, a real pagoda parasol, and some better gloves to the last minute of the planned deadline of the end of June!

The quest for Mr. Suze’s outfit started in March as well, so I was searching for tailcoats, poet’s shirts, riding boots, and collared vests beginning in March. (I found three tailcoats that were perfect, except two were too large and one was too small. $35-$65.)

Some have suggested I spent far too much time shopping when I could have sewn a gown for the same cost.

My reply? Not the same gown, nor anything near as nice for $33.95, and my morning gown would take a substantial amount of time and skill to sew.

Morning dress and camisole.

Morning dress with matching belt; camisole.

The amount of time spent shopping was not that much by the time I found the white Prairie wedding dress from the ’80’s in late February. Though I started in summer 2014, I only went every three weeks or so for a couple of hours at first, and December, January, and half of February may have been three visits total, due to other commitments and vacation.

It took a while to acclimatize myself, but my early purchases were far more than a gown: the accessories alone made the time spent worthwhile, never mind ribbon, lace, no-sew tape, and items for future gowns. The the final months were not as productive, but by then, few items were remaining.

Matching waistband with Guipure lace.

Matching waistband with Guipure lace.

There is no way anyone could make a gown anywhere close to this quality for less than triple the cost. The photo above shows the generous amount of fabric in the skirt, sleeves, and integral petticoats. There’s the delicate camisole that came with the dress, and the matching belt.

Sleeve detail with lace on cuff and pin-tucks the length of arm.

Sleeve detail with lace on cuff and pin-tucks the length of arm.

Bodice with pin-tucking, lace panels, and high collar trimmed with lace.

Bodice with pin-tucking, lace panels, and high collar trimmed with lace.


A great deal of work went into pin-tucking on the bodice and sleeves, and pleats on the cuffs and lace panels on the skirt.

The sheer Swiss dot fabric is so fine, you can see the petticoat lace detail through it.

The sheer Swiss dot fabric is so fine, you can see the petticoat lace detail through it.

Petticoats of fine fabric with high-quality Guipure lace edging.

Petticoats of fine fabric with high-quality Guipure lace edging.


The fabric in this gown would cost $80-$120. The Swiss dot fabric is super-fine, as is the batiste petticoat: like Regency muslin. As mentioned in the previous post, the gown is cool to wear on a hot summer day with a light breeze because of the breath-ability of the delicate fabric.


Two rows of Guipure lace and fine pleats on the skirt.

Two rows of Guipure lace and fine pleats on the skirt.


The lace alone is worth at more than I paid for the dress: at least 8 metres of 1″ wide Guipure bridal lace on the gown and another 3m of ¼” wide scalloped Guipure lace on the bottom of the petticoats. The former would be around $8 a metre, and the latter would be $1 a meter at a discount place like Dressew.

Lace goes over bodice from front waistband to back, and forms a gathered ruffle at top of sleeve.

Lace goes over bodice from front waistband to back, and forms a gathered ruffle at top of sleeve.


The rest of the costume is shown below, since you couldn’t see a few of them in the previous post.

Everything else worn at the Jane Austen tea, except knee high stockings. Photographer forgot them!

Everything else worn at the Jane Austen tea, except knee high stockings. Photographer forgot them!

Because the dress had a gathered front, it would be pre- or early Regency. I thought about modifying it, but it would require sewing.

Instead, I chose the sage shoes since they have a slightly pointy toe from the same period. To coordinate with the shoes, green ribbon was used in the trim for the pantalets and lace cap (hastily machine-sewn the morning of the event, but more on that in a later post!) and for the waist ribbon on the gown.

In conclusion, those who’ve suggested the dress was not worth it should consider that the entire costume was the cost of a simple dress with lesser-quality fabric and no lace, and petticoats would be extra. If my time prior to the purchase of this dress was split between all the items, the effort would be no more than the time to make a dress of the level of detail I purchased.

But that was not the point of the Experiment! What’s more, it would fly in the face of the guidelines I shared when we started.

My learning experience was crafted not to get the best deal on a gown, but to get the best gown I could for a good price, without making it.

The intention was to share this experience, warts and all, so others might feel empowered to wear that Regency costume they’ve dreamed about for the next Austen-related event, and to let them know they have options. We should all be able to feel pretty and pretend we’re in another time in history!

Isn’t my dress exquisite? I’m so proud to wear it!

I feel lucky to have found it, even if the ball gown proved to be difficult so far. But I’ll probably peek at the dresses every time I pop into a thrift store to see if they have a medium-sized tailcoat! You never know!


My Regency Costume Cheat Sheet, by Suzan Lauder, Regency Romance Author

Example of Regency letter-writing by http://toracellie.blogspot.ca

With 17 verbose posts full of images, the challenge of an Absolute Basic Check List was a bit daunting. How does one summarize a lady’s needs for a full Regency costume suitable to wear at a function where people are knowledgeable about the era? Actually, some of the links shared at the end of this post do a pretty good job of it.

For procuring and creating the costume parts, however, the individual blog posts in the Thrift Shop Regency Costume Experiment series will be of much more use. That’s because of the numerous images of step-by-step construction of the re-purposed or upcycled items, museum examples of actual clothing from the Regency era, period fashion magazine sketches, and paintings of people in the era. There are also topic-specific links and how-to videos in many areas.

This post also has a number of overview links, links with more images of museum and purpose-made Regency wear, and a sort of “next steps” list for some readers: how-to links that require sewing skills.

For the Checklist, I’ve noted price ranges:

  • Lowest prices listed are the minimum you would pay for a good-quality finished version of the item (new, gently used, or repurposed/upcycled using minimum crafting or sewing skills), based on my experience with the guidelines set out for the Thrift Shop Regency Costume Experiment.
  • If there is a zero instead of a bottom price, it’s because this is an item you’d probably choose only if you already had one, and if purchasing, another choice on the list is preferable.
  • Highest prices are for purchase of a period-correct, attractive, good-quality (but not always top end), brand new item from a good vendor, custom-made to fit you in the case of clothing.
  • If there is a question mark instead of a price, it means the item is of such a personal nature, the top end cost is based on the buyer’s evaluation.
  • If you have the item on hand, it will cost nothing.
  • Most items can be obtained in the lower half of the price range.

Footwear

  • Simple ballet flats ($5-$20)
    • Fully enclosed (pump).
    • Round, pointed, or square toe.
    • Slim sole, separate heel under 1” high (not wedge), and any heel over ¼” should be a flared kitten heel.
    • Silk-look fabric, fine cotton, or soft leather.
    • Any colour except for black, dark brown. Wide stripes and large dots are fine.
    • No elastic, rubber, jute or coarse cotton, large trim items, folded leather detail, external seams, etc.
    • Ribbon ties up the leg with flat soles are optional (good for keeping shoes on while dancing).
    • Simple trim is optional.

      My second set of footwear for potential Regency Costumes: a pair of half-boots and two pairs of satin ballet flat shoes. The boots will have the buckle removed (perhaps for a man’s shoes!) and get dressed up with a ribbon and fabric rose across the base of the toes. The white and pink shoes will be cleaned, then the white will get white ribbons to lace up the legs. The pink shoes will have the fringe covered with a ribbon and the cut-away area disguised.

  • For day wear, flat, lace-up half-boots ($18-$155).
    • 8′-12″ tall, round toe, slim sole and ¼” heel maximum.
    • Light colours.
    • Softer leather, cotton, or denim.
  • Orthotics may fit if you buy a half size larger than normal.
  • Post: Put on Your Dancing Shoes!

Stockings

High-lift foundation garment for “the girls”

  • Custom made Regency short stays ($70-$190), for C cup and under, OR
  • Custom made Regency full corset ($95-$380), for D cup and higher, OR
  • Push-up bustier or modern corset that’s low cut and not too cinched in the waist ($0-?), OR
  • Well-fitted (or slightly small) demi-cup, push-up bra, such as a Balconette. ($20-$?), plus a waist cincher if needed for extra lift.
  • Post: Lift and Separate!

Chemise and petticoats or pantalettes

  • Authentic, custom-made, new, Regency undergarments from specialty stores or Etsy:

    Petticoat, early 19th c, American, Boston Museum of Fine Arts

    • Chemise ($45-$100) (worn under the corset for comfort), and
    • Petticoats ($35-90) or pantalettes ($35) (to “fluff out” the gown so it won’t stick between your legs), OR
  • In place of all of the above:
    • A floor-length full slip or nightgown, deep cut to match neckline of stays/corset/bra ($7-$38), or
    • A floor-length half-slip pinned to base of bra ($7-$20), or
    • Plain, lightweight, light-coloured cotton capris or pajama pants, or pants liners. ($5-$20), and
    • A low-cut camisole if needed with the last two items ($5-$25).
    • Super-fine woven cotton is best for comfort, but polyester will work.
  • Post: Twenty Layers of Unmentionables and no Panties!

Basic empire waist gown ($38-$400)no information

  • Floor length, empire waist.
  • Straight (non-fitted) skirt, flat in front and gathered in back.
  • Short, puffed sleeves and wide, low neckline for a dinner/evening/ball gown; long sleeves and high neckline for morning gown (to 4pm).
  • Simple-print finely-woven cotton, linen, or percale (not black-based), smooth silk, organdy, or synthetics that are good facsimiles.
  • 2m (6’-7’) by 1”-2” ribbon tied under the bust.
  • Don’t buy a pre-made “Regency” gown for under $100 on Etsy, as most are terrible!
  • $200-$400 should buy a nice, authentic, custom-made gown.1812 costume parisien
  • Posts: Floor length, Empire waist, and what else? Anne Shirley? (description of a Regency gown and examples); A Morning Gown plus some Frankenstein Gown Parts (what aspects of vintage gown styles to avoid; my gown purchases; morning gown modification from 80’s vintage); Were Regency gowns worn on the Titanic? (purchase tips for new handmade Regency gown; what to look for in a vintage gown to re-purpose).

Regency Hair Style

  • Centre parted, with ringlets around the face; fancy up-do with bun and curls or braids, worn close to the head. (How-to and video links in posts.)
  • If hair is too short for a fancy up-do, a hairpiece (bun maker, bun hair, and 1-3 braids for $10-$30), fall ($0-$50), wig ($0-$92), or a turban are options.
  • Ringlets can be purchased or taken from a doll or fall ($7-$60) and held on by a bandeau, or flat pin curls can be made.
  • For very short hair, comb forward in a “Titus” and hold in place with a ribbon, bandeau, or similar decorative item.
  • If desired, trim with ribbon, lace, bandeau, braided fillet, small silk flowers, feathers, tiara, diadem, combs, etc. ($0-?)
  • Posts: Faking Purdy Locks: The Modern Hairstyle goes Regency;
    Regency Bad Hair Day? Wrap a Turban! (my clip-on fall in an updo at end of post).

Headwear

  • Bonnet or hat ($6-$70)
    • Preferable if your hair looks nice when you remove your hat indoors.
    • Brim is sturdy, not floppy, and straw or satin-type fabric.
    • Capote hat or bonnet can be made from a wrap-around straw visor or hat, a 20” diameter simple, smooth, silk-like fabric cover, and a ribbon.
    • A good hat base is the narrower brim straw picture hat at Michaels, $5.
    • Add 1.5′-2.5′ of 1″-1.5” ribbon to make ties for a bonnet.
    • If desired, trim with several bunches of small fabric flowers and greenery; larger fabric roses; an ostrich, peacock, or other feather and brooch/medallion; hat pin; or combination, or other designs based on Regency sketches.

      Mock up of design of green and straw visor with green velvet cap.

      Mock up of design of green and straw visor with green velvet cap.

    • A nice range of new items can be found at the upper half of the price range above. Fancy items are double the top price listed here.
    • Posts: The Thrifty Regency Hat-trick! (Capote hat from visor and dinner napkin for under $10); How-to Times Two: Variations on Dressing up a Bonnet (The Pink Hat); Special Headwear for the Grown-up Lady (museum hat examples at the end of the post).
  • Lace cap ($2-$40)
    • Optional; for married or single-and-proud-of-it women only.
    • Similar to the idea of a turban, this will hide hair for women who can’t manage a Regency hair style and will be indoors where they must remove their hat.
    • Can be made from super-fine white cotton and/or fine whitework lace items such as doilies, handkerchiefs, curtains, cushion/pillow covers, or purchased applique items and ribbon.
    • Post: Special Headwear for the Grown-up Lady
  • Turban ($15-$40)
    • An alternative to the hat or bonnet that does not have to be removed when you go indoors.
    • A nice choice for evening wear if you’re unable to create an up-do.
    • Twist 2-3 silk or satin scarves (how-to and video links on this blog), or a length of silk or satin fabric (could be a table or dresser runner, a pashmina, small shawl or wrap) about 15″-20” wide and 40” long about your head behind ringlets; secure with safety pins and bobby pins.
    • A brimless, soft, natural fabric hat with a scarf or fabric wound around its base in textured waves works well also.
    • Fringe or ends with some type of embellishment or trim are recommended, and can be left to droop on one side.
    • Braid or cord can be woven around with turban cloth.
    • Add feathers, foliage, brooch, medallion, hat pin, or similar items.
    • Post: Regency Bad Hair Day? Wrap a Turban!

Jewelry ($0-?)

  • Simplest would be a medium-sized “jeweled” cross on a chain.
  • More elaborate choices include “jeweled” necklaces, armlets, bracelets, brooches, rings, earrings, and combs.
  • Almost all stones are are acceptable, but they should be cut stones. Costume jewelry is fine if it doesn’t look plastic.
  • Cameos and red coral were popular.
  • Drop earrings were on hooks not studs; clasped or open hooks are period.
  • Lover’s eye brooches were fashionable.
  • Post: Shiny things expose my inner crow!
Regency Opera Gloves, kid, Metropolitan Museum of Arts

Regency Opera Gloves, kid, Metropolitan Museum of Arts

Gloves

  • Cotton, silk, or kid leather.
  • Short or optional for day wear ($5-$25).
  • Evening gloves go above the elbow: 24”-31″ (opera-length) with a loose-fitted upper arm are period-correct ($8-$32 for synthetic; $50-$200 for natural materials); 19” minimum.
  • If synthetic opera gloves are worn, buy a matte and not shiny satin finish, as it looks fake.
  • Any colour but black. White and softer colours were most common.
  • Post: I never did mind about the little things…

Fan ($1-$10)

  • Optional, but necessary on a warm day or in a ballroom.
  • Folding hand fan.
  • Avoid plastic and obvious synthetic materials for the sticks and guards.
  • If the fan has any scenes on the leaves, they should be English.
  • Any colour. Trim can include feathers, sequins, metallic, mother-of-pearl.
  • Post: I never did mind about the little things…

Parasol ($20-$200)

  • Optional if your face is protected from the sun by a bonnet or hat, or you are in a ballroom.
  • Eight or fewer ribs is Regency-appropriate, but who’s counting? As long as it’s not a dozen!
  • Pagoda shapes were most common, but round parasols were also in use.
  • A shallow curve is fine, but avoid flat Asian-style parasols.
  • The fabric should look like silk or cotton if possible.
    • Patterns on the fabric itself were rare, and would be a wide stripe or large dot or similar.
    • Fabric on vintage pagoda parasols from the early 20th century might not be very close to a Regency look.
    • Do not buy a Battenburg lace parasol, as they’re Victorian.
  • Most trim was on the periphery of the parasol: fringe (almost any kind), tassels, or lace. Some had embroidery.
  • Any colour but black.
  • Post: I never did mind about the little things…

Reticule ($5-$65)

  • Small drawstring bag (under 8” by 8”).
  • Almost any colour or shape works, in a fine fabric, beaded, netted, or knitted.
  • Avoid printed satin, most open lace or crocheted styles, eyelet lace, or leather.
  • Beads or sequins should not look plastic.
  • No zipper, but metal snap clasp or gate closures are fine.
  • The smooth silk bat-wing or moon reticules on Etsy are overpriced ($15-$22) for what you’re getting. The beaded and embroidered ones are often very good deals.
  • Post: All the pretty little purses

~~~

A few good overview web sites for a Regency costume:

These sites are summaries of what we’ve learned during the 17 previous posts in the Thrift Shop Regency Costume Experiment blog series, and I refer to them regularly myself.

Best site (pdf version) for showing the details one should search for: It’s All in the Details: Making an early 19th Century Ball Gown, by Hope Greenberg.

Best site (pdf version) for applying the other to real life: Miss Lisa Brown’s Guide to Dressing for a Regency Ball—Ladies’ Edition.

Less useful, but detailed, with lots of drawings and paintings is Wikipedia’s 1795-1820 in Western fashion.

An interesting article explaining Regency fashions while referencing the movie adaptations of Pride and Prejudice. Dressing for the Netherfield Ball in Pride and Prejudice: Regency Fashion.

Lots of links for buying stuff new can be found at Regency Attire: Purchasing Your Costume by Regency Dances.org  Not all these items are accurate, as they try to cover numerous costuming situations.

Sites for examples of Regency gowns:

Museum gowns:
Real people wore these, so they’re a bit more accurate than fashion plates such as Ackermann’s Repository for Art, La Belle Assemblée, or Costume Parisién.
The Vintage Thimble tumblr
Kyoto Costume Museum Archives 1800s-1810s

Ideas from others’ modern interpretations:
The JASNA AGM Regency Ball in Brooklyn, 2012. Most of these are probably handmade from modern reproduction patterns. There will be non-Regency clothing represented as well, as not everyone is immune to the marketing of those selling the Titanic/Downton Abbey gowns.
The Jane Austen Festival in Bath is a similar situation.

Erica Duncan's montage of Regency fashion plates for each year between 1809 to 1828.  Original art from Ackermann's Repository for Arts. Click on thumbnail for much larger image.

Erica Duncan’s montage of Regency fashion plates for each year between 1809 to 1828.
Original art from Ackermann’s Repository for Arts.
Click on thumbnail for much larger image.

Pinterest has a lot of good images, but I’d suggest searches by clothing article rather than just “Regency,” as the number is overwhelming even then.The site will often offer sub-headings at that point, too. This is an example of a huge board. Take care, as some images are modern and may contain misinformation; that’s why I like to stick to museum examples. But sometimes those are mis-dated by some pinner, too. It won’t be long before you’re picking them out yourself, though, as there’s nothing like 50 Regency gowns compared to one 1830’s gown. Warning: Pinterest is like crack.

Resources for making your own gown if you can sew a bit:

A video tutorial from Follies Past shows how to make a Regency ladies’ gown from a bridesmaid dress, a set of curtains, and a lace blouse. This requires beginner sewing skills.

Old Petticoat Shop offers their Regency Dress Online Class for $97 plus fabric, notions, etc.

My Regency Journey from Tea in a Teacup goes through creation of an entire Regency costume, but made from scratch.

Diary of a Mantua Maker has two tutorials on fitting a Regency gown: the first shows common mistakes and the second, sleeve and bodice fitting.

Sense and Sensibility Patterns has a number of videos with tips on how to fit your gown or modify the design of a pattern, as well as some sewing techniques.

~~~

Update: A nice little summary for evening wear, with some of the wonderful descriptions from The Lady’s Magazine and La Belle Assemblée: Mimi Matthews’ Elizabeth Bennet, La Belle Assemblée, and Early 19th Century Fashion.

~~~

turban 1 croppedNEXT POST: The grand finale! Photos of my completed costume, plus an overview of my learning experience with the “experiment” and brief notes on what the summer bonus posts will look like.

Put on Your Dancing Shoes!

Grandma Lauder’s eulogy ended with: “And girls—you can never have too many pairs of shoes!” No wonder a pair of light green flats were my first purchase for The Thrift Shop Regency Costume Experiment! They have a smoking slipper shape, slightly pointed toes, 1/8” heel, gold thread embroidery, and a small medallion. They were $7.99 from Value Village and, because of the lack of scratches on the soles, I think they’re new.

This part of the costume should be the easiest to obtain for two reasons: the little ballet flats that are in fashion right now tend to be close enough to the Regency look that they’ll do quite well, and low, flared-kitten-heel shoes with pointed toes from a few years back will work well, too. So raid your closet!

1812

1812

The ideal ballet flat will be a fully-closed shoe with a longer toe box, in materials not too far away from the texture of silk or kid, with minimal embellishment and no cut-outs or cut-aways. I got a pair of simple burgundy-coloured fabric ones on sale for $5 at Walmart. They’re fine plain, but appropriate bold dots and stripes work. Almost any colour will do—shoes and stockings tended to be colourful against the white gowns of the Regency!

When exactly was the Regency Period that these styles come from? There are a number of considerations to answer that question. The broadest application is 1795-1820, which includes the Directoire and Empire periods as well, because social customs and clothing conventions were similar, compared to neighbouring times. The true Regency was from 1811-1820, from the time the Prince Regent was put in place as the monarch of England on behalf of his insane father, King George III, until the father died and the prince became George IV. Some people like to narrow their costumes to the Austenesque time period of 1811-1817, when Jane Austen’s books were published, and some aim for 1811-1812, when Pride and Prejudice was set.

Heels (An open parasol indicates a good Regency shape.)

Heels (An open parasol indicates a good Regency shape.)

I’ve taken a few of my own stash to demonstrate shoe shape. The shoes with an open parasol in the photos are good Regency look-alikes for the aspect of the photo; those with closed parasols are acceptable, but have flaws, and no parasol indicates the shoe won’t work.

Before 1800, shoes had higher heels, and around 1810, heels began to go flat. Any heel much over 1/2” should be a spread kitten heel, and it should not be much higher than 1”. After about 1812, a look like a real ballet flat is best, including leg ties, but early Regency ones tended to have a thin heel. An ideal heel (and sole) would be leather, but we’re accommodating and allow synthetics if they aren’t too obvious. As you can see, the rubbery sports heels are a no-go. I’ve approved the low kitten heel for its shape only.

1795-1810

1795-1810

1810-30

1810-30

The toe can have almost any shape, but won’t have raised seams as on moccasin loafers or Toms. Sharp points to rounded and square toes are fine, and even pointed with a slight upward curve. Sharp points are the older style from the late 1700’s to 1800. Squared and softer points are seen as the fashionable shoe changes to include rounded toes until the clear preference is a rounded ballet toe by about 1815.


In the examples from my closet for toe shape, all but the sandal are a reasonable shape. The shoes below with an obvious left and right foot are compromises, as Regency shoes were both the same, and had to be worn to shape to the foot. The pointy-toed patent leather shoes have been ruled out due to their material and the elastic at the toe.

Toe shape and material

Toe shape and material

Materials of construction are important: no heavy leather, patent leather, printed leather, animal print, fur, canvas or coarse woven fabrics, hemp/jute, or metallic. I’ve seen snakeskin, cotton, and lace slippers from the extended Regency period, though most are fine leather (kid being the most popular) or silk.

English olive leather, 1800-1810

1800-1810

Decoration before 1810 included printed fabrics or solids with elaborate embroidery and gathered ribbon and lace on the toe, but after that, it became minimal, with no decoration behind the side seam (which was sometimes covered with contrasting narrow trim) other than the print of the shoe fabric, and sometimes narrow trim around the top opening. Simple trim on the toe could be a ribbon bow, fringe, tassels, or feathers, perhaps with a smaller medallion or similar object. Ribbon straps up the legs were seen on many round-toed shoes.

There were no heavy embellishments, e.g., no large buckles, studs and the like, and no heavy leather straps, leather fringe, or shaped leather designs. Elastic and usable rubber had not been invented yet. Cut-outs or cut-aways were not used. The full foot was covered, thus the sandal, sling-backs, or mules, won’t work. I did see a Van Dyke cut smoking slipper front on one shoe, and a narrow Mary Jane strap near the toe of another, though, so some leeway must be allowed for the fact that originality has always been part of fashion.Shoes: final choices

As you can see by the parasol party, I’ve narrowed down the shoes to the two pairs I bought! I apologise that the photo makes the green shoes look tan and the burgundy look grape; they’re a very soft sage and a pinot noir!

The reason I showed four other pairs of shoes as possibilities when they have strong non-Regency features is because some people need certain attributes in their shoes, and shoes similar to the four shown would be a reasonable compromise, with a little more work.

The Mary Janes are expensive walking shoes, and people who need support or wear orthotics shouldn’t feel they can’t wear these, just know the heavy cut, type of leather, and sports sole are a compromise. Since mine are porous enough leather, it may be possible to paint them to look prettier. The lime green Aerosoles fall into the same comfort category, and the colour is okay, so they could be treated just like the other ballet flats, and the rubber sole and hole pattern forgiven. In fact, the visible part of the rubber soles could be painted black (a felt marker works for this) to camouflage them.

A shorter person who likes their heels might decide to paint the leather strips on the toes of the 1-1/2” kitten-heeled shoes so they look like ribbons, or glue ribbons over them in the same pattern, leaving a loose bow. Similarly, some wearers need a low but not flat heel, yet balk at the narrowness of even the kitten heel. The patent leather part on the loafer could be covered or painted, and the button disguised with a ribbon bow or medallion of sorts. To be truly authentic, the suede could be covered, too, but it can remain as a compromise. In both cases, care would need to be taken to keep the covering from being too bulky-looking.

You can cover a simple-shaped, smooth shoe that’s made from the wrong sort of material if you can cut neat lines and have a steady hand to glue heavy silk fabric on smoothly. The fabric would be cut to align with the sole, with a side seam (see examples). The extra would then be tucked over and cut off at the top, then trimmed with narrow braid or ribbon.

1800-30

1800-30

Spray-on glue is good for this. You can spray each surface and let them dry separately, then do a test run, because it works like Post-it notes when dry. If you’re satisfied with the outline of your fabric, you can re-spray and then align the fabric on the shoe at the sole. Be sure to use lots of newspaper in the area where you’re working, and use it to mask off the sole or any area you’re not covering. Note that the Regency shoe has a side seam rather than a back seam, and it’s a desirable look to attach trim over that seam and at the top of the shoe, just not at the base.

1815

1815

Another shoe option is the half-boot, which became popular during the Regency. I have not been able to find any boots with light enough soles and leather to be used.

There are certain new shoes available on the Internet that claim they are a Regency style. The ads compare 2000s shoes to Regency shoes, and then claim their shoe design has filled the gaps and is a Regency-correct shoe. In all honesty, these shoes still look like 2000s pumps, and are a rip-off. Closer matches can be purchased at regular stores for less than half the price, including kitten-heeled pumps with a more authentic-looking toe shape.

I went to work at making my two pairs of shoes look Regency. The sage shoes need no additional trim. Martha Stewart types will roll their eyes at my attempts to decorate the two Wal-mart shoes, but I’m not crafty!shoes decorated feb 28 reduced

It looked like it wouldn’t be easy to remove the little bows cleanly, so I left them on. I took advantage of it on one shoe, threading goose feathers into the loops. The bag of maybe 25 goose feathers was $1.99. I added a clip-on earring from a set that sold for $3 at Salvation Army.

To decorate the shoe on the left, I used a short length of ribbon I already had at home, and a pierced earring from a $1 Salvation Army pair . Pretty ugly as earrings, but not bad on a Regency shoe!

I didn’t permanently attach these details yet, as I want to decide which dress I wear with which shoes first, and then work with trim colour to coordinate with the dress. I’ll use double-sided tape to attach the trim. I might try a folded ribbon effect for the final shoe. It would have to be sewn before attaching it to the shoe, or iron-on fabric tape used in lieu of sewing to keep the folds in place.

To see an excellent selection of Regency shoes, go to the Metropolitan Museum of Art searchable web site.

Next post: Propping up the Girls: Ideas for foundation wear on a budget.