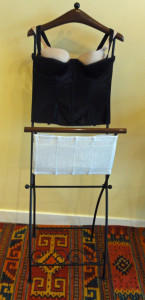
Louisville JASNA Costume One: Familiar to Followers

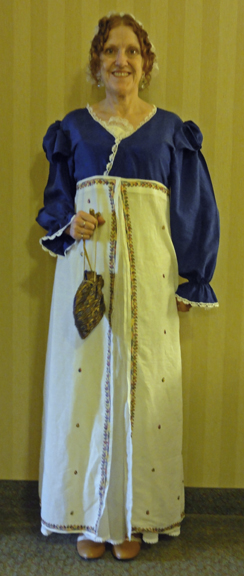
An American flag coloured morning gown was suitable for the first official day of the 2015 Louisville JASNA AGM because I planned to be at sessions until about 4 pm, the end of the morning in the Regency period, at least in the city. Austen herself commented about rising at 9am, and many slept until 10am, since balls and social life ended in the wee hours the night before–kind of like it does for many people attending this conference!

We were overtaken today compared to our quiet little pre-conference activity days! Many, many glorious gowns and hats appeared on ladies, and a good half-dozen more costumed gents now hovered about them as they priced out ribbon. I had already been confused and intimidated about purchasing these unique, quality products. Can you imagine having Ms. Silk Reddingote in front of you, passing things to Mr. Custom Top Hat? The “Quality” has come.

I have a cold and a stomach upset of some sort, and since I’ve already been here three days, I’m tired, so I kept Regency hours. Regency ladies breakfasted at nine, took callers or made calls from 2-4, thus the length of the morning. The morning dress should cover the arms and chest during those hours, thus long sleeves and chemisettes, fichus, or lace tuckers were in order.

I wore the same outfit you saw in an earlier post, which I refer to as my “emergency” gown since I put it together in a few days for a Jane Austen Tea put on by my local JASNA in early September.

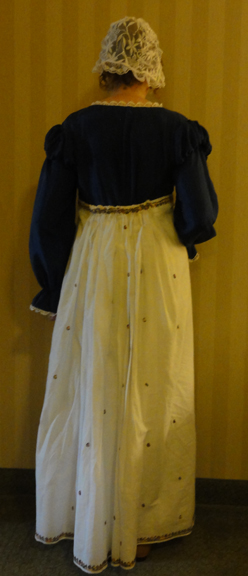
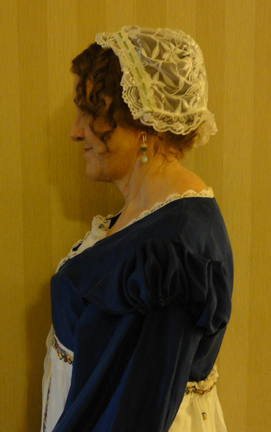
Here I am again, with more photos so you can see the back and my little “grown up lady’s” cap better. My ringlets turned out nice today. I cheated and used the tiniest amount of makeup, as I’m like Mr. Darcy in MP author Karalynne Mackrory’s book (ghostly complexion) otherwise!

louisville 15 friday louisville 15 friday backlouisville 15 friday sidelouisville 15 friday boot


One area of difficulty is I’d originally sewn nothing more than a no-fray finish on the top edge of the petticoats the first time, but lately, I added a narrow waist band with hooks and eyes to close it in back. It has back gathers to match any gown it would be worn with.

When I made the waist band, I measured myself under a regular bra. As you may recall, I’m using a bustier from years back when I was heavier as a corset. With the cups folded in and stitched down, its shape is good and it pushes the girls up well. Its boning is similar to a busk.

It turns out this bustier reduces my rib cage about an inch! I had to safety pin the petticoat to my bustier, and after about an hour, nearly tripped on it, as it was hanging a good eight inches low on one side! Two pins had become undone, as well as the back hooks and eyes! When I tried to fix them without being noticed, I jabbed myself instead! I returned to my hotel room to add more pins and close them with care this time!

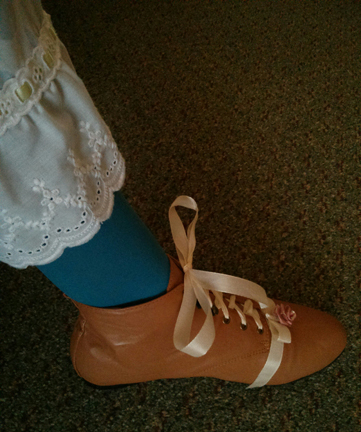
The half boots have been enhanced since the other function, and coloured stockings were worn for fun. Please don’t ogle my pantalettes, necessary to keep the dark colour from being seen through two layers of super fine cotton skirts!

I got a generous number of compliments on various aspects of the costume, and several ladies were quite taken by those little boots. They’re a half size larger than my normal shoe size, so I could fit my custom orthotics inside, and save myself from knee pain. They also liked the little blue and gold reticule I got in Cottage Grove, OR on vacation last year.

It surprised me that many ladies wore their spencers or pelisses and hats indoors all day. It wouldn’t have been done in Austen’s time!

Judging from the vendor prices at the conference’s Regency Emporium, some of those big Lady Catherine hats with exotic feathers cost close to $500. I guess they want to get as much mileage out of them as they can, so “screw the idea of wearing just a lace cap indoors!” Similarly, a pretty spencer that took hours (or dollars) to complete should be shown off!

I think I may do the same tomorrow or one of the later days this weekend!

I wasn’t the only one in a cap, as several had lace or fine muslin versions. Some long-haired ladies had not done a Regency hairdo, and had a bare head with their hair down. This all takes time, and we have to cut corners to get to the seminars we waited so long for!

My favourite seminar of the day was on Regency plumbing and how it (and water systems) evolved before and after the Regency. The speaker, Janet Fahey is a P.E. like me! Not much was new to me, as toilets have always fascinated me, but it was a good seminar, and I learned about John Snow, the father of epidemiology, who effectively created the first spreadsheets.

I know, boring compared to big hats and silk riding wear! I’ll try to remember to take some photos for you all to see!

But I have to sew more lacy on my “emergency ball gown” before tomorrow night, so that’s it for this post!

Remember to comment here or on my Facebook page, or to approach me at the conference with a mention of the Thrift Shop Regency Costume Experiment for give-aways of reticules, embroidered handkerchiefs, bling, and more. I have extra prizes, so everyone’s a winner!

Conference delegates, come by the Authors’ signing tables tomorrow at 3:45pm to say “Hi!” to me and Linda Beutler! Better yet, buy a copy of Alias Thomas Bennet from the Jane Austen Books booth at the Emporium, and I’ll sign it for you!

Also, watch for free and sale books from Meryton Press this week, as Managing Editor Michele Reed is at the Southern Festival of Books in Nashville, TN!

What quality of Regency dress do you get for $33.95?

If it weren’t for that elusive short-puffed-sleeve dress that was only a ribbon from Regency, I could have stopped shopping for a gown in February when I found my wonderful white dress for use as a morning gown.

Why did I continue for four more months? What made me keep seeking out a long gown in a pretty print, or similar in a smooth silk for a ball gown, that needed nothing more than to gather its extra fabric at the back and tie a ribbon about its empire waist? I believed in its existence, that’s why.

Several of the overview web sites listed in the “Cheat Sheet” post implied I’d find it with ease, and I was determined to! I saw many dresses that were close. Too short, too small, too much trouble removing panels of non-Regency trim, and mostly, polyester knit. Drat. Double drat.

In addition, some key accessories were found later on: my shawl was found in May, and the fan, half boots, and better ball slippers in June. I was still trying to find a better fan, a real pagoda parasol, and some better gloves to the last minute of the planned deadline of the end of June!

The quest for Mr. Suze’s outfit started in March as well, so I was searching for tailcoats, poet’s shirts, riding boots, and collared vests beginning in March. (I found three tailcoats that were perfect, except two were too large and one was too small. $35-$65.)

Some have suggested I spent far too much time shopping when I could have sewn a gown for the same cost.

My reply? Not the same gown, nor anything near as nice for $33.95, and my morning gown would take a substantial amount of time and skill to sew.

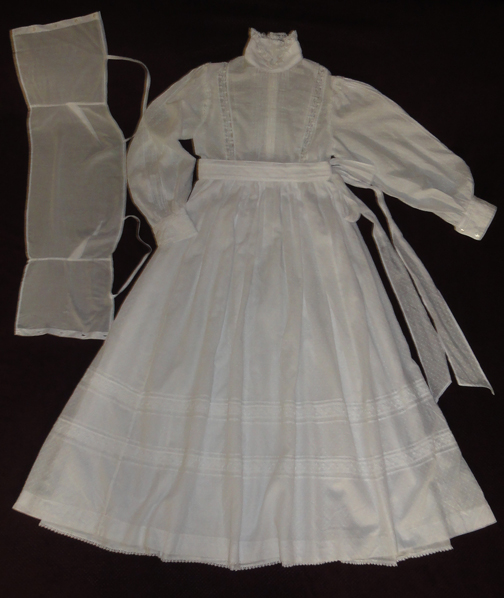
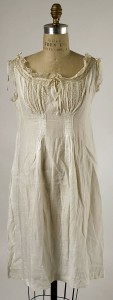
Morning dress and camisole.

Morning dress with matching belt; camisole.

The amount of time spent shopping was not that much by the time I found the white Prairie wedding dress from the ’80’s in late February. Though I started in summer 2014, I only went every three weeks or so for a couple of hours at first, and December, January, and half of February may have been three visits total, due to other commitments and vacation.

It took a while to acclimatize myself, but my early purchases were far more than a gown: the accessories alone made the time spent worthwhile, never mind ribbon, lace, no-sew tape, and items for future gowns. The the final months were not as productive, but by then, few items were remaining.

Matching waistband with Guipure lace.

Matching waistband with Guipure lace.

There is no way anyone could make a gown anywhere close to this quality for less than triple the cost. The photo above shows the generous amount of fabric in the skirt, sleeves, and integral petticoats. There’s the delicate camisole that came with the dress, and the matching belt.

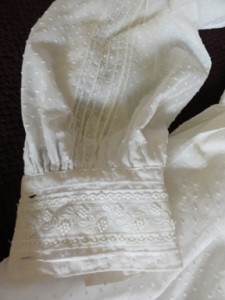
Sleeve detail with lace on cuff and pin-tucks the length of arm.

Sleeve detail with lace on cuff and pin-tucks the length of arm.

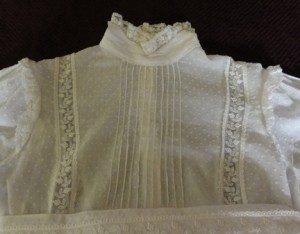
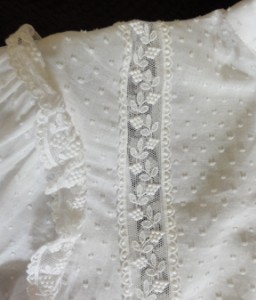
Bodice with pin-tucking, lace panels, and high collar trimmed with lace.

Bodice with pin-tucking, lace panels, and high collar trimmed with lace.


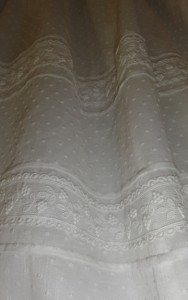
A great deal of work went into pin-tucking on the bodice and sleeves, and pleats on the cuffs and lace panels on the skirt.

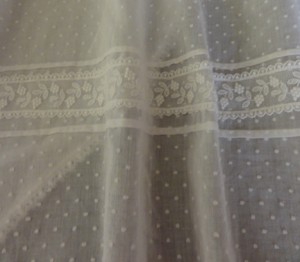
The sheer Swiss dot fabric is so fine, you can see the petticoat lace detail through it.

The sheer Swiss dot fabric is so fine, you can see the petticoat lace detail through it.

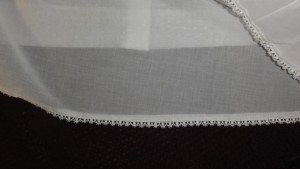
Petticoats of fine fabric with high-quality Guipure lace edging.

Petticoats of fine fabric with high-quality Guipure lace edging.


The fabric in this gown would cost $80-$120. The Swiss dot fabric is super-fine, as is the batiste petticoat: like Regency muslin. As mentioned in the previous post, the gown is cool to wear on a hot summer day with a light breeze because of the breath-ability of the delicate fabric.


Two rows of Guipure lace and fine pleats on the skirt.

Two rows of Guipure lace and fine pleats on the skirt.


The lace alone is worth at more than I paid for the dress: at least 8 metres of 1″ wide Guipure bridal lace on the gown and another 3m of ¼” wide scalloped Guipure lace on the bottom of the petticoats. The former would be around $8 a metre, and the latter would be $1 a meter at a discount place like Dressew.

Lace goes over bodice from front waistband to back, and forms a gathered ruffle at top of sleeve.

Lace goes over bodice from front waistband to back, and forms a gathered ruffle at top of sleeve.


The rest of the costume is shown below, since you couldn’t see a few of them in the previous post.

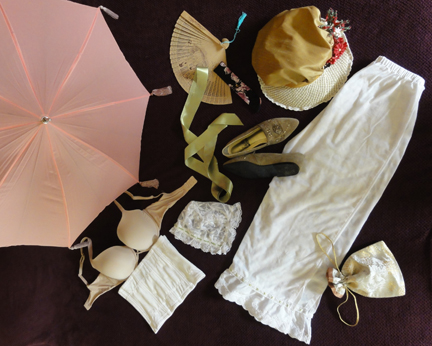
Everything else worn at the Jane Austen tea, except knee high stockings. Photographer forgot them!

Everything else worn at the Jane Austen tea, except knee high stockings. Photographer forgot them!

Because the dress had a gathered front, it would be pre- or early Regency. I thought about modifying it, but it would require sewing.

Instead, I chose the sage shoes since they have a slightly pointy toe from the same period. To coordinate with the shoes, green ribbon was used in the trim for the pantalets and lace cap (hastily machine-sewn the morning of the event, but more on that in a later post!) and for the waist ribbon on the gown.

In conclusion, those who’ve suggested the dress was not worth it should consider that the entire costume was the cost of a simple dress with lesser-quality fabric and no lace, and petticoats would be extra. If my time prior to the purchase of this dress was split between all the items, the effort would be no more than the time to make a dress of the level of detail I purchased.

But that was not the point of the Experiment! What’s more, it would fly in the face of the guidelines I shared when we started.

My learning experience was crafted not to get the best deal on a gown, but to get the best gown I could for a good price, without making it.

The intention was to share this experience, warts and all, so others might feel empowered to wear that Regency costume they’ve dreamed about for the next Austen-related event, and to let them know they have options. We should all be able to feel pretty and pretend we’re in another time in history!

Isn’t my dress exquisite? I’m so proud to wear it!

I feel lucky to have found it, even if the ball gown proved to be difficult so far. But I’ll probably peek at the dresses every time I pop into a thrift store to see if they have a medium-sized tailcoat! You never know!


My Regency Costume Cheat Sheet, by Suzan Lauder, Regency Romance Author

Example of Regency letter-writing by http://toracellie.blogspot.ca

With 17 verbose posts full of images, the challenge of an Absolute Basic Check List was a bit daunting. How does one summarize a lady’s needs for a full Regency costume suitable to wear at a function where people are knowledgeable about the era? Actually, some of the links shared at the end of this post do a pretty good job of it.

For procuring and creating the costume parts, however, the individual blog posts in the Thrift Shop Regency Costume Experiment series will be of much more use. That’s because of the numerous images of step-by-step construction of the re-purposed or upcycled items, museum examples of actual clothing from the Regency era, period fashion magazine sketches, and paintings of people in the era. There are also topic-specific links and how-to videos in many areas.

This post also has a number of overview links, links with more images of museum and purpose-made Regency wear, and a sort of “next steps” list for some readers: how-to links that require sewing skills.

For the Checklist, I’ve noted price ranges:

  • Lowest prices listed are the minimum you would pay for a good-quality finished version of the item (new, gently used, or repurposed/upcycled using minimum crafting or sewing skills), based on my experience with the guidelines set out for the Thrift Shop Regency Costume Experiment.
  • If there is a zero instead of a bottom price, it’s because this is an item you’d probably choose only if you already had one, and if purchasing, another choice on the list is preferable.
  • Highest prices are for purchase of a period-correct, attractive, good-quality (but not always top end), brand new item from a good vendor, custom-made to fit you in the case of clothing.
  • If there is a question mark instead of a price, it means the item is of such a personal nature, the top end cost is based on the buyer’s evaluation.
  • If you have the item on hand, it will cost nothing.
  • Most items can be obtained in the lower half of the price range.

Footwear

  • Simple ballet flats ($5-$20)
    • Fully enclosed (pump).
    • Round, pointed, or square toe.
    • Slim sole, separate heel under 1” high (not wedge), and any heel over ¼” should be a flared kitten heel.
    • Silk-look fabric, fine cotton, or soft leather.
    • Any colour except for black, dark brown. Wide stripes and large dots are fine.
    • No elastic, rubber, jute or coarse cotton, large trim items, folded leather detail, external seams, etc.
    • Ribbon ties up the leg with flat soles are optional (good for keeping shoes on while dancing).
    • Simple trim is optional.

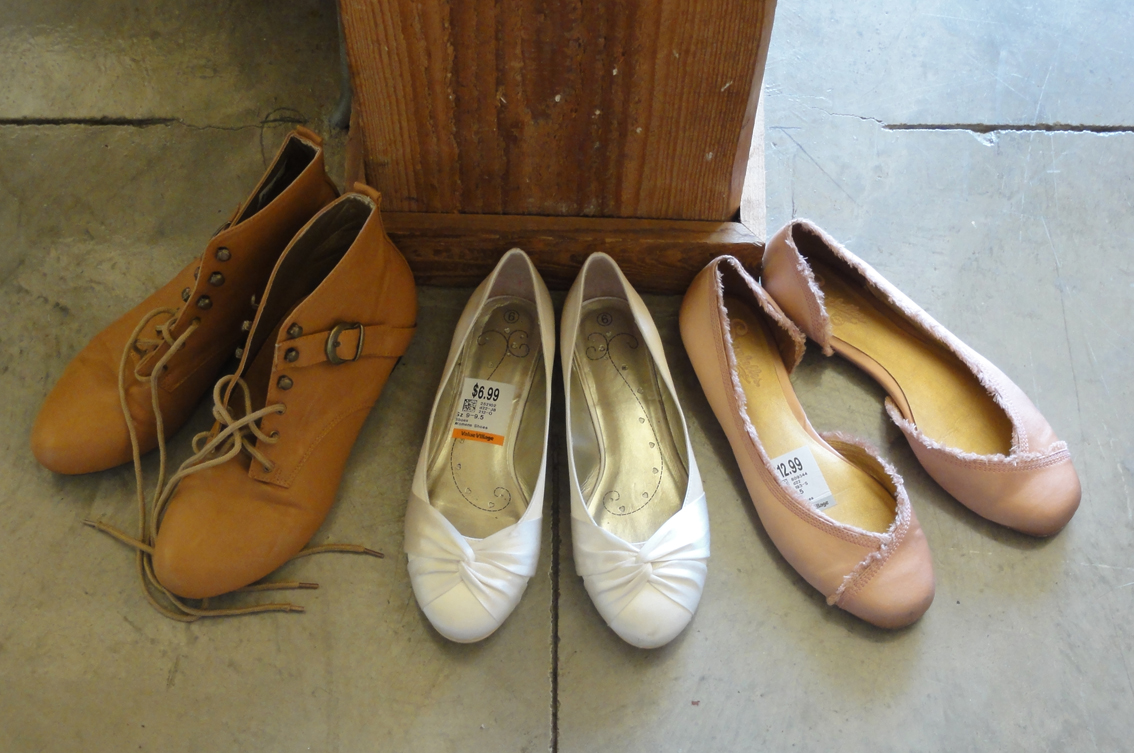
      My second set of footwear for potential Regency Costumes: a pair of half-boots and two pairs of satin ballet flat shoes. The boots will have the buckle removed (perhaps for a man’s shoes!) and get dressed up with a ribbon and fabric rose across the base of the toes. The white and pink shoes will be cleaned, then the white will get white ribbons to lace up the legs. The pink shoes will have the fringe covered with a ribbon and the cut-away area disguised.

  • For day wear, flat, lace-up half-boots ($18-$155).
    • 8′-12″ tall, round toe, slim sole and ¼” heel maximum.
    • Light colours.
    • Softer leather, cotton, or denim.
  • Orthotics may fit if you buy a half size larger than normal.
  • Post: Put on Your Dancing Shoes!

Stockings

High-lift foundation garment for “the girls”

  • Custom made Regency short stays ($70-$190), for C cup and under, OR
  • Custom made Regency full corset ($95-$380), for D cup and higher, OR
  • Push-up bustier or modern corset that’s low cut and not too cinched in the waist ($0-?), OR
  • Well-fitted (or slightly small) demi-cup, push-up bra, such as a Balconette. ($20-$?), plus a waist cincher if needed for extra lift.
  • Post: Lift and Separate!

Chemise and petticoats or pantalettes

  • Authentic, custom-made, new, Regency undergarments from specialty stores or Etsy:

    Petticoat, early 19th c, American, Boston Museum of Fine Arts

    • Chemise ($45-$100) (worn under the corset for comfort), and
    • Petticoats ($35-90) or pantalettes ($35) (to “fluff out” the gown so it won’t stick between your legs), OR
  • In place of all of the above:
    • A floor-length full slip or nightgown, deep cut to match neckline of stays/corset/bra ($7-$38), or
    • A floor-length half-slip pinned to base of bra ($7-$20), or
    • Plain, lightweight, light-coloured cotton capris or pajama pants, or pants liners. ($5-$20), and
    • A low-cut camisole if needed with the last two items ($5-$25).
    • Super-fine woven cotton is best for comfort, but polyester will work.
  • Post: Twenty Layers of Unmentionables and no Panties!

Basic empire waist gown ($38-$400)no information

  • Floor length, empire waist.
  • Straight (non-fitted) skirt, flat in front and gathered in back.
  • Short, puffed sleeves and wide, low neckline for a dinner/evening/ball gown; long sleeves and high neckline for morning gown (to 4pm).
  • Simple-print finely-woven cotton, linen, or percale (not black-based), smooth silk, organdy, or synthetics that are good facsimiles.
  • 2m (6’-7’) by 1”-2” ribbon tied under the bust.
  • Don’t buy a pre-made “Regency” gown for under $100 on Etsy, as most are terrible!
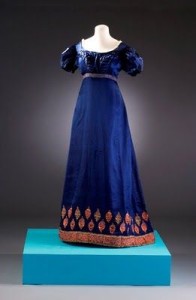
  • $200-$400 should buy a nice, authentic, custom-made gown.1812 costume parisien
  • Posts: Floor length, Empire waist, and what else? Anne Shirley? (description of a Regency gown and examples); A Morning Gown plus some Frankenstein Gown Parts (what aspects of vintage gown styles to avoid; my gown purchases; morning gown modification from 80’s vintage); Were Regency gowns worn on the Titanic? (purchase tips for new handmade Regency gown; what to look for in a vintage gown to re-purpose).

Regency Hair Style

  • Centre parted, with ringlets around the face; fancy up-do with bun and curls or braids, worn close to the head. (How-to and video links in posts.)
  • If hair is too short for a fancy up-do, a hairpiece (bun maker, bun hair, and 1-3 braids for $10-$30), fall ($0-$50), wig ($0-$92), or a turban are options.
  • Ringlets can be purchased or taken from a doll or fall ($7-$60) and held on by a bandeau, or flat pin curls can be made.
  • For very short hair, comb forward in a “Titus” and hold in place with a ribbon, bandeau, or similar decorative item.
  • If desired, trim with ribbon, lace, bandeau, braided fillet, small silk flowers, feathers, tiara, diadem, combs, etc. ($0-?)
  • Posts: Faking Purdy Locks: The Modern Hairstyle goes Regency;
    Regency Bad Hair Day? Wrap a Turban! (my clip-on fall in an updo at end of post).

Headwear

  • Bonnet or hat ($6-$70)
    • Preferable if your hair looks nice when you remove your hat indoors.
    • Brim is sturdy, not floppy, and straw or satin-type fabric.
    • Capote hat or bonnet can be made from a wrap-around straw visor or hat, a 20” diameter simple, smooth, silk-like fabric cover, and a ribbon.
    • A good hat base is the narrower brim straw picture hat at Michaels, $5.
    • Add 1.5′-2.5′ of 1″-1.5” ribbon to make ties for a bonnet.
    • If desired, trim with several bunches of small fabric flowers and greenery; larger fabric roses; an ostrich, peacock, or other feather and brooch/medallion; hat pin; or combination, or other designs based on Regency sketches.

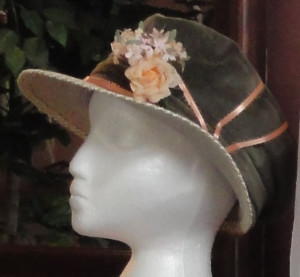
      Mock up of design of green and straw visor with green velvet cap.

      Mock up of design of green and straw visor with green velvet cap.

    • A nice range of new items can be found at the upper half of the price range above. Fancy items are double the top price listed here.
    • Posts: The Thrifty Regency Hat-trick! (Capote hat from visor and dinner napkin for under $10); How-to Times Two: Variations on Dressing up a Bonnet (The Pink Hat); Special Headwear for the Grown-up Lady (museum hat examples at the end of the post).
  • Lace cap ($2-$40)
    • Optional; for married or single-and-proud-of-it women only.
    • Similar to the idea of a turban, this will hide hair for women who can’t manage a Regency hair style and will be indoors where they must remove their hat.
    • Can be made from super-fine white cotton and/or fine whitework lace items such as doilies, handkerchiefs, curtains, cushion/pillow covers, or purchased applique items and ribbon.
    • Post: Special Headwear for the Grown-up Lady
  • Turban ($15-$40)
    • An alternative to the hat or bonnet that does not have to be removed when you go indoors.
    • A nice choice for evening wear if you’re unable to create an up-do.
    • Twist 2-3 silk or satin scarves (how-to and video links on this blog), or a length of silk or satin fabric (could be a table or dresser runner, a pashmina, small shawl or wrap) about 15″-20” wide and 40” long about your head behind ringlets; secure with safety pins and bobby pins.
    • A brimless, soft, natural fabric hat with a scarf or fabric wound around its base in textured waves works well also.
    • Fringe or ends with some type of embellishment or trim are recommended, and can be left to droop on one side.
    • Braid or cord can be woven around with turban cloth.
    • Add feathers, foliage, brooch, medallion, hat pin, or similar items.
    • Post: Regency Bad Hair Day? Wrap a Turban!

Jewelry ($0-?)

  • Simplest would be a medium-sized “jeweled” cross on a chain.
  • More elaborate choices include “jeweled” necklaces, armlets, bracelets, brooches, rings, earrings, and combs.
  • Almost all stones are are acceptable, but they should be cut stones. Costume jewelry is fine if it doesn’t look plastic.
  • Cameos and red coral were popular.
  • Drop earrings were on hooks not studs; clasped or open hooks are period.
  • Lover’s eye brooches were fashionable.
  • Post: Shiny things expose my inner crow!
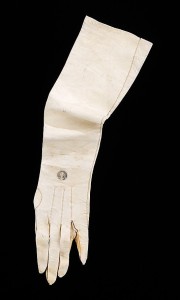
Regency Opera Gloves, kid, Metropolitan Museum of Arts

Regency Opera Gloves, kid, Metropolitan Museum of Arts

Gloves

  • Cotton, silk, or kid leather.
  • Short or optional for day wear ($5-$25).
  • Evening gloves go above the elbow: 24”-31″ (opera-length) with a loose-fitted upper arm are period-correct ($8-$32 for synthetic; $50-$200 for natural materials); 19” minimum.
  • If synthetic opera gloves are worn, buy a matte and not shiny satin finish, as it looks fake.
  • Any colour but black. White and softer colours were most common.
  • Post: I never did mind about the little things…

Fan ($1-$10)

  • Optional, but necessary on a warm day or in a ballroom.
  • Folding hand fan.
  • Avoid plastic and obvious synthetic materials for the sticks and guards.
  • If the fan has any scenes on the leaves, they should be English.
  • Any colour. Trim can include feathers, sequins, metallic, mother-of-pearl.
  • Post: I never did mind about the little things…

Parasol ($20-$200)

  • Optional if your face is protected from the sun by a bonnet or hat, or you are in a ballroom.
  • Eight or fewer ribs is Regency-appropriate, but who’s counting? As long as it’s not a dozen!
  • Pagoda shapes were most common, but round parasols were also in use.
  • A shallow curve is fine, but avoid flat Asian-style parasols.
  • The fabric should look like silk or cotton if possible.
    • Patterns on the fabric itself were rare, and would be a wide stripe or large dot or similar.
    • Fabric on vintage pagoda parasols from the early 20th century might not be very close to a Regency look.
    • Do not buy a Battenburg lace parasol, as they’re Victorian.
  • Most trim was on the periphery of the parasol: fringe (almost any kind), tassels, or lace. Some had embroidery.
  • Any colour but black.
  • Post: I never did mind about the little things…

Reticule ($5-$65)

  • Small drawstring bag (under 8” by 8”).
  • Almost any colour or shape works, in a fine fabric, beaded, netted, or knitted.
  • Avoid printed satin, most open lace or crocheted styles, eyelet lace, or leather.
  • Beads or sequins should not look plastic.
  • No zipper, but metal snap clasp or gate closures are fine.
  • The smooth silk bat-wing or moon reticules on Etsy are overpriced ($15-$22) for what you’re getting. The beaded and embroidered ones are often very good deals.
  • Post: All the pretty little purses

~~~

A few good overview web sites for a Regency costume:

These sites are summaries of what we’ve learned during the 17 previous posts in the Thrift Shop Regency Costume Experiment blog series, and I refer to them regularly myself.

Best site (pdf version) for showing the details one should search for: It’s All in the Details: Making an early 19th Century Ball Gown, by Hope Greenberg.

Best site (pdf version) for applying the other to real life: Miss Lisa Brown’s Guide to Dressing for a Regency Ball—Ladies’ Edition.

Less useful, but detailed, with lots of drawings and paintings is Wikipedia’s 1795-1820 in Western fashion.

An interesting article explaining Regency fashions while referencing the movie adaptations of Pride and Prejudice. Dressing for the Netherfield Ball in Pride and Prejudice: Regency Fashion.

Lots of links for buying stuff new can be found at Regency Attire: Purchasing Your Costume by Regency Dances.org  Not all these items are accurate, as they try to cover numerous costuming situations.

Sites for examples of Regency gowns:

Museum gowns:
Real people wore these, so they’re a bit more accurate than fashion plates such as Ackermann’s Repository for Art, La Belle Assemblée, or Costume Parisién.
The Vintage Thimble tumblr
Kyoto Costume Museum Archives 1800s-1810s

Ideas from others’ modern interpretations:
The JASNA AGM Regency Ball in Brooklyn, 2012. Most of these are probably handmade from modern reproduction patterns. There will be non-Regency clothing represented as well, as not everyone is immune to the marketing of those selling the Titanic/Downton Abbey gowns.
The Jane Austen Festival in Bath is a similar situation.

Erica Duncan's montage of Regency fashion plates for each year between 1809 to 1828.  Original art from Ackermann's Repository for Arts. Click on thumbnail for much larger image.

Erica Duncan’s montage of Regency fashion plates for each year between 1809 to 1828.
Original art from Ackermann’s Repository for Arts.
Click on thumbnail for much larger image.

Pinterest has a lot of good images, but I’d suggest searches by clothing article rather than just “Regency,” as the number is overwhelming even then.The site will often offer sub-headings at that point, too. This is an example of a huge board. Take care, as some images are modern and may contain misinformation; that’s why I like to stick to museum examples. But sometimes those are mis-dated by some pinner, too. It won’t be long before you’re picking them out yourself, though, as there’s nothing like 50 Regency gowns compared to one 1830’s gown. Warning: Pinterest is like crack.

Resources for making your own gown if you can sew a bit:

A video tutorial from Follies Past shows how to make a Regency ladies’ gown from a bridesmaid dress, a set of curtains, and a lace blouse. This requires beginner sewing skills.

Old Petticoat Shop offers their Regency Dress Online Class for $97 plus fabric, notions, etc.

My Regency Journey from Tea in a Teacup goes through creation of an entire Regency costume, but made from scratch.

Diary of a Mantua Maker has two tutorials on fitting a Regency gown: the first shows common mistakes and the second, sleeve and bodice fitting.

Sense and Sensibility Patterns has a number of videos with tips on how to fit your gown or modify the design of a pattern, as well as some sewing techniques.

~~~

Update: A nice little summary for evening wear, with some of the wonderful descriptions from The Lady’s Magazine and La Belle Assemblée: Mimi Matthews’ Elizabeth Bennet, La Belle Assemblée, and Early 19th Century Fashion.

~~~

turban 1 croppedNEXT POST: The grand finale! Photos of my completed costume, plus an overview of my learning experience with the “experiment” and brief notes on what the summer bonus posts will look like.

Convertibles aren’t just for Road Trips #thriftyregency

A Regency-costumed event that’s longer than a 21st century afternoon poses a problem: you need at least two gowns! From waking until dinner (at 4pm), you’ll wear a morning gown, which is modest, with full- or three-quarter-length sleeves and a high neckline. As the day wears on, you’ll be allowed short sleeves and a lower neckline, until the ball, when the bodice is brief. This is called “full dress,” as in the lady is fully dressed up in her best!

Sometimes a gown for “later in the day” was worn with a lightweight, white fabric insert or cover at the bodice and/or long sleeves, temporarily sewn under the short sleeves, for a morning gown look.

Chemisettes, Tuckers, and Fichus

A chemisette is similar to a dickey in fine white fabric: it tucks into the gown neckline to make it high cut, and cover the chest, shoulders, and back. It has a collar to suit a morning gown look.

A flat, sheer fabric panel called a lace tucker can be worn to artificially raise the neckline a few inches for an afternoon or dinner gown. It’s like the chemisette without the collar.

Alternatively, a lace triangle like a small shawl or scarf can be worn atop the gown and tied at the centre front, and this is called a fichu.

All of the above were made of light, translucent or sheer fabrics such as fine Regency muslin, cotton, or heavier net. They tended to be white with lace or whitework (white embroidery, drawn thread techniques, or darning) accents, not unlike the lace caps we saw in an earlier post.

Removable long sleeves took care of the other aspect of modesty, and these were often made in the same fabric as the gown.

In the late Regency, there was also a “summer bodice,” which was a high-necked, full bodice with long sleeves. It was super-light muslin, and sometimes had stays incorporated into it.

Re-purposing to make any of these items for yourself is an easy project. Some of the alternatives suggest “sewing,” which can be accomplished by use of no-sew tape.*
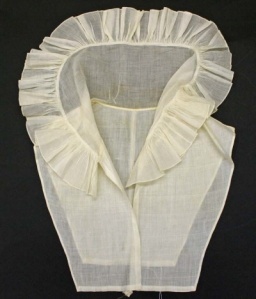
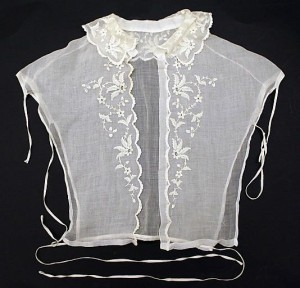
chemisettechemisette metMake your own chemisette:

The top of a white, sheer, natural fabric blouse can easily become a chemisette: Excess fabric is cut away to leave a dickey-like garment.

Fabric for the chemisette should not be stretchy or look synthetic. The chest should not be covered with ruffles, and a tuxedo style is not Regency, but fine pin-tucks, sections of smocking or ruching, simple lace, or embroidery on the front are nice. Embroidery designs should be reasonable for Regency. Silver or white are the best colours, with natural or simple geometric patterns. Please, no psychedelic stuff!

The blouse should have a collar that fits close to the neck. Almost any style but double lapel, drapey cowl, or boat-neck will be fine, and ruffled collars were common on chemisettes. If there is no collar, add some lace to achieve the look.

To make your chemisette, put the blouse on under the gown, mark the neckline in a wash-out product. Trace a parallel line to the neckline about 1 ½-2” wider on each side and cut off excess. Finish the cut edges.**

Disguise or replace modern-looking buttons and button holes on the blouse.*** Remove zippers and, if necessary, replace with ties, easily made from a pair of matching narrow ribbons about 6” long, tacked at the edge of the opening. Hand sewing is recommended for this. Make sure visible stitches look neat. Note one of the examples uses ties to hold the chemisette in place, too.
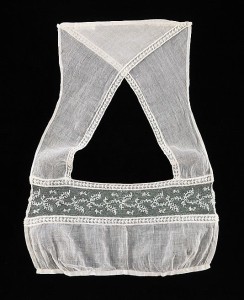
Lace Tucker, 1820's, French

Lace Tucker, 1820’s, French

Make your own lace tucker:

This is like a chemisette, but simple, collarless, and flat. The fabric should be similar to the caps we saw in a previous post: white-on-white super-fine cotton or linen, so it’s sheer.

A lower kitchen or bathroom curtain with a nice lace design will be more than enough fabric. Remove any flounce. As in all areas of the Thrift Shop Regency Costume Experiment, if you use polyester, it must be of good enough quality to appear as if it is fine cotton, linen, or silk.

If you can’t find a nicer curtain panel, a scrap of fine, sheer fabric with a lace insert, or a panel of a sheer silk scarf with an interesting design can be made into a tucker if trimmed, hemmed, and remade into a shape like in the photo above.
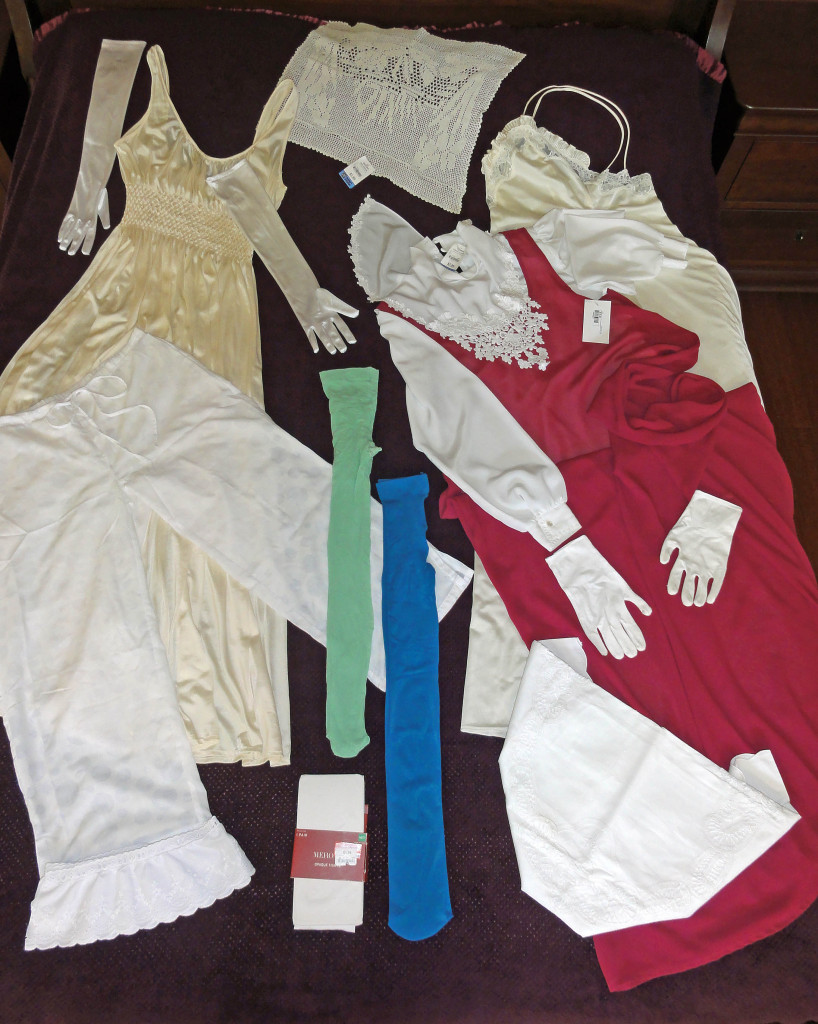
Underwear and convertibles, tTSRCEThe second pillowcase from the set of two for $1.99 (lower right in photo; the other was to be made into my cap) will be my tucker. If the outside edge of the lace pattern is wide enough, I can cut right up to it, and the heaviness of the Battenberg tape will suffice for an edge, otherwise I’ll have to leave a hemmed panel to tuck in.

It’s up to the wearer to decide the coverage, i.e., depending on preference, the neckline can be looser about your neck. For a morning gown look, it should be close to your neck, so I would need to add a back slit with ribbon ties on mine. Otherwise, a bigger hole is required to fit my head after hemming. Finish cut edges as needed.**

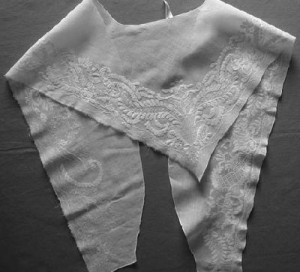
Make yourself a Regency fichu:mid-18thc-fichu whitework embroidered met museum fichu
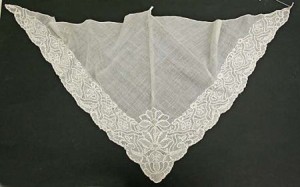
A light shawl-type garment, the basic design of a fichu is a white or light-coloured lace triangle in natural fibres. Its size can vary, but it must wrap over the shoulders to cover any the back to the neckline, then tie or tuck at the centre front neckline: in most cases 30 inches on the long side will suffice. Either an all-over lace design or something special on the two short sides of the triangle is desirable. It should be white on white, or at most, minimal pale or silver embroidery.

A square silk scarf with an intricate border, folded or cut in half on the diagonal;** a sheer triangular evening shawl; or similar garment will work.fichu 3
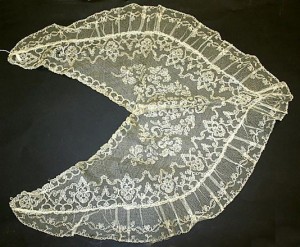
The corner of a lace or sheer curtain panel or tablecloth with a wider embroidered, lace, or applique edge is a good choice, if you can find one where the fabric looks natural and not plastic. I had no luck there, but I know I’ve seen them.

Another option is a doily or lace table runner. The rectangular doily at top centre in the photo is 16 inches on the long side. It can be cut on the diagonal, then the pieces moved and the short edges attached so it makes a triangle. Similar to the Regency cap I made, this lace is a bit heavier than true Regency, and I suggest working to find something lighter weight.

Fake sleeves:
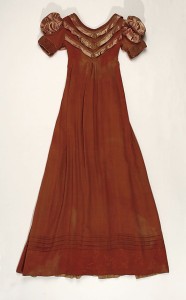
Dress with long sleeves removed, 1818, Metropolitan Museum of Art
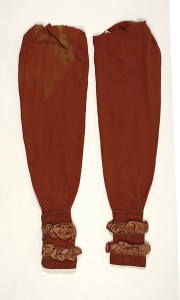
Dress with long sleeves removed, 1818, Metropolitan Museum of Art

Matching detachable sleeves from gown of 1818, Metropolitan Museum of Art

Matching detachable sleeves from gown of 1818, Metropolitan Museum of Art

In the same vein, it was not uncommon for a gown to have removable sleeves to create a morning gown from an evening gown. They fit over or under the short, puffed sleeves. Sometimes, they were made in the same fabric as the gown.

Basic sewing skills are recommended for making a convertible gown by removing long, puffed sleeves from a thrift shop gown and remaking both sleeves, or making new sleeves to be added.

If you choose to cut a long sleeve off, co-ordinating fabric will be needed for the cuff of a new short sleeve. It may be possible to steal it from elsewhere on the dress: a wide hem, a too-long skirt, moving a seam, the cuff of the long sleeve, etc. If you’re lucky, you might find a scrap elsewhere in the same colour and texture—but unless you made the original dress, that’s almost impossible. Cuffs were narrow, so it’s not a lot of fabric, but it should co-ordinate well, and match any cuff on the long sleeve.

If a match proves difficult, a complimentary fabric that’s obviously unmatched can enhance your gown if you use it elsewhere, for example, make the cuff from the same complimentary ribbon at the gown’s high waist or new trim you’ve added at the neckline or on the skirt hem. Another alternative is to put coordinating flat lace over the cuff to disguise a slight mismatch.

If the original long sleeve was puffed, the part you cut off should be narrowed a bit, and the end to be tucked under the new short sleeve should be finished with matching bias tape so you can keep as much length as possible, yet have a sturdy edge to whip-stitch inside when needed. Don’t make the cuff or new long sleeve too tight!

If you’re making new sleeves, keep in mind that Regency long sleeves tended to be very long and close-fitted. Take advantage of making them new, and have them go from inside the cuff of your short sleeve to your fingertips, flared a bit to go over your hand. Wear them slightly tugged up along your arms.

New sheer long sleeves can be added over a puffed sleeve, too, as in the example from this article in Jane Austen’s World.

When you want to wear the long sleeves, you baste or whip stitch the tops of them inside the cuffs of the short sleeves.

My cool idea for an alternate!

An interesting additional option makes it super-simple to create a convertible gown: A very lightweight, white, sheer or lace, long- or three-quarter-sleeve blouse with a high neckline and collar, in cotton, silk, or similar fabrics, can be worn under or over the corset of a ball gown!

You now have a combination of a chemisette, a set of removable sleeves, and the top of the chemise. You can see the effect under the fuschia under/overdress in the photo of my selections, above.

Add a floor-length half-slip or your version of pantalettes, pop on your ball gown, and you have a morning gown, and you’re ready to make calls!

But watch out—the “morning” didn’t start until 11 am, and a fifteen minute stay was all that was polite unless you were close to the hostess. Of course, you didn’t want to risk offense by making any assumption, so at fourteen minutes, you began to say your farewells! It took more time to travel between calls than was taken chatting!

The AHA Chat Chits could not handle that. At least they would be able to ghost a bit in the carriage. I wonder what priorities in conversation would be chosen if they had to minimize their chat time? Austen’s novels? Novels based on Austen’s work Hot men? Chocolate? Dodgy history topics?

When the night time comes, of course, the add-ons come off and you’re left with the abbreviated bodice again! Roll that top down, honey, it’s a convertible, and it’s time to have fun!car looking back cropped for header

~~~

NEXT POST: I’m running out of time in this series, because I promised to show the whole costume by the end of June, and we still have to do reticules, bling, show the final outfit, and provide the quick checklist. I’m pretty sure reticules will be two posts, unless I can figure out how to show how to make the clever designs without showing the whole process.

Anything I don’t absolutely need for a base costume will be in bonus posts, though: Outerwear (spencer, pelisse, shawl), additional accessories (fan, parasol), ball gown, the “tricks” to fake Regency, In addition, I had an idea for give-away’s in Louisville.

~~~

Notes:

* “No-sew” or hemming tape is a non-woven tape that can be used instead of machine or hand sewing where there is not too much load or stress on the seam. It must not be used alone for such things like setting sleeves, bodice seams, crotch seams, or attaching a skirt. It works well for hemming and finishing cut edges. It comes in two types: iron-on (fusible) or no-iron, which is similar to double-sided tape, but the tape is fabric and not plastic.

** When you adjust the product you buy or salvage at home, you should finish the cut edges by machine or hand stitching, or with ¼” wide hemming or “no-sew” tape. Invisible cut edges can be hemmed with a double fold pressed in before attaching. If the edge is visible, a narrow ribbon, flat lace, or matching narrow bias tape is nice.

*** The Problem of Regency Buttons
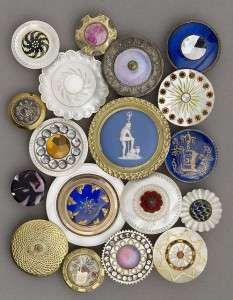
Pearl and metal buttons, 1780 to 1820, Luckcock Collection, Birmingham Museum of Art

Pearl and metal buttons, 1780 to 1820, Luckcock Collection, Birmingham Museum of Art

In what remains of her letters, Jane Austen commented to her sister, Cassandra, that buttons were expensive. Examples from the Regency can be seen in the photo. It’s not easy to find inexpensive buttons to match, and reproductions come with a hefty price tag. There is also the issue of hand-sewing buttonholes or eyelets to be authentic.

The good news is that buttons and laces appear to have been used in only about 20% of gowns: ties were more common, as well as hooks and eyes.

If your chemisette (or gown) has modern buttons, you should replace them. Oyster-shell buttons or kits for self-covered buttons are inexpensive and common in fabric stores. The self-covered button-making kits are easy for the novice. They were common on waistcoats for men.
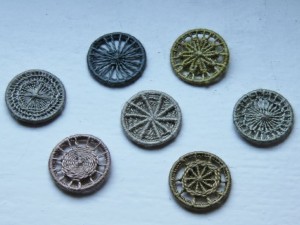
green and sapphire blog dorset buttonsThe craftier costumer may like to try making buttons from cording, such as knot buttons or Dorset buttons. It takes a fair bit of experience on larger sizes to be able to make Dorset buttons well. Small plastic loops in bags of around 20 are inexpensive in draperies departments of fabric stores. Sea Green and Sapphire has a tutorial.

button knot from paracord knots on youtube croppedIn my old sailing days, I tried making a Monkey’s Fist knot one rainy Saturday, and it took far more time and patience than I had, and I was working with rope large enough to make a knot a little large than the size of a ping-pong or squash ball. This is a bit simpler, and Paracord Knots’ video shows how to make it.

If you’re sensitive that the existing button holes on your chemisette or gown look machine made, either hide or remove the button hole panel, with alternatives as follows:

  • Remove the button-hole panel, re-hem, and add fine ribbon ties or make loops for the buttons at the neck, plus more locations as needed. The edges do not have to overlap: the layers of other underthings will hide skin!
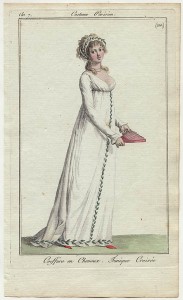
  • 56971c90f8e009296c2e1547df3b8135In front, hide with trim such as a co-ordinating flat lace panel. When you attach this trim, leave gaps to allow access to fasten buttons. Replace buttons with flat ones if they make lumps on the trim panel. For a gown, check out historical pieces with decorative panels on the front of gowns, such as the example.
  • For back buttons, use period-looking buttons large enough to cover most of the hole.

Note that frogs are not the best choice for this type of garment, but are good for outerwear in the Regency.

~~~

I had a good shopping day today. I found satin ballet flats in white and in pink, plus buff-coloured flat, laced ankle boots, with a light sole and heel, for Regency half-boots.

Ribbons were on sale in a craft store, and I got a dozen colours of varying widths. Some will be for the tricks that I’ll show as a bonus post after this series ends the end of June, and some will be used for that Lydia hat.

All this modifying of gowns has made me consider making a simple one or two, and there just happened to be Regency-looking fabric for $7.99 for 2.5m at Value Village. I hope it doesn’t wind up in my closet for 20 years like the last time I said I’d make a dress!

~~~

Twenty Layers of Unmentionables and no Panties!

I read bodice rippers! In the steamy scenes, the Regency hero is forced to wade through layers upon layers of underthings as he tries to seduce the heroine. The poor guy might find an overdress or an underdress as part of the gown. Once he had dispensed with that, he would first find petticoats and/or drawers/pantalets, then a corset or stays, and finally, a chemise and stockings under that enticing gown.

Okay, it’s not twenty layers, but I’m sure it seemed so to the impassioned, impatient fellow!

Chemises, petticoats, and drawers:

Chemise

Chemise

Chemise with owner s initials, A.F. c. 1820 to1830 at Vintage Textiles

Chemise, 1820 to 1830

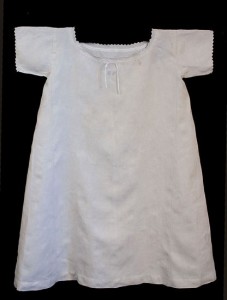
We start closest to the body, with the chemise (shift). It’s like a light, straight full-slip, worn under the corset to prevent chafing. It often had short sleeves.

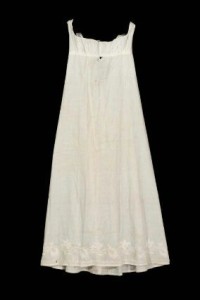
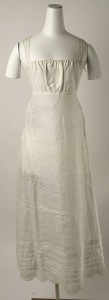
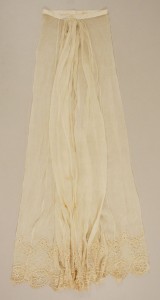
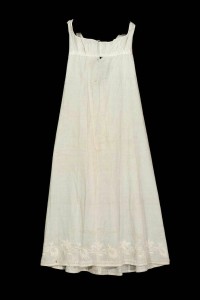
Petticoat, Metropolitan Museum of Arts

Petticoat, Metropolitan Museum of Arts

Regency petticoats are not heavy crinolines to pouf up the dress, rather, another slip, either a half- or full-slip. Worn over the stays or corset, the petticoat’s function is to make certain your soft, pretty skirt doesn’t bunch up around your legs. Some are heavily gathered and some are straighter, depending on the fabric and style of the dress they’re intended to shape.

Petticoats, Metropolitan Museum of Arts

Early 19th Century Petticoats, Metropolitan Museum of Arts

Some Regency petticoats had stays built in; you can buy a new bodiced petticoat custom-made to fit you for $90 from vendors at sites such as Etsy. If you are a sewer, Merle Brown of the Victoria BC chapter of JASNA recommends La Mode Bagatelle pattern  bodiced petticoats. She has made at least 6 of them.

1815 petticoat

1815 petticoat

1810 underdress or overdress

1810 underdress or overdress

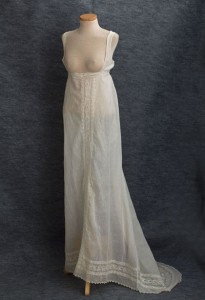
Other petticoats were cut so they hung open-busted from narrow shoulder straps to the dress “waistline,” to ensure they did not show in the opening of the low-cut gown.

In the mid-Regency, when the gown length became shorter, the petticoat was intentionally longer than the gown, and had beautiful lace decoration on the bottom that was intended to be seen. If anything got dirty, as in Elizabeth Bennet’s case when she walked to Netherfield, it would be the petticoat, which easier to wash than the gown, and cheaper if ruined by a stain.

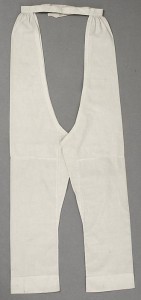
Pantalets, Metropolitan Museum of Arts

Pantalets, Metropolitan Museum of Arts

Drawers or pantalets are like a pair of legs of pants tied at the waist. They serve more or less the same function as the petticoat, and are in similar fabrics. Like the petticoats, their bottom lace trim was allowed to be seen at the bottom of the skirt.

The two legs weren’t joined at the top section until 30 years later, and briefs/panties/knickers as we know them didn’t exist until the 1930’s. (Even then, early panties were only used during menstruation!) For the pre- and post-Regency woman, this made sense, as the dresses had more layers of hoops and petticoats, and it made it easier to urinate if nothing had to be removed. I know, I know; you don’t want to imagine that!

The alternative: A full slip

For the purposes of your Regency costume, a floor-length full-slip should perform the function of all three. (You can add whatever underpants and shapewear you’re comfortable with.) If you’ve chosen a corset that hasn’t been lined for comfort, you may want to wear the slip underneath, otherwise, it can fit over top.

Slips used to be ubiquitous: in the 20th century, every lady had so many, she needed a “slip drawer” to hold them all. The slips inside would include regular-length and floor-length full-slips and half-slips (skirt only). Some would be bra-slips, and have side slits or back slits, and there may be mini-slips or ¾-length slips, as well. In all likelihood, each would be duplicated in black, white, and écru, a beige-y colour.

They were the 20th century version of petticoats: they helped skirts to sit flat across the legs, so no indication of a split was evident. But that taboo has gone, and floor length full slips haven’t been sold in regular stores for a good 10 years.

If you can’t find anything in your closet or your mom’s, or in thrift or vintage shops, a very light dress or nightgown, or the lining of an evening gown will work as well. This is where that dress that didn’t have enough fabric for a gown would be useful! It should have enough fullness to the skirt to support the gown and keep it from draping between your legs.

The colour must not show under your dress, so with a sheerer gown, it should be a similar colour, with no pattern. The exception is where you have a sheer overdress and want this as an underdress of a specific colour.

I purchased two cream-coloured nightgowns at small thrift shops for $9.99 and $7.99, and a fuschia slip-dress at a vintage store for $19.99, for use as an underdress.

Underwear and convertibles, tTSRCEThe slip neckline must be at least one inch larger than the gown neckline so it won’t show, so you may have to cut it back. Lace, trim, or any heavy edges on the undergarment that could be lumpy under any fitted area of the gown should be removed as well. Any new edges should be finished.*

You could consider a common Regency petticoat cut, as seen above in the 1810 underdress/overdress: Remove the entire front to the empire waist except for an inch or two at the sides (clear of the neckline) as shoulder straps.

If it’s just petticoats you need (your bodice is lined or of heavier fabric, and your corset alternative does not chafe), a floor-length half-slip or lightweight skirt can be tucked under the bosom instead of at the natural waist. It may be on the short side, but unless you need it to show at the bottom of a too-short gown, it should serve the purpose. If you have some sewing skills, a ¾ slip can be trimmed and modified to fit.

A special alternative for pantalets:

If you normally wear pants all the time, and this dress is quite the stretch for you already, a pair of lightweight cotton pajama pants or loose-legged capris can be worn as if they were pantalets, instead of the slip. Any colour or pattern must not show through.

I found a pair of capri-length cotton pajama pants (above) for $1 (everything was 50% off!) at a charity thrift store, and some very wide lace trim from a fabric store in Mazatlán (as part of my $5 trim purchase spree there) will make them more Regency. I’m leaving the crotch sewn together; I’m not that much of a stickler for exact period correctness!

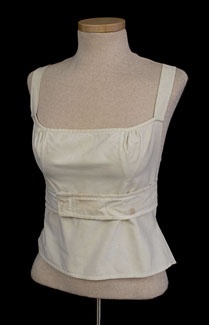
You can use a camisole or sleeveless/short sleeved blouse with the half-slip or pantalets if you see the need, e.g. if the fabric of your gown’s bodice is lightweight and light-coloured, or if you need something under a corset. It must be cut back to suit the gown’s neckline, similar to the slip instructions above.

Stockings:

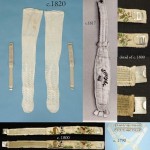
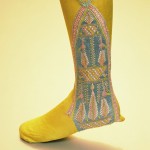
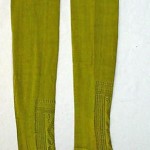
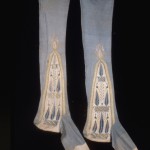
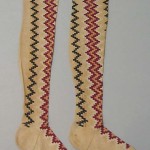
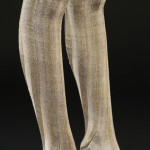
stockings and garters kyoto 1810 stockings england french acid green silk stockings early 19th c stockings early 19th c stockings met 1800-1829(Click on thumbnails for larger images.)

These went higher than the knee, and most were opaque, silk, and tied with ribbons or garters. There was no elastic of quality for this type of use for another 50 years or so. Many examples of Regency stockings in the museum photos have beautiful designs on them, and a wide range of colours are shown, similar to the shoes.

I plan to wear tights, and got three pair, as seen above. Since they were on sale for $1 at Joe Fresh, the colours of two pairs are pretty wild, and I may not find I have an outfit to wear them with, but they work for everyday in any case.

The third is white, bought on holidays for $1.99 brand new at the Goodwill in Portland, OR. Had I been successful in connecting with Meryton Press author Linda Beutler for dinner during the unplanned stop, I wouldn’t have had the time!

The tights could be trimmed to a more authentic length, but care would need to be taken to finish the edges well to avoid runs. In addition, I’m worried they’d keep falling down, and I don’t want to spend my entire time at any Jane Austen function trying to hike up my hose. I’m afraid I would look less than ladylike!

If I find time, I may try to transfer a simplified version of one of the designs onto the tights, and use fabric paint. If you like this idea, but don’t want to be crafty, Betsey Johnson has floral printed thigh-highs for $18 a pair!

~~~

NEXT POST: Make your evening gown convertible!

~~~

* For finishing edges or hemming where you have to adjust the product you buy or salvage at home, you can machine sew, hand sew, or use hemming tapes, which come in an iron-on type and a type that’s like double-sided tape. If the edge will be visible, a prettier edge will be achieved by attaching a very narrow lingerie ribbon to just cover the edge, in lieu of the hem.

Update for non-Upcycle (new) Products:

  • Victoria’s Secret has a Heritage Cotton Gown (nightgown) that works as petticoats for $38.
  • Sears sells Vanity Fair half slips and pants liners called “Snip-It” that can be used like the skirt of petticoats or pantalets, at $19.99.
  • Various companies sell Regency-looking silk or cotton stockings for $25 and $15 respectively. Google “historical silk stockings” or “clocked silk stockings.” Please take care when looking at other products at these companies, and don’t purchase Victorian-era products or expensive shoes sold as Regency that don’t resemble true museum examples.

Lift and Separate!

Nothing destroys a Regency look faster than droopy boobage—it’s better suited to activities with pot and daisy-weaving involved. The Regency bodice demands softness on top rather than on the bottom, and the opposite will be noticed, because the pretty ribbon you chose for your Regency “waist” will be obscured. Why wear a nice gown and fail to make sure “the girls” sit like queens?

Corsets and Stays:

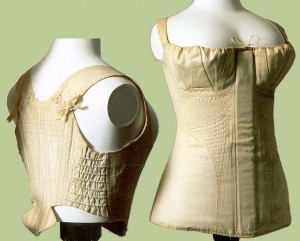
Short stays and corset from the Met museum, courtesy "Jane Austen's World"

Short stays and corset from the Met museum, courtesy “Jane Austen’s World”

This is one of the most important parts of your costume: to get the proper shape under the bodice of those high-waisted, low-cut gowns. You should wear your corset—or whatever alternative you choose—when trying on potential gowns, so this foundation garment is a procurement priority.

The Regency stays or corsets have a very specific goal: elevate. The idea is to get “the girls” so high you’d pass the pencil test with a whole box of HB’s. That’s where the “waistband” and ribbon of your empire gown will fit. The bottom of the breast is slightly flattened, as the softness is transferred to the top.

Many younger women will identify with women’s shapes in Austenesque artwork and movies because they already wear a push-up bra, and recognize the shape the Regency short stays (that fit like a longline bra) or Regency corset (fits to the waist or lower for more support) create. Michele Reed, the publisher of Meryton Press, swears a well-fitted Regency corset is quite comfortable, and if you were leaning in the direction of authenticity, that’s encouraging. If you’re a Nervous Nellie about exposing the tops of “the girls,” have a quick look at the BBC/A&E production of Pride and Prejudice from 1995—it’s a lovely look on anyone!

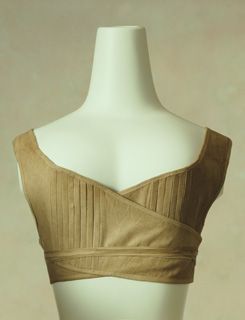
crossover stays kyoto

Wrap around brassiere-type Regency stays from the Kyoto museum.

Regency short stays are fine if your bra size is under C cup. At $65 to $170 custom-made, the more costly of these use additional personal measurements for a better fit, use better fabric, have breast gussets and extra boning, and are lined for comfort. The bra-like wrap stays, as seen in the Kyoto museum, can be custom-made for you—at $275! Ouch! I’d rather invest in my gown.

Lower-priced short stays on vendor sites such as Etsy appear well-made, if a simple design, making them a good bargain if your breasts don’t need much support. We’ll discuss the chemise later in the blog, but it can be worn underneath for comfort. A similar alternative is the bodiced petticoat, new and custom-made for $90. This is like simple stays, chemise, and petticoats in one garment.

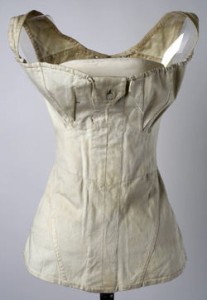
Front view, 1811 corset, Met Museum

Front view, 1811 corset, Met Museum

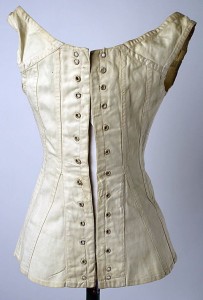
Back view, 1811 corset, Met Museum

Back view, 1811 corset, Met Museum

According to Regency undergarment seamstresses, a corset is a better choice if you wear a D cup or larger. A bonus is that a longer line will aid those who are concerned about the appearance of their midriff under the gown’s flat-fronted skirt.

Transitional or long stays, or a Regency corset, will set you back $50 to $375; $75-$330 for plus-sized. Reasons for price variations include the length of the corset—though some transitional corsets are dearer than some longer ones, due to complexity of design—and the comments for stays above. Some cheaper corsets and long stays have boning instead of the important wooden busk, and the differences in boning are far more obvious over the longer length.

Corset similar to less expensive styles. 1810-20

Corset similar to less expensive styles. 1810-20

If you’re larger, you should count on spending more, because the cheap ones will collapse. Gussets are necessary on a larger breast, and the complex boning of a dearer corset can help a great deal with a slimmer look.

With intermediate sewing skills, you can make your own. Patterns are common at about $20-$30, and kits of the hard-to-find materials are $70, but this is not a beginner sewing project. Some patterns include the important wooden busk (about $7 on its own) that sits along the centre front to separate “the girls;” others have patterns for other Regency undergarments. Vendors for baleen, plastic, or steel boning are available, though heavy cable ties (zip ties) are a good alternative, and you can get them at a hardware or dollar store. Online resources show how to fit a Regency corset. For those wearing a C-cup and lower, the Kyoto museum brassiere-like stays look easier to make.

The Budget Alternatives:

If you balk at the price for proper Regency support, and were tempted to buy a modern busked/boned corset from a lingerie store instead, DON’T. Most are the wrong shape for Regency: too cinched in the waist and wide in the hips and breasts, not enough lift in the breasts, and too much breast coverage!

Consider wearing a bra instead—but only if it provides the right look and fit. The bra must provide super-high lift without cleavage; your breasts must still be separated. To accommodate the wide, low ball gown necklines, the shoulder straps should be wide-spaced across the chest, near the shoulders, and the cups must be low-cut to show a bit of roundness on top. A near-horizontal cup top is necessary if you plan to match a squared off neckline of the P&P era.

ti-amo-light-cream-push-up-bra-by-gorsenia small

lavinia smalllane bryant 3 smallLeonisa-011789-4 small

The balconette (balconet, balcony) bra and many push-up styles of bra have the right shape, plus you’ll have a pretty bra to wear with other things, too! It’s sometimes called a t-shirt bra or demi-bra, but beware, sometimes these don’t have the wide-set straps or lower-cut horizontal tops—they’re just a seamless push-up bra.

I bought a pair of well-fitting balconette bras at an average lingerie store on sale for $55 for both. I wear 32-34F, so this is a good buy compared to a bra in a high-quality brand. The ones in the small photos vary from $17 to $48, the large photo is $64.

How to make sure your bra shape is right for Regency:

If you’ve never been fitted for a bra, get fitted first!* It’s usually free at lingerie and better department stores.

Once you know your size, you could consider trying on a bra one cup or band size smaller to see if you get more lift. You don’t want cleavage or four breasts (where the bra top edge cuts into the breast), just lots of lift. If you don’t like it, go back to your regular size—it didn’t work for me. Once you’ve made your purchase, tighten the straps as much as you can without discomfort.

If you wear a very large cup and/or have bottom-weighted,** menopausal breasts like me, you may still have a bit of softness on the bottom. Midriff shapewear, such as a spandex open bust camisole or waist cincher, can be worn slightly over the base of the breast to flatten, it as well as your midriff. I found a $5.50 straight-sided boned waist shaper from the WiN (Women in Need) charity vintage and thrift store.

Additional choices:

longline balconet from lane bryant smallSome longline bras or bustiers can work, too, if the garment has a lot of lift and breast separation, ideally with boning. You have to be ready to cut off the top half of the cup and finish the cut edge, so the ones in the backs of your drawers are preferable to buying new.***

Make sure the waist is natural and not too cinched, the cup lifts very high and covers just over half your breast, and the straps are set wide. You can remove the straps and safety pin them wider if necessary.

My balconette bra, bustier, and waist cincher.

My balconette bra, bustier, and waist cincher.

I’ve taken a 90’s bustier from before I lost weight, turned the too-large soft cups inside (almost in half) then moved the removable straps. This gave extra lift and opened up the top of the bra portion. I’ll need a light-coloured slip or camisole to cover to hide the black under light dresses, and that’s covered in a later post.

If, after all this, you like your old bra and don’t like shapewear, I understand. Tighten the straps on your old bra; it will help. To manage any bottom softness, when you try on or modify dresses, ensure that the empire “waistline” of your gown is at the lowest point of your breast, rather than under it. You don’t want the ribbon to be hidden or folded.

~~~

Next post: Polyester knits, fitted gores, and spaghetti straps: the problems I had finding a gown, and how to work around them.

~~~

* Many bra sizing charts suggest exhaling deeply and adding 4” to the under bust measurement to get band size. I find that results in too loose a band, so that’s why I recommend this site over others. Bare Necessities Sizing Help.

** From the Blog “Bras I Hate and Love,” Clarifying Breast Shape: Full-on-top vs. Full-on-bottom.

*** For finishing edges or hemming where you have to adjust the product you buy or salvage at home, you can machine sew, hand sew, or use hemming tapes. Hemming tapes come in an iron-on type and a type that’s like double-sided tape, and should not be used where the seam has to carry too much weight. Either turn back the edges slightly wider than the iron-on tape, or use pre-folded bias tape or a 3/4″ or wider ribbon ironed into a fold. Place the fold over the edge and attach to both sides. This latter method is best for thicker fabric.

~~~

Update: A Most Peculiar Mademoiselle‘s blog has a photo series of “Mademoiselle” in a Regency short dress with and without her corset. She’s what I’d call a normal-sized gal, and it’s quite convincing!