Hubby goes on a bike tour and I sew a new Regency gown

Anyone who has read the dedication to The Mist of Her Memory will figure out that when my house is quiet, I get a lot of writing done. The event that often causes the house to be quiet is the absence of Mr. Suze. He’s a busy, chatty, music-listening kinda guy who loves his bicycle. While we’re in Mexico in the winter, he disappears for long rides on his mountain bike for a couple of half-days a week. When we’re in Victoria in the summer, he road bikes along an extensive network of paved trails for a similar amount of time. Usually, this is when I write. I turn off the radio, occasionally play some tunes that have been selected specifically to stir my writing for the style of story I’m working on, but I’m focused. There’s no one poking his head in my space to enquire whether I’d like to go for coffee with Brad and Janet this afternoon; or asking did I know where he left his phone; or building or repairing something; or to deciding to vacuum. Yes, he’s a great husband. Great husbands can be noisy.

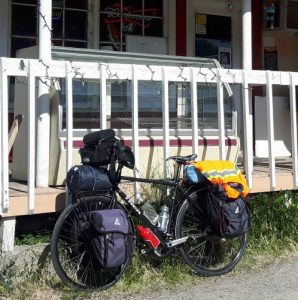
Last month, he took a week and a half for an epic trip to explore the Okanogan and Columbia River systems in eastern Washington as well as visit friends in Smalltown, WA. He camped along the way and rode on his own for 84 km (52 miles) a day on average. He had hoped to travel home from the friend’s home in one day using truck, train, bus, car ferry, and bike. Well, the bus was a no-show, so he missed the car ferry and had to take the more expensive passenger-only ferry from Seattle. The picture shows the load he had on his bike for this camping and cycling trip—a total of 38kg (85lb). He rode 600km (370 miles) and had about 6000m (20,000 ft.) of climbs, in weather that was mostly mid 30’s in oC (90’s in oF), but there was wet snow in the mountains. The scenery was magnificent.

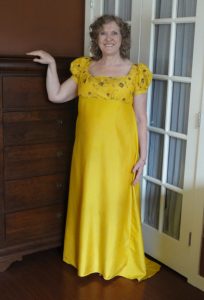
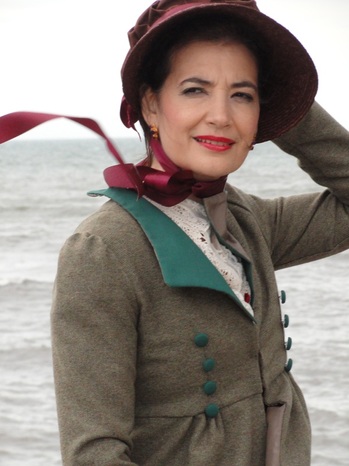
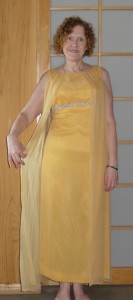
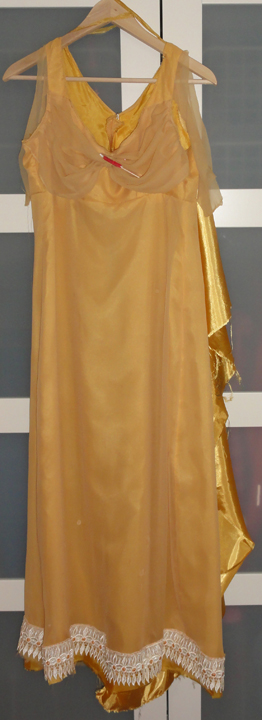
In the meantime, I did a little writing on my Regency romance trilogy, edited my existing writing, started taking an online course on Music in the Regency through the RWA Beau Monde, and finished sewing a Regency gown made from some thrift store sari fabric seconds I’d had on hand for a couple of years.

I’d cut the dress out last fall, intending to sew it in Mexico last winter once I procured a sewing machine. Mr. Suze and I practised my virtually non-existent Spanish to struggle through the interesting procedures around buying my machine from a rent-to-own store. Did you know a customer must stand in two different lines, one to pay and one to collect their merchandise, once they’ve decided to buy? The sewing machine is a newer version of the ancient one I have back in Canada, bought when I was just 19 years old, so I didn’t mind that the manual is in Spanish. But once I’d progressed so far on sewing my gown, I needed Millie, my dressmaker’s model, to ensure that it fit since it was impossible to do so on myself. So a partially sewn gown came home with me and sat around until Mr. Suze made this trip.

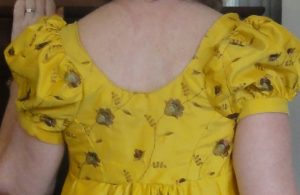
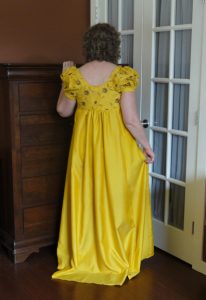
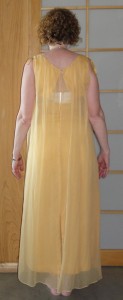
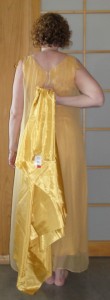
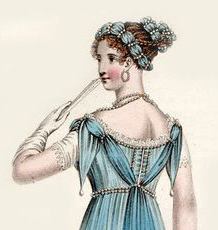
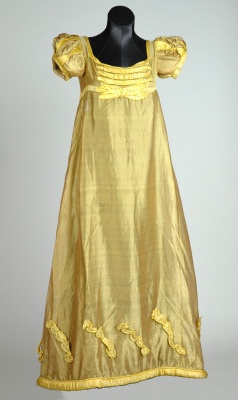
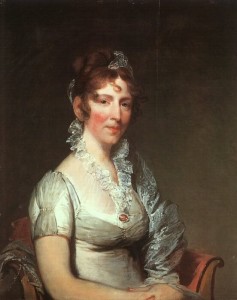
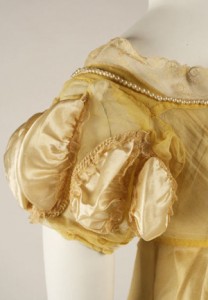
Isn’t it lovely? Note the Regency shape of the back bodice and sleeve—I made my own pattern. I also love the train.

However, I’m not sure where I’ll wear this gown. Perhaps to the next local JASNA meeting, even if the meeting is in the afternoon and this fabric and the style makes this dress clearly an evening gown. I can’t perform Jane Austen dancing—I have a bad shoulder—so events such as the Port Alberni Jane Austen Ball (a three hour drive away) or other Regency country dances are not going to entice me to spin it around a few times. But it’s a pretty dress, and my friends are sure to compliment it, poor seamstress skills aside.

I also started another gown. This one’s a morning dress, made from some lovely lightweight floral bedsheet fabric that looks just like fabric from Jane Austen’s time, though it’s probably a touch heavier than muslin. It’s also about half-made, and when I finish it, I’ll show it here. Mr. Suze is talking about another, shorter trip; however, writing calls me too. Decisions, decisions.

Review: Persuasion by the Chicago Chamber Opera Tour Company

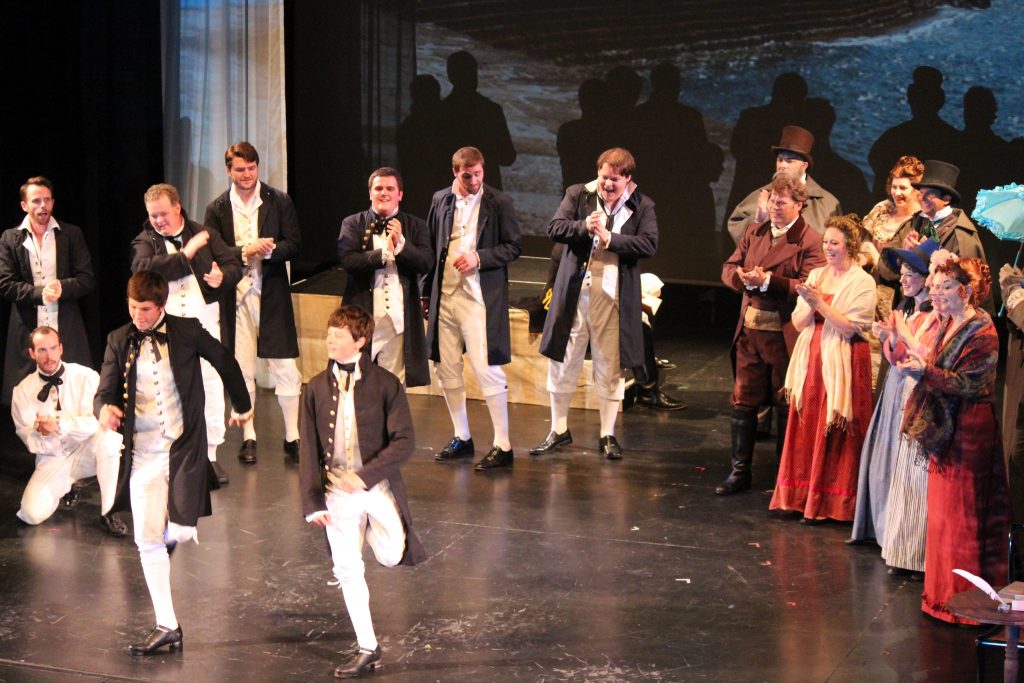
I was fortunate to attend a performance of the musical adaptation of “Jane Austen’s Persuasion: A Musical Drama” by Barbara Landis on July 6, 2018 as part of the Port Alberni Jane Austen Festival. It was a brilliant performance highlighted by 49 musical pieces from music of Jane Austen’s time to Irish folk tunes to classic opera, much of which is enhanced by lyrics and arrangements by Landis, who also took the lead roles in the play. Landis is certainly a flexible force behind this production, taking on the role of playwright in this variation of Jane Austen’s shortest novel as a tribute to the 200th anniversary of its publication. In discussion with some of the cast later on, I found out that she also takes a lead financial role and is a sort of mother to the very large cast and team involved in the performance, which has toured the world since 2013. To top off her ties to this situation is the fact that she’s a distant relative of Jane Austen. I’m sure that was as much of an impetus to do this show as any other reason.

Persuasion is clearly a strong romance, with the obligatory angst keeping the protagonists apart until the key moment when they both understand that the other’s love has withstood all the trials it has been forced to bear. Finally, the couple comes together, eliciting tears from the romantics in the audience.

A notable performance of the evening came from the perfectly austere, then flirtatious, then romantic–with perfect timing on those characteristics–Jeff Diebold as Captain Wentworth, who was wonderfully tall and handsome in his captain’s uniform. Comedic turns by several of the cast members were additional highlights, most notably by John B. Boss as a flamboyant Sir Walter Elliott, and Gretchen Mink Hansen, who could have walked off a Rowlandson cartoon, thanks to the costuming and her body language! I was especially impressed by the acting and singing of the dual roles of Anne Elliott and Jane Austen by Barbara Landis. Though Landis is significantly older than Anne is in Austen’s canon, the gifted and well-experienced soprano pulls off the multi-faceted role and character changes well. Her “bloom” comes back when she is in love, and she is the glue that holds the production together.

Nearly all the cast members were strong in voice and excellent actors. The odd time there was a mismatch with a stronger and weaker voice, however, at other times the duet was magical. With so many tunes to choose from, it’s impossible to pick out highlights. Landis did a marvelous job of timing and matching the music to create a seamless production with so many actors and songs.

Many in the audience were particularly enthralled by the two professional Irish dancers, but for me, the cameos that were most enjoyable were the choral music and classical opera, but that’s purely because I love those types of music. This brings up an interesting point about the production: it’s got something for everyone, yet no one style was so overdone that those who weren’t big fans could be tired of it.

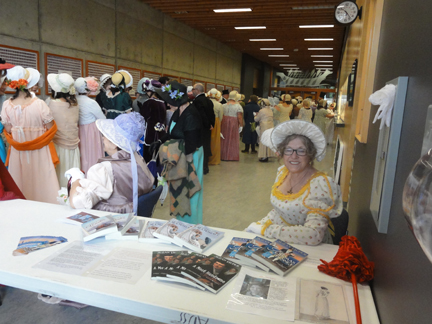
Costuming was a delight to the eyes despite some Victorian-looking hair styles, black neck ties instead of white Regency cravats, and a dearth of top hats. The lovely gowns and handsome tail coats were evident again the following day when the cast joined the festival-goers to try to break the Guinness World Record for people in Regency costume in one location–and came up only 60 short. I loved some of the details of the ladies’ gowns and how the dresses changed for each scene and the level of circumstance of each character. Similar details were given to the men, from the naval uniforms to the elaborate lace cuffs of Sir Walter.

Chamber Opera Tours can be proud of this long-standing production, which heads off to the Jane Austen Festival in Bath in the autumn. Barbara Landis’s adaptation of Persuasion was perfect Austen, wonderful Regency, and a melange of music proven to please all preferences. Brava!

Disclaimer: I’m no theatre critic, I’m just a person who loves opera, Regency costuming, and Jane Austen who happened to enjoy this show a great deal, as Austen would say.

~~~

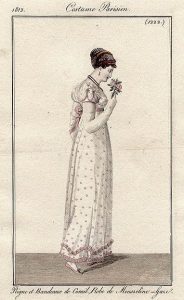
For those of you who have followed the Thrift Shop Regency Costume Experiment, I made a gown from a Value Village bed sheet at $7.99 and a ton of chenille and lace from Parasina in Mexico at about $5 and tried to match it to a Regency fashion plate for the Port Alberni Jane Austen Festival this year. What do you think? I wore Joe Fresh earrings at $3 and a Jane Austen topaz necklace that was a gift. I also had some ballet flats from Coppel in Mexico on sale at $49–yeah, expensive for me, but super comfortable for a whole day of activities, including the signing and selling of my Jane Austen Fan Fiction novels! As expected, A Most Handsome Gentleman was the most popular, given that many festival-goers had already bought and read the back-list. I got lots of encouraging comments from those fans!

I hope organizer Trisha Knight and the Centennial Belles will continue this festival for a fourth year next year so we can beat our record of 349 people in Regency costume in one place. It sure was fun! Think about adding this wonderful destination to you holiday plans for next year. I can loan a few costumes! Perhaps Chamber Opera Tours will be back with another fantastic production!


Louisville JASNA Costume One: Familiar to Followers

An American flag coloured morning gown was suitable for the first official day of the 2015 Louisville JASNA AGM because I planned to be at sessions until about 4 pm, the end of the morning in the Regency period, at least in the city. Austen herself commented about rising at 9am, and many slept until 10am, since balls and social life ended in the wee hours the night before–kind of like it does for many people attending this conference!

We were overtaken today compared to our quiet little pre-conference activity days! Many, many glorious gowns and hats appeared on ladies, and a good half-dozen more costumed gents now hovered about them as they priced out ribbon. I had already been confused and intimidated about purchasing these unique, quality products. Can you imagine having Ms. Silk Reddingote in front of you, passing things to Mr. Custom Top Hat? The “Quality” has come.

I have a cold and a stomach upset of some sort, and since I’ve already been here three days, I’m tired, so I kept Regency hours. Regency ladies breakfasted at nine, took callers or made calls from 2-4, thus the length of the morning. The morning dress should cover the arms and chest during those hours, thus long sleeves and chemisettes, fichus, or lace tuckers were in order.

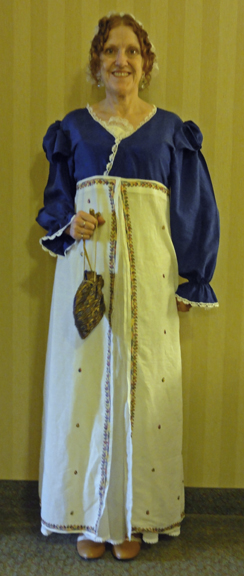
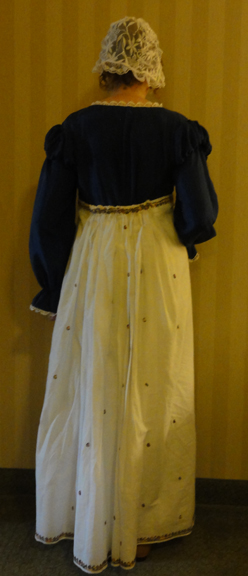
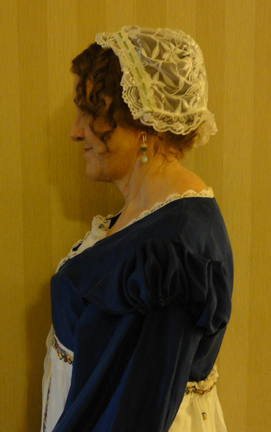
I wore the same outfit you saw in an earlier post, which I refer to as my “emergency” gown since I put it together in a few days for a Jane Austen Tea put on by my local JASNA in early September.

Here I am again, with more photos so you can see the back and my little “grown up lady’s” cap better. My ringlets turned out nice today. I cheated and used the tiniest amount of makeup, as I’m like Mr. Darcy in MP author Karalynne Mackrory’s book (ghostly complexion) otherwise!

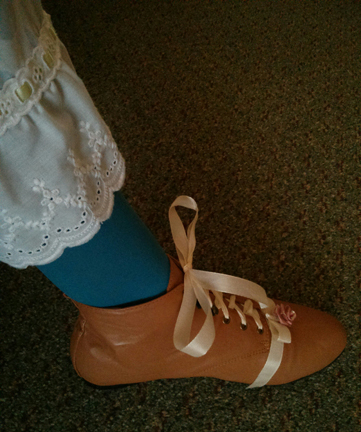
louisville 15 friday louisville 15 friday backlouisville 15 friday sidelouisville 15 friday boot


One area of difficulty is I’d originally sewn nothing more than a no-fray finish on the top edge of the petticoats the first time, but lately, I added a narrow waist band with hooks and eyes to close it in back. It has back gathers to match any gown it would be worn with.

When I made the waist band, I measured myself under a regular bra. As you may recall, I’m using a bustier from years back when I was heavier as a corset. With the cups folded in and stitched down, its shape is good and it pushes the girls up well. Its boning is similar to a busk.

It turns out this bustier reduces my rib cage about an inch! I had to safety pin the petticoat to my bustier, and after about an hour, nearly tripped on it, as it was hanging a good eight inches low on one side! Two pins had become undone, as well as the back hooks and eyes! When I tried to fix them without being noticed, I jabbed myself instead! I returned to my hotel room to add more pins and close them with care this time!

The half boots have been enhanced since the other function, and coloured stockings were worn for fun. Please don’t ogle my pantalettes, necessary to keep the dark colour from being seen through two layers of super fine cotton skirts!

I got a generous number of compliments on various aspects of the costume, and several ladies were quite taken by those little boots. They’re a half size larger than my normal shoe size, so I could fit my custom orthotics inside, and save myself from knee pain. They also liked the little blue and gold reticule I got in Cottage Grove, OR on vacation last year.

It surprised me that many ladies wore their spencers or pelisses and hats indoors all day. It wouldn’t have been done in Austen’s time!

Judging from the vendor prices at the conference’s Regency Emporium, some of those big Lady Catherine hats with exotic feathers cost close to $500. I guess they want to get as much mileage out of them as they can, so “screw the idea of wearing just a lace cap indoors!” Similarly, a pretty spencer that took hours (or dollars) to complete should be shown off!

I think I may do the same tomorrow or one of the later days this weekend!

I wasn’t the only one in a cap, as several had lace or fine muslin versions. Some long-haired ladies had not done a Regency hairdo, and had a bare head with their hair down. This all takes time, and we have to cut corners to get to the seminars we waited so long for!

My favourite seminar of the day was on Regency plumbing and how it (and water systems) evolved before and after the Regency. The speaker, Janet Fahey is a P.E. like me! Not much was new to me, as toilets have always fascinated me, but it was a good seminar, and I learned about John Snow, the father of epidemiology, who effectively created the first spreadsheets.

I know, boring compared to big hats and silk riding wear! I’ll try to remember to take some photos for you all to see!

But I have to sew more lacy on my “emergency ball gown” before tomorrow night, so that’s it for this post!

Remember to comment here or on my Facebook page, or to approach me at the conference with a mention of the Thrift Shop Regency Costume Experiment for give-aways of reticules, embroidered handkerchiefs, bling, and more. I have extra prizes, so everyone’s a winner!

Conference delegates, come by the Authors’ signing tables tomorrow at 3:45pm to say “Hi!” to me and Linda Beutler! Better yet, buy a copy of Alias Thomas Bennet from the Jane Austen Books booth at the Emporium, and I’ll sign it for you!

Also, watch for free and sale books from Meryton Press this week, as Managing Editor Michele Reed is at the Southern Festival of Books in Nashville, TN!

On the Road Again, Sans Ball Gown

jonquil original frontjonquil original backA sad event took place last Wednesday. I had to abandon efforts to complete my beautiful jonquil ball gown midway through the project.

My setback was part of a chain reaction from washing a panel of matching fabric to be used to line new gathers in back.

It’s best to wash new fabric in case it shrinks. The fabric came out fine.


The Original Plan

jonquil back with faux silk lining shownThe vintage 1960s gown from Women in Need (WiN) Thrift and Vintage Superstore (above and right, before any modifications) would have the following modifications:

  • The back skirt detached from the bodice, the zipper removed, and the center back seam opened.
  • A triangle cut from the former back panels to create Regency side panels 7″ wide at the top and 12″ wide at the bottom.
  • Part of the sheer overdress draping from the original dress, plus matching lining (faux silk from Salvation Army at $2.99 for 2 meters) added as a 24-inch-wide back panel, gathered to six inches wide.
  • The sleeves modified by cutting the overdress draping free at the neckline and reversing it to have a finished look like the artwork below left.
  • Panels from this draping would be finished with beads on the ends like the Regency fashion plate below right.
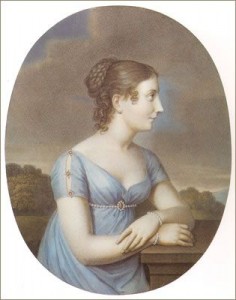
1815 Stephanie de Beauharnais-Baden wearing pale blue dress by Aloys Keßler after Johann Heinrich Schroeder

1815 Stephanie de Beauharnais-Baden wearing pale blue dress by Aloys Keßler after Johann Heinrich Schroeder


Evening Dress October 1811

Evening Dress October 1811

Indian blouse.

Indian blouse.


  • Lace from the Indian blouse was to run along the skirt bottom to lengthen the gown about 1.5 inches. Removal of this lace took quite a while since it was sewn on with  silver thread, which I wanted to retain to match the 1960s gown’s original waist trim.
  • A shirred panel from the ends of the draping would cover two holes in the bodice.


Disaster hits!

But when I decided to wash the gown along with the new fabric, on a super-delicate cycle, a horrid change took place: pin holes in the sheer fabric enlarged, and the overlay and draping, both from the same sheer material, shrank.

New projects emerged from the fiasco:

  • open the hemline where the overlay was attached to the lining so the fabric would relax before the lace was attached to the bottom of the sheer overlay,
  • cut a new piece from the sheer overdress draping for the back panel as the one previously cut was now too short,
  • re-think the sleeves since I stole the attached fabric for them and the dangly bits to create the second back panel,
  • figure out if I needed to add a panel at the hem for length (Maybe a rouleaux? I know, I keep adding beautiful design details!) now the bottom lace was a little higher,
  • find a way to camouflage the holes on the skirt.


I soldier on!

Yellow silk evening dress, 1817, Leeds Costume Collection.

Yellow silk evening dress, 1817, Leeds Costume Collection.

The Thrift Shop Regency Costume Experiment has always been about learning and adapting, and I wasn’t about to abandon this project yet. The back gathered panel, a simple project, turned out well. The gathered bodice overlay was a bit more complicated, but looks pretty.

I patched the holes on the front of the skirt using no-sew tape and tiny pieces of fabric from the overlay, and though they look better, it appears as if I spilled small drops of yogurt on my front!

Museum gowns, period fashion plates and Regency artwork were perused for additional hole camouflage ideas. Due to the location of the holes, I settled on diagonals of shirred fabric to mimic the museum piece on the right. I had plenty left from the Salvation Army piece.


Time is my enemy

It was Wednesday, and I would leave Friday morning for a short trip to celebrate my mother-in-law’s 86th birthday and an early Canadian Thanksgiving, before flying on to Louisville for the 2015 JASNA AGM.

Mother-in-law's 86th birthday and cool fall weather.

Mother-in-law’s 86th birthday in Winnipeg, MB, Canada.

In addition to the sleeves and skirt detail to hide the holes, the ball gown needed other work:

  • install the tapes with hooks and eyes on the back bodice to replace the zipper,
  • re-attach the waistline trim,
  • trim the neckline and sleeves with narrow silver braid to coordinate with the other trim,
  • use the same narrow silver trim to make the faux diamond back.

I was still thinking through the process and finish for the diagonal pieces on the skirt. I estimated this part of the project would take a full day.

The jonquil gown’s sleeves would take yet another day to design, make a pattern and at least one mock-up, and attach. Either of the two ideas that follow would be created with scraps of sheer draping and some of the faux silk.

1810 Ball Gown with pearls.

1810 Ball Gown with pearls.

Sleeve detail for 1811 gown, Metropolitan Museum of Art.

Sleeve detail for 1811 gown, Metropolitan Museum of Art.


No way could I finish this gown on time.

On top of those issues, several other machine-sewn projects were required for to the conference:

  • my spencer and the gentleman’s tail coat needed buttonholes–buttons had been temporarily attached to make deadlines for the blog posts!;
  • the white Swiss dot gown needed fake long sleeves, as the originals had been removed and short sleeves added, intended to make the dress flexible for morning or afternoon wear;
  • some pretty sheer fabric with white embroidery would be made into a fichu and, with the addition of some organza lace, a second cap.
  • Mr. Suze broke the cheap plastic belt lining product I’d used for his suspenders, and we had to purchase new banding and attach.
The jonquil ball gown needed too much additional work to earn its full parasol, and time ran out!

The jonquil ball gown needed too much additional work to earn its full parasol, and time ran out!

I also had numerous hand-sewn projects that would be tackled on the trip, such as 14 buttons on Mr. Suze’s tail coat and re-attaching the lining to my hat, which was not staying put with the double-sided tape.

Dozens of bags and containers of project items had to be packed up and stored after all this sewing, and I had to pack for a trip to two climates.

Something had to give, and the jonquil gown was sacrificed. I stopped all work on in mid-day Wednesday.


On to packing– but what to wear for the ball?

I had to quickly re-think possibilities for a ball gown. In a panic, I packed potential items that could be modified by hand, but were the dreaded polyester, and not my colour.

The alternative is the Swiss dotted gown (my original morning gown), but its fabric and style is less formal, better suited to an afternoon or dinner gown in its short-sleeved version.

I was in a terrible rush by the end, and didn’t stop moving from 7am Thursday to 1am Friday. I didn’t have time to make the new cap for day-wear, and have to wear my small-fitting first effort, made from cheap polyester lace at the last minute for my local JASNA’s Jane Austen Tea (an earlier blog post).

After the fact, I thought of a half dozen items that I should also have packed, e.g., my turban was to match the jonquil, and now I have to re-think headwear for the ball. I forgot my Alias Thomas Bennet book bead bracelet, which matches my editor and artists’ versions and would have been perfect for the book signing on Saturday prior to the promenade and ball.

I haven’t decided which way to go for the gown, and the only way to know is to watch my blog!

Next post: Louisville!


***UPDATE! Don’t forget to comment on The Thrift Shop Regency Costume blog posts, or find Author Suzan Lauder at the Louisville KY JASNA AGM for a chance to win items from the Experiment! Daily prizes October 8-12!


Tips for Faking Regency Costume Details #2

Clocked is a strange word. When I was young, when someone said “I clocked him,” I’m pretty sure it meant they hit him hard. I think it meant in the head, but I’m not sure. It’s not a word that I use in everyday conversation.

In Regency fashion, there are clocked stockings. This does not refer to anything resembling a clock as far as I can tell. It means stockings with a design on them.

Faking Regency Designs on Gloves and Stockings
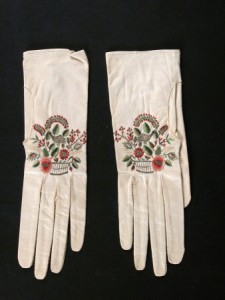
Embroidered kid gloves, 1800-1830, National Trust Museums

Embroidered kid gloves, 1800-1830, National Trust Collections.
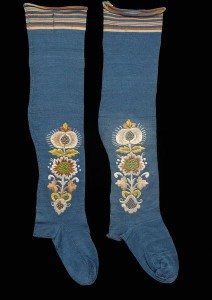
1775-1829 stockings, Victoria and Albert Museum

1775-1829 stockings, Victoria and Albert Museum

Embroidery or painting on stockings and gloves was an embellishment that was enjoyed by at least a few Regency ladies (and men), judging by the museum examples. Interestingly, an etiquette book of the time, Mirror of the Graces, frowns on clocked stockings. It looks like fashion won in consideration of a stuffy old guidebook!

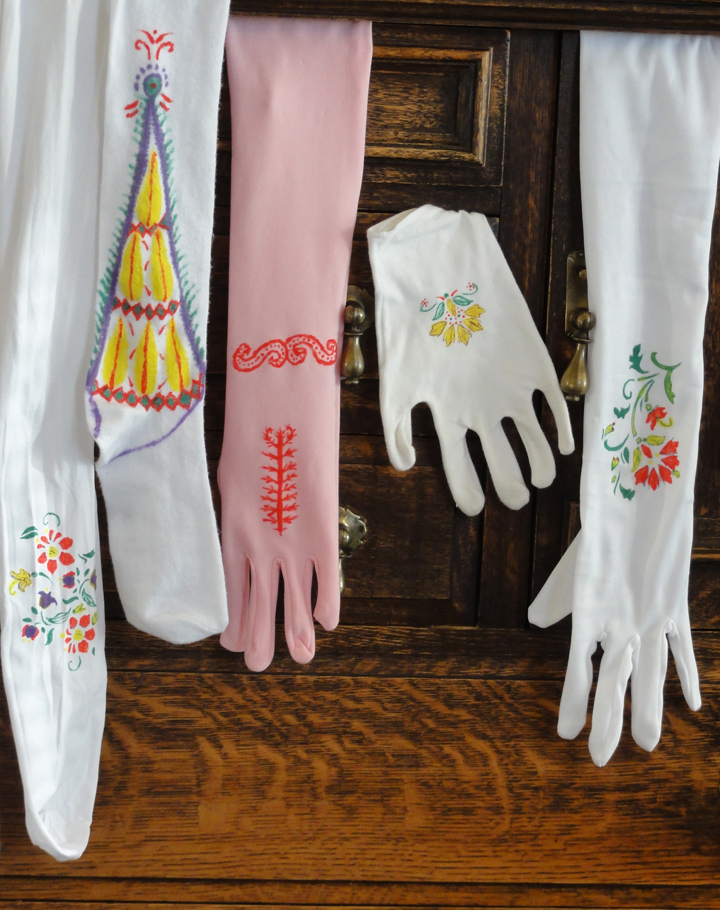
Some of my stockings and gloves got a fake Regency treatment this weekend: I used fabric paint to apply designs. A stencil purchased for half price at Michaels was used in three different ways, by masking some of the areas with packing tape each time. Once I’d done all I could with the stencil, I decided to try a bit of freehand with the four colours of paints I had.painting accessories all
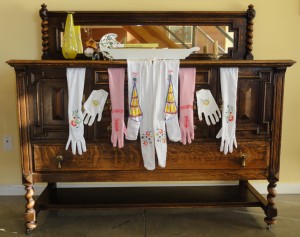
The floral designs on the white tights and the short and long white gloves were made with the stencil. The pink long gloves and the knee-high stockings are my attempt at freehand, loosely referring to photos of existing museum pieces (see below). Not bad for a non-crafty redheaded romance author!
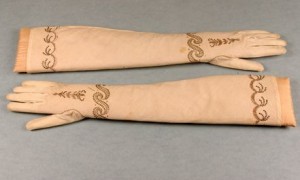
Cotton fabric embroidered gloves, circa 1790-1810, bias cut for stretch, gold and sequinned scrollwork, pale pink, floss silk detailing.

Cotton fabric embroidered gloves, circa 1790-1810, bias cut for stretch, gold and sequinned scrollwork, pale pink, floss silk detailing.

Stockings, early 19th century Cooper Hewitt collection

Stockings, early 19th century, Cooper Hewitt collection.
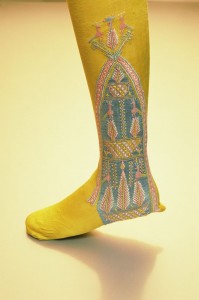
Stockings, 1810, English, Kyoto Museum
Stockings, 1810, English, Kyoto Museum


painting accessories closeup to show detailI didn’t bother with the coloured tights as for now, the colours don’t suit my gowns.

The pens tended to bleed in the fabric, and the bottled paints were a bit puffy. After the first items, I used the pens for light lines and not fill, and used a Q-tip to apply the paint so it was smoother. If I was doing this again, I’d consider getting additional colours, but these were all I found on sale the day I bought them at Michaels.

~

How to Make Easy Back Gathers on Regency Gowns

One of my favourite tricks for faking Regency is to use drapery tape to make the back gathers for a gown. The tape must be the kind that makes all uniform gathers, and not pinch pleats. I had some 1″ wide tape I got in two meter-long pieces at a thrift store for $1 a long time ago. I used it to make the last-minute “emergency” gown for the JASNA outing I had a few weeks ago. Belt backing tape can be seen for the non-gathered part.gathering tape and waistband material inside paisley embroidered fabric for use as a skirtpaisley fabric gathered using drapery tape

There are two ways to use the drapery tape to make your Regency gathers in the back of the gown.

  1. The simplest is to machine sew the tape onto the gown. Take care not to sew on the strings. Gather using the strings, tie the strings, cut shorter, and leave in place.
  2. The second method allows re-use of the drapery tape and less bulk in the back of the gown. Hand-baste the drapery tape on, but do not lock the end of your basting thread, rather, leave an inch or so free. Once you’ve sewn your skirt to the bodice, the gathers are fixed, and all you need do is tug on the knot on your basting threads to pull them free and remove the drapery tape to use on another skirt.

You want to have at least three times the width of fabric as your final gathered amount, and 4-5 times looks pretty.

Depending on your fabric, you may want to leave a seam allowance above the drapery tape. Because my fabric (above) had a border, I ran the tape at the top edge, then hand-stitched it to the bodice.

If you’re interested in standard methods for gathering fabric, this video from Teach Yourself to Sew shows three different methods.

~

To Zipper or not to Zipper–or To Fake!

When you get a vintage or other type of newer-than-Regency gown and wear it for a Regency gown, to be authentic, you should remove the zipper. Regency alternatives were ties, hooks and eyes, or buttons, or they were pinned closed by a lady’s maid.

In most cases, a replacement closure for the zipper is not necessary on the skirt, as the ribbon or belt holds the top edges together. The skirt is loose due to the gathers, and should overlap. The concern would be to ensure the bodice fit is snug.

There may be gaps between the replacement closures. In the Regency, so many undergarments were worn, the gap was of little consequence; however, some modern women balk at the idea.
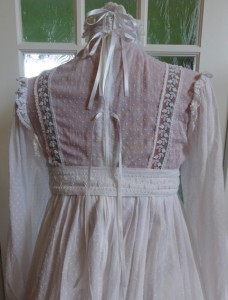
ribbon ties on back of original morning gown suzan lauderMost often, Regency gowns used ties to close at the back, and this is an easy-to-install and inexpensive closure. Discount and craft stores have narrow ribbons in limited colours for under $2 a roll, and attractive cords are under $1 a meter.

In the absence of a lady’s maid, to fake Regency with modern modesty, retain your zipper and add ribbon or light cording ties over it at a couple of locations. At right, two are tied and the lower one is not, so you can see where they’re attached. Care must be taken not to catch the ties when using the zipper.

At 12″, mine were too long; 6″-8″ would suffice.

~

To close the front of the “emergency” gown, I used hooks and eyes. This is not truly faking as they were common on Regency gowns. When hooks and eyes were used, seamstresses weren’t stingy, and used a lot of them.

Packages of individual hooks and eyes are inexpensive, and come in black, white, or steel in most stores, and some stores offer additional colours at a premium. They are fussy to sew on individually but are excellent in some cases, such as holding a short width or edges together.

For ease of installation when multiple hooks and eyes are needed, cotton tape with hooks spaced about every inch, and matching tape with eyes, is sold by the meter. I was lucky to get the tape with hooks on sale, but the tape with eyes was regular price.

An alternative to the tape with eyes (at half the price per meter) is a product intended for long rows of buttons, which looks like woven cording with loops every half inch or so. The loops appeared to align with the hooks, and for short lengths, they’re okay, but they’re just enough out of sync that, for longer lengths, I need to skip an extra one every so often.

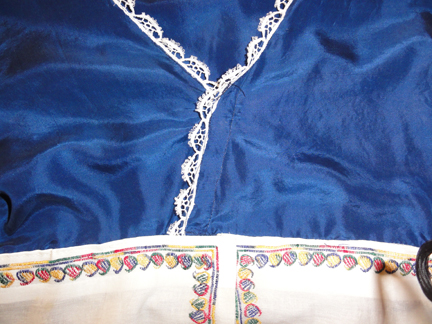
As you can see, I used both types: tape on the crossover v-neck and individual hooks on the belt edge of the skirt. The installation was fair to both right and left handed openings!
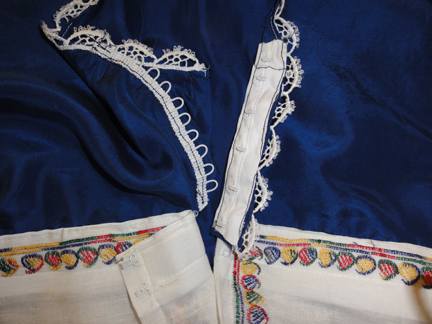
hooks and eyes on emergency dressemergency dress closure


~

As much as we like buttons these days, they were less common on Regency women’s wear. Jane Austen remarked in a letter to her sister Cassandra that buttons were quite dear. Men’s clothing most often had self-covered buttons, but ladies’ used metal, shell, ivory, stones, gems, and similar materials.

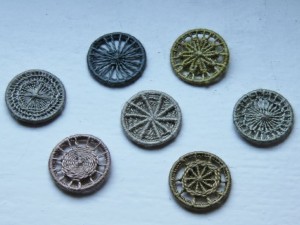
Mother-of-pearl buttons are okay if you can find them, as are buttons made with fine cording such as Dorset buttons. Don’t use plastic buttons unless they are an excellent fake.
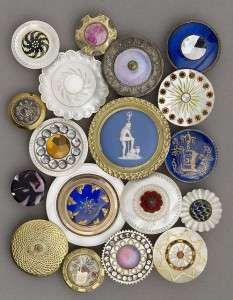
Pearl and metal buttons, 1780 to 1820, Luckcock Collection, Birmingham Museum of Art
Pearl and metal buttons, 1780 to 1820, Luckcock Collection, Birmingham Museum of Art

Dorset buttons

Dorset buttons

You could put fake buttons and loops on the gown just as you did for the ribbon ties, and keep your zipper.
~

Next post: I left all the hand-sewing for items like Mr. Suze’s coat to the last minute, and not much new is happening at the moment! I’ll try to take a photo or two of my ball gown as I complete it this week, but since I’ll be traveling prior to the JASNA AGM in Louisville, Kentucky on October 9-11, 2015, it will be a meager post!

~

The best word EVER: GIVE-AWAYS!

On October 8-11, while I’m in Louisville, there will be a draw for daily prizes from my stash of reticules, Regency accessories, and other goodies. The Regency items are one-of-a-kind. Though they’re hand made by someone who’s not crafty (so less than perfect), I’ve signed each one and added my signature pagoda parasol.

There are two ways to enter:

1) Comment on any Thrift Shop Regency Costume Experiment post on road trips with the redhead, with your email address (username at host dot com), or

2) approach me at the JASNA AGM and ask for a Parasol in a Ballroom. I’ll collect your name and email address.

**The first person who enters either way whose initials are M.C. is an automatic winner of a velvet reticule with your initials embroidered on it!

I’ll attempt to deliver winning prizes from the AGM while I’m there, and blog comment prizes will be mailed. Good luck!

A Grown-Up Lady Brings Tea Cakes to a Tea Party

I tore apart all my gowns. Not all, but the ones not torn apart need to be torn apart to be Regency. My ball gown is nearly completed, and some adjustments were planned for my morning gown, but I was better with the stitch ripper than concrete finished designs when I decided it would be fun to dress up for my local JASNA’s Jane Austen Regency Tea Party last Saturday.

I quickly faked Regency. So quickly, I forgot to take photos of much of the construction for this blog! The finished product will have to do!

Suzan Lauder costume JASNA tea Sept 15My Emergency Regency gown:

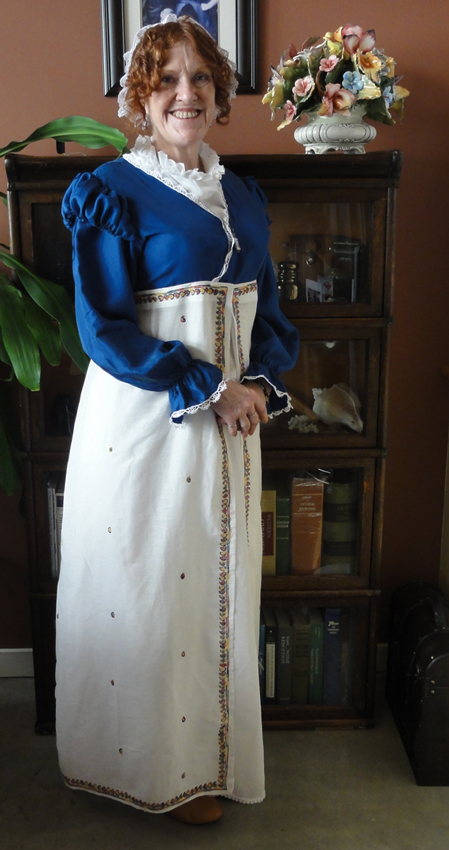
A Value Village purchase, a $7.99 length of paisley-embroidered super-fine cotton  targeted to eventually become an entire gown, became a skirt by gathering one long side at the centre (back). It was left open in front as it had trim along all four edges, so this was a Regency look I desired. The petticoats skirt from my morning gown was worn under it, as other possible underskirts were coloured with no trim, and this one was white with lace trim along the bottom, again, looking quite Regency! Coloured with lace would have been pretty.

A $9.99 navy silk blouse from Value Village was hemmed to bodice-size (like making a spencer). The ruffle at the neckline was used to make puffs at the tops of the long sleeves, and a front opening was added. I sewed a rolled edge on the neckline, but it  wasn’t pretty, so some sale Venetian lace from Dressew ($0.50 per meter) was added to the neckline. I liked it enough to add more to the sleeve bottoms.

The bodice was sewn to the skirt, except at the gathers, where I pinned, as it was too heavy for my machine. Hooks and eyes were used to close the front (more about that in a later post).

I also wore a fichu (the event was 2pm-4pm, still “morning” for Regency, hence arms and chest are covered), pantalets rather than another slip (the petticoats are sheer, but it was a warm day), and got away with my black bustier due to the navy bodice. The bustier gave a much better Regency silhouette than did the Balconet bra and waist cincher I wore to the Jane Austen Tea at Starling Winery in June. My half-boots and the first Capote hat I made for the Thrift Shop Regency Costume Experiment were also included, as was the Moorish-looking reticule and brisé fan.

I’ll have to rip the skirt apart again, but the top was planned to go with another skirt from a spaghetti strapped evening gown skirt with tons of fabric, so it got me ahead on another project. This project took about two days, much faster than assembling either of the other gowns, due to lace issues, and scissors that Mr. Suze used that now need to be sharpened, and it’s a long story.

I also made a Regency snack in that time! The 1820 cookbook I have on Google Books wasn’t too useful, so I cheated, but I’m sure this type of tea-cake is time-tested before Austen’s era. Here is the recipe:

Tea Cakes, from A New System of Domestic Cookery by A Lady (Maria Eliza Ketelby Rundell), 1833

Rub fine four ounces of butter into eight ounces of flour (I interpreted this as cutting unsalted butter into all purpose flour with my pastry cutter); mix eight ounces of currants (I only had 5, but it was plenty!) and six of fine Lisbon sugar (Whoa! Schweeet! I used regular granulated sugar.), two yolks and one white of eggs (I beat them slightly first), and a spoonful of brandy (What size spoon? Muahaha! Tablespoon!). Roll the paste (I worked with my hands to mix first) the thickness of an Oliver biscuit (Who?) and cut with a wine-glass. You may beat the other white and wash over them; and either dust sugar, or not, as you like. (I like! A big pinch per cookie.)

That’s it, the whole recipe, plus my comments, of course! I guessed, and baked them at 350F for 10 minutes. I got a couple more than two dozen, which allowed for taste testing! They were a bit more browned than I’d like, but the taste and texture were very nice! In retrospect, I’d make them a bit thicker (they were the thickness of a thick cookie) and bake at 325F for 8-10 minutes.

As for the mystery of how thick to roll them, one of our gentleman Janeites brought Bath Olivers! Oliver was a doctor in Bath, and invented Oliver buns, but found his patients gained weight from eating them. He developed Oliver biscuits for weight loss. They’re like a thick, doughy water cracker, to be eaten with cheese.

Other members brought sweets like Regency-style gingerbread cake, plum cake, pound cake, custard, jam tarts with a lard-based recipe for the crust, Regency-style tiny chocolate tarts, caraway-seed cookies, and Jane Austen’s silhouette-shaped sugar cookies. We tried Regency beverages including negus, spruce beer (non-alcoholic, like root beer, and in cans, from Montreal!), ginger beer, lemonade made the way Jane Austen would have made it, and elderflower cordial. There was a savoury mixed-meatball that sounded a bit gross, some Stilton, and other Regency treats on hand, as well as modern additions of tea sandwiches, devilled eggs, and chocolate cookies. I ate a salad for dinner that night!

In addition to the clothing mentioned above, I was the only one who wore a lace cap, or as christened in an earlier post, Special Headwear for the Grown-Up Lady, which details the Regency cap and shows some pretty museum examples.

The Lace Cap, Measured in Nails

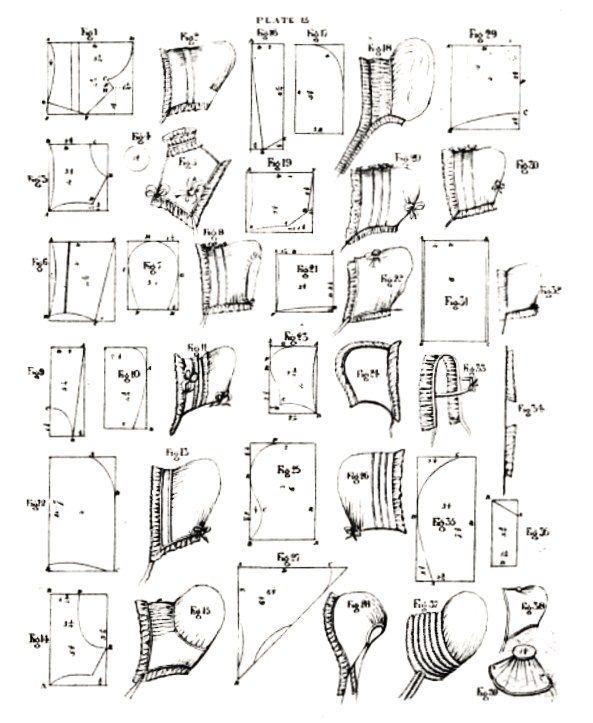
The cap pattern was from The Workwoman’s Guide, by a lady, available on Google books; it’s worth having a peruse through for all the interesting information, including cuts of meat, carpentry, and other household knowledge. Descriptions are in the text of the book, but drawings are at the end.Bonnet Diagrams from The Workwoman's GuideMy cap for the Tea in June was made from Fig. 6 through Fig. 8, Simple Dress Cap or Bonnet, since it looks like many Regency bonnets. The instructions use nails as a measurement. My head circumference in comparison to the drawings suggested 1-3/4 inches per nail. I tend to wear small hats, and I have short hair. I made a little mock-up to be sure, and the length of the back panel was reduced to remove an ugly poof and allow gathering per the original pattern.

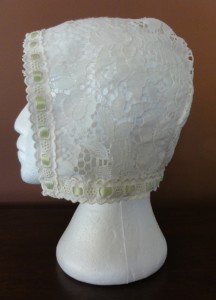
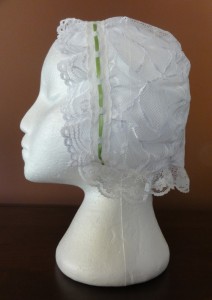
Last week, I made another to see how big one would be if it were made using two inch nails (somehow there’s a joke in there!). Without lace ruffles at the edge, it’s big on me, so I feel two-inch nails is size large. You can see the difference below in the fit on the wig head.

Lace cap, 1.75 inch nails (size small) with lace edge trim.

Lace cap, 1.75 inch nails (size small) with lace edge trim.

Lace cap, 2 inch nails, no lace edge trim, so fits medium to large.

Lace cap, 2 inch nails, no lace edge trim, so fits medium to large.


To make it easier for others, I drafted the adjusted pattern with notes, and the pdf is for anyone’s use: Simple Dress Cap or Bonnet Adapted from The Workwoman’s Guide (1840) by Author Suzan Lauder

Next post: Probably more of Mr. Suze’s costume: In addition to last week’s post, his boots, top hat, watch, and walking stick are ready to go. I have materials for trousers/breeches, shirt, cravat, and whiskers, all easy to make. We’re searching for a watch fob and he’s done! My lace issues may mean it takes longer for my gowns! Getting down to the wire for Louisville!