Tips for Faking Regency Costume Details #2

Clocked is a strange word. When I was young, when someone said “I clocked him,” I’m pretty sure it meant they hit him hard. I think it meant in the head, but I’m not sure. It’s not a word that I use in everyday conversation.

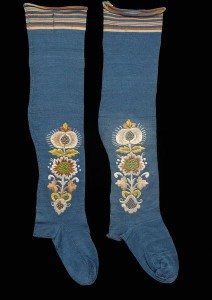
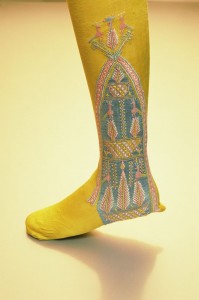
In Regency fashion, there are clocked stockings. This does not refer to anything resembling a clock as far as I can tell. It means stockings with a design on them.

Faking Regency Designs on Gloves and Stockings

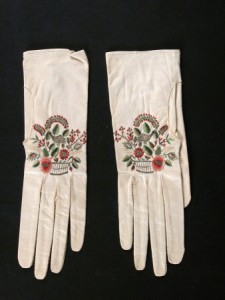
Embroidered kid gloves, 1800-1830, National Trust Museums

Embroidered kid gloves, 1800-1830, National Trust Collections.

1775-1829 stockings, Victoria and Albert Museum

1775-1829 stockings, Victoria and Albert Museum

Embroidery or painting on stockings and gloves was an embellishment that was enjoyed by at least a few Regency ladies (and men), judging by the museum examples. Interestingly, an etiquette book of the time, Mirror of the Graces, frowns on clocked stockings. It looks like fashion won in consideration of a stuffy old guidebook!

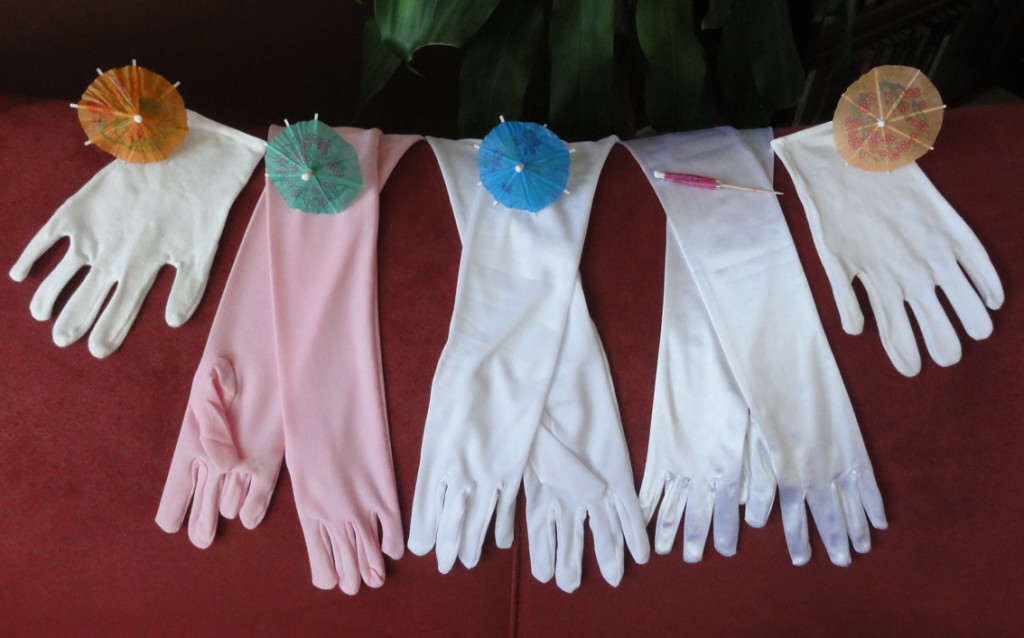
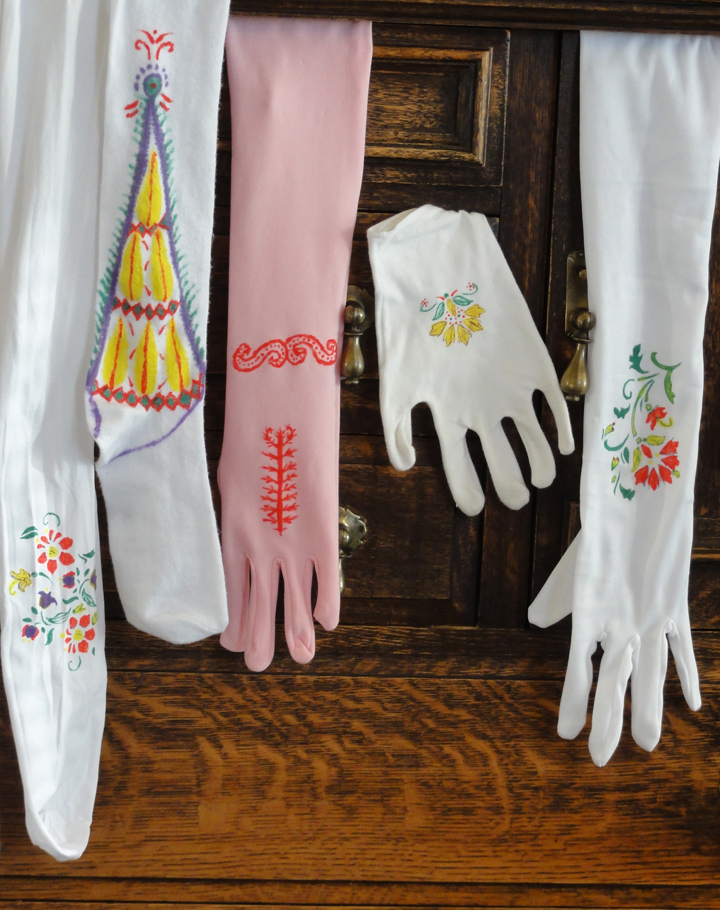
Some of my stockings and gloves got a fake Regency treatment this weekend: I used fabric paint to apply designs. A stencil purchased for half price at Michaels was used in three different ways, by masking some of the areas with packing tape each time. Once I’d done all I could with the stencil, I decided to try a bit of freehand with the four colours of paints I had.painting accessories all
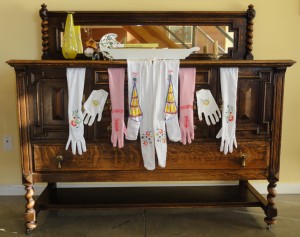
The floral designs on the white tights and the short and long white gloves were made with the stencil. The pink long gloves and the knee-high stockings are my attempt at freehand, loosely referring to photos of existing museum pieces (see below). Not bad for a non-crafty redheaded romance author!
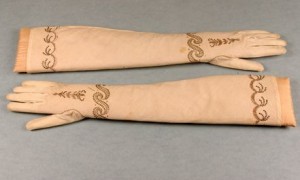
Cotton fabric embroidered gloves, circa 1790-1810, bias cut for stretch, gold and sequinned scrollwork, pale pink, floss silk detailing.
Cotton fabric embroidered gloves, circa 1790-1810, bias cut for stretch, gold and sequinned scrollwork, pale pink, floss silk detailing.

Stockings, early 19th century Cooper Hewitt collection

Stockings, early 19th century, Cooper Hewitt collection.

Stockings, 1810, English, Kyoto Museum

Stockings, 1810, English, Kyoto Museum


painting accessories closeup to show detailI didn’t bother with the coloured tights as for now, the colours don’t suit my gowns.

The pens tended to bleed in the fabric, and the bottled paints were a bit puffy. After the first items, I used the pens for light lines and not fill, and used a Q-tip to apply the paint so it was smoother. If I was doing this again, I’d consider getting additional colours, but these were all I found on sale the day I bought them at Michaels.

~

How to Make Easy Back Gathers on Regency Gowns

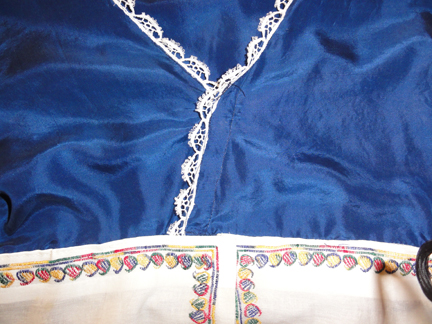
One of my favourite tricks for faking Regency is to use drapery tape to make the back gathers for a gown. The tape must be the kind that makes all uniform gathers, and not pinch pleats. I had some 1″ wide tape I got in two meter-long pieces at a thrift store for $1 a long time ago. I used it to make the last-minute “emergency” gown for the JASNA outing I had a few weeks ago. Belt backing tape can be seen for the non-gathered part.gathering tape and waistband material inside paisley embroidered fabric for use as a skirtpaisley fabric gathered using drapery tape

There are two ways to use the drapery tape to make your Regency gathers in the back of the gown.

  1. The simplest is to machine sew the tape onto the gown. Take care not to sew on the strings. Gather using the strings, tie the strings, cut shorter, and leave in place.
  2. The second method allows re-use of the drapery tape and less bulk in the back of the gown. Hand-baste the drapery tape on, but do not lock the end of your basting thread, rather, leave an inch or so free. Once you’ve sewn your skirt to the bodice, the gathers are fixed, and all you need do is tug on the knot on your basting threads to pull them free and remove the drapery tape to use on another skirt.

You want to have at least three times the width of fabric as your final gathered amount, and 4-5 times looks pretty.

Depending on your fabric, you may want to leave a seam allowance above the drapery tape. Because my fabric (above) had a border, I ran the tape at the top edge, then hand-stitched it to the bodice.

If you’re interested in standard methods for gathering fabric, this video from Teach Yourself to Sew shows three different methods.

~

To Zipper or not to Zipper–or To Fake!

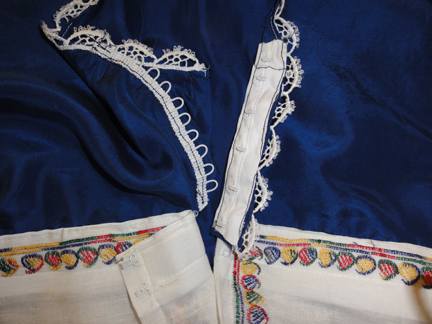
When you get a vintage or other type of newer-than-Regency gown and wear it for a Regency gown, to be authentic, you should remove the zipper. Regency alternatives were ties, hooks and eyes, or buttons, or they were pinned closed by a lady’s maid.

In most cases, a replacement closure for the zipper is not necessary on the skirt, as the ribbon or belt holds the top edges together. The skirt is loose due to the gathers, and should overlap. The concern would be to ensure the bodice fit is snug.

There may be gaps between the replacement closures. In the Regency, so many undergarments were worn, the gap was of little consequence; however, some modern women balk at the idea.
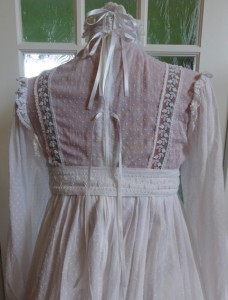
ribbon ties on back of original morning gown suzan lauderMost often, Regency gowns used ties to close at the back, and this is an easy-to-install and inexpensive closure. Discount and craft stores have narrow ribbons in limited colours for under $2 a roll, and attractive cords are under $1 a meter.

In the absence of a lady’s maid, to fake Regency with modern modesty, retain your zipper and add ribbon or light cording ties over it at a couple of locations. At right, two are tied and the lower one is not, so you can see where they’re attached. Care must be taken not to catch the ties when using the zipper.

At 12″, mine were too long; 6″-8″ would suffice.

~

To close the front of the “emergency” gown, I used hooks and eyes. This is not truly faking as they were common on Regency gowns. When hooks and eyes were used, seamstresses weren’t stingy, and used a lot of them.

Packages of individual hooks and eyes are inexpensive, and come in black, white, or steel in most stores, and some stores offer additional colours at a premium. They are fussy to sew on individually but are excellent in some cases, such as holding a short width or edges together.

For ease of installation when multiple hooks and eyes are needed, cotton tape with hooks spaced about every inch, and matching tape with eyes, is sold by the meter. I was lucky to get the tape with hooks on sale, but the tape with eyes was regular price.

An alternative to the tape with eyes (at half the price per meter) is a product intended for long rows of buttons, which looks like woven cording with loops every half inch or so. The loops appeared to align with the hooks, and for short lengths, they’re okay, but they’re just enough out of sync that, for longer lengths, I need to skip an extra one every so often.

As you can see, I used both types: tape on the crossover v-neck and individual hooks on the belt edge of the skirt. The installation was fair to both right and left handed openings!

hooks and eyes on emergency dressemergency dress closure


~

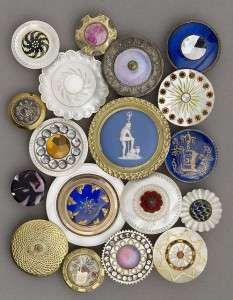
As much as we like buttons these days, they were less common on Regency women’s wear. Jane Austen remarked in a letter to her sister Cassandra that buttons were quite dear. Men’s clothing most often had self-covered buttons, but ladies’ used metal, shell, ivory, stones, gems, and similar materials.

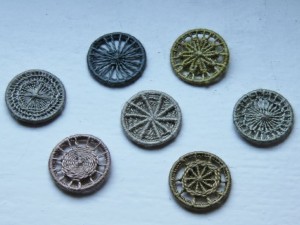
Mother-of-pearl buttons are okay if you can find them, as are buttons made with fine cording such as Dorset buttons. Don’t use plastic buttons unless they are an excellent fake.

Pearl and metal buttons, 1780 to 1820, Luckcock Collection, Birmingham Museum of Art

Pearl and metal buttons, 1780 to 1820, Luckcock Collection, Birmingham Museum of Art

Dorset buttons

Dorset buttons

You could put fake buttons and loops on the gown just as you did for the ribbon ties, and keep your zipper.

~

Next post: I left all the hand-sewing for items like Mr. Suze’s coat to the last minute, and not much new is happening at the moment! I’ll try to take a photo or two of my ball gown as I complete it this week, but since I’ll be traveling prior to the JASNA AGM in Louisville, Kentucky on October 9-11, 2015, it will be a meager post!

~

The best word EVER: GIVE-AWAYS!

On October 8-11, while I’m in Louisville, there will be a draw for daily prizes from my stash of reticules, Regency accessories, and other goodies. The Regency items are one-of-a-kind. Though they’re hand made by someone who’s not crafty (so less than perfect), I’ve signed each one and added my signature pagoda parasol.

There are two ways to enter:

1) Comment on any Thrift Shop Regency Costume Experiment post on road trips with the redhead, with your email address (username at host dot com), or

2) approach me at the JASNA AGM and ask for a Parasol in a Ballroom. I’ll collect your name and email address.

**The first person who enters either way whose initials are M.C. is an automatic winner of a velvet reticule with your initials embroidered on it!

I’ll attempt to deliver winning prizes from the AGM while I’m there, and blog comment prizes will be mailed. Good luck!

Mr. Darcy in the making: The Thrifty Regency Gentleman’s Costume

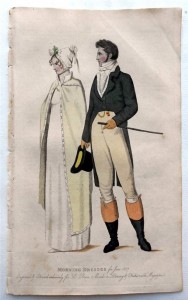
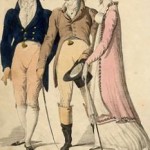
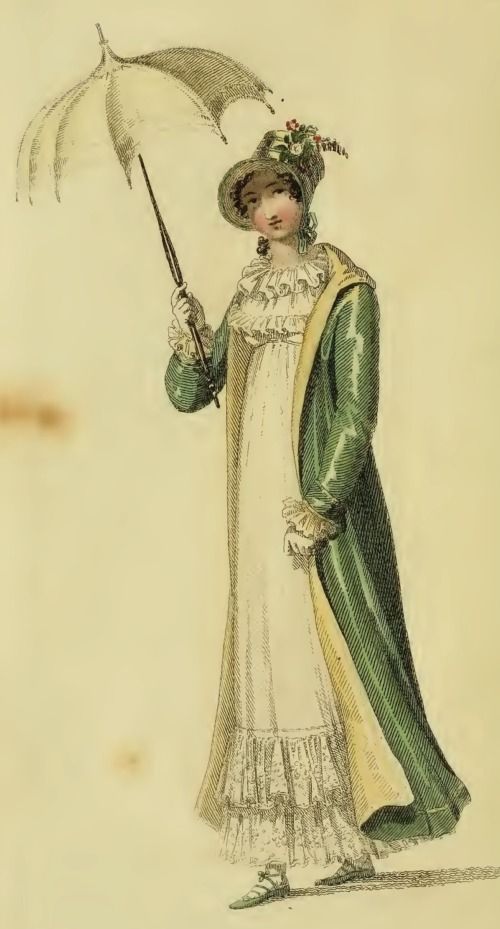
Beau Monde, 1807, Morning Dress

Beau Monde, 1807, Morning Dress

Mr. Suze used to bug me to let him read my Regency writing. I told him he’d have to read Jane Austen’s Pride and Prejudice first, so he’d understand it better. I didn’t expect him to actually read my favourite novel, but he did! What choice did I have but to share Alias Thomas Bennet with him? I was preparing to submit it to Meryton Press at the time, and he was a good final cold reader.

He became a big fan of my writing, and joined me to watch the A&E/BBC 1995 production of Pride and Prejudice. A good sport, he went along with me on half a dozen meet-ups of my online friends from A Happy Assembly while we were on vacation in Washington, Oregon, and California over several road trips.

When I told him I wanted to go to Louisville, KY for the JASNA AGM, he said I could go on my own; he’d had enough of Jane Austen events. Over time, he softened to say he’d join me and enjoy the city on his own while I was at the conference, and later, he agreed to dress in a Regency costume for the Saturday festivities. In May, my vintage and thrift shop trips to finalize my own costume included searches for his items. I quickly got the lay of the land.

For this post, I’ll speak to two items: the tailcoat and waistcoat. The rest of the costume will be seen in future posts.

I saw only three tailcoats in vintage and thrift stores, at $65 and $35, but two were too large and one, too small. There were no suitable vests for a waistcoat, even if I looked at size extra-large in Ladies’ wear. Mr. Suze is not a large man, and I thought if I did a good job, he’d be okay with this.

Please note these are sewing projects. The same result will not be easy to achieve with no-sew iron-on tape, and the fabric is too heavy for that product in any case.

Upcycling a garment into a Regency tailcoat

Coat, 1810, dark brown herringbone.

Coat, 1810, dark brown herringbone.

Le Beau Monde, 1807

Le Beau Monde, 1807

Regency tailcoat 1815, Metropolitan Museum of Art

Regency tailcoat 1815, Metropolitan Museum of Art

Post-Regency example for fun! 1825-1830 dress coat

Post-Regency example for fun! 1825-1830 dress coat

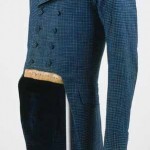
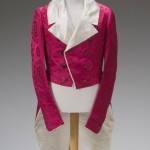
Regency tailcoats were by no means all the same. They came in many colours, and some had interesting textures, as shown in these thumbnails, which can be enlarged if you click on them.


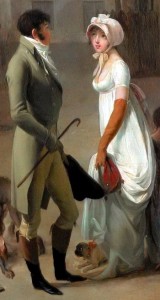
Louis-Léopold Boilly - The Arrival of a Stage-coach in the Courtyard of the Messageries (Detail), 1803.

Louis-Léopold Boilly – The Arrival of a Stage-coach in the Courtyard of the Messageries (Detail), 1803.

Both single and double-breasted designs were stylish, but double-breasted appears more frequently in the examples I could find, and I’ve been told they outnumbered single-breasted by about 2:1. Lapels tended to be wider, and the opening quite high in comparison to modern menswear.

Many modern tuxedo tailcoats require slight modifications to straighten the bottom front to match the style of the early 19th Century. The Regency tailcoat has no back waist seams: each panel is one piece of fabric, whereas post-Regency, the seam at the waistline came into play, and continues in modern tailcoats.

Because I couldn’t easily find a used tailcoat in thrift shops, I looked to the Internet, where previous rental tuxedo coats are readily available at under $100. Problems that rule out some modern tuxedo tailcoats include trim such as velvet or satin that do not look Regency. Shawl collars or narrow lapels are common. Most are black, white, or grey. Black would do for a court suit or a formal ball, but the other two would not work, unless I decided to buy a white one and dye it the popular dark blue of the Regency.

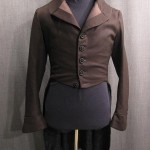
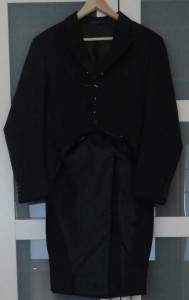
Modern morning coat, dark green wool, herringbone.

Modern morning coat, dark green wool, herringbone.

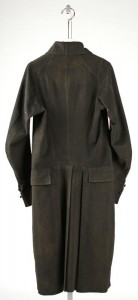
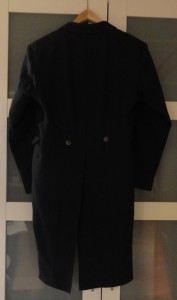
Back view of Regency tail coat to show the single panels of fabric, with no waist seams.

Back view of Regency tail coat to show the single panels of fabric, with no waist seams.

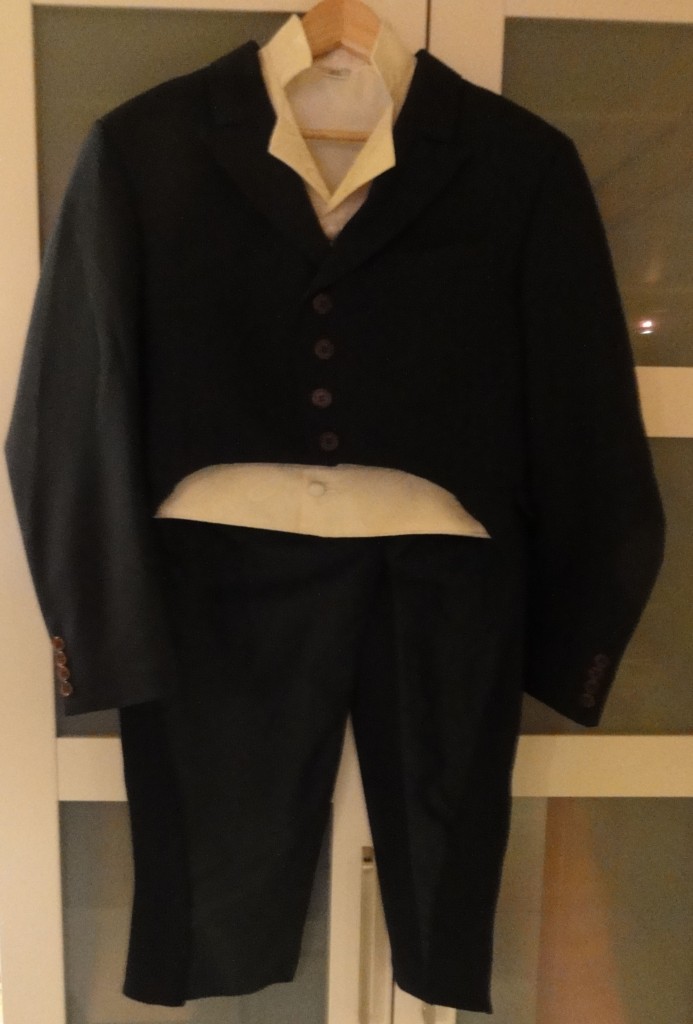
A wool morning coat in dark green, with a fine herringbone pattern and slightly wider lapels, caught my eye and got approval from Mr. Suze. Of course, he doesn’t know that Jane Austen fans love the idea of a green coat ever since Andrew Davies had Colin Firth choose it to ride into Lambton the day Elizabeth got her fateful letter from Jane!

This coat appeared to have no back waist seam in the photos online, but when it arrived, it did. Also, the collar was not self-lined, so it would have to stay down. Oh, well, we knew we were not going to be perfect by any stretch of the imagination, and it fit well, so that was a huge relief. It was advertised on eBay at £25, or $80 with shipping.

Green tailcoat after first cut of shape of front opening and tails.

Green tailcoat after first cut of shape of front opening and tails.

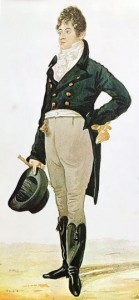
George "Beau" Brummell, watercolor by Richard Dighton, 1805.

George “Beau” Brummell, watercolor by Richard Dighton, 1805.

Mr. Suze is a bit particular about his clothing. His father was a menswear tailor at the Canadian institution of high-class shopping: Eaton’s. My husband is accustomed to a well-fitted, flattering suit in quality fabric, and that was my goal for the Regency tailcoat. We looked at numerous examples from museum pieces and fashion pages like Ackermann’s, and decided on a full curve at the waist, as opposed to a straighter line. A painting of Beau Brummel served as reference. The line was pinned while “my Beau” wore the coat, and the future wearer did a mirror check to approve it. To further achieve a Regency look, the lapels were pressed higher, and extra buttons are needed to suit this modification. The front of the cut coat is shown above, on the left.

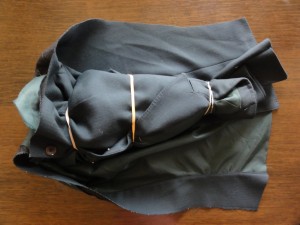
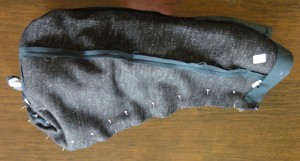
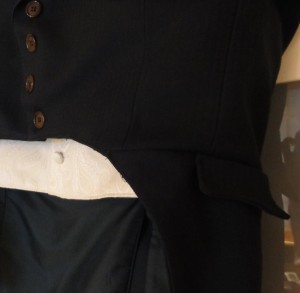
I re-applied the matching fabric facings to the underside of the new shape of the tails. To sew the new contour front edges together, I thought about pinning them under and top-stitching, but I opted to sew a normal seam with the fabric pinned right sides together. That meant I had to turn half the jacket inside out.folded and tied with elastics to sew right sides togetherpinned for sewing, all inside the taildetail of fake side pocket

Green tailcoat, back, final except buttons.

Green tailcoat, back, final except buttons.

I tied the upper portion together with elastic bands as shown and laid it inside along the length of the tail, where I’d opened the bottom hem. The tail was pinned right sides together over it all, and sewn with a 1/2″ seam. It was turned it right side out again by pulling it through the open bottom of the tail.

I did a test run with the narrower side before I was brave enough to photograph it for this blog!

I used scraps of fabric to fake Regency by putting flaps that look like pockets at the sides of the jacket. Regency coats sometimes had a cuff, so if your modification allows more fabric, that’s another way to make it more authentic in appearance. Mine did not.

The Regency coat design didn’t always close, but boasted decorative buttons, and men wore them buttoned or unbuttoned, though I’d assume formal circumstances would demand a tightly-buttoned look. The buttons are plastic, and I have yet to purchase proper buttons for the tailcoat. As mentioned earlier, Regency menswear often had fabric-covered buttons in the same colour, though not always the same fabric as the garment. Regency coat fronts have buttons closer together, so my mockup has 4 buttons where the original suit had one.

My intention was self-covered buttons with a brass ring trim from Dressew, and I had enough extra fabric left for them. But I didn’t have enough buttons of the right size, and none of the stores in my city have the snap-on brass trim. I won’t be able to get to Dressew (in Vancouver, BC) prior to the JASNA conference, so I can’t use these buttons at this time.

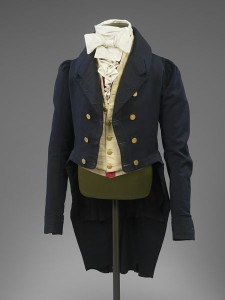
Suit, 1815-1820, The Victoria & Albert Museum.

Suit, 1815-1820, The Victoria & Albert Museum.

The alternatives are thread buttons, which are a lot of work I don’t have time for, and metallic buttons. Brass buttons were a must on blue coats in the Regency, and seen on other colours sometimes, too. The estimated cost for this tailcoat is $20 on sale. Some attractive steel buttons with an insignia will cost about $7 at Fabricland, so next shopping trip, I’ll purchase them.

Making a modern vest into a Regency waistcoat

The modification of a vest into a nice facsimile of a Regency waistcoat was an easy sewing project, once I found the suitable vest. Strange, since I was lamenting that I’d have to make this item from scratch!

Waistcoat, 1810-20, National Trust Collections

Waistcoat, 1810-20, National Trust Collections

Waistcoat, early 19th century, British, wool and silk. 21" by 33", Metropolitan Museum of Art.

Waistcoat, early 19th century, British, wool and silk. 21″ by 33″, Metropolitan Museum of Art.

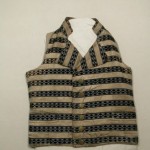
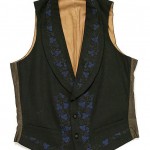
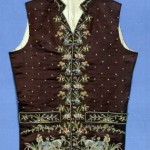
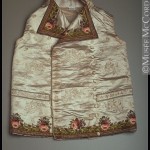
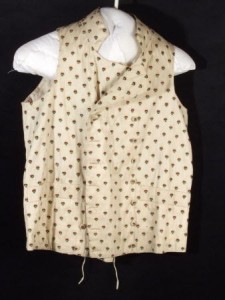
It’s not that Regency waistcoats are so limited in design that it’s impossible to find them: this clothing item was the pizazz in the man’s outfit. Almost limitless possibilities existed for colour and pattern, as seen in the set of thumbnails. Click to see larger images.

The most common fabric was silk, but cotton and linen were worn as well. Some boasted gorgeous detailed embroidery. Similar to the tailcoat, the waistcoat could be single- or double-breasted.

Waistcoat French or English, 1790–1810, Brooklyn Museum of Fine Arts. Note the detailed embroidery.

Waistcoat French or English, 1790–1810, Brooklyn Museum of Fine Arts. Note the detailed embroidery.

Waistcoat, 1805-1810, Mccord Museum, Montreal. Note the embroidery.

Waistcoat, 1805-1810, Mccord Museum, Montreal. Note the embroidery.

The trouble with modern vests is their simplicity. Plain, pin-striped, or herringbone wool or wool-like synthetics are as good as it gets for suit vests, which are difficult to find. Most thrift shop vests are casual, with zippers and fleece and plaid and quilting and such.

Regency vests usually had stand-up collars and lapels, too, which modern vests lack. The balance is that Regency vests were straight across at the bottom, so I knew I had a fabric source for the collar and/or lapels: that double V-shape on a dressy modern vest.

William Blake, by Thomas Phillips, oil on canvas, 1807.

William Blake, by Thomas Phillips, oil on canvas, 1807.

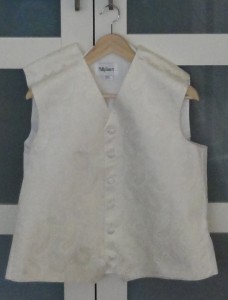
The internet, and used tuxedo rentals, offered more options in terms of colour and pattern, and the satin vests mimic the look of silk. Mr. Suze and I agreed on a paisley pattern for a fullback vest. It cost $11.99, and included a matching bow tie; the total was $25 by the time we paid for shipping.

He selected ivory since it best suited the green coat, compared to the bright colour palette otherwise available. The other colours would be great with a black or blue tailcoat. We had also noted that many of the waistcoats in paintings were white or ivory.

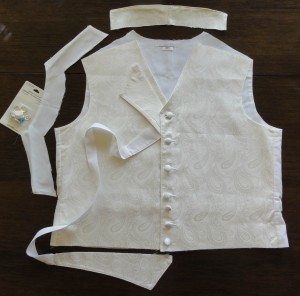
The vest was a bit on the big side, and I realized I could use that to my advantage, as I pinned it up at the shoulders to get extra fabric to make a short stand-up collar, plus raise the V of the neckline higher, to make it more Regency in appearance. The photos show it pinned up before the cut (left) and after the collar is made, but not attached, and the bottom is trimmed (right). Two extra buttons are on the bottom in the photo on the right, to show how it would look if more were added.Ivory paisley waistcoat, pinned for the cuts to the shouldersIvory paisley waistcoat, collar made, showing cut and location for lapel


Waistcoat, National Trust Inventory, 1790 - 1810, Cotton and silk, Chastleton House, Oxfordshire.

Waistcoat, National Trust Inventory, 1790 – 1810, Cotton and silk, Chastleton House, Oxfordshire.

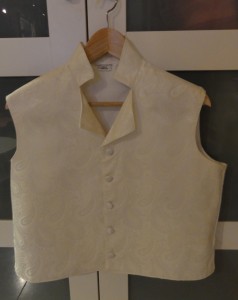
Regency waistcoats sometimes had distinct lapels, but more often, the front panel rose to the collar above the button line, and that upper portion was propped open by the cravat. Unfortunately, when I removed the two Vs from the vest’s bottom front to straighten the line for a Regency look, I couldn’t put it on like the latter design, as it was lined in herringbone, the same as the back panel of the vest. The option was a small lapel.

Ivory paisley waistcoat, final


If you have additional fabric, a detail that appears on some, but not all Regency waistcoats is a small pocket on each side, which can be faked with a piece of finished size of about 1-1/2″ by 5″. I tried to make them with what I had left, but they were too small.

This vest had matching satin-covered buttons, perfect for Regency. One was cut off with the bottom V, and there was one spare. Because Regency had lots of buttons, I’ll add more in between the current buttons if I have time after my other projects are complete for Louisville.

The two pieces put together look nice! There’s about 2″-3″ of waistcoat showing below the bottom of the waistline of the tailcoat, a fashionable length. The small lapel on the waistcoat fits neatly into the higher opening at the collar of the tailcoat. We’ll see the shirt ruffles and cravat fill that space in a future post!

TSRCE for Gentlemen: Green herringbone tailcoat and ivory paisley waistcoat.

TSRCE for Gentlemen: Green herringbone tailcoat and ivory paisley waistcoat.

Next post: Who knows? My time has become filled with editing for myself and a fellow author, fitness programs that stopped for August, as well as new activities.

I’m scrambling to complete the most important Regency costume projects now, as time is running out. The balance of Mr. Suze’s costume will come some time this month, and I have lots of little projects I want to finish for Louisville. If I can manage to write something to accompany photos, that will be the topic for upcoming posts!

Faking Regency Part One: A modern blazer morphs into a spencer.

This sounds pretty easy, right? Get an old blazer, cut and hem to under-bust length, and Bob’s Your Uncle. Well, not so easy. Unless, of course, you’re super-lucky and find exactly the right blazer.

Early 19th century spencer, Metropolitan Museum of Art

Early 19th century spencer, Metropolitan Museum of Art

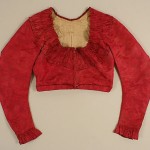
Embroidered muslin bodice or spencer, 1800-1810

Embroidered muslin bodice or spencer, 1800-1810

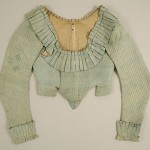
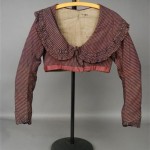
Rose pink striped cotton and silk spencer, early 19th C.

Rose pink striped cotton and silk spencer, early 19th C.

Early 19th Century, Spencer, early 19th century, French, silk, Metropolitan Museum of Art

Early 19th Century, Spencer, early 19th century, French, silk, Metropolitan Museum of Art

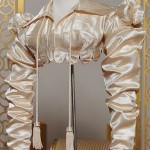
Cream silk satin Spencer, c1818. Decorated in imitation of military uniforms. Worthing Museum.

Cream silk satin Spencer, c1818. Decorated in imitation of military uniforms. Worthing Museum.

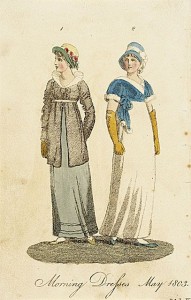
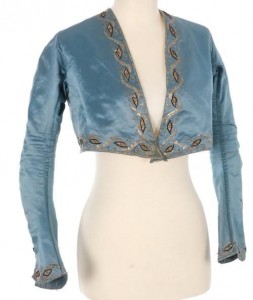
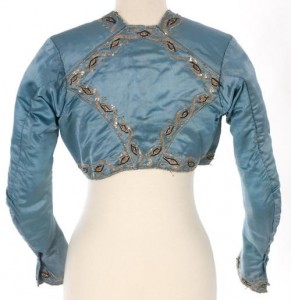
If you hadn’t already figured it out, the Regency spencer is a little, long-sleeved jacket that’s just as long as the bodice of the empire waist gown. One bonus for shopping for a blazer to make into a Regency spencer is that almost any neckline will suit. Click on the thumbnails to see details, including neckline examples.

The difficulties include a requirement for long sleeves (as per usual in the Regency, longer than standard is better), a fitted bodice, fabrics that don’t look modern, colours that are more interesting than black, and a lack of embellishments such as studs, fake pockets on the chest, or jean jacket seams.

The textures and colours of many blazers in my thrift shop visits didn’t work. Black polyester rules, and next to that, corduroy and knits. Every time I saw one I’d consider, it was 3/4 sleeve, the wrong size, or had some detail that screamed the 90’s.

I looked at blouses, too, since some spencers are more blouse-like and some modern blouses are more blazer-like.


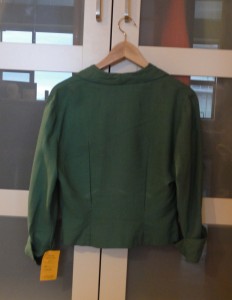
spencerspencer back


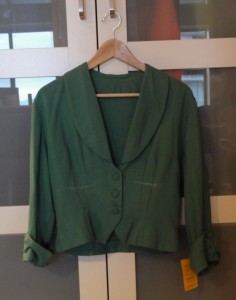
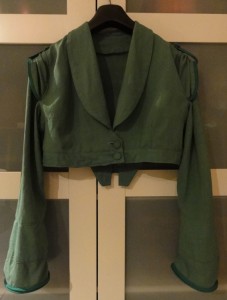
This unlined, fitted, pomona-green jacket will be my spencer. Pomona? I would have called this leaf-green, as it’s fairly bright. (Some of my shots were taken in the evening, and appear darker.) Then I read an article about Ackermann saying Pomona green was the same as apple green and I thought, this is a little darker than apple green, but I’ll check on Google images. Enough of the examples were the same as my blazer for me to confidently say it’s one of the more popular colours of the Regency!

The 3/4 sleeve, linen, shawl-collared blazer was $16.50 at Women in Need Thrift and Vintage. It has unique matching self-covered buttons.

Short sleeved spencer alongside unusual short coat.

Short sleeved spencer alongside unusual short coat.

Sleeve trim idea.

Sleeve trim idea.

The down side of my blazer is the 3/4-length sleeves. At the time I bought it, I didn’t realize that detail wasn’t popular during first 20 years of the 1800s. I looked in vain for examples of Regency spencers with 3/4 sleeves, and though there are a few short-sleeved spencers, I found nothing 3/4 sleeved.

Lucky for me, the flared cuff was long enough to drop to make a long sleeve. I kept looking for a long-sleeved blazer for a spencer. As mentioned before, I saw a blazer with lovely soutache designs, but balked because I worried about how to cut down the blazer at a good point for the soutache. When I decided I could rework the soutache if need be, I returned, but it had been sold. But today, I found a cute, gold silk blazer with a pretty collar, long sleeves, and mother of pearl buttons! The only sad part is a centre-back seam. More on that later.

(An aside: I’ve seen the perfect dress that just needs an empire waist height ribbon to fake Regency on two shopping trips since June, but both times, they were too small for back gathers for me, but would work with a smaller person!)

In most cases, your blazer should be cut to 2-1/2″ longer than the bottom of your bust line, turned under 1/2″, and hemmed 1″. This will stiffen the edge and ensure it fits over your gown bodice, but it won’t be too long. You can see I’ve marked my blazer to spencer length while wearing it. This frees up two buttons from the front for embellishment elsewhere.

If your blazer doesn’t close tightly at the bottom after it’s trimmed to length, there are several possibilities. If there are buttons in the upper portion (part you’re wearing), it’s better to fit the spencer than to ease in fullness. Add darts or gathers under the bust, or pleats or gathers in the mid-back; they’re era-appropriate. Don’t make it too tight, as it must fit over the gathers of your gown.

My blazer was already fitted with six darts in front and two very long back darts (in fact, the back darts were over-sewn longer and deeper than the originals). It was snug across the bustline, so I removed the back darts, washed it so the stitch holes relaxed closed again, and pressed out the remaining dart creases while it was still damp. A few gathers added by hand in the mid-back at the waistline help to fit my slimmer rib-cage under the bust.

If the bottom button is too far from the bottom of the spencer, you can put back a cut-off button and make a buttonhole at the band level, or add hooks and eyes. To fake Regency, buttons should have a Regency look: metal, shell, pearl, mother-of-pearl, fabric-covered, thread-covered (such as Dorset), or corded knot (such as Celtic or Chinese knot or frogs with knots) are best. Since metal buttons were expensive, use them only if your spencer has a rich look with elaborate trim. With corded buttons, your other trim would be best as corded, in fact, a military look to the spencer was popular! Self covered buttons were ubiquitous on mens’ wear, but less so for ladies’.

Spencer jacket, 1790-1815. Note no closure in front.

Spencer jacket, 1790-1815. Note no closure in front.

If there are no buttons, there’s nothing wrong with having a spencer that doesn’t fasten closed, unless you need it for warmth. An example of an open-front spencer can be seen on the left, and others existed in the Regency.

My blazer was unlined, so I chose to use the inside bottom facing from the original blazer on the outside, as a waist band. Bias tape was used to finish it on the inside where it’s not seen. Another option is to add a contrasting band (as on the pink striped blazer above). If you have good sewing skills and choose to add a waist band, it’s an opportunity to put contrasting piping all around it per a tutorial below.

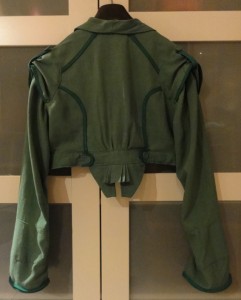
Spencer jacket 1815 (back). This trim is an example of how we plan to fake a Regency diamond back! The real shoulder seam will never be noticed!
Spencer jacket 1815 (back). This trim is an example of how we plan to fake a Regency diamond back! The real shoulder seam will never be noticed!
Since the facing didn’t continue across the buttonhole panel in front of the original blazer, it didn’t go all the way around, so was short for the waist band. To make up for this, I used extra fabric from the cut away parts in front. If you use multiple pieces for the waist band, make sure your seams are at the blazer’s side seams, or at both bottoms of the diamond-back, so they’re less noticeable.

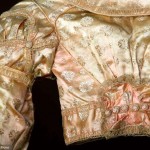
In addition, to fake Regency, some front cut-off material from my blazer made a little skirt-tail in the centre back, similar to the museum examples. See thumbnails below; click to enlarge. Extra self-covered buttons trim the ends of the waist band tabs in back.

Back detail of a spencer, 1813, American or European, Wool and silk, Metropolitan Museum of Art.

Back detail of a spencer, 1813, American or European, Wool and silk, Metropolitan Museum of Art.

To fake Regency, you need do none of the above. Focus on the one detail that’s not too hard to manage: the diamond back.

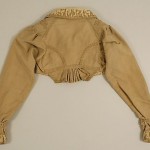
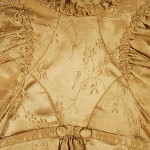
The look was on almost all women’s wear of the period, achieved by a shoulder seam that fell behind, rather than on top of the shoulder, and a pair of side-back seams that curved from the outside edge of the back gathers on gowns to partway up the back of the sleeve. The back of the sleeve fit farther into the back of the bodice than a modern sleeve, too. Click on the thumbnails for examples of the backs of spencers.

Silk spencer, 1810. Augusta Auctions.

Silk spencer, 1810. Augusta Auctions.

A faux-diamond-back can easily be achieved by numerous methods. You can fake the seams with a line of fabric paint or even fine-line permanent marker in a slightly darker colour, a line of top-stitching using hand back-stitching in embroidery thread, or machine top-stitching a double line.

Spencer, early 19th century, American or European, silk. Metropolitan Museum of Art.

Spencer, early 19th century, American or European, silk. Metropolitan Museum of Art.

Better yet,  Regency clothing often had trim over these seams to show off the shape, making them even easier to fake: cording, piping, soutache, braid, narrow ribbon, narrow bias tape, and other similar materials can be attached along the line where the seams would sit.

I got a great deal on a few dozen packages of bias binding tape in multiple colours at Value Village for $3.99, and I’m using a slightly darker green for all my trim, as I have four packages in two sizes. For most of the trim, I’ve just folded 3/4″ bias tape in on itself to the width of the pieces folded behind. This means it has some thickness at 1/4″ wide.

If you’re an experienced sewer, you can make piping or a piped band from purchased bias tape. Links to tutorials are at the end of this post.

When shopping for the blazer, the faux-diamond-back will look better if you buy one that doesn’t have a centre back seam. In fact, many that don’t have the centre back seam have a side panel with a seam similar to the lower curve of some Regency clothing backs, and I’d suggest using that curve, plus faking the shoulder seam that sits two or more inches behind the modern one.

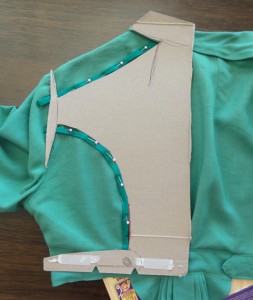
pomona spencer pinning on fake regency diamond backIt’s best to make a pattern for your trim so it’s mirror image both sides. Light cardboard–mine was from a breakfast cereal box–works well. Set it so one side runs along the centre back of your shortened and hemmed blazer, and play with lines and curves in pencil until you see one you like. Mark it with marker and cut out to make a pattern to guide in placement of the trim on each side.

I pinned my trim in place, then put it on a model for a photo. On the model, the fake Regency shoulder seams looked better if dropped down more at the sleeve end, so check before you sew. Attach the trim after you make any adjustments to sleeves, described next.

1810

1810

1815-1820

1815-1820

Modern reproduction.

Modern reproduction.

1815 LACMA

1815 LACMA

1820-25, Metropolitan Museum of Art

1820-25, Metropolitan Museum of Art

1820, Metropolitan Museum of Art

1820, Metropolitan Museum of Art

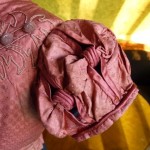
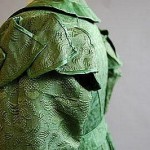
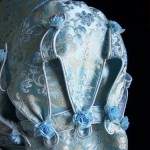
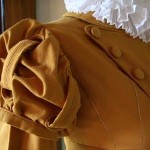
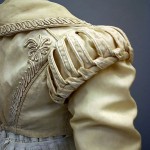
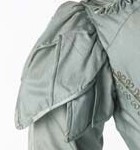
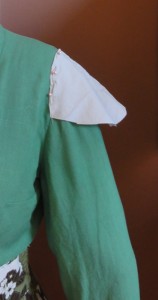
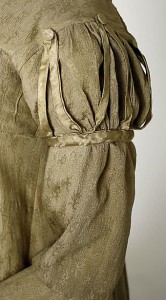
Like gowns, spencers often had puffed sleeves or similar-looking embellishments over a straight sleeve, however, many had a plain sleeve (see some examples above), so faking Regency here is optional.

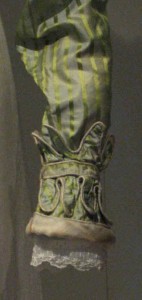
If you prefer a little over-sleeve, examples to the right range from clusters of petal-like fabric to fancy slashed and looped designs. These sleeve examples are on spencers, and more ideas from gowns can be found in the post, “Were Regency gowns worn on the Titanic?

You won’t have enough fabric to make the full sleeve variations, but a simple, small capped, tulip, or shirred cap sleeve, or a rolled tube at the top of the sleeve, can come from the fabric cut from the back of the blazer, or you can utilize sleeves made with coordinating fabric.

There’s a tutorial below for tulip sleeves. If desired, use the same trim you used to fake Regency with your diamond back to attach the new sleeve over the old one at the seam line, or turn under 1/4″ to 1/2″ and top-stitch close to the edge. If it’s possible to hide the ends, make the new sleeve fit an inch or two farther towards the middle of the back of your spencer, so you also have a fake Regency sleeve fit!

pomona spencer gathered cap sleeve mock upFor my fake short over-sleeve, I used the leftover fabric from the back panel. First, I experimented with some cheap fabric from a pair of torn pants to make the best of the small amount of fabric. A piped band (tutorials below) made from 2″ wide bias tape held the gathers, topped with one of the self-covered buttons from the old sleeve cuffs.

1818, Metropolitan Museum of Art

1818, Metropolitan Museum of Art

The simplest fake Regency sleeve topper, to the right, was another option I considered. I could have used the 3/4″ bias tape (sewn closed) and the three buttons from the 3/4 sleeves on each side. This can also be accomplished with ribbon, if the same ribbon is used for the fake Regency diamond back.

Self-covered button kits can be purchased at fabric stores for about $3 a package of 3-6, depending on size (full price, but I got one from Dressew for $0.99!), and they’re easy to make.

Alternatively, matching ribbon or fabric can be stretched over stiff plastic circles with a little glue, then the back fabric stitched in place. It should be slightly more than double the diameter so it closes fully behind the button and there’s something to sew it on with. Important note: the latter is fine for trim but not for actual working buttons.

The finished pomona green spencer, with cap sleeves over long sleeves, tied back with a piped band and button from the original blazer.

Front view of Suzan Lauder’s pomona green spencer, with cap sleeves over long sleeves, tied back with a piped band and button from the original blazer. Long sleeves are trimmed at the bottom with piped band also. An extra button was added to empire waist band, made from original blazer facing.

Back view of Suzan Lauder's pomona green spencer, with Fake Regency diamond back and pleated skirt-like ruffle.

Back view of Suzan Lauder’s pomona green spencer, with Fake Regency diamond back and pleated skirt-like ruffle. Buttons from the original 3/4 sleeve cuffs are used on the tabs at the back of the empire waist band.

This project wasn’t easy for me, though it may be for a more experienced sewer. I hadn’t sewn much for 30 years, except for the odd repair, straight-line window toppers and throw cushions, or slapping together a Hallowe’en costume that was meant to last a few hours. I became good friends with my stitch ripper over the last two weeks and learned a few things along the way.

No-sew iron-on tape would work for simpler modifications to make a spencer, but some of my problems came from construction and developing my own patterns, so they’d occur had I used no-sew tape, too. In addition, it sucks for curves, and you couldn’t have made piped band. Other trims (like in the thumbnails) are fine, and there’s nothing wrong with straight lines for your fake Regency diamond back.

Most of these ideas for faking Regency are applicable to gowns, pelisses, redingcotes, and any other bodiced clothing of the Regency period. Have fun shopping for trim on sale or in grab bags at thrift stores!

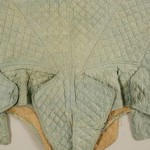
A blue quilted spencer, front. Late 18th early to 19th century, Metropolitan Museum of Art.

A blue quilted spencer, front. Late 18th early to 19th century, Metropolitan Museum of Art.

Spencer, late 18th to early 19th century, French, silk. Note the unusual detail below the centre back.

Spencer, late 18th to early 19th century, French, silk. Note the unusual detail below the centre back.

~~~

Web sites with ideas and tutorials:

Inspiration: So Many Backs from Atelier Nostalgia Though these are gowns, you can see the line of the Regency diamond back you want to emulate, and variations on that design.

Sew Many Seams’ Tulip Sleeve Tutorial  Shows two types of tulip sleeves to make, using a plain sleeve pattern as a guide.

Slashed puffed sleeve from Firefly Path: The inside of the slash can be made from the spare fabric cut from the spencer, and the oversleeve from a complimentary fabric using a regular puffed sleeve pattern. Maybe use that extra cushion cover or dinner napkin! The slashes need not be filled in, either. You can loop trim material from the inside shoulder to outside through each slash. Similarly, a loop can be made from the cuff inside to outside. Very fake Regency!

Sew4Home’s excellent tutorial on how to make your own piping and bias tape.

For the advanced sewer, two choices for instructions for a piped band: Kleidung 1800‘s site is German, but brief descriptions of each step are in English under the photos. Tea in a Teacup has a different way to make the band, and it looks a bit different in the end.

For the ambitious spencer designer, two posts about making soutache designs: The Fashionable Past shows technique while trimming a Victorian coat, and a trick to make the loops easy by Threads.

~~~

Next few posts: I’ve started on projects for Mr. Suze’s costume, and I have a “Grown-up Lady’s Lace Cap” to make as part of the give-away for my guest post on Roof Beam Reader’s blog as part of his Austen in August (#AusteninAugustRBR) reading challenge, and I’ll draft up the cap pattern to share.

~~~

I WON A PRIZE!!! As part of the same reading challenge above, I won JAFF Author Lisa Pliscou‘s Young Jane Austen: Becoming a Writer, which I’ve been coveting since it came out, for its cool illustrations. I’ve entered every contest I’ve seen about this book! HOORAY FOR ME!

~~~

There are still spaces remaining for the Jane Austen Society of North America Annual General Meeting on October 9-11, 2015, my goal destination for the Thrift Shop Regency Costume Experiment series. The conference theme is “Living in Jane Austen’s World,” and the workshops run the gamut (?? who says stuff like that?) from Regency medicine and home remedies, to evaluation of the wealth of Austen’s characters; the influence of India on Regency England; plants and gardens of the Regency (featuring Meryton Press’s Linda Beutler, an international clematis expert!); food, fashion, and social events of the period; and many others! Pre-conference activities start on October 7. Registration deadline is September 1, 2015, so don’t delay!


I never did mind about the little things…

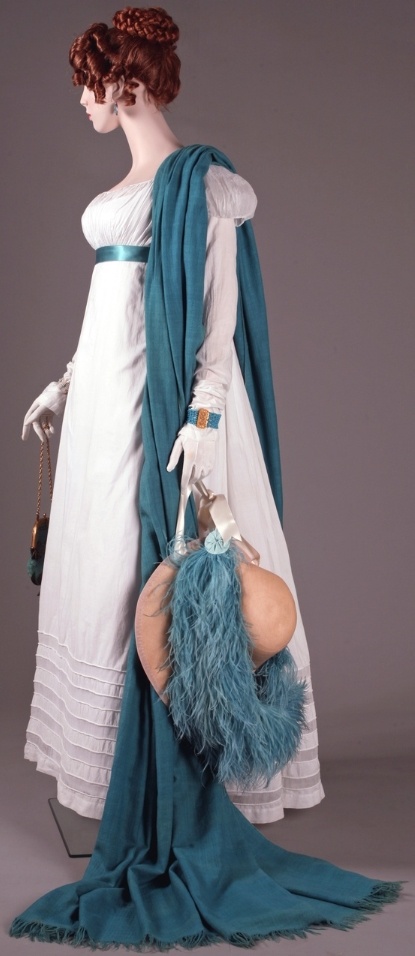
Slippers similar to ballet flats; several layers of underwear to enhance her bosom and disguise that she had legs; a gown appropriate for the time of day; stylish curls and a fancy but tidy up-do; a turban, bonnet, or hat, and perhaps a cap; a cherished piece of jewelry—what more could a Regency lady need?

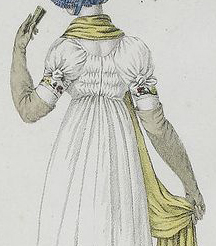
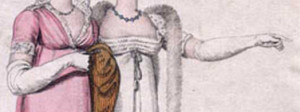
From Costume de Promenade, 1804-1805, opera gloves

From Costume de Promenade, 1804-1805, opera gloves

Accessories, of course! Heaven forbid if she left her home without her gloves, and she’ll die from the heat at a ball without her fan! On a morning promenade, her parasol will keep her delicate skin from growing coarse and brown in the sun.

This post is about how to obtain these accessories for your Regency costume.

~~~

Dudmaston National Trust (Claire Reeves) -- Embroidered kid gloves, circa 1800-1830

Dudmaston National Trust (Claire Reeves) — Embroidered kid gloves, circa 1800-1830


Gloves

Gloves were common apparel outside the home, though period art indicates they were not imperative during the day. It’s pretty simple to find Regency-appropriate gloves for day-wear: short, cotton gloves are acceptable, and stores carry them for hand care at a low price. I continue to watch for nicer ones, in finer cotton, and maybe with trim like seed pearls or lace, but simple will do. Of course, if you can obtain kid gloves, it’s even better!

For evening wear, the sleeves were short and the gloves were long. Super long, much past the elbow. Opera-length.

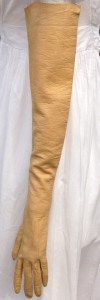
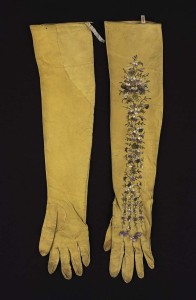
Circa 1810 kid leather, buff.

Circa 1810 kid leather, buff.

Not a problem, right? Long, synthetic, “satin” evening gloves are dirt cheap, and easy to find. One would think they’d pass for fancy ones from 1812. White sounds like the right colour, right? Unfortunately, they’re not the best choice.

Most Regency evening gloves were made of kid leather. They were often white, but also came in many colours, usually muted, softer tones.  Though vintage kid opera gloves in cream, buff, bone, pale yellow, pale pink, ecru, and similar colours are common on Etsy and ebay, with bids starting at $25 and up, read the fine print: they tend to be size 6 or 6.5 when most women these days wear at least a size 7. (In case you don’t know your glove size, this is a handy link: Your Glove Size.)

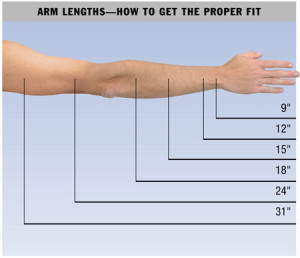
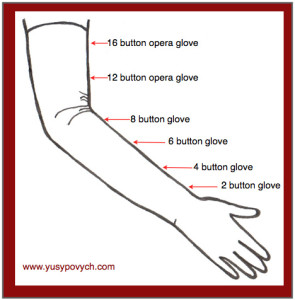
Glove lengths in inches.

Glove lengths in inches.

Beware: many vendors will say their gloves are opera length, but they may be as short as 11 inches! A true opera-length glove goes past the elbow: a minimum of 19 to 21 inches on most women.

In addition, vintage kid gloves can be stained, torn, worn, or otherwise damaged, especially if unlined. The three-button wrist opening is Victorian, so don’t be tempted to buy gloves with that style.

“New” in-package vintage opera-length kid gloves start at $150 on ebay, but are in small sizes, too. Brand new kid gloves made for coming-out balls are $200-$300 in Regency colours and modern sizes. If that were not enough to make this accessory difficult, many Regency gloves had embroidery along the back!
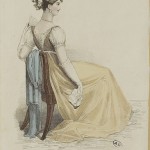
From La Belle Assemblee April 1808, opera gloves

From La Belle Assemblee April 1808, Opera gloves

As seen in Regency art, the fit tended to be relaxed, which meant the glove fell so it drooped along the arms, yet still wound up falling higher than the elbow. To accomplish this, a minimum of a 12-button glove (24 inches long) would be required, and the example to the left is much longer.

Glove lengths in “buttons.” Opera gloves are 12 buttons or longer.

An alternative, new lambskin gloves, come at reasonable prices ($25 starting bid on ebay for unlined 21-inch gloves) for black (mourning gloves in Regency), white, brown, or bright, saturated colours. Faux leather is about $10 for the same colour ranges.

Museum of Fine Arts, Boston--Women's Gloves, early 19th century, silk.

Museum of Fine Arts, Boston–Women’s Gloves, early 19th century, silk.

Fabric evening gloves in the Regency were cotton or silk, and they weren’t shiny. If all you can find are those shiny satin ones (they are 19 inches long), some people use sandpaper them to dull them, then dye them if desired. The colour selections in dyes these days are bright, basic tones, so watch to limit dye time so the colour isn’t too saturated; though if I recall correctly, that type of fabric takes dyes poorly.

Cotton fabric embroidered gloves, circa 1790-1810, bias cut for stretch, gold and sequinned scrollwork pale pink floss silk detailing

Cotton fabric embroidered gloves, circa 1790-1810, bias cut for stretch, gold and sequined scrollwork, pale pink floss silk detailing.

my glovesI purchased 19 inch (8-button) matte-look synthetic gloves for $7.99 at Dressew in Vancouver, BC, in pale pink and white, on top of the original white satin pair. They also had purple matte, but I felt it was too bright. The nice buff yellow colour was only in the shiny satin finish. All these gloves fit the arm snugly, and just barely cover the elbow, but many Austen costume wearers feel they’re a reasonable enough choice. Like with my stockings, I may try to mimic an embroidered pattern using fabric paint.

In the meantime, I’m still watching ebay and Etsy for ball gloves in size 8 and any colour but black, brown, or loud! If I can get 16-button (31 inch) gloves in a nice soft yellow or cream, it will be like heaven! If they’re kid leather with no wrist buttons, I’ll have to pay more than I did for any of my dresses!

~~~

Fans:

A Regency ballroom can become very warm. Fans were a must-have accessory for one’s comfort. Chinatown, thrift, vintage, and budget stores are possible places to buy your fan.

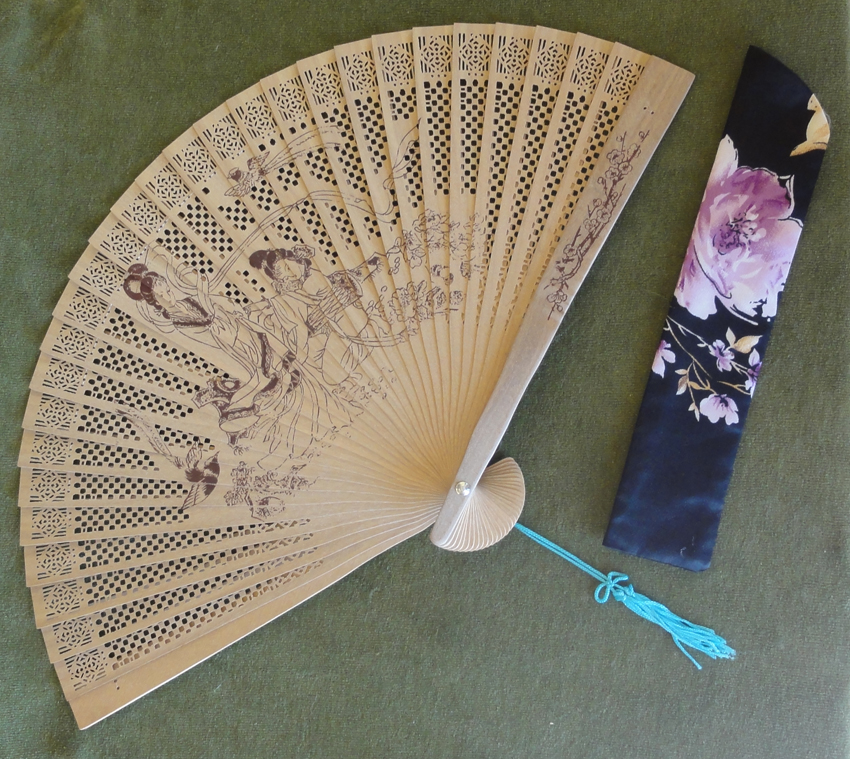
The one fan I purchased was part of a $2.99 grab bag at Value Village. Though I adore it, it’s rather simple for its purpose: a medium-toned wooden brisé fan with a line drawing of a Chinese scene printed on the leaves, and a satin-looking sleeve.my first fanIt took months to find this fan. The available fans were all cheap-looking or had non-Regency features. Most wood fans had paper leaves that were plain or had very Asian motifs, and pale, plain wood sticks. Fans with silk/satin leaves had sticks and guards made of cheap plastic, no matter how pretty or elaborate the painting on the leaves!

Ten or so years ago when I shopped for a gift for my sister, fans with dark, rich wood or enamelled sticks, with inlays such as mother-of-pearl on the guards, were available at a reasonable price, but I didn’t see one fan like this in months of searching. It doesn’t help that, though the Chinatown in my current city is the second-oldest on the West coast, it’s also the smallest, at two blocks long.

Brisé fan, circa 1790, wood.

Brisé minuet fan with blue silk. Dutch, 1810. Museum of Fine Arts, Boston.

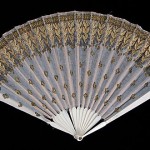
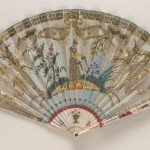
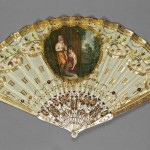
Regency fans came with sticks and guards made from ivory, mother-of-pearl, bone, tortoise shell, metal, ebony, and horn. Ribs and leaves could be of the same material as the sticks, or the fan could have leaves made from gauze, silk, paper, or feathers, and trimmed in gilt, lace, ribbons, or sequins. They could be inlaid or piquéd, painted, pierced in a pattern, or embroidered, and any scene depicted would be English. For full size images, click on the thumbnails.

Battoir fan, 1800-1830. Silk, ivory, and metal. National Trust Collections, UK.

Battoir fan, 1800-1830. Silk, ivory, and metal. National Trust Collections, UK.

Fan, 1800-1815, French. Bone, silk, metal, wood. Brooklyn Museum Costume Collection at The Metropolitan Museum of Art.

Fan, 1800-1815, French. Bone, silk, metal, wood. Brooklyn Museum Costume Collection at The Metropolitan Museum of Art.

Folding fan of ivory sticks with a silk leaf embroidered with sequins and painted with a female figure watering plants. English, circa 1810. Fan Museum, Greenwich.

Folding fan of ivory sticks with a silk leaf, embroidered with sequins and painted with a female figure watering plants. English, circa 1810. Fan Museum, Greenwich.

Folding fan. Carved, gilded mother-of-pearl sticks, silk leaf decorated with gold sequins, embroidery, mezzotint. Two girls with a cat. English, circa 1800-1820. Fitzwilliam Museum.

Cartouche fan, from a plate in Ackermann's Repository for Art, 1808.

Cartouche fan, from a plate in Ackermann’s Repository for Art, 1808.


The coolest fans (not meaning efficacy, but in eye-catching quality) are the cartouche fans, which open to 360 degrees.

If you can find a fan with an attractive non-plastic material for the sticks and guard, and a pretty painted or embroidered design that isn’t too Asian, it will do well.

 ~~~


Parasol:

If you’ve followed this blog from the start, you’ll know one of my catch-phrases is “Parasol in a Ballroom.” This originates from a scene I wrote in the original Alias Thomas Bennet before posting it in serial form at A Happy Assembly.

While in London, Jane Bennet writes to her sister Elizabeth, who is at Hunsford:

“Mary and I attended a private ball at Miss Morris’ home and it was all that was spectacular. The ballroom was the largest I have ever seen, and the candles were so brilliant that the room was almost as bright as day. The ladies were in beautiful dresses and held lovely fans or parasols.”

Cassandra, the final cold reader, tagged the final word with a simple comment in a balloon: “At a ball?”

Indeed! Why would they use parasols indoors at night? In my mind, I could just see Cassie’s head-tilt! It’s been a joke between us ever since.

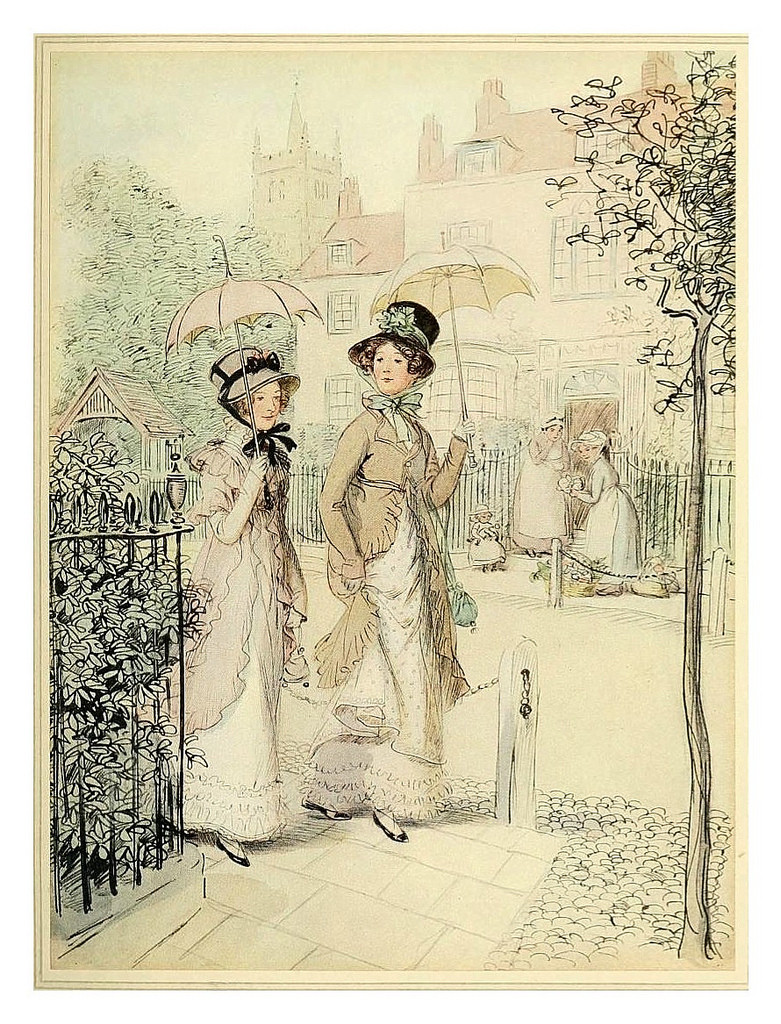
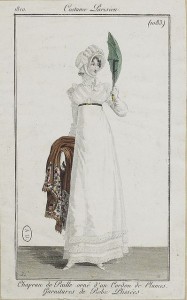
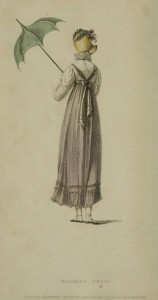
tumblr_na3t53ZkSc1s5i6ido3_1280Although a parasol is an optional item, mainly for when the headwear doesn’t protect the Regency lady’s face from the sun, it’s seen in many fashion sketches of the time, leading me to believe it was for show, as well.

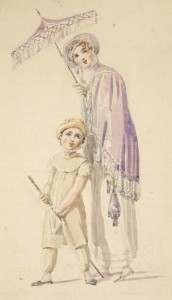
Walking dress, parasol with knotted tassel fringe, 1810.

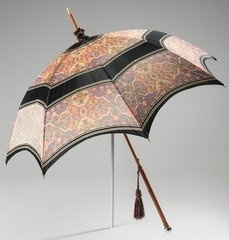
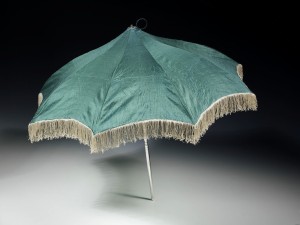
This item comes in so many variations, it’s not nearly so difficult to procure something that is a good facsimile. Deep or shallow scallops between the ribs, either rounded or pagoda shaped, deep or shallow curve to the parasol body, but not flat: all are appropriate in almost any colour except black, unless you are in mourning.

Parasol, 1805, Metropolitan  Museum of Art

Parasol, 1805, Metropolitan Museum of Art

Parasol, European, circa 1805. Silk knit with glass and steel beads, wood, bone, and metal.

Parasol, European, circa 1805. Silk knit with glass and steel beads, wood, bone, and metal.

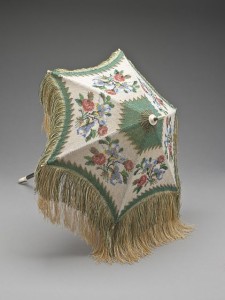
Multiple modes of decoration enhance the parasol cover, such as stripes, prints, tassels, embroidery, and all types of fringe: eyelash, brush, ball, and multiple-knot tassel fringe. Others are plain. Most handles were straight, though a few curved ones existed, and they were sometimes decorated and inlaid not unlike the guards on the fans. A fascinating Regency specialty is the hinged parasol.

Hinged parasol, Costume Parisien, 1810

Hinged parasol, Costume Parisien, 1810

Lace is not common, though, and the ones I’ve seen with lace use it as trim similar to fringe. The Battenburg lace parasols sold as Regency are Victorian, so don’t waste your money!

Of course, a real Regency parasol frame is made from wood or baleen (whalebone), and the cover from silk. Modern Asian parasols of wood frame construction tend to have too many ribs; Regency ones had four to ten, though six to eight were most common on the plates I’ve seen, and many had seven.

Pagoda parasol from Ackermann's Repository print, 1814

Pagoda parasol from Ackermann’s Repository print, 1814

If you’ve followed this blog from the start, you know my obsession with the idea of a pagoda parasol, which has a second upward curve on the canopy of the parasol. They were common during the Regency period, in fact, up until the 1960s. Vintage pagoda parasols on Etsy and ebay are usually mid-20th century, with a metal frame and handle made from bakelite, a non-melting plastic that’s still used for items such as billiard balls today. The fabric is often in a “modern” pattern for the era, so it may not work well for a Regency costume.

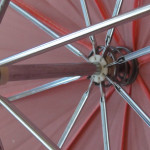
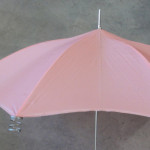
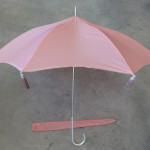
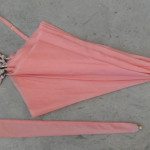
A vintage pink nylon-covered non-pagoda umbrella, with a matching fitted sleeve complete with a grommet for the spiked end, was purchased for $9.99 at WiN (Women in Need Vintage and Thrift Store). It has an interesting, curved, patterned aluminum handle. I’m not a pink person, yet I manage to repeatedly find the best items in pink!
Silk parasol, ca. 1811, Victoria and Albert Museum.

Silk parasol, ca. 1811, Victoria and Albert Museum.

Two-inch wide white fringe was one of the items in my amazing budget purchase of multiple types of trim for $5 in Mazatlán, and the idea was to tone back the pink and make the umbrella look more like a Regency parasol.

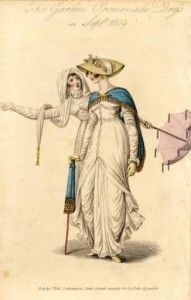
Garden promenade dresses, 1809, Fashion Plate Collection. Tasseled parasol on the right and parasol with knotted tassel fringe on the left.

Garden promenade dresses, 1809, Fashion Plate Collection. Tasseled parasol on the right and parasol with knotted tassel fringe on the left.

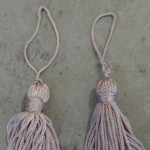
Later, a local Indian fabric store (K T Boutique and Fabrics) was selling certain colours of tassels at half price, and I liked the idea of tassels better, as the parasol would be less bulky when folded. I got eight in a muted violet for $1 each.

But I kept looking for my pagoda parasol with a straight handle, in materials that looked like they could be from the Regency.

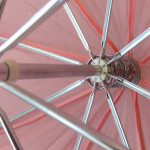
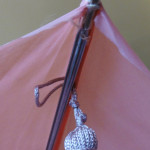
Then I read an article on how to make a regular umbrella into a pagoda parasol, using a length of milliner’s wire twisted into a spring and inserted inside the canopy of the umbrella, around the part of the stick that’s above the frame. Some time ago, I’d been curious about the inner workings of a pump cosmetics bottle, and had two short, fat springs on hand as a result, so I didn’t have to use my questionable wire-bending skills.


First spring inserted above the upper rib of the umbrella frame.

The beginning of the pagoda shape from the first spring, and second spring displayed (just hanging on the end of a rib) to show how it looks before installation.

Inside the open umbrella, I placed my fingers around the umbrella stick between the canopy and the frame, then easily slid the canopy up the spike so I could thread the spring on, much like you’d put a key on a key ring. Click on the thumbnails for larger images of the instructional photos.

Second spring in place.

Second spring in place.

After the first, I decided it would look better with two springs. The second was much harder to install. You could not do this with an umbrella that does not have a long enough spike on top.

A slimmer spring would be better, as these tend to slide down over the ribs when the umbrella is closed, and I have to reach in and wiggle them up to get the umbrella to open. In addition, the extra bulk means the matching sleeve no longer goes on all the way. I’m going to wait until I finish my hand lotion to procure the alternate spring!
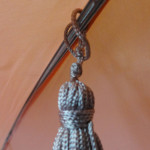
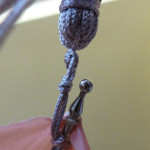
I found it difficult to figure out how to tie on the tassels, so I’ve shown the steps I eventually used to save you all some trouble. I did a better job of showing the “How-to” steps by using captions this time! Click on the thumbnails for larger images.

Tighten the top knot on the tassel (left). Tie a second knot about 2-3mm or ⅛ inch above it (right).

Loop string between rib and fabric, inside of where the cover fabric ties to the end of the rib.

Push tassel through loop to tie to rib.

Push tassel through loop to tie to rib.

Pull the tassel to the end of the rib and push the gap between the knots over the ball at end of rib.

Pull the tassel to the end of the rib and push the gap between the knots over the ball at end of rib.


Final pagoda shape of parasol, with eight tassels. Matching sleeve is shown below.

Final pagoda shape of parasol, with eight tassels. Matching sleeve is shown below.

Parasol closed, with sleeve. You can see all the tassels here.

Voila! A pagoda parasol with tassels for my Thrift Shop Regency Costume! I’m so pleased, I barely care what else I wear!


~~~

NEXT POST: One of the easiest items to find for your Regency costume is a reticule. A small drawstring bag (at least 5 inches wide, but under 8 inches in each dimension) of almost any shape, in a rich fabric, will suffice. If the bag you found is too simple, we have ways to dress it up! I have six examples, and three came to me in fine condition with no need for upgrades. Three need simple, typical modifications that are super-easy for the non-crafter.

~~~

Pop quiz: Did anyone know the source of the title without looking it up? In what other movie did the same guy play a sort of a “cleaner?” What Regency-era movie was he in?

I’d adore some comments! (The Meryton Press blog page version of this post is the best location for this.) I’m trying to decide how to do a give-away, and feedback would help me to know if anyone besides me is reading this shiz.

~~~

Updates: If you’re interested in learning more about Regency fans, or just seeing some more beautiful designs, check out this blog post: Special Exhibition: The Unrivalled Beauty of the Hand-held Fan in the Romantic Age 

Thanks to Zorylee Diaz-Lupitou, who solved my problem with the comments box. Hopefully, it should be working now!

Were Regency gowns worn on the Titanic?

Hey! There’s an Alfred Angelo prom dress at “Vinny’s Second Wife’s Closet” in your favourite colour! But before you buy it, rip it apart and remake it, check the prices of custom-made Regency gowns. They start at just under $100, and an appropriate, good-quality morning dress can be purchased for $150-250, a pretty ball gown will cost around $200-450, breathtaking concoctions go for up to $1000, and the sky’s the limit for exact reproductions of specialty gowns.

All of a sudden your $200 used, strapless polyester with the fitted waist and sequined empire bodice seems a bit dear. Think of the fun, though! Trying to adjust it to get gathers in back, shopping for fabric that’s a reasonable match for sleeves, never mind re-working the bodice to attach them. And you just cut a hole in the nipple area while removing that sequin!

One thing I learned is that a suitable re-purposed dress is not that easy to find in thrift and vintage stores, in fact, that’s how I made the list of what not to buy: those dresses were in the majority. In order to make this blog as authentic as possible, I didn’t depend on others and stuck to my “rules.” But the reader can freely ask friends and relatives to raid their attics, get advice or assistance from a seamstress, or buy a product.

I set my upper limit for a used gown at $100 for a dress with little modification required. The most I’ve spent so far was $50 for a pelisse gown, which I admit was a bad purchase. My morning gown cost under $35, and needs less than $10 worth of modifications, plus my time, and though not perfect, it will be close enough in style, with better fabric and yards more lace than a $150 made-to-order one on eBay or Etsy.

As with anything, you get what you pay for, and the cheapest purpose-made Regency gowns are not worth buying. Gowns under $150 are usually machine-made using inexpensive fabric and simple construction, are not fitted properly—and are being sold as Victorian/Regency/Steampunk/Pioneer/Hippie/Jane Austen/Titanic dresses! What happened to Downton Abbey? Author Melanie Schertz found one with that on the list, too!

idea for accessories with morning gownHowever, a strict budget and no time to shop in vintage stores changes things; if so, buy a simple pre-made Regency gown and augment it. For example, a white dress with simple gathered neckline and sleeves can be dressed up with ribbon and lace and pretty accessories. An overdress or robe can be purchased in a colour you like to make it into evening wear.1813 la belle assemblee evening gown1812 Costume Parisien Dress and manteau (train) trimmed with marten (fur) (Click on thumbnails to enlarge.)


I still love the idea of vintage, though, because it affords a budget opportunity to have a gown that doesn’t look like it would be at home on the Titanic! In addition, I have a bit of a crush on Colin Firth, and his wife, green fashion advocate Livia Guiggioli, would approve of a re-purposed gown. She’d approve of Pemberley, too. Maybe he’ll buy it for her!

In an earlier post, I had a list of items to avoid in purchasing a vintage dress or re-using a dress from your closet. This time, we look at what to shop for and examples of good vintage dresses.

When I shop for a potential Regency gown in a vintage or thrift store, I walk down the dress aisles looking at the floor. Depending on the hanger bar height, if the dress touches or puddles on the floor compared to its neighbours, it has length. If the fabric and colour look okay, I pick up the skirt. Often the fabric looks okay from farther back, but is knit, and I drop it. Then I look at the whole dress, evaluating for necessary modifications. I’d guess that 90% get rejected due to unworkable designs.

The last thing is size. As we all know, marked sizes are inconsistent. In a second-hand situation, a clerk may have guessed for the tag, and the dress may have been taken in or home-made. I’ve always had problems with size, because my bust is a good size larger than the rest of me, so if the shoulders fit, the bust doesn’t. It’s important to try it on. I know it sounds creepy, but it’s rare for anything to be smelly, and I wash the clothing as soon as I get it home!

Ideal characteristics for re-purposing a gown:

  • Minimum 8” wide extra fabric at the bra-band level as you pull it out flat while wearing the dress (16” actual length since the fabric is doubled up) for back gathering; more is better. The early Regency hem brushes the tops of the shoes, so if a fitted dress is too long with your ballet flats, pull up the skirt to see if this gains extra fabric width for gathers at the top.
  • Regency fabrics or visually reasonable facsimiles (Jessamyn’s Regency Costume Companion has some great examples).
  • If no Empire waistline, there should be no sewn waistline front or back, or if so, the skirt should be long enough when pulled up under the bust. Later Regency was ankle length, and ribbon or lace can be used to add a couple of inches.
  • Bodice should be a close fit, but not too tight—you should be able to remove visible zippers and replace with ties, laces, or buttons and loops.
  • Puffed sleeves about 3-6” long (underarm) that don’t puff high. This is the most difficult requirement, as they were only common for short spurts a few times in our history. See photos below for alternatives that work and, in a later post, I’ll show some examples for faux-puffed sleeves using minimal spare fabric from your gown.
  • Non-Regency details should be easy to remove, hide with trim, or modify without being obvious.

Other details for Regency:

  • Back bodice either flat and fitted or gathered to mirror the skirt.
  • Front bodice style varies a great deal in Regency.

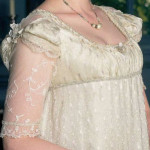
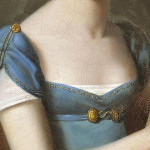
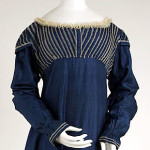
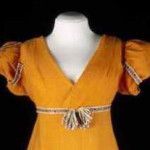
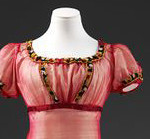
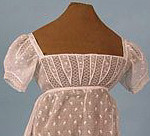
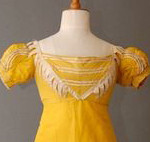
I’ve shown a few bodice examples, and while you’re looking at them, enjoy the sleeve style variety, too. You can click on the thumbnails to enlarge the image.

Evening dress 1818-20 cream silk and wool mix trimmed with green satin1810 cropped1810 cotton metallic thread met interesting neckline croppedcan do this with the net for blue dress croppedThe Rendezvous Reginald Edward Arnold croppedFrench School XIX century A young lady with a lyre cropped.met museum 1815 bodice and sleeve detail1810 orange croppedcotton muslin 1820 note back closures1805-1810 muslin with metal star embroidery and back ties croppedback bodice 1811


Dress, 1810-15, French, cotton, The Met cropped


Dresses requiring very little modification:

  • Hippie dresses.
  • Empire waist “round” dresses: gathered all around.
  • 80’s dresses, though the puffed sleeve may be large and high and the dress may not be long enough—but there’s nothing wrong with adding lace to the hemline, and we’ll look at other tricks in a later post.
  • Empire-waist gowns with straight skirts, but not fitted and flared. Then another dress can be used for an overlay or robe for the skirt with the gathering at back, and perhaps sleeves.
  • Regular-waisted dresses, if the skirt is long enough to be lifted up to under the bust and still barely brush the tops of the shoes.
  • Gowns that work otherwise, with sleeves large enough to be made into puffed sleeves.

The Thrift Shop Regency Costume Experiment is intended to be a minimal-sewing project, but in case some readers have greater ambition, there are more gowns that will work.

Sewing and fitting will be required:

  • Caftans, with a single fabric, not too heavily patterned. You’ll have to fit the bodice, modify the sleeves, and gather the “skirt” fabric in the centre back.
  • Too-large evening gowns, if the top of the skirt is big enough to make gathers in the back and the bodice suits being pulled into back-gathers with the skirt, or you do not mind fitting the bodice.
  • Sleeveless or strapless gowns with enough skirt fabric for empire with back gathers, plus other extra fabric for sleeves (a matching shawl or wrap, a bodice overlay that can be removed leaving an attractive bodice, a lining, or extra skirt fabric). It’s difficult to buy a coordinating blouse or fabric to make sleeves, because it’s almost impossible to match colour and texture.
  • A skirt from one dress and bodice from a blouse or a short dress—it’s better if the darker colour is on top.

Some bodice enlargement insert ideas (click on thumbnails to enlarge):1810 evening dress V and A cropped1805 croppedidea for bugle lace


To add a few inches to get extra fabric for gathering (click on thumbnails to enlarge):1812-July-Evening-Dress-blueRed gauze dress with chenille embroidery. A light open weave fabric woven in Scotland, gauze or leno, ca 1808

Notes on adding trim:

  • If you want to tie a bow in a waist ribbon, it needs to be about five feet longer than your waist measurement. If it is a wider ribbon, you can attach it to the dress to keep it flat, but I recommend a loose whip stitch unless you never want to change it for another look. An alternative is reinforce it with a second ribbon or stiff fabric of matching width an inch short of your waist size, attached on both edges with fabric tape in the middle section of the ribbon, to keep it from folding over.
  • If you intend to add lace to the bottom of the skirt, it can be flat or gathered. Pre-gathered lace can be bought in several widths, though colours are limited. If you find flat lace you want gathered, you need 2½ to three times the length of your hemline. Run a baste stitch and gather (hand sew ½” long stitches near the top edge for about 2-3 foot intervals; tighten the baste stitches uniformly to match the skirt edge). Attach with the fabric tape. If you attach outside, you should then attach a ribbon with fabric tape over the top edge to hide it. Overlap the ends the width of the fabric tape and secure.

~

That’s it for the three-post introductory series on Gowns. My initial plan for this Experiment involved one complete outfit by the end of June, so I have success with my morning gown, and we’ll see the rest of the items in future posts. I also said if I had time, I’d include a ball gown. Counting forward, and knowing I can’t post every week, my time is tight! But I will continue posting my projects beyond the initial Experiment, and a ball gown and spencer are in my plans!

NEXT POST:  HEADWEAR AND HAIR, WHICH WILL LIKELY BE 2-3 POSTS. I HAVEN’T ENOUGH COURAGE TO TACKLE LYDIA’S HAT YET, BUT THERE WAS A SNEAK PEEK AT MY FIRST TRY AT A CAPOTE WITH THE WHITE MORNING GOWN LAST WEEK!

~

Cool links:

Fashion examples from 1808 to 1828 from E.K. Duncan.

The Repository of arts, literature, commerce, manufactures, fashions and politics, published in 1809 by R. Ackermann

The Mirror of the Graces, a ladies’ etiquette book from 1811.

~

Images are from Pinterest, most originating from museum pages. If interested in the source of any particular image, contact me for more details.

Update:

The Rules, uhm, vague guidelines for my Regency costume: #ThriftyRegency

I can sew well, but I hate it. It gives me back cramps. Worse, I’m cheap. If I find an item I like, but it’s too dear, I often seek an acceptable alternate. This posed a huge problem when I decided to attend the Jane Austen Society of North America Annual General Meeting (JASNA AGM) in Louisville, KY in October, 2015.

About a year and a half ago, when I finally got up the nerve to attend one of these annual gatherings for scholarly pursuits related to Austen, I knew I wanted to dress up. My friends, the Chat Chits at A Happy Assembly, joined me in perusing Ebay and Etsy for Regency gowns and bonnets.

Though prices started at just under $100, the cheap dresses were, well, cheap. A decent but simple dress could be bought for $150-250, most ball gowns were $250-$400, with higher prices for the couture models. The one I liked best was at the top of the range, as expected.

“Sew it yourself,” said one of the Chits, who owns a serger. I’ve found that those who own a serger think anyone can sew anything.

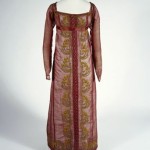
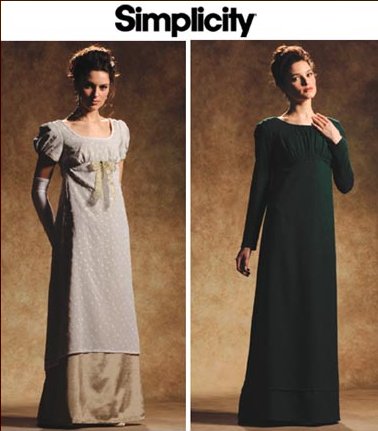
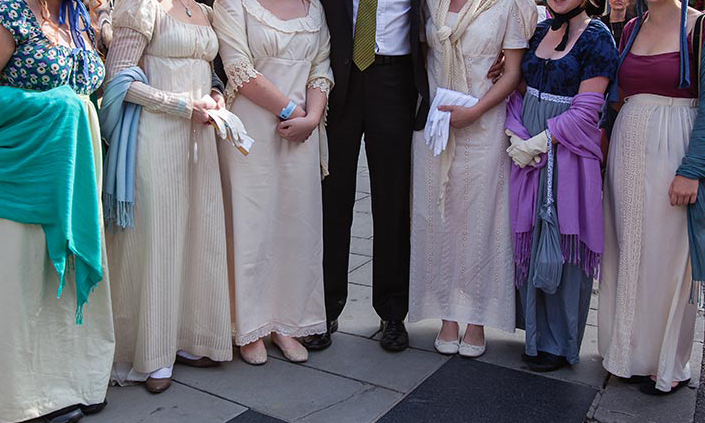
The gowns in so many of the photos of JASNA AGM, the Bath Festival, the Jane Austen Festival, and similar events have been painstakingly hand-sewn by their owners or someone like the vendors on Etsy. The big problem is that most are based on the same pattern from Simplicity. It has a lovely neckline, square with rounded corners.

TRTSE-2-1 Simplicity4055TTSRCE-2-6TTSRCE-2-7But I want something different. I follow several Pinterest collections with actual Regency gowns from museums, and the necklines are all over the map. From those plates, I noticed that many of the outfits I’d seen at Austen events had aspects from the Victorian era, and the owner had been duped by sellers who called them Regency. Some vendors will advertise Regency/Jane Austen/Victorian/Steampunk/Pioneer/Medieval/Fantasy/Titanic for the same gown! When I read more, some sites suggested purchasing a vintage gown from the ‘80’s, which are supposedly close to the right design.

While looking at gowns, I also saw various recommendations on other parts of the Regency ensemble. I decided to put together an outfit from items not purpose-made for Regency costumes, rather, I would find clothing articles and accessories that would suit with a bit of modification. I would also aim for minimal need for crafting or sewing skills, since some sites were daunting because of phrases like “Buckram molding.”

TTSRCE-2-4I made myself a rough set of “rules” for The Thrift Shop Regency Costume Experiment (tTSRCE). Okay, rules are meant to be broken, and it may happen, but for now I have restricted myself to these guidelines for procurement of raw materials:

  • Things I find around the house.
  • Thrift store items, not just clothing, but trims, fabric, etc.
  • Similarly, vintage store items.
  • Free stuff from others.
  • New items on sale.

We moved to a smaller home a few years ago, and performed several iterations of radical de-cluttering, so most of the raw materials I could have used have already gone to charity. All my dated or ill-fitting clothing, old shoes, Hallowe’en costumes and materials, linens, fabric scraps, even patterns! I never anticipated this costume, and decided I had no need for them.

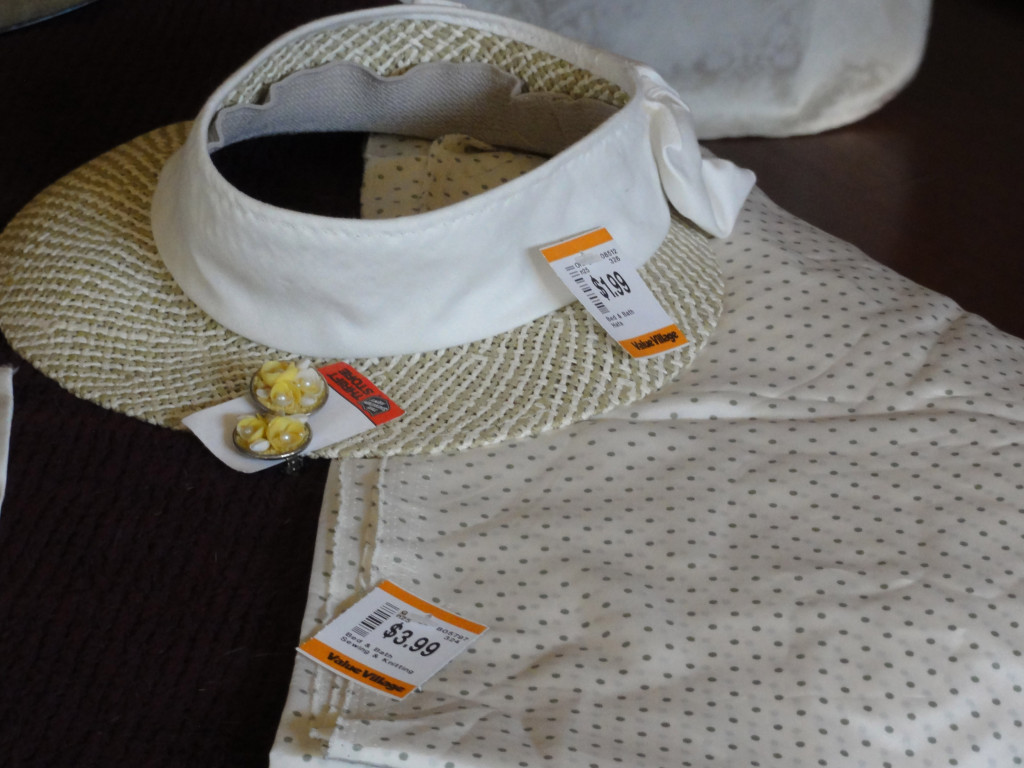
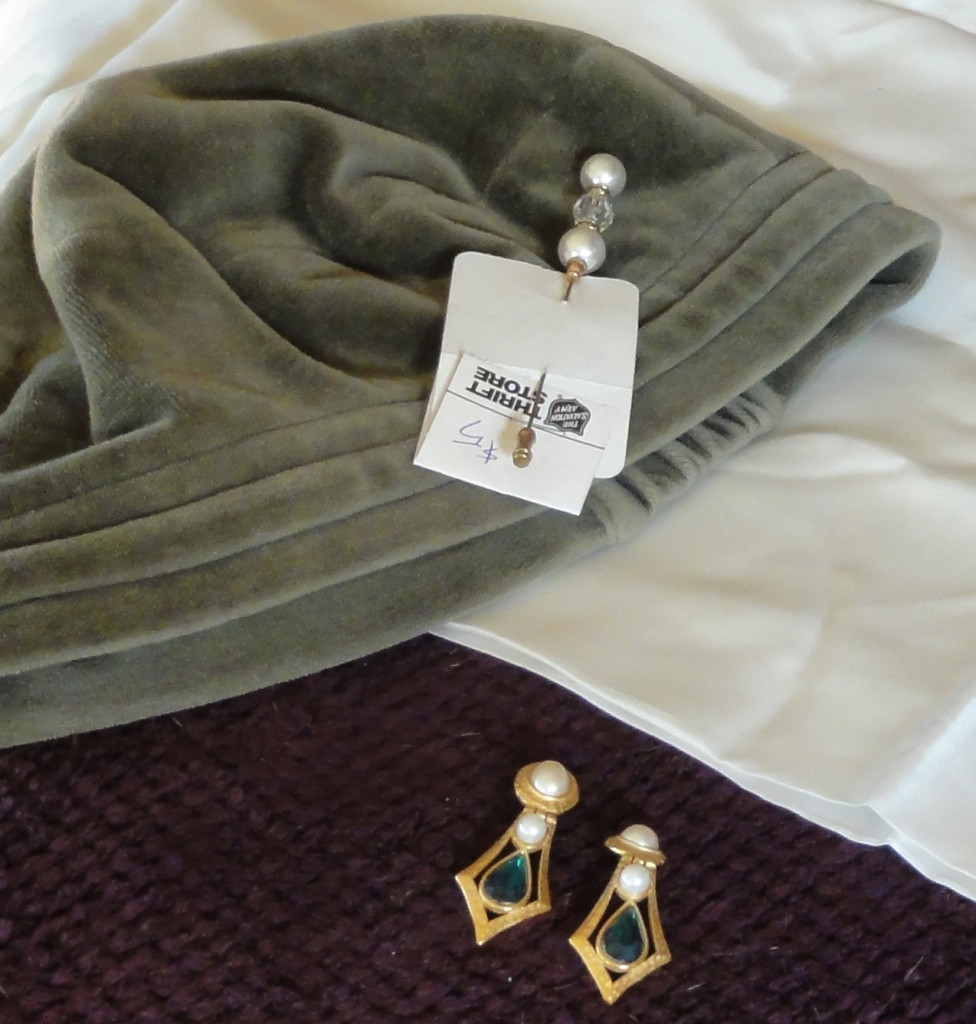
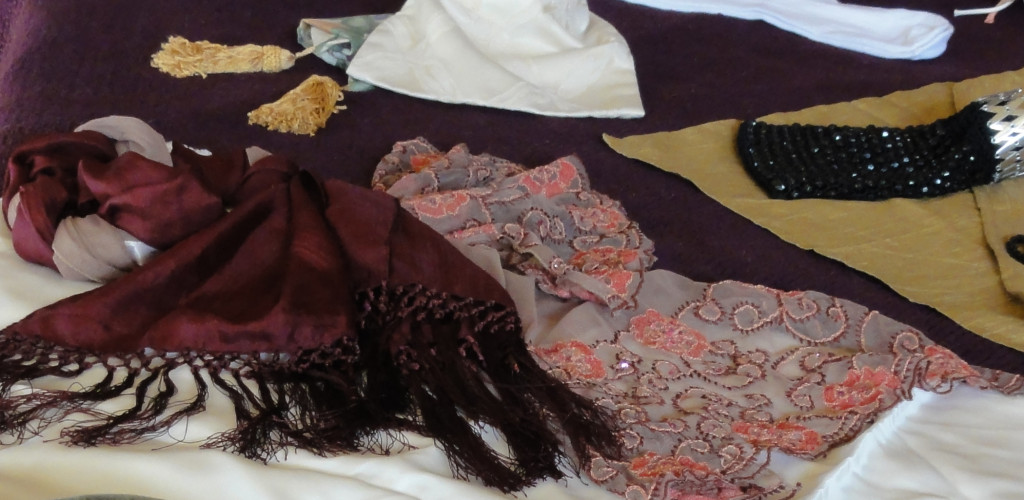
TTSRCE-2-2I started shopping last summer, and the photos here are some of the items I have procured so far, as well as ones I found in my own home, for example, the hat and earrings above. I found some items were easy to match to the styles from the Metropolitan Museum of Art; Boston Museum of Fine Arts; McCord; Victoria and Albert; Brooklyn; Swansea; and similar costume museums, and some more difficult.

TTSRCE-2-3I’m going to start the blog with a couple of easy, ones, so anyone who wants to do this will feel encouraged. But I’ll also address the difficult ones early, and return to them in later posts, to give readers time to find them.

  1. I’ll include photos for ideas.
  2. There is a scene in my next novel that involves a parasol, so I will be grading possible purchases or finds with a parasol.
    1. An open parasol means it’s an acceptable choice for your Regency outfit.
    2. A closed parasol means it’s a compromise because of at least one important feature, or more than one minor mismatch to Regency, but not terrible. It’s offered because I think some readers need a wider choice than a strict match.
    3. No parasol means the item is not a good choice, for a number of reasons, which I’ll list. It’s like a parasol in a ballroom: it may be pretty, but will be out of place. Even parasols will get parasol grades! Properties such as unreasonable cost, obvious synthetics that can’t be disguised, and post-1820 or pre-1795 Georgian fashion will fall into this category.
  3. There will be lots of links to help with areas that others have already done well.
  4. I’ll also offer a “Quick Checklist” to help a person who wants to assemble an outfit super-quickly, but not spend too much.
  5. I plan to post a completed gown and coordinating outfit by the end of June 2015. However, the accessories posts will each cover a broad range of situations, and with any luck I’ll have both a morning/day gown and evening/ball gown completed by the end of June. Outerwear and bonus items will follow.

TTSRCE-2-5UP NEXT: Shoes!