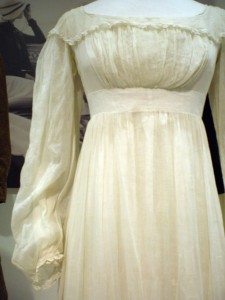
The Thrifty Regency Hat-trick!

No rabbits are involved in this type of hat-trick! However, once in cricket, four times in NHL hockey, and twice in rubgy, three hat-tricks, or three sets of three goals scored by the same player, have taken place in a single game. Other games also use the concept of a hat-trick.

Our Thrift Shop Regency Costume Experiment is also doing three tricks with hats this week—well, two are technically bonnets, and you’ll have to wait for them until next post.

You say, “What? You said three hats this week, now it’s only one?”

I reply, “Yes, because the post was a million years long, and your eyes would have glazed over. Instead, I’m doing two posts this week, and the other hats will be in the next one!”

And you say, “Two posts? YAAAAAYYYY! You’re our favourite!”

Of course I am. And every fine lady holds a parasol in a Regency ballroom, too.

~~~

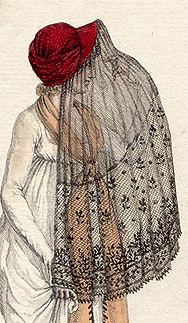
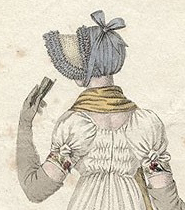
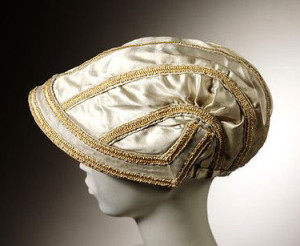
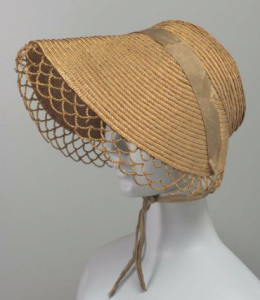
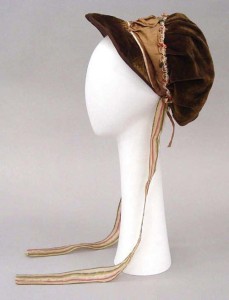
1812 capote croppedEnglish, 1805-1808  manchester galleries cropped  capote with veil croppedCapote Hat1804 capote cropped

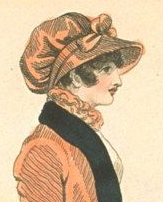
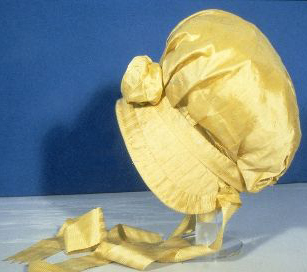
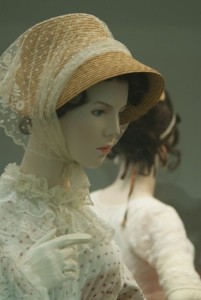
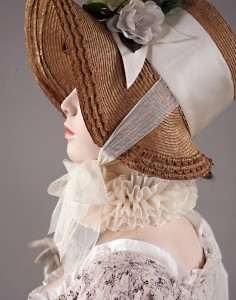
This is the most common type of hat at Regency costume events, probably because it’s fairly easy to make and is quite cute! It’s not nearly as common in Regency fashion plates or paintings, though; that’s where the poke bonnet shines. The capote is the one that looks like a tea cosy or shower cap over a brim that’s narrow in the back and moderate in the front, or goes about ¾ of the way around. The proper description is “a firm brim with a soft cap.”Woman's bonnet, 1807 Centraal Museum Utrecht croppedhat one potential materials of construction
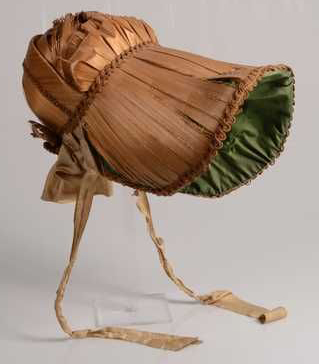
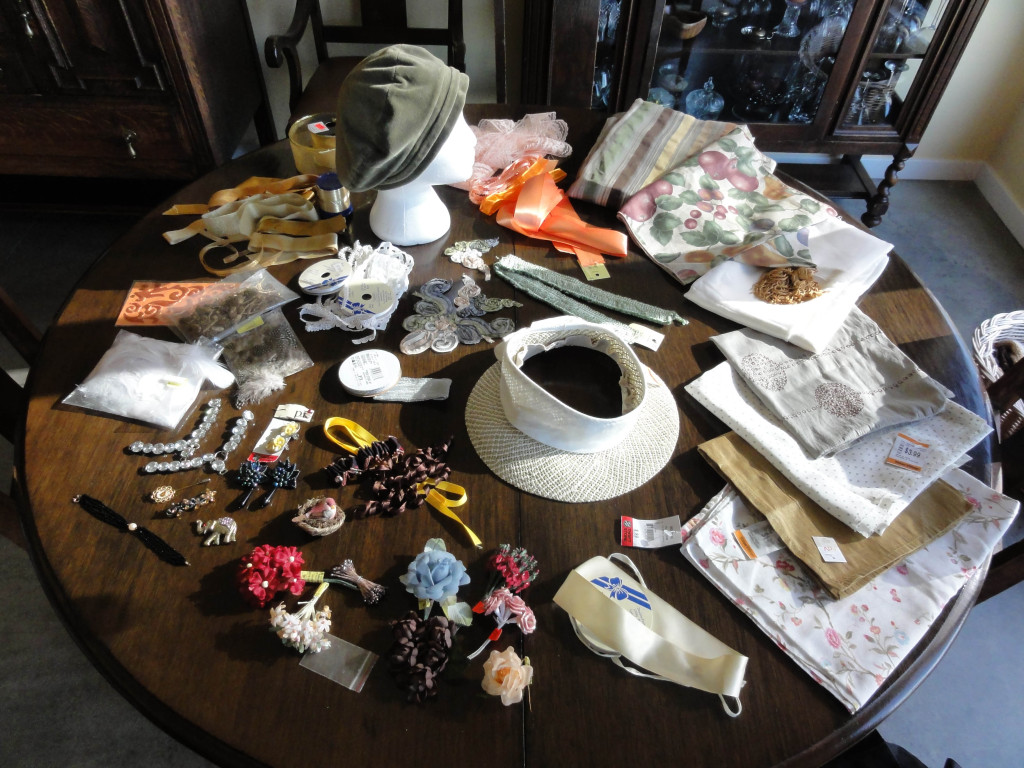
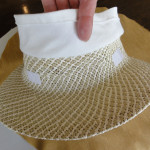
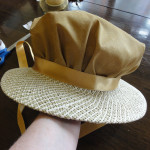
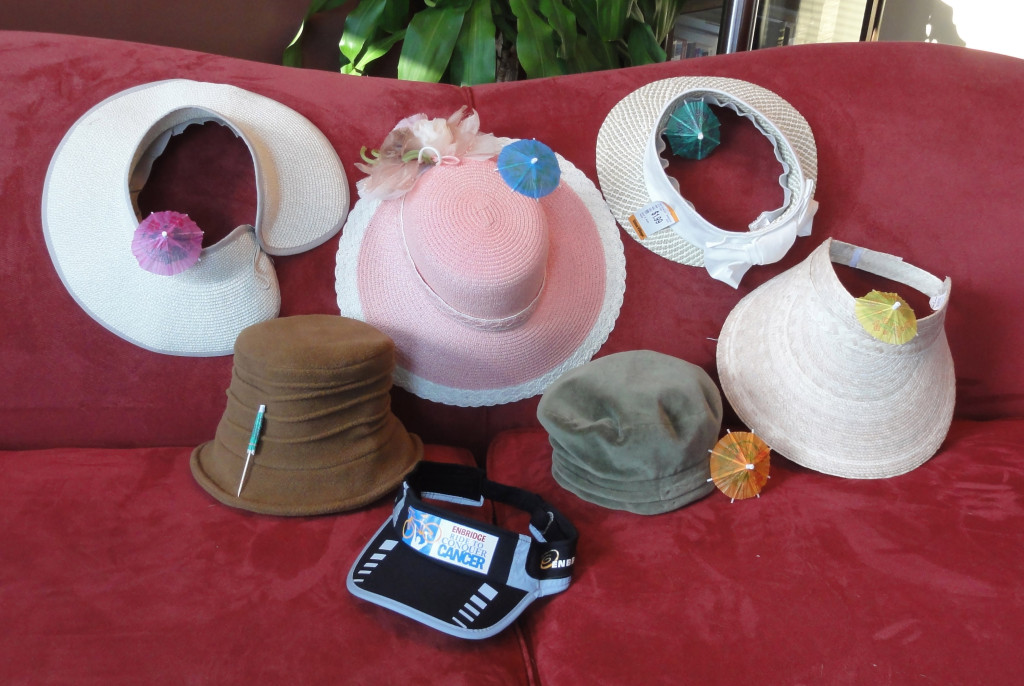
I found the perfect shaped brim in a green and natural-coloured straw visor with a mid-weight cotton band and bow. You can see all the fabric and trim options for all my hats above, along with this hat. Some are too bold, others too plain, and some too matchy-matchy.

I’m not using the little green velvet hat, as I love it for everyday modern, and won’t modify it. I may dress it up as a turban, but I like the table-runner turban, which goes well with the gown I like best for the ball at the Louisville JASNA AGM this fall.

I chose one of the pair of 19″ square gold silk dinner napkins as the soft cover for my capote.
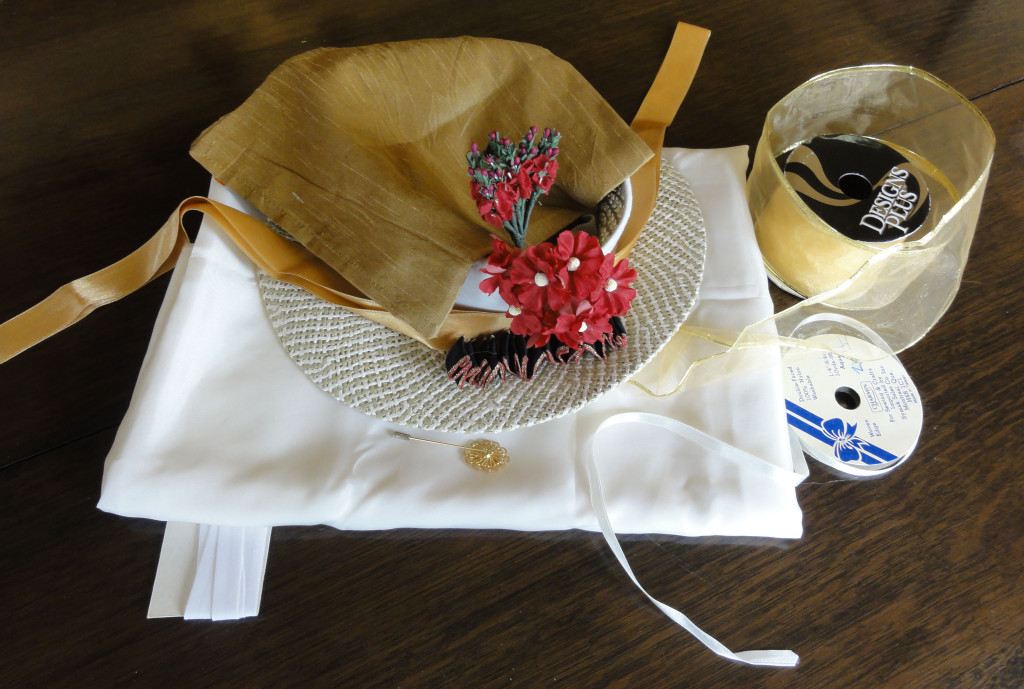
hat one materialsI removed the bow from the hat, but not the fabric, choosing instead to turn it up to help support the new fabric.

Here are the steps used to make the cover, with accompanying photos (click on thumbnails to see larger image):

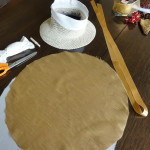
  • Cut the napkin into a circle (procedure for an easy way to cut a circle is at the end of this post).hat 1 put tape at quarters one inch longhat 1 cut lining into circle too and remove ribbon from hat
  • Cut a matching circle of your lining material.
  • Measure distance around hatband level. Cut a length of 1″-1½” wide ribbon about an inch longer.
  • Place 1½”-2” strips of double sided tape about ½” above where the brim meets the crown of the hat (under where the hatband would sit) in four equal spaces; scrub/burnish with your fingernail to ensure they’re stuck.
  • Align the grain of the napkin fabric circle front to back and attach to the front and back pieces of tape; burnish with your fingernail. Repeat with the tape at 1/4 marks.hat one put top on tape align grain front to back fabric in quarters
  • Place another 4 pieces of tape half-way between the first four and press down the centre of the fabric between them. Scrub with your fingernail to make sure tape holds.
  • Continue putting tape half-way between previous positions and pressing down cover until tape is continuous or gaps are less than ½”.
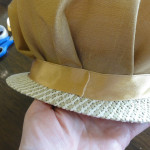
  • hat 1 fold end of ribbon and tape underhat 1 put new tape between and continue until sixteen or moreFold in half and position fold at front centre, then wrap around to back. Fold one end under and tape underneath to ribbon below it.
  • Adjust folds in napkin fabric as needed to get the look you like.
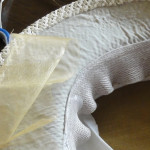
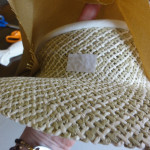
hat 1 under brim lining ugly so add start center front pleating finger widthMy hat was lined under the brim, but it was unattractive. It added stiffness, so I decided to leave it and cover it. A pale gold 3” wide wire-edged ribbon was about the same width as the front of the brim, so I chose to use it, removing the wire edges first. It will be easier if your fabric is wider than the space you want to cover.

Here is how I attached a pleated lining to the underside of the brim:

  • Mask off the areas you don’t want to glue: masking tape works well for narrow spaces, and paper for others.
    • I covered the interior circle of the hat with a loose piece of paper, then made loose arcs of paper about 6 inches wide to tuck under the brim to protect the napkin cover.
    • I used 2″ strips of masking tape to cover the edge that matched the top.
  • Put newspaper on the floor of your work area at least 3 feet square.
  • Spray glue on the area you wish to cover.
  • Wait 5 minutes. The glue should be sticky enough to hold fabric in place, but not so sticky that it can’t be peeled back and adjusted: a bit stickier than “Post-it” notes.
  • Start at the centre front of the underside of the hat brim and fold pleats in opposing directions, with the outside of the pleat slightly wider than that at the crown part (centre). A nice size is finger-width. The stiff net material I worked with kept its fold nicely, so I would recommend a stiff but not heavy fabric.
  • Continue down each side, aligning the outside edge.
  • Cut a ribbon the same size as your hatband ribbon and fold in half. (You can also use bias binding tape, a cloth tape with lots of give.)

If you are not lining the hat:

  • Trim the brim lining to just inside of the hole for your head (inside of headband).
  • Run double-sided tape along the inside edge of the pleats, just barely on top of the pleats, and continuing past them inside.
  • Start at the centre front with the middle of the second ribbon or bias binding tape, and attach the outer edge of this ribbon along the edge of the tape just to hide the edge of the pleats.
  • Ease around curves, that is, slightly compress the short side of the length hat 1 add lining similar to top only can use longer lengths of tapeof the ribbon edge without folding, so the long side can match the curve.
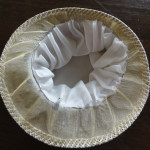
  • At the end, fold the edge of one end of the ribbon under. Use double-sided tape to attach it over other end for a neat finish.

To line the hat:

  • Take the circle of lining fabric that was cut the same size as the napkin circle and place pins at each ¼ around the outside edge.
  • Using the second ribbon or bias tape as above, run double-sided tape along the length of the ribbon along one edge only. Mark ¼ lengths with pins.
  • Attach the circle of lining fabric to the ribbon about 1/3 of the way up, pinching pleats in along the way. Leave the ends free in case you need to adjust when attached to the hat.
  • Continue from the third point in the section above. Remove pins.
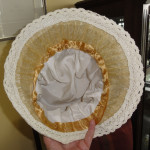
hat 1 cover joint between linings with ribbon and optional lace edgeTo add lace or ribbon to the outer edge of the brim:

  • I wasn’t crazy about the look of the unfinished edge of the pleats, so I decided to add lace.
  • This can be done from above or below.
  • Tape the brim edge with double-sided tape the entire width that you expect the lace to cover.
  • Start the middle of the lace at the center front, similar to how you’ve attached the ribbon in the previous section. Ease in the lace (push edges together slightly but don’t fold) so it does not “roll” over itself.

hat 1Final trim:

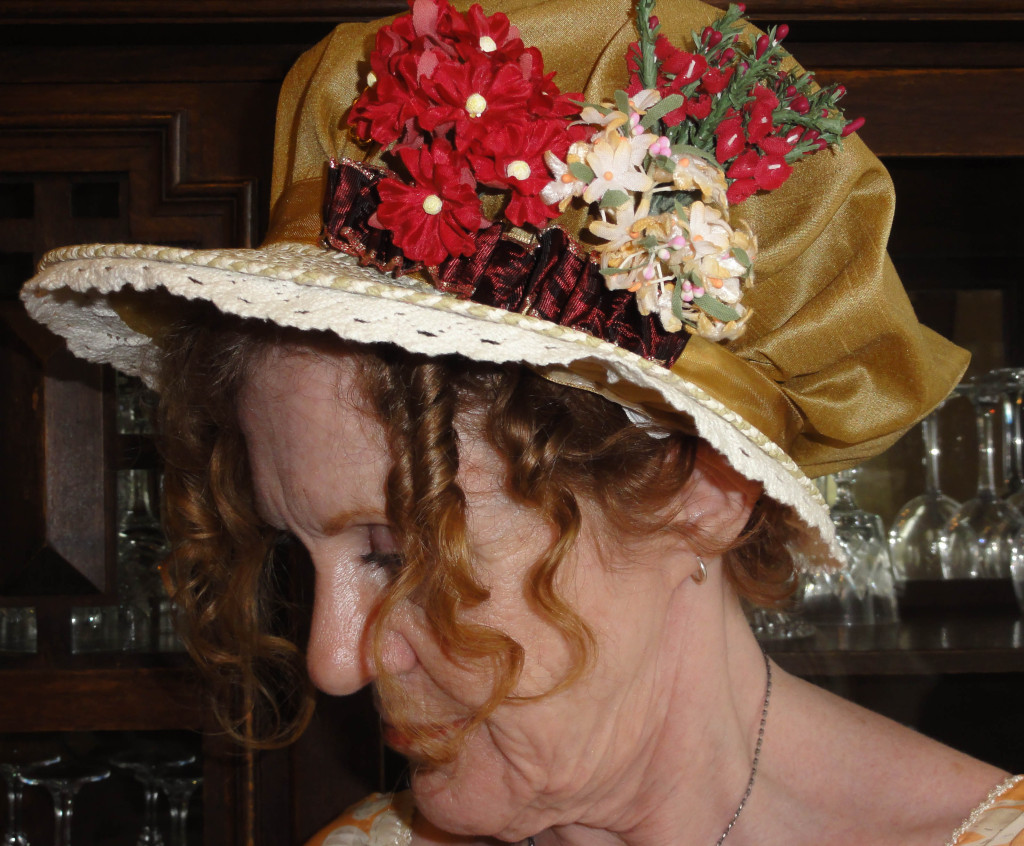
  • I used some small bouquets of fabric flowers purchased on sale at a fabric store, a bit of ribbon folded accordion-style, and a stick pin with a petit-point rose in it, made by Grandma Lauder!


~~~

Total cost for this hat: Under $10!
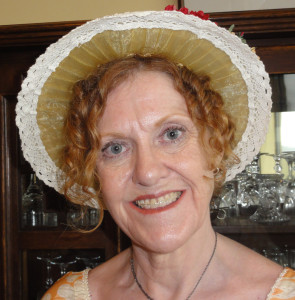
  • hat 1 front viewThe visor was $1.99, and the napkin was in a set of two for $1.99, both from Value Village.
  • Value Village was also the source of the ribbon, in a “grab bag” of more than a dozen bits for $3.99, as well as a 2m piece of cream lining satin for $1.99.
  • The lace came from the spaghetti straps of a “Frankenstein” dress that was $14.98 and still has about 4m of other types of lace, plus some large panels of embroidery I plan to use on an evening gown.
  • The little flower sprigs were $.50/each times three.
  • I used a half package of double-sided tape for $2.99.

~~~

Trimming your hat or bonnet:

Flowers, foliage, feathers, and such are common on the sides, and sometimes on the back or the front of Regency headwear. We can’t tell from photos whether both sides of the hat were trimmed the same, if they were asymmetrical but both trimmed, or if only one side had adornments.
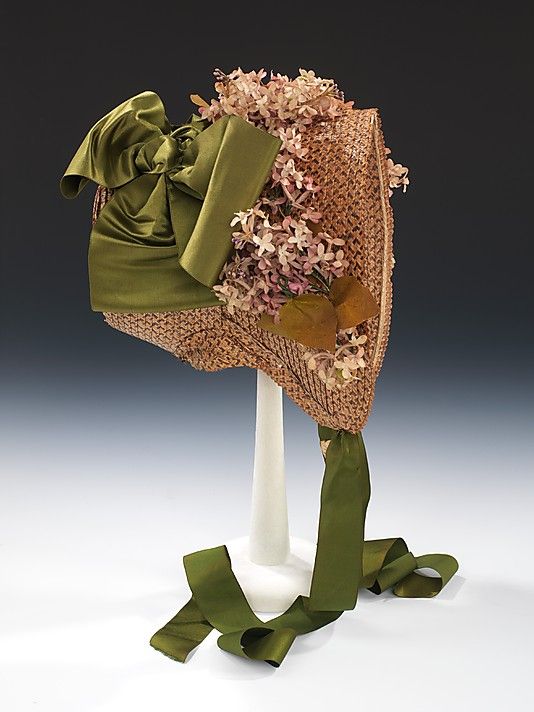
poke bonnet metThese days, it’s really up to the wearer, as long as you make an effort to have a Regency look. Like gowns, the amount of fussiness and elaborate details increased as the Regency went on.

A little garnish does go a long way, so here are some ideas to whet your appetite.

http://historicalsewing.com/trimming-regency-bonnet-ideas-instructions
http://www.janeausten.co.uk/trim-your-regency-bonnet/
http://www.songsmyth.com/hatsandbonnets.html

hat 1 side view~~~

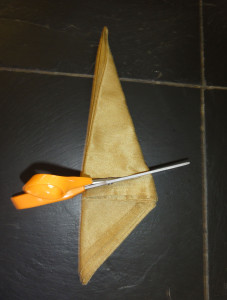
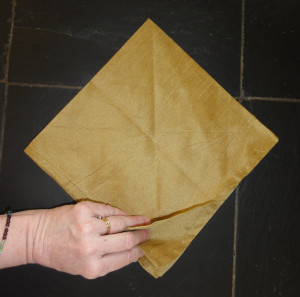
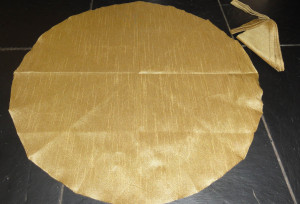
To cut a circle from a square:

hat one fold three

Fold into quarters.


hat one fold 3

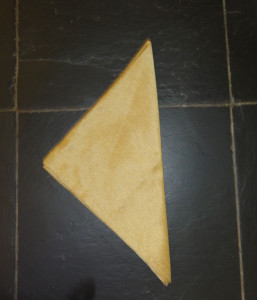
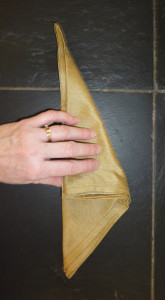
Keeping centre point on top and open edges towards you, fold again, twice.

hat 1 fold 4


hat 2 cut top into circle

Cut off uneven ends at an angle so two long sides are about the same length from the centre point (top).


hat one top made into circle

Unfold and look where it needs to be trimmed. Refold if it will make it easier to trim. It doesn’t have to be perfect for this situation. Press out the creases before you use it.


~~~

NEXT POST: the Pink Hat goes all bonnet on tTSRCE!

Signature  file for tTSRCE

~~~

Special Headwear for the Grown-up Lady

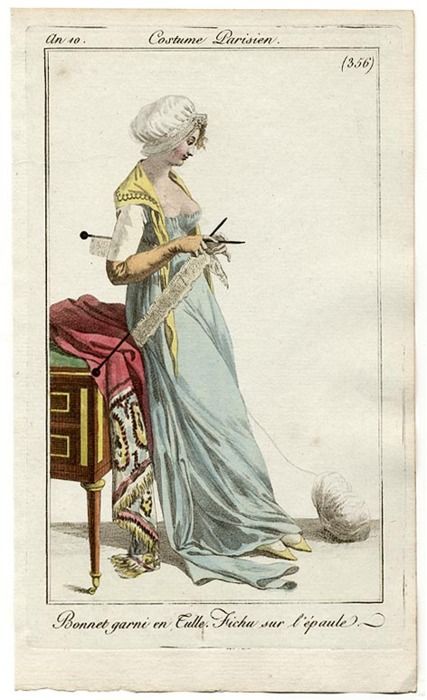
1806 capIf you asked a reader of Regency Romance what character would wear a cap, they would say a married woman or a spinster. But what makes a spinster, and why would they wear a cap? The reader would reply, an unmarried woman past her prime would wear a cap. But they might be vague on why.

To signify she was off the marriage market? To indicate her age? To allow her to avoid fussing over her appearance for yet another unproductive Season? So she could sit on the sidelines and not dance until the handsome rake/Lord noticed her? Ah, the appearance of a Regency Romance cliché!

The whole thing must have been confusing. Married women wore a cap, so it would follow that the odd time, the rake would have flirted with Lady Offlimits—until Lord Offlimits showed. There might be a better chance of it, since the spinster would have been passed by repeatedly, implying she was never as vivacious as Lady Offlimits. Unless, of course, she was crossed in love. Another Regency Romance cliché.

For the 21st century woman, the choice of a cap is personal. I figure it’s a lot like the turban: a way to hide your non-Regency hair indoors when your hat or bonnet must come off. If you’re married, or single and proud of it, you certainly have the option, and would have in the Regency. We’ll just assume that you have to be a grown-up to wear a cap: old enough to be married.

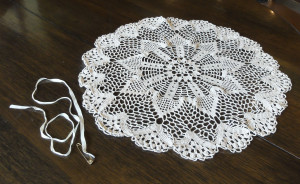
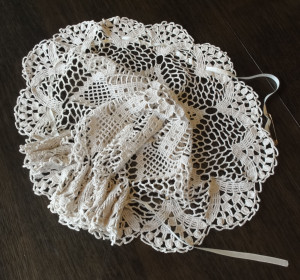
doily cap materialsdoily cap tie off start


doily cap threading one


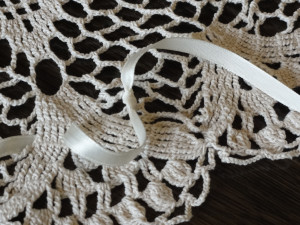
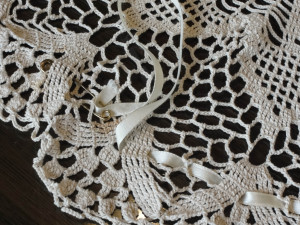
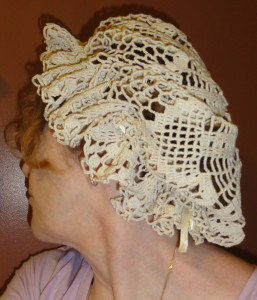
One of great-Grandma Lauder’s tatted doilies, 21 inches in diameter, was easy to make into a cap. I tied a matching ribbon to a point about 2½” from the edge and pinned a safety pin to the other end. The safety pin helped me to weave the ribbon in and out around the doily at 2½” from the edge until about 2½” from the start point, gathering in the fullness. I tightened the ribbon so the “cap” fit my head loosely, then tied the other end off, too. Then I tied a bow to tighten the cap with once in place.

It’s a bit big for my head, and droops, but I have a small head. I still think it looks rather pretty.doily cap gatherdoily cap

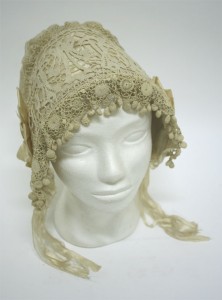
Bonnet  cap 1806

1806 cap/bonnet

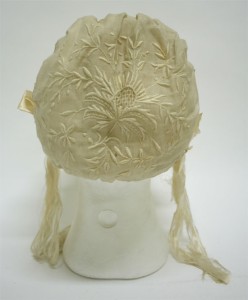
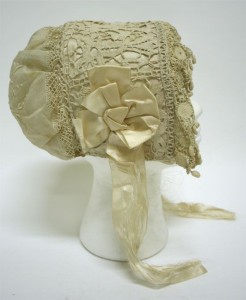
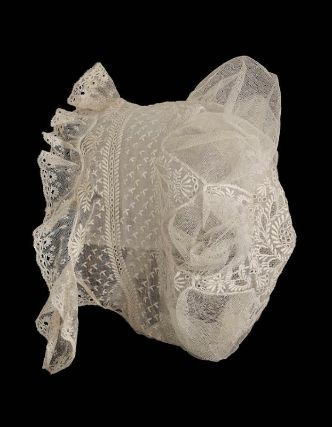
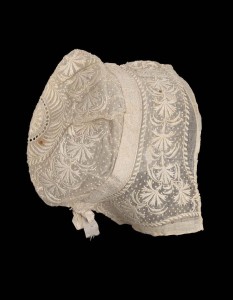
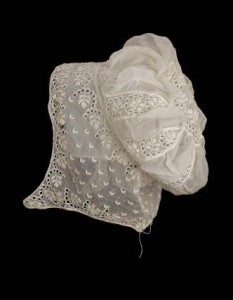
The trouble is, I doubt many caps looked like this, so at best, it’s graded as a “closed parasol”: okay in a pinch, but not correct. The one shown from 1806 has some similarities in appearance from the front, but it’s not the same construction. You see, I had mistaken the idea of a lace cap as a cap made of heavier lace like tatting, and had not paid a great deal of attention to real examples.

In actual fact, Regency caps were made from  fine cotton, muslin, or linen, often with whitework embroidery, including eyelets, drawn thread techniques, and areas cut away so lace-like darning can fill the area.

1806

Back view showing embroidery on 1806 cap/bonnet.

side view, 1806 bonnet

Side view, 1806 cap/bonnet


Museum of Fine Arts, Boston lace cap, 1815

Lace cap, 1815, Boston Museum of Fine Arts

First half 19th century, Europe - Cap - Cotton mull with cotton embroidery, linen bobbin lace insertion, and silk ribbonmfa.org.


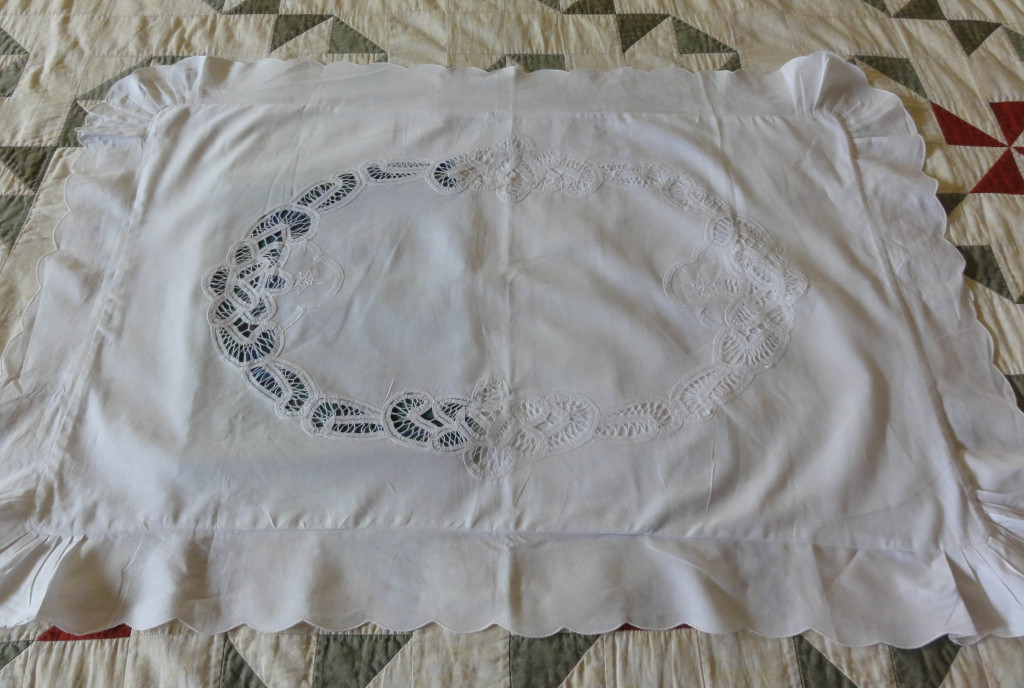
Sources of whitework might be found on a pillow sham as seen below, as well as handkerchiefs, scarves, or tablecloths. The shams, found at a small thrift shop for $1.99 for the pair, have some large drawn thread panels that can be used to make a cap, but it will be complicated.pillow sham for creating cap

The first step will be to figure out how best to select the panels of embroidery, then where to cut them for the right shapes to piece together for a cap. The panels should be sewn together because of the complex shapes and need for fine, flat seams. Ruffles on the front edge of the hat and ties at the throat seem to be optional, which saves me some fussing.

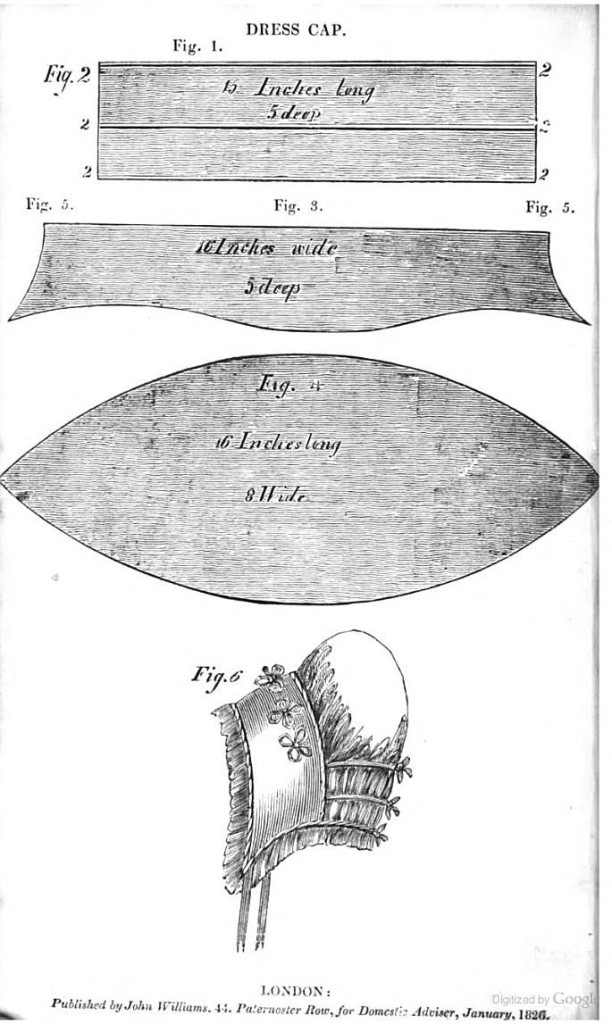
I’ve been watching for a pattern that may better suit my situation before I start this project. The one shown may not be perfect, but it may be all I have.

The Female's Friend and General Domestic Adviser Robert Huish~

With all the mention of what your hair will look like if you remove your headwear, and all the alternatives, we have yet to spend any time on hats and bonnets! Is that a bit like Chicken Little, worried about something unknown that may never come to pass?Hat from Karl August Hagberg painting1810 from Ackermann, three types of headwear


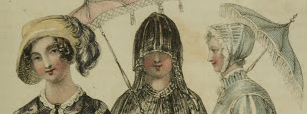
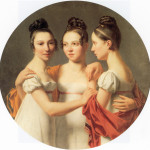
napoleon exhibitIt could be that your event is an out-of-doors afternoon Promenade. A Regency lady would wear some kind of head covering outdoors to give her an air of modesty. To shield her delicate skin from the sun, she may also carry a parasol, but it will not be a substitute for headwear, as in the drawing of the set of three ladies above.

Unless you plan to spend an appreciable amount of time indoors during the event, you might never need to remove that hat while in your Regency persona. Alternately, if you plan to attend a Regency ball in the evening, and take on your persona indoors, you need not don a hat or bonnet in the first place. My event, the Louisville, KY Jane Austen Society of North America Annual General Meeting in October 2015, will call for both.

1805 to 18101810 bonnet mfaHere are some of the wide variety of designs for Regency hats and bonnets from around 1810, as well as the original seven modern hats I collected to demonstrate what you can find in your closet, showing which ones will work and which are devoid of the famous grading parasol!

cap 1810 metChapeau a la Pamela. France, circa 1810.first 7 hatsNEXT POST, I’ll give some ideas on how these hats can be made into Regency hats or bonnets, and show step-by-step how I made a Capote hat with one of them. I may have time to make a second hat or the whitework cap before then, too.

~

Here is a cute article by Anna Snyder on the clichés mentioned above: How To Tell If You Are In a Regency Romance Novel

Regency Bad Hair Day? Wrap a Turban!

Mihrimah Sultan, daughter of Suleyman the Magnificent and Roxelana of Ukraine

Mihrimah Sultan, daughter of Suleyman the Magnificent and Roxelana of Ukraine

When Regency fashionista Lord Byron was invited to visit Topkapi Palace in 1810, the Ottoman Turks refused to recognize his peerage and, as a non-diplomat, he was ranked behind everyone else. In hopes of changing their minds, the well-known dandy arrived in the most impressive “scarlet regimentals topped by a profusely feathered cocked hat,” but the Ottoman Turks were not swayed: he would take his place at the end of the line, behind all the staff of the embassy.

Woman in Turkish Clothing--Jean Etienne Liotard

Woman in Turkish Clothing–Jean Etienne Liotard

According to Stratford Canning, the embassy secretary and a good friend, Byron shot them a “look of scornful indignation which so well became his fine imperious features” and stormed away to sulk in his chambers over the ordeal.(1)

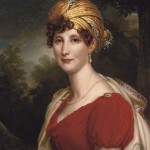
Marie Therese Princess von Esterhazy (Almack's Patroness)--Alois Maria Martignon

Marie Therese Princess von Esterhazy (Almack’s Patroness)–Alois Maria Martignon

I visited Topkapi 15 years ago, and Byron should have counted his blessings for the chance see the inner sanctum, which at that time was rarely seen by outsiders. Obviously, he wasn’t the fashion scout who brought back the turbans shown in numerous fashion plates and paintings in the late 18th and 19th century, including the Regency. Marie-Louise-Élisabeth Vigée-Lebrun was partial to them; they’re featured in many of her paintings.

(Click on thumbnails for larger images.)


Self-Portrait (1800)--Marie-Louise Élisabeth Vigée-Lebrun

Self-Portrait (1800)–Marie-Louise Élisabeth Vigée-Lebrun

Mlle du Pront (1812) --Marie-Louise Élisabeth Vigée-Lebrun

Mlle du Pront (1812) –Marie-Louise Élisabeth Vigée-Lebrun


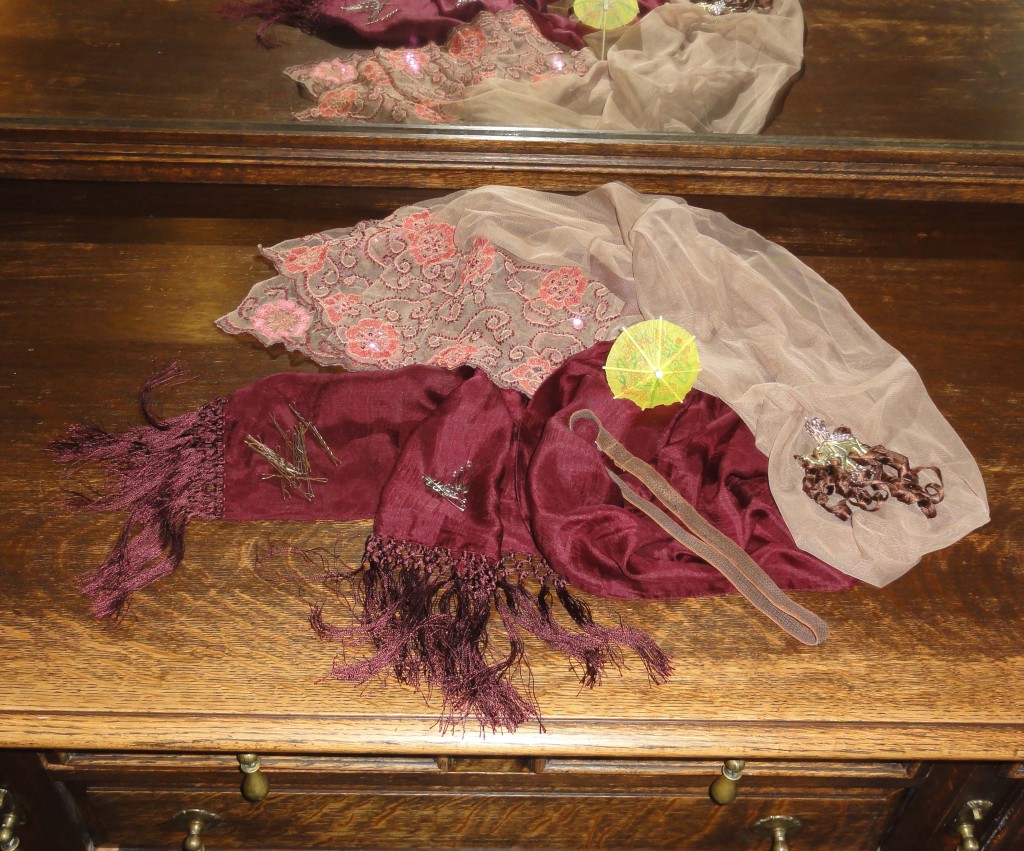
In the twenty-first century, the turban is a great alternative to a fancy Regency hairstyle for those of us with short hair or unable to style our own complex up-do. You’ll need an attractive silk panel long enough to wrap around your head twice and wide enough to cover your hair while doing so (such as an oblong scarf), lots of bobby pins and safety pins, and decorative trim.scarves table runner and pareo potential turban plus hair piece

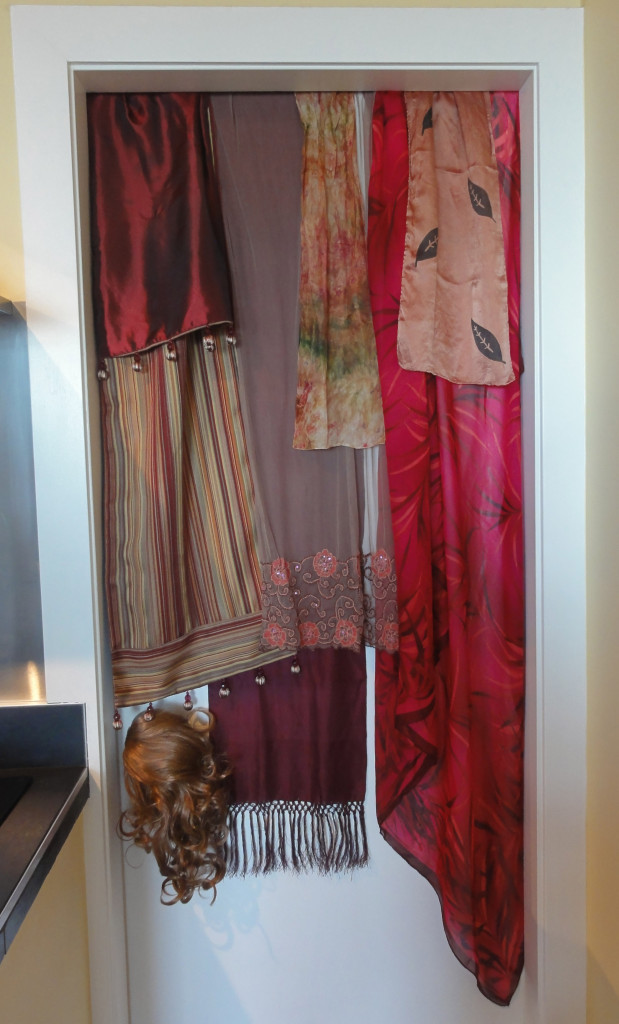
I had a choice of a number of scarves, table runners, and a pareo, as shown. Some fabrics and prints didn’t look Regency, so I didn’t use them. Dresser scarves; a length of smooth silk or similar fabric 10-20” wide and 4-5 feet long, with neatly finished ends; a small, light silk shawl or wrap; or similar fabric finds will work. It’s nice to have fringed, tasseled, or otherwise decorated ends to dangle, but not necessary.

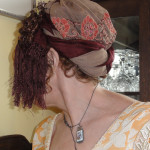
turban 2 raw materials incl pins, hairband, bobby pinsFor my first turban, I chose two oblong scarves in complimentary fabrics, one with a lace pattern on the end, and the other with fringe. They were purchased at Value Village for $5.99 and $3.99.turban 2 first panel on head

After trying to create the look a couple of times, I realized a hairband was a helpful cheat—the kind that has elastic threads woven through so it’s a bit “sticky” both sides—when set just behind the front curls of my hair to hold the slippery fabric from sliding off my head. Here are the steps I used for this turban (for larger images, click on thumbnails):turban 2 drape of 2 scarves

  • Anchor the lace end of the lighter-coloured scarf to the hair band using bobby pins; cover the crown of the head.
  • Arrange the second scarf so it drapes behind the front curls on one side; tuck bobby pins under it to anchor it to the temple.
  • Drape this scarf across top of head, attach with bobby pins hidden underneath.
  • Use a safety pin or two to join both scarves at that point.turban 2 twisting the scarves
  • Loosely twist scarves and wrap around the head.
  • Use bobby pins hidden under the edge to anchor the first turn and hidden safety pins to anchor the second turn.
  • Near the end of the wrapping, twist the second scarf back so the second fringed end drapes alongside the first and tuck the other end of the lace scarf around the turban so it looks nice.turban 2 final wrap right side
  • Secure with safety pins hidden within the folds.

Attach your choice of decorative trim: I used some curled ribbon, an elephant from a card holder, and some floral stamens, tied together with fine wire, with a safety pin attached behind to pin the arrangement to the turban.turban 2 left rearturban 2 right rear

turban 2 decorationUpon scrutiny, when I sorted my photos for this blog, I realized this turban is a bit small and under-decorated. I suck at the latter, and you’ll see that when we get to hats, too. But I try, and no excellence is acquired without constant practice! **Squints eyes in suspicion that Martha Stewart may be channeling Lady Catherine de Bourgh!**turban 2 frontAn interesting piece of cording or ribbon can be attached to the scarves when you first join the two, then twisted along with them; ideally it will make a full circle with them. A third scarf, or sturdier/heavier fabric, would make a more noticeable head dress, and lighter coloured, bigger trim would help.

Aside: A couple of weeks ago, I was in Mexico and scored a couple meters of ribbon, parasol fringe, wide lace, braid for my spencer, and an ostrich feather, for $5 total, but misplaced the ostrich feather, or I would have used it to dress this up. I’ll find it and use it later!

~

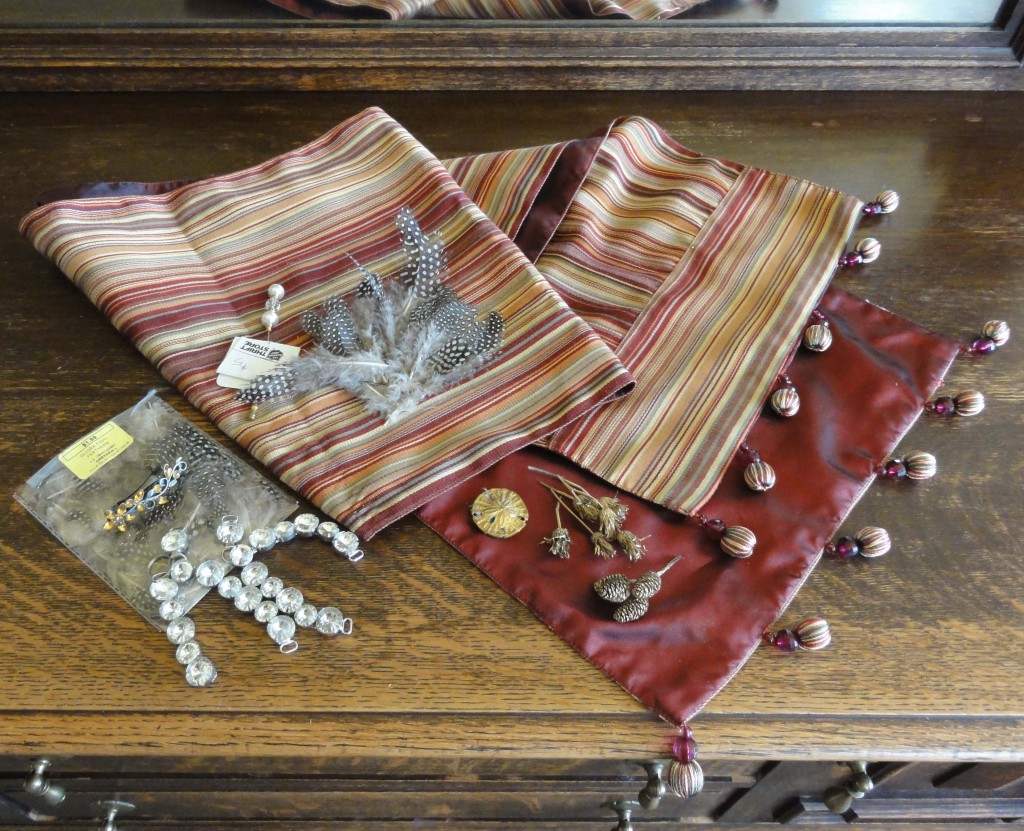
Turban 1 materialsThe materials for my other turban can be seen: I scored a Pier One lined silk table runner with cool thread-wrapped ball tassels for $7.99 at Value Village. Someone had tossed it because of a small amount of candle wax, which I removed by placing an absorbent cloth over the wax, then using a hot iron to melt the wax.

I’ve shown extra trim ideas: “jewels” from a pair of broken thongs ($1 at Value Village), an old barrette of mine with a topaz-coloured leaf design, dried and gold painted seeds, and a $5 hat pin from Salvation Army.

Be imaginative when looking for trim. You can attach a safety pin to your decoration with sturdy tape like duct tape.

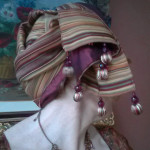
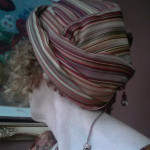
The heavier fabric was difficult to work with, and I struggled with it for a long time, even though I used a simple wrap method in the video link below. Had I used a lot more pins and the hair band, I think it would have taken less effort. The end product looks nice, though.turban 1 croppedturban 1 right rear croppedturban 1 left rear croppedI used a bobby pin to secure a fan of guinea fowl feathers (never tasted it—apparently it’s quite good!), and a Swarovski crystal stick pin I got as a freebie years ago in Innsbruck when I bought a crystal kitty. I used double-sided tape to add a sand dollar medallion that I think came with a bookmark that fell apart, but I can’t be sure—there were short pieces of ribbon still attached. I’d tossed it in with buttons and beads. I do keep some stuff!

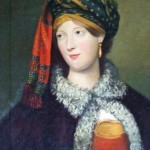
Lady Charlotte Susan Maria Bury (née Campbell) (1812)--Archibald Skirving

Lady Charlotte Susan Maria Bury (née Campbell) (1812)–Archibald Skirving

These three links show alternative ways to wrap a turban, and some nice trim ideas:

Lynn McMasters shows three ways to make a turban. There used to be a video for this but I can no longer find it.

American Duchess has a video of a simple technique for wrapping a turban. I used a similar technique for the table runner turban. You don’t have to do the end twisting steps if you like your turban simple—just pin them to hold.

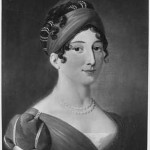
1810s Eléonore de Montmorency

1810s Eléonore de Montmorency

Jen Thompson makes her turban like a cap, so you make it and then put it on, rather than twisting it on your head. Sewing is involved in this one.

Portret van Catharina Valentina van der Kun (1811-1813)--Gijsbertus Johannus van den Berg

Portret van Catharina Valentina van der Kun (1811-1813)–Gijsbertus Johannus van den Berg

I have a brimless soft velvet hat that I used on a visor for the hat mock-up shown in a previous post with my morning gown; it looks a lot like the first part of Jen’s tutorial. A fringed silk scarf wound around it, and perhaps my wayward ostrich feather, and it would be just the thing!


~

A follow-up to my last post: The rat on the door knob in the photo of scarves on the door is a clamp-on hairpiece I purchased for $9.99 at Value Village, then shampooed and conditioned. It’s got a nice wave and it’s a good match to my hair—and my hairdresser could make it perfect for an event. At my age, “redhead” is either memories of my youth or an hour at her salon!

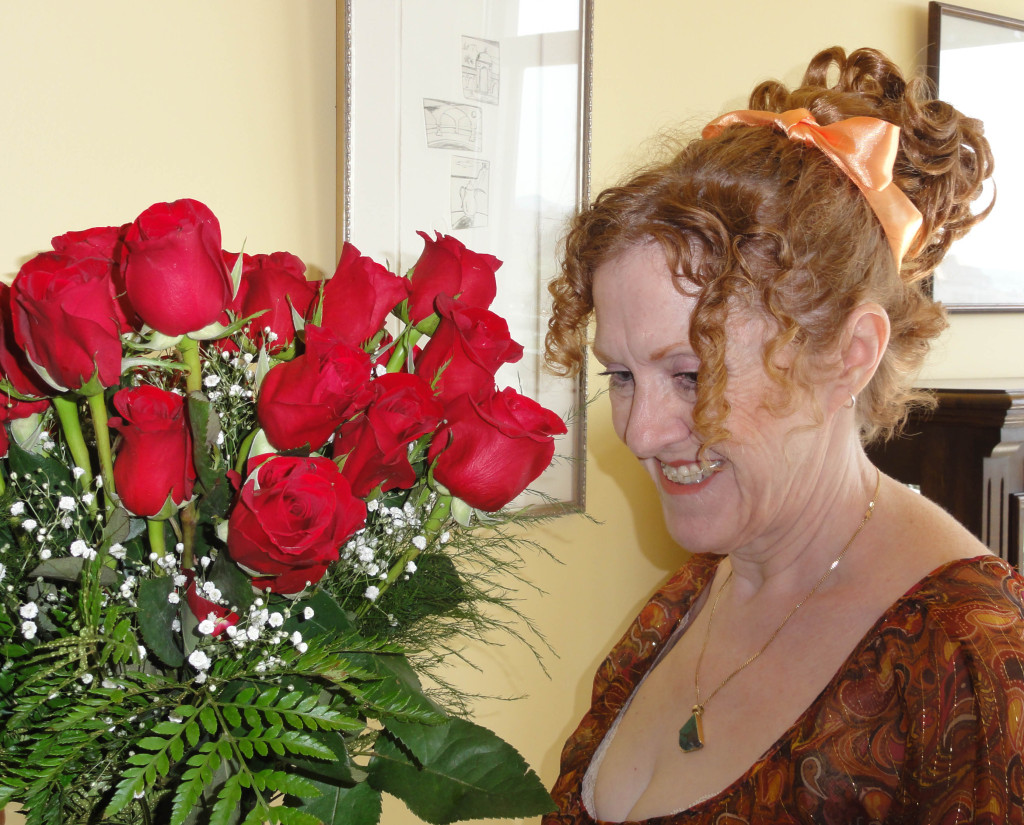
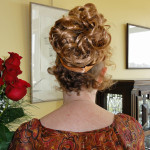
I had a little time yesterday, so I tied it into a ponytail (which looks like a bun over the hair clamp) and then pinned the waves into curls, letting them curve the way they wanted to, and sprayed everything liberally. Then I put most of my own bobbed hair into a ponytail, and clamped the thing over it. The bun looked odd, so I tied a ribbon around the base of it. This weekend I had my 30th wedding anniversary, so I thought I’d show you the roses along with my ‘do.hair in fall with roses

hair in fall back viewHad I more time, I’d have fussed with the loose ends of hair at my nape to make pin curls. One could tie a twisted pair of scarves around the hairline and in behind the curls—essentially, the turban I made already, but without covering the back of the head.

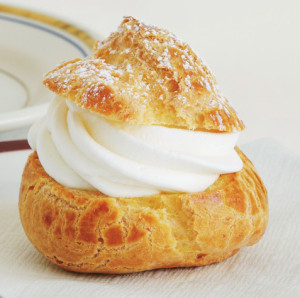
This hair-do is huge compared to my intention. If I decide to wear it for real, I’ll have to figure out how to do it so the curls wrap around the base rather than look like a pouf on top of a bun. cream-puffsThat’s a look reserved for pâte à choux and crème fouettée. Yeah, that emoticon! Hey—it looks a bit like… like… a turban!


Regency print detail c. 1803 Here's an example of a turban a woman of fashion might have worn.turban and sleeve 3turban and sleeve 2turban and sleeve 1


Here are some more turbans, and some sleeve ideas for that dress!


~

NEXT POST: For the married woman or spinster, another sneaky way to hide your hair is to wear a CAP! When you go outdoors, you plop your hat or bonnet over it. It’s not a dressy enough look for a ball, where the turban is a better choice, but for day-wear, it rocks! PLUS a sneak peak at HATS! Be there or be square.

~

1. Richmond, Steven (2014): The Voice of England in the East: Stratford Canning and Diplomacy with the Ottoman Empire. London: 2014 I.B. Tauris and Co. Ltd.

~

NEWS FLASH!! Edited May 4 9:27pm PDT to add Livia (Guiggioli) Firth’s Plastic Bottle gown!

The Thrift Shop Regency Costume Experiment started as a project to obtain a more affordable, nicer style of gown without designing it and sewing it myself (although the design part is coming into it in a big way, and my stitch ripper is getting a workout!). I’ve always been a sustainability advocate, so it was natural to re-use beautiful “found” materials. As I delved farther into this project and started to get feedback, it became evident that the repurposing/upcycling aspect was huge to others. I started to pay attention to it, rather than just assume it was an ordinary thing to do.

I’d love to snag Livia’s Antonio Berardi gown after the Met Gala, to remake. (We love the Met historical costumes on this blog!). She’s so tiny, even with the beautiful trailing wrap, I doubt there’s enough fabric there for my back gathers! A sketch of the back detail of her gown is shown with this article and in this photo. She sure looks like she’s having fun!

~

May 26, 2016 update on tying the turban:

At the Louisville JASNA AGM, a vendor showed Author Linda Beutler and I an easier way of tying a turban than the method above or in some videos. Women often start from the back, like we tie bath towels on wet hair. The vendor said a Canadian showed her that if you first position the middle of the turban scarf across the front of your hair, just behind the curls, it’s easier.

You cross the ends at the nape of your neck and loop them back over themselves. Pull the ends forward and twist the fabric as desired. Bring the ends up over the first bit, cross them and loop back over themselves again. Tuck or safety pin ends to hold in place, or tie in an attractive knot. It’s nice to leave one or the other end dangling, especially if it has fringe or an attractive design, such as that of a Kashmir scarf. Fold and tuck in the parts you don’t want loose and pin where needed, hiding the pin in the fabric folds. Secure to hair with bobby pins as needed, though I didn’t need near as many with this process.

My turban looked good on the first attempt, whereas the other way, I had many lumpy failures. For the Grand Ball at JASNA, I started with the fabric (the same silk table scarf as above) slightly off-centre (one end longer than the other) so the final tie of the fabric was off to one side of my head. There’s lots of inspiration for how to tie them in Madame Vigée Le Brun’s paintings.

The finer scarves in the first attempt at a turban (above) are nice for those wearing their hair in “The Titus” or hiding the pinned-on portion of a hairpiece.

Faking Purdy Locks: The Modern Hairstyle goes Regency

When my hair was long, the best up-do I could accomplish myself was the Olive Oyl look when attempting even the simplest bun! Now it’s cut in an angled bob, and the good news is the front is a nice length for some Regency curls around my face.

The most common Regency hair styles are centre-parted, with several ringlets close to the face and a fancy up-do. If you never had to take off your hat, the ringlets would be all you’d need. But if you go indoors, hats come off, so for me and other short-haired gals, other options are a must!

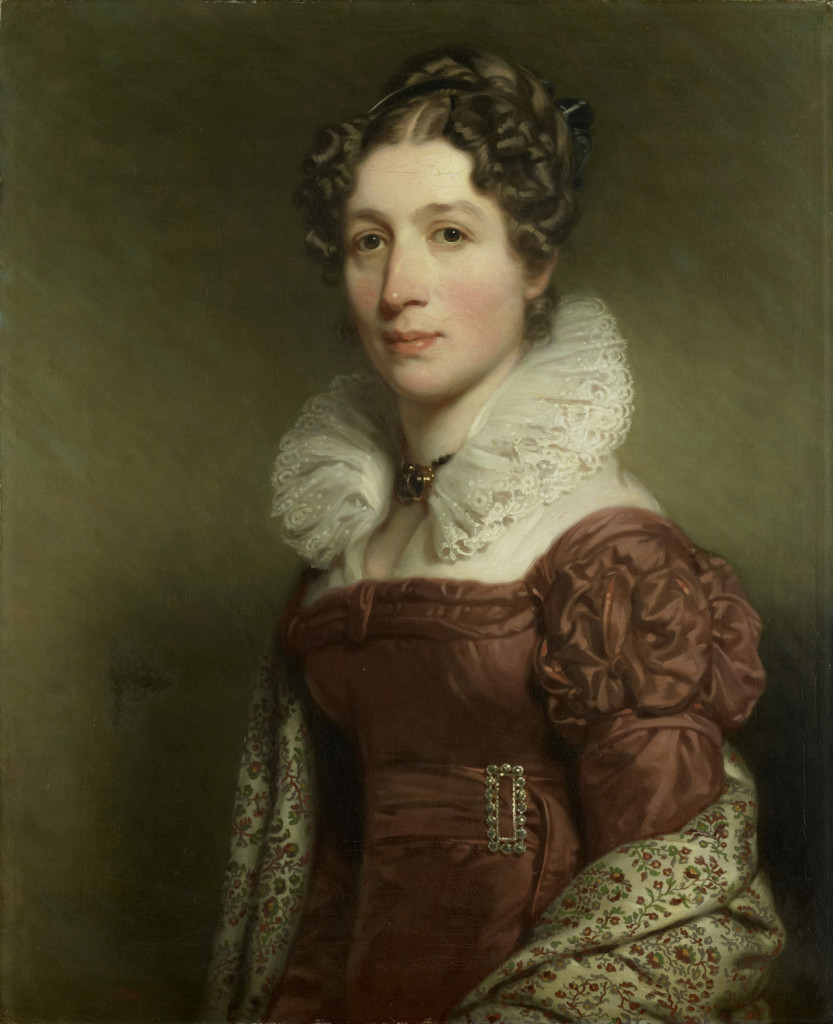
Jacoba Vetter--Charles Howard Hodges

Jacoba Vetter–Charles Howard Hodges


William Affleck

The Old Manse Garden–William Affleck

Even though most Regency women had long hair, worn up in public and taken down for nighttime,some had short haircuts. These tended to be combed forward and decorated with a ribbon or bandeau. Update below.

The balance of this post will focus on creating the illusion of the full Regency up-do.

Click on the thumbnails to see larger images that enhance the text of this post.

~

Planning the Grand Tour--Emil Brack

Planning the Grand Tour–Emil Brack


The Ringlets:

How to Style your Medium to Long Bangs into Ringlets

Your hair is straight or almost straight:

  • Part clean, damp hair in middle
  • Separate hair hold the rest back (a hairband can help):
    o If your hair suits curls that sit side-by-side like soldiers, separate in front of your ears.
    o If you have tapered bangs, your curls will drop like stair-steps down the side of the face, so separate about one inch back.
  • Starting at the back (or part for stair-steps), separate a section about 1” by 1”or finger-sized when gathered.
  • Spray the first section liberally with hair spray and roll into a cylinder using a curling iron or small-diameter hot roller.
  • If you have foam hair rollers the diameter of your finger or so, roll the curl off the iron and onto these, otherwise, secure to your other hair with bobby pins underneath each curl at each end. You can also use rags like the Bennet girls.
  • Repeat for all curls, at least two on each side.
    o You can also choose to have more curls, asymmetric ones, and/or a couple of curls at the base of your neck.
    o The curls can be fatter if you like. Just take a little more hair and use slightly larger roller.
    • Let cool and dry completely, then spray again lightly.
    • Loosen and drop one curl.
    o If it falls too long (long and/or very straight hair), re-attach to the hair underneath with a bobby pin each end and spray liberally with hair spray.
    o Make sure the pins are well-hidden since you’re going to leave them in for your event.
The Squire S Arrival--Mary E. Harding

The Squire S Arrival–Mary E. Harding

Your hair is wavy or curly:

  • Start with very wet hair: lightly pat wet hair with towel only until it no longer drips.
  • Separate and spray as above.
  • Spin hair section around your finger until it’s a medium-loose curl.
  • If desired, dry to damp with a diffuser. It will help to set the curl.
  • Spray generously again.
  • When my hair is done like this, it lasts through a couple of sleeps!
  • In the image, the women have allowed their hair to curl naturally.

How to Make Curls in your Short Bangs

Jane Austen

Jane Austen

Elizabeth Burney--George Smart

Elizabeth Burney–George Smart

Jane Austen wore little curls flat on her forehead.

  • Apply an “extreme hold” hair product.
  • Pin the curls, then scotch-tape the ends to your face. Remove carefully when dry.
  • If you have trouble getting the curl to stay:
    o Use a stronger-hold hair product, or
    o Learn from Punk rock—yes, you heard that right, Punk in a Regency blog!—by putting a small dab of water-soluble household glue (white glue, art glue, carpenter’s glue) in your wet hand, mix with a few drops of water and/or or your hair product, and then use it instead of gel.
    • To remove, soak with a wet cloth until fairly soft, then carefully shampoo out.
    • Do not tug too hard, instead, repeat wetting if it does not all come out.
  • Curls can be made after up-do is formed or headwear is secured, whichever you prefer.
    The Maiden Sweetly Fair and Pale--Rosa Koberwein

    The Maiden Sweetly Fair and Pale–Rosa Koberwein

    Roses--George Dunlop

    Roses–George Dunlop

As ubiquitous as they were, curls at the face were not mandatory. Note the two examples of styles where there are no tight curls at the face.

How to Fake Face Curls When You have No Bangs

Long hair, high hairlines, and super-short haircuts are not suited to Regency ringlets.

  • A Regency hairpiece seller on Etsy sells ringlets with an alligator clip for $10 each. That adds up if you want a pair or more on each side!
  • Curls of hair can be removed from one of those dolls with the “real” hair and “porcelain” face meant to be displayed rather than played with; they’re $8-12 at thrift stores.
    o Wrap tape around each curl, close to the doll’s scalp, and snip off. Leave tape in place.
    o Pin to your real hair in stair-steps fashion down the side of your hairline, OR tape individual curls to the underside of a hair band, leaving a slight space between each.
    o Cover pins/hair band with your long hair, a bandeau, or a turban.
    o With a turban, you could even select a new hair colour!
  • Update at the end of post!
  • An alternative: don’t worry about ringlets, and wear a fantastic hair band or turban to distract!

~

The Up-do:

How to Fake it on a Budget when your Hair is too Short for an Up-do

The Regency hair style was long hair dressed close to the head, without any poufy parts other than ringlets.

To get that long hair look, wigs, falls, or hairpieces can be pricey. An Etsy seller has attractive Regency hair pieces in 12 colours, starting at $10 for a single clip-on ringlet, with several styles of full Regency wig with lots of curls for $92. There’s also a $39 curly back bun, and $53 will buy a swirly, pretty one.

Accessories stores have fake hair:

  • $12 falls at Claire’s are straight, but can separated with lots of hair spray, then looped and pinned. Hide the ends with a fake braid ($7) from the same store, in four super-basic colours.
  • A bun maker ($3) and 1-3 braids work with a short ponytail. Bun hair will be an extra $5.
    o Braids can be roped around the bun’s base and then threaded out the centre and left dangly.
    o Braid material can be used to make some droops like Jane Bennet in P&P 1995.
    o You could wrap a braid around your head, behind your ringlets, like a hairband. This would hide the edges of fake ringlets.
  • Courtship--Edmund Blair Leighton

    Courtship–Edmund Blair Leighton

    For bobbed hair, hide wispy hair in back with a wide fillet or hairband tied behind your ringlets, then make certain the rest of your hair is arranged to appear as part of the up-do, perhaps pony-tailed into the bun.

  • Slightly longer hair at the hairline that won’t go into a ponytail can be made into additional pin-curls.
  • You can also opt to wear a turban, which is covered in the next post. It can be as simple as a pair of intertwined silk scarves, a brooch, and a fancy feather ($20-$50).
Kitty Packe--William Beechey

Kitty Packe–William Beechey

You’re Lucky if you have Long Hair!

You can do pretty much anything, including re-creating the styles above without a bun maker or pre-made braids, because you have enough hair yourself.

  • Assuming that like me, you can struggle through ringlets, but an up-do behind your head is near impossible, know that we have options!
    o The bun-maker with your long hair, plus braid ideas as above.
    o Tie your hair in multiple small ponytails and pin to your head, then wear a turban.
    o A simple style as in some in the first link below. #1 and #5 are basically ringlets in a ponytail, then loosely pinned around the ponytail.
    o I could also manage #6 of the first link below. It would probably end up as a pointy bun like Olive Oyl, which I have seen in some Regency photos.

Online Regency Hair Tutorials:
Seven styles, some harder than others. Please consider putting curls around your face, even if the style you’ve chosen doesn’t have it in the tutorial. You don’t need as many as the first example.

Video; again, make ringlets around the face.

More difficult, and for long hair with no bangs, made with long ringlets. This would be better if they had done a photo or two for each step.

A video for a complicated but beautiful long hairdo.

~

Henrietta Fane (c.1785–1856), Countess de Salis--F. Van Donne

Henrietta Fane (c.1785–1856), Countess de Salis–F. Van Donne

The Accessories

Your hair can be dressed up with accessories regardless of whether you’re using them to hide pins or fake bangs. Fillets, bandeaus, ribbons, combs, flowers, and feathers are the simpler ones, and tiaras, diadems, and jewels were the upscale effects for the best ballrooms!hair decor and sleevetumblr_na3t53ZkSc1s5i6ido4_1280 As you see in the variety of images in this post, they are optional.

~

Here are more style ideas and just plain beautiful artwork. Also note the ideas for gowns in all the images! (Click on the thumbnails for larger images.)

Les Trois Graces--Alexandre Jean Dubois Drahonet

Les Trois Graces–Alexandre Jean Dubois Drahonet

Singing to the Reverend--Edmund Blair Leighton

Singing to the Reverend–Edmund Blair Leighton


~

With luck and good timing, I’ll be able to register for the JASNA AGM in Louisville, Kentucky on October 8-11, 2015; the previous AGM sold out quickly. The theme is “Living in Jane Austen’s World,” and I’m excited about the seminars about her times. That’s where I’ll be wearing the items I’ve collected and re-purposed for this blog.

I’ve had no expert advice during this “Experiment.” “The Boss of Food” from my local JASNA, who’s sewn many a Regency outfit, expressed an interest; I’m sure she would have saved me some mistakes.

Instead, I learned all I know on my own from Regency and other historical web pages, images of real period clothing from museums, and artwork from the time. I felt it made the challenge “real” and helped me communicate through the eyes of a newbie to costuming. Had I not made the mistakes and owned to them, this would not be the blog series it is!

But now, I’m keen to attend some costuming seminars at the AGM. I want to see the Regency clothing construction “up close and in person” for the first time!

I’m in the middle of making my hat, and you’ll be walked through that process in a future post. For the ball, I’ll wear a turban, and I’ve tested out my ability to install one on my own head. We can safely say I won’t embarrass myself too badly! I’ll try a second design for my NEXT POST.

Before the JASNA event, there are a number of Austenesque events to dress up for, and the soonest one just came to my attention: the Regency Springtime Ball in Calgary, Alberta, Canada. It’s the second annual event, organized by Austen-inspired author Melanie Kerr. Her novel Follies Past takes place prior to the start of Pride and Prejudice, with scenes at Ramsgate, similar to my upcoming Letter from Ramsgate.

I wish I’d known of this event sooner, since my sister lives in Calgary, and during my vintage store visits I found several dresses suitable for Regency gowns that were too small for me, but would suit her and my 17-year-old niece. I’d bribe them to join me to the ball. A Regency gown is a good bribe, don’t you think?

~~~

Amalie Wolff-Malcolmi by Johann Friedrich August Tischbein, 1805

A Young Lady by Henry Jacob Burch

Caroline Bonaparte-Murat by François-Pascal-Simon Gérard, 1808

Updates:

1. Some more short hair ideas. The style is called the “Titus,” and it was worn by both men and women.


2. A blogger, Places in Time has a tutorial on how to make your own ringlets from inexpensive fake hair! It looks like you can make a nice set of three ringlets for each side of your face, plus more for the up-do, for around $12.

3. Author and blogger Rachel Knowles has a page dedicated to Headdresses and Hairstyles for Regency on her blog, Regency History. The images, sorted with 4 per year, are from La Belle Assemblée and Ackermann’s Repository for Art and include descriptions from those periodicals.

Were Regency gowns worn on the Titanic?

Hey! There’s an Alfred Angelo prom dress at “Vinny’s Second Wife’s Closet” in your favourite colour! But before you buy it, rip it apart and remake it, check the prices of custom-made Regency gowns. They start at just under $100, and an appropriate, good-quality morning dress can be purchased for $150-250, a pretty ball gown will cost around $200-450, breathtaking concoctions go for up to $1000, and the sky’s the limit for exact reproductions of specialty gowns.

All of a sudden your $200 used, strapless polyester with the fitted waist and sequined empire bodice seems a bit dear. Think of the fun, though! Trying to adjust it to get gathers in back, shopping for fabric that’s a reasonable match for sleeves, never mind re-working the bodice to attach them. And you just cut a hole in the nipple area while removing that sequin!

One thing I learned is that a suitable re-purposed dress is not that easy to find in thrift and vintage stores, in fact, that’s how I made the list of what not to buy: those dresses were in the majority. In order to make this blog as authentic as possible, I didn’t depend on others and stuck to my “rules.” But the reader can freely ask friends and relatives to raid their attics, get advice or assistance from a seamstress, or buy a product.

I set my upper limit for a used gown at $100 for a dress with little modification required. The most I’ve spent so far was $50 for a pelisse gown, which I admit was a bad purchase. My morning gown cost under $35, and needs less than $10 worth of modifications, plus my time, and though not perfect, it will be close enough in style, with better fabric and yards more lace than a $150 made-to-order one on eBay or Etsy.

As with anything, you get what you pay for, and the cheapest purpose-made Regency gowns are not worth buying. Gowns under $150 are usually machine-made using inexpensive fabric and simple construction, are not fitted properly—and are being sold as Victorian/Regency/Steampunk/Pioneer/Hippie/Jane Austen/Titanic dresses! What happened to Downton Abbey? Author Melanie Schertz found one with that on the list, too!

idea for accessories with morning gownHowever, a strict budget and no time to shop in vintage stores changes things; if so, buy a simple pre-made Regency gown and augment it. For example, a white dress with simple gathered neckline and sleeves can be dressed up with ribbon and lace and pretty accessories. An overdress or robe can be purchased in a colour you like to make it into evening wear.1813 la belle assemblee evening gown1812 Costume Parisien Dress and manteau (train) trimmed with marten (fur) (Click on thumbnails to enlarge.)


I still love the idea of vintage, though, because it affords a budget opportunity to have a gown that doesn’t look like it would be at home on the Titanic! In addition, I have a bit of a crush on Colin Firth, and his wife, green fashion advocate Livia Guiggioli, would approve of a re-purposed gown. She’d approve of Pemberley, too. Maybe he’ll buy it for her!

In an earlier post, I had a list of items to avoid in purchasing a vintage dress or re-using a dress from your closet. This time, we look at what to shop for and examples of good vintage dresses.

When I shop for a potential Regency gown in a vintage or thrift store, I walk down the dress aisles looking at the floor. Depending on the hanger bar height, if the dress touches or puddles on the floor compared to its neighbours, it has length. If the fabric and colour look okay, I pick up the skirt. Often the fabric looks okay from farther back, but is knit, and I drop it. Then I look at the whole dress, evaluating for necessary modifications. I’d guess that 90% get rejected due to unworkable designs.

The last thing is size. As we all know, marked sizes are inconsistent. In a second-hand situation, a clerk may have guessed for the tag, and the dress may have been taken in or home-made. I’ve always had problems with size, because my bust is a good size larger than the rest of me, so if the shoulders fit, the bust doesn’t. It’s important to try it on. I know it sounds creepy, but it’s rare for anything to be smelly, and I wash the clothing as soon as I get it home!

Ideal characteristics for re-purposing a gown:

  • Minimum 8” wide extra fabric at the bra-band level as you pull it out flat while wearing the dress (16” actual length since the fabric is doubled up) for back gathering; more is better. The early Regency hem brushes the tops of the shoes, so if a fitted dress is too long with your ballet flats, pull up the skirt to see if this gains extra fabric width for gathers at the top.
  • Regency fabrics or visually reasonable facsimiles (Jessamyn’s Regency Costume Companion has some great examples).
  • If no Empire waistline, there should be no sewn waistline front or back, or if so, the skirt should be long enough when pulled up under the bust. Later Regency was ankle length, and ribbon or lace can be used to add a couple of inches.
  • Bodice should be a close fit, but not too tight—you should be able to remove visible zippers and replace with ties, laces, or buttons and loops.
  • Puffed sleeves about 3-6” long (underarm) that don’t puff high. This is the most difficult requirement, as they were only common for short spurts a few times in our history. See photos below for alternatives that work and, in a later post, I’ll show some examples for faux-puffed sleeves using minimal spare fabric from your gown.
  • Non-Regency details should be easy to remove, hide with trim, or modify without being obvious.

Other details for Regency:

  • Back bodice either flat and fitted or gathered to mirror the skirt.
  • Front bodice style varies a great deal in Regency.

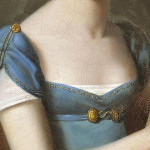
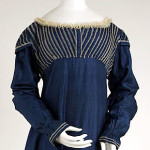
I’ve shown a few bodice examples, and while you’re looking at them, enjoy the sleeve style variety, too. You can click on the thumbnails to enlarge the image.

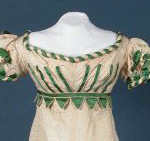
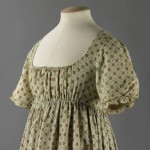
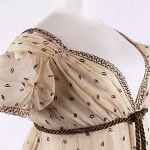
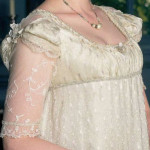
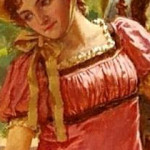
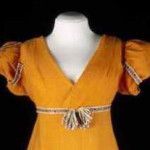
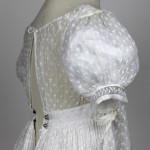
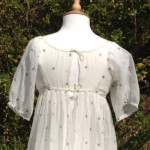
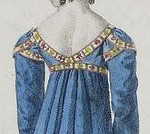
Evening dress 1818-20 cream silk and wool mix trimmed with green satin1810 cropped1810 cotton metallic thread met interesting neckline croppedcan do this with the net for blue dress croppedThe Rendezvous Reginald Edward Arnold croppedFrench School XIX century A young lady with a lyre cropped.met museum 1815 bodice and sleeve detail1810 orange croppedcotton muslin 1820 note back closures1805-1810 muslin with metal star embroidery and back ties croppedback bodice 1811


Dress, 1810-15, French, cotton, The Met cropped


Dresses requiring very little modification:

  • Hippie dresses.
  • Empire waist “round” dresses: gathered all around.
  • 80’s dresses, though the puffed sleeve may be large and high and the dress may not be long enough—but there’s nothing wrong with adding lace to the hemline, and we’ll look at other tricks in a later post.
  • Empire-waist gowns with straight skirts, but not fitted and flared. Then another dress can be used for an overlay or robe for the skirt with the gathering at back, and perhaps sleeves.
  • Regular-waisted dresses, if the skirt is long enough to be lifted up to under the bust and still barely brush the tops of the shoes.
  • Gowns that work otherwise, with sleeves large enough to be made into puffed sleeves.

The Thrift Shop Regency Costume Experiment is intended to be a minimal-sewing project, but in case some readers have greater ambition, there are more gowns that will work.

Sewing and fitting will be required:

  • Caftans, with a single fabric, not too heavily patterned. You’ll have to fit the bodice, modify the sleeves, and gather the “skirt” fabric in the centre back.
  • Too-large evening gowns, if the top of the skirt is big enough to make gathers in the back and the bodice suits being pulled into back-gathers with the skirt, or you do not mind fitting the bodice.
  • Sleeveless or strapless gowns with enough skirt fabric for empire with back gathers, plus other extra fabric for sleeves (a matching shawl or wrap, a bodice overlay that can be removed leaving an attractive bodice, a lining, or extra skirt fabric). It’s difficult to buy a coordinating blouse or fabric to make sleeves, because it’s almost impossible to match colour and texture.
  • A skirt from one dress and bodice from a blouse or a short dress—it’s better if the darker colour is on top.

Some bodice enlargement insert ideas (click on thumbnails to enlarge):1810 evening dress V and A cropped1805 croppedidea for bugle lace


To add a few inches to get extra fabric for gathering (click on thumbnails to enlarge):1812-July-Evening-Dress-blueRed gauze dress with chenille embroidery. A light open weave fabric woven in Scotland, gauze or leno, ca 1808

Notes on adding trim:

  • If you want to tie a bow in a waist ribbon, it needs to be about five feet longer than your waist measurement. If it is a wider ribbon, you can attach it to the dress to keep it flat, but I recommend a loose whip stitch unless you never want to change it for another look. An alternative is reinforce it with a second ribbon or stiff fabric of matching width an inch short of your waist size, attached on both edges with fabric tape in the middle section of the ribbon, to keep it from folding over.
  • If you intend to add lace to the bottom of the skirt, it can be flat or gathered. Pre-gathered lace can be bought in several widths, though colours are limited. If you find flat lace you want gathered, you need 2½ to three times the length of your hemline. Run a baste stitch and gather (hand sew ½” long stitches near the top edge for about 2-3 foot intervals; tighten the baste stitches uniformly to match the skirt edge). Attach with the fabric tape. If you attach outside, you should then attach a ribbon with fabric tape over the top edge to hide it. Overlap the ends the width of the fabric tape and secure.

~
That’s it for the three-post introductory series on Gowns. My initial plan for this Experiment involved one complete outfit by the end of June, so I have success with my morning gown, and we’ll see the rest of the items in future posts. I also said if I had time, I’d include a ball gown. Counting forward, and knowing I can’t post every week, my time is tight! But I will continue posting my projects beyond the initial Experiment, and a ball gown and spencer are in my plans!

NEXT POST:  HEADWEAR AND HAIR, WHICH WILL LIKELY BE 2-3 POSTS. I HAVEN’T ENOUGH COURAGE TO TACKLE LYDIA’S HAT YET, BUT THERE WAS A SNEAK PEEK AT MY FIRST TRY AT A CAPOTE WITH THE WHITE MORNING GOWN LAST WEEK!

~
Cool links:

Fashion examples from 1808 to 1828 from E.K. Duncan.

The Repository of arts, literature, commerce, manufactures, fashions and politics, published in 1809 by R. Ackermann

The Mirror of the Graces, a ladies’ etiquette book from 1811.

~

Images are from Pinterest, most originating from museum pages. If interested in the source of any particular image, contact me for more details.

Update:

A Morning Gown plus some Frankenstein Gown Parts

Poll time: Another instructional post on what to buy, or The Big Reveal: my Regency gown purchases to date? Okay, here’s the boring list… just kidding!

I started shopping for my costume for the 2015 JASNA AGM in July 2014. Early on, I decided my top dollar was $100 for a gown that required almost no modification to make it Regency-appropriate.

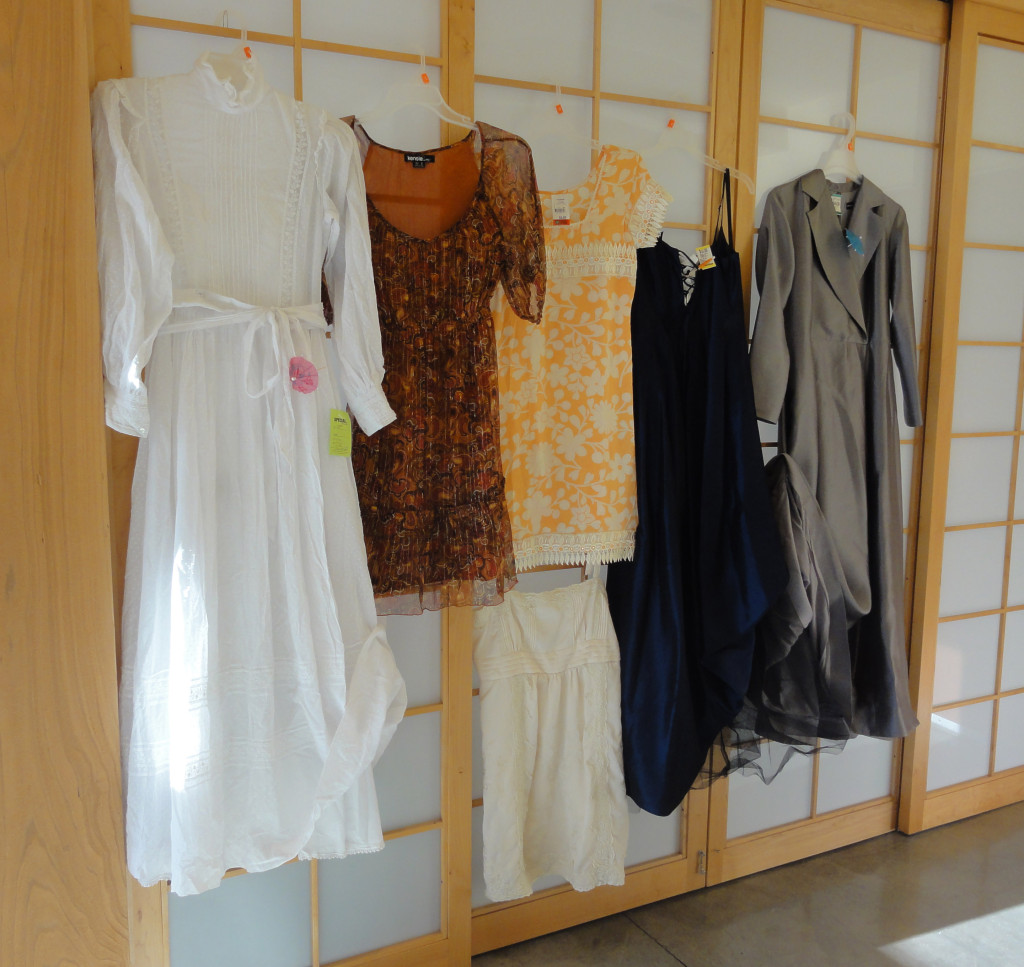
My second and third purchase for this blog, along with a $3.99 reticule, was a dove grey coat dress (far right) for $49.95 at Value Village, the most expensive item I’ve purchased to date. The pelisse-like style of this dress could not be passed up: the bodice has a double-lapelled crossover in front while the skirt has a faux front opening. It was intentionally purchased 4 sizes too large to allow modification for gathering in back. In the photo, the skirt is turned back so you can see it’s fully-lined.initial thrift shop gown set reduced

I consider this purchase a bit of a mistake that I hope I can wiggle my way out of! Even with the large size, it has minimal additional fabric at the under-bust level. The bodice is huge, and since the front opening is faked, it has an invisible zipper in back to make additional reworking complicated!

The skirt is flared, so between it and the bodice, there’s plenty of extra fabric to make a faux-puffed sleeve atop the long, straight sleeves. However, this flared skirt will look odd with the tiny amount of gathering. To make the grey dress into a pelisse that fits will be a lot of  work—and might not even be possible.

A navy blue strapless gown was purchased at Value Village for $19.95. The generous skirt has a pocket-pleated top edge that sits just above natural waist, so it’s about 2” too short for floor length at empire waist. This is easily remedied with a bit of lace at the hem. The bodice is tight, fitted and spaghetti-strapped, laced in back in a V-shape. The skirt has an underskirt; the top half is lining fabric that’s not an exact match to the gown, with the bottom two feet in black net crinoline (see photo above). These can be used to make sleeves and modify the bodice to attach them.

Unless I find a simpler solution, the blue gown will be my evening/ball gown; however, this gown will need to be almost entirely remade: remove the skirt at the top pleat cuts, then reattach with a flat front and back gathers, add lace to the bottom, add about two inches to the bodice to close the V-lacing for my comfort, make shoulder straps to attach sleeves, and make sleeves trimmed to disguise the fabric mismatch.

I made a bit of a panic decision when I bought it, as it seemed I’d never find anything suitable, it was cheap and had lots of fabric, and I had just realized my parking meter was expired! But completed, it will be unique!

My collection includes three short dresses for “spare parts” hence, the Frankenstein reference. I bought two garments for their trim from the Salvation Army Thrift Store. I spent $14.95 for the cream silk mini-dress, which has fabulous embroidered panels (perhaps instead of the lining and black net for sleeves and bodice trim on the navy gown!) as well as enough Vandyke (pointed) lace for a good-sized skirt bottom (navy, navy, navy!). The orange silk Indian blouse has elaborate pointed lace for $6.95. The fabric won’t work for anything Regency.

I already owned a multi-coloured paisley print silk dress with gold thread, a potential bodice and trim for a ball gown. I’m watching for a nightgown or slip dress in one of the main colours.

The star of the show is my most prized purchase: a white Swiss-dotted lightweight cotton 1980’s “Prairie dress” vintage wedding dress (on the left). This gown was $33.95 at WiN (Women in Need) Vintage and Thrift Superstore. I found it just after I had the difficult episode of social anxiety described in an earlier blog post, and it perked me up!

It features a lace-trimmed high neck; long, puffed sleeves with matching lace on the cuffs; lace-edged petticoats attached with the skirt (see photo above), and a separate, plain camisole. There are lovely lace insets and narrow pleats for subtle detail. The skirt is at the natural waist level, and well-gathered all around.

The dress fits well except for a tight bust area, and it’s back zippered, which means if I remove the zipper, the resulting relaxation of the fabric over “the girls” will result in a gap in back. I’m torn between being more Regency-correct and the work involved in figuring out a way to modify the bodice without too much work.

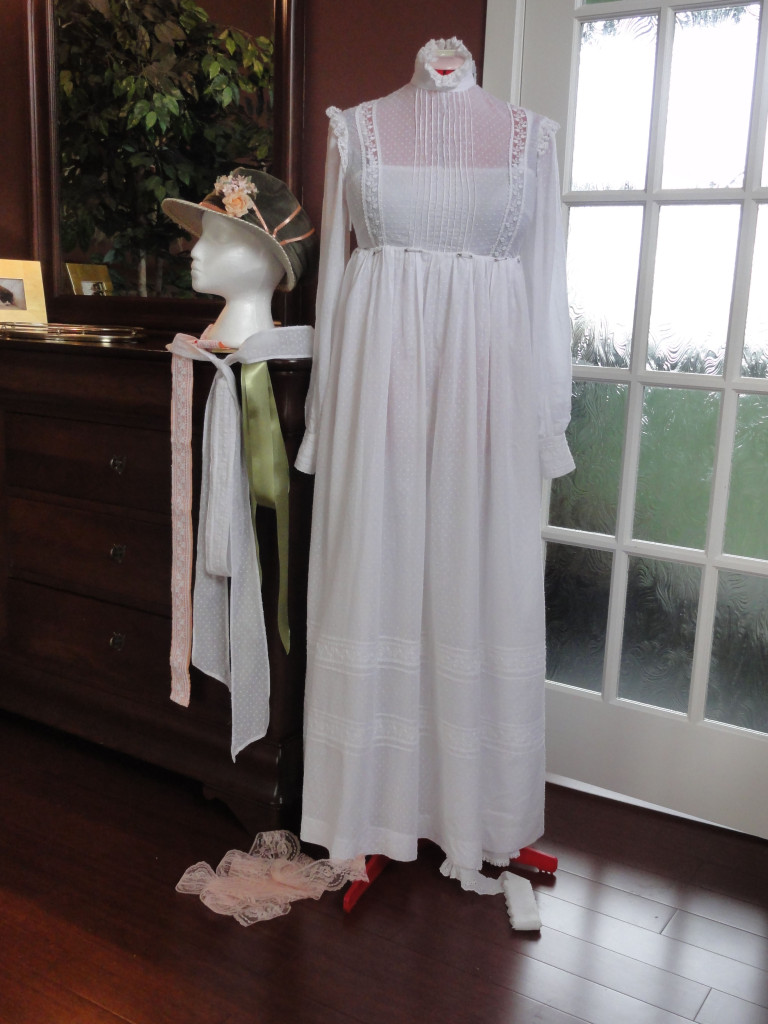
This is intended for my morning gown or day/walking dress. I’ve shown the simplest modification.white gown pinned up first example

The skirt was raised without removing it, and re-attached to the under-bust. I’ve safety pinned it every three inches or so, and when covered by the matching white waistband with ties (left of dress) or a ribbon for colour, it becomes a close enough facsimile to a Regency gown.

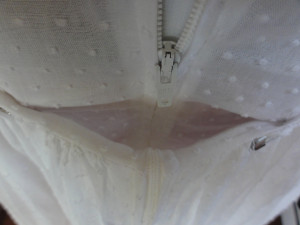
white gown showing folded zipperFor a neater finish than safety pins, no-sew fabric tape alone will not suffice, as it is not strong enough. The skirt can be tacked in place with the fabric tape, then either machine sewn or whip-stitched for strength.

No matter how the skirt is attached, if you keep the zipper, you must leave a width equal to the depth of the pocket of the zipper on each side, so you can operate it. I’ve propped it open for the photo, but it doesn’t droop since the zipper is stiff. I’ve been told you can hide the zipper with a shawl!

bath muslin 1815

1815 muslin morning gown, Bath Fashion Museum. Note the gathered skirt front that fits at the bottom of the waistband rather than at the underbust.

If raising the skirt makes it too short, you can add lace to the bottom of the dress or the petticoats as shown above, and/or raise the top edge of the skirt to a position where its top edge would be at the bottom of the matching waistband, as in the 1815 gown. However, around 1815, gowns were shorter!

bodice back

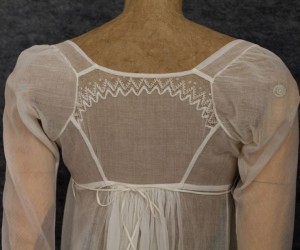
Detail of the back of a Regency gown bodice, showing shoulder seams several inches behind the top of the shoulder, diagonal seams to help fit the bodice, and sleeves fitted much farther back than a modern gown. This creates the a classic “diamond back” shape typical of the era.

A great deal more could be done with this dress: the skirt could be removed and all the gathering moved to the back, and at the same time, the petticoats could be attached to the camisole to make a separate garment that can be used elsewhere. The sleeves can be modified to look like a top puffed sleeve over a straight sleeve, from as simple as attaching a ribbon level with the bottom of the bodice, to as complex as adding lace panels to make them longer, with a slimmer cuff, which is more Regency. I mentioned the zipper earlier. Dare I go whole-hog and make a classic diamond-back? Yikes!

The thing is, the dress is close enough, in my estimation, with perhaps the exception of that zipper. What’s a Frankenstein without a zipper somewhere?


Newsflash:
Since I prepared the photos for this post, I bought a 1960’s jonquil dress (such a popular Regency colour!) that may need less work than the navy! Woo-Hoo!

Trouble is the bodice fits perfectly, but the skirt is 2” too tight—everywhere! I know! Who is built like that?

Good thing is a ton of sheer overlay plus a cape-like draping begging to be made into back gathers. I can put a period-style decorative panel along the centre front to accommodate my tummy and butt—I hope I can find the right fabric!

Also, I bought a cool hat, thinking it looked a lot like museum Regency ones, then realized the nice square-woven sections between the swirly fabric parts were made of synthetic ribbons—pretty much plastic! So I’m Lydia, with a very ugly bonnet that I’m going to rip apart as soon as I get home. Good bones, though.


NEXT POST: THE LAST IN THE THREE-PART INITIAL SERIES ON GOWNS WILL DISCUSS THE VALUE OF PURCHASING A CUSTOM-MADE REGENCY GOWN, AND WHAT TO LOOK FOR WHEN SHOPPING FOR A USED GOWN TO BE RE-PURPOSED FOR YOUR UNIQUE REGENCY GOWN. THERE WILL BE MORE GOWN POSTS IN JUNE TO SHOW THE FINAL PRODUCT AND SOME EASY TRIM TECHNIQUES TO MAKE YOUR GOWN SPECIAL AND FAKE SOME REGENCY DETAILS. BUT WE MUST MOVE ON TO HEADWEAR AND HAIR, RETICULES, JEWELRY, AND MORE UNDERWEAR KIND-OF-STUFF IN BETWEEN!