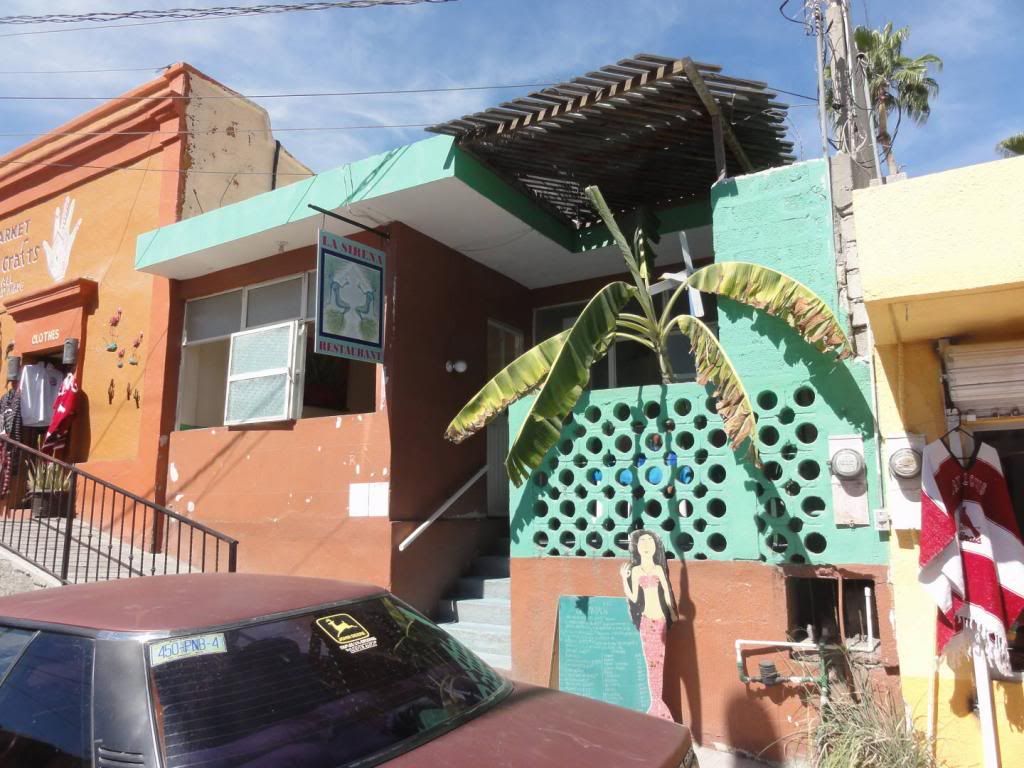
Foodie on a Mini-Vacation

When you live for half the year in a place where most from the rest of the world comes for a vacation, it’s fun to go elsewhere for a mini-vacation within that time. This year, we went to Oaxaca (pronounced wah-HA-ka), the food and arts and crafts capital of Mexico. We chose to fly, since it would be about 20 hours by ground transportation. That meant we were in our hotel on the Zocalo (town square) within the UNESCO World Heritage Site within a few hours via Mexico City airport.

Loud, fun music was playing on a stage outside our room, so we quickly got changed to a quieter room on the other side of the hotel, which was a hacienda-style historic building. The location on the Zocalo in the middle of Centro couldn’t be beat.

We found the mercado and freshly roasted Oaxacan coffee quickly, and also a new treat to us: chocolate covered churros (long donuts)! They were still crunchy inside. We spent most of our trip wandering the 300-year-old streets of the heritage part of town, where the buildings are made of volcanic rock, so some have a greenish tinge to the stone. Glorious huge churches stood every few blocks, or so it seemed. We stepped inside each when they were open. (You can click on the thumbnails for larger images.)

We were treated to fantastic food every step of the way. I happened to choose about half vegetarian meals—not that I’m vegetarian, just that the selection was good. It helped me to gain no weight on the trip. I wore my Jennyvi (Jane Austen Couture) dress out to dinner since it packed well and was the right weight for the weather, which is quite warm in the day and quite cool at night.

Some of the specialties of Oaxaca include the sauce called mole that’s served over meat or vegetables (with at least two dozen ingredients, the best mole has chocolate in it!), a sort of hard tortilla pizza called tlayudas, tamales (filled corn dough inside a banana leaf), memelas (a simple fresh open-faced thick corn tortilla with beans and cheese), and toasted, seasoned grasshoppers called chapulines. The latter was the only thing we didn’t try. They’re supposed to be quite tasty, but I had to give them a miss. Also, Oaxacan chocolate is quite different: grainy and dark.

Eggplant appetizer

Tlayuda

Ancho stuffed with huitlacoche

Custard cone

Two of the days we visited Oaxaca were for side trips out of town. One day, we went to small towns south of the city and looked at an historical village and another town known for its black pottery. We took the bus. There are also towns with weaving (we already have two Oaxacan rugs), Alibrije art (little animals that are supposed to come out of dreams), Amate art (made from tree bark), embroidery art, and other kinds of pottery. Often, when you’re in big Mexican tourist towns, the best art you see isn’t from that city, it’s from Oaxaca state, a testament to the hundreds of indigenous tribes and their traditional crafts.

For the second day-trip, we hired a driver to head east and take us to see the “frozen waterfall” and a thousand-year-old tree. We chose not to go to the pyramids since we’d seen Teotihuacán and Chichen Itza, and they’re now not much more than tourist traps, and besides, ruins are not our thing. We saw many of Monte Alban’s artifacts at the Cultural Museum.

Our trip back home from Oaxaca was an adventure in itself. Three airplane delays in Oaxaca plus two delays and finally a cancellation in Mexico City meant we could have gotten home faster with the bus. We literally spent 14 hours in airports that day. Even though we were masked and used sanitizer, we both got Covid. We weren’t too sick, but it’s not something I’d wish on anyone.

We brought back lots of coffee and chocolate, plus a nice black pottery vase and lots of cool memories. I suggest you all put Oaxaca on your bucket list.

Coming up: I have a new release planned. I mentioned on this blog that I’d been working on the Cecilia’s Mismatches series, and the first book is due out the end of March 2023. An Accomplished Woman is a shorter novel, set in Bath, with a bit of a nod to Northanger Abbey. But it’s not an Austenesque book. The characters are all new. Janet B. Taylor, Meryton Press’s cover designer, has gone all swoony over Everett Tremaine. I hope you will, too. Spread the word! And watch for the cover reveal coming up soon!

Busy People

If there’s one thing that’s a constant in this world, it’s that you can expect that busy people are eventually productive people.

So what can I hold as evidence? I managed a lot of completions since my last blog post, including:

  • A three week trip to England during which I sought out many Jane Austen locations (lifetime and film) among other tourist destinations, plus met JAFFers Mίra Magdó and Lizzie Sargent, and saw Pride and Prejudice with author Leslie L. Diamond at the only operating Regency theatre left in England (the Royal Theatre in Bury St. Edmunds)—that should have been a blog post in itself;
  • Writing a JAFF novella (working title The Fitzwilliam Intervention);
  • New writing on Book One: An Accomplished Woman of my non-JAFF Regency trilogy (the Lady Hoxley, Matchmaker Trilogy);
  • Collaborating with narrator Neil MacFarlane on the recently released audiobook for my novel The Mist of Her Memory.

During the start of the current pandemic, I was still in my home in Mexico, which at the time seemed to be the safer place to be. In the midst of the expat travel panic in late March, I contracted viral pneumonia, which was also a COVID-19 scare. This meant I was in isolation in a nice private hospital in Mexico at the cost of an excellent insurance company then rushed home on a private jet since the commercial companies wouldn’t take someone with my cough. For the record, I was tested as COVID-19 negative, as well as negative for Influenza A and B and Dengue.

I’m now recovering, though my lung capacity won’t let me exercise like I used to, but that will be overcome in time. Being a COVID-19 vulnerable person, I must be more careful than most, so I remain isolated in my home, with only walks in a mask to get out of the condo. I don’t mind, as it’s a lovely loft apartment with huge windows and views to make you jealous, and includes two cats who like to cuddle up to me while I’m on the laptop on the sofa. I can read and write and edit like before, and I’m enjoying it as well. I’m busy enough that I have to say “no” to special projects, and all that’s on top of a happy and balanced real life!

I’ll let the pictures show the excitement from my trip! Click on the thumbnails for a larger picture.

All the pretty little purses

The finely-fitted out modern woman has a few things in her hobo. Trouble is, the 19th century woman’s hobo was pretty tiny. Thank goodness a full set of cosmetics, hair gear, phone, tablet, photo album, and dishwasher were not necessary to tote around during the Regency.
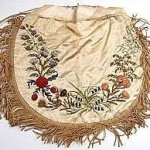
Early 19th century silk purse, 8 inches,  with silk embroidery, fringe, tassels

Early 19th century silk purse, 8 inches, with silk embroidery, fringe, tassels

The Regency lady carried a small drawstring bag or purse called a reticule. For some reason it’s been jokingly called a “ridicule” on occasion, but I don’t know why, and frankly, I don’t care, because how could you make fun of such pretty little purses?

Here’s the low-down on them:

  • Roughly 4-8 inches wide and 4-8 inches tall, plus closure (most in the mid-range). (Click on the thumbnails for larger images.)
  • A multitude of shapes.
  • Closure is typically drawstrings at the top.
    • Drawstrings are made of cording or ribbon, often with beads or tassels at the ends.
    • Double or single drawstrings are seen.
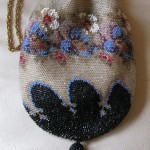
      Reticule with gate closure

      Reticule with gate closure

    • No zippers.
    • Gate and metal clasp closures were less common but acceptable.
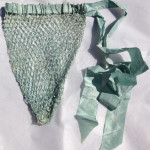
      Early 1800s blue silk netted purse

      Early 1800s blue silk netted purse.

  • Made of a variety of materials and methods, including silk, linen, tapestry, cording (including metal), straw, beads of all kinds, wool, and more, by sewing, netting, weaving, or knitting.
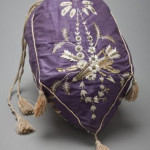
    Silk reticule with embroidery and tassels, 1810, LA Costume Museum/.

    • Embroidery was common on smooth silks, including chenille and tambour work; also painted designs.
    • Designs can be anything, but most tend to be floral.
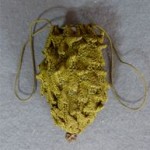
      4.5 inches long knitted pineapple reticule, 1800, Kyoto museum.

      4.5 inches long knitted pineapple reticule, 1800, Kyoto museum.

    • Pineapple purses made from straw or knitted were very popular.
    • Some crocheted designs existed, but take care, as many modern crocheted bags are too loose and large of a design.
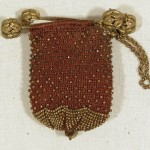
      1800-1825 Brown crocheted silk bar purse.

      1800-1825 Brown crocheted silk bar purse.

    • Many have tassels, beads, or fringe trim on the bottom.
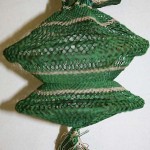
      Reticule, 1800–1825, British, silk and metal, Metropolitan Museum of Art.

      Reticule, 1800–1825, British, silk and metal, Metropolitan Museum of Art.


A bag that works like this can often easily be found in a Thrift Shop, or even at home, where it may have come as a cover to a product. You may have to trim it to make it more festive. Fabric for a bag like this can come from an old decorative cushion and trim from jewelry.

For the Thrift Shop Regency Costume Experiment, I bought three bags. Part of my second and third purchase for this blog (with the grey pelisse dress in summer 2014) was an crocheted beaded black purse with a short, beaded carry strap and a gate closure. It was $3.99 at Value Village and needs no modifications.

A black, designer-label, beaded satin purse with beaded fringe, a broken beaded shoulder strap, and a zipper closing was $1.99 at Value Village shortly after my initial find. I’m sure it was so cheap because of the broken strap.
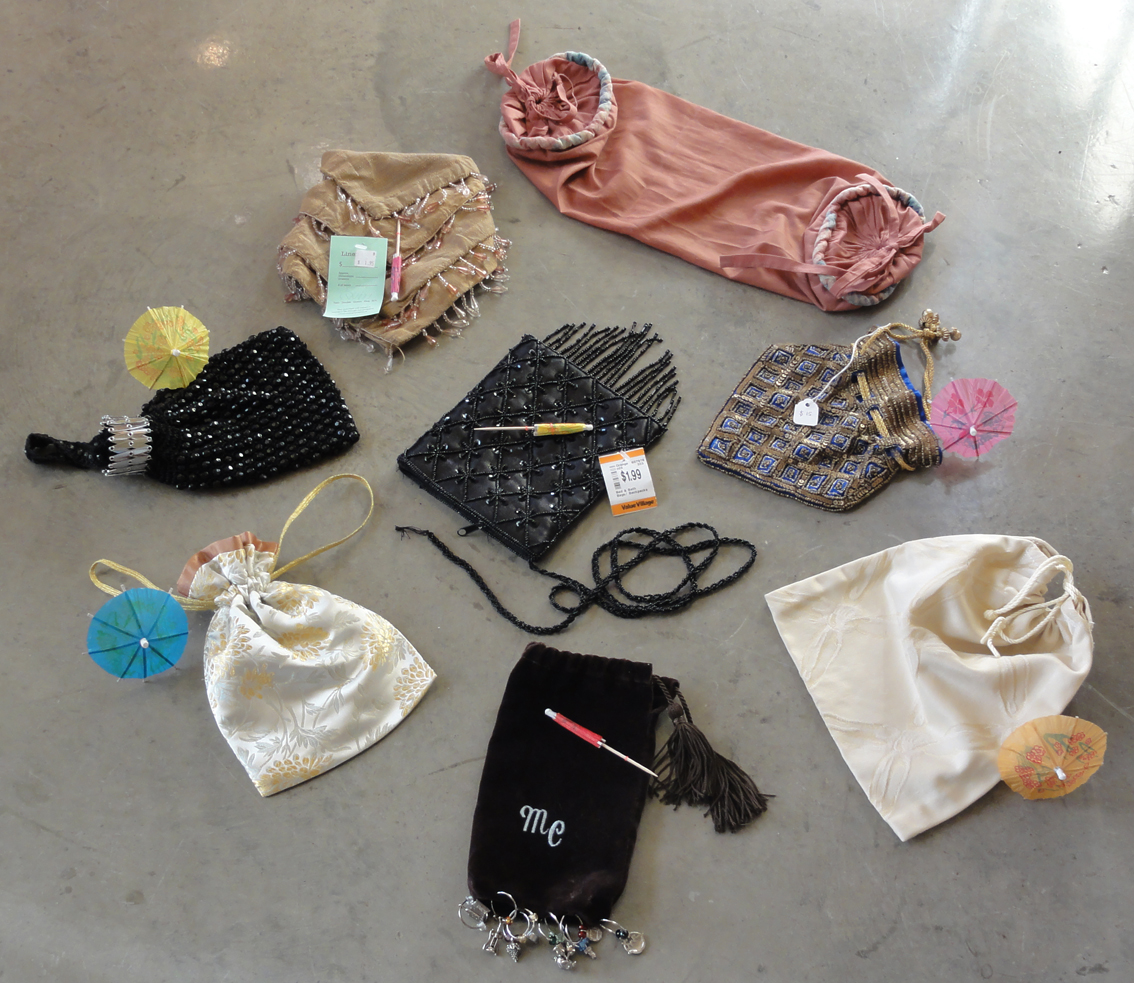
my reticulesIt cemented my view that the reticule was the easiest item to find, and that’s why I’ve left it to the end: so you could focus on the difficult items earlier on.
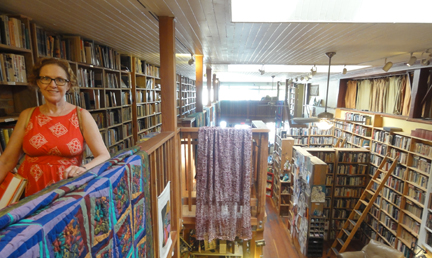
cottage grove used book store source of blue and gold reticuleThe blue and bronze beaded bag has a pattern that reminds me of Moorish azulejo tiles seen in Sevilla, Andalucia, Spain. I lucked into finding it at Kalapuya books, a used books and gifts shop in Cottage Grove, Oregon, USA with a theater, bar, coffee shop, and excellent bakery all attached! At $15.99, it was more costly than most of the purchases I typically made for this thrift-based series. I also bought two books (English Cottages and an older copy of The Chicago Manual of Style) and got a free paperback of Jack Kerouac’s On the Road because my purchase was over $30!

The reticule has gorgeous coordinating beads at the ends of its drawstrings. It’s a bit small, but so pretty!

A month later, I saw a fourth bag at a vintage store in Winnipeg, Manitoba, Canada, which was $25.99, and perfect for the Regency. I coveted it for a heartbeat or two, but knew it was too much, not just in cost, but in number of reticules!

I already had two simpler bags on hand when I started. In with my travel items, I had a cream damask bag that came with some beauty item or other. At 8.5″wide by 8″ tall, this is the largest of the reticules in my set. It was boring as-is, so I dressed it up in green. Click on the thumbnails for larger images.

Fringe and ribbon applique ironed on with “Stitch Witchery.” Use existing off-white cord to thread two green cords in opposite directions. This is much easier to tighten and release than a single cord.

Loop tassel over cord near end, then tie a tight knot in the green cord over it, close to the end of the cord. Tie pairs of tasseled cords together just at the point the reticule is fully open.

$0.49 of sale fringe and some pre-made ribbon applique decorations (three small (left) on sale for $0.49 each, and $1.99 for the large, below) from Dressew Supply in Vancouver, BC, Canada were added and made a huge difference. I replaced the single, fraying cream cord with a longer green cord from another grab bag (cut into two), and attached four green tassels on the cord ends (on sale for $0.49 each at Dressew). Total price: under $6.

The completed green and black reticules. Note that with the black one, I tied the loose ends of the velvet ribbon together firmly, and slid them into the ribbon sleeve, rather than add tassels as on the green cord. (The black ribbon was not long enough.) You could also thread beads and sew them onto the ends instead of tassels.
Silk reticule with steel cut beads, beaded tassels, and double drawstring, 1810, Bowes Museum.

To update the zippered black bag with beaded fringe (left), I removed the zipper and managed to free the other end of the shoulder strap without untying the strings, so no beads were lost in this venture! I may use this lovely braided string of beads tied around the Empire waistband of a ball gown.

I put a scrap of ribbon inside the purse to act as a sleeve for the drawstring, and threaded black velvet ribbon that I’d had on hand for a dozen or more years. Note that  reticule drawstrings should each be at least 18 inches in length and threaded opposite ways to make for the ideal closure. The total cost for this bag was less than $3.

My wedding rings came in a little chocolate brown velvet bag with matching tasseled drawstring and the initials of the jeweler on the side, and of course, I kept it and the little metal boxes all these years. Before this blog was started, I went to a local stage presentation of Pride and Prejudice, I attempted to dress it up by hooking a set of wineglass rings along the bottom like jewels. I said all along I wasn’t crafty!

This drawstring bag is very small (5″x7.5″) and would only suit someone with the initials M.C. Perhaps Mr. Parachute Pants will come out of retirement for this? Oh, goodness! **blushes** It sounds like I think he’d like to dress like Elizabeth Bennet! M.C. Regency Cross-Dresser Hammer! Drop that thought!

Anyhow, this reticule is rated with a closed parasol at best: acceptable, but not the best choice. Better beads at the bottom would help its look, but it’s still small, with someone else’s initials on it.

I got another reticule for a gift last Christmas, as part of the A Happy Assembly Holiday Card Exchange, made by member Sharlotte. The fabric is a rich yet subtle silver and gold silk brocade fabric, with gold drawstrings and the satin lining trimming the top.

Inside, she included some “work” for the recipients: a new scallop-hemmed handkerchief with two skeins of embroidery thread for decorating it! To go with that theme, I’m showing my little collection of handkerchiefs.handkerchiefsThe whitework one with a purple lace edge and the daisy motif handkerchief both belonged to my mother, and were gifts for use at my wedding. The attendants were required to use them to hold the ceremonial gold crowns of the Orthodox wedding ceremony above Mr. Suze’s and my heads. The plain lace-edged one was also from my wedding.
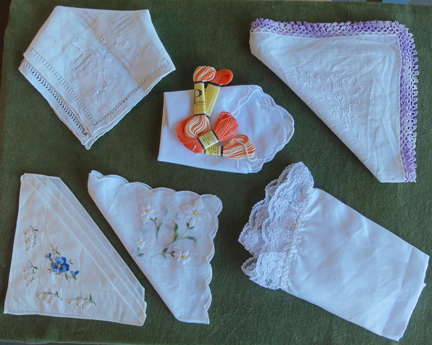
The other whitework one and the pansy pattern handkerchiefs were purchased for $3.99 and $2.99 each at Women in Need (WiN) Thrift and Vintage.

This reticule seems better for a daytime reticule than the others. It could be fancied up with beads or tassels, but for now, I like it as-is.

The other two items in the big picture of my reticules (above) are for demonstration purposes. Both are pillow covers, one oblong, and one square with beaded edges, folded up like a dinner napkin. These could be used to make reticules.

Although the shape would work to make two reticules, I don’t like the fabric or colours for the oblong one, hence, no parasol. As for the other, one of the bonus projects this summer will be making several designs of reticules from a cushion cover using a pattern I developed myself.
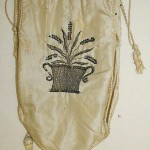
Simple and elegant reticule with lavender embroidered on one side and the lady's initial on the other surrounded by flowers, 1800-10 Metropolitan Museum of Art.

Simple and elegant reticule with lavender embroidered on one side and the lady’s initial on the other surrounded by flowers, 1800-10 Metropolitan Museum of Art.
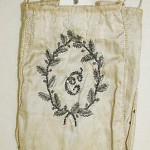
The opposite side. 1800-1810, Metropolitan Museum of Art.

The opposite side. 1800-1810, Metropolitan Museum of Art.

How does one manage with such a tiny purse instead of the hobo? I’m sure you’ve used a tiny dress clutch for a formal situation before! In this case, we don’t need a stash of makeup on hand, for starters.

I intend to minimize the size and number of items I have with me. For Louisville, instead of a wallet, I’ll put my US cash in an envelope, my change in Frida (the name of my little zipper coin purse from a gallery in Mazatlán, Sinaloa, Mexico), and the minimum of cards (driver’s license, health services card, and one credit card, all in RFID* sleeves) in a small card holder. An organza bag will organize my small pill holder and an emergency kit: some safety and bobby pins for repairs; blister strips, in case the new shoes bug me; and wax for my braces. Glasses and case and cleaner cloth (“those lion eyes”), and it’s full!Stuff that goes into the reticuleIf you’re accustomed to having a photo album in your wallet, pare it down to one or two. Even better, trace the important ones onto onion skin paper, fold like a Regency letter, and put it in the envelope with your cash.
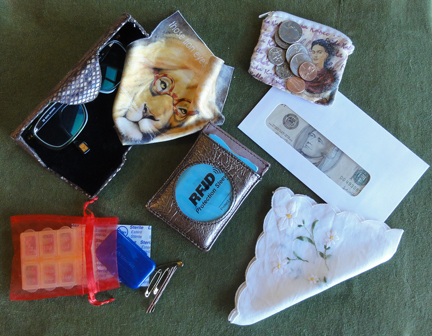
Last but not least, a Regency lady must have at least one embroidered handkerchief on hand, in case she winds up featured in one of those Romance novels where it is plays a starring role!

~~~

This was the last item for the full Regency costume as planned!

On Saturday, I was at a “Jane Austen Tea” fundraiser that I heard of only two days before. The costume was ready, but I decided to make a better version of my lace cap at the last minute. Up until then, I was okay, since there was the other cap for this series, and I had until Louisville in October to make one closer to my needs for my Regency costume.

This project was out of the scope of the “Experiment,” as it was machine sewn, but only because of time constraints. I’m super-proud of how I used a 1900’s pattern that was almost unreadable, figured out the instructions (how many “nails” large my head is!), made a mock-up, adjusted it to fit me, and made my version simple, but cute. Pity it was under my hat most of the day! I’ll share more about this “dress cap” next month, once I’ve drafted a tidied pattern.

The photos from the tea will be part of next Monday’s post, with the full costume featured as the end to the “Experiment.” In the meantime…

NEXT POST: The promised “quick checklist” to summarize the Regency costume, with links back to the articles on each topic, and a number of my favourite web resources… and it will be later this week! WOO-HOO! Two posts in a week again!

The fabulous Zorylee Diaz-Lupitou fixed the comments problem, and there’s a “Reply” link at the end of the list of Tags! For Monday’s post, let me know if there’s anything I missed in the series. Do you have any questions or feedback to help ensure the last post of the series is satisfying?

~~~

*RFID sleeves are metal lined paper covers used to hold identification and credit or debit cards that have information that can be read by radio frequency. Though the odds of unauthorized information access are extremely low, the information is pretty much useless to the person who gathers it, and my bank will cover any losses, I still use them.

Regency Bad Hair Day? Wrap a Turban!

Mihrimah Sultan, daughter of Suleyman the Magnificent and Roxelana of Ukraine

Mihrimah Sultan, daughter of Suleyman the Magnificent and Roxelana of Ukraine

When Regency fashionista Lord Byron was invited to visit Topkapi Palace in 1810, the Ottoman Turks refused to recognize his peerage and, as a non-diplomat, he was ranked behind everyone else. In hopes of changing their minds, the well-known dandy arrived in the most impressive “scarlet regimentals topped by a profusely feathered cocked hat,” but the Ottoman Turks were not swayed: he would take his place at the end of the line, behind all the staff of the embassy.

Woman in Turkish Clothing--Jean Etienne Liotard

Woman in Turkish Clothing–Jean Etienne Liotard

According to Stratford Canning, the embassy secretary and a good friend, Byron shot them a “look of scornful indignation which so well became his fine imperious features” and stormed away to sulk in his chambers over the ordeal.(1)

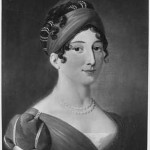
Marie Therese Princess von Esterhazy (Almack's Patroness)--Alois Maria Martignon

Marie Therese Princess von Esterhazy (Almack’s Patroness)–Alois Maria Martignon

I visited Topkapi 15 years ago, and Byron should have counted his blessings for the chance see the inner sanctum, which at that time was rarely seen by outsiders. Obviously, he wasn’t the fashion scout who brought back the turbans shown in numerous fashion plates and paintings in the late 18th and 19th century, including the Regency. Marie-Louise-Élisabeth Vigée-Lebrun was partial to them; they’re featured in many of her paintings.

(Click on thumbnails for larger images.)


Self-Portrait (1800)--Marie-Louise Élisabeth Vigée-Lebrun

Self-Portrait (1800)–Marie-Louise Élisabeth Vigée-Lebrun

Mlle du Pront (1812) --Marie-Louise Élisabeth Vigée-Lebrun

Mlle du Pront (1812) –Marie-Louise Élisabeth Vigée-Lebrun


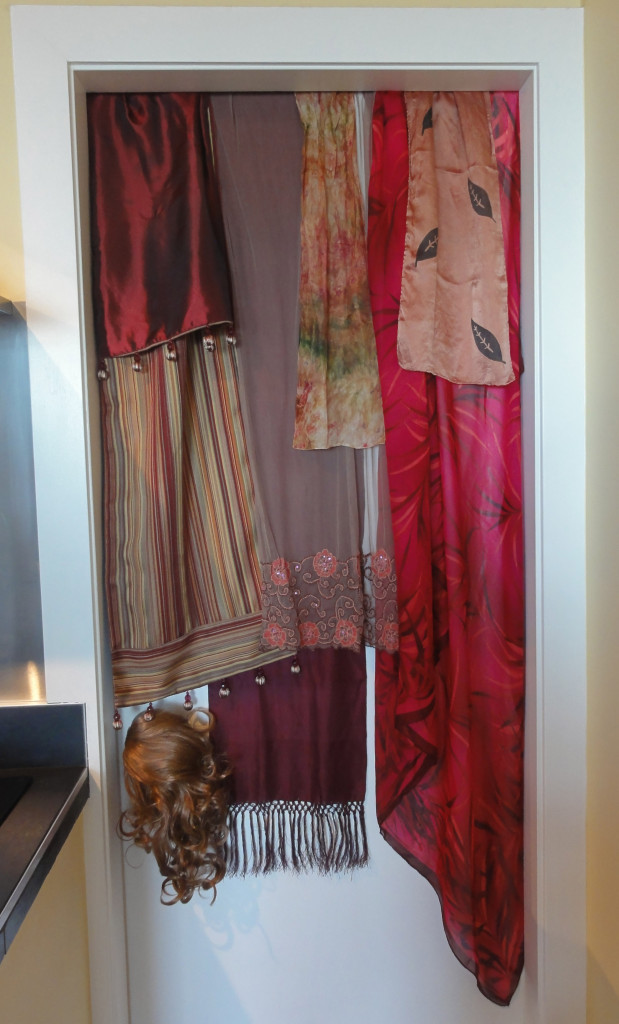
In the twenty-first century, the turban is a great alternative to a fancy Regency hairstyle for those of us with short hair or unable to style our own complex up-do. You’ll need an attractive silk panel long enough to wrap around your head twice and wide enough to cover your hair while doing so (such as an oblong scarf), lots of bobby pins and safety pins, and decorative trim.scarves table runner and pareo potential turban plus hair piece

I had a choice of a number of scarves, table runners, and a pareo, as shown. Some fabrics and prints didn’t look Regency, so I didn’t use them. Dresser scarves; a length of smooth silk or similar fabric 10-20” wide and 4-5 feet long, with neatly finished ends; a small, light silk shawl or wrap; or similar fabric finds will work. It’s nice to have fringed, tasseled, or otherwise decorated ends to dangle, but not necessary.

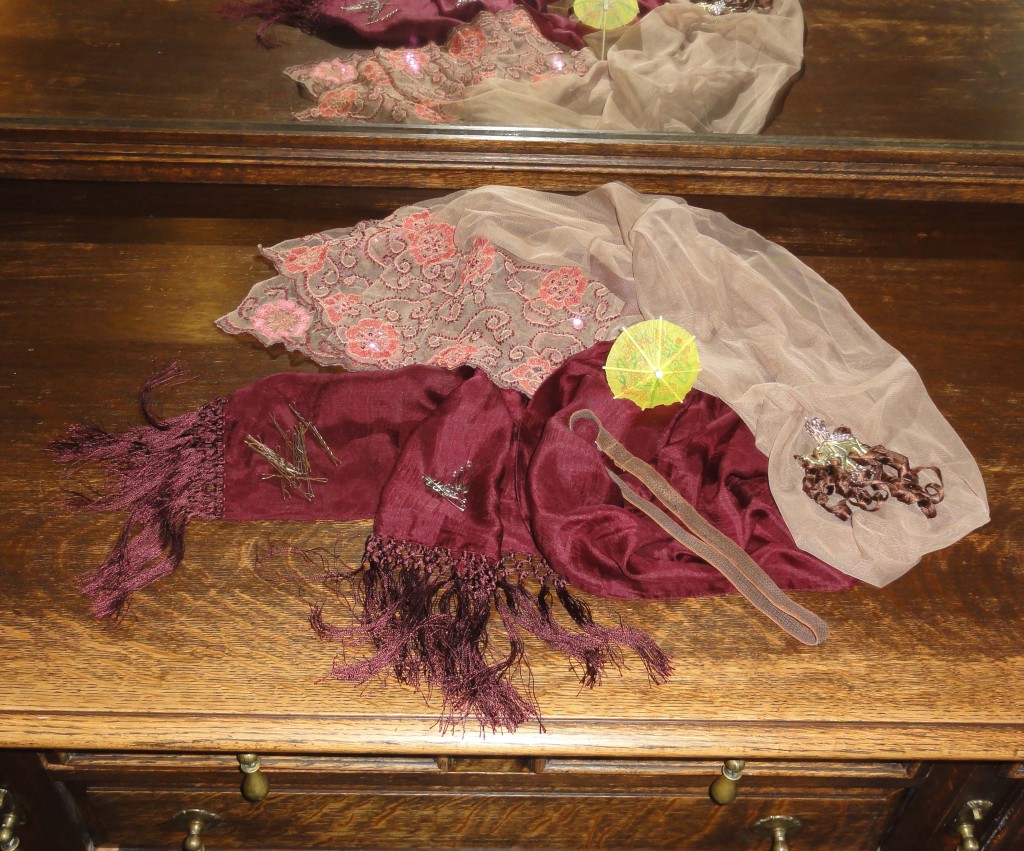
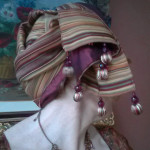
turban 2 raw materials incl pins, hairband, bobby pinsFor my first turban, I chose two oblong scarves in complimentary fabrics, one with a lace pattern on the end, and the other with fringe. They were purchased at Value Village for $5.99 and $3.99.turban 2 first panel on head

After trying to create the look a couple of times, I realized a hairband was a helpful cheat—the kind that has elastic threads woven through so it’s a bit “sticky” both sides—when set just behind the front curls of my hair to hold the slippery fabric from sliding off my head. Here are the steps I used for this turban (for larger images, click on thumbnails):turban 2 drape of 2 scarves

  • Anchor the lace end of the lighter-coloured scarf to the hair band using bobby pins; cover the crown of the head.
  • Arrange the second scarf so it drapes behind the front curls on one side; tuck bobby pins under it to anchor it to the temple.
  • Drape this scarf across top of head, attach with bobby pins hidden underneath.
  • Use a safety pin or two to join both scarves at that point.turban 2 twisting the scarves
  • Loosely twist scarves and wrap around the head.
  • Use bobby pins hidden under the edge to anchor the first turn and hidden safety pins to anchor the second turn.
  • Near the end of the wrapping, twist the second scarf back so the second fringed end drapes alongside the first and tuck the other end of the lace scarf around the turban so it looks nice.turban 2 final wrap right side
  • Secure with safety pins hidden within the folds.

Attach your choice of decorative trim: I used some curled ribbon, an elephant from a card holder, and some floral stamens, tied together with fine wire, with a safety pin attached behind to pin the arrangement to the turban.turban 2 left rearturban 2 right rear

turban 2 decorationUpon scrutiny, when I sorted my photos for this blog, I realized this turban is a bit small and under-decorated. I suck at the latter, and you’ll see that when we get to hats, too. But I try, and no excellence is acquired without constant practice! **Squints eyes in suspicion that Martha Stewart may be channeling Lady Catherine de Bourgh!**turban 2 frontAn interesting piece of cording or ribbon can be attached to the scarves when you first join the two, then twisted along with them; ideally it will make a full circle with them. A third scarf, or sturdier/heavier fabric, would make a more noticeable head dress, and lighter coloured, bigger trim would help.

Aside: A couple of weeks ago, I was in Mexico and scored a couple meters of ribbon, parasol fringe, wide lace, braid for my spencer, and an ostrich feather, for $5 total, but misplaced the ostrich feather, or I would have used it to dress this up. I’ll find it and use it later!

~

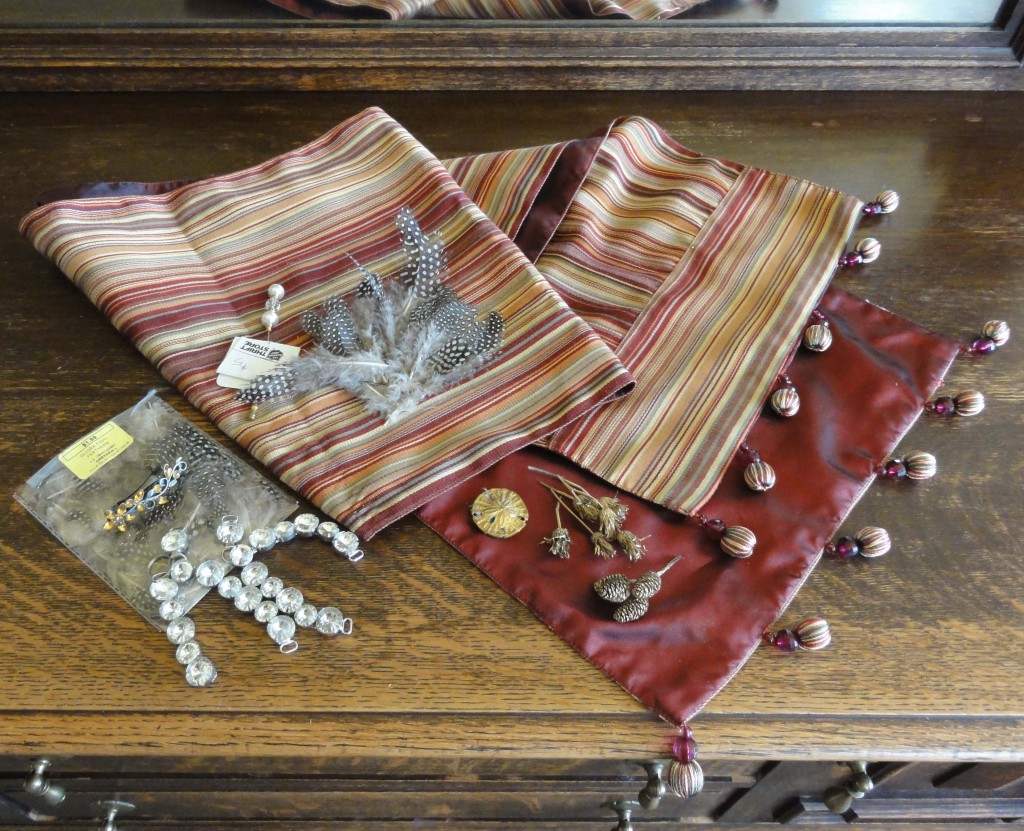
Turban 1 materialsThe materials for my other turban can be seen: I scored a Pier One lined silk table runner with cool thread-wrapped ball tassels for $7.99 at Value Village. Someone had tossed it because of a small amount of candle wax, which I removed by placing an absorbent cloth over the wax, then using a hot iron to melt the wax.

I’ve shown extra trim ideas: “jewels” from a pair of broken thongs ($1 at Value Village), an old barrette of mine with a topaz-coloured leaf design, dried and gold painted seeds, and a $5 hat pin from Salvation Army.

Be imaginative when looking for trim. You can attach a safety pin to your decoration with sturdy tape like duct tape.

The heavier fabric was difficult to work with, and I struggled with it for a long time, even though I used a simple wrap method in the video link below. Had I used a lot more pins and the hair band, I think it would have taken less effort. The end product looks nice, though.turban 1 croppedturban 1 right rear croppedturban 1 left rear croppedI used a bobby pin to secure a fan of guinea fowl feathers (never tasted it—apparently it’s quite good!), and a Swarovski crystal stick pin I got as a freebie years ago in Innsbruck when I bought a crystal kitty. I used double-sided tape to add a sand dollar medallion that I think came with a bookmark that fell apart, but I can’t be sure—there were short pieces of ribbon still attached. I’d tossed it in with buttons and beads. I do keep some stuff!

Lady Charlotte Susan Maria Bury (née Campbell) (1812)--Archibald Skirving

Lady Charlotte Susan Maria Bury (née Campbell) (1812)–Archibald Skirving

These three links show alternative ways to wrap a turban, and some nice trim ideas:

Lynn McMasters shows three ways to make a turban. There used to be a video for this but I can no longer find it.

American Duchess has a video of a simple technique for wrapping a turban. I used a similar technique for the table runner turban. You don’t have to do the end twisting steps if you like your turban simple—just pin them to hold.

1810s Eléonore de Montmorency

1810s Eléonore de Montmorency

Jen Thompson makes her turban like a cap, so you make it and then put it on, rather than twisting it on your head. Sewing is involved in this one.

Portret van Catharina Valentina van der Kun (1811-1813)--Gijsbertus Johannus van den Berg

Portret van Catharina Valentina van der Kun (1811-1813)–Gijsbertus Johannus van den Berg

I have a brimless soft velvet hat that I used on a visor for the hat mock-up shown in a previous post with my morning gown; it looks a lot like the first part of Jen’s tutorial. A fringed silk scarf wound around it, and perhaps my wayward ostrich feather, and it would be just the thing!


~

A follow-up to my last post: The rat on the door knob in the photo of scarves on the door is a clamp-on hairpiece I purchased for $9.99 at Value Village, then shampooed and conditioned. It’s got a nice wave and it’s a good match to my hair—and my hairdresser could make it perfect for an event. At my age, “redhead” is either memories of my youth or an hour at her salon!

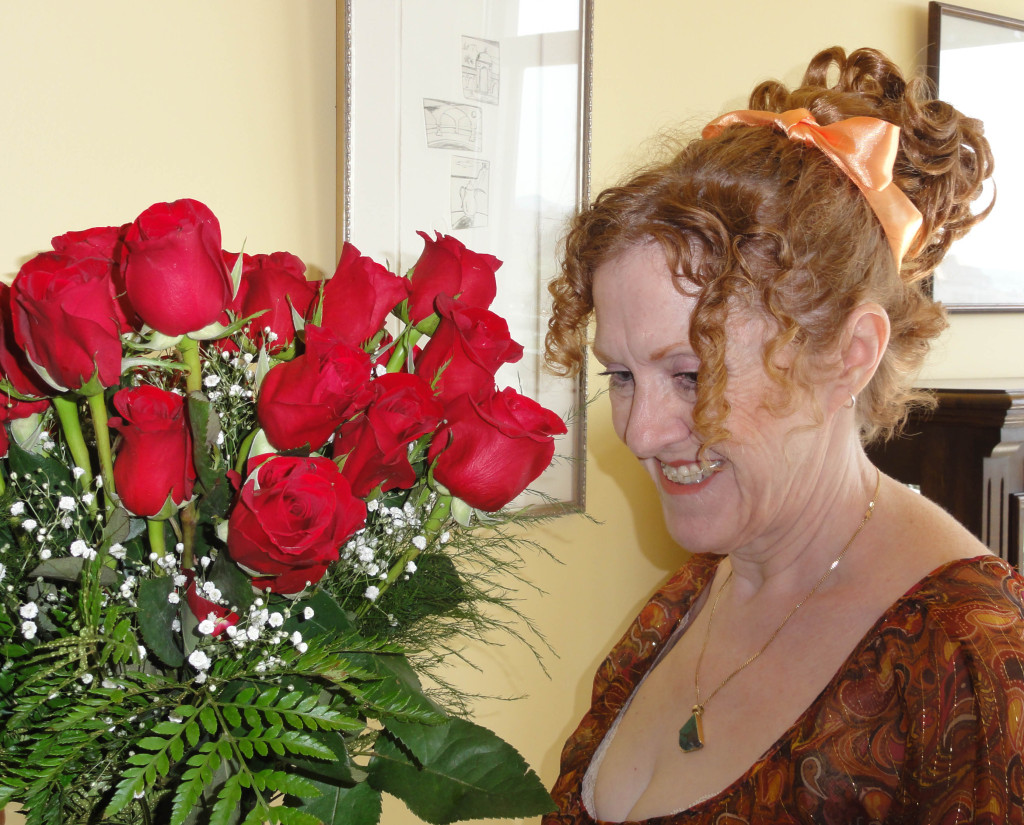
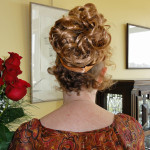
I had a little time yesterday, so I tied it into a ponytail (which looks like a bun over the hair clamp) and then pinned the waves into curls, letting them curve the way they wanted to, and sprayed everything liberally. Then I put most of my own bobbed hair into a ponytail, and clamped the thing over it. The bun looked odd, so I tied a ribbon around the base of it. This weekend I had my 30th wedding anniversary, so I thought I’d show you the roses along with my ‘do.hair in fall with roses

hair in fall back viewHad I more time, I’d have fussed with the loose ends of hair at my nape to make pin curls. One could tie a twisted pair of scarves around the hairline and in behind the curls—essentially, the turban I made already, but without covering the back of the head.

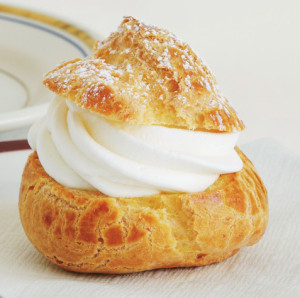
This hair-do is huge compared to my intention. If I decide to wear it for real, I’ll have to figure out how to do it so the curls wrap around the base rather than look like a pouf on top of a bun. cream-puffsThat’s a look reserved for pâte à choux and crème fouettée. Yeah, that emoticon! Hey—it looks a bit like… like… a turban!


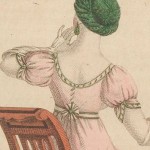
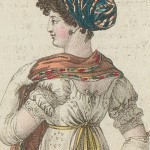
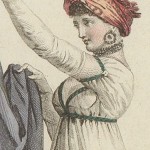
Regency print detail c. 1803 Here's an example of a turban a woman of fashion might have worn.turban and sleeve 3turban and sleeve 2turban and sleeve 1


Here are some more turbans, and some sleeve ideas for that dress!


~

NEXT POST: For the married woman or spinster, another sneaky way to hide your hair is to wear a CAP! When you go outdoors, you plop your hat or bonnet over it. It’s not a dressy enough look for a ball, where the turban is a better choice, but for day-wear, it rocks! PLUS a sneak peak at HATS! Be there or be square.

~

1. Richmond, Steven (2014): The Voice of England in the East: Stratford Canning and Diplomacy with the Ottoman Empire. London: 2014 I.B. Tauris and Co. Ltd.

~

NEWS FLASH!! Edited May 4 9:27pm PDT to add Livia (Guiggioli) Firth’s Plastic Bottle gown!

The Thrift Shop Regency Costume Experiment started as a project to obtain a more affordable, nicer style of gown without designing it and sewing it myself (although the design part is coming into it in a big way, and my stitch ripper is getting a workout!). I’ve always been a sustainability advocate, so it was natural to re-use beautiful “found” materials. As I delved farther into this project and started to get feedback, it became evident that the repurposing/upcycling aspect was huge to others. I started to pay attention to it, rather than just assume it was an ordinary thing to do.

I’d love to snag Livia’s Antonio Berardi gown after the Met Gala, to remake. (We love the Met historical costumes on this blog!). She’s so tiny, even with the beautiful trailing wrap, I doubt there’s enough fabric there for my back gathers! A sketch of the back detail of her gown is shown with this article and in this photo. She sure looks like she’s having fun!

~

May 26, 2016 update on tying the turban:

At the Louisville JASNA AGM, a vendor showed Author Linda Beutler and I an easier way of tying a turban than the method above or in some videos. Women often start from the back, like we tie bath towels on wet hair. The vendor said a Canadian showed her that if you first position the middle of the turban scarf across the front of your hair, just behind the curls, it’s easier.

You cross the ends at the nape of your neck and loop them back over themselves. Pull the ends forward and twist the fabric as desired. Bring the ends up over the first bit, cross them and loop back over themselves again. Tuck or safety pin ends to hold in place, or tie in an attractive knot. It’s nice to leave one or the other end dangling, especially if it has fringe or an attractive design, such as that of a Kashmir scarf. Fold and tuck in the parts you don’t want loose and pin where needed, hiding the pin in the fabric folds. Secure to hair with bobby pins as needed, though I didn’t need near as many with this process.

My turban looked good on the first attempt, whereas the other way, I had many lumpy failures. For the Grand Ball at JASNA, I started with the fabric (the same silk table scarf as above) slightly off-centre (one end longer than the other) so the final tie of the fabric was off to one side of my head. There’s lots of inspiration for how to tie them in Madame Vigée Le Brun’s paintings.

The finer scarves in the first attempt at a turban (above) are nice for those wearing their hair in “The Titus” or hiding the pinned-on portion of a hairpiece.

The big trip: a year of learning about publishing

Today is my last full day of a nice relaxing trip to Baja California Sur in Mexico. We come to this wonderful country nearly every winter, to different locations. I sprained a toe about a week before we came here, and after trying to do my “normal” tourism of exploring the town on foot, I wound up at a clinic being told by a Mexican doctor to rest the foot for a week. Since then, I’ve spent most of my time reading and writing by the pool at our little Mexican hotel.

It could be worse, I suppose! I was still able to hobble to the central mercado and enjoy home-made sweet potato empanadas; go on an eco-sensitive whale-watching tour and see nine humpbacks, including a calf; listen to mariachi one lunchtime and the sound of the surf the next; and window-shop amazing galleries.

Interestingly, my husband chose this holiday as the time to re-read Alias Thomas Bennet. He first read it nearly a year ago to help me catch any glaring errors before I sent it off to Meryton Press. He tells me he’s noticed some changes, subtle bits that landed on the cutting room floor; however, he’s finding it even better this time, mostly because the mystery’s out. Interesting. When Gail (my editor) heard he said that, she wondered if he was disappointed. Nope. He keeps complimenting me.

So how did ATB and I get here in a year? A dear friend and fellow author, C. Rafe Carlson, asked me a question when I said ATB was too long for publishing: “Is the the only reason?” I had to admit I was a little nervous about bad reviews, but yes, the main reason was the story was a bit long for a published novel, and I had tried to pare it down but was at a loss. Rafe encouraged me to submit it anyways. So I then approached Karen M. Cox and asked a few questions about her experience with MP. All good. And all that led up to the email I sent a year and two days ago: the original submission.

Interesting, because my research had told me that the publishing process would take at least a year. Yet here I am a year later and the book has been selling well for over two months. The blog tour I just finished gave reviews of 4/5/4/5 for the book and 4.5 for the cover. My sister tells me she stayed up until 5am reading my novel, and thinks it’s better than the original. Well, not all of us love Austen so well as our sisters, I guess.

What a trip it’s been! I’ve met so many nice people: the international contingent of bloggers from the recent tour, the cluster of associates at Meryton Press, other authors both in this genre and others, a serial tweeter who has become my best marketer, reviewers who I always admired but never thought I’d know as friends, and new friends who have long been fans of the story. It’s like another world I never knew existed, and it’s all because I decided my little homage to Jane Austen was better shared beyond my family at A Happy Assembly.

I’d love to hear your experience with my book, or the story that led you to try it in spite of it clearly being different than most Jane Austen inspired fiction.

Please consider commenting, or contacting me at my Meryton Assembly AHA profile page (member name redhead) or my Facebook author page (links at the top of this page).

My husband had trouble signing up for the email blog posts and I wonder if he’s the only one. If you’ve had that problem, could you let me know? Thank you!