Louisville JASNA Costume One: Familiar to Followers

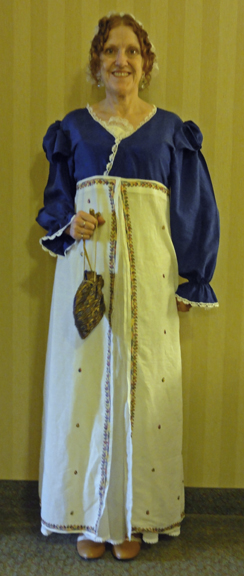
An American flag coloured morning gown was suitable for the first official day of the 2015 Louisville JASNA AGM because I planned to be at sessions until about 4 pm, the end of the morning in the Regency period, at least in the city. Austen herself commented about rising at 9am, and many slept until 10am, since balls and social life ended in the wee hours the night before–kind of like it does for many people attending this conference!

We were overtaken today compared to our quiet little pre-conference activity days! Many, many glorious gowns and hats appeared on ladies, and a good half-dozen more costumed gents now hovered about them as they priced out ribbon. I had already been confused and intimidated about purchasing these unique, quality products. Can you imagine having Ms. Silk Reddingote in front of you, passing things to Mr. Custom Top Hat? The “Quality” has come.

I have a cold and a stomach upset of some sort, and since I’ve already been here three days, I’m tired, so I kept Regency hours. Regency ladies breakfasted at nine, took callers or made calls from 2-4, thus the length of the morning. The morning dress should cover the arms and chest during those hours, thus long sleeves and chemisettes, fichus, or lace tuckers were in order.

I wore the same outfit you saw in an earlier post, which I refer to as my “emergency” gown since I put it together in a few days for a Jane Austen Tea put on by my local JASNA in early September.

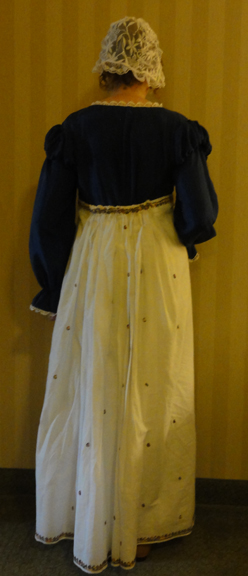
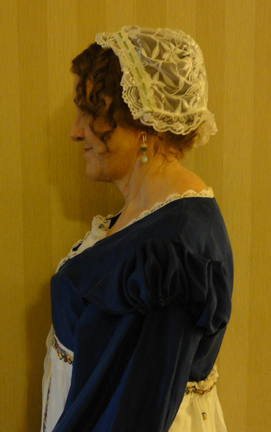
Here I am again, with more photos so you can see the back and my little “grown up lady’s” cap better. My ringlets turned out nice today. I cheated and used the tiniest amount of makeup, as I’m like Mr. Darcy in MP author Karalynne Mackrory’s book (ghostly complexion) otherwise!

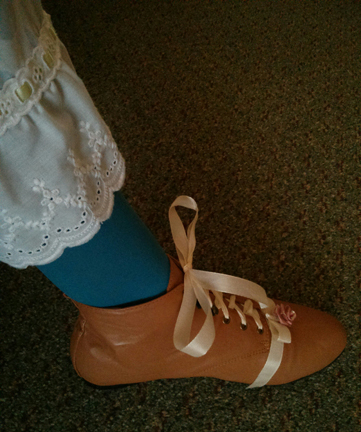
louisville 15 friday louisville 15 friday backlouisville 15 friday sidelouisville 15 friday boot


One area of difficulty is I’d originally sewn nothing more than a no-fray finish on the top edge of the petticoats the first time, but lately, I added a narrow waist band with hooks and eyes to close it in back. It has back gathers to match any gown it would be worn with.

When I made the waist band, I measured myself under a regular bra. As you may recall, I’m using a bustier from years back when I was heavier as a corset. With the cups folded in and stitched down, its shape is good and it pushes the girls up well. Its boning is similar to a busk.

It turns out this bustier reduces my rib cage about an inch! I had to safety pin the petticoat to my bustier, and after about an hour, nearly tripped on it, as it was hanging a good eight inches low on one side! Two pins had become undone, as well as the back hooks and eyes! When I tried to fix them without being noticed, I jabbed myself instead! I returned to my hotel room to add more pins and close them with care this time!

The half boots have been enhanced since the other function, and coloured stockings were worn for fun. Please don’t ogle my pantalettes, necessary to keep the dark colour from being seen through two layers of super fine cotton skirts!

I got a generous number of compliments on various aspects of the costume, and several ladies were quite taken by those little boots. They’re a half size larger than my normal shoe size, so I could fit my custom orthotics inside, and save myself from knee pain. They also liked the little blue and gold reticule I got in Cottage Grove, OR on vacation last year.

It surprised me that many ladies wore their spencers or pelisses and hats indoors all day. It wouldn’t have been done in Austen’s time!

Judging from the vendor prices at the conference’s Regency Emporium, some of those big Lady Catherine hats with exotic feathers cost close to $500. I guess they want to get as much mileage out of them as they can, so “screw the idea of wearing just a lace cap indoors!” Similarly, a pretty spencer that took hours (or dollars) to complete should be shown off!

I think I may do the same tomorrow or one of the later days this weekend!

I wasn’t the only one in a cap, as several had lace or fine muslin versions. Some long-haired ladies had not done a Regency hairdo, and had a bare head with their hair down. This all takes time, and we have to cut corners to get to the seminars we waited so long for!

My favourite seminar of the day was on Regency plumbing and how it (and water systems) evolved before and after the Regency. The speaker, Janet Fahey is a P.E. like me! Not much was new to me, as toilets have always fascinated me, but it was a good seminar, and I learned about John Snow, the father of epidemiology, who effectively created the first spreadsheets.

I know, boring compared to big hats and silk riding wear! I’ll try to remember to take some photos for you all to see!

But I have to sew more lacy on my “emergency ball gown” before tomorrow night, so that’s it for this post!

Remember to comment here or on my Facebook page, or to approach me at the conference with a mention of the Thrift Shop Regency Costume Experiment for give-aways of reticules, embroidered handkerchiefs, bling, and more. I have extra prizes, so everyone’s a winner!

Conference delegates, come by the Authors’ signing tables tomorrow at 3:45pm to say “Hi!” to me and Linda Beutler! Better yet, buy a copy of Alias Thomas Bennet from the Jane Austen Books booth at the Emporium, and I’ll sign it for you!

Also, watch for free and sale books from Meryton Press this week, as Managing Editor Michele Reed is at the Southern Festival of Books in Nashville, TN!

Pre-JASNA AGM Day trips: New Albany and Jeffersonville, Indiana

I’m truly on holidays. How do I know this? It’s 27C and sunny! (That’s 81F.) Of course, no one expected this summer-like weather in Louisville, KY in October, but they do it right around here!
New Albany and the Harvest Homecoming Festival

After a relaxing morning to compensate for yesterday’s air travel, Mr. Suze and I headed out for an afternoon of tourism. We checked the forecast, and I was glad I’d thrown one pair of shorts into my suitcase, as it was already warm!

Our destination was lunch at the food booths of the Harvest Homecoming, taking place October 3-11 in New Albany, Indiana, across the Ohio River from our hotel. We caught the #71 bus on Jefferson, about 4 blocks from our hotel.

New Albany, IndianaNew Albany, Indiana 3The trouble was, there were no events for the festival today! The food booths and craft fair start tomorrow, when I’m registered in sessions as part of the 2015 JASNA AGM!

We found a great sandwich place (Toast on Market), then enjoyed a long walk along Main Street then back along Spring Street in New Albany to see many fine houses and large commercial buildings from the 19th century in restored condition.New Albany, Indiana 2The Emporium!

Upon our return to Louisville (pronounced Loo’-uh-vull), I met up with Meryton Press Author Linda Beutler during registration for the JASNA AGM. After a chat and introductions to her friends from JASNA SW Washington/NW Oregon, we were about to set off to rest before dinner.

But first, we peeked into the Regency Emporium rooms to see all the goodies that were for sale: gift items with Austen quotes, both modern and Regency jewelry, top hats, hairpieces and wigs, paper products, “grown-up lady’s” caps similar to the John Williams Dress Cap pattern from 1826 in simple muslin, wax bas-relief profiles, books, toys, and more. Fewer than half the booths had merchandise (6pm Wednesday).

Ready-made Regency gowns were for sale for $200-$300 in a rainbow of colours, multiple styles including pre-Regency, and many sizes, mostly larger! The fabrics and finishing details showed off the designer’s ability to make each gown special, and I recognized her from Etsy (I think–if it’s the same person). Her work often has modern flair, but it’s so pretty, only the snottiest costumers will whisper and point. Most JASNA-goers will be pleased to see such a pretty gown!

My author colleague sneaked an early purchase (the Emporium officially opens tomorrow at 8am) of a beautiful shawl at a budget price from a vendor who also sold sari fabric for gowns, many eclectic books, and a few framed Regency fashion magazine prints! She showed us how to wrap a turban in far simpler terms than the videos, and mentioned she’d learned it from a Canadian! My favourite set of items for sale was right up the alley of the Thrift Shop Regency Costume Experiment: her lovely collection of “found” vintage reticules of all types!

On the way to the elevator, we nearly bumped into a pretty natural blond woman, casually dressed, and wearing glasses–OH! Author Sharon Lathan, one of the organizers of the author signing event on Saturday. She looked like an ordinary person! This is a taste of what to expect this weekend!

Pedestrian and cycling bridge between Louisville KY and Jeffersonville IN. The colours of the lights change regularly, and each side has different unique light towers to guide you up the ramps.

Pedestrian and cycling bridge between Louisville KY and Jeffersonville IN. The colours of the lights change regularly, and each side has different unique light towers to guide you up the ramps.

Jeffersonville via the Big Four Bridge

After a rest, my husband and I met Linda to walk over to Jeffersonville, IN for dinner. The paths along the Ohio river iin downtown Louisville are wide and surrounded by park area, and the huge area of bicycle racks for the weekend’s Iron Man Triathlon event was impressive!

Meryton Press Authors Suzan Lauder and Linda Beutler

Meryton Press Authors Suzan Lauder and Linda Beutler

We thought it was a half hour or so walk–but it turned out to take 50 minutes just to get to the footbridge! We were thirsty!

We chose the first restaurant (Red Yeti Brewing Company) we found in Jeffersonville about another half hour later. A prompt delivery of unsweetened iced tea and we were chatting happily as if it had taken 5 minutes to get there. (I like a little sweetening, but most sweet tea is too much for me, and Linda likes her tannins raw!) The memorable food featured yummy details like bacon jam on the brisket sandwich, and we all declared ourselves satisfied!

The rest was sufficient to restore our energy, and we walked back on the “short cut” along city streets instead of along the riverside, which shortened the trip to under an hour.

Tomorrow, Linda and I will let Mr. Suze explore on his own while we haunt the shops of the Emporium until our seminars start.

Give-aways!

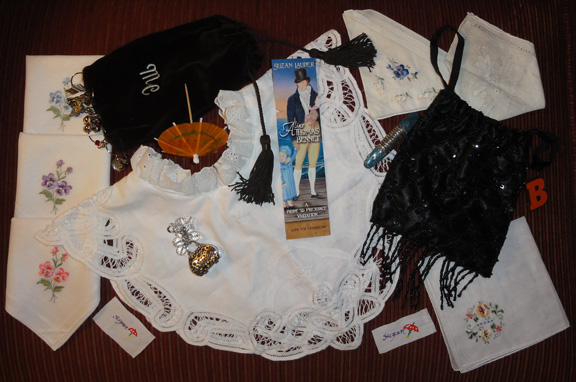
TSRCE Oct 8-12 giveaway itemsRemember, if you’re also here in Louisville with us, and have followed the blog, look out for me so you can meet me to let me know. I’ll be in costume Friday and Saturday, and in regular clothing Thursday and Sunday. The items in the photo will be given away here, a few in each of the next four days.

Linda and I will be signing copies of our books at the author booth on Saturday at 3:45. You can bring your own copy of Alias Thomas Bennet or buy a copy from Jane Austen Books at the AGM (the same for Linda’s 4 JAFF books!), or just stop by to say “Hi!”

For the balance of the followers of my blog, don’t forget to comment, as I’ll be giving away TSRCE prizes to be mailed out to winners of the draw on the blog, too!

UPDATE: Because we’ve had a lot of trouble with spam, some types of email addresses are being blocked by an extra-enthusiastic spam filter. If you’ve had trouble commenting on the blog (get an error message), I encourage you to comment on my Facebook page and mention the difficulties so we know for sure whether our spam blockers are too intense.

Tips for Faking Regency Costume Details #2

Clocked is a strange word. When I was young, when someone said “I clocked him,” I’m pretty sure it meant they hit him hard. I think it meant in the head, but I’m not sure. It’s not a word that I use in everyday conversation.

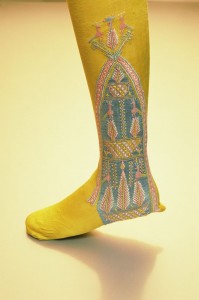
In Regency fashion, there are clocked stockings. This does not refer to anything resembling a clock as far as I can tell. It means stockings with a design on them.

Faking Regency Designs on Gloves and Stockings

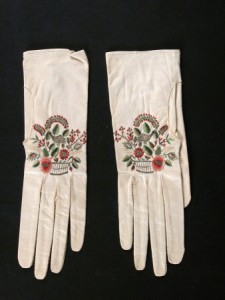
Embroidered kid gloves, 1800-1830, National Trust Museums

Embroidered kid gloves, 1800-1830, National Trust Collections.

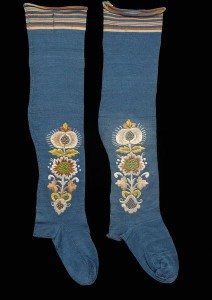
1775-1829 stockings, Victoria and Albert Museum

1775-1829 stockings, Victoria and Albert Museum

Embroidery or painting on stockings and gloves was an embellishment that was enjoyed by at least a few Regency ladies (and men), judging by the museum examples. Interestingly, an etiquette book of the time, Mirror of the Graces, frowns on clocked stockings. It looks like fashion won in consideration of a stuffy old guidebook!

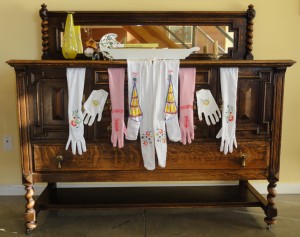
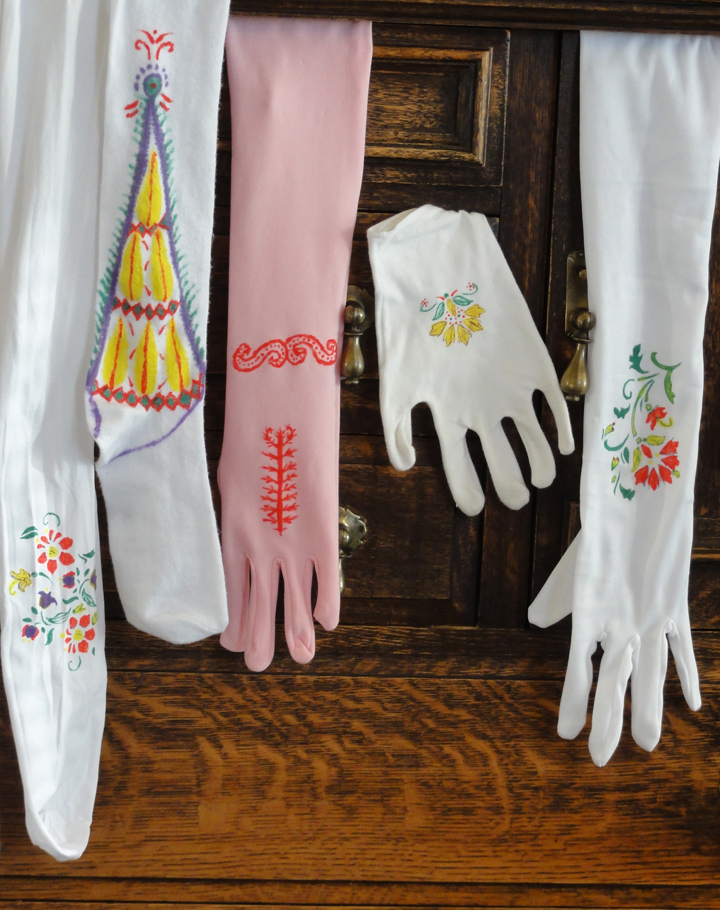
Some of my stockings and gloves got a fake Regency treatment this weekend: I used fabric paint to apply designs. A stencil purchased for half price at Michaels was used in three different ways, by masking some of the areas with packing tape each time. Once I’d done all I could with the stencil, I decided to try a bit of freehand with the four colours of paints I had.painting accessories all

The floral designs on the white tights and the short and long white gloves were made with the stencil. The pink long gloves and the knee-high stockings are my attempt at freehand, loosely referring to photos of existing museum pieces (see below). Not bad for a non-crafty redheaded romance author!

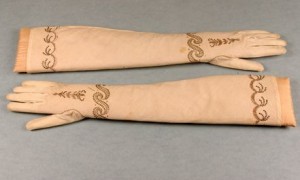
Cotton fabric embroidered gloves, circa 1790-1810, bias cut for stretch, gold and sequinned scrollwork, pale pink, floss silk detailing.

Cotton fabric embroidered gloves, circa 1790-1810, bias cut for stretch, gold and sequinned scrollwork, pale pink, floss silk detailing.

Stockings, early 19th century Cooper Hewitt collection

Stockings, early 19th century, Cooper Hewitt collection.

Stockings, 1810, English, Kyoto Museum

Stockings, 1810, English, Kyoto Museum


painting accessories closeup to show detailI didn’t bother with the coloured tights as for now, the colours don’t suit my gowns.

The pens tended to bleed in the fabric, and the bottled paints were a bit puffy. After the first items, I used the pens for light lines and not fill, and used a Q-tip to apply the paint so it was smoother. If I was doing this again, I’d consider getting additional colours, but these were all I found on sale the day I bought them at Michaels.

~

How to Make Easy Back Gathers on Regency Gowns

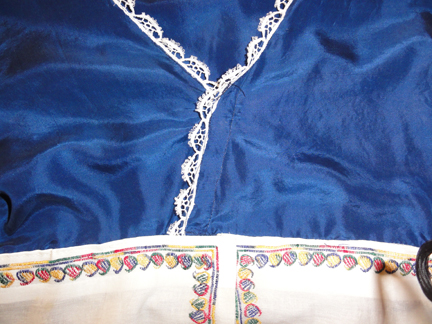
One of my favourite tricks for faking Regency is to use drapery tape to make the back gathers for a gown. The tape must be the kind that makes all uniform gathers, and not pinch pleats. I had some 1″ wide tape I got in two meter-long pieces at a thrift store for $1 a long time ago. I used it to make the last-minute “emergency” gown for the JASNA outing I had a few weeks ago. Belt backing tape can be seen for the non-gathered part.gathering tape and waistband material inside paisley embroidered fabric for use as a skirtpaisley fabric gathered using drapery tape

There are two ways to use the drapery tape to make your Regency gathers in the back of the gown.

  1. The simplest is to machine sew the tape onto the gown. Take care not to sew on the strings. Gather using the strings, tie the strings, cut shorter, and leave in place.
  2. The second method allows re-use of the drapery tape and less bulk in the back of the gown. Hand-baste the drapery tape on, but do not lock the end of your basting thread, rather, leave an inch or so free. Once you’ve sewn your skirt to the bodice, the gathers are fixed, and all you need do is tug on the knot on your basting threads to pull them free and remove the drapery tape to use on another skirt.

You want to have at least three times the width of fabric as your final gathered amount, and 4-5 times looks pretty.

Depending on your fabric, you may want to leave a seam allowance above the drapery tape. Because my fabric (above) had a border, I ran the tape at the top edge, then hand-stitched it to the bodice.

If you’re interested in standard methods for gathering fabric, this video from Teach Yourself to Sew shows three different methods.

~

To Zipper or not to Zipper–or To Fake!

When you get a vintage or other type of newer-than-Regency gown and wear it for a Regency gown, to be authentic, you should remove the zipper. Regency alternatives were ties, hooks and eyes, or buttons, or they were pinned closed by a lady’s maid.

In most cases, a replacement closure for the zipper is not necessary on the skirt, as the ribbon or belt holds the top edges together. The skirt is loose due to the gathers, and should overlap. The concern would be to ensure the bodice fit is snug.

There may be gaps between the replacement closures. In the Regency, so many undergarments were worn, the gap was of little consequence; however, some modern women balk at the idea.

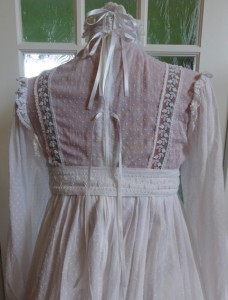
ribbon ties on back of original morning gown suzan lauderMost often, Regency gowns used ties to close at the back, and this is an easy-to-install and inexpensive closure. Discount and craft stores have narrow ribbons in limited colours for under $2 a roll, and attractive cords are under $1 a meter.

In the absence of a lady’s maid, to fake Regency with modern modesty, retain your zipper and add ribbon or light cording ties over it at a couple of locations. At right, two are tied and the lower one is not, so you can see where they’re attached. Care must be taken not to catch the ties when using the zipper.

At 12″, mine were too long; 6″-8″ would suffice.

~

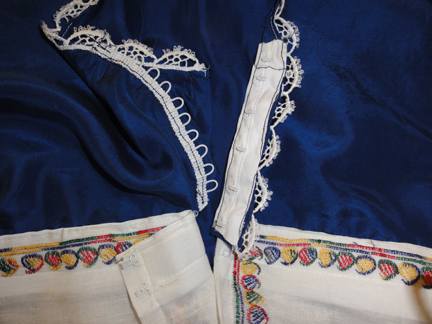
To close the front of the “emergency” gown, I used hooks and eyes. This is not truly faking as they were common on Regency gowns. When hooks and eyes were used, seamstresses weren’t stingy, and used a lot of them.

Packages of individual hooks and eyes are inexpensive, and come in black, white, or steel in most stores, and some stores offer additional colours at a premium. They are fussy to sew on individually but are excellent in some cases, such as holding a short width or edges together.

For ease of installation when multiple hooks and eyes are needed, cotton tape with hooks spaced about every inch, and matching tape with eyes, is sold by the meter. I was lucky to get the tape with hooks on sale, but the tape with eyes was regular price.

An alternative to the tape with eyes (at half the price per meter) is a product intended for long rows of buttons, which looks like woven cording with loops every half inch or so. The loops appeared to align with the hooks, and for short lengths, they’re okay, but they’re just enough out of sync that, for longer lengths, I need to skip an extra one every so often.

As you can see, I used both types: tape on the crossover v-neck and individual hooks on the belt edge of the skirt. The installation was fair to both right and left handed openings!

hooks and eyes on emergency dressemergency dress closure


~

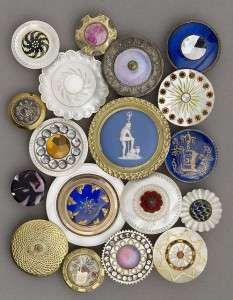
As much as we like buttons these days, they were less common on Regency women’s wear. Jane Austen remarked in a letter to her sister Cassandra that buttons were quite dear. Men’s clothing most often had self-covered buttons, but ladies’ used metal, shell, ivory, stones, gems, and similar materials.

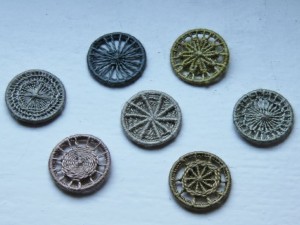
Mother-of-pearl buttons are okay if you can find them, as are buttons made with fine cording such as Dorset buttons. Don’t use plastic buttons unless they are an excellent fake.

Pearl and metal buttons, 1780 to 1820, Luckcock Collection, Birmingham Museum of Art

Pearl and metal buttons, 1780 to 1820, Luckcock Collection, Birmingham Museum of Art

Dorset buttons

Dorset buttons

You could put fake buttons and loops on the gown just as you did for the ribbon ties, and keep your zipper.

~

Next post: I left all the hand-sewing for items like Mr. Suze’s coat to the last minute, and not much new is happening at the moment! I’ll try to take a photo or two of my ball gown as I complete it this week, but since I’ll be traveling prior to the JASNA AGM in Louisville, Kentucky on October 9-11, 2015, it will be a meager post!

~

The best word EVER: GIVE-AWAYS!

On October 8-11, while I’m in Louisville, there will be a draw for daily prizes from my stash of reticules, Regency accessories, and other goodies. The Regency items are one-of-a-kind. Though they’re hand made by someone who’s not crafty (so less than perfect), I’ve signed each one and added my signature pagoda parasol.

There are two ways to enter:

1) Comment on any Thrift Shop Regency Costume Experiment post on road trips with the redhead, with your email address (username at host dot com), or

2) approach me at the JASNA AGM and ask for a Parasol in a Ballroom. I’ll collect your name and email address.

**The first person who enters either way whose initials are M.C. is an automatic winner of a velvet reticule with your initials embroidered on it!

I’ll attempt to deliver winning prizes from the AGM while I’m there, and blog comment prizes will be mailed. Good luck!

The trials of Regency correctness in fiction writing: My guest post on Austen in August

Words coined during Queen Victoria’s era, critical plot points that require our hero to travel to London from Derbyshire and back twice in the same week, a twist that depends on English Parliament sitting in the fall in the wrong year–these elements creep into our Regency fiction writing every so often, and the poor author must re-think the scene. All three have affected my latest novel! On top of it, there’s technology and medicine, titles and inheritance law, etiquette and fashion… all must be in order in an Austen-inspired Regency romance, or beware!

When literary historian and blogger Roof Beam Reader was looking for guest blogs for his annual Austen in August series, I suggested a tongue-in-cheek summary of the challenges with keeping true to the era, and the energetic viewpoints of Austen enthusiasts regarding historical accuracy in Jane Austen Fan Fiction on some story boards. It was a new topic to him, and he was keen, as no one had taken this direction on his blog yet.

Regency lady writing: did she have issues with anachronisms? --From Ackermann's Repository for Art, 1813.

Regency lady writing: did she have issues with anachronisms? –From Ackermann’s Repository for Art, 1813.

Click here to read my post on Regency correctness on Roof Beam Reader’s blog! #AusteninAugustRBR

If you’ve already signed up for the Austen in August reading challenge, you can enter the giveaway, too! I’ve donated a signed copy of my Regency romance with a mystery twist Alias Thomas Bennet, a choice of reticule from a set including the two I upcycled for the “Pretty Little Purses” post for the Thrift Shop Regency Costume Experiment, and a special “grown-up lady” lace cap to be made to order.

Fun with Reticules: The first half-dozen designs!

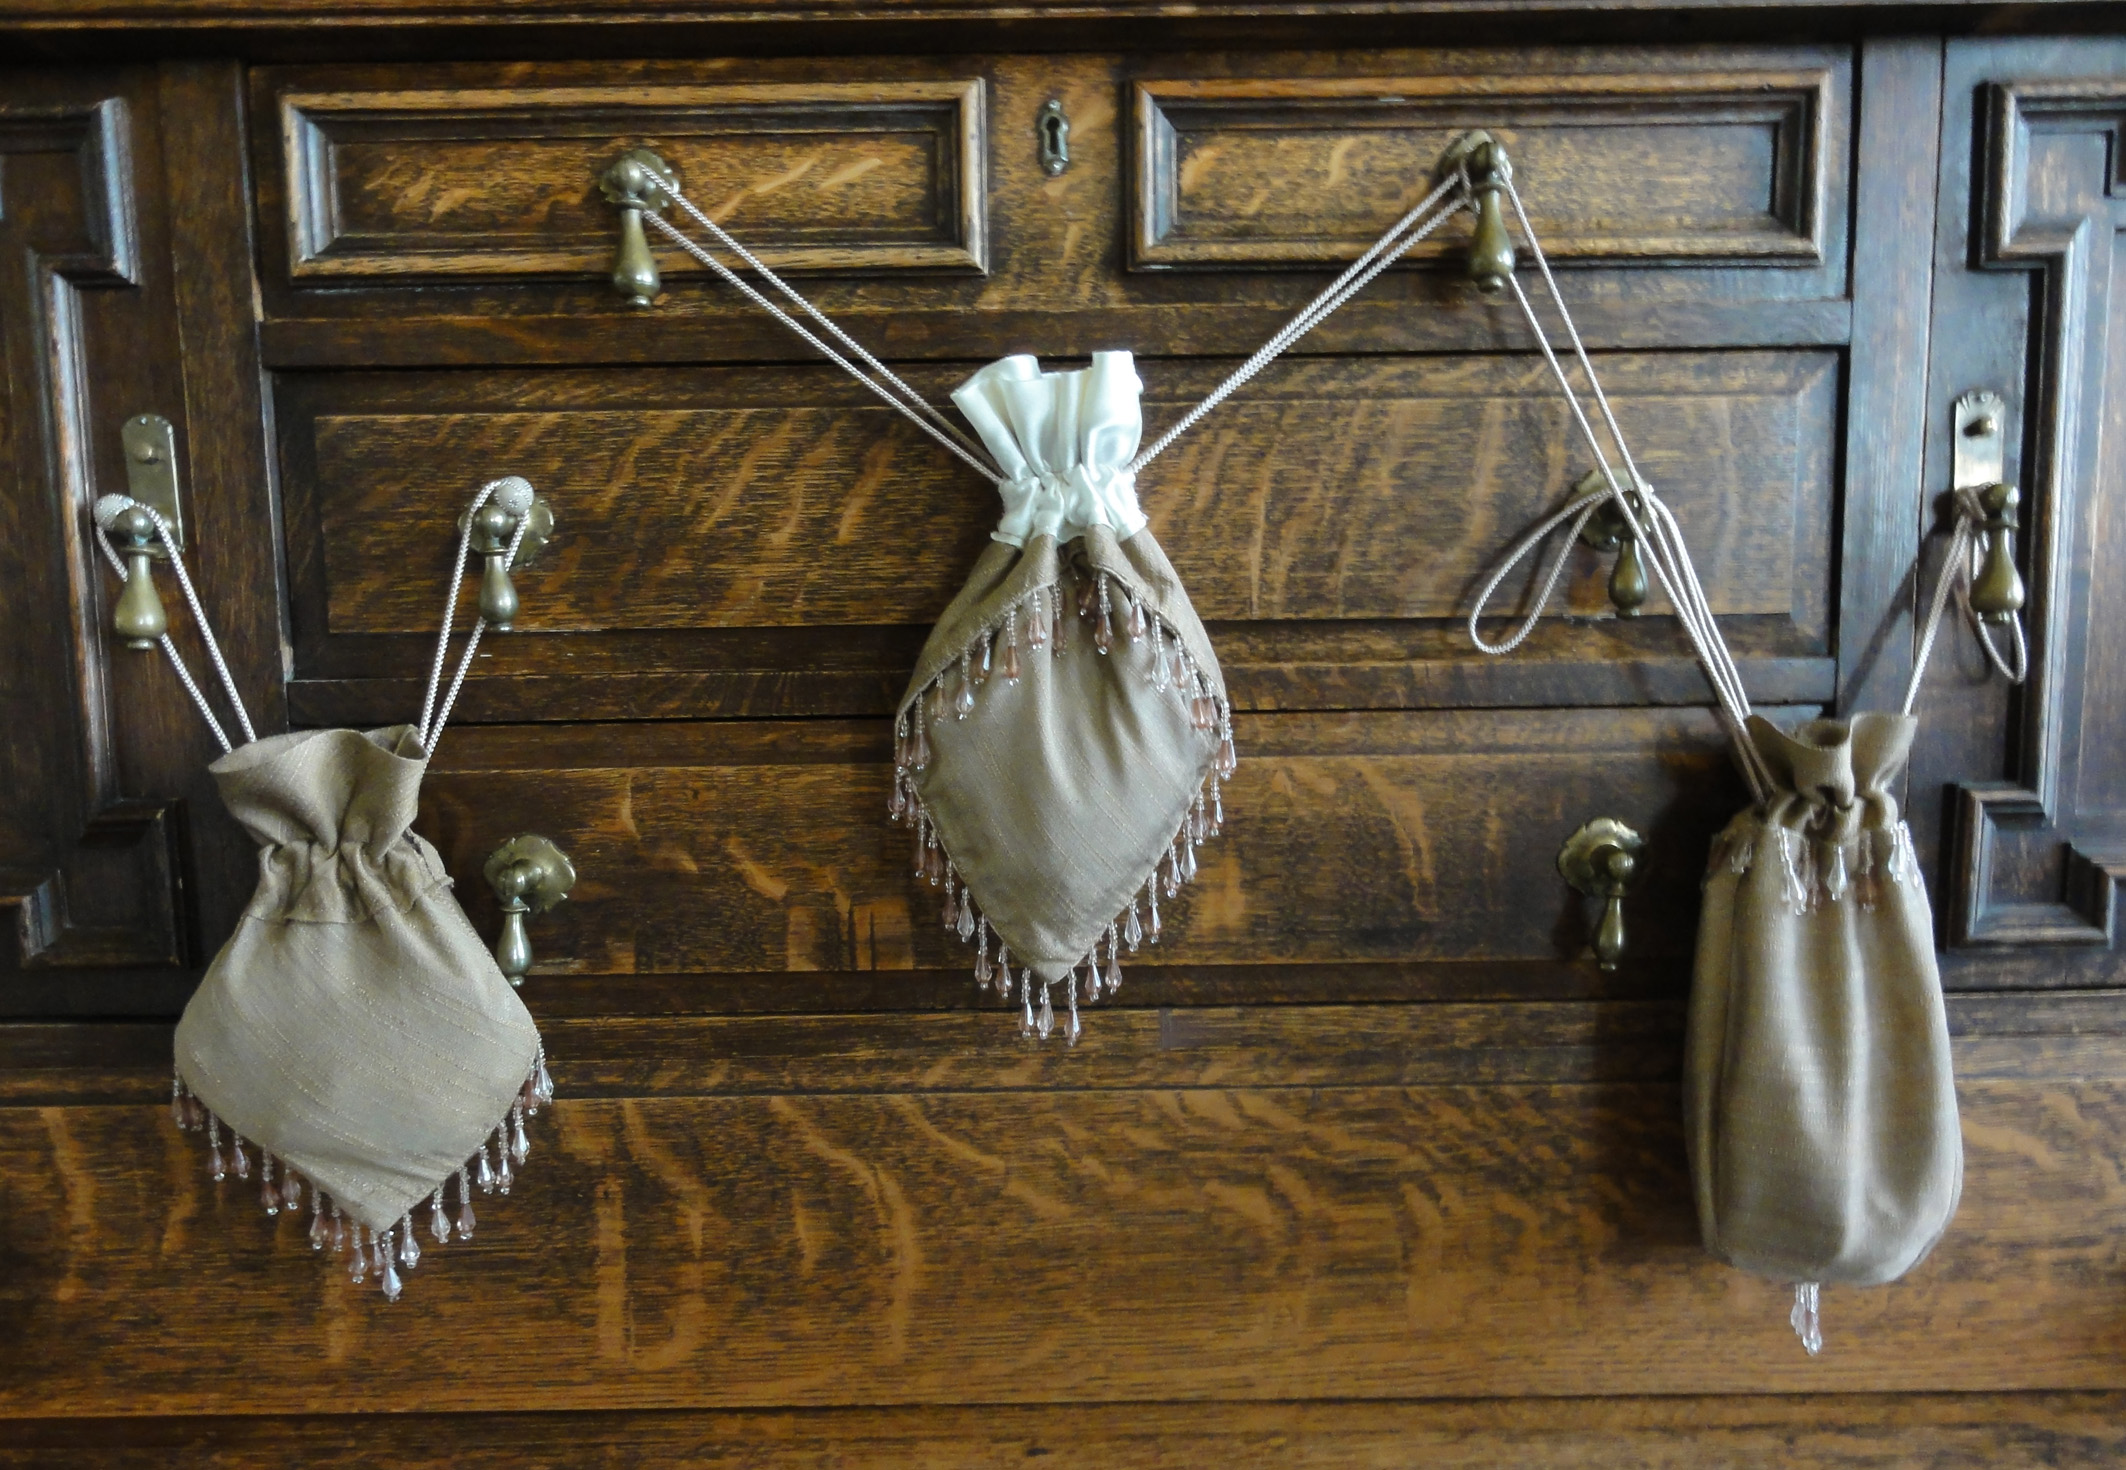
One cushion cover down, two to go! My favourite, the silk with strands of beads about every half inch along the edge, was the one to start with. Recall that it was $1.99 from Women in Need (WiN). A back zipper limited the use with my standard designs, which yield for four reticules from one cushion, two of each of two designs. Instead, I still used the first design, but made two from the wider section, after which I stared at the leftover panel for a while.

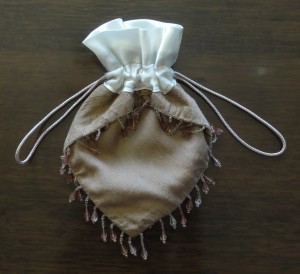
Two small square reticules could be made, but the beads were on two sides of each half. I decided on a three-sided reticule with the row of beads at the top, below a ruffle.

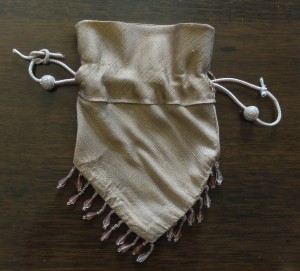
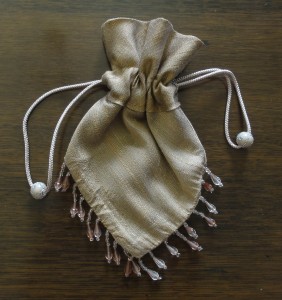
Beaded cushion cover reticules: Design #1, Design #2, and "Bonus Reticule," similar to Design #5 ("The American Girl's Book" Three-Sided Reticule).

Beaded cushion cover reticules: Design #1, Design #2, and “Bonus Reticule,” similar to Design #5 (“The American Girl’s Book” Three-Sided Reticule).

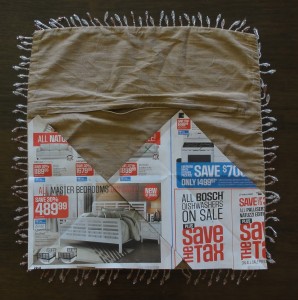
I started by cutting a square piece of newspaper the size of my cushion cover, then folding it on the diagonal and marking the centre. The cushion cover had a zipper about 2/3 of the way across the back, so I cut the pattern to the size of the largest back panel. I realized I’d only get two reticules made from this piece.

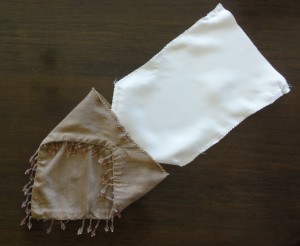
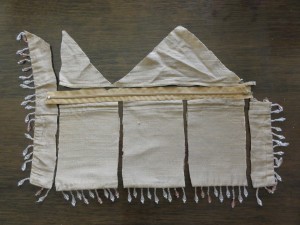
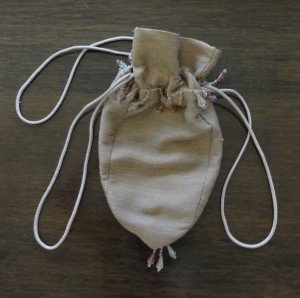
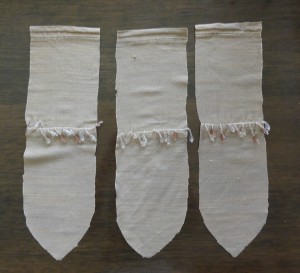
Appended to this post are two pdfs: one for the reticules and one for trim. The first has the main patterns for 6 different reticules, the instructions on how to sew the reticules, including special no-sew iron-on tape instructions, and a bonus design for leftover panels. A second pdf describes how to run and trim drawstrings, decorating the reticule body, several ways to line a reticule, and the installation of tassels and other hanging baubles.

with pattern pieces for #1 and #2This cushion cover made Reticule #1 and Reticule #2 (with exposed lining). I marked the design on my newspaper, cut each pattern out, pinned it on the fabric, cut the fabric, and assembled each according to the instructions.

I added beads to the loops of the drawstrings of Reticule #1 because it was simpler in appearance than the other. You could add a lot more decoration to either if desired.beaded cushion cover reticule #1 thread beads and tie with reef knot

Suzan Lauder's Cushion Cover Reticules, Design #1

Suzan Lauder’s Cushion Cover Reticules, Design #1

Suzan Lauder's Cushion Cover Reticules, Design #2, "The Envelope Reticule."

Suzan Lauder’s Cushion Cover Reticules, Design #2, “The Envelope Reticule.”

#2 lining goes in wrong side out with outer part right side out


#3 cuts


I removed the zipper from the leftover panel and cut the fabric into three strips, then opened them up to make panels for the final reticule. The beads that were on the end wound up at the top of the reticule, since the section below them became the body and the section above, the drawstring casing and a ruffle. This is shown as a “Bonus Reticule on the pdf, which has patterns and instructions for Reticules #1 through #6.

In retrospect, I wish I’d left the row of beads halfway down instead of at the top–in other words, shortened the lower portion rather than trimming the upper portion prior to sewing. I could have used the beads cut off from the sides and tucked them under the edge of the drawstring casing for double the beads.

I also had some difficulty with this one since I made it on the fly, where I’d carefully written the instructions for the others first, made them, then updated the instructions for the learning experience. I found it awkward to sew the beads at the base, and next time, I’ll just re-thread them and hand-sew them on at the end.

Note that similar reticules on Etsy start at $15, and cheap-looking bat-wing ones sell in the $25 range!

Bonus Reticule, similar to Reticule #5.

Bonus Reticule, similar to Reticule #5.

#3 three panels spread out


PDFs for this post:
Cushion Cover Reticule Patterns 1 to 6 by Suzan Lauder
Drawstrings, Trim, Linings, and Tassels for Reticules by Suzan Lauder

~~~

Additional reticule designs for the other two cushions will be shown in a few weeks, and two more pdf’s will be added with that post. The main hangup is I don’t like the designs I have for the next two cushions. A paper fill inside the cording of one swelled when I washed it, so the look of the threads has deteriorated where the brown shows through. I can’t use it where I’d planned: Reticule #6. In addition, the woven pattern on its fabric wouldn’t be shown off to its best in a petal reticule. The other has no trim and is a bit bland, but may turn into a pineapple yet! It would be great if I could find one more.

But do I need to make more reticules to test my patterns and show off my designs? I’m running out of time before the Louisville JASNA AGM. Instead of shopping for more for myself, as I need to sew my last items, and Mr. Suze needs a costume! I’ll post about the Gentleman’s Thrift Shop Regency Costume as I progress.

I’ll divulge that I’m happy with four purchases for my husband’s costume so far:

  • New black leather dressage riding boots for $65 via a local “used items for sale by owner” web site. The fellow bought them for over $200 for a very tall daughter, who didn’t like them. DH will spend $40 to have them cut down 2″, rather than risk blisters behind his knees. From what I can see on the Internet, that’s a huge bargain! DH has hard-to-fit feet, and boots will be easier to fit than dance slippers.
  • Buff-coloured, slim-fitting, fine, faux-suede trousers for $6.99 from The Salvation Army will be made into breeches, with part of a leg used to make the front flap. I already have some nice knee buckles from an old visit to Dressew. They were $1 each.
  • A dark green, wool, cutaway morning coat for $65 (including shipping) from an online seller of former rental tuxedos on eBay. The front bottom edge will be cut to a Regency line, and the lapels tacked a bit higher if possible.
  • An ivory, paisley, satin waistcoat from a different online seller of used tuxedos, for $25 (including shipping), which comes with a matching bow tie! All the men’s vests I saw at local thrift stores were wool, and I was even looking at ladies’, just in case. I’ll cut the modern bottom edge straight across and use the extra pieces to make a collar. The buttons will be replaced with self-covered ones, perhaps using that bow tie. I already have two packs of four self-covered button kits, plus brass trim rings, from Dressew for $0.25 a package!

~~~

Next Post: Faking Regency #1, using my spencer and some artwork and museum pieces for ideas.

~~~

RETICULE GIVE-AWAYS! I’ll be giving away one reticule as part of my upcoming guest post on Austen in August, on August 24, 2015. It will be chosen from the two I improved for the “All the Pretty Little Purses” post (below), and perhaps one or more of the cushion cover reticules from today, or any I make before then! Of course, they’re handmade by a non-crafty person, so there are flaws, but I’ve signed each one inside.

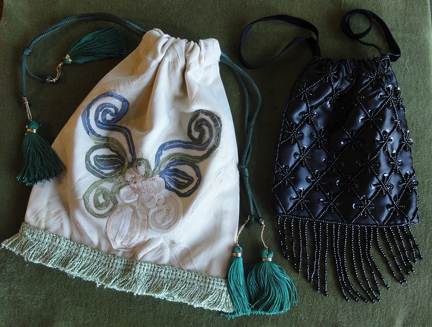
The completed green and black reticules. Note that with the black one, I tied the  loose ends of the velvet ribbon together firmly, and slid them into the ribbon sleeve, rather than add tassels as on the green cord. (The black ribbon was not long enough.) You could also thread beads and sew them onto the ends instead of tassels.

Suzan Lauder’s Thrift Shop Regency Costume Experiment: The completed green and black reticules.

What quality of Regency dress do you get for $33.95?

If it weren’t for that elusive short-puffed-sleeve dress that was only a ribbon from Regency, I could have stopped shopping for a gown in February when I found my wonderful white dress for use as a morning gown.

Why did I continue for four more months? What made me keep seeking out a long gown in a pretty print, or similar in a smooth silk for a ball gown, that needed nothing more than to gather its extra fabric at the back and tie a ribbon about its empire waist? I believed in its existence, that’s why.

Several of the overview web sites listed in the “Cheat Sheet” post implied I’d find it with ease, and I was determined to! I saw many dresses that were close. Too short, too small, too much trouble removing panels of non-Regency trim, and mostly, polyester knit. Drat. Double drat.

In addition, some key accessories were found later on: my shawl was found in May, and the fan, half boots, and better ball slippers in June. I was still trying to find a better fan, a real pagoda parasol, and some better gloves to the last minute of the planned deadline of the end of June!

The quest for Mr. Suze’s outfit started in March as well, so I was searching for tailcoats, poet’s shirts, riding boots, and collared vests beginning in March. (I found three tailcoats that were perfect, except two were too large and one was too small. $35-$65.)

Some have suggested I spent far too much time shopping when I could have sewn a gown for the same cost.

My reply? Not the same gown, nor anything near as nice for $33.95, and my morning gown would take a substantial amount of time and skill to sew.

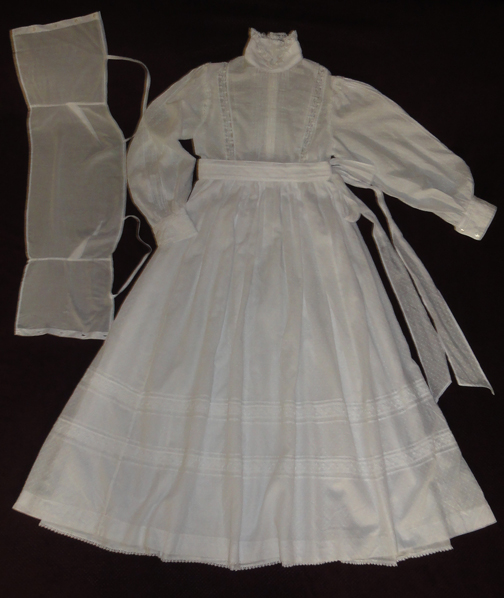
Morning dress and camisole.

Morning dress with matching belt; camisole.

The amount of time spent shopping was not that much by the time I found the white Prairie wedding dress from the ’80’s in late February. Though I started in summer 2014, I only went every three weeks or so for a couple of hours at first, and December, January, and half of February may have been three visits total, due to other commitments and vacation.

It took a while to acclimatize myself, but my early purchases were far more than a gown: the accessories alone made the time spent worthwhile, never mind ribbon, lace, no-sew tape, and items for future gowns. The the final months were not as productive, but by then, few items were remaining.

Matching waistband with Guipure lace.

Matching waistband with Guipure lace.

There is no way anyone could make a gown anywhere close to this quality for less than triple the cost. The photo above shows the generous amount of fabric in the skirt, sleeves, and integral petticoats. There’s the delicate camisole that came with the dress, and the matching belt.

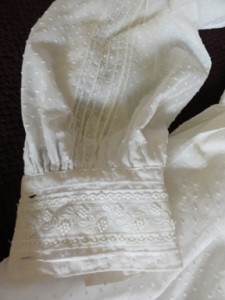
Sleeve detail with lace on cuff and pin-tucks the length of arm.

Sleeve detail with lace on cuff and pin-tucks the length of arm.

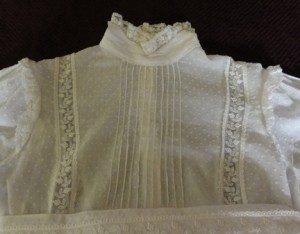
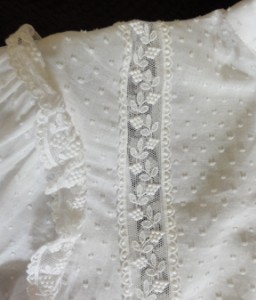
Bodice with pin-tucking, lace panels, and high collar trimmed with lace.

Bodice with pin-tucking, lace panels, and high collar trimmed with lace.


A great deal of work went into pin-tucking on the bodice and sleeves, and pleats on the cuffs and lace panels on the skirt.

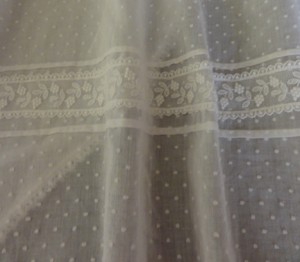
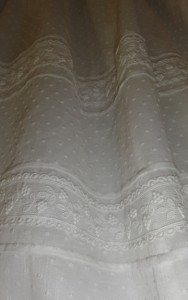
The sheer Swiss dot fabric is so fine, you can see the petticoat lace detail through it.

The sheer Swiss dot fabric is so fine, you can see the petticoat lace detail through it.

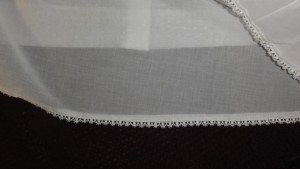
Petticoats of fine fabric with high-quality Guipure lace edging.

Petticoats of fine fabric with high-quality Guipure lace edging.


The fabric in this gown would cost $80-$120. The Swiss dot fabric is super-fine, as is the batiste petticoat: like Regency muslin. As mentioned in the previous post, the gown is cool to wear on a hot summer day with a light breeze because of the breath-ability of the delicate fabric.


Two rows of Guipure lace and fine pleats on the skirt.

Two rows of Guipure lace and fine pleats on the skirt.


The lace alone is worth at more than I paid for the dress: at least 8 metres of 1″ wide Guipure bridal lace on the gown and another 3m of ¼” wide scalloped Guipure lace on the bottom of the petticoats. The former would be around $8 a metre, and the latter would be $1 a meter at a discount place like Dressew.

Lace goes over bodice from front waistband to back, and forms a gathered ruffle at top of sleeve.

Lace goes over bodice from front waistband to back, and forms a gathered ruffle at top of sleeve.


The rest of the costume is shown below, since you couldn’t see a few of them in the previous post.

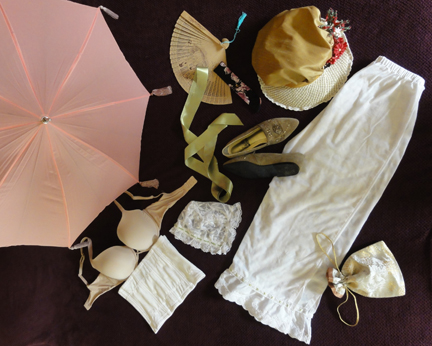
Everything else worn at the Jane Austen tea, except knee high stockings. Photographer forgot them!

Everything else worn at the Jane Austen tea, except knee high stockings. Photographer forgot them!

Because the dress had a gathered front, it would be pre- or early Regency. I thought about modifying it, but it would require sewing.

Instead, I chose the sage shoes since they have a slightly pointy toe from the same period. To coordinate with the shoes, green ribbon was used in the trim for the pantalets and lace cap (hastily machine-sewn the morning of the event, but more on that in a later post!) and for the waist ribbon on the gown.

In conclusion, those who’ve suggested the dress was not worth it should consider that the entire costume was the cost of a simple dress with lesser-quality fabric and no lace, and petticoats would be extra. If my time prior to the purchase of this dress was split between all the items, the effort would be no more than the time to make a dress of the level of detail I purchased.

But that was not the point of the Experiment! What’s more, it would fly in the face of the guidelines I shared when we started.

My learning experience was crafted not to get the best deal on a gown, but to get the best gown I could for a good price, without making it.

The intention was to share this experience, warts and all, so others might feel empowered to wear that Regency costume they’ve dreamed about for the next Austen-related event, and to let them know they have options. We should all be able to feel pretty and pretend we’re in another time in history!

Isn’t my dress exquisite? I’m so proud to wear it!

I feel lucky to have found it, even if the ball gown proved to be difficult so far. But I’ll probably peek at the dresses every time I pop into a thrift store to see if they have a medium-sized tailcoat! You never know!