On the Road Again, Sans Ball Gown

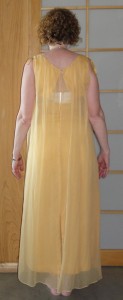
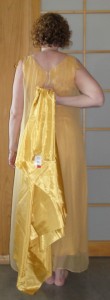
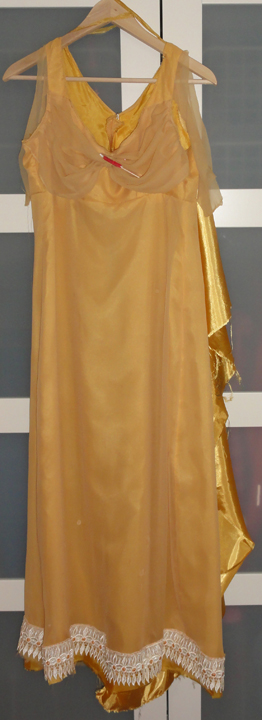
jonquil original frontjonquil original backA sad event took place last Wednesday. I had to abandon efforts to complete my beautiful jonquil ball gown midway through the project.

My setback was part of a chain reaction from washing a panel of matching fabric to be used to line new gathers in back.

It’s best to wash new fabric in case it shrinks. The fabric came out fine.


The Original Plan

jonquil back with faux silk lining shownThe vintage 1960s gown from Women in Need (WiN) Thrift and Vintage Superstore (above and right, before any modifications) would have the following modifications:

  • The back skirt detached from the bodice, the zipper removed, and the center back seam opened.
  • A triangle cut from the former back panels to create Regency side panels 7″ wide at the top and 12″ wide at the bottom.
  • Part of the sheer overdress draping from the original dress, plus matching lining (faux silk from Salvation Army at $2.99 for 2 meters) added as a 24-inch-wide back panel, gathered to six inches wide.
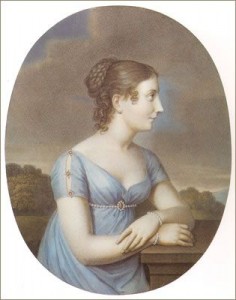
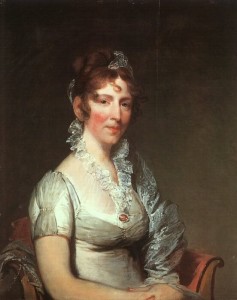
  • The sleeves modified by cutting the overdress draping free at the neckline and reversing it to have a finished look like the artwork below left.
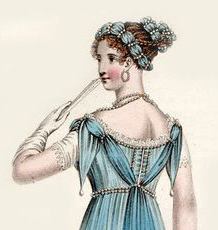
  • Panels from this draping would be finished with beads on the ends like the Regency fashion plate below right.
1815 Stephanie de Beauharnais-Baden wearing pale blue dress by Aloys Keßler after Johann Heinrich Schroeder

1815 Stephanie de Beauharnais-Baden wearing pale blue dress by Aloys Keßler after Johann Heinrich Schroeder


Evening Dress October 1811

Evening Dress October 1811

Indian blouse.

Indian blouse.


  • Lace from the Indian blouse was to run along the skirt bottom to lengthen the gown about 1.5 inches. Removal of this lace took quite a while since it was sewn on with  silver thread, which I wanted to retain to match the 1960s gown’s original waist trim.
  • A shirred panel from the ends of the draping would cover two holes in the bodice.


Disaster hits!

But when I decided to wash the gown along with the new fabric, on a super-delicate cycle, a horrid change took place: pin holes in the sheer fabric enlarged, and the overlay and draping, both from the same sheer material, shrank.

New projects emerged from the fiasco:

  • open the hemline where the overlay was attached to the lining so the fabric would relax before the lace was attached to the bottom of the sheer overlay,
  • cut a new piece from the sheer overdress draping for the back panel as the one previously cut was now too short,
  • re-think the sleeves since I stole the attached fabric for them and the dangly bits to create the second back panel,
  • figure out if I needed to add a panel at the hem for length (Maybe a rouleaux? I know, I keep adding beautiful design details!) now the bottom lace was a little higher,
  • find a way to camouflage the holes on the skirt.


I soldier on!

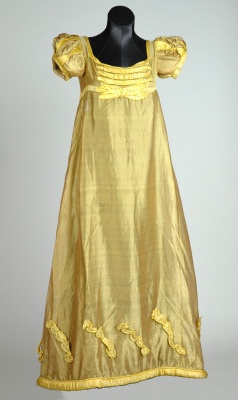
Yellow silk evening dress, 1817, Leeds Costume Collection.

Yellow silk evening dress, 1817, Leeds Costume Collection.

The Thrift Shop Regency Costume Experiment has always been about learning and adapting, and I wasn’t about to abandon this project yet. The back gathered panel, a simple project, turned out well. The gathered bodice overlay was a bit more complicated, but looks pretty.

I patched the holes on the front of the skirt using no-sew tape and tiny pieces of fabric from the overlay, and though they look better, it appears as if I spilled small drops of yogurt on my front!

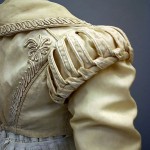
Museum gowns, period fashion plates and Regency artwork were perused for additional hole camouflage ideas. Due to the location of the holes, I settled on diagonals of shirred fabric to mimic the museum piece on the right. I had plenty left from the Salvation Army piece.


Time is my enemy

It was Wednesday, and I would leave Friday morning for a short trip to celebrate my mother-in-law’s 86th birthday and an early Canadian Thanksgiving, before flying on to Louisville for the 2015 JASNA AGM.

Mother-in-law's 86th birthday and cool fall weather.

Mother-in-law’s 86th birthday in Winnipeg, MB, Canada.

In addition to the sleeves and skirt detail to hide the holes, the ball gown needed other work:

  • install the tapes with hooks and eyes on the back bodice to replace the zipper,
  • re-attach the waistline trim,
  • trim the neckline and sleeves with narrow silver braid to coordinate with the other trim,
  • use the same narrow silver trim to make the faux diamond back.

I was still thinking through the process and finish for the diagonal pieces on the skirt. I estimated this part of the project would take a full day.

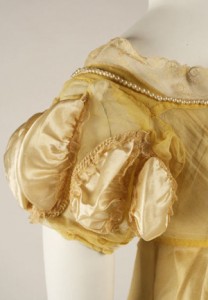
The jonquil gown’s sleeves would take yet another day to design, make a pattern and at least one mock-up, and attach. Either of the two ideas that follow would be created with scraps of sheer draping and some of the faux silk.

1810 Ball Gown with pearls.

1810 Ball Gown with pearls.

Sleeve detail for 1811 gown, Metropolitan Museum of Art.

Sleeve detail for 1811 gown, Metropolitan Museum of Art.


No way could I finish this gown on time.

On top of those issues, several other machine-sewn projects were required for to the conference:

  • my spencer and the gentleman’s tail coat needed buttonholes–buttons had been temporarily attached to make deadlines for the blog posts!;
  • the white Swiss dot gown needed fake long sleeves, as the originals had been removed and short sleeves added, intended to make the dress flexible for morning or afternoon wear;
  • some pretty sheer fabric with white embroidery would be made into a fichu and, with the addition of some organza lace, a second cap.
  • Mr. Suze broke the cheap plastic belt lining product I’d used for his suspenders, and we had to purchase new banding and attach.
The jonquil ball gown needed too much additional work to earn its full parasol, and time ran out!

The jonquil ball gown needed too much additional work to earn its full parasol, and time ran out!

I also had numerous hand-sewn projects that would be tackled on the trip, such as 14 buttons on Mr. Suze’s tail coat and re-attaching the lining to my hat, which was not staying put with the double-sided tape.

Dozens of bags and containers of project items had to be packed up and stored after all this sewing, and I had to pack for a trip to two climates.

Something had to give, and the jonquil gown was sacrificed. I stopped all work on in mid-day Wednesday.


On to packing– but what to wear for the ball?

I had to quickly re-think possibilities for a ball gown. In a panic, I packed potential items that could be modified by hand, but were the dreaded polyester, and not my colour.

The alternative is the Swiss dotted gown (my original morning gown), but its fabric and style is less formal, better suited to an afternoon or dinner gown in its short-sleeved version.

I was in a terrible rush by the end, and didn’t stop moving from 7am Thursday to 1am Friday. I didn’t have time to make the new cap for day-wear, and have to wear my small-fitting first effort, made from cheap polyester lace at the last minute for my local JASNA’s Jane Austen Tea (an earlier blog post).

After the fact, I thought of a half dozen items that I should also have packed, e.g., my turban was to match the jonquil, and now I have to re-think headwear for the ball. I forgot my Alias Thomas Bennet book bead bracelet, which matches my editor and artists’ versions and would have been perfect for the book signing on Saturday prior to the promenade and ball.

I haven’t decided which way to go for the gown, and the only way to know is to watch my blog!

Next post: Louisville!


***UPDATE! Don’t forget to comment on The Thrift Shop Regency Costume blog posts, or find Author Suzan Lauder at the Louisville KY JASNA AGM for a chance to win items from the Experiment! Daily prizes October 8-12!


Trousers or Breeches for Best Bunchage?

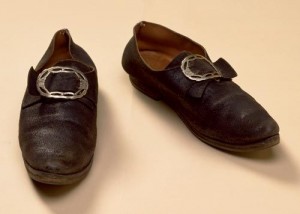
Regency shoes with buckle.

Regency shoes with buckle.

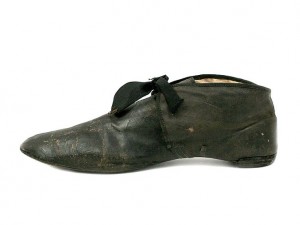
1810 Rare Gentleman's Leather Shoes with Silk Ribbon Ties.

1810 Rare Gentleman’s Leather Shoes with Silk Ribbon Ties.

Footwear assisted the decision of whether Mr. Suze would wear trousers or breeches. The first aim was for comfort, and we thought we’d put buckles on a pair of his black work loafers and be done with it. But clarity on the appearance of a Regency man’s shoe pointed out that the soles of his shoes were too thick. You see, my husband and I both have wide feet and wear orthotics. His feet are sensitive, and he owns shoes he can’t wear for long without pain.

Thrift and vintage stores were checked for several months for plain black shoes or tall boots, both with minimal embellishment, minimal soles, a wider fit, and in my husband’s size. No luck. I thought if I could find some of those folding leather bedroom slippers, it would be better than the work shoes, but I only found new brown ones, at $60.

I checked the Internet. I avoided this for my clothing for Thrift Shop Regency Costume Experiment because shipping charges can double the cost of an item, but my husband’s clothing has been a steal of a deal, even with shipping.

Real riding boots would cost at least $200. Jazz shoes are supposed to be a good alternative, but they didn’t look too much like Regency shoes. At $120, I gave them a miss, too.

I knew Mr. Suze would be more comfortable in boots than in stockings and slippers, and I concentrated on them more than shoes in my search, but the one I found first would dictate the rest of the costume.

The Boots

On a local “For Sale by Owner” site, I came across a pair of new black riding boots that were men’s size 9.5, and the owner claimed they fit wide. The ad stated the seller had originally asked $150 and was now asking $120. I emailed the link to my husband, but nothing happened, so a month or so later, I checked to see if they were still for sale. The price had been further reduced to $80, so I bugged Mr. Suze to go see them.

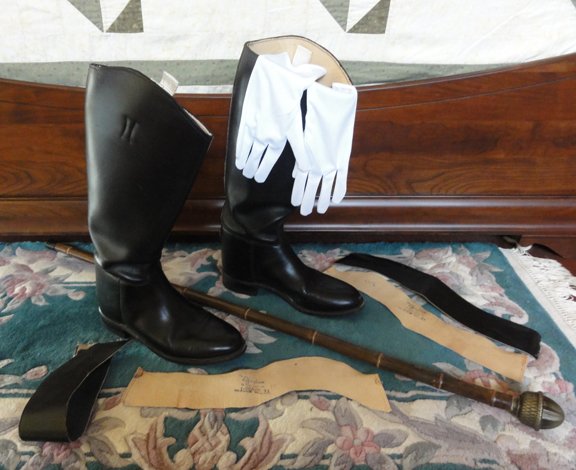
He returned with a pair of brand new boots, slightly too large, for $65—he’s great at dealing sellers down! The seller’s daughter was very tall, and he’d bought them for her, but she balked at men’s boots, and never wore them. Thick socks and orthotics will help the fit for my husband, and he won’t spend a great deal of time walking in them in Louisville.

The shaft of the boot was too tall, though, and rubbed the back of his thighs badly. We looked to see if we could turn the tops over to show the brown lining, but the leather was too stiff, and the lining had writing.

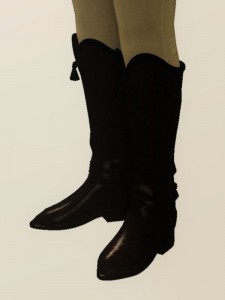
Riding Boots, 1810, British, leather. Philadephia Museum of Art

Riding Boots, 1810, British, leather. Philadephia Museum of Art

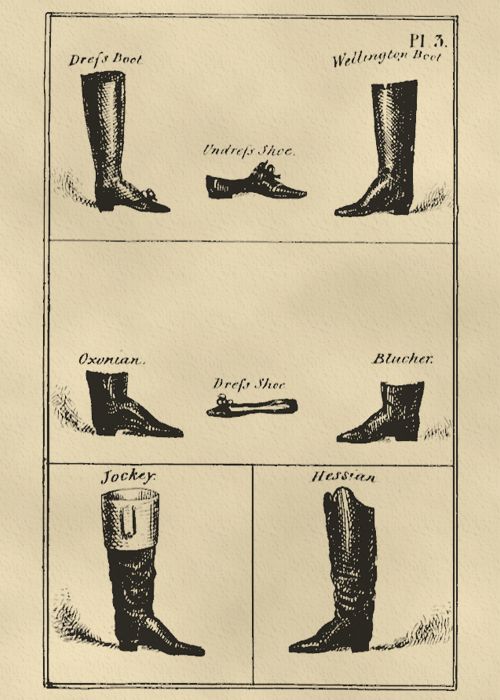
The different kinds of footwear popular in the Regency are in the drawing below. The jockey boot (black with a brown band) is most frequently seen in artwork and fashion magazines, the runner up is the Hessian, and we had a riding boot (left), similar to the Wellington—but it’s really a modern dressage boot, worn for show horse riding.

Regency Footwear

Regency Footwear

He checked to see how much to cut them down and was quoted $65. Ouch!

We looked into whether we could cut them easily ourselves, and there were no clear instructions on the Internet other than repeated short cuts with a utility knife. Now, I’ve cut many things with a utility knife, and 90% of the time, the cut has at least one ugly spot where the knife slipped. That idea was discarded.

Riding forum members advised other riders that the boots are supposed to sit a couple of inches above the knee, high enough to protect the leg from some aspect of the saddle, so they recommended not to cut them. Instead, suggestions included wetting the boots and walking around in them to get the leather to relax, plus wearing a sports wrap around the knee under the pants. We thought we’d still rather cut Mr. Suze’s boots.

Hessian boots: Mid-calf boots coming to just below the knee or lower that have tassels on the top, named for the German soldiers called Hessians who introduced them.

Hessian boots: Mid-calf boots coming to just below the knee or lower that have tassels on the top, named for the German soldiers called Hessians who introduced them.

At first, we said if we’re going to have them cut, we may as well get a Hessian profile. I could add trim and a tassel. We assumed this would be routine for the shoe maker.

Instead, he asked us to mark the cut line and would take no responsibility for problems. We hesitated, unsure we could do a good job of drafting the double curve.

Mr. Suze discovered a second shoe maker who would cut the boots for $40, but the same issue: he wouldn’t take responsibility for a special shape. We decided it was best to remove the top 2” with a profile to match the original curve.


How trousers intended to be breeches became trousers

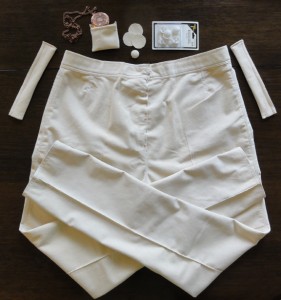
After months of no luck finding pants suitable for breeches, I discovered a pair of buff-coloured Nubuck pants for $5.99 at Salvation Army.

Blogger Experiments in Elegance has a post on how to fake a Regency costume, and for breeches, advises cutting the pant legs off a few inches below the knee, and utilizing fabric from one cut-off leg to make a trim band for the bottom of the breeches.

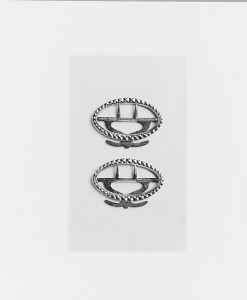
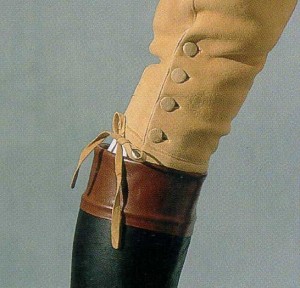
I had bought some nice buckles from Dressew to use for knee buckles that would be used on the trim band. However, the most common closure was a set of three to six self-covered buttons up a placket above ties that are an extension of the trim band, which would be narrower than the blogger suggests.

Knee buckle, 1770-1810 American

Knee buckle, 1770-1810 American

Buckskin breeches, showing buttons and tie closure and jockey boots. Metropolitan Museum of Art.

Buckskin breeches, showing buttons and tie closure and jockey boots. Metropolitan Museum of Art.


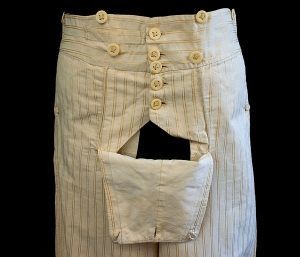
Buttoned fall on museum breeches.

Buttoned fall on museum breeches.

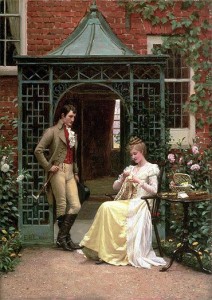
Regency boots with breeches: Edmund Blair Leyton On the Threshold

Regency boots with breeches: Edmund Blair Leyton On the Threshold

Regency breeches had buttoned falls in front rather than the modern fly, though the odd museum piece from that era shows early use of a buttoned fly. The same blogger describes how to make a flap for the fall-front with the other leg.


Breeches were the best idea if I could find shoes. With boots, either breeches or trousers would suffice. Trousers would be advantageous for me, as I could put a stirrup at the end to hold the pants into the boot, much less work than making breeches.


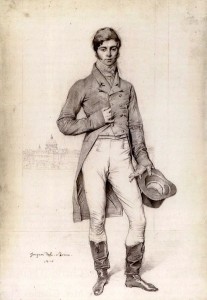
Trousers and Hessians: Thomas Philip Robinson the third Baron Grantham and later Earl de Grey aged 35 years - portrait study by the great French artist Jean Auguste Dominique.

Trousers and Hessians: Thomas Philip Robinson the third Baron Grantham and later Earl de Grey aged 35 years – portrait study by the great French artist Jean Auguste Dominique.

Trousers became popular in the mid-Regency for casual wear, but breeches with stockings and slippers remained the correct clothing for formal occasions like balls. Eventually, trousers overtook breeches in formal wear as well, though this occurred after the end of the Regency.

Since neither boots nor trousers were appropriate ball attire in the Regency (though one Oregon Regency Society gentleman said he was wearing his to the ball anyways), our story would be we were sneaking into the ball for a short while to watch, but would not dance since Mr. Suze was not properly attired.

We do not want to dance. It’s not that we don’t want to dance, it’s that we don’t want to ruin our marriage in the attempt to dance.

We took ballroom dance lessons once, and Mr. Suze stared at his feet and forgot he had a partner. I got frustrated and started to lead, but I’m terribly uncoordinated, which didn’t help Mr. Suze concentrate on his feet. We’d get messed up on the steps, he’d get mad, I’d try to instruct him, and we’d stop to argue. Neither of us were able to learn the steps of one dance before the instructors moved on to the next.

We’d try again, and repeat the whole mess. We finally dropped out of class, deciding we were too terrible at this, and we didn’t want to keep arguing to get better.

Neither of us is concerned that his trousers and boots aren’t correct for the ball, as we’ll be lurkers and watchers.

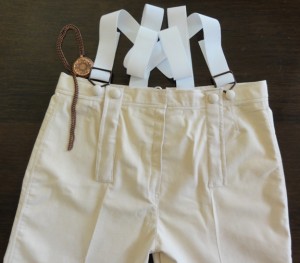
trousers after legs slimmed, with watch pocket, fake front fall edges before addingSince Regency trousers were slim, I cut about 3” from the inseam of the pants. Instead of using part of a pant leg for a flap, I used some of the cut fabric to make panels that look like the trim panels for the sides of the falls. Self-covered buttons were also made to fake Regency at the top of those flap edges, as well as to secure suspenders to keep the trousers high. A small watch pocket was made to set inside the waistband.

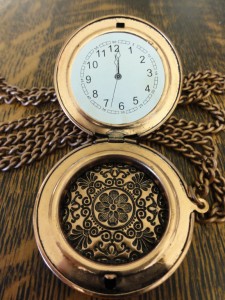
steampunk costume pocket watch showing paper insideAt first, I despaired of finding a pocket watch at a reasonable price, as the vintage watches I’d seen were over $100, and that was for either one that was a fake and used a battery, or another that didn’t work and would be another $200 to repair!

But Value Village had a display of Steampunk accessories for Hallowe’en, and I got a cool pocket watch and chain for $1.99! Outside, it’s a pretty good-looking imitation for the price. Inside, it has a hilarious paper face!

We now have to find a watch fob of some sort. The Pragmatic Costumer has a nice article on watch fobs for ideas.

finished breeches with suspendersA combination of the leg narrowing, the original size of the pants, and the need for So Mr. Suze to wear the pants high like Regency gentlemen caused the pants to be tight at the waist band. A 5” deep opening was made in the seam at the back of the pants, and eyelets and laces were added for true Regency fashion. I was going to sew the fly closed and have him use them.

When he tried the trousers on, he couldn’t reach the ties. Not such great idea, after all! We left the fly.

Puttin’ on the Ritz: The Walking Stick and Gloves

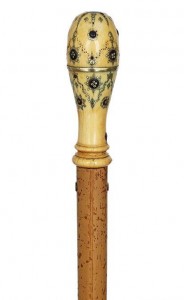
Cane with tortoiseshell and brass wire piqué on ivory.

Cane with tortoiseshell and brass wire piqué on ivory.

Mr. Suze’s project was to make himself a walking stick. We had some pieces of bamboo that had previously been used for supporting plants, and some of the Ackermann’s prints had bamboo walking sticks. I’d been looking for a handle re-purposed from a drawer or door handle, similar to the photo (left). I also knew that drapery rod ends may have other designs suitable for this.

Mr. Suze went to Habitat for Humanity’s Re-Store and found a pineapple-like end that he attached to the bamboo, then to Rona for an end piece so the bottom wouldn’t scratch floors.

I’d read that the walking sticks were quite long, and had seen some Ackermann’s illustrations that confirmed it, but my husband wasn’t so keen on a tall cane. The compromise was to make the length so his hand on the top made his arm parallel to the floor. He freshened up the bamboo with a light sanding and shoe oil.

TSRCE men's boots, gloves, and walking stick. The cut-off panels from the boots are shown.

TSRCE men’s boots, gloves, and walking stick. The cut-off panels from the boots are shown.

I was pleased with the pineapple look, as I’d learned at the JASNA Jane Austen Tea just a few weeks earlier that in the Regency, pineapples were important because they were so expensive. They were imported from Suriname or India, and a shipment of pineapples would allow a ship’s captain to retire in fine comfort. The rich had pineries to try to grow them, but they were so dear, they were rarely eaten, but just left on the table for decoration as they deteriorated! This explains why there were so many reticules of pineapple design as well.

The gloves are white cotton costume gloves for $4.99 from Value Village. They’re not something you’d see at other times of the year, but the Hallowe’en costumes are out! A Regency gentleman would be more likely to wear kid gloves, but I had enough trouble with the search for kid opera gloves for my costume since the few I found were far too small. There’s a good chance they’re more rare for a man!

Mr. Suze opted to glue on whiskers rather than grow his own sideburns, and found a moustache at a Dollar Store that’s pretty perfect, except it’s black, and he used to be blond but is all grey now! We’ll try using tempera paint to change the colour. He had the top of his hair left long for two haircuts, and will comb it forward, as that was the Regency style.

Quizzing glasses

Quizzing glasses

Perhaps he’d like to forego his glasses for the popular Regency accessory, the quizzing glass!

~


One thing I missed last week was the closure on the sleeves of the shirt. It has plastic buttons right now, but the most common was ribbon ties. Cuff links as we know them today became popular in Edwardian period, though in the post-Regency, around 1840, simple versions were introduced in France.

~

Some helpful sites for the Regency Gentleman’s costume:

The Oregon Regency Society’s Outfitting the Regency Man has links for purchasing authentic product and patterns to make costumes from scratch. Their How-To sheet shows a modification of a standard tuxedo tailcoat.

The Black Tie Guide’s Regency Evolution: Dress Details has details on things like lapels, colour, and etiquette while providing an excellent, succinct summary of the man’s outfit.

How to Make a Men’s Regency Boot on a Budget by Living with Jane uses leather-look boots and adds a leather-look panel to the top for jockey boots. They look like rubber boots to me.

How to Convert an Ordinary Suit Coat into a Tail Coat from Tor.Com is useful as long as your suit coat or blazer is in a fabric like Regency examples.

~

Next Post: I hope to have another episode of “Faking Regency,” because I haven’t yet finished my ball gown, which was my intended post for Monday. I’ll add a post between Monday and Louisville if I have time, then there will be pictures from the JASNA AGM!

Faking Regency Part One: A modern blazer morphs into a spencer.

This sounds pretty easy, right? Get an old blazer, cut and hem to under-bust length, and Bob’s Your Uncle. Well, not so easy. Unless, of course, you’re super-lucky and find exactly the right blazer.
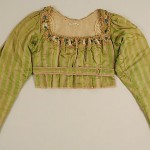
Early 19th century spencer, Metropolitan Museum of Art
Early 19th century spencer, Metropolitan Museum of Art

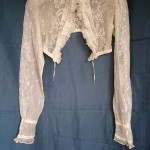
Embroidered muslin bodice or spencer, 1800-1810
Embroidered muslin bodice or spencer, 1800-1810

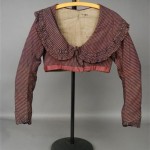
Rose pink striped cotton and silk spencer, early 19th C.
Rose pink striped cotton and silk spencer, early 19th C.

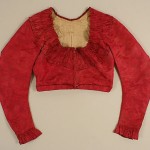
Early 19th Century, Spencer, early 19th century, French, silk, Metropolitan Museum of Art
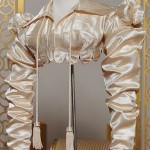
Early 19th Century, Spencer, early 19th century, French, silk, Metropolitan Museum of Art

Cream silk satin Spencer, c1818. Decorated in imitation of military uniforms. Worthing Museum.

Cream silk satin Spencer, c1818. Decorated in imitation of military uniforms. Worthing Museum.

If you hadn’t already figured it out, the Regency spencer is a little, long-sleeved jacket that’s just as long as the bodice of the empire waist gown. One bonus for shopping for a blazer to make into a Regency spencer is that almost any neckline will suit. Click on the thumbnails to see details, including neckline examples.

The difficulties include a requirement for long sleeves (as per usual in the Regency, longer than standard is better), a fitted bodice, fabrics that don’t look modern, colours that are more interesting than black, and a lack of embellishments such as studs, fake pockets on the chest, or jean jacket seams.

The textures and colours of many blazers in my thrift shop visits didn’t work. Black polyester rules, and next to that, corduroy and knits. Every time I saw one I’d consider, it was 3/4 sleeve, the wrong size, or had some detail that screamed the 90’s.

I looked at blouses, too, since some spencers are more blouse-like and some modern blouses are more blazer-like.
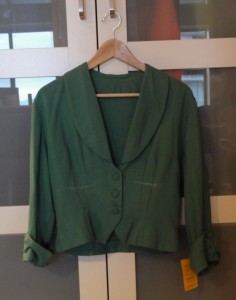
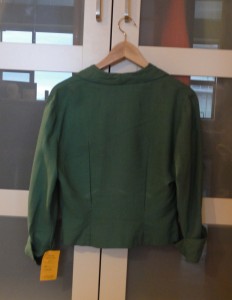


spencerspencer back


This unlined, fitted, pomona-green jacket will be my spencer. Pomona? I would have called this leaf-green, as it’s fairly bright. (Some of my shots were taken in the evening, and appear darker.) Then I read an article about Ackermann saying Pomona green was the same as apple green and I thought, this is a little darker than apple green, but I’ll check on Google images. Enough of the examples were the same as my blazer for me to confidently say it’s one of the more popular colours of the Regency!

The 3/4 sleeve, linen, shawl-collared blazer was $16.50 at Women in Need Thrift and Vintage. It has unique matching self-covered buttons.
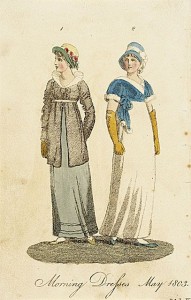
Short sleeved spencer alongside unusual short coat.
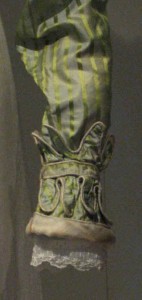
Short sleeved spencer alongside unusual short coat.

Sleeve trim idea.

Sleeve trim idea.

The down side of my blazer is the 3/4-length sleeves. At the time I bought it, I didn’t realize that detail wasn’t popular during first 20 years of the 1800s. I looked in vain for examples of Regency spencers with 3/4 sleeves, and though there are a few short-sleeved spencers, I found nothing 3/4 sleeved.

Lucky for me, the flared cuff was long enough to drop to make a long sleeve. I kept looking for a long-sleeved blazer for a spencer. As mentioned before, I saw a blazer with lovely soutache designs, but balked because I worried about how to cut down the blazer at a good point for the soutache. When I decided I could rework the soutache if need be, I returned, but it had been sold. But today, I found a cute, gold silk blazer with a pretty collar, long sleeves, and mother of pearl buttons! The only sad part is a centre-back seam. More on that later.

(An aside: I’ve seen the perfect dress that just needs an empire waist height ribbon to fake Regency on two shopping trips since June, but both times, they were too small for back gathers for me, but would work with a smaller person!)

In most cases, your blazer should be cut to 2-1/2″ longer than the bottom of your bust line, turned under 1/2″, and hemmed 1″. This will stiffen the edge and ensure it fits over your gown bodice, but it won’t be too long. You can see I’ve marked my blazer to spencer length while wearing it. This frees up two buttons from the front for embellishment elsewhere.

If your blazer doesn’t close tightly at the bottom after it’s trimmed to length, there are several possibilities. If there are buttons in the upper portion (part you’re wearing), it’s better to fit the spencer than to ease in fullness. Add darts or gathers under the bust, or pleats or gathers in the mid-back; they’re era-appropriate. Don’t make it too tight, as it must fit over the gathers of your gown.

My blazer was already fitted with six darts in front and two very long back darts (in fact, the back darts were over-sewn longer and deeper than the originals). It was snug across the bustline, so I removed the back darts, washed it so the stitch holes relaxed closed again, and pressed out the remaining dart creases while it was still damp. A few gathers added by hand in the mid-back at the waistline help to fit my slimmer rib-cage under the bust.

If the bottom button is too far from the bottom of the spencer, you can put back a cut-off button and make a buttonhole at the band level, or add hooks and eyes. To fake Regency, buttons should have a Regency look: metal, shell, pearl, mother-of-pearl, fabric-covered, thread-covered (such as Dorset), or corded knot (such as Celtic or Chinese knot or frogs with knots) are best. Since metal buttons were expensive, use them only if your spencer has a rich look with elaborate trim. With corded buttons, your other trim would be best as corded, in fact, a military look to the spencer was popular! Self covered buttons were ubiquitous on mens’ wear, but less so for ladies’.
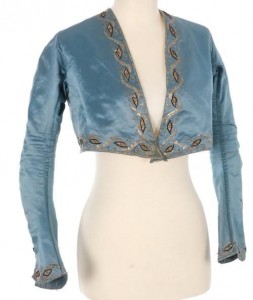
Spencer jacket, 1790-1815. Note no closure in front.

Spencer jacket, 1790-1815. Note no closure in front.

If there are no buttons, there’s nothing wrong with having a spencer that doesn’t fasten closed, unless you need it for warmth. An example of an open-front spencer can be seen on the left, and others existed in the Regency.

My blazer was unlined, so I chose to use the inside bottom facing from the original blazer on the outside, as a waist band. Bias tape was used to finish it on the inside where it’s not seen. Another option is to add a contrasting band (as on the pink striped blazer above). If you have good sewing skills and choose to add a waist band, it’s an opportunity to put contrasting piping all around it per a tutorial below.
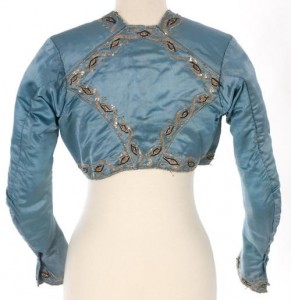
Spencer jacket 1815 (back). This trim is an example of how we plan to fake a Regency diamond back! The real shoulder seam will never be noticed!

Spencer jacket 1815 (back). This trim is an example of how we plan to fake a Regency diamond back! The real shoulder seam will never be noticed!

Since the facing didn’t continue across the buttonhole panel in front of the original blazer, it didn’t go all the way around, so was short for the waist band. To make up for this, I used extra fabric from the cut away parts in front. If you use multiple pieces for the waist band, make sure your seams are at the blazer’s side seams, or at both bottoms of the diamond-back, so they’re less noticeable.

In addition, to fake Regency, some front cut-off material from my blazer made a little skirt-tail in the centre back, similar to the museum examples. See thumbnails below; click to enlarge. Extra self-covered buttons trim the ends of the waist band tabs in back.
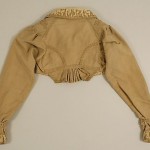
Back detail of a spencer, 1813, American or European, Wool and silk, Metropolitan Museum of Art.

Back detail of a spencer, 1813, American or European, Wool and silk, Metropolitan Museum of Art.

To fake Regency, you need do none of the above. Focus on the one detail that’s not too hard to manage: the diamond back.

The look was on almost all women’s wear of the period, achieved by a shoulder seam that fell behind, rather than on top of the shoulder, and a pair of side-back seams that curved from the outside edge of the back gathers on gowns to partway up the back of the sleeve. The back of the sleeve fit farther into the back of the bodice than a modern sleeve, too. Click on the thumbnails for examples of the backs of spencers.
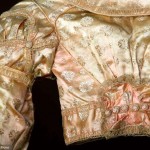
Silk spencer, 1810. Augusta Auctions.

Silk spencer, 1810. Augusta Auctions.

A faux-diamond-back can easily be achieved by numerous methods. You can fake the seams with a line of fabric paint or even fine-line permanent marker in a slightly darker colour, a line of top-stitching using hand back-stitching in embroidery thread, or machine top-stitching a double line.
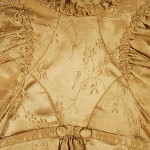
Spencer, early 19th century, American or European, silk. Metropolitan Museum of Art.

Spencer, early 19th century, American or European, silk. Metropolitan Museum of Art.

Better yet,  Regency clothing often had trim over these seams to show off the shape, making them even easier to fake: cording, piping, soutache, braid, narrow ribbon, narrow bias tape, and other similar materials can be attached along the line where the seams would sit.

I got a great deal on a few dozen packages of bias binding tape in multiple colours at Value Village for $3.99, and I’m using a slightly darker green for all my trim, as I have four packages in two sizes. For most of the trim, I’ve just folded 3/4″ bias tape in on itself to the width of the pieces folded behind. This means it has some thickness at 1/4″ wide.

If you’re an experienced sewer, you can make piping or a piped band from purchased bias tape. Links to tutorials are at the end of this post.

When shopping for the blazer, the faux-diamond-back will look better if you buy one that doesn’t have a centre back seam. In fact, many that don’t have the centre back seam have a side panel with a seam similar to the lower curve of some Regency clothing backs, and I’d suggest using that curve, plus faking the shoulder seam that sits two or more inches behind the modern one.
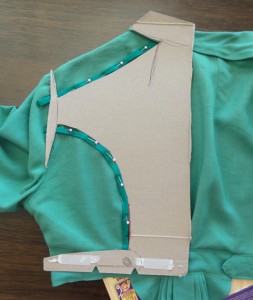
pomona spencer pinning on fake regency diamond backIt’s best to make a pattern for your trim so it’s mirror image both sides. Light cardboard–mine was from a breakfast cereal box–works well. Set it so one side runs along the centre back of your shortened and hemmed blazer, and play with lines and curves in pencil until you see one you like. Mark it with marker and cut out to make a pattern to guide in placement of the trim on each side.

I pinned my trim in place, then put it on a model for a photo. On the model, the fake Regency shoulder seams looked better if dropped down more at the sleeve end, so check before you sew. Attach the trim after you make any adjustments to sleeves, described next.
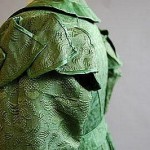
1810
1810

1815-1820

1815-1820

Modern reproduction.

Modern reproduction.

1815 LACMA

1815 LACMA

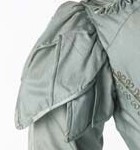
1820-25, Metropolitan Museum of Art
1820-25, Metropolitan Museum of Art

1820, Metropolitan Museum of Art

1820, Metropolitan Museum of Art

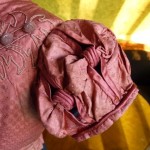
Like gowns, spencers often had puffed sleeves or similar-looking embellishments over a straight sleeve, however, many had a plain sleeve (see some examples above), so faking Regency here is optional.

If you prefer a little over-sleeve, examples to the right range from clusters of petal-like fabric to fancy slashed and looped designs. These sleeve examples are on spencers, and more ideas from gowns can be found in the post, “Were Regency gowns worn on the Titanic?

You won’t have enough fabric to make the full sleeve variations, but a simple, small capped, tulip, or shirred cap sleeve, or a rolled tube at the top of the sleeve, can come from the fabric cut from the back of the blazer, or you can utilize sleeves made with coordinating fabric.

There’s a tutorial below for tulip sleeves. If desired, use the same trim you used to fake Regency with your diamond back to attach the new sleeve over the old one at the seam line, or turn under 1/4″ to 1/2″ and top-stitch close to the edge. If it’s possible to hide the ends, make the new sleeve fit an inch or two farther towards the middle of the back of your spencer, so you also have a fake Regency sleeve fit!
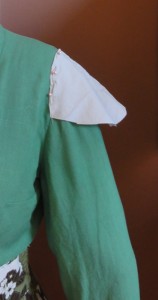
pomona spencer gathered cap sleeve mock upFor my fake short over-sleeve, I used the leftover fabric from the back panel. First, I experimented with some cheap fabric from a pair of torn pants to make the best of the small amount of fabric. A piped band (tutorials below) made from 2″ wide bias tape held the gathers, topped with one of the self-covered buttons from the old sleeve cuffs.
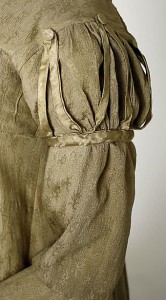
1818, Metropolitan Museum of Art

1818, Metropolitan Museum of Art

The simplest fake Regency sleeve topper, to the right, was another option I considered. I could have used the 3/4″ bias tape (sewn closed) and the three buttons from the 3/4 sleeves on each side. This can also be accomplished with ribbon, if the same ribbon is used for the fake Regency diamond back.

Self-covered button kits can be purchased at fabric stores for about $3 a package of 3-6, depending on size (full price, but I got one from Dressew for $0.99!), and they’re easy to make.

Alternatively, matching ribbon or fabric can be stretched over stiff plastic circles with a little glue, then the back fabric stitched in place. It should be slightly more than double the diameter so it closes fully behind the button and there’s something to sew it on with. Important note: the latter is fine for trim but not for actual working buttons.
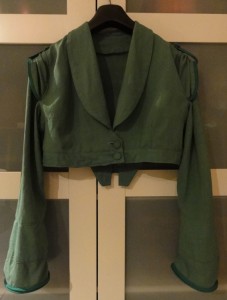
The finished pomona green spencer, with cap sleeves over long sleeves, tied back with a piped band and button from the original blazer.

Front view of Suzan Lauder’s pomona green spencer, with cap sleeves over long sleeves, tied back with a piped band and button from the original blazer. Long sleeves are trimmed at the bottom with piped band also. An extra button was added to empire waist band, made from original blazer facing.
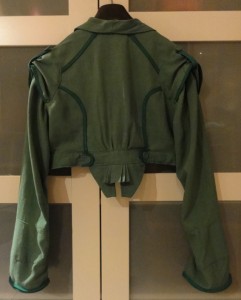
Back view of Suzan Lauder's pomona green spencer, with Fake Regency diamond back and pleated skirt-like ruffle.

Back view of Suzan Lauder’s pomona green spencer, with Fake Regency diamond back and pleated skirt-like ruffle. Buttons from the original 3/4 sleeve cuffs are used on the tabs at the back of the empire waist band.

This project wasn’t easy for me, though it may be for a more experienced sewer. I hadn’t sewn much for 30 years, except for the odd repair, straight-line window toppers and throw cushions, or slapping together a Hallowe’en costume that was meant to last a few hours. I became good friends with my stitch ripper over the last two weeks and learned a few things along the way.

No-sew iron-on tape would work for simpler modifications to make a spencer, but some of my problems came from construction and developing my own patterns, so they’d occur had I used no-sew tape, too. In addition, it sucks for curves, and you couldn’t have made piped band. Other trims (like in the thumbnails) are fine, and there’s nothing wrong with straight lines for your fake Regency diamond back.

Most of these ideas for faking Regency are applicable to gowns, pelisses, redingcotes, and any other bodiced clothing of the Regency period. Have fun shopping for trim on sale or in grab bags at thrift stores!
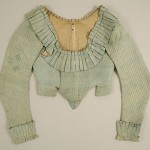
A blue quilted spencer, front. Late 18th early to 19th century, Metropolitan Museum of Art.
A blue quilted spencer, front. Late 18th early to 19th century, Metropolitan Museum of Art.

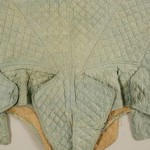
Spencer, late 18th to early 19th century, French, silk. Note the unusual detail below the centre back.

Spencer, late 18th to early 19th century, French, silk. Note the unusual detail below the centre back.

~~~

Web sites with ideas and tutorials:

Inspiration: So Many Backs from Atelier Nostalgia Though these are gowns, you can see the line of the Regency diamond back you want to emulate, and variations on that design.

Sew Many Seams’ Tulip Sleeve Tutorial  Shows two types of tulip sleeves to make, using a plain sleeve pattern as a guide.

Slashed puffed sleeve from Firefly Path: The inside of the slash can be made from the spare fabric cut from the spencer, and the oversleeve from a complimentary fabric using a regular puffed sleeve pattern. Maybe use that extra cushion cover or dinner napkin! The slashes need not be filled in, either. You can loop trim material from the inside shoulder to outside through each slash. Similarly, a loop can be made from the cuff inside to outside. Very fake Regency!

Sew4Home’s excellent tutorial on how to make your own piping and bias tape.

For the advanced sewer, two choices for instructions for a piped band: Kleidung 1800‘s site is German, but brief descriptions of each step are in English under the photos. Tea in a Teacup has a different way to make the band, and it looks a bit different in the end.

For the ambitious spencer designer, two posts about making soutache designs: The Fashionable Past shows technique while trimming a Victorian coat, and a trick to make the loops easy by Threads.

~~~

Next few posts: I’ve started on projects for Mr. Suze’s costume, and I have a “Grown-up Lady’s Lace Cap” to make as part of the give-away for my guest post on Roof Beam Reader’s blog as part of his Austen in August (#AusteninAugustRBR) reading challenge, and I’ll draft up the cap pattern to share.

~~~

I WON A PRIZE!!! As part of the same reading challenge above, I won JAFF Author Lisa Pliscou‘s Young Jane Austen: Becoming a Writer, which I’ve been coveting since it came out, for its cool illustrations. I’ve entered every contest I’ve seen about this book! HOORAY FOR ME!

~~~

There are still spaces remaining for the Jane Austen Society of North America Annual General Meeting on October 9-11, 2015, my goal destination for the Thrift Shop Regency Costume Experiment series. The conference theme is “Living in Jane Austen’s World,” and the workshops run the gamut (?? who says stuff like that?) from Regency medicine and home remedies, to evaluation of the wealth of Austen’s characters; the influence of India on Regency England; plants and gardens of the Regency (featuring Meryton Press’s Linda Beutler, an international clematis expert!); food, fashion, and social events of the period; and many others! Pre-conference activities start on October 7. Registration deadline is September 1, 2015, so don’t delay!


Fun with Reticules: The first half-dozen designs!

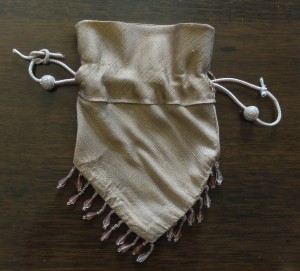
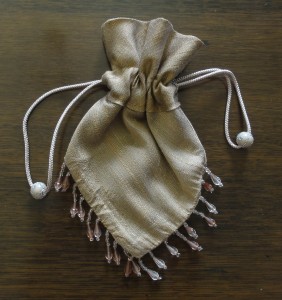
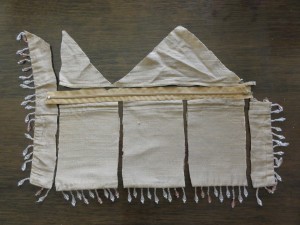
One cushion cover down, two to go! My favourite, the silk with strands of beads about every half inch along the edge, was the one to start with. Recall that it was $1.99 from Women in Need (WiN). A back zipper limited the use with my standard designs, which yield for four reticules from one cushion, two of each of two designs. Instead, I still used the first design, but made two from the wider section, after which I stared at the leftover panel for a while.

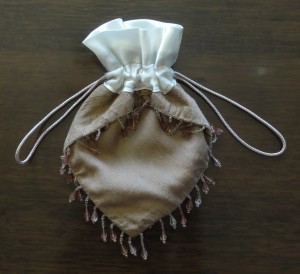
Two small square reticules could be made, but the beads were on two sides of each half. I decided on a three-sided reticule with the row of beads at the top, below a ruffle.

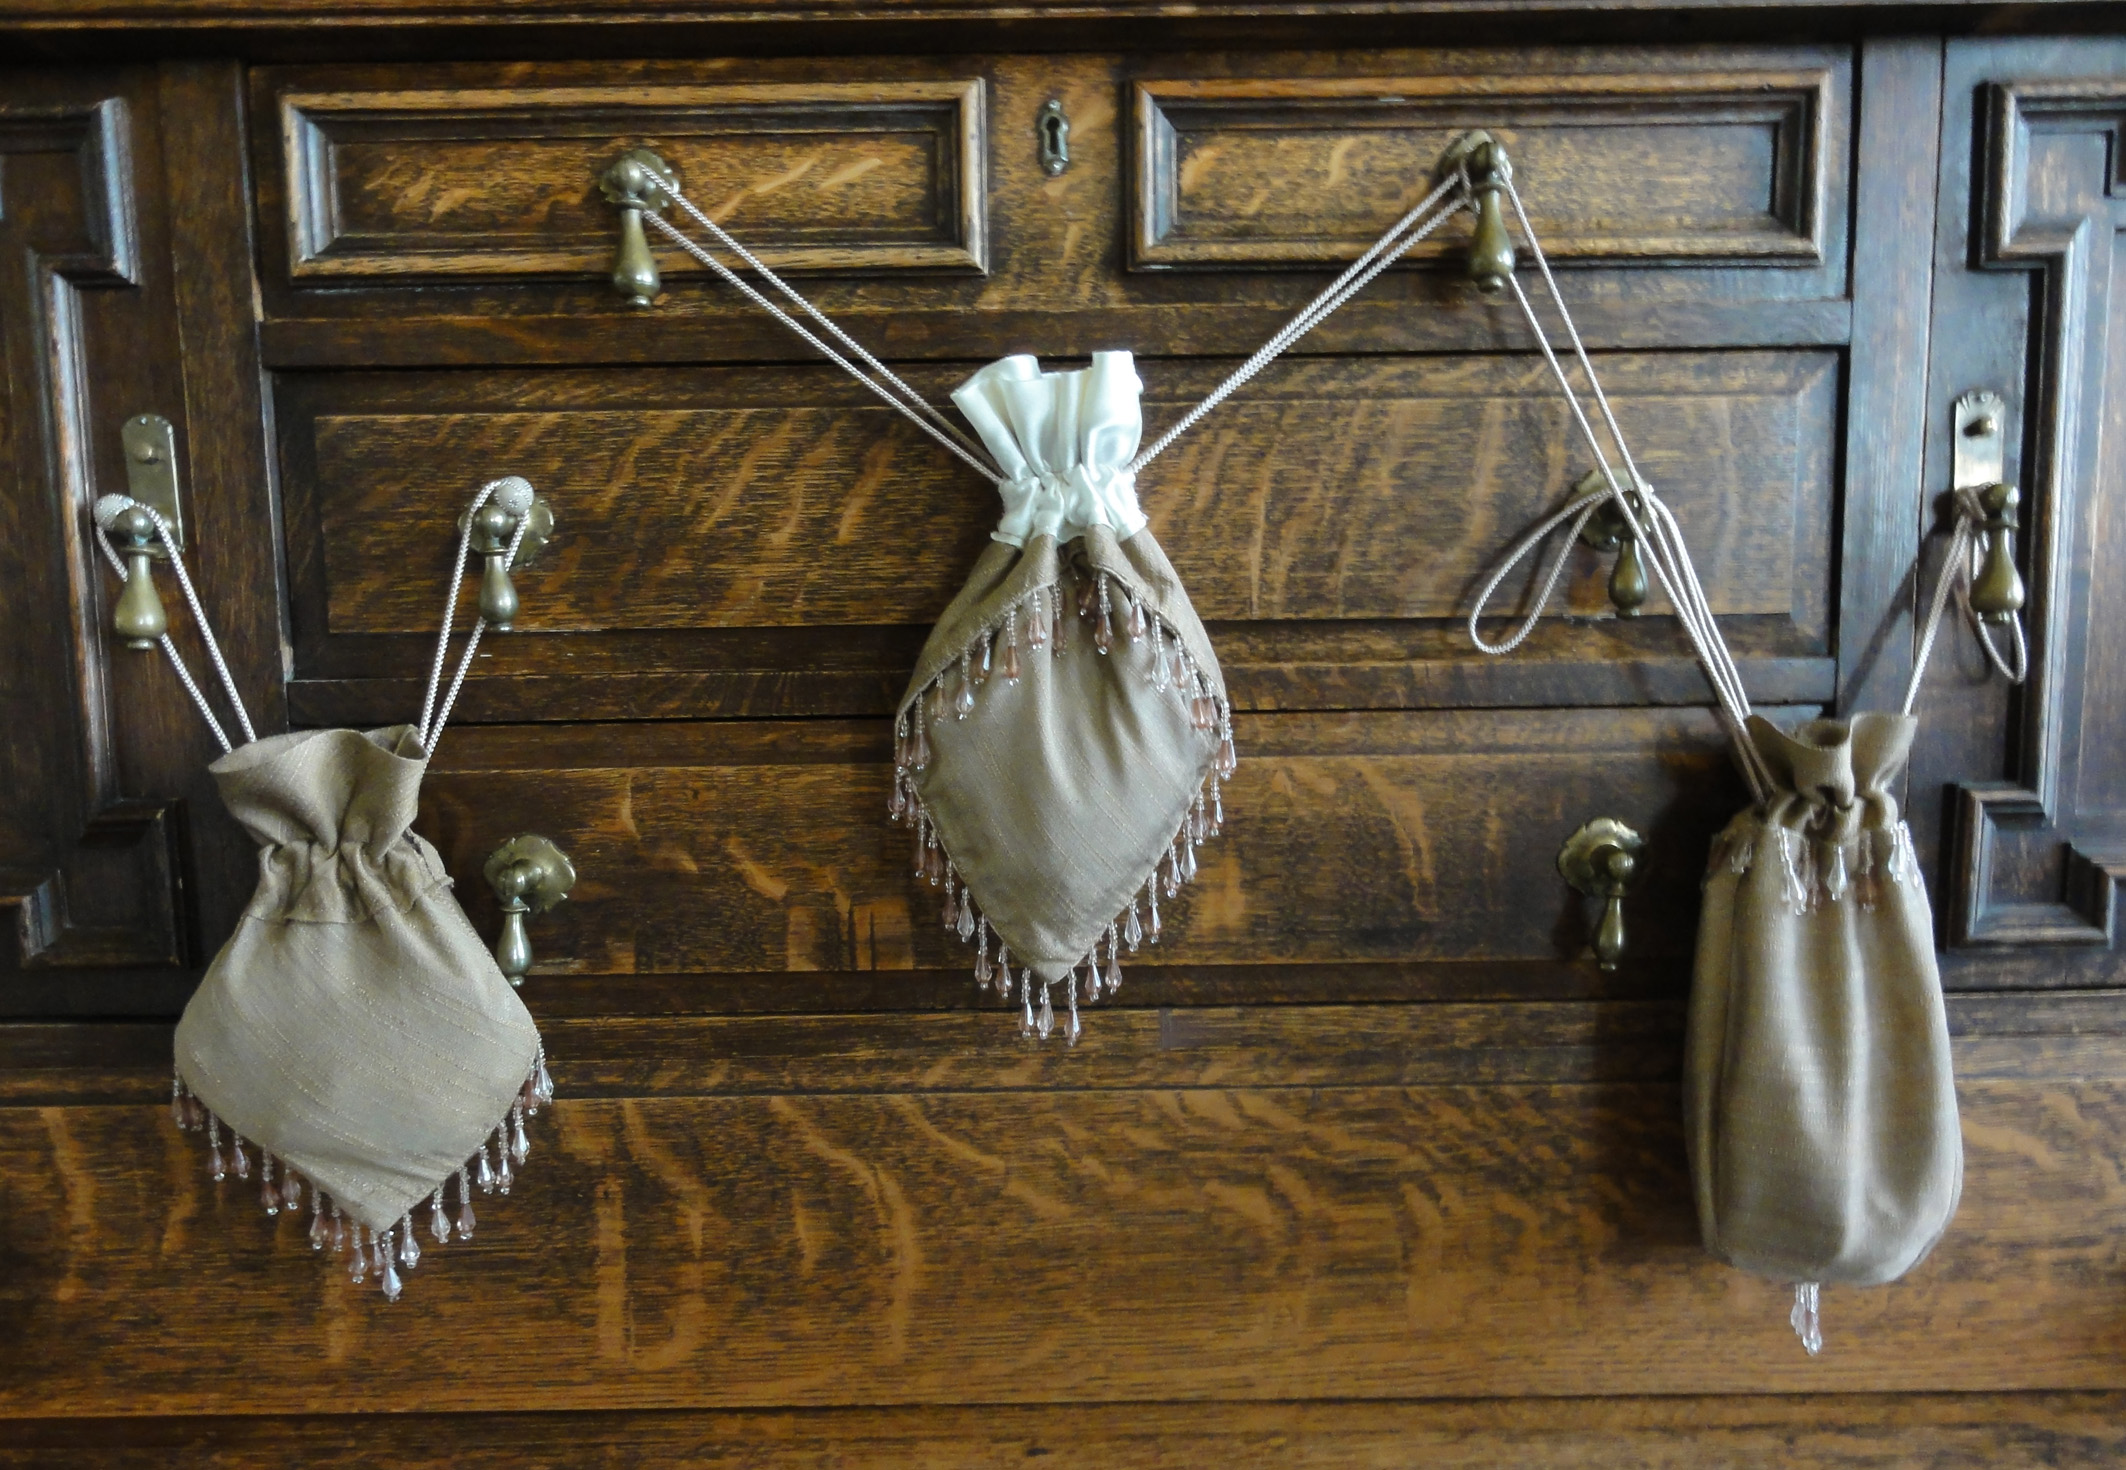
Beaded cushion cover reticules: Design #1, Design #2, and "Bonus Reticule," similar to Design #5 ("The American Girl's Book" Three-Sided Reticule).

Beaded cushion cover reticules: Design #1, Design #2, and “Bonus Reticule,” similar to Design #5 (“The American Girl’s Book” Three-Sided Reticule).

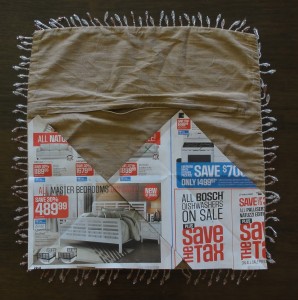
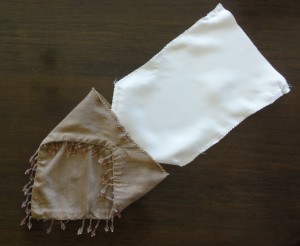
I started by cutting a square piece of newspaper the size of my cushion cover, then folding it on the diagonal and marking the centre. The cushion cover had a zipper about 2/3 of the way across the back, so I cut the pattern to the size of the largest back panel. I realized I’d only get two reticules made from this piece.

Appended to this post are two pdfs: one for the reticules and one for trim. The first has the main patterns for 6 different reticules, the instructions on how to sew the reticules, including special no-sew iron-on tape instructions, and a bonus design for leftover panels. A second pdf describes how to run and trim drawstrings, decorating the reticule body, several ways to line a reticule, and the installation of tassels and other hanging baubles.

with pattern pieces for #1 and #2This cushion cover made Reticule #1 and Reticule #2 (with exposed lining). I marked the design on my newspaper, cut each pattern out, pinned it on the fabric, cut the fabric, and assembled each according to the instructions.

I added beads to the loops of the drawstrings of Reticule #1 because it was simpler in appearance than the other. You could add a lot more decoration to either if desired.beaded cushion cover reticule #1 thread beads and tie with reef knot

Suzan Lauder's Cushion Cover Reticules, Design #1

Suzan Lauder’s Cushion Cover Reticules, Design #1

Suzan Lauder's Cushion Cover Reticules, Design #2, "The Envelope Reticule."

Suzan Lauder’s Cushion Cover Reticules, Design #2, “The Envelope Reticule.”

#2 lining goes in wrong side out with outer part right side out


#3 cuts


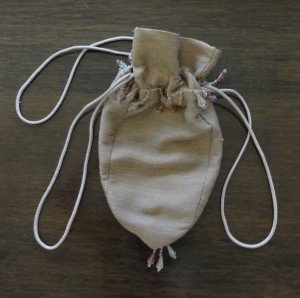
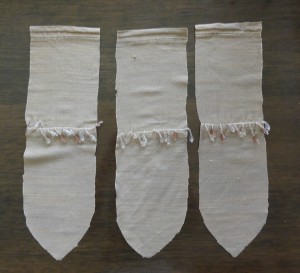
I removed the zipper from the leftover panel and cut the fabric into three strips, then opened them up to make panels for the final reticule. The beads that were on the end wound up at the top of the reticule, since the section below them became the body and the section above, the drawstring casing and a ruffle. This is shown as a “Bonus Reticule on the pdf, which has patterns and instructions for Reticules #1 through #6.

In retrospect, I wish I’d left the row of beads halfway down instead of at the top–in other words, shortened the lower portion rather than trimming the upper portion prior to sewing. I could have used the beads cut off from the sides and tucked them under the edge of the drawstring casing for double the beads.

I also had some difficulty with this one since I made it on the fly, where I’d carefully written the instructions for the others first, made them, then updated the instructions for the learning experience. I found it awkward to sew the beads at the base, and next time, I’ll just re-thread them and hand-sew them on at the end.

Note that similar reticules on Etsy start at $15, and cheap-looking bat-wing ones sell in the $25 range!

Bonus Reticule, similar to Reticule #5.

Bonus Reticule, similar to Reticule #5.

#3 three panels spread out


PDFs for this post:
Cushion Cover Reticule Patterns 1 to 6 by Suzan Lauder
Drawstrings, Trim, Linings, and Tassels for Reticules by Suzan Lauder

~~~

Additional reticule designs for the other two cushions will be shown in a few weeks, and two more pdf’s will be added with that post. The main hangup is I don’t like the designs I have for the next two cushions. A paper fill inside the cording of one swelled when I washed it, so the look of the threads has deteriorated where the brown shows through. I can’t use it where I’d planned: Reticule #6. In addition, the woven pattern on its fabric wouldn’t be shown off to its best in a petal reticule. The other has no trim and is a bit bland, but may turn into a pineapple yet! It would be great if I could find one more.

But do I need to make more reticules to test my patterns and show off my designs? I’m running out of time before the Louisville JASNA AGM. Instead of shopping for more for myself, as I need to sew my last items, and Mr. Suze needs a costume! I’ll post about the Gentleman’s Thrift Shop Regency Costume as I progress.

I’ll divulge that I’m happy with four purchases for my husband’s costume so far:

  • New black leather dressage riding boots for $65 via a local “used items for sale by owner” web site. The fellow bought them for over $200 for a very tall daughter, who didn’t like them. DH will spend $40 to have them cut down 2″, rather than risk blisters behind his knees. From what I can see on the Internet, that’s a huge bargain! DH has hard-to-fit feet, and boots will be easier to fit than dance slippers.
  • Buff-coloured, slim-fitting, fine, faux-suede trousers for $6.99 from The Salvation Army will be made into breeches, with part of a leg used to make the front flap. I already have some nice knee buckles from an old visit to Dressew. They were $1 each.
  • A dark green, wool, cutaway morning coat for $65 (including shipping) from an online seller of former rental tuxedos on eBay. The front bottom edge will be cut to a Regency line, and the lapels tacked a bit higher if possible.
  • An ivory, paisley, satin waistcoat from a different online seller of used tuxedos, for $25 (including shipping), which comes with a matching bow tie! All the men’s vests I saw at local thrift stores were wool, and I was even looking at ladies’, just in case. I’ll cut the modern bottom edge straight across and use the extra pieces to make a collar. The buttons will be replaced with self-covered ones, perhaps using that bow tie. I already have two packs of four self-covered button kits, plus brass trim rings, from Dressew for $0.25 a package!

~~~

Next Post: Faking Regency #1, using my spencer and some artwork and museum pieces for ideas.

~~~

RETICULE GIVE-AWAYS! I’ll be giving away one reticule as part of my upcoming guest post on Austen in August, on August 24, 2015. It will be chosen from the two I improved for the “All the Pretty Little Purses” post (below), and perhaps one or more of the cushion cover reticules from today, or any I make before then! Of course, they’re handmade by a non-crafty person, so there are flaws, but I’ve signed each one inside.

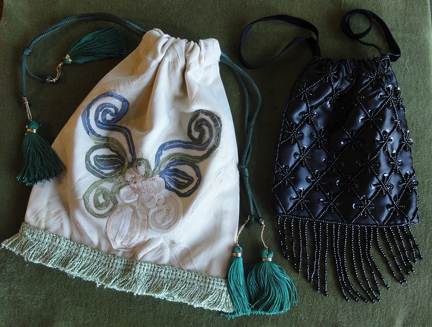
The completed green and black reticules. Note that with the black one, I tied the  loose ends of the velvet ribbon together firmly, and slid them into the ribbon sleeve, rather than add tassels as on the green cord. (The black ribbon was not long enough.) You could also thread beads and sew them onto the ends instead of tassels.

Suzan Lauder’s Thrift Shop Regency Costume Experiment: The completed green and black reticules.