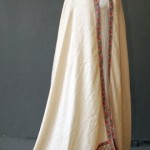
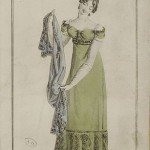
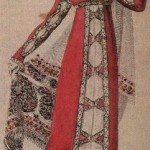
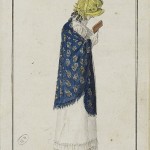
A road trip to Madame Gilflurt’s blog: My guest post on sneaky Regency hands.

I clicked the wrong link. I intended to email the organizer of a Jane Austen ball to tell her about the Thrift Shop Regency Costume Experiment, but I accidentally clicked a link that led me to Madame Gilflurt.

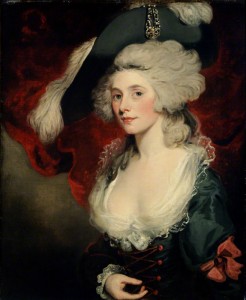
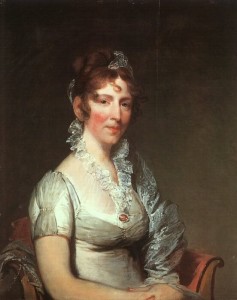
011-Mrs-Robinson-as-Perdita-246x300 as Madame Gilflurt“No problem,” she said, “but would you consider doing a guest post on my blog?”

Of course! I love to hear myself talk, and a busy blog sounded fun. I had an idea for a blog post that came up during my research on Regency gowns, and offered to post it on her blog. She loved the idea. It took a while for me to write the actual text of the post, and by then, Madame Giflurt was in the middle of her own series.

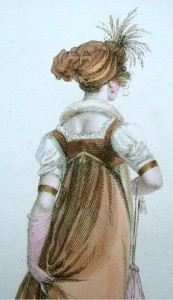
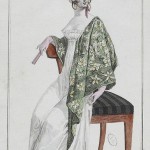
Today, the post is up: The Itch Exposed: A Special Report for the Admirers of Regency and Georgian Fashion. It’s a tongue-in-cheek look at an accidental observation I made while perusing hundreds of Regency gowns in museum pieces, historical paintings, and fashion magazine drawings—the position of some ladies’ hands in drawings from Costume Parisien and other art during the early 1800s. You can read the post at A Covent Garden Gilfllurt’s Guide to Life: Glorious Georgian dispatches from the long 18th century…, Madame Gilflurt’s blog.

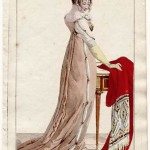
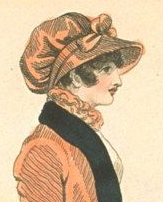
La Miroir de la Mode gown from 1803, the inspiration drawing for Suzan Lauder's January 20, 2016 guest post on "A Covent Garden Gilflurt's Guide to Life" blog.

La Miroir de la Mode gown from 1803, the inspiration drawing for Suzan Lauder’s January 20, 2016 guest post on “A Covent Garden Gilflurt’s Guide to Life” blog.

Madame Gilflurt, also known as Catherine Curzon, blogs about the fascinating personalities of history, focused on the 18th Century and Regency periods. Her lively blog includes a number of interesting guest writers each year. She is also the online host for An Evening with Jane Austen, and may just get to see Adrian Lukis’s (Mr. Wickham from the BBC/A&E 1995 production of Pride and Prejudice) phone number come up on her call display from time-to-time. Madame Gilflurt will join road trips with the redhead for a guest post celebrating the release of her non-fiction book Life in the Georgian Court, which is being published by Pen and Sword books in June 2016.

~~~

A reminder to catch up on chapters of Letter from Ramsgate, now posting at A Happy Assembly! We’re past the bad angst and moving towards mush. The comments thread is as much fun as the story!

Graphic art for signature design by L.L. Diamond using an oil painting by Johannes Vermeer: "A Lady Writing."

Graphic art for signature design by L.L. Diamond using an oil painting by Johannes Vermeer: “A Lady Writing.”

~~~

As can be seen on the sidebar of this blog, Then Comes Winter has been selected as a favourite on three top JAFF book blogs! YAY!

~~~

Please comment on this blog (below) at any time, or for today’s guest post, on Madame Gilflurt’s blog!

On the Road Again, Sans Ball Gown

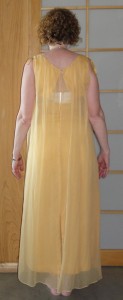
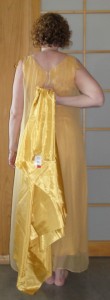
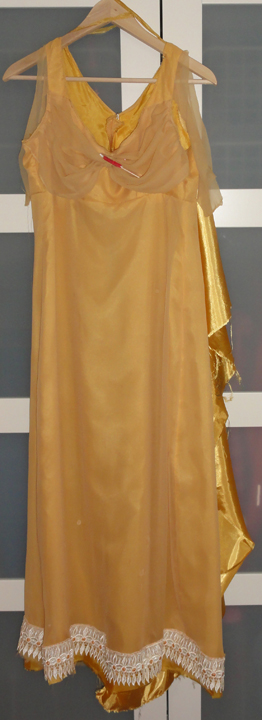
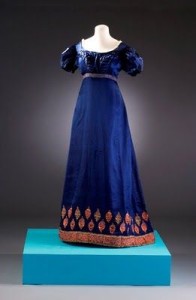
jonquil original frontjonquil original backA sad event took place last Wednesday. I had to abandon efforts to complete my beautiful jonquil ball gown midway through the project.

My setback was part of a chain reaction from washing a panel of matching fabric to be used to line new gathers in back.

It’s best to wash new fabric in case it shrinks. The fabric came out fine.


The Original Plan

jonquil back with faux silk lining shownThe vintage 1960s gown from Women in Need (WiN) Thrift and Vintage Superstore (above and right, before any modifications) would have the following modifications:

  • The back skirt detached from the bodice, the zipper removed, and the center back seam opened.
  • A triangle cut from the former back panels to create Regency side panels 7″ wide at the top and 12″ wide at the bottom.
  • Part of the sheer overdress draping from the original dress, plus matching lining (faux silk from Salvation Army at $2.99 for 2 meters) added as a 24-inch-wide back panel, gathered to six inches wide.
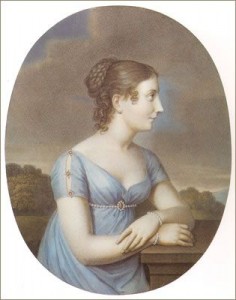
  • The sleeves modified by cutting the overdress draping free at the neckline and reversing it to have a finished look like the artwork below left.
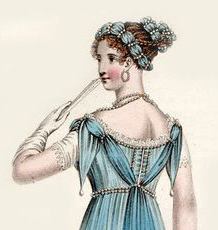
  • Panels from this draping would be finished with beads on the ends like the Regency fashion plate below right.
1815 Stephanie de Beauharnais-Baden wearing pale blue dress by Aloys Keßler after Johann Heinrich Schroeder

1815 Stephanie de Beauharnais-Baden wearing pale blue dress by Aloys Keßler after Johann Heinrich Schroeder


Evening Dress October 1811

Evening Dress October 1811

Indian blouse.

Indian blouse.


  • Lace from the Indian blouse was to run along the skirt bottom to lengthen the gown about 1.5 inches. Removal of this lace took quite a while since it was sewn on with  silver thread, which I wanted to retain to match the 1960s gown’s original waist trim.
  • A shirred panel from the ends of the draping would cover two holes in the bodice.


Disaster hits!

But when I decided to wash the gown along with the new fabric, on a super-delicate cycle, a horrid change took place: pin holes in the sheer fabric enlarged, and the overlay and draping, both from the same sheer material, shrank.

New projects emerged from the fiasco:

  • open the hemline where the overlay was attached to the lining so the fabric would relax before the lace was attached to the bottom of the sheer overlay,
  • cut a new piece from the sheer overdress draping for the back panel as the one previously cut was now too short,
  • re-think the sleeves since I stole the attached fabric for them and the dangly bits to create the second back panel,
  • figure out if I needed to add a panel at the hem for length (Maybe a rouleaux? I know, I keep adding beautiful design details!) now the bottom lace was a little higher,
  • find a way to camouflage the holes on the skirt.


I soldier on!

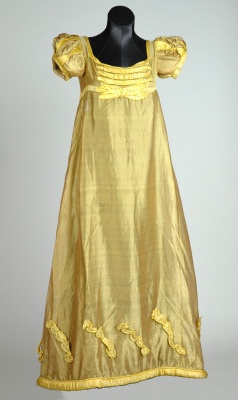
Yellow silk evening dress, 1817, Leeds Costume Collection.

Yellow silk evening dress, 1817, Leeds Costume Collection.

The Thrift Shop Regency Costume Experiment has always been about learning and adapting, and I wasn’t about to abandon this project yet. The back gathered panel, a simple project, turned out well. The gathered bodice overlay was a bit more complicated, but looks pretty.

I patched the holes on the front of the skirt using no-sew tape and tiny pieces of fabric from the overlay, and though they look better, it appears as if I spilled small drops of yogurt on my front!

Museum gowns, period fashion plates and Regency artwork were perused for additional hole camouflage ideas. Due to the location of the holes, I settled on diagonals of shirred fabric to mimic the museum piece on the right. I had plenty left from the Salvation Army piece.


Time is my enemy

It was Wednesday, and I would leave Friday morning for a short trip to celebrate my mother-in-law’s 86th birthday and an early Canadian Thanksgiving, before flying on to Louisville for the 2015 JASNA AGM.

Mother-in-law's 86th birthday and cool fall weather.

Mother-in-law’s 86th birthday in Winnipeg, MB, Canada.

In addition to the sleeves and skirt detail to hide the holes, the ball gown needed other work:

  • install the tapes with hooks and eyes on the back bodice to replace the zipper,
  • re-attach the waistline trim,
  • trim the neckline and sleeves with narrow silver braid to coordinate with the other trim,
  • use the same narrow silver trim to make the faux diamond back.

I was still thinking through the process and finish for the diagonal pieces on the skirt. I estimated this part of the project would take a full day.

The jonquil gown’s sleeves would take yet another day to design, make a pattern and at least one mock-up, and attach. Either of the two ideas that follow would be created with scraps of sheer draping and some of the faux silk.

1810 Ball Gown with pearls.

1810 Ball Gown with pearls.

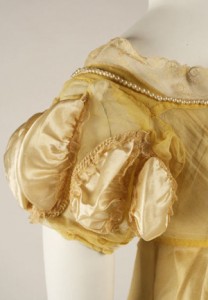
Sleeve detail for 1811 gown, Metropolitan Museum of Art.

Sleeve detail for 1811 gown, Metropolitan Museum of Art.


No way could I finish this gown on time.

On top of those issues, several other machine-sewn projects were required for to the conference:

  • my spencer and the gentleman’s tail coat needed buttonholes–buttons had been temporarily attached to make deadlines for the blog posts!;
  • the white Swiss dot gown needed fake long sleeves, as the originals had been removed and short sleeves added, intended to make the dress flexible for morning or afternoon wear;
  • some pretty sheer fabric with white embroidery would be made into a fichu and, with the addition of some organza lace, a second cap.
  • Mr. Suze broke the cheap plastic belt lining product I’d used for his suspenders, and we had to purchase new banding and attach.
The jonquil ball gown needed too much additional work to earn its full parasol, and time ran out!

The jonquil ball gown needed too much additional work to earn its full parasol, and time ran out!

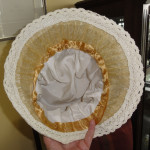
I also had numerous hand-sewn projects that would be tackled on the trip, such as 14 buttons on Mr. Suze’s tail coat and re-attaching the lining to my hat, which was not staying put with the double-sided tape.

Dozens of bags and containers of project items had to be packed up and stored after all this sewing, and I had to pack for a trip to two climates.

Something had to give, and the jonquil gown was sacrificed. I stopped all work on in mid-day Wednesday.


On to packing– but what to wear for the ball?

I had to quickly re-think possibilities for a ball gown. In a panic, I packed potential items that could be modified by hand, but were the dreaded polyester, and not my colour.

The alternative is the Swiss dotted gown (my original morning gown), but its fabric and style is less formal, better suited to an afternoon or dinner gown in its short-sleeved version.

I was in a terrible rush by the end, and didn’t stop moving from 7am Thursday to 1am Friday. I didn’t have time to make the new cap for day-wear, and have to wear my small-fitting first effort, made from cheap polyester lace at the last minute for my local JASNA’s Jane Austen Tea (an earlier blog post).

After the fact, I thought of a half dozen items that I should also have packed, e.g., my turban was to match the jonquil, and now I have to re-think headwear for the ball. I forgot my Alias Thomas Bennet book bead bracelet, which matches my editor and artists’ versions and would have been perfect for the book signing on Saturday prior to the promenade and ball.

I haven’t decided which way to go for the gown, and the only way to know is to watch my blog!

Next post: Louisville!


***UPDATE! Don’t forget to comment on The Thrift Shop Regency Costume blog posts, or find Author Suzan Lauder at the Louisville KY JASNA AGM for a chance to win items from the Experiment! Daily prizes October 8-12!


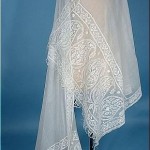
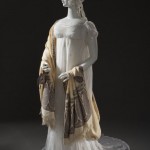
A pretty wrap to keep out the chill: Regency shawls.

Shawl, muslin cotton, white embroidery. Made in India, 1806- 1814.

Shawl, muslin cotton, white embroidery. Made in India, 1806- 1814.

Whitework Shawl, 1810-1820

Whitework Shawl, 1810-1820

The first Regency shawls I saw were summer-weight, wispy things, mostly white-on-white and all lacy-looking. Thus, I purchased a sheer Indian shawl, as it was as close as I could get. Made of fine net in a seafoam colour with silver embroidery, it was a compromise, but I knew silver embroidery was popular on clothing in the Regency period. (Click on thumbnails for larger images.)

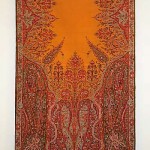
Shawl, cashmere and silk, 1800–1820, Metropolitan Museum of Art

Shawl, cashmere and silk, 1800–1820, Metropolitan Museum of Art

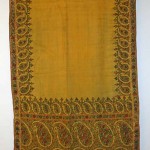
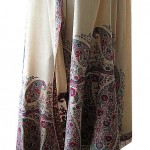
At some point, I saw other shawls, and realized these delicate ones were the minority. The majority were the  Kashmiri shawls, with their ubiquitous wide paisley panel at the ends and a border along the sides. Paisley, paisley, paisley. Most were cashmere, some with silk for a magnificent sheen. Wool, silk, or blends were also seen.

Shawl, Spitalfields. Silk, England 1810 -1815. The workers of the silk weaving district in London were French Huguenot silk workers who had fled to England to escape a religious purge.

Shawl, Spitalfields. Silk, England 1810 -1815. The workers of the silk weaving district in London were French Huguenot silk workers who had fled to England to escape a religious purge.

Shawl, wool and silk, Scotland, 1815.

Shawl, wool and silk, Scotland, 1815.

Shawl. Silk and wool. England, circa 1815.

Shawl. Silk and wool. England, circa 1815.


1812, Costume Parisien.

1812, Costume Parisien.

1811, Costume Parisien

1811, Costume Parisien

The love affair with Kashmiri textiles went to gowns, too. You can see how they were matched.


1810, Costume Parisien.

1810, Costume Parisien.

1810, LACMA collections.

1810, LACMA collections.

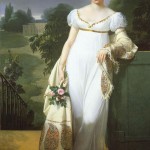
Felicite de Durfort von Merry-Joseph Blondel, 1808

Felicite de Durfort von Merry-Joseph Blondel, 1808

What’s with the paisley? The bent teardrop was a popular “Tree of Life” design in Persia. When Scotland became a leader in the production of textiles, the town of Paisley became the place where cashmere shawls were made. In England, the design became named after the town.

I was ecstatic when I found two paisley Pashmina shawls at Value Village for $7.99. This turned into a facepalm moment in my shopping history. I chose the one I liked best, that would go best with my outfits, and set aside the other. The next day, I realized these shawls were uncommon, and I could have given the second to a friend, or even sold it to someone assembling a Regency costume. But when I went back, the second one was gone.


While paisley was popular, Regency shawls used other designs, in all the colours of the rainbow!

1801, Costume Parisien

1801, Costume Parisien

Shawl, silk and cotton, English, 1800-50, Metropolitan Museum of Art

Shawl, silk and cotton, English, 1800-50, Metropolitan Museum of Art

1802, Journal des Dames et des Modes

1802, Journal des Dames et des Modes

Spitalfields rectangular silk shawl with Chinoiserie borders, c.1810

Spitalfields rectangular silk shawl with Chinoiserie borders, c.1810

La Belle Assemblée, February 1811.

La Belle Assemblée, February 1811.

Silk shawl by Spitalfields, London, 1810-1815.

Silk shawl by Spitalfields, London, 1810-1815.


The fiber Kashmir, or cashmere, is made from the down hairs of Nepalese capra hircus goats, also called Cashmere goats or Pashmina goats. The Pashmina shawl is the modern equivalent of the Kashmiri shawl, and they’re ubiquitous once again, but in different designs. Pashmina is a high-level cashmere, made from the thinnest threads.

However, most modern shawls labelled “Pashmina” have no Pashmina hair in them, but unlike the word “cashmere,” there is no regulation of the term. The best knock-offs are made from cashmere and silk and cost around $100; the cheapest are $20 for viscose and/or wool. The latter textiles may keep you warm, but don’t have the light weight of the fibers they’re mimicking. Real cashmere will pill with wear, and doesn’t have sheen or create static electricity.

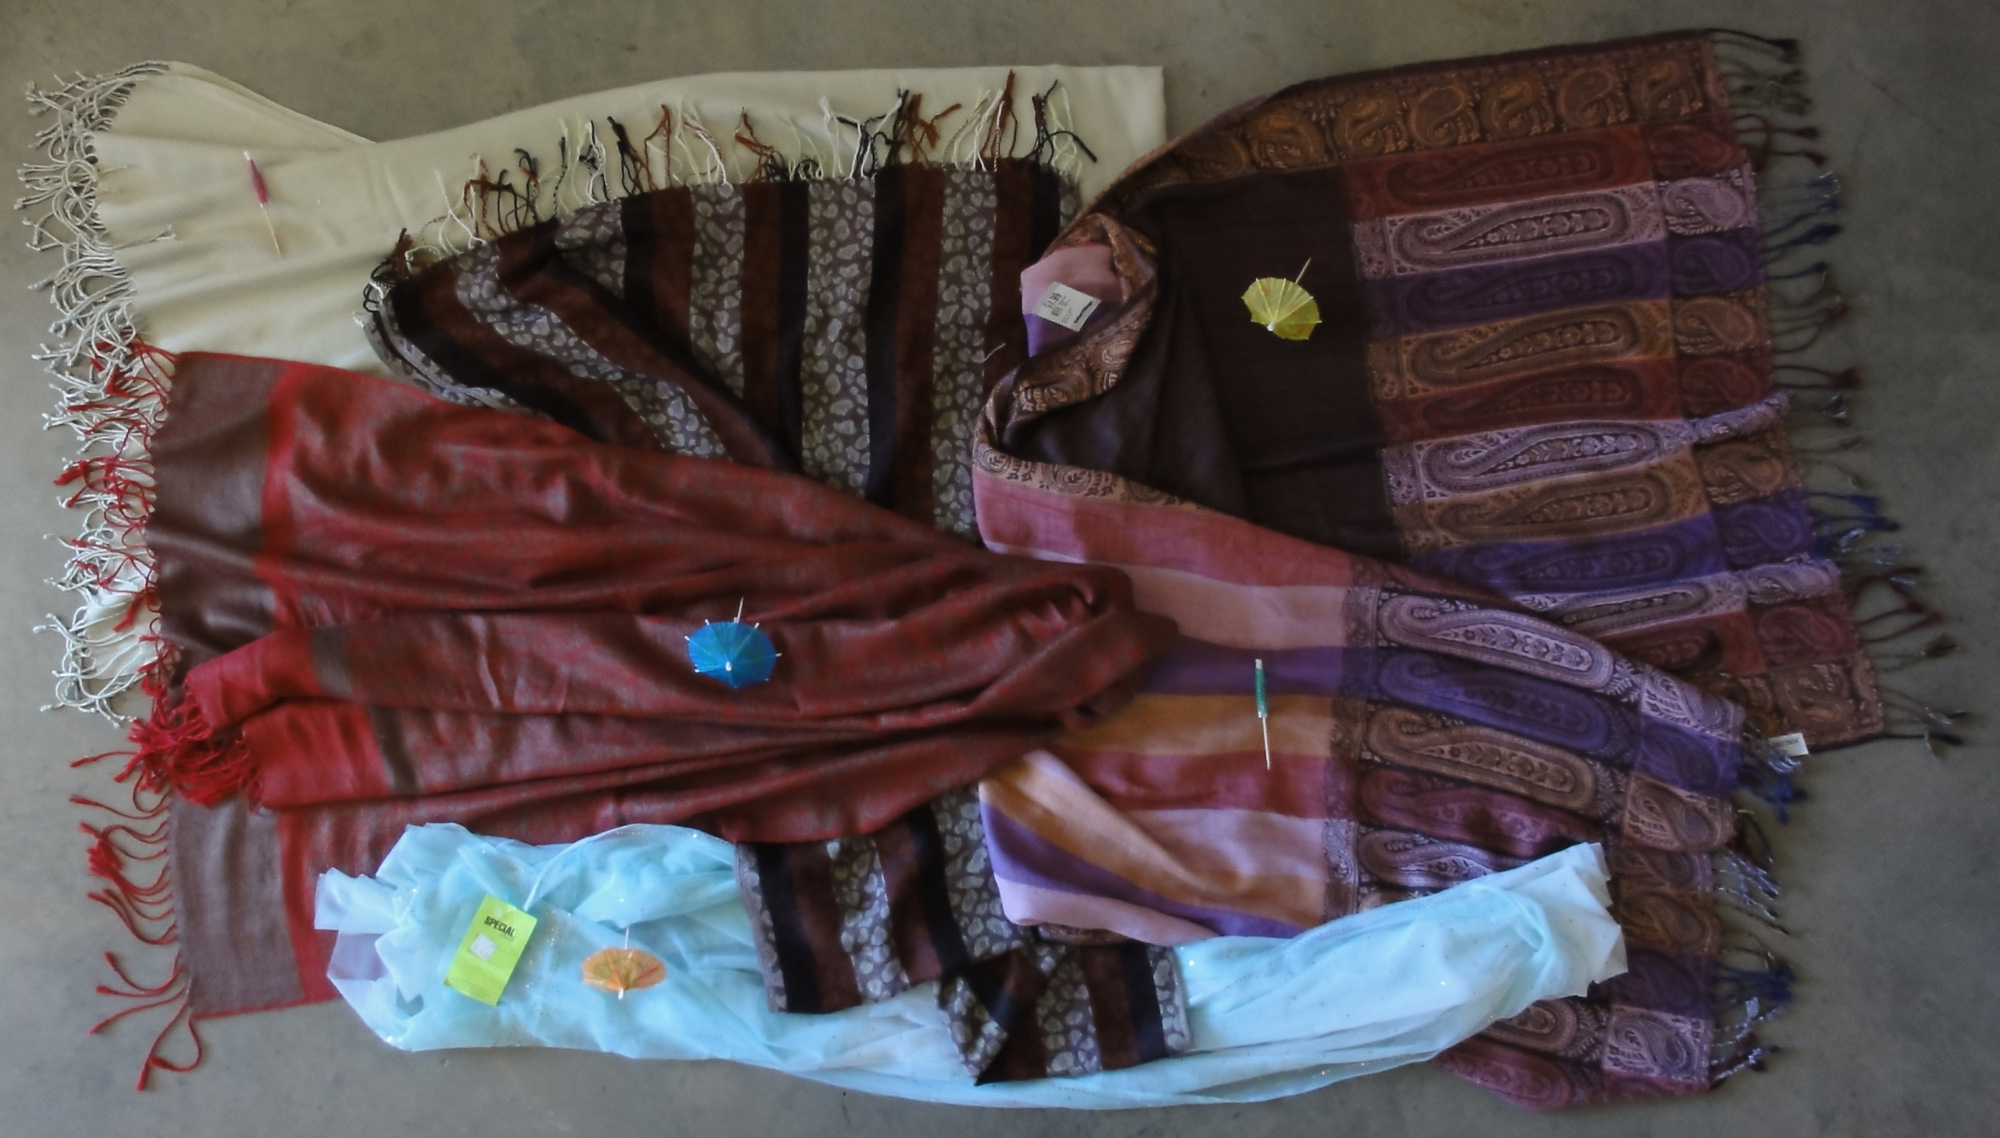
I bought a real Pashmina in Turkey in 2001, and since have acquired two knock-offs. Below are my shawls. They’re folded in half both so you can see their true size in comparison with one another, except the Value Village shawl is scrunched a bit to flip it over so you can the pattern on each side.My shawlsThe parasol ratings show the real Pashmina (pale green) with a closed umbrella, meaning it’s okay, but not the best choice. There are almost no shawls in my Regency image collection that are plain with no pattern. Its large size and light weight in comparison to its warmth is great, though. It’s my airplane blanket!

The red and brown “Pashmina” is as soft and has a nice silk-like glow, but its perpetually smooth texture and $19.99 price make me believe it’s viscose. The pattern and the stripe near the ends make this shawl reasonable in a Regency costume.

The brown striped “Pashmina” with animal spots was a gift. It’s small for a shawl: I use it as a large scarf. The fabric is coarse and probably contains a fair bit of sheep’s or regular goat’s wool. Though this scarf goes well with many of my winter clothes, the pattern eliminates it from my Regency wardrobe, so no parasol.

The previously mentioned seafoam net with silver is like an evening gown wrap, and that will be its best use at any Regency event I’ll attend.

Shawl c.1820

Shawl c.1820

The Value Village shawl is two-sided, with the centre area having bold stripes on one side and a dark grey main field opposite. When I took the photograph, I had not recalled any Regency shawls with a bold stripe in the main field, and thought I’d use what is likely intended as the back as the outside of the shawl. When I gathered photos for this post, I found an historical example similar to the side of the thrift store shawl that got a closed parasol! The sun came out, so we need to open that little parasol perched on the stripes!

Shawl, British, silk c.1822, Metropolitan Museum of Art

An interesting historical shawl is one that has no paisley and uses a different traditional design altogether: tartan. It’s a pity the only piece of Lauder tartan I own is a small scarf! I’d love to find a way to work it into one of the costumes without cutting it up or modifying it. It would be lame as a turban. These days, over the shoulder and tucked into the belt is reasonable, but I’ve yet to see a Regency outfit with tartan in this way. Do any of you know?


More shawls: Though mostly post-Regency, Mimi Matthews’ blog has a selection of beautiful 19th century artwork with shawls.

~~~

I’d planned to do a cushion reticule post today, but I haven’t made the last reticule for the set, and I had company this weekend from two different cities! Neither stayed with us, but my house needed to be tidied, and after that, our time was full with brunch, and The Bug Zoo, and skinny, former opium den streets, and other such tourist attractions!

I decided to do this shawl blog post first, as it was quick and easy. I know you don’t mind!

Next post: A twist added another design to my reticule arsenal, and three different designs will be shown, plus I hope to have the pdf’s ready for the patterns and instructions. After that, I still have at least three other designs I want to try making, but I may take a reticule break and show some of the “Faking Regency” tips.

My Regency Costume Cheat Sheet, by Suzan Lauder, Regency Romance Author

Example of Regency letter-writing by http://toracellie.blogspot.ca

With 17 verbose posts full of images, the challenge of an Absolute Basic Check List was a bit daunting. How does one summarize a lady’s needs for a full Regency costume suitable to wear at a function where people are knowledgeable about the era? Actually, some of the links shared at the end of this post do a pretty good job of it.

For procuring and creating the costume parts, however, the individual blog posts in the Thrift Shop Regency Costume Experiment series will be of much more use. That’s because of the numerous images of step-by-step construction of the re-purposed or upcycled items, museum examples of actual clothing from the Regency era, period fashion magazine sketches, and paintings of people in the era. There are also topic-specific links and how-to videos in many areas.

This post also has a number of overview links, links with more images of museum and purpose-made Regency wear, and a sort of “next steps” list for some readers: how-to links that require sewing skills.

For the Checklist, I’ve noted price ranges:

  • Lowest prices listed are the minimum you would pay for a good-quality finished version of the item (new, gently used, or repurposed/upcycled using minimum crafting or sewing skills), based on my experience with the guidelines set out for the Thrift Shop Regency Costume Experiment.
  • If there is a zero instead of a bottom price, it’s because this is an item you’d probably choose only if you already had one, and if purchasing, another choice on the list is preferable.
  • Highest prices are for purchase of a period-correct, attractive, good-quality (but not always top end), brand new item from a good vendor, custom-made to fit you in the case of clothing.
  • If there is a question mark instead of a price, it means the item is of such a personal nature, the top end cost is based on the buyer’s evaluation.
  • If you have the item on hand, it will cost nothing.
  • Most items can be obtained in the lower half of the price range.

Footwear

  • Simple ballet flats ($5-$20)
    • Fully enclosed (pump).
    • Round, pointed, or square toe.
    • Slim sole, separate heel under 1” high (not wedge), and any heel over ¼” should be a flared kitten heel.
    • Silk-look fabric, fine cotton, or soft leather.
    • Any colour except for black, dark brown. Wide stripes and large dots are fine.
    • No elastic, rubber, jute or coarse cotton, large trim items, folded leather detail, external seams, etc.
    • Ribbon ties up the leg with flat soles are optional (good for keeping shoes on while dancing).
    • Simple trim is optional.

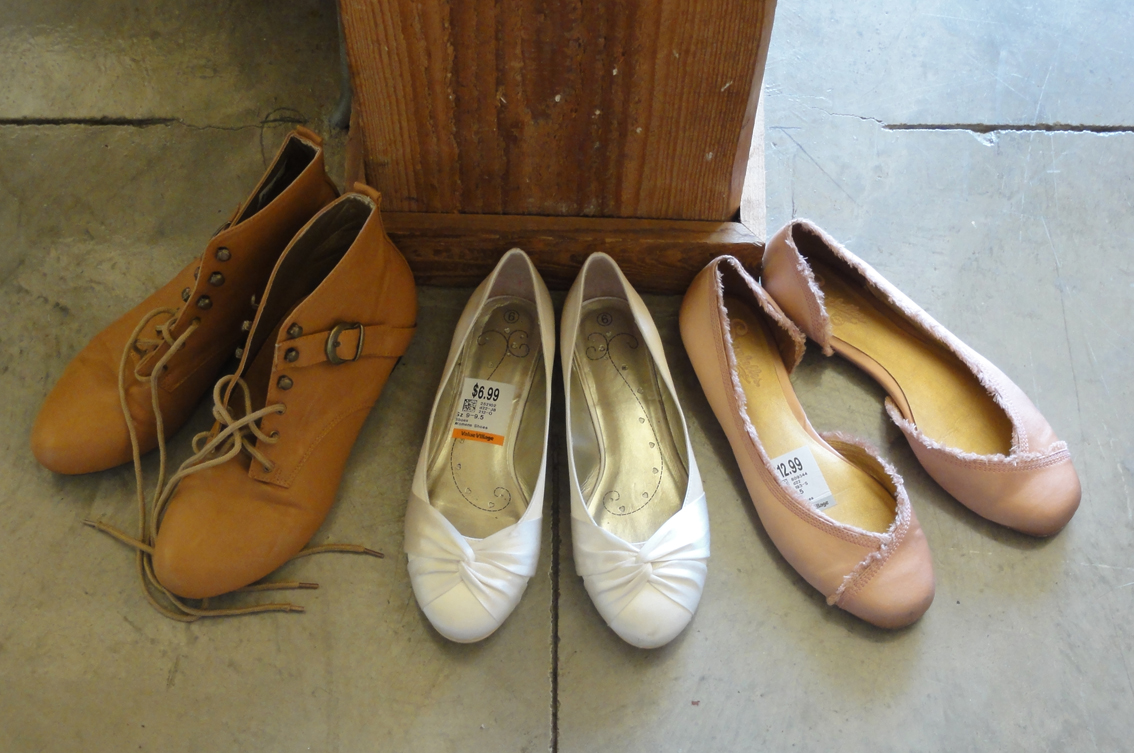
      My second set of footwear for potential Regency Costumes: a pair of half-boots and two pairs of satin ballet flat shoes. The boots will have the buckle removed (perhaps for a man’s shoes!) and get dressed up with a ribbon and fabric rose across the base of the toes. The white and pink shoes will be cleaned, then the white will get white ribbons to lace up the legs. The pink shoes will have the fringe covered with a ribbon and the cut-away area disguised.

  • For day wear, flat, lace-up half-boots ($18-$155).
    • 8′-12″ tall, round toe, slim sole and ¼” heel maximum.
    • Light colours.
    • Softer leather, cotton, or denim.
  • Orthotics may fit if you buy a half size larger than normal.
  • Post: Put on Your Dancing Shoes!

Stockings

High-lift foundation garment for “the girls”

  • Custom made Regency short stays ($70-$190), for C cup and under, OR
  • Custom made Regency full corset ($95-$380), for D cup and higher, OR
  • Push-up bustier or modern corset that’s low cut and not too cinched in the waist ($0-?), OR
  • Well-fitted (or slightly small) demi-cup, push-up bra, such as a Balconette. ($20-$?), plus a waist cincher if needed for extra lift.
  • Post: Lift and Separate!

Chemise and petticoats or pantalettes

  • Authentic, custom-made, new, Regency undergarments from specialty stores or Etsy:

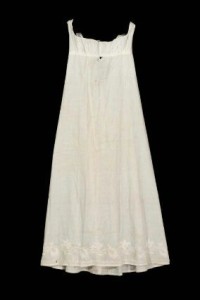
    Petticoat, early 19th c, American, Boston Museum of Fine Arts

    • Chemise ($45-$100) (worn under the corset for comfort), and
    • Petticoats ($35-90) or pantalettes ($35) (to “fluff out” the gown so it won’t stick between your legs), OR
  • In place of all of the above:
    • A floor-length full slip or nightgown, deep cut to match neckline of stays/corset/bra ($7-$38), or
    • A floor-length half-slip pinned to base of bra ($7-$20), or
    • Plain, lightweight, light-coloured cotton capris or pajama pants, or pants liners. ($5-$20), and
    • A low-cut camisole if needed with the last two items ($5-$25).
    • Super-fine woven cotton is best for comfort, but polyester will work.
  • Post: Twenty Layers of Unmentionables and no Panties!

Basic empire waist gown ($38-$400)no information

  • Floor length, empire waist.
  • Straight (non-fitted) skirt, flat in front and gathered in back.
  • Short, puffed sleeves and wide, low neckline for a dinner/evening/ball gown; long sleeves and high neckline for morning gown (to 4pm).
  • Simple-print finely-woven cotton, linen, or percale (not black-based), smooth silk, organdy, or synthetics that are good facsimiles.
  • 2m (6’-7’) by 1”-2” ribbon tied under the bust.
  • Don’t buy a pre-made “Regency” gown for under $100 on Etsy, as most are terrible!
  • $200-$400 should buy a nice, authentic, custom-made gown.1812 costume parisien
  • Posts: Floor length, Empire waist, and what else? Anne Shirley? (description of a Regency gown and examples); A Morning Gown plus some Frankenstein Gown Parts (what aspects of vintage gown styles to avoid; my gown purchases; morning gown modification from 80’s vintage); Were Regency gowns worn on the Titanic? (purchase tips for new handmade Regency gown; what to look for in a vintage gown to re-purpose).

Regency Hair Style

  • Centre parted, with ringlets around the face; fancy up-do with bun and curls or braids, worn close to the head. (How-to and video links in posts.)
  • If hair is too short for a fancy up-do, a hairpiece (bun maker, bun hair, and 1-3 braids for $10-$30), fall ($0-$50), wig ($0-$92), or a turban are options.
  • Ringlets can be purchased or taken from a doll or fall ($7-$60) and held on by a bandeau, or flat pin curls can be made.
  • For very short hair, comb forward in a “Titus” and hold in place with a ribbon, bandeau, or similar decorative item.
  • If desired, trim with ribbon, lace, bandeau, braided fillet, small silk flowers, feathers, tiara, diadem, combs, etc. ($0-?)
  • Posts: Faking Purdy Locks: The Modern Hairstyle goes Regency;
    Regency Bad Hair Day? Wrap a Turban! (my clip-on fall in an updo at end of post).

Headwear

  • Bonnet or hat ($6-$70)
    • Preferable if your hair looks nice when you remove your hat indoors.
    • Brim is sturdy, not floppy, and straw or satin-type fabric.
    • Capote hat or bonnet can be made from a wrap-around straw visor or hat, a 20” diameter simple, smooth, silk-like fabric cover, and a ribbon.
    • A good hat base is the narrower brim straw picture hat at Michaels, $5.
    • Add 1.5′-2.5′ of 1″-1.5” ribbon to make ties for a bonnet.
    • If desired, trim with several bunches of small fabric flowers and greenery; larger fabric roses; an ostrich, peacock, or other feather and brooch/medallion; hat pin; or combination, or other designs based on Regency sketches.

      Mock up of design of green and straw visor with green velvet cap.

      Mock up of design of green and straw visor with green velvet cap.

    • A nice range of new items can be found at the upper half of the price range above. Fancy items are double the top price listed here.
    • Posts: The Thrifty Regency Hat-trick! (Capote hat from visor and dinner napkin for under $10); How-to Times Two: Variations on Dressing up a Bonnet (The Pink Hat); Special Headwear for the Grown-up Lady (museum hat examples at the end of the post).
  • Lace cap ($2-$40)
    • Optional; for married or single-and-proud-of-it women only.
    • Similar to the idea of a turban, this will hide hair for women who can’t manage a Regency hair style and will be indoors where they must remove their hat.
    • Can be made from super-fine white cotton and/or fine whitework lace items such as doilies, handkerchiefs, curtains, cushion/pillow covers, or purchased applique items and ribbon.
    • Post: Special Headwear for the Grown-up Lady
  • Turban ($15-$40)
    • An alternative to the hat or bonnet that does not have to be removed when you go indoors.
    • A nice choice for evening wear if you’re unable to create an up-do.
    • Twist 2-3 silk or satin scarves (how-to and video links on this blog), or a length of silk or satin fabric (could be a table or dresser runner, a pashmina, small shawl or wrap) about 15″-20” wide and 40” long about your head behind ringlets; secure with safety pins and bobby pins.
    • A brimless, soft, natural fabric hat with a scarf or fabric wound around its base in textured waves works well also.
    • Fringe or ends with some type of embellishment or trim are recommended, and can be left to droop on one side.
    • Braid or cord can be woven around with turban cloth.
    • Add feathers, foliage, brooch, medallion, hat pin, or similar items.
    • Post: Regency Bad Hair Day? Wrap a Turban!

Jewelry ($0-?)

  • Simplest would be a medium-sized “jeweled” cross on a chain.
  • More elaborate choices include “jeweled” necklaces, armlets, bracelets, brooches, rings, earrings, and combs.
  • Almost all stones are are acceptable, but they should be cut stones. Costume jewelry is fine if it doesn’t look plastic.
  • Cameos and red coral were popular.
  • Drop earrings were on hooks not studs; clasped or open hooks are period.
  • Lover’s eye brooches were fashionable.
  • Post: Shiny things expose my inner crow!
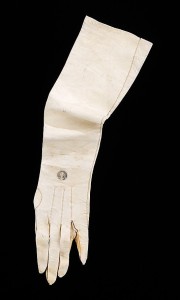
Regency Opera Gloves, kid, Metropolitan Museum of Arts

Regency Opera Gloves, kid, Metropolitan Museum of Arts

Gloves

  • Cotton, silk, or kid leather.
  • Short or optional for day wear ($5-$25).
  • Evening gloves go above the elbow: 24”-31″ (opera-length) with a loose-fitted upper arm are period-correct ($8-$32 for synthetic; $50-$200 for natural materials); 19” minimum.
  • If synthetic opera gloves are worn, buy a matte and not shiny satin finish, as it looks fake.
  • Any colour but black. White and softer colours were most common.
  • Post: I never did mind about the little things…

Fan ($1-$10)

  • Optional, but necessary on a warm day or in a ballroom.
  • Folding hand fan.
  • Avoid plastic and obvious synthetic materials for the sticks and guards.
  • If the fan has any scenes on the leaves, they should be English.
  • Any colour. Trim can include feathers, sequins, metallic, mother-of-pearl.
  • Post: I never did mind about the little things…

Parasol ($20-$200)

  • Optional if your face is protected from the sun by a bonnet or hat, or you are in a ballroom.
  • Eight or fewer ribs is Regency-appropriate, but who’s counting? As long as it’s not a dozen!
  • Pagoda shapes were most common, but round parasols were also in use.
  • A shallow curve is fine, but avoid flat Asian-style parasols.
  • The fabric should look like silk or cotton if possible.
    • Patterns on the fabric itself were rare, and would be a wide stripe or large dot or similar.
    • Fabric on vintage pagoda parasols from the early 20th century might not be very close to a Regency look.
    • Do not buy a Battenburg lace parasol, as they’re Victorian.
  • Most trim was on the periphery of the parasol: fringe (almost any kind), tassels, or lace. Some had embroidery.
  • Any colour but black.
  • Post: I never did mind about the little things…

Reticule ($5-$65)

  • Small drawstring bag (under 8” by 8”).
  • Almost any colour or shape works, in a fine fabric, beaded, netted, or knitted.
  • Avoid printed satin, most open lace or crocheted styles, eyelet lace, or leather.
  • Beads or sequins should not look plastic.
  • No zipper, but metal snap clasp or gate closures are fine.
  • The smooth silk bat-wing or moon reticules on Etsy are overpriced ($15-$22) for what you’re getting. The beaded and embroidered ones are often very good deals.
  • Post: All the pretty little purses

~~~

A few good overview web sites for a Regency costume:

These sites are summaries of what we’ve learned during the 17 previous posts in the Thrift Shop Regency Costume Experiment blog series, and I refer to them regularly myself.

Best site (pdf version) for showing the details one should search for: It’s All in the Details: Making an early 19th Century Ball Gown, by Hope Greenberg.

Best site (pdf version) for applying the other to real life: Miss Lisa Brown’s Guide to Dressing for a Regency Ball—Ladies’ Edition.

Less useful, but detailed, with lots of drawings and paintings is Wikipedia’s 1795-1820 in Western fashion.

An interesting article explaining Regency fashions while referencing the movie adaptations of Pride and Prejudice. Dressing for the Netherfield Ball in Pride and Prejudice: Regency Fashion.

Lots of links for buying stuff new can be found at Regency Attire: Purchasing Your Costume by Regency Dances.org  Not all these items are accurate, as they try to cover numerous costuming situations.

Sites for examples of Regency gowns:

Museum gowns:
Real people wore these, so they’re a bit more accurate than fashion plates such as Ackermann’s Repository for Art, La Belle Assemblée, or Costume Parisién.
The Vintage Thimble tumblr
Kyoto Costume Museum Archives 1800s-1810s

Ideas from others’ modern interpretations:
The JASNA AGM Regency Ball in Brooklyn, 2012. Most of these are probably handmade from modern reproduction patterns. There will be non-Regency clothing represented as well, as not everyone is immune to the marketing of those selling the Titanic/Downton Abbey gowns.
The Jane Austen Festival in Bath is a similar situation.

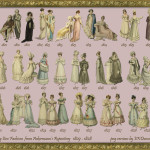
Erica Duncan's montage of Regency fashion plates for each year between 1809 to 1828.  Original art from Ackermann's Repository for Arts. Click on thumbnail for much larger image.

Erica Duncan’s montage of Regency fashion plates for each year between 1809 to 1828.
Original art from Ackermann’s Repository for Arts.
Click on thumbnail for much larger image.

Pinterest has a lot of good images, but I’d suggest searches by clothing article rather than just “Regency,” as the number is overwhelming even then.The site will often offer sub-headings at that point, too. This is an example of a huge board. Take care, as some images are modern and may contain misinformation; that’s why I like to stick to museum examples. But sometimes those are mis-dated by some pinner, too. It won’t be long before you’re picking them out yourself, though, as there’s nothing like 50 Regency gowns compared to one 1830’s gown. Warning: Pinterest is like crack.

Resources for making your own gown if you can sew a bit:

A video tutorial from Follies Past shows how to make a Regency ladies’ gown from a bridesmaid dress, a set of curtains, and a lace blouse. This requires beginner sewing skills.

Old Petticoat Shop offers their Regency Dress Online Class for $97 plus fabric, notions, etc.

My Regency Journey from Tea in a Teacup goes through creation of an entire Regency costume, but made from scratch.

Diary of a Mantua Maker has two tutorials on fitting a Regency gown: the first shows common mistakes and the second, sleeve and bodice fitting.

Sense and Sensibility Patterns has a number of videos with tips on how to fit your gown or modify the design of a pattern, as well as some sewing techniques.

~~~

Update: A nice little summary for evening wear, with some of the wonderful descriptions from The Lady’s Magazine and La Belle Assemblée: Mimi Matthews’ Elizabeth Bennet, La Belle Assemblée, and Early 19th Century Fashion.

~~~

turban 1 croppedNEXT POST: The grand finale! Photos of my completed costume, plus an overview of my learning experience with the “experiment” and brief notes on what the summer bonus posts will look like.

I never did mind about the little things…

Slippers similar to ballet flats; several layers of underwear to enhance her bosom and disguise that she had legs; a gown appropriate for the time of day; stylish curls and a fancy but tidy up-do; a turban, bonnet, or hat, and perhaps a cap; a cherished piece of jewelry—what more could a Regency lady need?
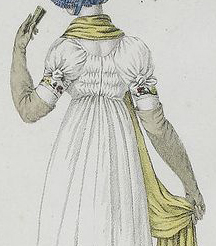
From Costume de Promenade, 1804-1805, opera gloves

From Costume de Promenade, 1804-1805, opera gloves

Accessories, of course! Heaven forbid if she left her home without her gloves, and she’ll die from the heat at a ball without her fan! On a morning promenade, her parasol will keep her delicate skin from growing coarse and brown in the sun.

This post is about how to obtain these accessories for your Regency costume.

~~~
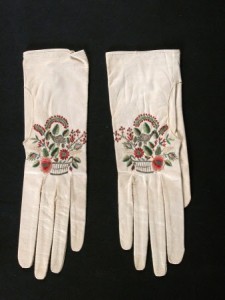
Dudmaston National Trust (Claire Reeves) -- Embroidered kid gloves, circa 1800-1830

Dudmaston National Trust (Claire Reeves) — Embroidered kid gloves, circa 1800-1830


Gloves

Gloves were common apparel outside the home, though period art indicates they were not imperative during the day. It’s pretty simple to find Regency-appropriate gloves for day-wear: short, cotton gloves are acceptable, and stores carry them for hand care at a low price. I continue to watch for nicer ones, in finer cotton, and maybe with trim like seed pearls or lace, but simple will do. Of course, if you can obtain kid gloves, it’s even better!

For evening wear, the sleeves were short and the gloves were long. Super long, much past the elbow. Opera-length.
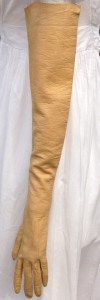
Circa 1810 kid leather, buff.

Circa 1810 kid leather, buff.

Not a problem, right? Long, synthetic, “satin” evening gloves are dirt cheap, and easy to find. One would think they’d pass for fancy ones from 1812. White sounds like the right colour, right? Unfortunately, they’re not the best choice.

Most Regency evening gloves were made of kid leather. They were often white, but also came in many colours, usually muted, softer tones.  Though vintage kid opera gloves in cream, buff, bone, pale yellow, pale pink, ecru, and similar colours are common on Etsy and ebay, with bids starting at $25 and up, read the fine print: they tend to be size 6 or 6.5 when most women these days wear at least a size 7. (In case you don’t know your glove size, this is a handy link: Your Glove Size.)
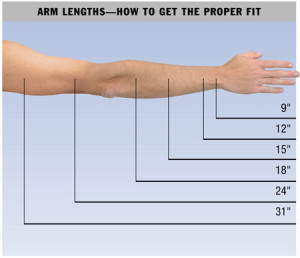
Glove lengths in inches.

Glove lengths in inches.

Beware: many vendors will say their gloves are opera length, but they may be as short as 11 inches! A true opera-length glove goes past the elbow: a minimum of 19 to 21 inches on most women.

In addition, vintage kid gloves can be stained, torn, worn, or otherwise damaged, especially if unlined. The three-button wrist opening is Victorian, so don’t be tempted to buy gloves with that style.

“New” in-package vintage opera-length kid gloves start at $150 on ebay, but are in small sizes, too. Brand new kid gloves made for coming-out balls are $200-$300 in Regency colours and modern sizes. If that were not enough to make this accessory difficult, many Regency gloves had embroidery along the back!
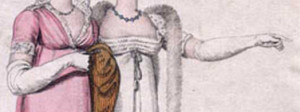
From La Belle Assemblee April 1808, opera gloves

From La Belle Assemblee April 1808, Opera gloves

As seen in Regency art, the fit tended to be relaxed, which meant the glove fell so it drooped along the arms, yet still wound up falling higher than the elbow. To accomplish this, a minimum of a 12-button glove (24 inches long) would be required, and the example to the left is much longer.
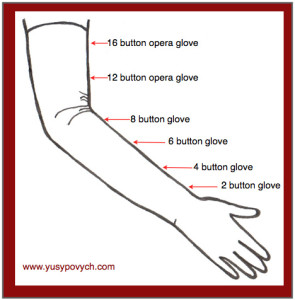
Glove lengths in “buttons.” Opera gloves are 12 buttons or longer.

An alternative, new lambskin gloves, come at reasonable prices ($25 starting bid on ebay for unlined 21-inch gloves) for black (mourning gloves in Regency), white, brown, or bright, saturated colours. Faux leather is about $10 for the same colour ranges.
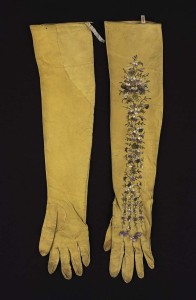
Museum of Fine Arts, Boston--Women's Gloves, early 19th century, silk.

Museum of Fine Arts, Boston–Women’s Gloves, early 19th century, silk.

Fabric evening gloves in the Regency were cotton or silk, and they weren’t shiny. If all you can find are those shiny satin ones (they are 19 inches long), some people use sandpaper them to dull them, then dye them if desired. The colour selections in dyes these days are bright, basic tones, so watch to limit dye time so the colour isn’t too saturated; though if I recall correctly, that type of fabric takes dyes poorly.
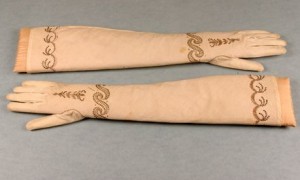
Cotton fabric embroidered gloves, circa 1790-1810, bias cut for stretch, gold and sequinned scrollwork pale pink floss silk detailing

Cotton fabric embroidered gloves, circa 1790-1810, bias cut for stretch, gold and sequined scrollwork, pale pink floss silk detailing.
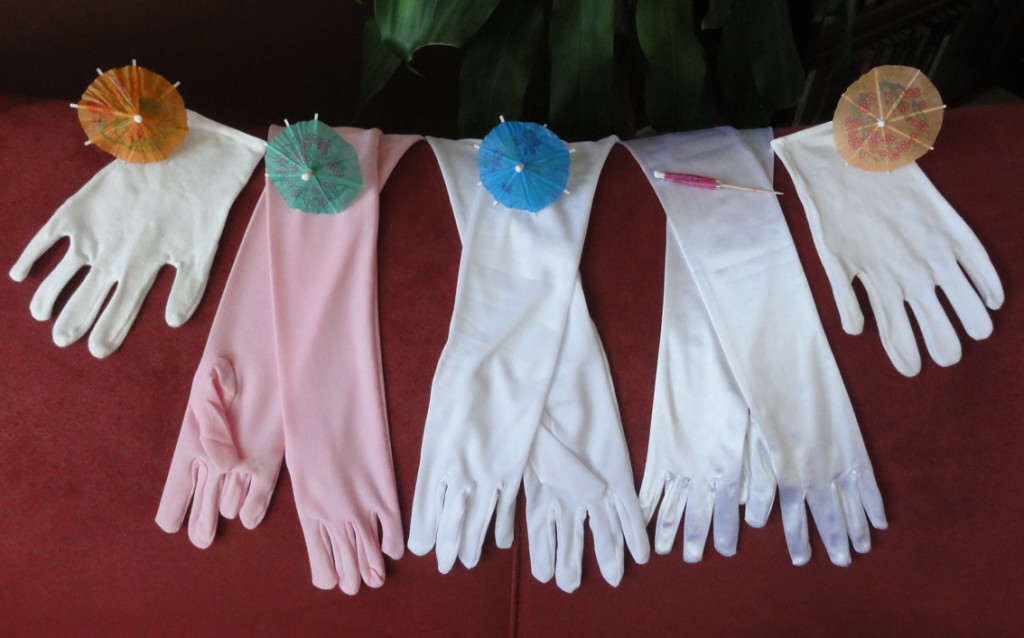
my glovesI purchased 19 inch (8-button) matte-look synthetic gloves for $7.99 at Dressew in Vancouver, BC, in pale pink and white, on top of the original white satin pair. They also had purple matte, but I felt it was too bright. The nice buff yellow colour was only in the shiny satin finish. All these gloves fit the arm snugly, and just barely cover the elbow, but many Austen costume wearers feel they’re a reasonable enough choice. Like with my stockings, I may try to mimic an embroidered pattern using fabric paint.

In the meantime, I’m still watching ebay and Etsy for ball gloves in size 8 and any colour but black, brown, or loud! If I can get 16-button (31 inch) gloves in a nice soft yellow or cream, it will be like heaven! If they’re kid leather with no wrist buttons, I’ll have to pay more than I did for any of my dresses!

~~~

Fans:

A Regency ballroom can become very warm. Fans were a must-have accessory for one’s comfort. Chinatown, thrift, vintage, and budget stores are possible places to buy your fan.

The one fan I purchased was part of a $2.99 grab bag at Value Village. Though I adore it, it’s rather simple for its purpose: a medium-toned wooden brisé fan with a line drawing of a Chinese scene printed on the leaves, and a satin-looking sleeve.my first fanIt took months to find this fan. The available fans were all cheap-looking or had non-Regency features. Most wood fans had paper leaves that were plain or had very Asian motifs, and pale, plain wood sticks. Fans with silk/satin leaves had sticks and guards made of cheap plastic, no matter how pretty or elaborate the painting on the leaves!
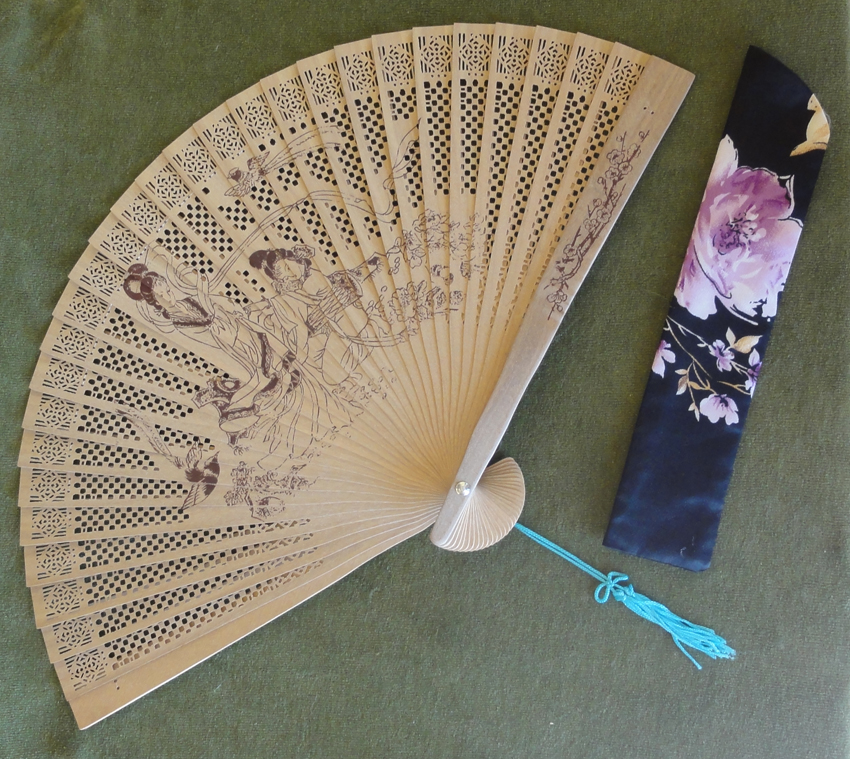
Ten or so years ago when I shopped for a gift for my sister, fans with dark, rich wood or enamelled sticks, with inlays such as mother-of-pearl on the guards, were available at a reasonable price, but I didn’t see one fan like this in months of searching. It doesn’t help that, though the Chinatown in my current city is the second-oldest on the West coast, it’s also the smallest, at two blocks long.
Brisé fan, circa 1790, wood.
Brisé minuet fan with blue silk. Dutch, 1810. Museum of Fine Arts, Boston.

Regency fans came with sticks and guards made from ivory, mother-of-pearl, bone, tortoise shell, metal, ebony, and horn. Ribs and leaves could be of the same material as the sticks, or the fan could have leaves made from gauze, silk, paper, or feathers, and trimmed in gilt, lace, ribbons, or sequins. They could be inlaid or piquéd, painted, pierced in a pattern, or embroidered, and any scene depicted would be English. For full size images, click on the thumbnails.
Battoir fan, 1800-1830. Silk, ivory, and metal. National Trust Collections, UK.
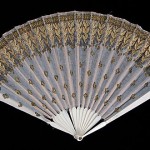
Battoir fan, 1800-1830. Silk, ivory, and metal. National Trust Collections, UK.

Fan, 1800-1815, French. Bone, silk, metal, wood. Brooklyn Museum Costume Collection at The Metropolitan Museum of Art.
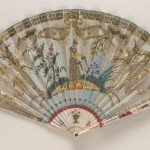
Fan, 1800-1815, French. Bone, silk, metal, wood. Brooklyn Museum Costume Collection at The Metropolitan Museum of Art.

Folding fan of ivory sticks with a silk leaf embroidered with sequins and painted with a female figure watering plants. English, circa 1810. Fan Museum, Greenwich.
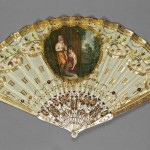
Folding fan of ivory sticks with a silk leaf, embroidered with sequins and painted with a female figure watering plants. English, circa 1810. Fan Museum, Greenwich.

Folding fan. Carved, gilded mother-of-pearl sticks, silk leaf decorated with gold sequins, embroidery, mezzotint. Two girls with a cat. English, circa 1800-1820. Fitzwilliam Museum.
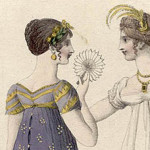
Cartouche fan, from a plate in Ackermann's Repository for Art, 1808.

Cartouche fan, from a plate in Ackermann’s Repository for Art, 1808.


The coolest fans (not meaning efficacy, but in eye-catching quality) are the cartouche fans, which open to 360 degrees.

If you can find a fan with an attractive non-plastic material for the sticks and guard, and a pretty painted or embroidered design that isn’t too Asian, it will do well.

 ~~~


Parasol:

If you’ve followed this blog from the start, you’ll know one of my catch-phrases is “Parasol in a Ballroom.” This originates from a scene I wrote in the original Alias Thomas Bennet before posting it in serial form at A Happy Assembly.

While in London, Jane Bennet writes to her sister Elizabeth, who is at Hunsford:

“Mary and I attended a private ball at Miss Morris’ home and it was all that was spectacular. The ballroom was the largest I have ever seen, and the candles were so brilliant that the room was almost as bright as day. The ladies were in beautiful dresses and held lovely fans or parasols.”

Cassandra, the final cold reader, tagged the final word with a simple comment in a balloon: “At a ball?”

Indeed! Why would they use parasols indoors at night? In my mind, I could just see Cassie’s head-tilt! It’s been a joke between us ever since.
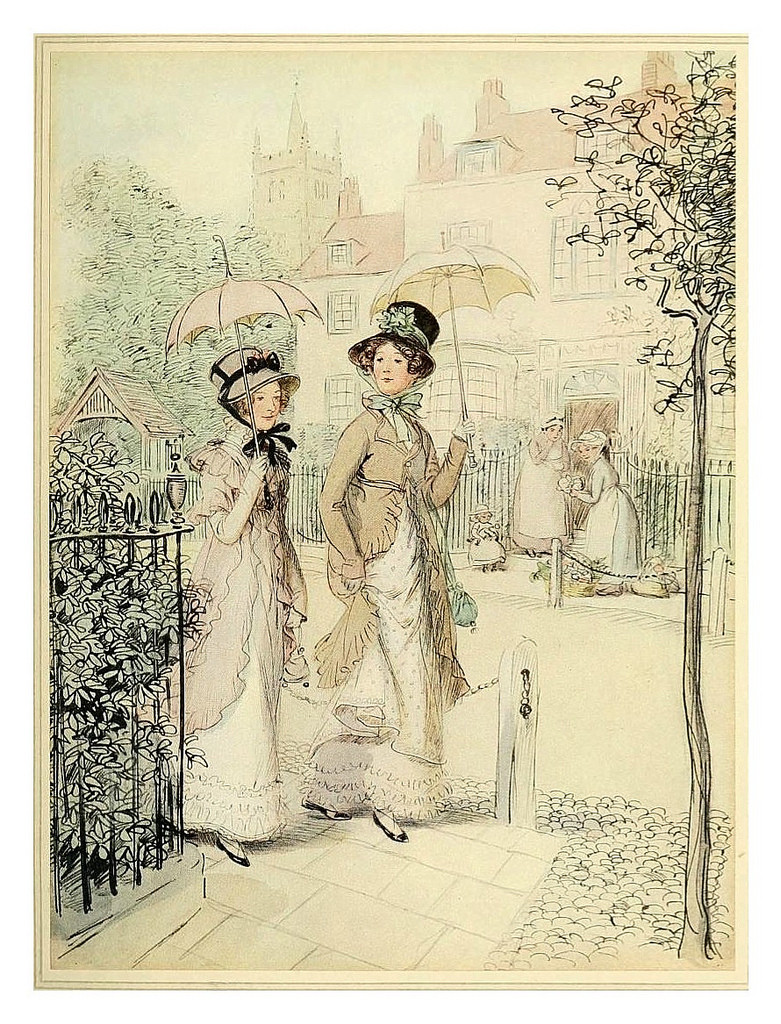
tumblr_na3t53ZkSc1s5i6ido3_1280Although a parasol is an optional item, mainly for when the headwear doesn’t protect the Regency lady’s face from the sun, it’s seen in many fashion sketches of the time, leading me to believe it was for show, as well.
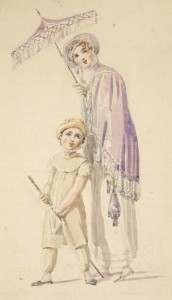
Walking dress, parasol with knotted tassel fringe, 1810.

This item comes in so many variations, it’s not nearly so difficult to procure something that is a good facsimile. Deep or shallow scallops between the ribs, either rounded or pagoda shaped, deep or shallow curve to the parasol body, but not flat: all are appropriate in almost any colour except black, unless you are in mourning.
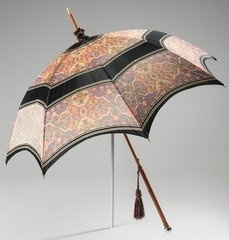
Parasol, 1805, Metropolitan  Museum of Art
Parasol, 1805, Metropolitan Museum of Art

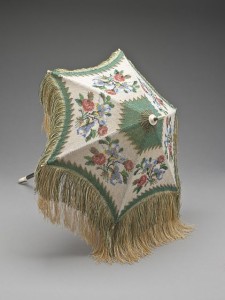
Parasol, European, circa 1805. Silk knit with glass and steel beads, wood, bone, and metal.

Parasol, European, circa 1805. Silk knit with glass and steel beads, wood, bone, and metal.

Multiple modes of decoration enhance the parasol cover, such as stripes, prints, tassels, embroidery, and all types of fringe: eyelash, brush, ball, and multiple-knot tassel fringe. Others are plain. Most handles were straight, though a few curved ones existed, and they were sometimes decorated and inlaid not unlike the guards on the fans. A fascinating Regency specialty is the hinged parasol.
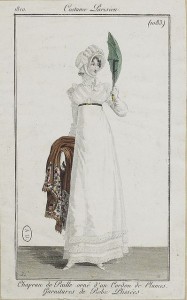
Hinged parasol, Costume Parisien, 1810

Hinged parasol, Costume Parisien, 1810

Lace is not common, though, and the ones I’ve seen with lace use it as trim similar to fringe. The Battenburg lace parasols sold as Regency are Victorian, so don’t waste your money!

Of course, a real Regency parasol frame is made from wood or baleen (whalebone), and the cover from silk. Modern Asian parasols of wood frame construction tend to have too many ribs; Regency ones had four to ten, though six to eight were most common on the plates I’ve seen, and many had seven.
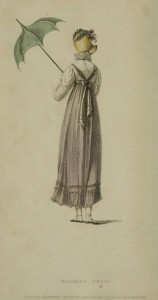
Pagoda parasol from Ackermann's Repository print, 1814

Pagoda parasol from Ackermann’s Repository print, 1814

If you’ve followed this blog from the start, you know my obsession with the idea of a pagoda parasol, which has a second upward curve on the canopy of the parasol. They were common during the Regency period, in fact, up until the 1960s. Vintage pagoda parasols on Etsy and ebay are usually mid-20th century, with a metal frame and handle made from bakelite, a non-melting plastic that’s still used for items such as billiard balls today. The fabric is often in a “modern” pattern for the era, so it may not work well for a Regency costume.

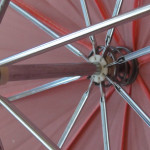
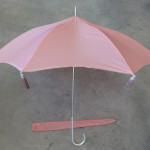
A vintage pink nylon-covered non-pagoda umbrella, with a matching fitted sleeve complete with a grommet for the spiked end, was purchased for $9.99 at WiN (Women in Need Vintage and Thrift Store). It has an interesting, curved, patterned aluminum handle. I’m not a pink person, yet I manage to repeatedly find the best items in pink!
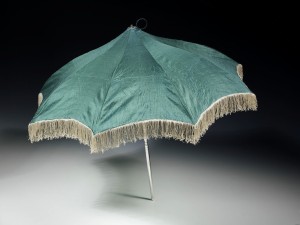
Silk parasol, ca. 1811, Victoria and Albert Museum.

Silk parasol, ca. 1811, Victoria and Albert Museum.

Two-inch wide white fringe was one of the items in my amazing budget purchase of multiple types of trim for $5 in Mazatlán, and the idea was to tone back the pink and make the umbrella look more like a Regency parasol.
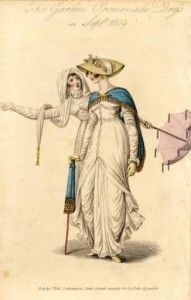
Garden promenade dresses, 1809, Fashion Plate Collection. Tasseled parasol on the right and parasol with knotted tassel fringe on the left.

Garden promenade dresses, 1809, Fashion Plate Collection. Tasseled parasol on the right and parasol with knotted tassel fringe on the left.

Later, a local Indian fabric store (K T Boutique and Fabrics) was selling certain colours of tassels at half price, and I liked the idea of tassels better, as the parasol would be less bulky when folded. I got eight in a muted violet for $1 each.

But I kept looking for my pagoda parasol with a straight handle, in materials that looked like they could be from the Regency.

Then I read an article on how to make a regular umbrella into a pagoda parasol, using a length of milliner’s wire twisted into a spring and inserted inside the canopy of the umbrella, around the part of the stick that’s above the frame. Some time ago, I’d been curious about the inner workings of a pump cosmetics bottle, and had two short, fat springs on hand as a result, so I didn’t have to use my questionable wire-bending skills.


First spring inserted above the upper rib of the umbrella frame.
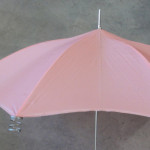
The beginning of the pagoda shape from the first spring, and second spring displayed (just hanging on the end of a rib) to show how it looks before installation.

Inside the open umbrella, I placed my fingers around the umbrella stick between the canopy and the frame, then easily slid the canopy up the spike so I could thread the spring on, much like you’d put a key on a key ring. Click on the thumbnails for larger images of the instructional photos.

Second spring in place.

Second spring in place.

After the first, I decided it would look better with two springs. The second was much harder to install. You could not do this with an umbrella that does not have a long enough spike on top.

A slimmer spring would be better, as these tend to slide down over the ribs when the umbrella is closed, and I have to reach in and wiggle them up to get the umbrella to open. In addition, the extra bulk means the matching sleeve no longer goes on all the way. I’m going to wait until I finish my hand lotion to procure the alternate spring!

I found it difficult to figure out how to tie on the tassels, so I’ve shown the steps I eventually used to save you all some trouble. I did a better job of showing the “How-to” steps by using captions this time! Click on the thumbnails for larger images.
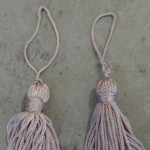
Tighten the top knot on the tassel (left). Tie a second knot about 2-3mm or ⅛ inch above it (right).
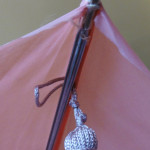
Loop string between rib and fabric, inside of where the cover fabric ties to the end of the rib.
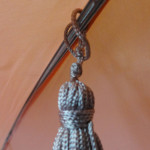
Push tassel through loop to tie to rib.
Push tassel through loop to tie to rib.

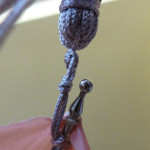
Pull the tassel to the end of the rib and push the gap between the knots over the ball at end of rib.
Pull the tassel to the end of the rib and push the gap between the knots over the ball at end of rib.


Final pagoda shape of parasol, with eight tassels. Matching sleeve is shown below.
Final pagoda shape of parasol, with eight tassels. Matching sleeve is shown below.

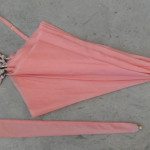
Parasol closed, with sleeve. You can see all the tassels here.

Voila! A pagoda parasol with tassels for my Thrift Shop Regency Costume! I’m so pleased, I barely care what else I wear!


~~~

NEXT POST: One of the easiest items to find for your Regency costume is a reticule. A small drawstring bag (at least 5 inches wide, but under 8 inches in each dimension) of almost any shape, in a rich fabric, will suffice. If the bag you found is too simple, we have ways to dress it up! I have six examples, and three came to me in fine condition with no need for upgrades. Three need simple, typical modifications that are super-easy for the non-crafter.

~~~

Pop quiz: Did anyone know the source of the title without looking it up? In what other movie did the same guy play a sort of a “cleaner?” What Regency-era movie was he in?

I’d adore some comments! (The Meryton Press blog page version of this post is the best location for this.) I’m trying to decide how to do a give-away, and feedback would help me to know if anyone besides me is reading this shiz.

~~~

Updates: If you’re interested in learning more about Regency fans, or just seeing some more beautiful designs, check out this blog post: Special Exhibition: The Unrivalled Beauty of the Hand-held Fan in the Romantic Age 

Thanks to Zorylee Diaz-Lupitou, who solved my problem with the comments box. Hopefully, it should be working now!

The Thrifty Regency Hat-trick!

No rabbits are involved in this type of hat-trick! However, once in cricket, four times in NHL hockey, and twice in rubgy, three hat-tricks, or three sets of three goals scored by the same player, have taken place in a single game. Other games also use the concept of a hat-trick.

Our Thrift Shop Regency Costume Experiment is also doing three tricks with hats this week—well, two are technically bonnets, and you’ll have to wait for them until next post.

You say, “What? You said three hats this week, now it’s only one?”
I reply, “Yes, because the post was a million years long, and your eyes would have glazed over. Instead, I’m doing two posts this week, and the other hats will be in the next one!”
And you say, “Two posts? YAAAAAYYYY! You’re our favourite!”

Of course I am. And every fine lady holds a parasol in a Regency ballroom, too.

~~~

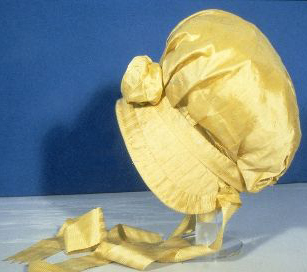
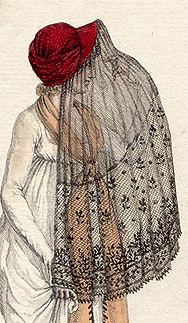
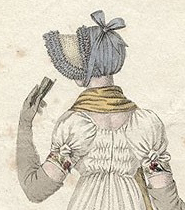
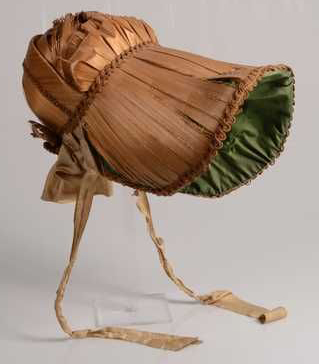
1812 capote croppedEnglish, 1805-1808  manchester galleries cropped  capote with veil croppedCapote Hat1804 capote cropped

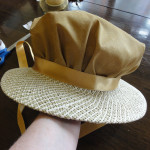
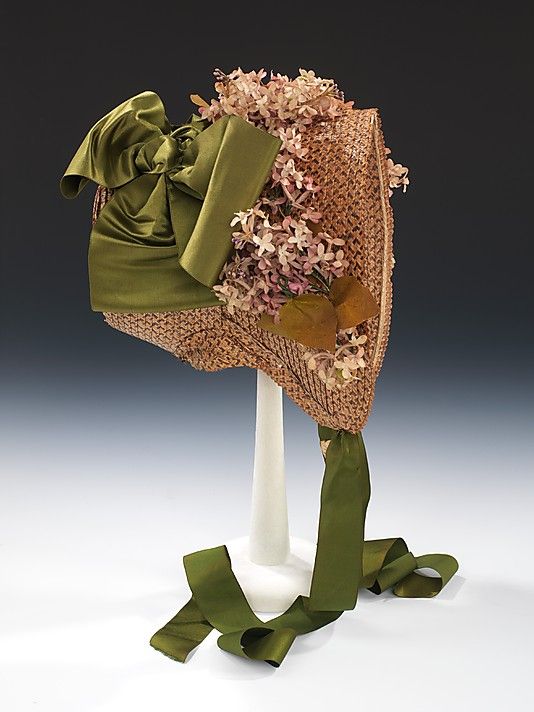
This is the most common type of hat at Regency costume events, probably because it’s fairly easy to make and is quite cute! It’s not nearly as common in Regency fashion plates or paintings, though; that’s where the poke bonnet shines. The capote is the one that looks like a tea cosy or shower cap over a brim that’s narrow in the back and moderate in the front, or goes about ¾ of the way around. The proper description is “a firm brim with a soft cap.”Woman's bonnet, 1807 Centraal Museum Utrecht croppedhat one potential materials of construction

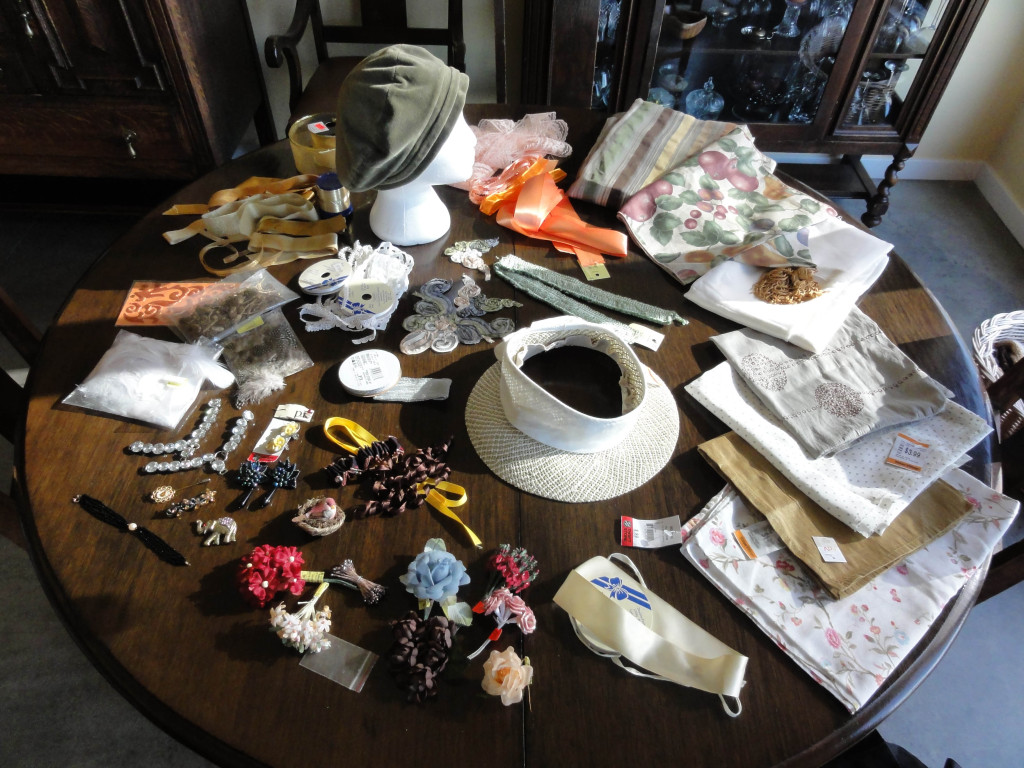
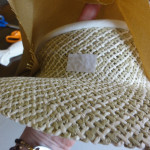
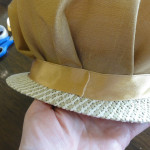
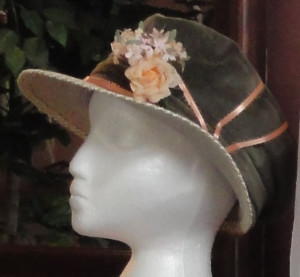
I found the perfect shaped brim in a green and natural-coloured straw visor with a mid-weight cotton band and bow. You can see all the fabric and trim options for all my hats above, along with this hat. Some are too bold, others too plain, and some too matchy-matchy.

I’m not using the little green velvet hat, as I love it for everyday modern, and won’t modify it. I may dress it up as a turban, but I like the table-runner turban, which goes well with the gown I like best for the ball at the Louisville JASNA AGM this fall.

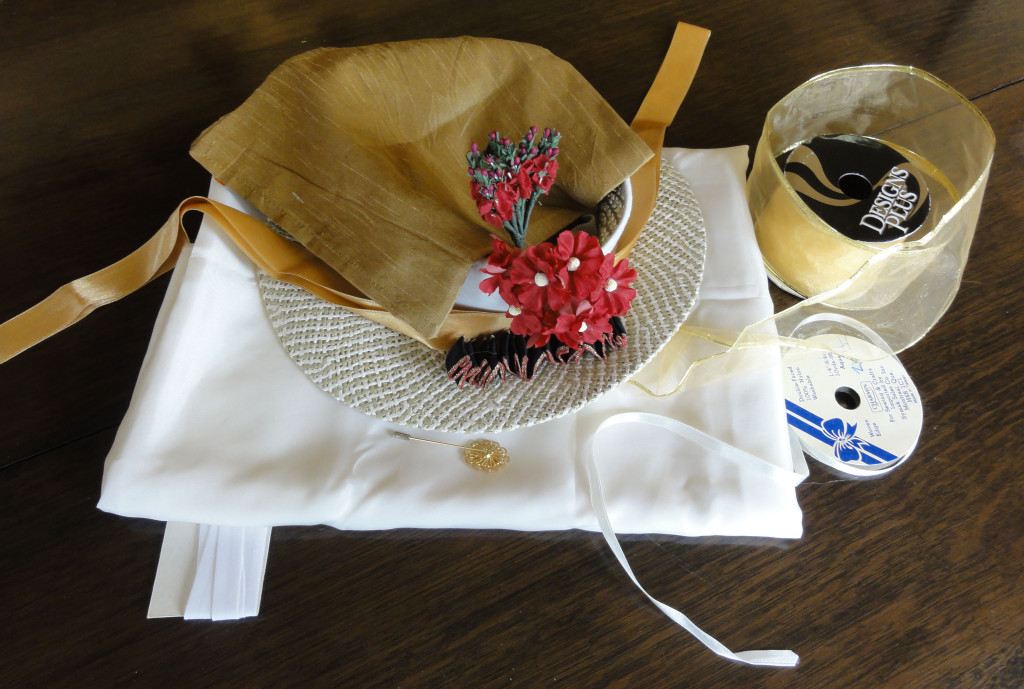
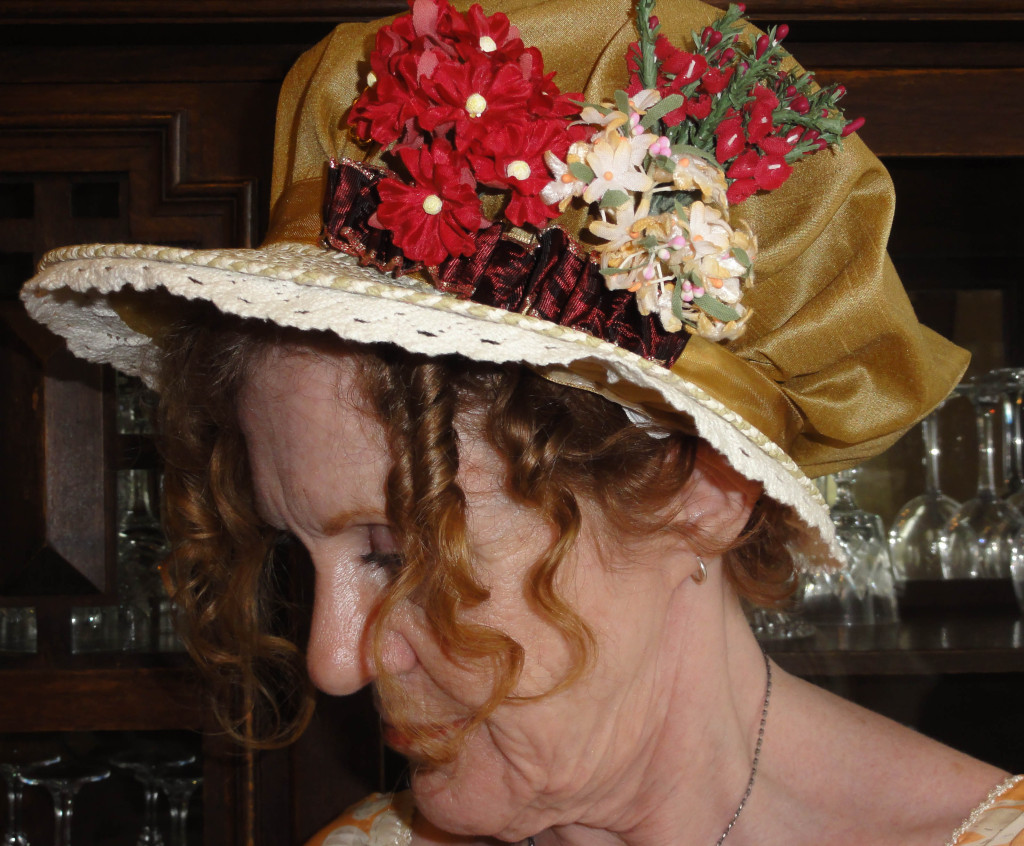
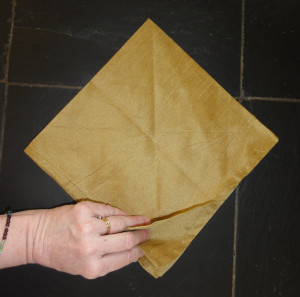
I chose one of the pair of 19″ square gold silk dinner napkins as the soft cover for my capote.

hat one materialsI removed the bow from the hat, but not the fabric, choosing instead to turn it up to help support the new fabric.

Here are the steps used to make the cover, with accompanying photos (click on thumbnails to see larger image):

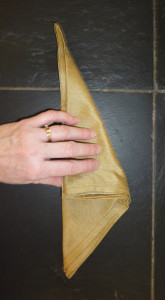
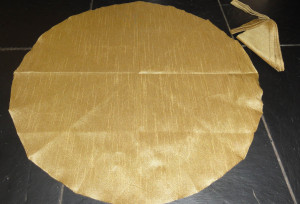
  • Cut the napkin into a circle (procedure for an easy way to cut a circle is at the end of this post).hat 1 put tape at quarters one inch longhat 1 cut lining into circle too and remove ribbon from hat
  • Cut a matching circle of your lining material.
  • Measure distance around hatband level. Cut a length of 1″-1½” wide ribbon about an inch longer.
  • Place 1½”-2” strips of double sided tape about ½” above where the brim meets the crown of the hat (under where the hatband would sit) in four equal spaces; scrub/burnish with your fingernail to ensure they’re stuck.
  • Align the grain of the napkin fabric circle front to back and attach to the front and back pieces of tape; burnish with your fingernail. Repeat with the tape at 1/4 marks.hat one put top on tape align grain front to back fabric in quarters
  • Place another 4 pieces of tape half-way between the first four and press down the centre of the fabric between them. Scrub with your fingernail to make sure tape holds.
  • Continue putting tape half-way between previous positions and pressing down cover until tape is continuous or gaps are less than ½”.
  • hat 1 fold end of ribbon and tape underhat 1 put new tape between and continue until sixteen or moreFold in half and position fold at front centre, then wrap around to back. Fold one end under and tape underneath to ribbon below it.
  • Adjust folds in napkin fabric as needed to get the look you like.

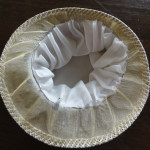
hat 1 under brim lining ugly so add start center front pleating finger widthMy hat was lined under the brim, but it was unattractive. It added stiffness, so I decided to leave it and cover it. A pale gold 3” wide wire-edged ribbon was about the same width as the front of the brim, so I chose to use it, removing the wire edges first. It will be easier if your fabric is wider than the space you want to cover.

Here is how I attached a pleated lining to the underside of the brim:

  • Mask off the areas you don’t want to glue: masking tape works well for narrow spaces, and paper for others.
    • I covered the interior circle of the hat with a loose piece of paper, then made loose arcs of paper about 6 inches wide to tuck under the brim to protect the napkin cover.
    • I used 2″ strips of masking tape to cover the edge that matched the top.
  • Put newspaper on the floor of your work area at least 3 feet square.
  • Spray glue on the area you wish to cover.
  • Wait 5 minutes. The glue should be sticky enough to hold fabric in place, but not so sticky that it can’t be peeled back and adjusted: a bit stickier than “Post-it” notes.
  • Start at the centre front of the underside of the hat brim and fold pleats in opposing directions, with the outside of the pleat slightly wider than that at the crown part (centre). A nice size is finger-width. The stiff net material I worked with kept its fold nicely, so I would recommend a stiff but not heavy fabric.
  • Continue down each side, aligning the outside edge.
  • Cut a ribbon the same size as your hatband ribbon and fold in half. (You can also use bias binding tape, a cloth tape with lots of give.)

If you are not lining the hat:

  • Trim the brim lining to just inside of the hole for your head (inside of headband).
  • Run double-sided tape along the inside edge of the pleats, just barely on top of the pleats, and continuing past them inside.
  • Start at the centre front with the middle of the second ribbon or bias binding tape, and attach the outer edge of this ribbon along the edge of the tape just to hide the edge of the pleats.
  • Ease around curves, that is, slightly compress the short side of the length hat 1 add lining similar to top only can use longer lengths of tapeof the ribbon edge without folding, so the long side can match the curve.
  • At the end, fold the edge of one end of the ribbon under. Use double-sided tape to attach it over other end for a neat finish.

To line the hat:

  • Take the circle of lining fabric that was cut the same size as the napkin circle and place pins at each ¼ around the outside edge.
  • Using the second ribbon or bias tape as above, run double-sided tape along the length of the ribbon along one edge only. Mark ¼ lengths with pins.
  • Attach the circle of lining fabric to the ribbon about 1/3 of the way up, pinching pleats in along the way. Leave the ends free in case you need to adjust when attached to the hat.
  • Continue from the third point in the section above. Remove pins.

hat 1 cover joint between linings with ribbon and optional lace edgeTo add lace or ribbon to the outer edge of the brim:

  • I wasn’t crazy about the look of the unfinished edge of the pleats, so I decided to add lace.
  • This can be done from above or below.
  • Tape the brim edge with double-sided tape the entire width that you expect the lace to cover.
  • Start the middle of the lace at the center front, similar to how you’ve attached the ribbon in the previous section. Ease in the lace (push edges together slightly but don’t fold) so it does not “roll” over itself.

hat 1Final trim:

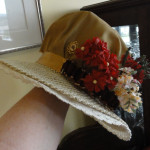
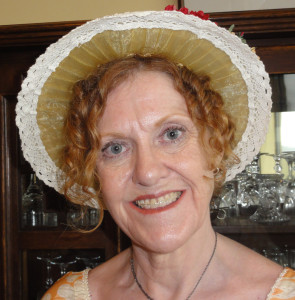
  • I used some small bouquets of fabric flowers purchased on sale at a fabric store, a bit of ribbon folded accordion-style, and a stick pin with a petit-point rose in it, made by Grandma Lauder!


~~~

Total cost for this hat: Under $10!

  • hat 1 front viewThe visor was $1.99, and the napkin was in a set of two for $1.99, both from Value Village.
  • Value Village was also the source of the ribbon, in a “grab bag” of more than a dozen bits for $3.99, as well as a 2m piece of cream lining satin for $1.99.
  • The lace came from the spaghetti straps of a “Frankenstein” dress that was $14.98 and still has about 4m of other types of lace, plus some large panels of embroidery I plan to use on an evening gown.
  • The little flower sprigs were $.50/each times three.
  • I used a half package of double-sided tape for $2.99.

~~~

Trimming your hat or bonnet:

Flowers, foliage, feathers, and such are common on the sides, and sometimes on the back or the front of Regency headwear. We can’t tell from photos whether both sides of the hat were trimmed the same, if they were asymmetrical but both trimmed, or if only one side had adornments.

poke bonnet metThese days, it’s really up to the wearer, as long as you make an effort to have a Regency look. Like gowns, the amount of fussiness and elaborate details increased as the Regency went on.

A little garnish does go a long way, so here are some ideas to whet your appetite.

http://historicalsewing.com/trimming-regency-bonnet-ideas-instructions
http://www.janeausten.co.uk/trim-your-regency-bonnet/
http://www.songsmyth.com/hatsandbonnets.html

hat 1 side view~~~

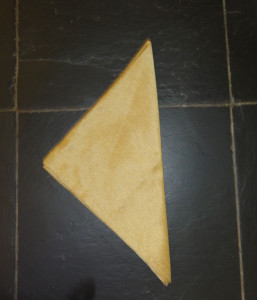
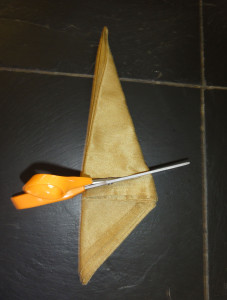
To cut a circle from a square:

hat one fold three

Fold into quarters.


hat one fold 3

Keeping centre point on top and open edges towards you, fold again, twice.

hat 1 fold 4


hat 2 cut top into circle

Cut off uneven ends at an angle so two long sides are about the same length from the centre point (top).


hat one top made into circle

Unfold and look where it needs to be trimmed. Refold if it will make it easier to trim. It doesn’t have to be perfect for this situation. Press out the creases before you use it.


~~~

NEXT POST: the Pink Hat goes all bonnet on tTSRCE!

Signature  file for tTSRCE

~~~