My Regency Costume Cheat Sheet, by Suzan Lauder, Regency Romance Author

Example of Regency letter-writing by http://toracellie.blogspot.ca

With 17 verbose posts full of images, the challenge of an Absolute Basic Check List was a bit daunting. How does one summarize a lady’s needs for a full Regency costume suitable to wear at a function where people are knowledgeable about the era? Actually, some of the links shared at the end of this post do a pretty good job of it.

For procuring and creating the costume parts, however, the individual blog posts in the Thrift Shop Regency Costume Experiment series will be of much more use. That’s because of the numerous images of step-by-step construction of the re-purposed or upcycled items, museum examples of actual clothing from the Regency era, period fashion magazine sketches, and paintings of people in the era. There are also topic-specific links and how-to videos in many areas.

This post also has a number of overview links, links with more images of museum and purpose-made Regency wear, and a sort of “next steps” list for some readers: how-to links that require sewing skills.

For the Checklist, I’ve noted price ranges:

  • Lowest prices listed are the minimum you would pay for a good-quality finished version of the item (new, gently used, or repurposed/upcycled using minimum crafting or sewing skills), based on my experience with the guidelines set out for the Thrift Shop Regency Costume Experiment.
  • If there is a zero instead of a bottom price, it’s because this is an item you’d probably choose only if you already had one, and if purchasing, another choice on the list is preferable.
  • Highest prices are for purchase of a period-correct, attractive, good-quality (but not always top end), brand new item from a good vendor, custom-made to fit you in the case of clothing.
  • If there is a question mark instead of a price, it means the item is of such a personal nature, the top end cost is based on the buyer’s evaluation.
  • If you have the item on hand, it will cost nothing.
  • Most items can be obtained in the lower half of the price range.

Footwear

  • Simple ballet flats ($5-$20)
    • Fully enclosed (pump).
    • Round, pointed, or square toe.
    • Slim sole, separate heel under 1” high (not wedge), and any heel over ¼” should be a flared kitten heel.
    • Silk-look fabric, fine cotton, or soft leather.
    • Any colour except for black, dark brown. Wide stripes and large dots are fine.
    • No elastic, rubber, jute or coarse cotton, large trim items, folded leather detail, external seams, etc.
    • Ribbon ties up the leg with flat soles are optional (good for keeping shoes on while dancing).
    • Simple trim is optional.

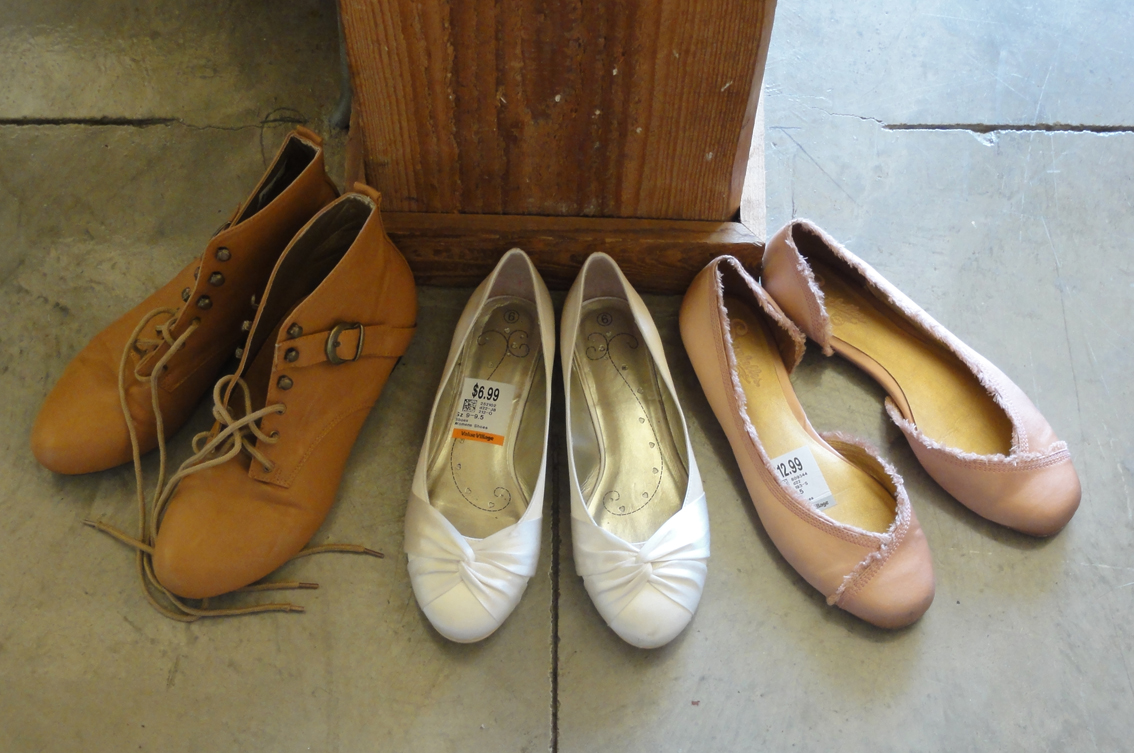
      My second set of footwear for potential Regency Costumes: a pair of half-boots and two pairs of satin ballet flat shoes. The boots will have the buckle removed (perhaps for a man’s shoes!) and get dressed up with a ribbon and fabric rose across the base of the toes. The white and pink shoes will be cleaned, then the white will get white ribbons to lace up the legs. The pink shoes will have the fringe covered with a ribbon and the cut-away area disguised.

  • For day wear, flat, lace-up half-boots ($18-$155).
    • 8′-12″ tall, round toe, slim sole and ¼” heel maximum.
    • Light colours.
    • Softer leather, cotton, or denim.
  • Orthotics may fit if you buy a half size larger than normal.
  • Post: Put on Your Dancing Shoes!

Stockings

High-lift foundation garment for “the girls”

  • Custom made Regency short stays ($70-$190), for C cup and under, OR
  • Custom made Regency full corset ($95-$380), for D cup and higher, OR
  • Push-up bustier or modern corset that’s low cut and not too cinched in the waist ($0-?), OR
  • Well-fitted (or slightly small) demi-cup, push-up bra, such as a Balconette. ($20-$?), plus a waist cincher if needed for extra lift.
  • Post: Lift and Separate!

Chemise and petticoats or pantalettes

  • Authentic, custom-made, new, Regency undergarments from specialty stores or Etsy:

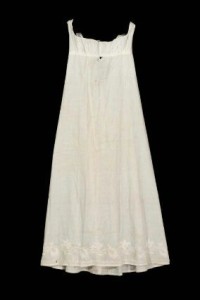
    Petticoat, early 19th c, American, Boston Museum of Fine Arts

    • Chemise ($45-$100) (worn under the corset for comfort), and
    • Petticoats ($35-90) or pantalettes ($35) (to “fluff out” the gown so it won’t stick between your legs), OR
  • In place of all of the above:
    • A floor-length full slip or nightgown, deep cut to match neckline of stays/corset/bra ($7-$38), or
    • A floor-length half-slip pinned to base of bra ($7-$20), or
    • Plain, lightweight, light-coloured cotton capris or pajama pants, or pants liners. ($5-$20), and
    • A low-cut camisole if needed with the last two items ($5-$25).
    • Super-fine woven cotton is best for comfort, but polyester will work.
  • Post: Twenty Layers of Unmentionables and no Panties!

Basic empire waist gown ($38-$400)no information
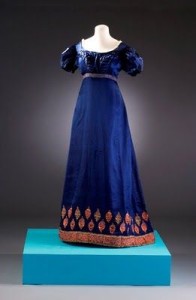
  • Floor length, empire waist.
  • Straight (non-fitted) skirt, flat in front and gathered in back.
  • Short, puffed sleeves and wide, low neckline for a dinner/evening/ball gown; long sleeves and high neckline for morning gown (to 4pm).
  • Simple-print finely-woven cotton, linen, or percale (not black-based), smooth silk, organdy, or synthetics that are good facsimiles.
  • 2m (6’-7’) by 1”-2” ribbon tied under the bust.
  • Don’t buy a pre-made “Regency” gown for under $100 on Etsy, as most are terrible!
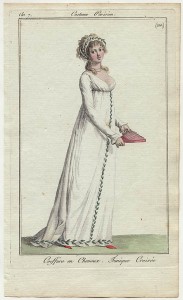
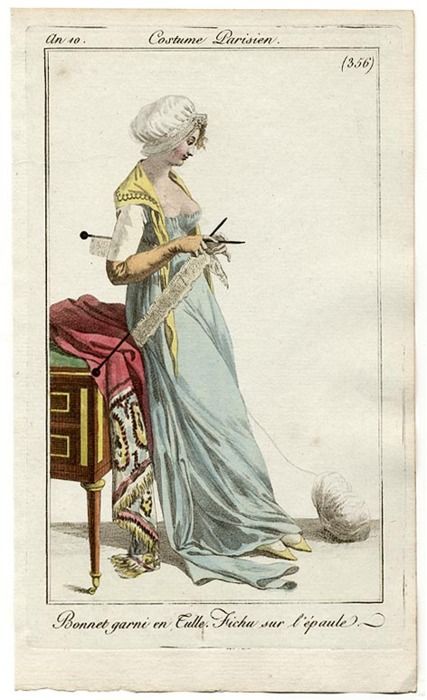
  • $200-$400 should buy a nice, authentic, custom-made gown.1812 costume parisien
  • Posts: Floor length, Empire waist, and what else? Anne Shirley? (description of a Regency gown and examples); A Morning Gown plus some Frankenstein Gown Parts (what aspects of vintage gown styles to avoid; my gown purchases; morning gown modification from 80’s vintage); Were Regency gowns worn on the Titanic? (purchase tips for new handmade Regency gown; what to look for in a vintage gown to re-purpose).

Regency Hair Style

  • Centre parted, with ringlets around the face; fancy up-do with bun and curls or braids, worn close to the head. (How-to and video links in posts.)
  • If hair is too short for a fancy up-do, a hairpiece (bun maker, bun hair, and 1-3 braids for $10-$30), fall ($0-$50), wig ($0-$92), or a turban are options.
  • Ringlets can be purchased or taken from a doll or fall ($7-$60) and held on by a bandeau, or flat pin curls can be made.
  • For very short hair, comb forward in a “Titus” and hold in place with a ribbon, bandeau, or similar decorative item.
  • If desired, trim with ribbon, lace, bandeau, braided fillet, small silk flowers, feathers, tiara, diadem, combs, etc. ($0-?)
  • Posts: Faking Purdy Locks: The Modern Hairstyle goes Regency;
    Regency Bad Hair Day? Wrap a Turban! (my clip-on fall in an updo at end of post).

Headwear

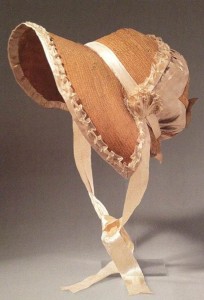
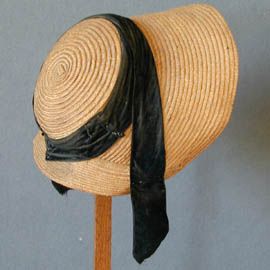
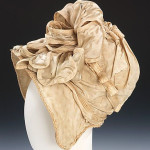
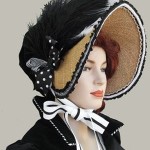
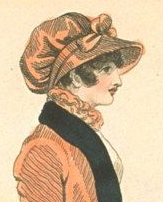
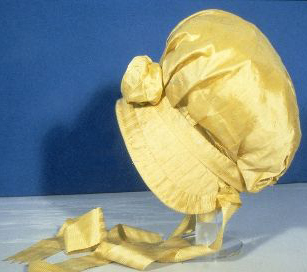
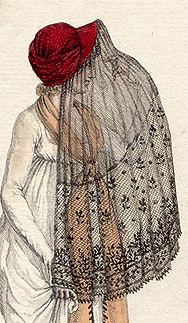
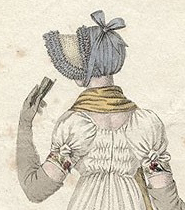
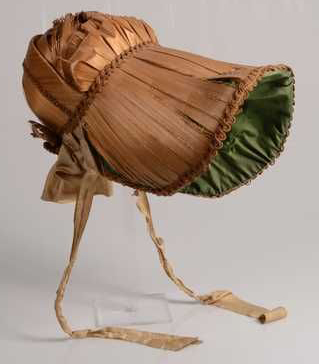
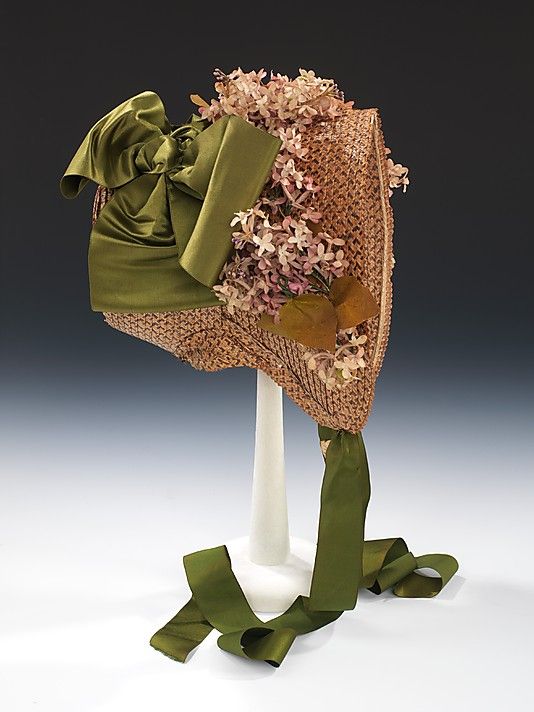
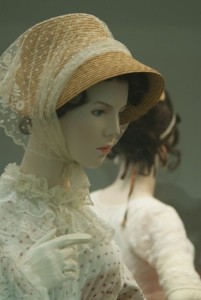
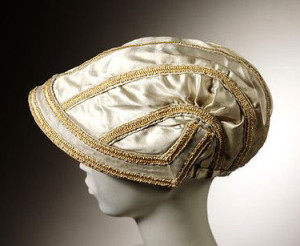
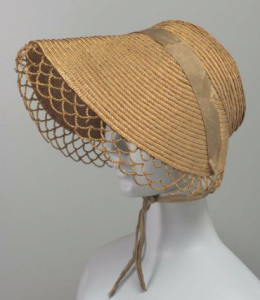
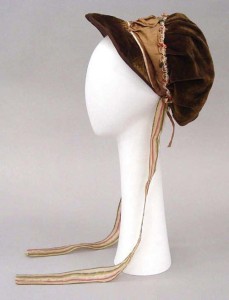
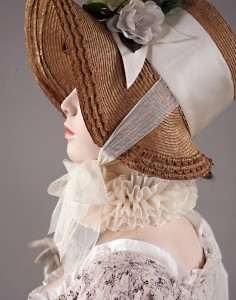
  • Bonnet or hat ($6-$70)
    • Preferable if your hair looks nice when you remove your hat indoors.
    • Brim is sturdy, not floppy, and straw or satin-type fabric.
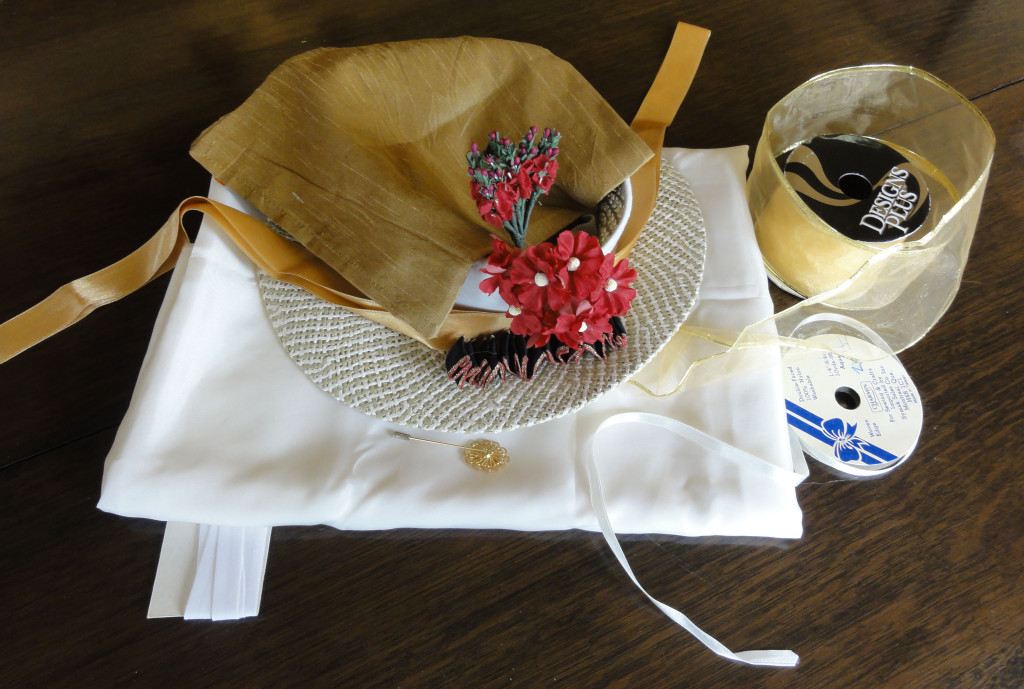
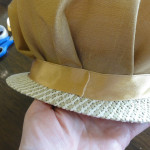
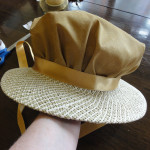
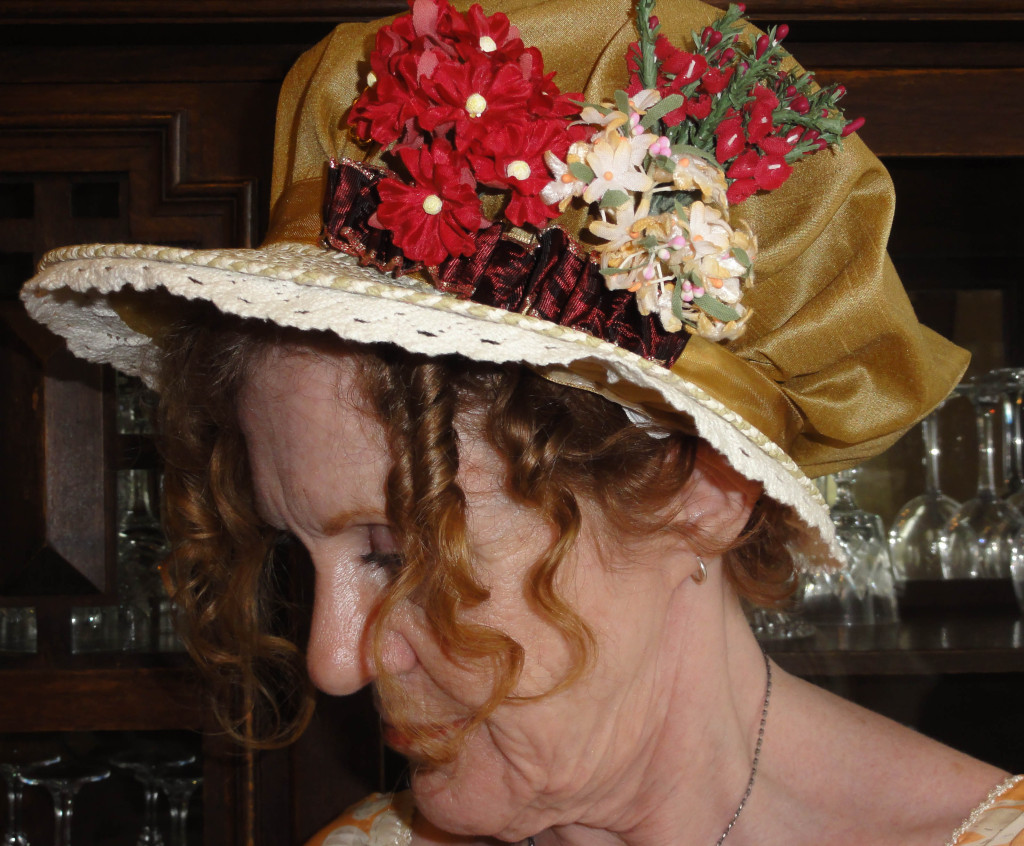
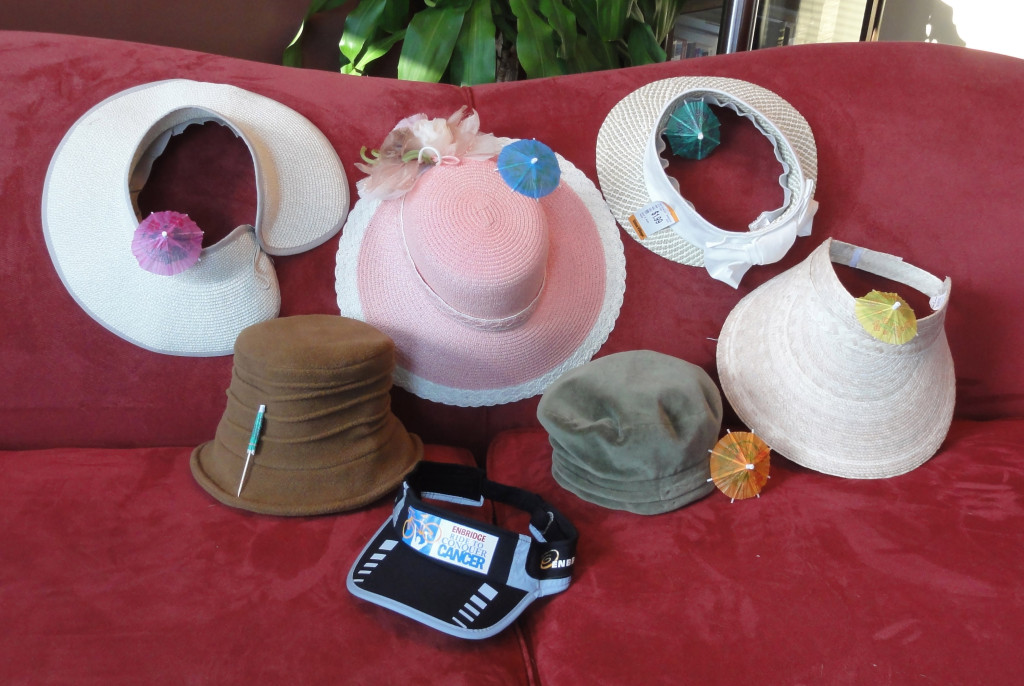
    • Capote hat or bonnet can be made from a wrap-around straw visor or hat, a 20” diameter simple, smooth, silk-like fabric cover, and a ribbon.
    • A good hat base is the narrower brim straw picture hat at Michaels, $5.
    • Add 1.5′-2.5′ of 1″-1.5” ribbon to make ties for a bonnet.
    • If desired, trim with several bunches of small fabric flowers and greenery; larger fabric roses; an ostrich, peacock, or other feather and brooch/medallion; hat pin; or combination, or other designs based on Regency sketches.

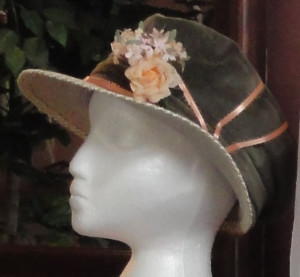
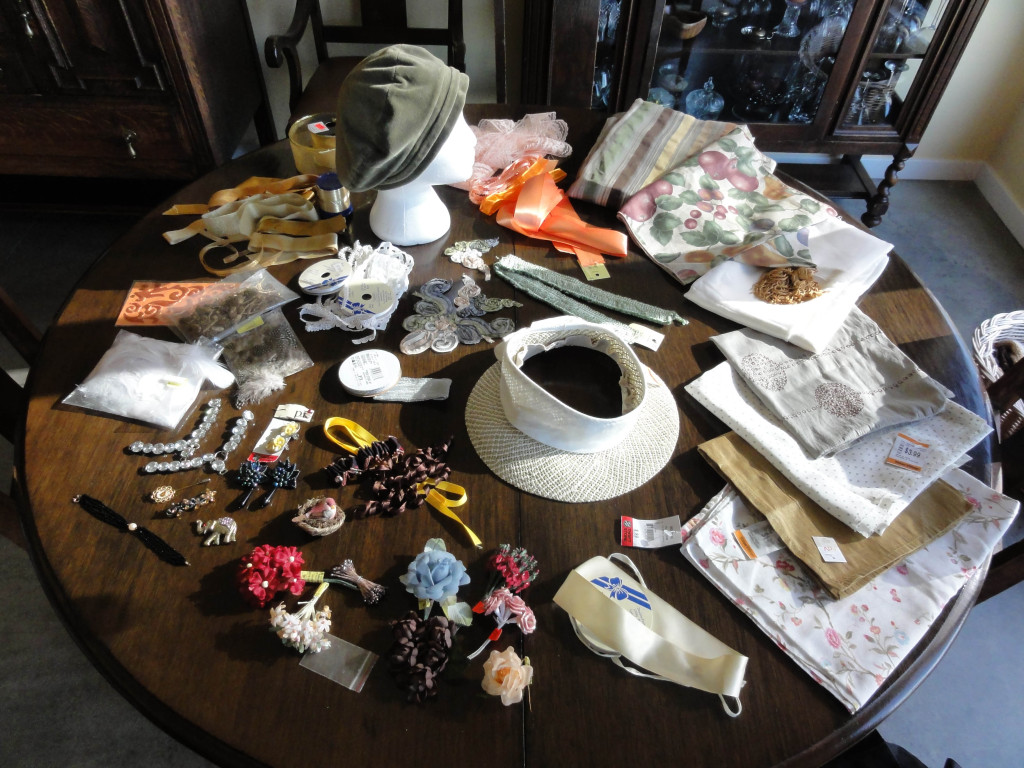
      Mock up of design of green and straw visor with green velvet cap.

      Mock up of design of green and straw visor with green velvet cap.

    • A nice range of new items can be found at the upper half of the price range above. Fancy items are double the top price listed here.
    • Posts: The Thrifty Regency Hat-trick! (Capote hat from visor and dinner napkin for under $10); How-to Times Two: Variations on Dressing up a Bonnet (The Pink Hat); Special Headwear for the Grown-up Lady (museum hat examples at the end of the post).
  • Lace cap ($2-$40)
    • Optional; for married or single-and-proud-of-it women only.
    • Similar to the idea of a turban, this will hide hair for women who can’t manage a Regency hair style and will be indoors where they must remove their hat.
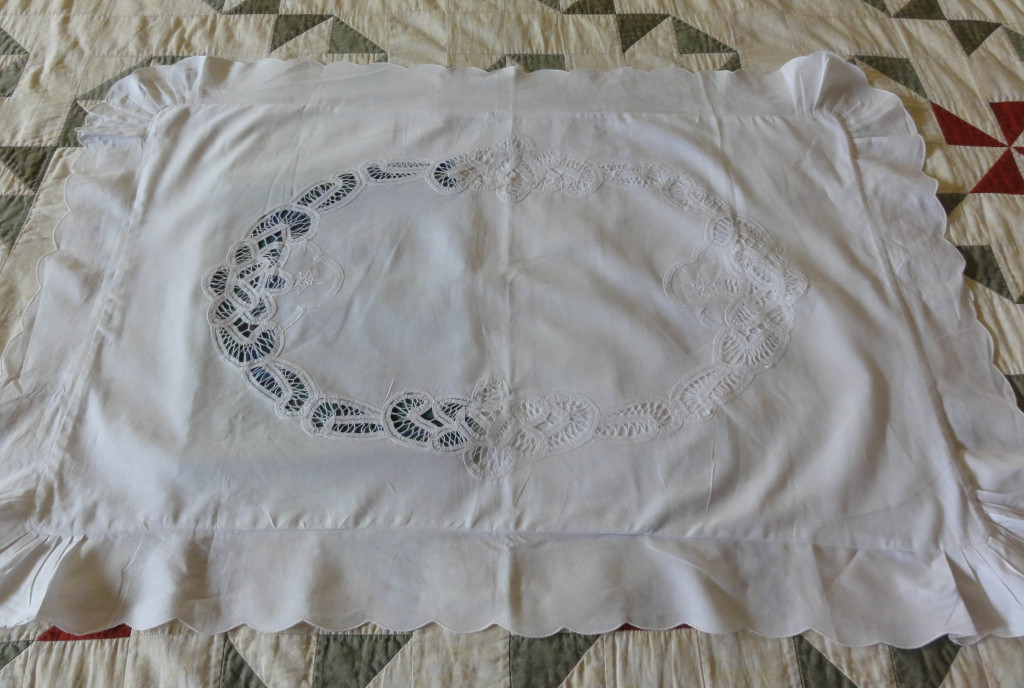
    • Can be made from super-fine white cotton and/or fine whitework lace items such as doilies, handkerchiefs, curtains, cushion/pillow covers, or purchased applique items and ribbon.
    • Post: Special Headwear for the Grown-up Lady
  • Turban ($15-$40)
    • An alternative to the hat or bonnet that does not have to be removed when you go indoors.
    • A nice choice for evening wear if you’re unable to create an up-do.
    • Twist 2-3 silk or satin scarves (how-to and video links on this blog), or a length of silk or satin fabric (could be a table or dresser runner, a pashmina, small shawl or wrap) about 15″-20” wide and 40” long about your head behind ringlets; secure with safety pins and bobby pins.
    • A brimless, soft, natural fabric hat with a scarf or fabric wound around its base in textured waves works well also.
    • Fringe or ends with some type of embellishment or trim are recommended, and can be left to droop on one side.
    • Braid or cord can be woven around with turban cloth.
    • Add feathers, foliage, brooch, medallion, hat pin, or similar items.
    • Post: Regency Bad Hair Day? Wrap a Turban!

Jewelry ($0-?)

  • Simplest would be a medium-sized “jeweled” cross on a chain.
  • More elaborate choices include “jeweled” necklaces, armlets, bracelets, brooches, rings, earrings, and combs.
  • Almost all stones are are acceptable, but they should be cut stones. Costume jewelry is fine if it doesn’t look plastic.
  • Cameos and red coral were popular.
  • Drop earrings were on hooks not studs; clasped or open hooks are period.
  • Lover’s eye brooches were fashionable.
  • Post: Shiny things expose my inner crow!
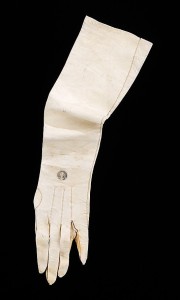
Regency Opera Gloves, kid, Metropolitan Museum of Arts

Regency Opera Gloves, kid, Metropolitan Museum of Arts

Gloves

  • Cotton, silk, or kid leather.
  • Short or optional for day wear ($5-$25).
  • Evening gloves go above the elbow: 24”-31″ (opera-length) with a loose-fitted upper arm are period-correct ($8-$32 for synthetic; $50-$200 for natural materials); 19” minimum.
  • If synthetic opera gloves are worn, buy a matte and not shiny satin finish, as it looks fake.
  • Any colour but black. White and softer colours were most common.
  • Post: I never did mind about the little things…

Fan ($1-$10)

  • Optional, but necessary on a warm day or in a ballroom.
  • Folding hand fan.
  • Avoid plastic and obvious synthetic materials for the sticks and guards.
  • If the fan has any scenes on the leaves, they should be English.
  • Any colour. Trim can include feathers, sequins, metallic, mother-of-pearl.
  • Post: I never did mind about the little things…

Parasol ($20-$200)

  • Optional if your face is protected from the sun by a bonnet or hat, or you are in a ballroom.
  • Eight or fewer ribs is Regency-appropriate, but who’s counting? As long as it’s not a dozen!
  • Pagoda shapes were most common, but round parasols were also in use.
  • A shallow curve is fine, but avoid flat Asian-style parasols.
  • The fabric should look like silk or cotton if possible.
    • Patterns on the fabric itself were rare, and would be a wide stripe or large dot or similar.
    • Fabric on vintage pagoda parasols from the early 20th century might not be very close to a Regency look.
    • Do not buy a Battenburg lace parasol, as they’re Victorian.
  • Most trim was on the periphery of the parasol: fringe (almost any kind), tassels, or lace. Some had embroidery.
  • Any colour but black.
  • Post: I never did mind about the little things…

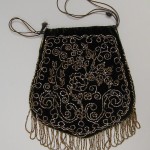
Reticule ($5-$65)

  • Small drawstring bag (under 8” by 8”).
  • Almost any colour or shape works, in a fine fabric, beaded, netted, or knitted.
  • Avoid printed satin, most open lace or crocheted styles, eyelet lace, or leather.
  • Beads or sequins should not look plastic.
  • No zipper, but metal snap clasp or gate closures are fine.
  • The smooth silk bat-wing or moon reticules on Etsy are overpriced ($15-$22) for what you’re getting. The beaded and embroidered ones are often very good deals.
  • Post: All the pretty little purses

~~~

A few good overview web sites for a Regency costume:

These sites are summaries of what we’ve learned during the 17 previous posts in the Thrift Shop Regency Costume Experiment blog series, and I refer to them regularly myself.

Best site (pdf version) for showing the details one should search for: It’s All in the Details: Making an early 19th Century Ball Gown, by Hope Greenberg.

Best site (pdf version) for applying the other to real life: Miss Lisa Brown’s Guide to Dressing for a Regency Ball—Ladies’ Edition.

Less useful, but detailed, with lots of drawings and paintings is Wikipedia’s 1795-1820 in Western fashion.

An interesting article explaining Regency fashions while referencing the movie adaptations of Pride and Prejudice. Dressing for the Netherfield Ball in Pride and Prejudice: Regency Fashion.

Lots of links for buying stuff new can be found at Regency Attire: Purchasing Your Costume by Regency Dances.org  Not all these items are accurate, as they try to cover numerous costuming situations.

Sites for examples of Regency gowns:

Museum gowns:
Real people wore these, so they’re a bit more accurate than fashion plates such as Ackermann’s Repository for Art, La Belle Assemblée, or Costume Parisién.
The Vintage Thimble tumblr
Kyoto Costume Museum Archives 1800s-1810s

Ideas from others’ modern interpretations:
The JASNA AGM Regency Ball in Brooklyn, 2012. Most of these are probably handmade from modern reproduction patterns. There will be non-Regency clothing represented as well, as not everyone is immune to the marketing of those selling the Titanic/Downton Abbey gowns.
The Jane Austen Festival in Bath is a similar situation.
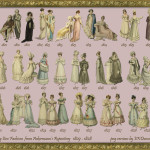
Erica Duncan's montage of Regency fashion plates for each year between 1809 to 1828.  Original art from Ackermann's Repository for Arts. Click on thumbnail for much larger image.

Erica Duncan’s montage of Regency fashion plates for each year between 1809 to 1828.
Original art from Ackermann’s Repository for Arts.
Click on thumbnail for much larger image.

Pinterest has a lot of good images, but I’d suggest searches by clothing article rather than just “Regency,” as the number is overwhelming even then.The site will often offer sub-headings at that point, too. This is an example of a huge board. Take care, as some images are modern and may contain misinformation; that’s why I like to stick to museum examples. But sometimes those are mis-dated by some pinner, too. It won’t be long before you’re picking them out yourself, though, as there’s nothing like 50 Regency gowns compared to one 1830’s gown. Warning: Pinterest is like crack.

Resources for making your own gown if you can sew a bit:

A video tutorial from Follies Past shows how to make a Regency ladies’ gown from a bridesmaid dress, a set of curtains, and a lace blouse. This requires beginner sewing skills.

Old Petticoat Shop offers their Regency Dress Online Class for $97 plus fabric, notions, etc.

My Regency Journey from Tea in a Teacup goes through creation of an entire Regency costume, but made from scratch.

Diary of a Mantua Maker has two tutorials on fitting a Regency gown: the first shows common mistakes and the second, sleeve and bodice fitting.

Sense and Sensibility Patterns has a number of videos with tips on how to fit your gown or modify the design of a pattern, as well as some sewing techniques.

~~~

Update: A nice little summary for evening wear, with some of the wonderful descriptions from The Lady’s Magazine and La Belle Assemblée: Mimi Matthews’ Elizabeth Bennet, La Belle Assemblée, and Early 19th Century Fashion.

~~~

turban 1 croppedNEXT POST: The grand finale! Photos of my completed costume, plus an overview of my learning experience with the “experiment” and brief notes on what the summer bonus posts will look like.

All the pretty little purses

The finely-fitted out modern woman has a few things in her hobo. Trouble is, the 19th century woman’s hobo was pretty tiny. Thank goodness a full set of cosmetics, hair gear, phone, tablet, photo album, and dishwasher were not necessary to tote around during the Regency.

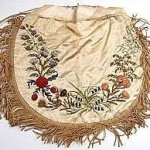
Early 19th century silk purse, 8 inches,  with silk embroidery, fringe, tassels

Early 19th century silk purse, 8 inches, with silk embroidery, fringe, tassels

The Regency lady carried a small drawstring bag or purse called a reticule. For some reason it’s been jokingly called a “ridicule” on occasion, but I don’t know why, and frankly, I don’t care, because how could you make fun of such pretty little purses?

Here’s the low-down on them:

  • Roughly 4-8 inches wide and 4-8 inches tall, plus closure (most in the mid-range). (Click on the thumbnails for larger images.)
  • A multitude of shapes.
  • Closure is typically drawstrings at the top.
    • Drawstrings are made of cording or ribbon, often with beads or tassels at the ends.
    • Double or single drawstrings are seen.

      Reticule with gate closure

      Reticule with gate closure

    • No zippers.
    • Gate and metal clasp closures were less common but acceptable.

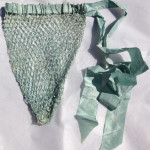
      Early 1800s blue silk netted purse

      Early 1800s blue silk netted purse.

  • Made of a variety of materials and methods, including silk, linen, tapestry, cording (including metal), straw, beads of all kinds, wool, and more, by sewing, netting, weaving, or knitting.

    Silk reticule with embroidery and tassels, 1810, LA Costume Museum/.

    • Embroidery was common on smooth silks, including chenille and tambour work; also painted designs.
    • Designs can be anything, but most tend to be floral.

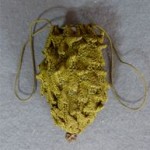
      4.5 inches long knitted pineapple reticule, 1800, Kyoto museum.

      4.5 inches long knitted pineapple reticule, 1800, Kyoto museum.

    • Pineapple purses made from straw or knitted were very popular.
    • Some crocheted designs existed, but take care, as many modern crocheted bags are too loose and large of a design.

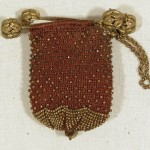
      1800-1825 Brown crocheted silk bar purse.

      1800-1825 Brown crocheted silk bar purse.

    • Many have tassels, beads, or fringe trim on the bottom.

      Reticule, 1800–1825, British, silk and metal, Metropolitan Museum of Art.

      Reticule, 1800–1825, British, silk and metal, Metropolitan Museum of Art.


A bag that works like this can often easily be found in a Thrift Shop, or even at home, where it may have come as a cover to a product. You may have to trim it to make it more festive. Fabric for a bag like this can come from an old decorative cushion and trim from jewelry.

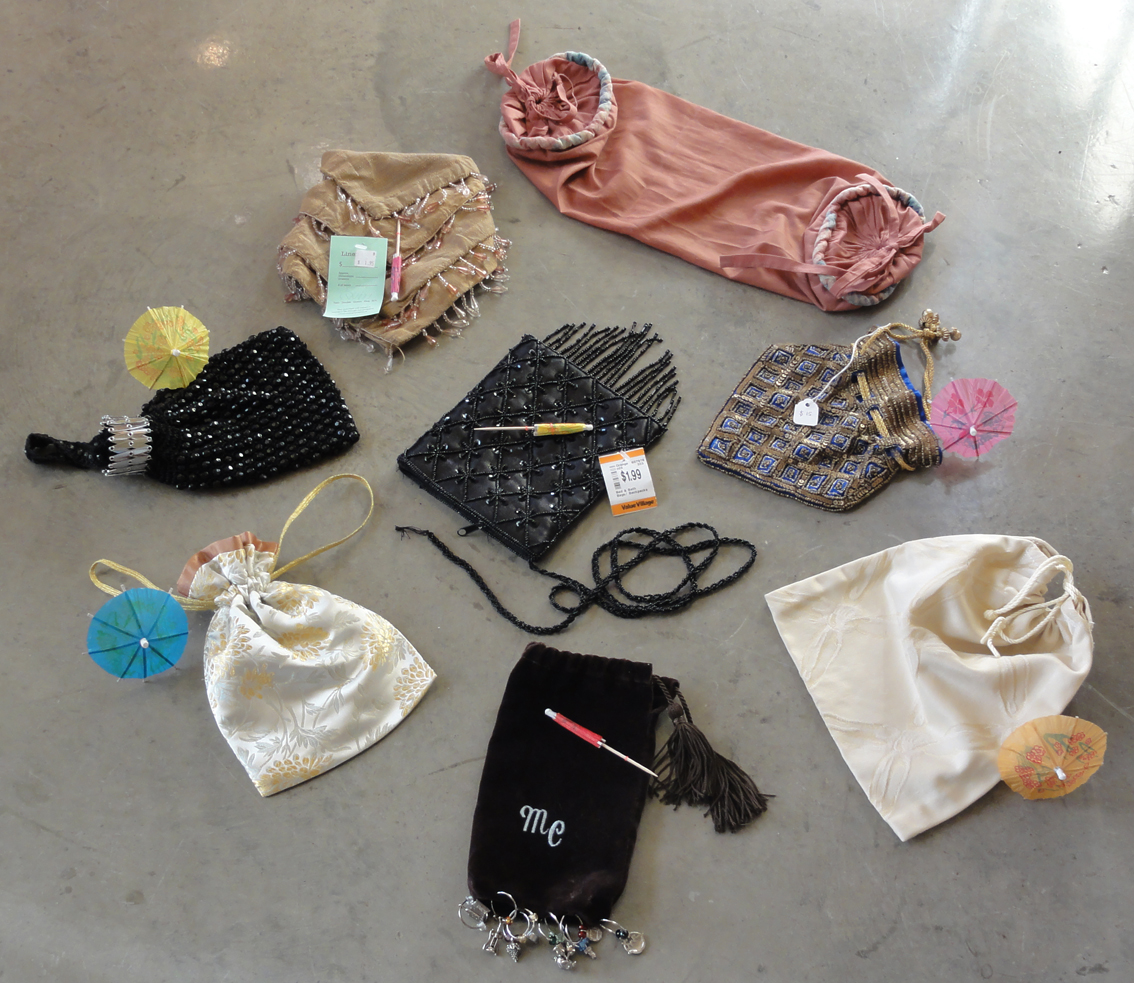
For the Thrift Shop Regency Costume Experiment, I bought three bags. Part of my second and third purchase for this blog (with the grey pelisse dress in summer 2014) was an crocheted beaded black purse with a short, beaded carry strap and a gate closure. It was $3.99 at Value Village and needs no modifications.

A black, designer-label, beaded satin purse with beaded fringe, a broken beaded shoulder strap, and a zipper closing was $1.99 at Value Village shortly after my initial find. I’m sure it was so cheap because of the broken strap.

my reticulesIt cemented my view that the reticule was the easiest item to find, and that’s why I’ve left it to the end: so you could focus on the difficult items earlier on.

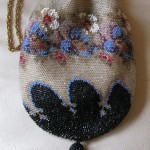
cottage grove used book store source of blue and gold reticuleThe blue and bronze beaded bag has a pattern that reminds me of Moorish azulejo tiles seen in Sevilla, Andalucia, Spain. I lucked into finding it at Kalapuya books, a used books and gifts shop in Cottage Grove, Oregon, USA with a theater, bar, coffee shop, and excellent bakery all attached! At $15.99, it was more costly than most of the purchases I typically made for this thrift-based series. I also bought two books (English Cottages and an older copy of The Chicago Manual of Style) and got a free paperback of Jack Kerouac’s On the Road because my purchase was over $30!

The reticule has gorgeous coordinating beads at the ends of its drawstrings. It’s a bit small, but so pretty!

A month later, I saw a fourth bag at a vintage store in Winnipeg, Manitoba, Canada, which was $25.99, and perfect for the Regency. I coveted it for a heartbeat or two, but knew it was too much, not just in cost, but in number of reticules!

I already had two simpler bags on hand when I started. In with my travel items, I had a cream damask bag that came with some beauty item or other. At 8.5″wide by 8″ tall, this is the largest of the reticules in my set. It was boring as-is, so I dressed it up in green. Click on the thumbnails for larger images.

Fringe and ribbon applique ironed on with “Stitch Witchery.” Use existing off-white cord to thread two green cords in opposite directions. This is much easier to tighten and release than a single cord.

Loop tassel over cord near end, then tie a tight knot in the green cord over it, close to the end of the cord. Tie pairs of tasseled cords together just at the point the reticule is fully open.

$0.49 of sale fringe and some pre-made ribbon applique decorations (three small (left) on sale for $0.49 each, and $1.99 for the large, below) from Dressew Supply in Vancouver, BC, Canada were added and made a huge difference. I replaced the single, fraying cream cord with a longer green cord from another grab bag (cut into two), and attached four green tassels on the cord ends (on sale for $0.49 each at Dressew). Total price: under $6.

The completed green and black reticules. Note that with the black one, I tied the loose ends of the velvet ribbon together firmly, and slid them into the ribbon sleeve, rather than add tassels as on the green cord. (The black ribbon was not long enough.) You could also thread beads and sew them onto the ends instead of tassels.

Silk reticule with steel cut beads, beaded tassels, and double drawstring, 1810, Bowes Museum.

To update the zippered black bag with beaded fringe (left), I removed the zipper and managed to free the other end of the shoulder strap without untying the strings, so no beads were lost in this venture! I may use this lovely braided string of beads tied around the Empire waistband of a ball gown.

I put a scrap of ribbon inside the purse to act as a sleeve for the drawstring, and threaded black velvet ribbon that I’d had on hand for a dozen or more years. Note that  reticule drawstrings should each be at least 18 inches in length and threaded opposite ways to make for the ideal closure. The total cost for this bag was less than $3.

My wedding rings came in a little chocolate brown velvet bag with matching tasseled drawstring and the initials of the jeweler on the side, and of course, I kept it and the little metal boxes all these years. Before this blog was started, I went to a local stage presentation of Pride and Prejudice, I attempted to dress it up by hooking a set of wineglass rings along the bottom like jewels. I said all along I wasn’t crafty!

This drawstring bag is very small (5″x7.5″) and would only suit someone with the initials M.C. Perhaps Mr. Parachute Pants will come out of retirement for this? Oh, goodness! **blushes** It sounds like I think he’d like to dress like Elizabeth Bennet! M.C. Regency Cross-Dresser Hammer! Drop that thought!

Anyhow, this reticule is rated with a closed parasol at best: acceptable, but not the best choice. Better beads at the bottom would help its look, but it’s still small, with someone else’s initials on it.

I got another reticule for a gift last Christmas, as part of the A Happy Assembly Holiday Card Exchange, made by member Sharlotte. The fabric is a rich yet subtle silver and gold silk brocade fabric, with gold drawstrings and the satin lining trimming the top.

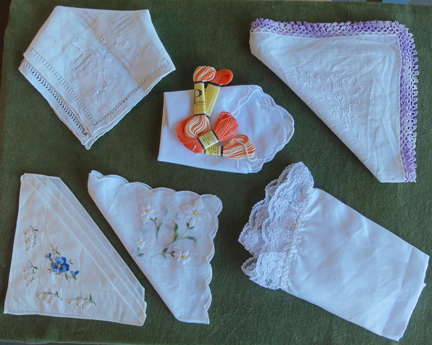
Inside, she included some “work” for the recipients: a new scallop-hemmed handkerchief with two skeins of embroidery thread for decorating it! To go with that theme, I’m showing my little collection of handkerchiefs.handkerchiefsThe whitework one with a purple lace edge and the daisy motif handkerchief both belonged to my mother, and were gifts for use at my wedding. The attendants were required to use them to hold the ceremonial gold crowns of the Orthodox wedding ceremony above Mr. Suze’s and my heads. The plain lace-edged one was also from my wedding.

The other whitework one and the pansy pattern handkerchiefs were purchased for $3.99 and $2.99 each at Women in Need (WiN) Thrift and Vintage.

This reticule seems better for a daytime reticule than the others. It could be fancied up with beads or tassels, but for now, I like it as-is.

The other two items in the big picture of my reticules (above) are for demonstration purposes. Both are pillow covers, one oblong, and one square with beaded edges, folded up like a dinner napkin. These could be used to make reticules.

Although the shape would work to make two reticules, I don’t like the fabric or colours for the oblong one, hence, no parasol. As for the other, one of the bonus projects this summer will be making several designs of reticules from a cushion cover using a pattern I developed myself.

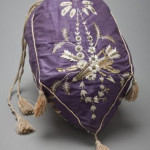
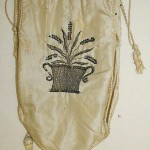
Simple and elegant reticule with lavender embroidered on one side and the lady's initial on the other surrounded by flowers, 1800-10 Metropolitan Museum of Art.

Simple and elegant reticule with lavender embroidered on one side and the lady’s initial on the other surrounded by flowers, 1800-10 Metropolitan Museum of Art.

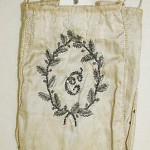
The opposite side. 1800-1810, Metropolitan Museum of Art.

The opposite side. 1800-1810, Metropolitan Museum of Art.

How does one manage with such a tiny purse instead of the hobo? I’m sure you’ve used a tiny dress clutch for a formal situation before! In this case, we don’t need a stash of makeup on hand, for starters.

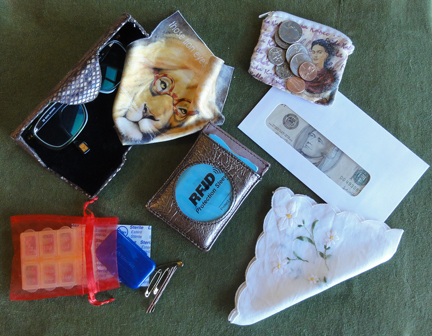
I intend to minimize the size and number of items I have with me. For Louisville, instead of a wallet, I’ll put my US cash in an envelope, my change in Frida (the name of my little zipper coin purse from a gallery in Mazatlán, Sinaloa, Mexico), and the minimum of cards (driver’s license, health services card, and one credit card, all in RFID* sleeves) in a small card holder. An organza bag will organize my small pill holder and an emergency kit: some safety and bobby pins for repairs; blister strips, in case the new shoes bug me; and wax for my braces. Glasses and case and cleaner cloth (“those lion eyes”), and it’s full!Stuff that goes into the reticuleIf you’re accustomed to having a photo album in your wallet, pare it down to one or two. Even better, trace the important ones onto onion skin paper, fold like a Regency letter, and put it in the envelope with your cash.

Last but not least, a Regency lady must have at least one embroidered handkerchief on hand, in case she winds up featured in one of those Romance novels where it is plays a starring role!

~~~

This was the last item for the full Regency costume as planned!

On Saturday, I was at a “Jane Austen Tea” fundraiser that I heard of only two days before. The costume was ready, but I decided to make a better version of my lace cap at the last minute. Up until then, I was okay, since there was the other cap for this series, and I had until Louisville in October to make one closer to my needs for my Regency costume.

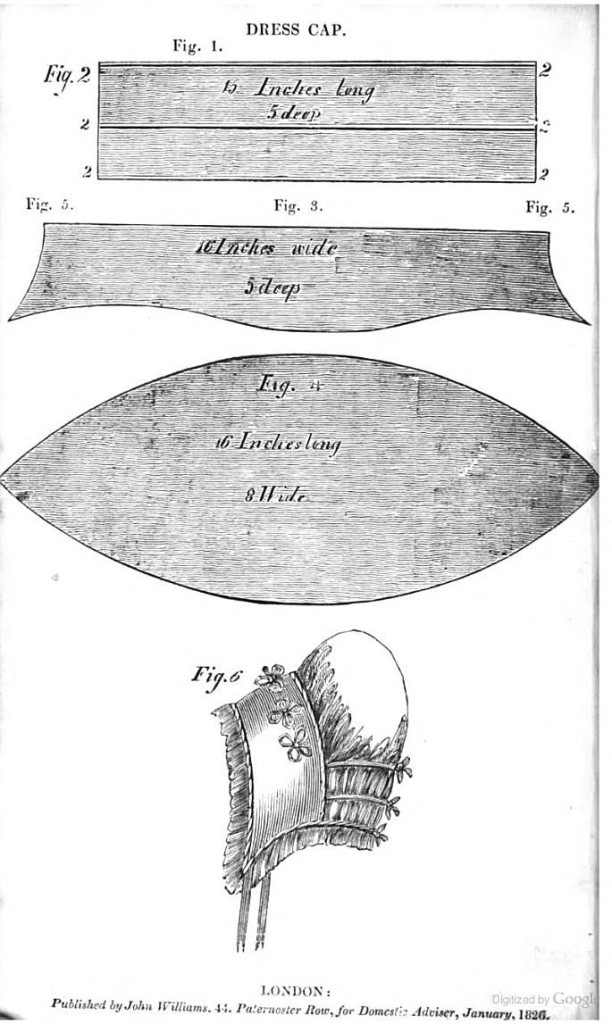
This project was out of the scope of the “Experiment,” as it was machine sewn, but only because of time constraints. I’m super-proud of how I used a 1900’s pattern that was almost unreadable, figured out the instructions (how many “nails” large my head is!), made a mock-up, adjusted it to fit me, and made my version simple, but cute. Pity it was under my hat most of the day! I’ll share more about this “dress cap” next month, once I’ve drafted a tidied pattern.

The photos from the tea will be part of next Monday’s post, with the full costume featured as the end to the “Experiment.” In the meantime…

NEXT POST: The promised “quick checklist” to summarize the Regency costume, with links back to the articles on each topic, and a number of my favourite web resources… and it will be later this week! WOO-HOO! Two posts in a week again!

The fabulous Zorylee Diaz-Lupitou fixed the comments problem, and there’s a “Reply” link at the end of the list of Tags! For Monday’s post, let me know if there’s anything I missed in the series. Do you have any questions or feedback to help ensure the last post of the series is satisfying?

~~~

*RFID sleeves are metal lined paper covers used to hold identification and credit or debit cards that have information that can be read by radio frequency. Though the odds of unauthorized information access are extremely low, the information is pretty much useless to the person who gathers it, and my bank will cover any losses, I still use them.

Convertibles aren’t just for Road Trips #thriftyregency

A Regency-costumed event that’s longer than a 21st century afternoon poses a problem: you need at least two gowns! From waking until dinner (at 4pm), you’ll wear a morning gown, which is modest, with full- or three-quarter-length sleeves and a high neckline. As the day wears on, you’ll be allowed short sleeves and a lower neckline, until the ball, when the bodice is brief. This is called “full dress,” as in the lady is fully dressed up in her best!

Sometimes a gown for “later in the day” was worn with a lightweight, white fabric insert or cover at the bodice and/or long sleeves, temporarily sewn under the short sleeves, for a morning gown look.

Chemisettes, Tuckers, and Fichus

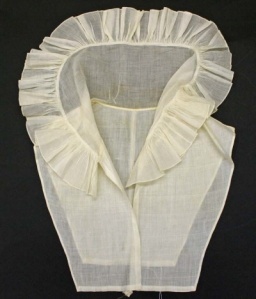
A chemisette is similar to a dickey in fine white fabric: it tucks into the gown neckline to make it high cut, and cover the chest, shoulders, and back. It has a collar to suit a morning gown look.

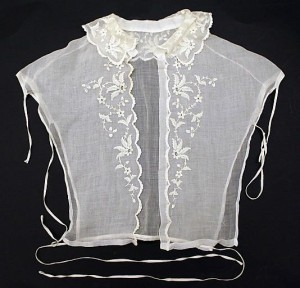
A flat, sheer fabric panel called a lace tucker can be worn to artificially raise the neckline a few inches for an afternoon or dinner gown. It’s like the chemisette without the collar.

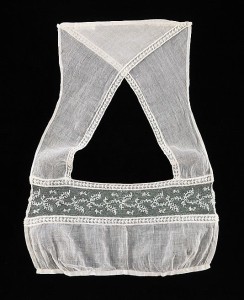
Alternatively, a lace triangle like a small shawl or scarf can be worn atop the gown and tied at the centre front, and this is called a fichu.

All of the above were made of light, translucent or sheer fabrics such as fine Regency muslin, cotton, or heavier net. They tended to be white with lace or whitework (white embroidery, drawn thread techniques, or darning) accents, not unlike the lace caps we saw in an earlier post.

Removable long sleeves took care of the other aspect of modesty, and these were often made in the same fabric as the gown.

In the late Regency, there was also a “summer bodice,” which was a high-necked, full bodice with long sleeves. It was super-light muslin, and sometimes had stays incorporated into it.

Re-purposing to make any of these items for yourself is an easy project. Some of the alternatives suggest “sewing,” which can be accomplished by use of no-sew tape.*

chemisettechemisette metMake your own chemisette:

The top of a white, sheer, natural fabric blouse can easily become a chemisette: Excess fabric is cut away to leave a dickey-like garment.

Fabric for the chemisette should not be stretchy or look synthetic. The chest should not be covered with ruffles, and a tuxedo style is not Regency, but fine pin-tucks, sections of smocking or ruching, simple lace, or embroidery on the front are nice. Embroidery designs should be reasonable for Regency. Silver or white are the best colours, with natural or simple geometric patterns. Please, no psychedelic stuff!

The blouse should have a collar that fits close to the neck. Almost any style but double lapel, drapey cowl, or boat-neck will be fine, and ruffled collars were common on chemisettes. If there is no collar, add some lace to achieve the look.

To make your chemisette, put the blouse on under the gown, mark the neckline in a wash-out product. Trace a parallel line to the neckline about 1 ½-2” wider on each side and cut off excess. Finish the cut edges.**

Disguise or replace modern-looking buttons and button holes on the blouse.*** Remove zippers and, if necessary, replace with ties, easily made from a pair of matching narrow ribbons about 6” long, tacked at the edge of the opening. Hand sewing is recommended for this. Make sure visible stitches look neat. Note one of the examples uses ties to hold the chemisette in place, too.

Lace Tucker, 1820's, French

Lace Tucker, 1820’s, French

Make your own lace tucker:

This is like a chemisette, but simple, collarless, and flat. The fabric should be similar to the caps we saw in a previous post: white-on-white super-fine cotton or linen, so it’s sheer.

A lower kitchen or bathroom curtain with a nice lace design will be more than enough fabric. Remove any flounce. As in all areas of the Thrift Shop Regency Costume Experiment, if you use polyester, it must be of good enough quality to appear as if it is fine cotton, linen, or silk.

If you can’t find a nicer curtain panel, a scrap of fine, sheer fabric with a lace insert, or a panel of a sheer silk scarf with an interesting design can be made into a tucker if trimmed, hemmed, and remade into a shape like in the photo above.

Underwear and convertibles, tTSRCEThe second pillowcase from the set of two for $1.99 (lower right in photo; the other was to be made into my cap) will be my tucker. If the outside edge of the lace pattern is wide enough, I can cut right up to it, and the heaviness of the Battenberg tape will suffice for an edge, otherwise I’ll have to leave a hemmed panel to tuck in.

It’s up to the wearer to decide the coverage, i.e., depending on preference, the neckline can be looser about your neck. For a morning gown look, it should be close to your neck, so I would need to add a back slit with ribbon ties on mine. Otherwise, a bigger hole is required to fit my head after hemming. Finish cut edges as needed.**

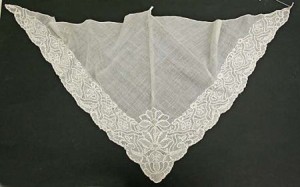
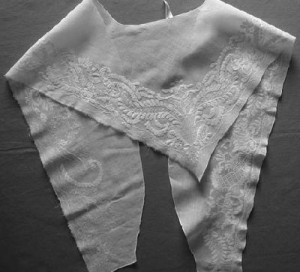
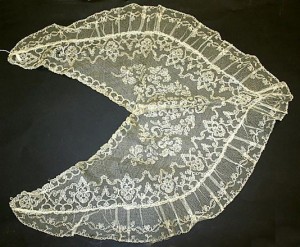
Make yourself a Regency fichu:mid-18thc-fichu whitework embroidered met museum fichu

A light shawl-type garment, the basic design of a fichu is a white or light-coloured lace triangle in natural fibres. Its size can vary, but it must wrap over the shoulders to cover any the back to the neckline, then tie or tuck at the centre front neckline: in most cases 30 inches on the long side will suffice. Either an all-over lace design or something special on the two short sides of the triangle is desirable. It should be white on white, or at most, minimal pale or silver embroidery.

A square silk scarf with an intricate border, folded or cut in half on the diagonal;** a sheer triangular evening shawl; or similar garment will work.fichu 3

The corner of a lace or sheer curtain panel or tablecloth with a wider embroidered, lace, or applique edge is a good choice, if you can find one where the fabric looks natural and not plastic. I had no luck there, but I know I’ve seen them.

Another option is a doily or lace table runner. The rectangular doily at top centre in the photo is 16 inches on the long side. It can be cut on the diagonal, then the pieces moved and the short edges attached so it makes a triangle. Similar to the Regency cap I made, this lace is a bit heavier than true Regency, and I suggest working to find something lighter weight.

Fake sleeves:

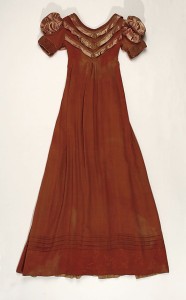
Dress with long sleeves removed, 1818, Metropolitan Museum of Art

Dress with long sleeves removed, 1818, Metropolitan Museum of Art

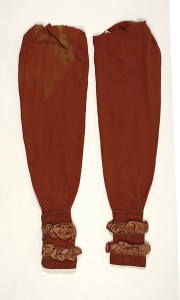
Matching detachable sleeves from gown of 1818, Metropolitan Museum of Art

Matching detachable sleeves from gown of 1818, Metropolitan Museum of Art

In the same vein, it was not uncommon for a gown to have removable sleeves to create a morning gown from an evening gown. They fit over or under the short, puffed sleeves. Sometimes, they were made in the same fabric as the gown.

Basic sewing skills are recommended for making a convertible gown by removing long, puffed sleeves from a thrift shop gown and remaking both sleeves, or making new sleeves to be added.

If you choose to cut a long sleeve off, co-ordinating fabric will be needed for the cuff of a new short sleeve. It may be possible to steal it from elsewhere on the dress: a wide hem, a too-long skirt, moving a seam, the cuff of the long sleeve, etc. If you’re lucky, you might find a scrap elsewhere in the same colour and texture—but unless you made the original dress, that’s almost impossible. Cuffs were narrow, so it’s not a lot of fabric, but it should co-ordinate well, and match any cuff on the long sleeve.

If a match proves difficult, a complimentary fabric that’s obviously unmatched can enhance your gown if you use it elsewhere, for example, make the cuff from the same complimentary ribbon at the gown’s high waist or new trim you’ve added at the neckline or on the skirt hem. Another alternative is to put coordinating flat lace over the cuff to disguise a slight mismatch.

If the original long sleeve was puffed, the part you cut off should be narrowed a bit, and the end to be tucked under the new short sleeve should be finished with matching bias tape so you can keep as much length as possible, yet have a sturdy edge to whip-stitch inside when needed. Don’t make the cuff or new long sleeve too tight!

If you’re making new sleeves, keep in mind that Regency long sleeves tended to be very long and close-fitted. Take advantage of making them new, and have them go from inside the cuff of your short sleeve to your fingertips, flared a bit to go over your hand. Wear them slightly tugged up along your arms.

New sheer long sleeves can be added over a puffed sleeve, too, as in the example from this article in Jane Austen’s World.

When you want to wear the long sleeves, you baste or whip stitch the tops of them inside the cuffs of the short sleeves.

My cool idea for an alternate!

An interesting additional option makes it super-simple to create a convertible gown: A very lightweight, white, sheer or lace, long- or three-quarter-sleeve blouse with a high neckline and collar, in cotton, silk, or similar fabrics, can be worn under or over the corset of a ball gown!

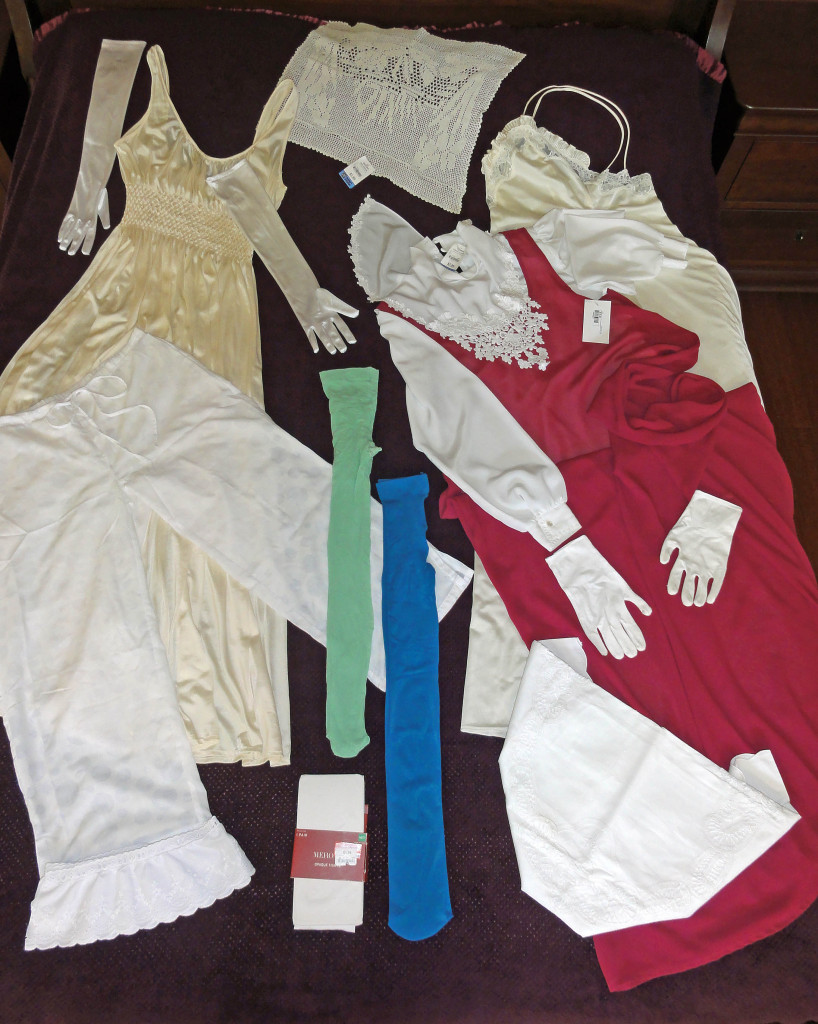
You now have a combination of a chemisette, a set of removable sleeves, and the top of the chemise. You can see the effect under the fuschia under/overdress in the photo of my selections, above.

Add a floor-length half-slip or your version of pantalettes, pop on your ball gown, and you have a morning gown, and you’re ready to make calls!

But watch out—the “morning” didn’t start until 11 am, and a fifteen minute stay was all that was polite unless you were close to the hostess. Of course, you didn’t want to risk offense by making any assumption, so at fourteen minutes, you began to say your farewells! It took more time to travel between calls than was taken chatting!

The AHA Chat Chits could not handle that. At least they would be able to ghost a bit in the carriage. I wonder what priorities in conversation would be chosen if they had to minimize their chat time? Austen’s novels? Novels based on Austen’s work Hot men? Chocolate? Dodgy history topics?

When the night time comes, of course, the add-ons come off and you’re left with the abbreviated bodice again! Roll that top down, honey, it’s a convertible, and it’s time to have fun!car looking back cropped for header

~~~

NEXT POST: I’m running out of time in this series, because I promised to show the whole costume by the end of June, and we still have to do reticules, bling, show the final outfit, and provide the quick checklist. I’m pretty sure reticules will be two posts, unless I can figure out how to show how to make the clever designs without showing the whole process.

Anything I don’t absolutely need for a base costume will be in bonus posts, though: Outerwear (spencer, pelisse, shawl), additional accessories (fan, parasol), ball gown, the “tricks” to fake Regency, In addition, I had an idea for give-away’s in Louisville.

~~~

Notes:

* “No-sew” or hemming tape is a non-woven tape that can be used instead of machine or hand sewing where there is not too much load or stress on the seam. It must not be used alone for such things like setting sleeves, bodice seams, crotch seams, or attaching a skirt. It works well for hemming and finishing cut edges. It comes in two types: iron-on (fusible) or no-iron, which is similar to double-sided tape, but the tape is fabric and not plastic.

** When you adjust the product you buy or salvage at home, you should finish the cut edges by machine or hand stitching, or with ¼” wide hemming or “no-sew” tape. Invisible cut edges can be hemmed with a double fold pressed in before attaching. If the edge is visible, a narrow ribbon, flat lace, or matching narrow bias tape is nice.

*** The Problem of Regency Buttons

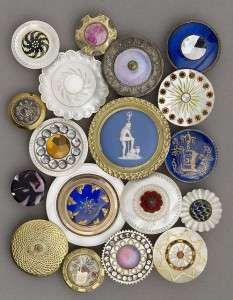
Pearl and metal buttons, 1780 to 1820, Luckcock Collection, Birmingham Museum of Art

Pearl and metal buttons, 1780 to 1820, Luckcock Collection, Birmingham Museum of Art

In what remains of her letters, Jane Austen commented to her sister, Cassandra, that buttons were expensive. Examples from the Regency can be seen in the photo. It’s not easy to find inexpensive buttons to match, and reproductions come with a hefty price tag. There is also the issue of hand-sewing buttonholes or eyelets to be authentic.

The good news is that buttons and laces appear to have been used in only about 20% of gowns: ties were more common, as well as hooks and eyes.

If your chemisette (or gown) has modern buttons, you should replace them. Oyster-shell buttons or kits for self-covered buttons are inexpensive and common in fabric stores. The self-covered button-making kits are easy for the novice. They were common on waistcoats for men.

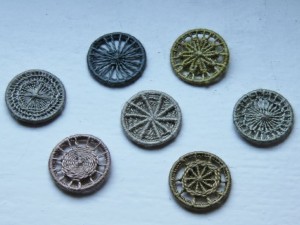
green and sapphire blog dorset buttonsThe craftier costumer may like to try making buttons from cording, such as knot buttons or Dorset buttons. It takes a fair bit of experience on larger sizes to be able to make Dorset buttons well. Small plastic loops in bags of around 20 are inexpensive in draperies departments of fabric stores. Sea Green and Sapphire has a tutorial.

button knot from paracord knots on youtube croppedIn my old sailing days, I tried making a Monkey’s Fist knot one rainy Saturday, and it took far more time and patience than I had, and I was working with rope large enough to make a knot a little large than the size of a ping-pong or squash ball. This is a bit simpler, and Paracord Knots’ video shows how to make it.

If you’re sensitive that the existing button holes on your chemisette or gown look machine made, either hide or remove the button hole panel, with alternatives as follows:

  • Remove the button-hole panel, re-hem, and add fine ribbon ties or make loops for the buttons at the neck, plus more locations as needed. The edges do not have to overlap: the layers of other underthings will hide skin!
  • 56971c90f8e009296c2e1547df3b8135In front, hide with trim such as a co-ordinating flat lace panel. When you attach this trim, leave gaps to allow access to fasten buttons. Replace buttons with flat ones if they make lumps on the trim panel. For a gown, check out historical pieces with decorative panels on the front of gowns, such as the example.
  • For back buttons, use period-looking buttons large enough to cover most of the hole.

Note that frogs are not the best choice for this type of garment, but are good for outerwear in the Regency.

~~~

I had a good shopping day today. I found satin ballet flats in white and in pink, plus buff-coloured flat, laced ankle boots, with a light sole and heel, for Regency half-boots.

Ribbons were on sale in a craft store, and I got a dozen colours of varying widths. Some will be for the tricks that I’ll show as a bonus post after this series ends the end of June, and some will be used for that Lydia hat.

All this modifying of gowns has made me consider making a simple one or two, and there just happened to be Regency-looking fabric for $7.99 for 2.5m at Value Village. I hope it doesn’t wind up in my closet for 20 years like the last time I said I’d make a dress!

~~~

How-to Times Two: Variations on Dressing up a Bonnet

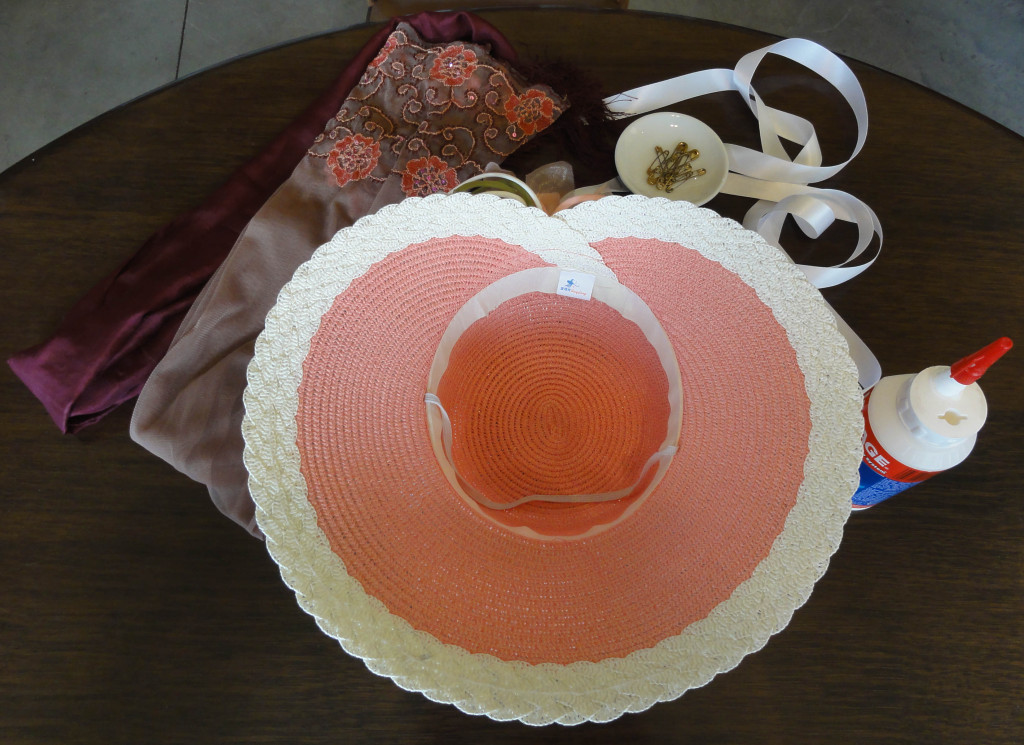
Hat 2 underside and shape

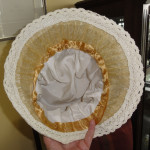
Underside of hat to show brim shape and braided trim.

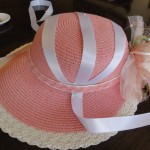
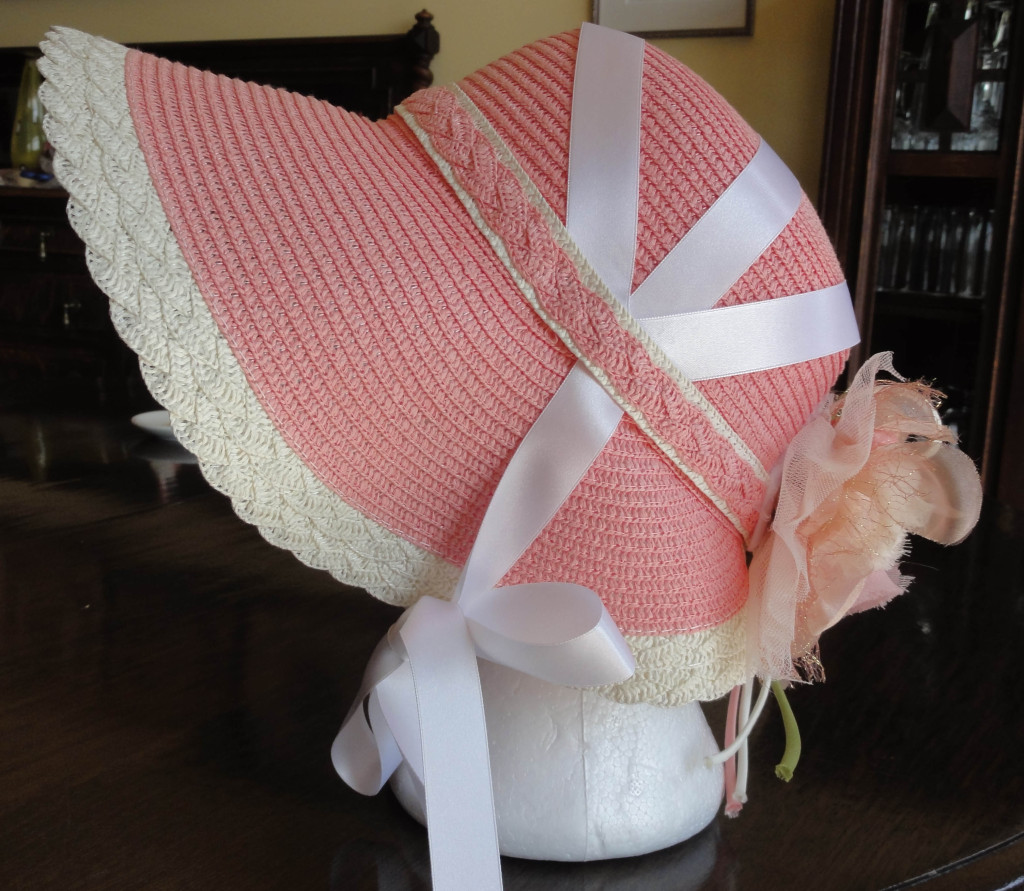
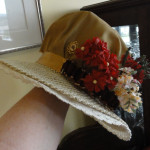
A bit of an impulse buy, as a few of my items were, the Pink Hat has a beautiful, perfect Regency shape and some nice trim. I was so pleased with those aspects, I overlooked the fact that it was overpriced for what it is and for the intention of this experiment, at $25 from a little second-hand store.

It’s so very, very PINK! I almost never wear pink!

I was uncertain whether to include it in this blog. I decided it represented a normal part of this type of project, and if my readership knew I could eat my mistakes, they may have less fear of showing up in an item that was slightly incorrect. The idea worked so well for me that I used the Pink Hat as a bit of a mascot!Hat 2 materials used

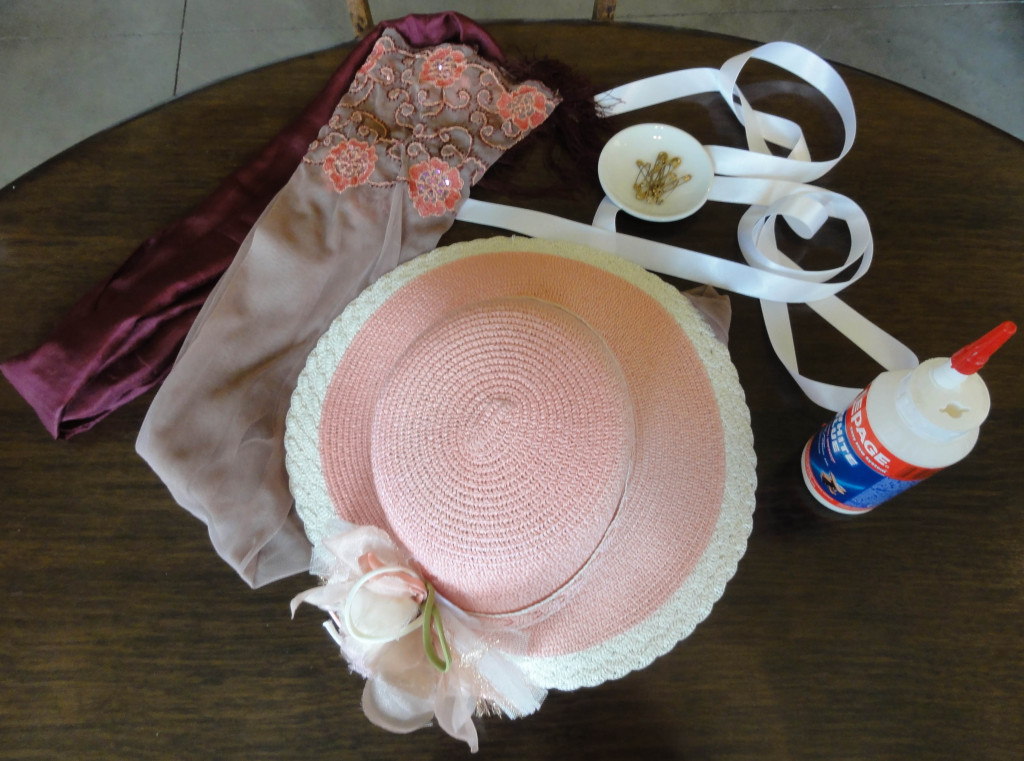
This post shares two quick and easy ideas for enhancing this hat and making it appear like a Regency bonnet. The materials for both are in the photos above.

~~~

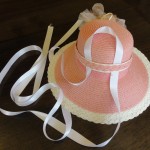
The Pink Hat Design #1: A three-ribbon design is seen often in Regency hats and hairstyles. (Click on the thumbnails for larger images.)

  • Loosen the existing hat band around the front and sides.Hat 2 loosen band and loop ribbon under
  • Fold a ½” to 1″ wide by 2m long ribbon in half and tuck under the band from below, with the loop heading to the back of the hat.
  • Arrange so the ribbon is at an angle with the tails at the middle of the hat band front to back, and the middle of the ribbon is just barely over the back of the crown of the hat.Hat 2 pin ribbon to band at halfway back both sides and loop over back edge of top where it sits best and smoothest
  • Use the band to help you fold each side of the ribbon up and back over the hat, one going straight across the middle, and the other at a slight angle across the front crown of the hat.Hat 2 fold ribbon up and over top of hat, one end over middle and one over front of hat
  • Each tail can go under the far side of the hat. Adjust so the hatband is down and the ribbons are roughly in the middle, though they won’t be neat at this point.Hat 2 remove pin holding in place and add one at the fold of the ribbon
  • Safety pin the ribbon at the “V” made when the ribbon is folding under the hat band (the first fold you made) on each side.
  • Remove the ribbon. Re-install, but this time, do not wrap over band, instead, use the pin to help you place the fold behind the band.
  • Adjust until the bands are equally spaced and smooth over the crown, the hat band is down and in place, and the “V” is hidden.Hat 2 Remove ribbon, then put back in place only under the band, using the pin as a guide as to fold location
  • Pin in place from behind.
  • The ties will come down the middle of the side of the hat to tie under your chin, and the bonnet will sit back of your ringlets.


Additional ideas:

  • If desired, you can flip the front of the bonnet up, using steam to shape it, but be careful of burns.

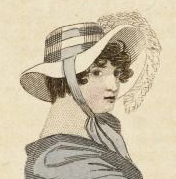
    July 1812

    July 1812

  • I’ve left the existing fabric flowers in back because I like them, and they hide a gap in the brim trim.
  • A strategically placed ostrich feather, curved forward, with some smaller items at its base, would work instead of the fabric flowers.
  • Additional trim is optional, but a ribbon flower, a few clusters of flowers, a medallion, or whatever pleases you can be placed on the joint of the three ribbons. Remember, simple trim means early Regency, and embellishments became more elaborate, especially in the teens. Match to your outfit’s time period.

This bonnet cost about $28, plus any additional trim.

Hat 2 pin in place from behind and trim as desired

Note that a similar hat, in natural straw, without the hatband or trim, is $5 at major craft stores. I’d recommend going that way. A ½” to 1½” wide hatband should be attached at the centre back to facilitate the instructions in this post. Ribbon, braid, beaded band, or similar material can be used.

~~~

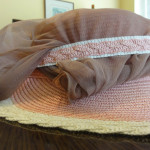
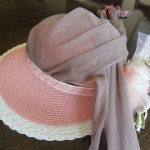
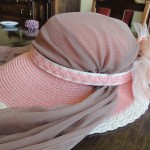
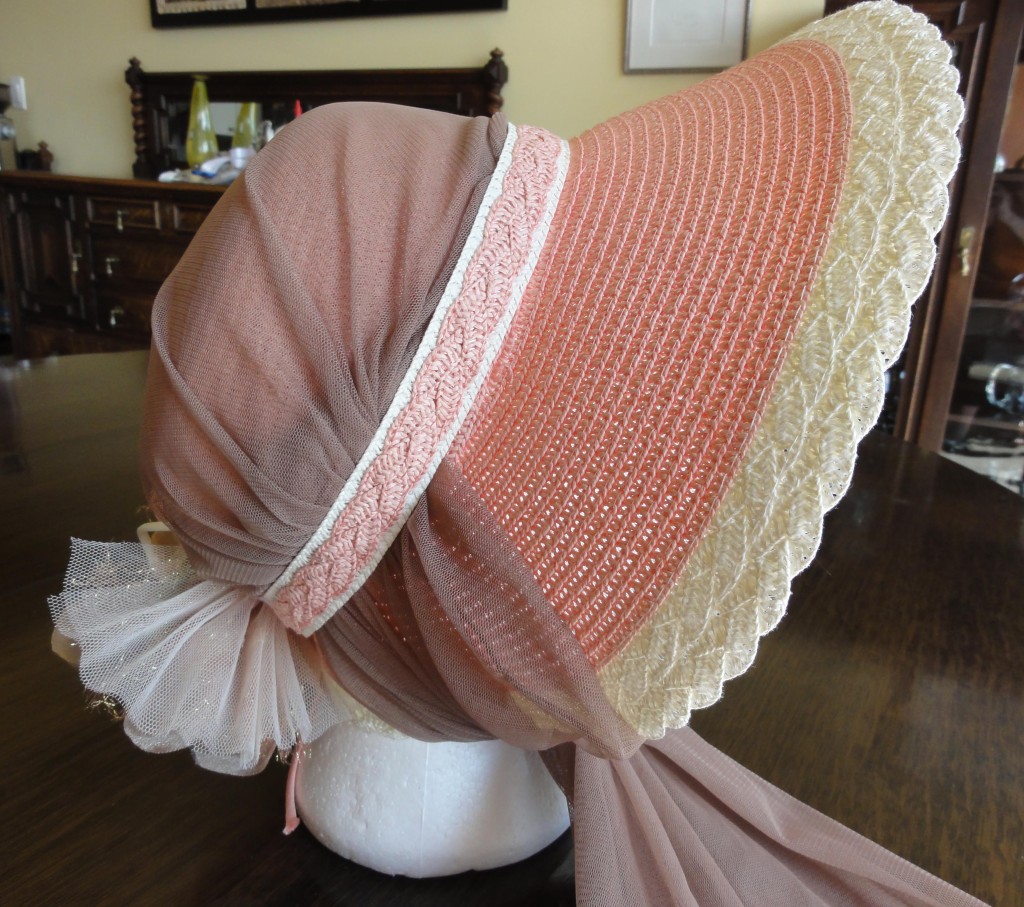
The Pink Hat Design #2: Inspired by hats in the Napoleonic Collection, with a sheer panel of fabric stretched over the hat and tied under the chin.Hat 2 design 2 fold scarf in half and slide under band from rear

  • Fold an oblong scarf (about 5 feet long) in a co-ordinating colour in half. A sheer or solid scarf can be used.
  • Slide down the front of the crown of the hat, under hatband, in a flat position.
  • Adjust so front (folded) edge of scarf is under hatband.Hat 2 design 2 roll edge of scarf and tuck under band
  • Roll up corners and tuck along sides under hatband. Adjust to your choice of fit: tight over crown of hat; with soft, regular folds; or puffed like a Capote hat.Hat 2 design 2 cross ends of scarf over back of hat
  • Pull tail ends of scarves so they cross to opposite sides and the back of the crown of the hat is covered.
  • Tug tail ends of scarf forward under hat band until they are midway between the front and back of hat.Hat 2 design 2 tuck scarf ends under band at about halfway point and adjust to hide extra fabric
  • Adjust folds and edges that are tucked under the band.
  • If necessary, pin, double-sided tape, or glue sections of the scarf under the edge.
  • The existing fabric flowers, with the frayed edges trimmed, are good embellishments for this hat. But each person has their own ideas, so add extra trim as suits your fancy!

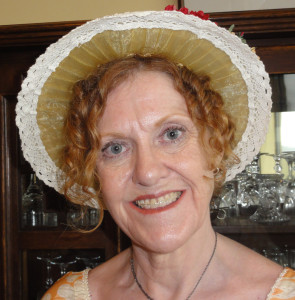
Hat 2 design 2 completedThis bonnet cost about $32, plus any alternative or additional trim the owner selects.

~~~

Why are these called bonnets and not hats? The only difference I could figure out between a bonnet and a hat was that a bonnet was tied on and a hat was not. These are called “cottage” bonnets.

Luise Kleider der Konigen 1810

1810

Cottage Bonnet ca 1810, Meg Andrews

1810


 ~~~

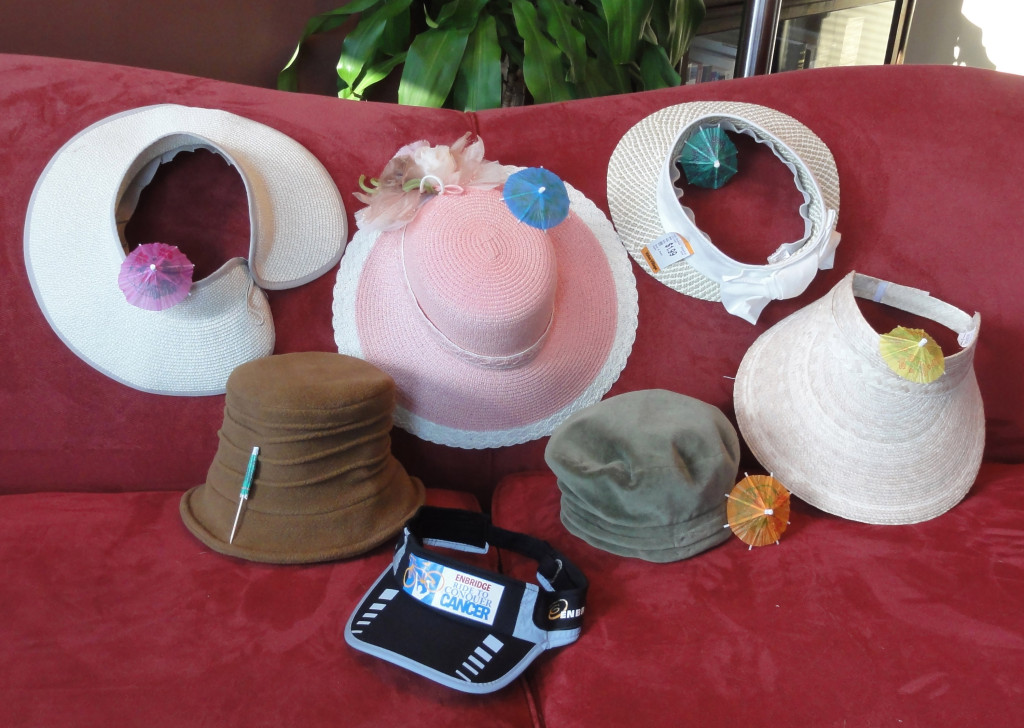
I still have three—count ‘em—three more potential Regency hats/bonnets!hat basicsTwo hats in the original “group of seven” didn’t make the “Okay for Regency” grade indicated by an open parasol: their shapes and fabrics are intended to show contrast.

The brown synthetic fleece hat might be okay as a base, if wrapped with fabric almost like a turban; tulle or net might work.

The sad little baseball cap visor has no parasol, as it’s not worth the effort. Not even a tea cosy will revive it.

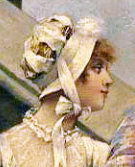
Close-up of painting, Portrait of a Woman--François Flameng

Close-up of painting, Portrait of a Woman–François Flameng

1814, Metropolitan Museum of Art

1814, Metropolitan Museum of Art

I want to make the larger-brimmed visor (far right, $4 from a Wal-Mart in Mazatlán, Mexico) into a Lady Catherine stove-pipe or leghorn bonnet, which involves a curved tube. After a lot of searches, I found a site that gave me an idea how to start it. There will still be lots of trial and error, so I’m leaving it to after the main blog series, in the “bonus” posts. (Click on the thumbnails to see larger images.)

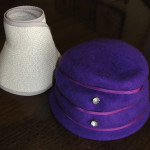
Fez and rollupI’m not sure if I’ll create something with the roll-up hat from the San Diego zoo from 10 or more years ago (upper left), but I bought a little purple felt fez I could prop on top! It would assemble/disassemble well for travel! Hahaha! This hat is also suitable for a Capote-like covering or a tube, just like the other two topless hats. (Hmmm. That sounds nasty.)

The big reveal: the Lydia Bennet special! (Click on thumbnail for larger image.)

Lydia hat before

The “Lydia Bennet” hat, before.

“Look here, I have bought this bonnet. I do not think it is very pretty; but I thought I might as well buy it as not. I shall pull it to pieces as soon as I get home, and see if I can make it up any better.”

And when her sisters abused it as ugly, she added, with perfect unconcern, “Oh! but there were two or three much uglier in the shop; and when I have bought some prettier-coloured satin to trim it with fresh, I think it will be very tolerable.”

—Pride and Prejudice, Chapter 39

French, 1800-1805, Boston Museum of Fine Arts

French, 1800-1805, Boston Museum of Fine Arts

At first glance, this hat is quite pretty. But looks deceive: it has good bones, but requires some serious deconstruction of braided plastic ribbons, then replacement with satin and sheer ribbon in a similar design. You can see the look in these museum hats; that’s why I was drawn to this one.

1820, Augusta Auctions

1820, Augusta Auctions

American, 1810, Metropolitan Museum of Art

American, 1810, Metropolitan Museum of Art


~~~

There are more complicated hats and bonnets you can make, but sewing and more complex craft skills are required.

http://themerrydressmaker.blogspot.ca/2011/08/regency-bonnet-tutorial.html
https://teainateacup.wordpress.com/2011/08/01/how-to-make-a-regency-poke-bonnet-in-ten-steps/?blogsub=confirmed#blog_subscription-3

This video demonstrates the second of the more complicated sites above:
http://oregonregency.blogspot.ca/2008/04/how-to-make-regency-poke-bonnet.html

I can’t quite understand tearing apart a straw hat into its spirals, or cutting off the back half and having to cover it, when it’s more work than is necessary. Regency bonnets came in so many shapes; it’s odd to take a shape that would work, only to change it to another, rather than seek out the second shape in the first place. But these sites have other good ideas.

Modern reproduction Poke bonnet

Modern reproduction Poke bonnet

Even more complicated is a stovepipe bonnet from the late Regency, made with a buckram frame: https://www.youtube.com/watch?v=98vKEHfjOAA

If I do a stovepipe bonnet, I’ll likely use more traditional techniques as in the Regency: cardboard and/or papier maché. It’s not so much that I’m afraid of buckram (maybe I am) or have no clue where to obtain it, but I know my skills with wire, and I’d wind up with a bumpy cam-shaped thing when I need an oval.


~~~

More on my pillowcase cap: A web site with a series of cap patterns for sale included a comment that the more uppercrust caps had more than one style of lace on them, as did the lovely examples in an earlier post. I’d like to find some finer pieces of whitework or lace to fill in some holes, rather than use the plain cotton of the pillow case. Shopping never seems to be done!

~~~

NEXT WEEK’S POST: There’s more to undies than corsets! **Cue tawdry bump-n-grind music!**

~~~

The Thrifty Regency Hat-trick!

No rabbits are involved in this type of hat-trick! However, once in cricket, four times in NHL hockey, and twice in rubgy, three hat-tricks, or three sets of three goals scored by the same player, have taken place in a single game. Other games also use the concept of a hat-trick.

Our Thrift Shop Regency Costume Experiment is also doing three tricks with hats this week—well, two are technically bonnets, and you’ll have to wait for them until next post.

You say, “What? You said three hats this week, now it’s only one?”

I reply, “Yes, because the post was a million years long, and your eyes would have glazed over. Instead, I’m doing two posts this week, and the other hats will be in the next one!”

And you say, “Two posts? YAAAAAYYYY! You’re our favourite!”

Of course I am. And every fine lady holds a parasol in a Regency ballroom, too.

~~~

1812 capote croppedEnglish, 1805-1808  manchester galleries cropped  capote with veil croppedCapote Hat1804 capote cropped

This is the most common type of hat at Regency costume events, probably because it’s fairly easy to make and is quite cute! It’s not nearly as common in Regency fashion plates or paintings, though; that’s where the poke bonnet shines. The capote is the one that looks like a tea cosy or shower cap over a brim that’s narrow in the back and moderate in the front, or goes about ¾ of the way around. The proper description is “a firm brim with a soft cap.”Woman's bonnet, 1807 Centraal Museum Utrecht croppedhat one potential materials of construction

I found the perfect shaped brim in a green and natural-coloured straw visor with a mid-weight cotton band and bow. You can see all the fabric and trim options for all my hats above, along with this hat. Some are too bold, others too plain, and some too matchy-matchy.

I’m not using the little green velvet hat, as I love it for everyday modern, and won’t modify it. I may dress it up as a turban, but I like the table-runner turban, which goes well with the gown I like best for the ball at the Louisville JASNA AGM this fall.

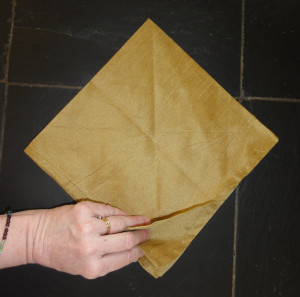
I chose one of the pair of 19″ square gold silk dinner napkins as the soft cover for my capote.

hat one materialsI removed the bow from the hat, but not the fabric, choosing instead to turn it up to help support the new fabric.

Here are the steps used to make the cover, with accompanying photos (click on thumbnails to see larger image):

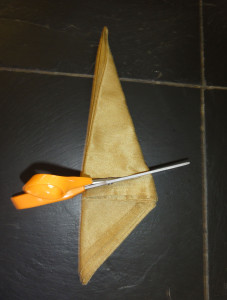
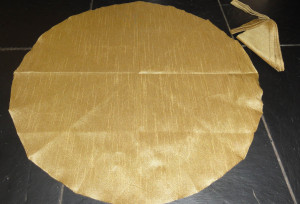
  • Cut the napkin into a circle (procedure for an easy way to cut a circle is at the end of this post).hat 1 put tape at quarters one inch longhat 1 cut lining into circle too and remove ribbon from hat
  • Cut a matching circle of your lining material.
  • Measure distance around hatband level. Cut a length of 1″-1½” wide ribbon about an inch longer.
  • Place 1½”-2” strips of double sided tape about ½” above where the brim meets the crown of the hat (under where the hatband would sit) in four equal spaces; scrub/burnish with your fingernail to ensure they’re stuck.
  • Align the grain of the napkin fabric circle front to back and attach to the front and back pieces of tape; burnish with your fingernail. Repeat with the tape at 1/4 marks.hat one put top on tape align grain front to back fabric in quarters
  • Place another 4 pieces of tape half-way between the first four and press down the centre of the fabric between them. Scrub with your fingernail to make sure tape holds.
  • Continue putting tape half-way between previous positions and pressing down cover until tape is continuous or gaps are less than ½”.
  • hat 1 fold end of ribbon and tape underhat 1 put new tape between and continue until sixteen or moreFold in half and position fold at front centre, then wrap around to back. Fold one end under and tape underneath to ribbon below it.
  • Adjust folds in napkin fabric as needed to get the look you like.
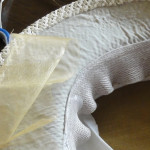
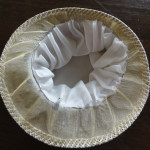
hat 1 under brim lining ugly so add start center front pleating finger widthMy hat was lined under the brim, but it was unattractive. It added stiffness, so I decided to leave it and cover it. A pale gold 3” wide wire-edged ribbon was about the same width as the front of the brim, so I chose to use it, removing the wire edges first. It will be easier if your fabric is wider than the space you want to cover.
Here is how I attached a pleated lining to the underside of the brim:

  • Mask off the areas you don’t want to glue: masking tape works well for narrow spaces, and paper for others.
    • I covered the interior circle of the hat with a loose piece of paper, then made loose arcs of paper about 6 inches wide to tuck under the brim to protect the napkin cover.
    • I used 2″ strips of masking tape to cover the edge that matched the top.
  • Put newspaper on the floor of your work area at least 3 feet square.
  • Spray glue on the area you wish to cover.
  • Wait 5 minutes. The glue should be sticky enough to hold fabric in place, but not so sticky that it can’t be peeled back and adjusted: a bit stickier than “Post-it” notes.
  • Start at the centre front of the underside of the hat brim and fold pleats in opposing directions, with the outside of the pleat slightly wider than that at the crown part (centre). A nice size is finger-width. The stiff net material I worked with kept its fold nicely, so I would recommend a stiff but not heavy fabric.
  • Continue down each side, aligning the outside edge.
  • Cut a ribbon the same size as your hatband ribbon and fold in half. (You can also use bias binding tape, a cloth tape with lots of give.)

If you are not lining the hat:

  • Trim the brim lining to just inside of the hole for your head (inside of headband).
  • Run double-sided tape along the inside edge of the pleats, just barely on top of the pleats, and continuing past them inside.
  • Start at the centre front with the middle of the second ribbon or bias binding tape, and attach the outer edge of this ribbon along the edge of the tape just to hide the edge of the pleats.
  • Ease around curves, that is, slightly compress the short side of the length hat 1 add lining similar to top only can use longer lengths of tapeof the ribbon edge without folding, so the long side can match the curve.
  • At the end, fold the edge of one end of the ribbon under. Use double-sided tape to attach it over other end for a neat finish.

To line the hat:

  • Take the circle of lining fabric that was cut the same size as the napkin circle and place pins at each ¼ around the outside edge.
  • Using the second ribbon or bias tape as above, run double-sided tape along the length of the ribbon along one edge only. Mark ¼ lengths with pins.
  • Attach the circle of lining fabric to the ribbon about 1/3 of the way up, pinching pleats in along the way. Leave the ends free in case you need to adjust when attached to the hat.
  • Continue from the third point in the section above. Remove pins.

hat 1 cover joint between linings with ribbon and optional lace edgeTo add lace or ribbon to the outer edge of the brim:

  • I wasn’t crazy about the look of the unfinished edge of the pleats, so I decided to add lace.
  • This can be done from above or below.
  • Tape the brim edge with double-sided tape the entire width that you expect the lace to cover.
  • Start the middle of the lace at the center front, similar to how you’ve attached the ribbon in the previous section. Ease in the lace (push edges together slightly but don’t fold) so it does not “roll” over itself.

hat 1Final trim:

  • I used some small bouquets of fabric flowers purchased on sale at a fabric store, a bit of ribbon folded accordion-style, and a stick pin with a petit-point rose in it, made by Grandma Lauder!


~~~

Total cost for this hat: Under $10!

  • hat 1 front viewThe visor was $1.99, and the napkin was in a set of two for $1.99, both from Value Village.
  • Value Village was also the source of the ribbon, in a “grab bag” of more than a dozen bits for $3.99, as well as a 2m piece of cream lining satin for $1.99.
  • The lace came from the spaghetti straps of a “Frankenstein” dress that was $14.98 and still has about 4m of other types of lace, plus some large panels of embroidery I plan to use on an evening gown.
  • The little flower sprigs were $.50/each times three.
  • I used a half package of double-sided tape for $2.99.

~~~

Trimming your hat or bonnet:

Flowers, foliage, feathers, and such are common on the sides, and sometimes on the back or the front of Regency headwear. We can’t tell from photos whether both sides of the hat were trimmed the same, if they were asymmetrical but both trimmed, or if only one side had adornments.

poke bonnet metThese days, it’s really up to the wearer, as long as you make an effort to have a Regency look. Like gowns, the amount of fussiness and elaborate details increased as the Regency went on.

A little garnish does go a long way, so here are some ideas to whet your appetite.

http://historicalsewing.com/trimming-regency-bonnet-ideas-instructions
http://www.janeausten.co.uk/trim-your-regency-bonnet/
http://www.songsmyth.com/hatsandbonnets.html

hat 1 side view~~~

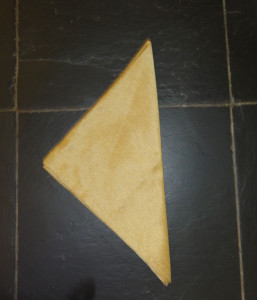
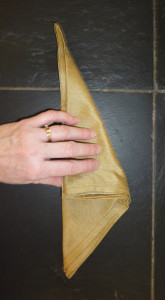
To cut a circle from a square:

hat one fold three

Fold into quarters.


hat one fold 3

Keeping centre point on top and open edges towards you, fold again, twice.

hat 1 fold 4


hat 2 cut top into circle

Cut off uneven ends at an angle so two long sides are about the same length from the centre point (top).


hat one top made into circle

Unfold and look where it needs to be trimmed. Refold if it will make it easier to trim. It doesn’t have to be perfect for this situation. Press out the creases before you use it.


~~~

NEXT POST: the Pink Hat goes all bonnet on tTSRCE!

Signature  file for tTSRCE

~~~

Special Headwear for the Grown-up Lady

1806 capIf you asked a reader of Regency Romance what character would wear a cap, they would say a married woman or a spinster. But what makes a spinster, and why would they wear a cap? The reader would reply, an unmarried woman past her prime would wear a cap. But they might be vague on why.

To signify she was off the marriage market? To indicate her age? To allow her to avoid fussing over her appearance for yet another unproductive Season? So she could sit on the sidelines and not dance until the handsome rake/Lord noticed her? Ah, the appearance of a Regency Romance cliché!

The whole thing must have been confusing. Married women wore a cap, so it would follow that the odd time, the rake would have flirted with Lady Offlimits—until Lord Offlimits showed. There might be a better chance of it, since the spinster would have been passed by repeatedly, implying she was never as vivacious as Lady Offlimits. Unless, of course, she was crossed in love. Another Regency Romance cliché.

For the 21st century woman, the choice of a cap is personal. I figure it’s a lot like the turban: a way to hide your non-Regency hair indoors when your hat or bonnet must come off. If you’re married, or single and proud of it, you certainly have the option, and would have in the Regency. We’ll just assume that you have to be a grown-up to wear a cap: old enough to be married.

doily cap materialsdoily cap tie off start


doily cap threading one


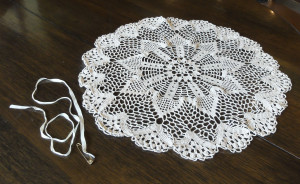
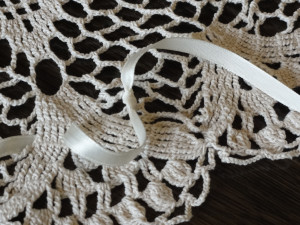
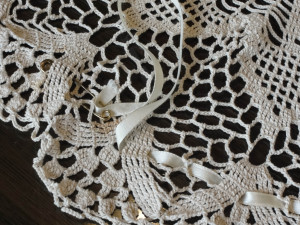
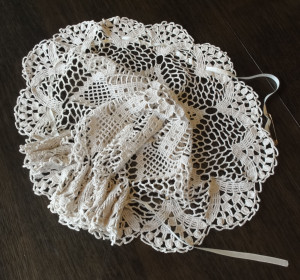
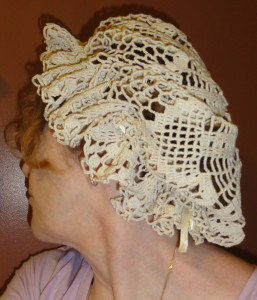
One of great-Grandma Lauder’s tatted doilies, 21 inches in diameter, was easy to make into a cap. I tied a matching ribbon to a point about 2½” from the edge and pinned a safety pin to the other end. The safety pin helped me to weave the ribbon in and out around the doily at 2½” from the edge until about 2½” from the start point, gathering in the fullness. I tightened the ribbon so the “cap” fit my head loosely, then tied the other end off, too. Then I tied a bow to tighten the cap with once in place.

It’s a bit big for my head, and droops, but I have a small head. I still think it looks rather pretty.doily cap gatherdoily cap

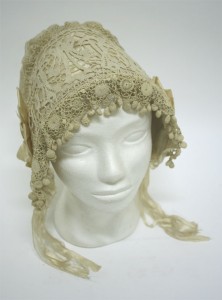
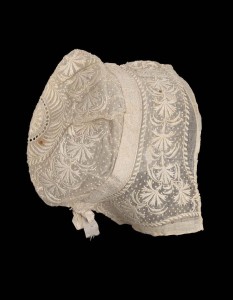
Bonnet  cap 1806

1806 cap/bonnet

The trouble is, I doubt many caps looked like this, so at best, it’s graded as a “closed parasol”: okay in a pinch, but not correct. The one shown from 1806 has some similarities in appearance from the front, but it’s not the same construction. You see, I had mistaken the idea of a lace cap as a cap made of heavier lace like tatting, and had not paid a great deal of attention to real examples.

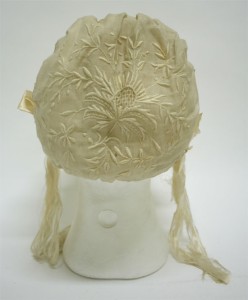
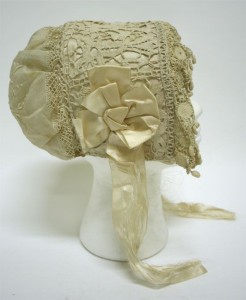
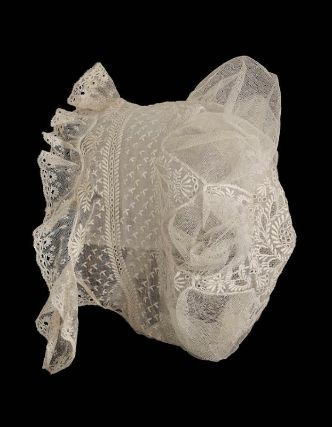
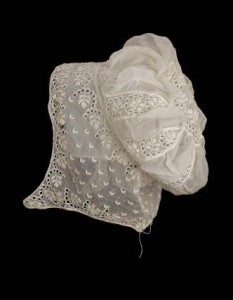
In actual fact, Regency caps were made from  fine cotton, muslin, or linen, often with whitework embroidery, including eyelets, drawn thread techniques, and areas cut away so lace-like darning can fill the area.

1806

Back view showing embroidery on 1806 cap/bonnet.

side view, 1806 bonnet

Side view, 1806 cap/bonnet


Museum of Fine Arts, Boston lace cap, 1815

Lace cap, 1815, Boston Museum of Fine Arts

First half 19th century, Europe - Cap - Cotton mull with cotton embroidery, linen bobbin lace insertion, and silk ribbonmfa.org.


Sources of whitework might be found on a pillow sham as seen below, as well as handkerchiefs, scarves, or tablecloths. The shams, found at a small thrift shop for $1.99 for the pair, have some large drawn thread panels that can be used to make a cap, but it will be complicated.pillow sham for creating cap

The first step will be to figure out how best to select the panels of embroidery, then where to cut them for the right shapes to piece together for a cap. The panels should be sewn together because of the complex shapes and need for fine, flat seams. Ruffles on the front edge of the hat and ties at the throat seem to be optional, which saves me some fussing.

I’ve been watching for a pattern that may better suit my situation before I start this project. The one shown may not be perfect, but it may be all I have.

The Female's Friend and General Domestic Adviser Robert Huish~

With all the mention of what your hair will look like if you remove your headwear, and all the alternatives, we have yet to spend any time on hats and bonnets! Is that a bit like Chicken Little, worried about something unknown that may never come to pass?Hat from Karl August Hagberg painting1810 from Ackermann, three types of headwear


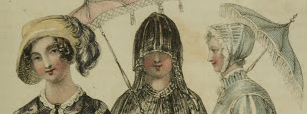
napoleon exhibitIt could be that your event is an out-of-doors afternoon Promenade. A Regency lady would wear some kind of head covering outdoors to give her an air of modesty. To shield her delicate skin from the sun, she may also carry a parasol, but it will not be a substitute for headwear, as in the drawing of the set of three ladies above.

Unless you plan to spend an appreciable amount of time indoors during the event, you might never need to remove that hat while in your Regency persona. Alternately, if you plan to attend a Regency ball in the evening, and take on your persona indoors, you need not don a hat or bonnet in the first place. My event, the Louisville, KY Jane Austen Society of North America Annual General Meeting in October 2015, will call for both.

1805 to 18101810 bonnet mfaHere are some of the wide variety of designs for Regency hats and bonnets from around 1810, as well as the original seven modern hats I collected to demonstrate what you can find in your closet, showing which ones will work and which are devoid of the famous grading parasol!

cap 1810 metChapeau a la Pamela. France, circa 1810.first 7 hatsNEXT POST, I’ll give some ideas on how these hats can be made into Regency hats or bonnets, and show step-by-step how I made a Capote hat with one of them. I may have time to make a second hat or the whitework cap before then, too.

~

Here is a cute article by Anna Snyder on the clichés mentioned above: How To Tell If You Are In a Regency Romance Novel