
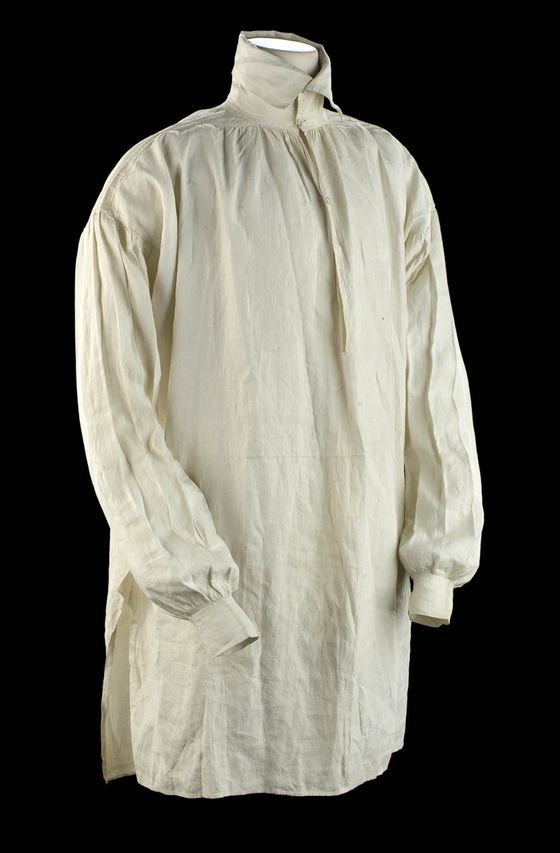
1807 men’s shirt from The National Maritime Museum.
A poet’s or pirate’s shirt will work well for a Regency man’s shirt, they say. I remember sewing a similar shirt for a boyfriend in the 70’s: long sleeved, loose body, placket at the front. Surely a few vintage versions in a light, flowing fabric still exist!
For months, I searched the thrift and vintage stores for a plain, white, light weight, long-sleeved, wider-collared shirt with a placket-style opening, rather than button-down. Long-sleeved white dress shirts of any type were rare, probably popular for job interviews.
All were button-down. At least half had a subtle pattern woven into the fabric that was non-Regency in appearance. A few had logos emblazoned on the front pockets. Military shirts with epaulets were constructed of mid-weight, crisp fabric, rather than soft and flowing, as were tuxedo shirts with their multiple pleats in front. The odd shirt was collarless, and I needed a collar to stand up and wrap the cravat around.

Man’s linen shirt, 1790-1810. Augusta Auctions.
Early on, I expanded my search to ladies’ wear size large and greater for that front placket shirt, but they were rare, and in addition to similar traits to those for men above, often had ¾ sleeves or ruffles in the wrong arrangement. Ruffles aren’t a bad thing, as the neckline of the waistcoat shows off ruffles.
The Blouse
This month, I gave up on the placket front and searched for a white dress shirt in Mr. Suze’s neck size, loose in the body, and simple in design. At Value Village, I found a ladies’ extra-large blouse that looked ¾ sleeved at first, but discovered it had button tabs on the sleeves. The cuffed long sleeves were scrunched up and could be easily let down.
I measured the collar, and it was just short of 17” around, so larger than Mr. Suze’s 15½” shirt size, but my measurement didn’t count overlap for buttoning. To ensure the sleeve was a couple of inches too long for me (the advantage of having borrowed his cool-looking jean and leather jackets in the past is knowing this fact!), I tried on the blouse on over my own t-shirt before purchasing it at $7.99.
It fit Mr. Suze perfectly in the neck and sleeve, and was loose in the body! Hooray!
The shirt was button-down, and Poor Mr. Suze lamented that it buttoned backwards—that’s how he discovered it was a ladies’ blouse upon trying it on. It had no top button, so I attached two 8” ribbons to tie it closed. The Regency shirt would close with laces or a simple set of string ties.
I could have sewn the front panel partly closed to make it emulate a placket-type, but Mr. Suze didn’t mind the buttons too much and, as the shirt was considered underwear in the Regency, no one was allowed to see it. Yes, you heard that right. Underwear.
The main modification to Regency for a plain white shirt is simple: since the collar is to be turned up so it is standing, the front points need to be trimmed back slightly so the line of the collar goes straight across. When purchasing, a wider collar is better so it looks good standing up.
Depending on how the shirt is made, you might be able to push the points into themselves and sew closed with top-stitching near the edge. Because of top-stitching on the blouse collar, I had to open a seam, so I cut the corners back. Don’t forget the seam allowance!
An optional but beneficial modification while you’re at the collar is to cut a slight curve out of the middle back to suit the head of the wearer, so the collar stands up and doesn’t crinkle. My curve was about ⅝” deep in the middle and tapered down, overall about 5” wide. The seam allowances in the curves were clipped and pressed inside. Rather than remove the collar and redo the seam, the opening was top stitched close to the edge, then a second row of top stitching, similar to the original, was added.
Ruffles can be added to the placket area where the shirt shows above the neckline of the gentleman’s waistcoat. A plain, straight piece of light cotton 3”-4” wide, with a simple rolled hem on three sides, will work.
I used scalloped border panels from a white pillow sham (the main area’s lace was for a cap and fichu in previous posts). The scallops had a finished edge, and I made a narrow hem on each end.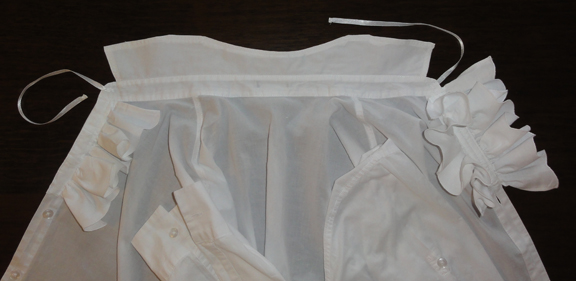 Each ruffle started as 4” wide and 20” long. I gathered it to 5” long, which was plenty long enough for the V neck on Mr. Suze’s waistcoat. I covered the base of the gathers and sewed that to the button panel. A third ruffle was added later, as two didn’t seem like enough, but when the cravat was added, I realized it fills the centre area, so two would be fine. The finished ruffles should be pressed backwards at ¼” near the bases, so they prefer to stand rather than lay flat along the shirt front.
Similar to Regency ladies’ wear, men’s clothing had longer sleeves, extending over the base of the hand. If your Mr.’s tail coat sleeves are not long enough, you can also add a ruffle at the cuff of the shirt. It can be sewn inside the cuff so minimal fussing over finishes is needed.
If you want to use a shirt that will be reverted back to a dress shirt after the Regency occasion, the collar corners can be neatly pinned inside, as the cravat will probably hide the pins, and the back curve ignored. Neckline ruffles can be basted to the inside opening of the waistcoat instead. Sleeve ruffles can also be attached with basting, but make sure the stitches are not obvious on the outside.
The “Scarf”
The mystery of how to make a cravat or neck-cloth covers Regency costuming pages all over the Internet. There are three commonly suggested designs: a rectangle, a rectangle with tapered ends, and a triangle. Most sites explaining the triangle use the same wording, which is so poorly described that people have wound up with huge rectangles instead!
Suggested sizes for a rectangle are 50”-80” long by 4”-10” wide, but I found the finished length should be at least 60”, and the finished width no more than your Mr.’s neck length. Tapered ends on a rectangular shape make the tied cravat tails less bulky.
Another design uses a long, low isosceles triangle. The two short sides are 50” long, and the triangle is 10” high, with rolled hems on the cut edges. To wear, it’s rolled to a width to suit the wearer’s neck length. This is a very long cravat, but well-suited to complex tie styles or multiple wraps, as it has far less bulk at the ends.
White or off-white were the most common colours for a Regency cravat, and the only colours acceptable for a ball. Various ideas on fabric stiffness abound on the Internet: some say pliable, some suggest starch. From my experience making one cravat, if the fabric can keep a neat shape without collapsing, but not so stiff that it’s uncomfortable or won’t drape a little, it should work.
A Fabricland $1.99 remnant of light but not super-sheer white cotton at 53” wide was the source for Mr. Suze’s cravat. A 9” wide panel was cut the full width of the fabric. It was folded lengthwise and the ends tapered starting 8” back, with the tapers in opposite directions as seen in the photo. A blanket-type seam closed and bound the edges, with a 4” gap left halfway along the taper of one end. The cravat was turned inside out through this gap, pressed flat, and the opening sewn closed. The finished width was just under 4½”, as any wider made no sense with the length of Mr. Suze’s neck. Some sites suggest a rolled hem, which is better for heavier or stiffer fabric, but doubled up has a more finished appearance.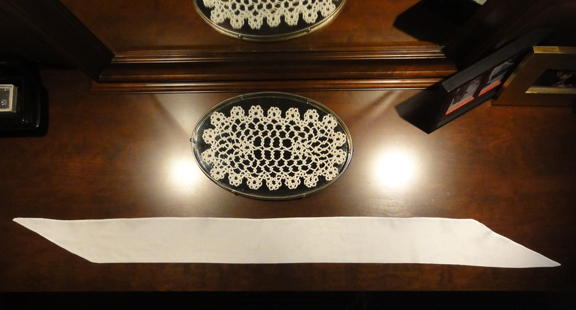 With a basic tie style, this cravat is barely long enough. If I can find a longer piece of fabric, I’ll make another. This is why I suggest no shorter than 60”!
The cravat is tied over the shirt collar but inside the waistcoat collar. The easiest style is to start with the middle of the length of the cravat in front of your neck, cross over at the back and pull forward, cross one end over the other in a half knot in front and snug up, tidying edges around your neck and fluffing folds of the panel that falls down vertical in front. A simple pin can hold the front fall in place.
Tea in a Teapot has a summary from an 1818 satire on the cravat called “Neckclothitania” that appears on several other blogs as well. The complicated tie styles have been attempted by some modern costumers, with varying degrees of success. I think the author would be suitably amused that his work was taken with such a degree of seriousness!
The Art of Tying the Cravat by H. Le Blanc (post-Regency, 1828) is an interesting read via Google books (free e-book). It has additional designs for the neck-cloth knots, and the illustrations are below.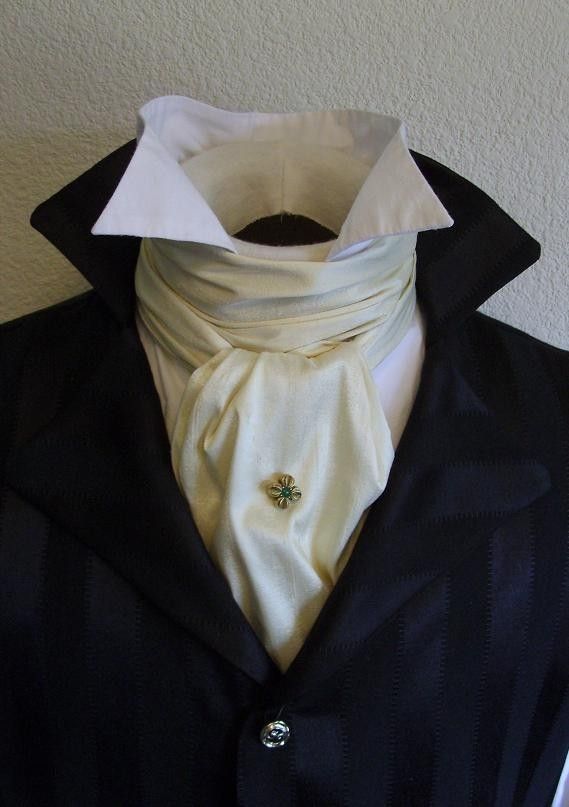 Your Mr.’s cravat tie style should be no more complicated than he is comfortable with creating. A man confident in making a full Windsor on a regular basis, or who plays with knots—boat owners often are often hobbyists with knot-making—can fuss all he wants with styles from the links. For the rest, there’s no shame in simplicity.
A gentlemanly way to top off a blouse and scarf
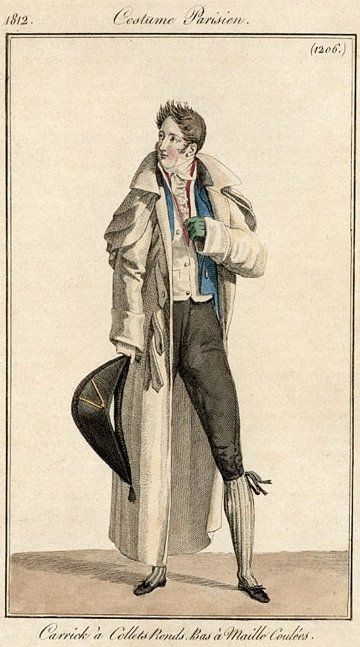
Bicorne hat, Costume Parisien, 1819
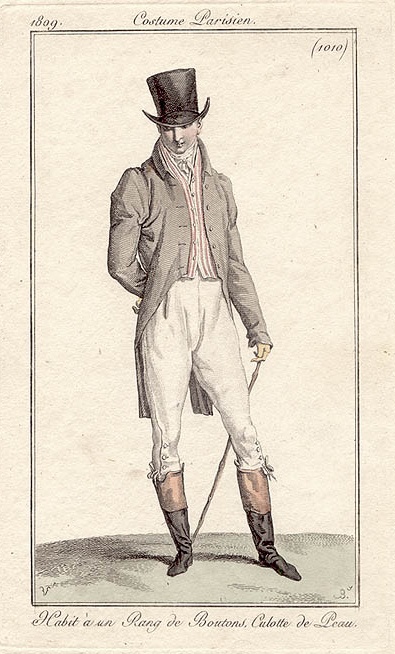
Top hat, Costume Parisien, 1809
Regency men wore a variety of hat styles, but a simple top hat was most common in art work. The bicorne was also popular, particularly for formal situations like a ball, and is favoured for faux-military costuming.
A top hat can be had for as little as $10 for one-size fuzz-covered plastic at a party store; $25 for a magician’s silk hat or one-size felt coachman’s hat (too tall and costumey) at Dressew; or as much as $200 and up for a vintage collapsible opera hat or actual beaver fur top hat on eBay, and you have to pay over $300 for good condition.
In vintage stores during my shopping trips, I saw two vintage felt top hats. A hat in great condition but a small size was $125, and $165 could get a hat showing a little wear but otherwise in good condition. These had superb shape compared to an inexpensive felt hat, were lined, had hat boxes, and silk hat bands.
Mr. Suze settled for a $35.99 (including shipping) wool felt hat from eBay. The sides of the pipe part are straighter than a milliner’s top hat, but its brim shape is nice, and the quality is excellent for the price. It came in small-medium-large-XL sizes, not one size fits all. It didn’t come with a hat box for that price, so it will go to Louisville in the rectangular box with Styrofoam inserts that it was shipped in. We’ve already accepted the requirement to take the giant suitcase from my set of three, which has only been used once before!
I don’t recommend magician’s collapsing satin hats. Back in May, I purchased one at Dressew as the first item for Mr. Suze’s costume, and presented it to him with an entreaty to consider a costume when he’d been resistant beforehand. The collapsible option seemed practical for travel, and the top hat looked well enough when open. However, it had a heavy metal frame inside to facilitate the collapse and easy “snap of the wrist” restoration of its shape for performance. As a result, it fit small. On my small head, it was acceptable—that is, if you don’t mind having a wire frame in your skull! But the hat perched atop Mr. Suze’s normal-sized head. It was returned the next day.
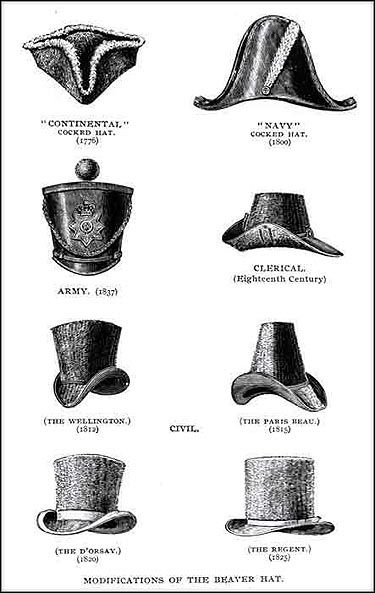
Beaver hats of the 18th and 19th century.
To show you the results, Millie wore one of Mr. Suze’s blazers, as her shoulders were too narrow for the shirt to hang properly. Mr. Suze is not this big around, as he fits inside the blazer, and the sleeves are also under the shirt! Similarly, Chili has a hat under the top hat.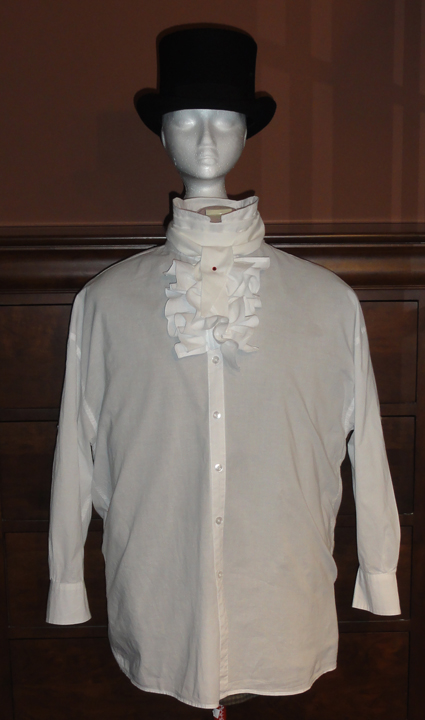 I sacrificed a ruby-red Swarovski crystal stick pin I’d used on my turban as it’s perfect for Mr. Suze’s cravat, and none of my other stick pins were right. It was also stunning on the turban, but I have a hat pin I’ll use instead.
Next post: Trousers, boots, and accessories for your Regency beau! Watch for it as a second post this week! YES! Double post week for the Gentleman’s Thrift Shop Regency Costume!