Imagining #MrDarcy: The Faceless Man and the Book Cover

When other authors mention the name of someone they had in mind as Mr. Darcy while writing their Austen-inspired fiction, once in a while, I’m able to visualize their version of the hero while reading. It’s not easy. Otherwise, the closest Mr. Darcy image that comes to my mind for Mr. Darcy is that of a Disney hero.

Disney Princes (from The Disney Wiki http://disney.wikia.com/wiki/Disney_Prince)

Disney Princes (from The Disney Wiki http://disney.wikia.com/wiki/Disney_Prince)

The odd time, glimpses of a faceless man similar to the rear view of Colin Firth in the 1995 A&E/BBC adaptation occur. Of course, there have been other actors in other adaptations, and I like some better than others.

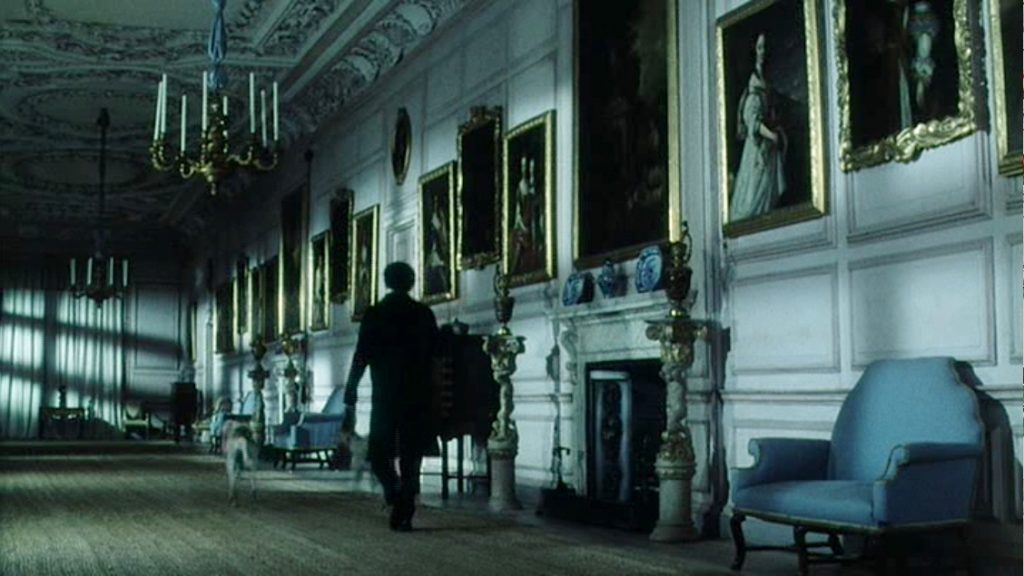
From the BBC/A&E 1995 mini-series Pride and Prejudice. Colin Firth as Mr. Darcy walks along the gallery at Pemberley.

From the BBC/A&E 1995 mini-series Pride and Prejudice. Colin Firth, as Mr. Darcy, walks along the gallery at Pemberley.

Austen herself is no help. She just said he was tall and handsome, with a noble mien and fine figure. He could be bald! Of course, the costume people would put a dark, curly wig on him. Is it a wonder dreamy-eyed JAFF authors persist in mentioning those slightly unruly curls?

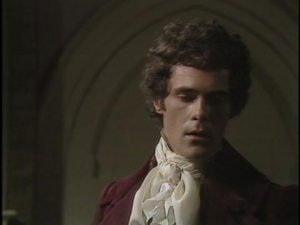
David Rintoul as Mr. Darcy in BBC's 1980 mini-series "Pride and Prejudice." Mr. Rintoul wore a hairpiece for the role.

David Rintoul as Mr. Darcy in BBC’s 1980 mini-series “Pride and Prejudice.” Mr. Rintoul wore a hairpiece for the role.

I try very hard to imagine Mr. Darcy as eye-candy actor Henry Cavill (before the Superman bulk), even if he’s almost too pretty. A story I posted on Jane Austen fan fiction mega-site A Happy Assembly (Studio 54) “cast” the inimitable Christopher Reeve as Darcy, since he was the right age for the story’s era. I like the late Gregory Peck in mid-20th century stories. But none of their faces come to mind when I’m writing.

As part of my addiction to Pinterest since the Thrift Shop Regency Costume Experiment, I’ve pinned some portraits of terribly handsome real Regency gentlemen, and maybe… but try as I might, no Darcy. I look at book covers that supposedly have Mr. Darcy on them, and to me, none of those gentlemen are quite right.

This is a problem when you want Mr. Darcy on your own book cover.

New Letter from Ramsgate character, Lady Edwina Moore, is easy to imagine. Georgiana Darcy can be a young Caroline Murat. And there’s sneaky Mr. Wickham bothering her, and Elizabeth Bennet in the background with her dizzy parasol. But where’s my Mr. Darcy for Letter from Ramsgate‘s cover?

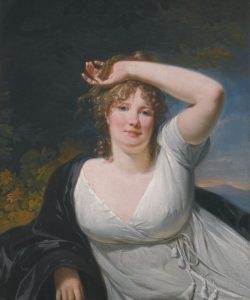
Lady Edwina Moore from Suzan Lauder's "Letter from Ramsgate" (artwork: Henri-Pierre Danloux, Portrait of a Young Lady in a White Dress, from Sotheby's)

Lady Edwina Moore from Suzan Lauder’s “Letter from Ramsgate” (artwork: Henri-Pierre Danloux, Portrait of a Young Lady in a White Dress, from Sotheby’s)

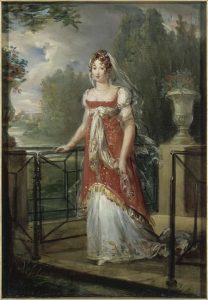
Miss Georgiana Darcy from Suzan Lauder's "Letter from Ramsgate" (Artwork: François-Pascal-Simon Gérard's painting "Caroline Murat walking in the gardens of Château de Neuilly," 1807, from Versailles)

Miss Georgiana Darcy from Suzan Lauder’s “Letter from Ramsgate” (Artwork: François-Pascal-Simon, Baron Gérard’s painting “Caroline Murat walking in the gardens of Château de Neuilly,” 1807, from Versailles)

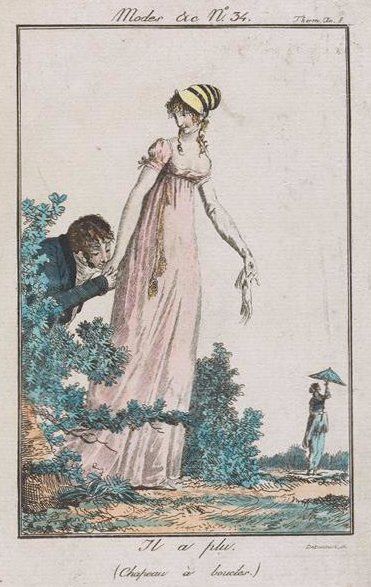
Mr. Wickham from Suzan Lauder's "Letter from Ramsgate" attempts to woo Miss Georgiana Darcy, while Miss Elizabeth Bennet wanders around in the distance, spinning her parasol. (Artwork: Debucourt, Modes et Manières du Jour no. 34)

Mr. Wickham from Suzan Lauder’s “Letter from Ramsgate” attempts to woo Miss Georgiana Darcy while Miss Elizabeth Bennet wanders around in the distance, spinning her parasol. (Artwork: Debucourt, Modes et Manières du Jour no. 34)

I suppose one could have a worse dilemma than having to peruse artwork in search of Mr. Darcy! In any case, the wonderful Zorylee Diaz-Lupitou is the cover designer for Letter from Ramsgate, and whether or not Mr. Darcy’s face appears, I love her covers, so I know it will be fantastic.

~~~

Suzan Lauder’s latest novel, Letter from Ramsgate, will be published by Meryton Press in the autumn of 2016.

~~~

2016 May 17 Edited to add a note: For some reason, readers have flocked to my blog for this post, yet none have left comments on my blog, road trips with the redhead! I wonder if you all saw the hot Regency guy and clicked to discover who the heck he is! If someone asked, I’d tell, but I’m not sure that’s the reason this post is so extremely popular! Can anyone give me a hint?

Thanks! Suzan

A road trip to Madame Gilflurt’s blog: My guest post on sneaky Regency hands.

I clicked the wrong link. I intended to email the organizer of a Jane Austen ball to tell her about the Thrift Shop Regency Costume Experiment, but I accidentally clicked a link that led me to Madame Gilflurt.

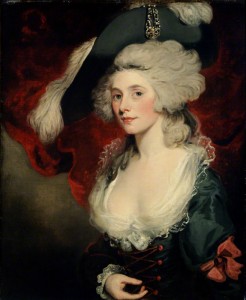
011-Mrs-Robinson-as-Perdita-246x300 as Madame Gilflurt“No problem,” she said, “but would you consider doing a guest post on my blog?”

Of course! I love to hear myself talk, and a busy blog sounded fun. I had an idea for a blog post that came up during my research on Regency gowns, and offered to post it on her blog. She loved the idea. It took a while for me to write the actual text of the post, and by then, Madame Giflurt was in the middle of her own series.

Today, the post is up: The Itch Exposed: A Special Report for the Admirers of Regency and Georgian Fashion. It’s a tongue-in-cheek look at an accidental observation I made while perusing hundreds of Regency gowns in museum pieces, historical paintings, and fashion magazine drawings—the position of some ladies’ hands in drawings from Costume Parisien and other art during the early 1800s. You can read the post at A Covent Garden Gilfllurt’s Guide to Life: Glorious Georgian dispatches from the long 18th century…, Madame Gilflurt’s blog.

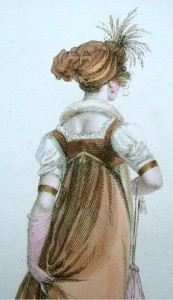
La Miroir de la Mode gown from 1803, the inspiration drawing for Suzan Lauder's January 20, 2016 guest post on "A Covent Garden Gilflurt's Guide to Life" blog.

La Miroir de la Mode gown from 1803, the inspiration drawing for Suzan Lauder’s January 20, 2016 guest post on “A Covent Garden Gilflurt’s Guide to Life” blog.

Madame Gilflurt, also known as Catherine Curzon, blogs about the fascinating personalities of history, focused on the 18th Century and Regency periods. Her lively blog includes a number of interesting guest writers each year. She is also the online host for An Evening with Jane Austen, and may just get to see Adrian Lukis’s (Mr. Wickham from the BBC/A&E 1995 production of Pride and Prejudice) phone number come up on her call display from time-to-time. Madame Gilflurt will join road trips with the redhead for a guest post celebrating the release of her non-fiction book Life in the Georgian Court, which is being published by Pen and Sword books in June 2016.

~~~

A reminder to catch up on chapters of Letter from Ramsgate, now posting at A Happy Assembly! We’re past the bad angst and moving towards mush. The comments thread is as much fun as the story!

Graphic art for signature design by L.L. Diamond using an oil painting by Johannes Vermeer: "A Lady Writing."

Graphic art for signature design by L.L. Diamond using an oil painting by Johannes Vermeer: “A Lady Writing.”

~~~

As can be seen on the sidebar of this blog, Then Comes Winter has been selected as a favourite on three top JAFF book blogs! YAY!

~~~

Please comment on this blog (below) at any time, or for today’s guest post, on Madame Gilflurt’s blog!

Mr. Darcy in the making: The Thrifty Regency Gentleman’s Costume

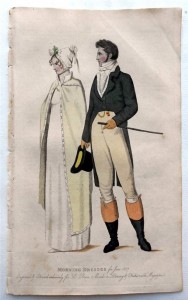
Beau Monde, 1807, Morning Dress

Beau Monde, 1807, Morning Dress

Mr. Suze used to bug me to let him read my Regency writing. I told him he’d have to read Jane Austen’s Pride and Prejudice first, so he’d understand it better. I didn’t expect him to actually read my favourite novel, but he did! What choice did I have but to share Alias Thomas Bennet with him? I was preparing to submit it to Meryton Press at the time, and he was a good final cold reader.

He became a big fan of my writing, and joined me to watch the A&E/BBC 1995 production of Pride and Prejudice. A good sport, he went along with me on half a dozen meet-ups of my online friends from A Happy Assembly while we were on vacation in Washington, Oregon, and California over several road trips.

When I told him I wanted to go to Louisville, KY for the JASNA AGM, he said I could go on my own; he’d had enough of Jane Austen events. Over time, he softened to say he’d join me and enjoy the city on his own while I was at the conference, and later, he agreed to dress in a Regency costume for the Saturday festivities. In May, my vintage and thrift shop trips to finalize my own costume included searches for his items. I quickly got the lay of the land.

For this post, I’ll speak to two items: the tailcoat and waistcoat. The rest of the costume will be seen in future posts.

I saw only three tailcoats in vintage and thrift stores, at $65 and $35, but two were too large and one, too small. There were no suitable vests for a waistcoat, even if I looked at size extra-large in Ladies’ wear. Mr. Suze is not a large man, and I thought if I did a good job, he’d be okay with this.

Please note these are sewing projects. The same result will not be easy to achieve with no-sew iron-on tape, and the fabric is too heavy for that product in any case.

Upcycling a garment into a Regency tailcoat
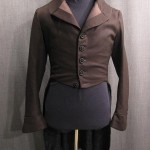
Coat, 1810, dark brown herringbone.
Coat, 1810, dark brown herringbone.

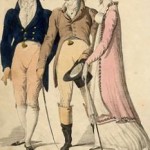
Le Beau Monde, 1807
Le Beau Monde, 1807

Regency tailcoat 1815, Metropolitan Museum of Art
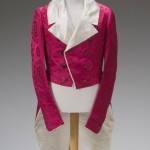
Regency tailcoat 1815, Metropolitan Museum of Art

Post-Regency example for fun! 1825-1830 dress coat

Post-Regency example for fun! 1825-1830 dress coat

Regency tailcoats were by no means all the same. They came in many colours, and some had interesting textures, as shown in these thumbnails, which can be enlarged if you click on them.
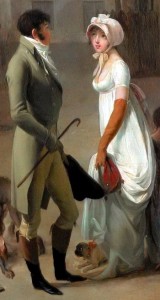
 

Louis-Léopold Boilly - The Arrival of a Stage-coach in the Courtyard of the Messageries (Detail), 1803.

Louis-Léopold Boilly – The Arrival of a Stage-coach in the Courtyard of the Messageries (Detail), 1803.

Both single and double-breasted designs were stylish, but double-breasted appears more frequently in the examples I could find, and I’ve been told they outnumbered single-breasted by about 2:1. Lapels tended to be wider, and the opening quite high in comparison to modern menswear.

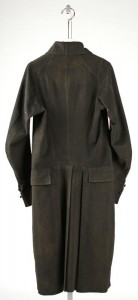
Many modern tuxedo tailcoats require slight modifications to straighten the bottom front to match the style of the early 19th Century. The Regency tailcoat has no back waist seams: each panel is one piece of fabric, whereas post-Regency, the seam at the waistline came into play, and continues in modern tailcoats.

Because I couldn’t easily find a used tailcoat in thrift shops, I looked to the Internet, where previous rental tuxedo coats are readily available at under $100. Problems that rule out some modern tuxedo tailcoats include trim such as velvet or satin that do not look Regency. Shawl collars or narrow lapels are common. Most are black, white, or grey. Black would do for a court suit or a formal ball, but the other two would not work, unless I decided to buy a white one and dye it the popular dark blue of the Regency.
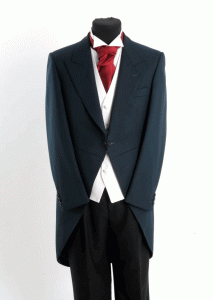
Modern morning coat, dark green wool, herringbone.
Modern morning coat, dark green wool, herringbone.

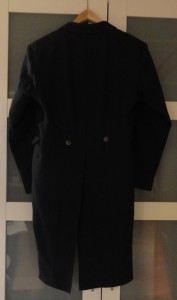
Back view of Regency tail coat to show the single panels of fabric, with no waist seams.

Back view of Regency tail coat to show the single panels of fabric, with no waist seams.

A wool morning coat in dark green, with a fine herringbone pattern and slightly wider lapels, caught my eye and got approval from Mr. Suze. Of course, he doesn’t know that Jane Austen fans love the idea of a green coat ever since Andrew Davies had Colin Firth choose it to ride into Lambton the day Elizabeth got her fateful letter from Jane!

This coat appeared to have no back waist seam in the photos online, but when it arrived, it did. Also, the collar was not self-lined, so it would have to stay down. Oh, well, we knew we were not going to be perfect by any stretch of the imagination, and it fit well, so that was a huge relief. It was advertised on eBay at £25, or $80 with shipping.
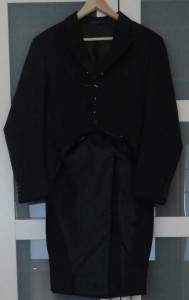
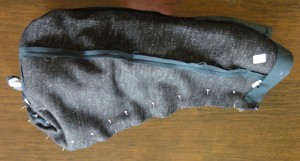
Green tailcoat after first cut of shape of front opening and tails.
Green tailcoat after first cut of shape of front opening and tails.

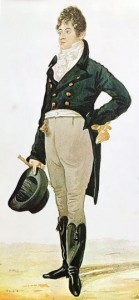
George "Beau" Brummell, watercolor by Richard Dighton, 1805.

George “Beau” Brummell, watercolor by Richard Dighton, 1805.

Mr. Suze is a bit particular about his clothing. His father was a menswear tailor at the Canadian institution of high-class shopping: Eaton’s. My husband is accustomed to a well-fitted, flattering suit in quality fabric, and that was my goal for the Regency tailcoat. We looked at numerous examples from museum pieces and fashion pages like Ackermann’s, and decided on a full curve at the waist, as opposed to a straighter line. A painting of Beau Brummel served as reference. The line was pinned while “my Beau” wore the coat, and the future wearer did a mirror check to approve it. To further achieve a Regency look, the lapels were pressed higher, and extra buttons are needed to suit this modification. The front of the cut coat is shown above, on the left.

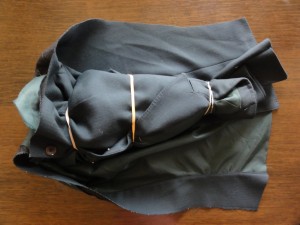
I re-applied the matching fabric facings to the underside of the new shape of the tails. To sew the new contour front edges together, I thought about pinning them under and top-stitching, but I opted to sew a normal seam with the fabric pinned right sides together. That meant I had to turn half the jacket inside out.folded and tied with elastics to sew right sides togetherpinned for sewing, all inside the taildetail of fake side pocket
Green tailcoat, back, final except buttons.

Green tailcoat, back, final except buttons.

I tied the upper portion together with elastic bands as shown and laid it inside along the length of the tail, where I’d opened the bottom hem. The tail was pinned right sides together over it all, and sewn with a 1/2″ seam. It was turned it right side out again by pulling it through the open bottom of the tail.

I did a test run with the narrower side before I was brave enough to photograph it for this blog!

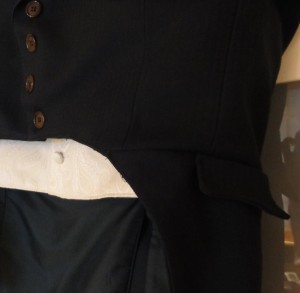
I used scraps of fabric to fake Regency by putting flaps that look like pockets at the sides of the jacket. Regency coats sometimes had a cuff, so if your modification allows more fabric, that’s another way to make it more authentic in appearance. Mine did not.

The Regency coat design didn’t always close, but boasted decorative buttons, and men wore them buttoned or unbuttoned, though I’d assume formal circumstances would demand a tightly-buttoned look. The buttons are plastic, and I have yet to purchase proper buttons for the tailcoat. As mentioned earlier, Regency menswear often had fabric-covered buttons in the same colour, though not always the same fabric as the garment. Regency coat fronts have buttons closer together, so my mockup has 4 buttons where the original suit had one.

My intention was self-covered buttons with a brass ring trim from Dressew, and I had enough extra fabric left for them. But I didn’t have enough buttons of the right size, and none of the stores in my city have the snap-on brass trim. I won’t be able to get to Dressew (in Vancouver, BC) prior to the JASNA conference, so I can’t use these buttons at this time.
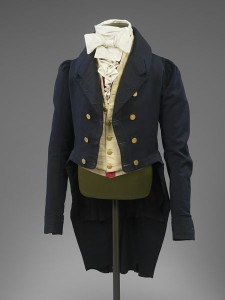
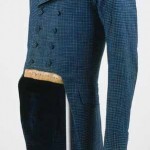
Suit, 1815-1820, The Victoria & Albert Museum.

Suit, 1815-1820, The Victoria & Albert Museum.

The alternatives are thread buttons, which are a lot of work I don’t have time for, and metallic buttons. Brass buttons were a must on blue coats in the Regency, and seen on other colours sometimes, too. The estimated cost for this tailcoat is $20 on sale. Some attractive steel buttons with an insignia will cost about $7 at Fabricland, so next shopping trip, I’ll purchase them.

Making a modern vest into a Regency waistcoat

The modification of a vest into a nice facsimile of a Regency waistcoat was an easy sewing project, once I found the suitable vest. Strange, since I was lamenting that I’d have to make this item from scratch!
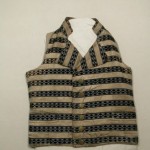
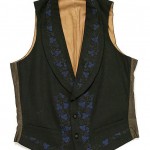
Waistcoat, 1810-20, National Trust Collections
Waistcoat, 1810-20, National Trust Collections

Waistcoat, early 19th century, British, wool and silk. 21" by 33", Metropolitan Museum of Art.

Waistcoat, early 19th century, British, wool and silk. 21″ by 33″, Metropolitan Museum of Art.

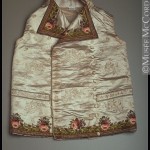
It’s not that Regency waistcoats are so limited in design that it’s impossible to find them: this clothing item was the pizazz in the man’s outfit. Almost limitless possibilities existed for colour and pattern, as seen in the set of thumbnails. Click to see larger images.

The most common fabric was silk, but cotton and linen were worn as well. Some boasted gorgeous detailed embroidery. Similar to the tailcoat, the waistcoat could be single- or double-breasted.
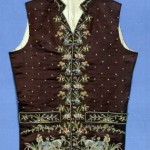
Waistcoat French or English, 1790–1810, Brooklyn Museum of Fine Arts. Note the detailed embroidery.
Waistcoat French or English, 1790–1810, Brooklyn Museum of Fine Arts. Note the detailed embroidery.

Waistcoat, 1805-1810, Mccord Museum, Montreal. Note the embroidery.

Waistcoat, 1805-1810, Mccord Museum, Montreal. Note the embroidery.

The trouble with modern vests is their simplicity. Plain, pin-striped, or herringbone wool or wool-like synthetics are as good as it gets for suit vests, which are difficult to find. Most thrift shop vests are casual, with zippers and fleece and plaid and quilting and such.

Regency vests usually had stand-up collars and lapels, too, which modern vests lack. The balance is that Regency vests were straight across at the bottom, so I knew I had a fabric source for the collar and/or lapels: that double V-shape on a dressy modern vest.
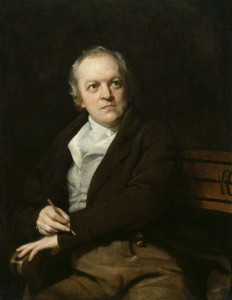
William Blake, by Thomas Phillips, oil on canvas, 1807.

William Blake, by Thomas Phillips, oil on canvas, 1807.

The internet, and used tuxedo rentals, offered more options in terms of colour and pattern, and the satin vests mimic the look of silk. Mr. Suze and I agreed on a paisley pattern for a fullback vest. It cost $11.99, and included a matching bow tie; the total was $25 by the time we paid for shipping.

He selected ivory since it best suited the green coat, compared to the bright colour palette otherwise available. The other colours would be great with a black or blue tailcoat. We had also noted that many of the waistcoats in paintings were white or ivory.

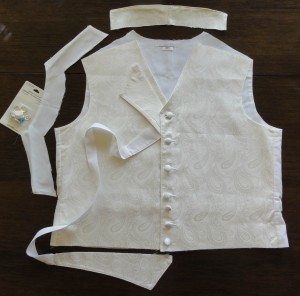
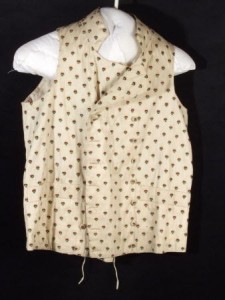
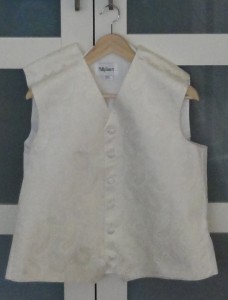
The vest was a bit on the big side, and I realized I could use that to my advantage, as I pinned it up at the shoulders to get extra fabric to make a short stand-up collar, plus raise the V of the neckline higher, to make it more Regency in appearance. The photos show it pinned up before the cut (left) and after the collar is made, but not attached, and the bottom is trimmed (right). Two extra buttons are on the bottom in the photo on the right, to show how it would look if more were added.Ivory paisley waistcoat, pinned for the cuts to the shouldersIvory paisley waistcoat, collar made, showing cut and location for lapel


Waistcoat, National Trust Inventory, 1790 - 1810, Cotton and silk, Chastleton House, Oxfordshire.

Waistcoat, National Trust Inventory, 1790 – 1810, Cotton and silk, Chastleton House, Oxfordshire.

Regency waistcoats sometimes had distinct lapels, but more often, the front panel rose to the collar above the button line, and that upper portion was propped open by the cravat. Unfortunately, when I removed the two Vs from the vest’s bottom front to straighten the line for a Regency look, I couldn’t put it on like the latter design, as it was lined in herringbone, the same as the back panel of the vest. The option was a small lapel.
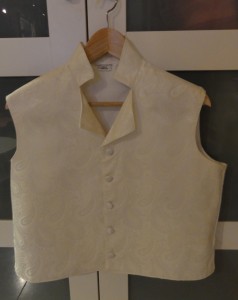
Ivory paisley waistcoat, final


If you have additional fabric, a detail that appears on some, but not all Regency waistcoats is a small pocket on each side, which can be faked with a piece of finished size of about 1-1/2″ by 5″. I tried to make them with what I had left, but they were too small.

This vest had matching satin-covered buttons, perfect for Regency. One was cut off with the bottom V, and there was one spare. Because Regency had lots of buttons, I’ll add more in between the current buttons if I have time after my other projects are complete for Louisville.

The two pieces put together look nice! There’s about 2″-3″ of waistcoat showing below the bottom of the waistline of the tailcoat, a fashionable length. The small lapel on the waistcoat fits neatly into the higher opening at the collar of the tailcoat. We’ll see the shirt ruffles and cravat fill that space in a future post!
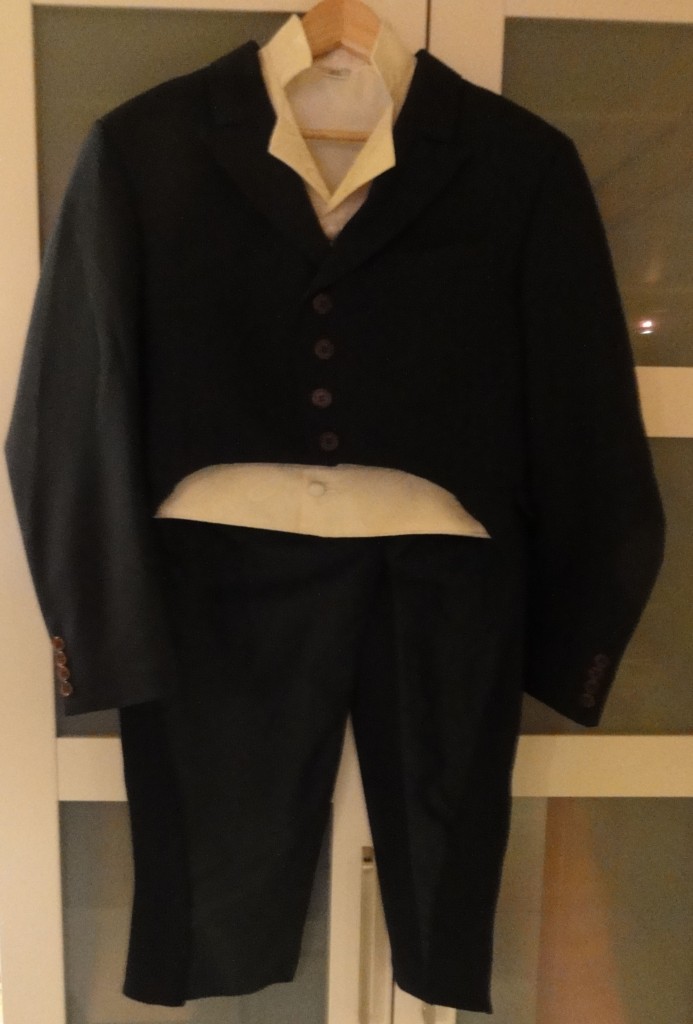
TSRCE for Gentlemen: Green herringbone tailcoat and ivory paisley waistcoat.
TSRCE for Gentlemen: Green herringbone tailcoat and ivory paisley waistcoat.

Next post: Who knows? My time has become filled with editing for myself and a fellow author, fitness programs that stopped for August, as well as new activities.

I’m scrambling to complete the most important Regency costume projects now, as time is running out. The balance of Mr. Suze’s costume will come some time this month, and I have lots of little projects I want to finish for Louisville. If I can manage to write something to accompany photos, that will be the topic for upcoming posts!

My Regency Costume Cheat Sheet, by Suzan Lauder, Regency Romance Author

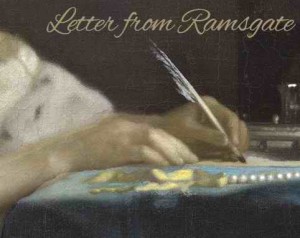
Example of Regency letter-writing by http://toracellie.blogspot.ca

With 17 verbose posts full of images, the challenge of an Absolute Basic Check List was a bit daunting. How does one summarize a lady’s needs for a full Regency costume suitable to wear at a function where people are knowledgeable about the era? Actually, some of the links shared at the end of this post do a pretty good job of it.

For procuring and creating the costume parts, however, the individual blog posts in the Thrift Shop Regency Costume Experiment series will be of much more use. That’s because of the numerous images of step-by-step construction of the re-purposed or upcycled items, museum examples of actual clothing from the Regency era, period fashion magazine sketches, and paintings of people in the era. There are also topic-specific links and how-to videos in many areas.

This post also has a number of overview links, links with more images of museum and purpose-made Regency wear, and a sort of “next steps” list for some readers: how-to links that require sewing skills.

For the Checklist, I’ve noted price ranges:

  • Lowest prices listed are the minimum you would pay for a good-quality finished version of the item (new, gently used, or repurposed/upcycled using minimum crafting or sewing skills), based on my experience with the guidelines set out for the Thrift Shop Regency Costume Experiment.
  • If there is a zero instead of a bottom price, it’s because this is an item you’d probably choose only if you already had one, and if purchasing, another choice on the list is preferable.
  • Highest prices are for purchase of a period-correct, attractive, good-quality (but not always top end), brand new item from a good vendor, custom-made to fit you in the case of clothing.
  • If there is a question mark instead of a price, it means the item is of such a personal nature, the top end cost is based on the buyer’s evaluation.
  • If you have the item on hand, it will cost nothing.
  • Most items can be obtained in the lower half of the price range.

Footwear

  • Simple ballet flats ($5-$20)
    • Fully enclosed (pump).
    • Round, pointed, or square toe.
    • Slim sole, separate heel under 1” high (not wedge), and any heel over ¼” should be a flared kitten heel.
    • Silk-look fabric, fine cotton, or soft leather.
    • Any colour except for black, dark brown. Wide stripes and large dots are fine.
    • No elastic, rubber, jute or coarse cotton, large trim items, folded leather detail, external seams, etc.
    • Ribbon ties up the leg with flat soles are optional (good for keeping shoes on while dancing).
    • Simple trim is optional.

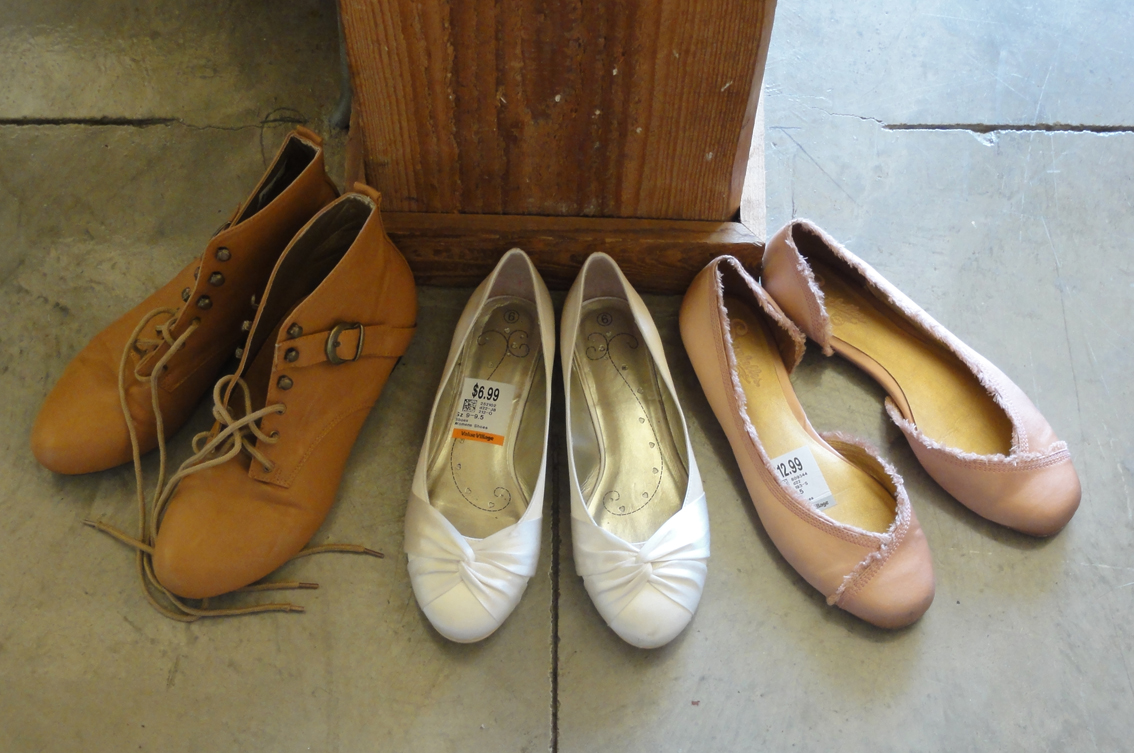
      My second set of footwear for potential Regency Costumes: a pair of half-boots and two pairs of satin ballet flat shoes. The boots will have the buckle removed (perhaps for a man’s shoes!) and get dressed up with a ribbon and fabric rose across the base of the toes. The white and pink shoes will be cleaned, then the white will get white ribbons to lace up the legs. The pink shoes will have the fringe covered with a ribbon and the cut-away area disguised.

  • For day wear, flat, lace-up half-boots ($18-$155).
    • 8′-12″ tall, round toe, slim sole and ¼” heel maximum.
    • Light colours.
    • Softer leather, cotton, or denim.
  • Orthotics may fit if you buy a half size larger than normal.
  • Post: Put on Your Dancing Shoes!

Stockings

High-lift foundation garment for “the girls”

  • Custom made Regency short stays ($70-$190), for C cup and under, OR
  • Custom made Regency full corset ($95-$380), for D cup and higher, OR
  • Push-up bustier or modern corset that’s low cut and not too cinched in the waist ($0-?), OR
  • Well-fitted (or slightly small) demi-cup, push-up bra, such as a Balconette. ($20-$?), plus a waist cincher if needed for extra lift.
  • Post: Lift and Separate!

Chemise and petticoats or pantalettes

  • Authentic, custom-made, new, Regency undergarments from specialty stores or Etsy:

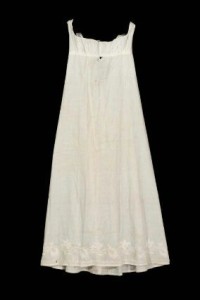
    Petticoat, early 19th c, American, Boston Museum of Fine Arts

    • Chemise ($45-$100) (worn under the corset for comfort), and
    • Petticoats ($35-90) or pantalettes ($35) (to “fluff out” the gown so it won’t stick between your legs), OR
  • In place of all of the above:
    • A floor-length full slip or nightgown, deep cut to match neckline of stays/corset/bra ($7-$38), or
    • A floor-length half-slip pinned to base of bra ($7-$20), or
    • Plain, lightweight, light-coloured cotton capris or pajama pants, or pants liners. ($5-$20), and
    • A low-cut camisole if needed with the last two items ($5-$25).
    • Super-fine woven cotton is best for comfort, but polyester will work.
  • Post: Twenty Layers of Unmentionables and no Panties!

Basic empire waist gown ($38-$400)no information

  • Floor length, empire waist.
  • Straight (non-fitted) skirt, flat in front and gathered in back.
  • Short, puffed sleeves and wide, low neckline for a dinner/evening/ball gown; long sleeves and high neckline for morning gown (to 4pm).
  • Simple-print finely-woven cotton, linen, or percale (not black-based), smooth silk, organdy, or synthetics that are good facsimiles.
  • 2m (6’-7’) by 1”-2” ribbon tied under the bust.
  • Don’t buy a pre-made “Regency” gown for under $100 on Etsy, as most are terrible!
  • $200-$400 should buy a nice, authentic, custom-made gown.1812 costume parisien
  • Posts: Floor length, Empire waist, and what else? Anne Shirley? (description of a Regency gown and examples); A Morning Gown plus some Frankenstein Gown Parts (what aspects of vintage gown styles to avoid; my gown purchases; morning gown modification from 80’s vintage); Were Regency gowns worn on the Titanic? (purchase tips for new handmade Regency gown; what to look for in a vintage gown to re-purpose).

Regency Hair Style

  • Centre parted, with ringlets around the face; fancy up-do with bun and curls or braids, worn close to the head. (How-to and video links in posts.)
  • If hair is too short for a fancy up-do, a hairpiece (bun maker, bun hair, and 1-3 braids for $10-$30), fall ($0-$50), wig ($0-$92), or a turban are options.
  • Ringlets can be purchased or taken from a doll or fall ($7-$60) and held on by a bandeau, or flat pin curls can be made.
  • For very short hair, comb forward in a “Titus” and hold in place with a ribbon, bandeau, or similar decorative item.
  • If desired, trim with ribbon, lace, bandeau, braided fillet, small silk flowers, feathers, tiara, diadem, combs, etc. ($0-?)
  • Posts: Faking Purdy Locks: The Modern Hairstyle goes Regency;
    Regency Bad Hair Day? Wrap a Turban! (my clip-on fall in an updo at end of post).

Headwear

  • Bonnet or hat ($6-$70)
    • Preferable if your hair looks nice when you remove your hat indoors.
    • Brim is sturdy, not floppy, and straw or satin-type fabric.
    • Capote hat or bonnet can be made from a wrap-around straw visor or hat, a 20” diameter simple, smooth, silk-like fabric cover, and a ribbon.
    • A good hat base is the narrower brim straw picture hat at Michaels, $5.
    • Add 1.5′-2.5′ of 1″-1.5” ribbon to make ties for a bonnet.
    • If desired, trim with several bunches of small fabric flowers and greenery; larger fabric roses; an ostrich, peacock, or other feather and brooch/medallion; hat pin; or combination, or other designs based on Regency sketches.

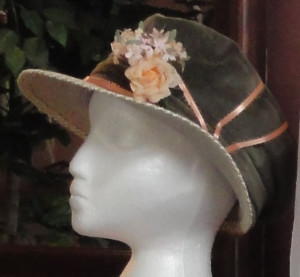
      Mock up of design of green and straw visor with green velvet cap.

      Mock up of design of green and straw visor with green velvet cap.

    • A nice range of new items can be found at the upper half of the price range above. Fancy items are double the top price listed here.
    • Posts: The Thrifty Regency Hat-trick! (Capote hat from visor and dinner napkin for under $10); How-to Times Two: Variations on Dressing up a Bonnet (The Pink Hat); Special Headwear for the Grown-up Lady (museum hat examples at the end of the post).
  • Lace cap ($2-$40)
    • Optional; for married or single-and-proud-of-it women only.
    • Similar to the idea of a turban, this will hide hair for women who can’t manage a Regency hair style and will be indoors where they must remove their hat.
    • Can be made from super-fine white cotton and/or fine whitework lace items such as doilies, handkerchiefs, curtains, cushion/pillow covers, or purchased applique items and ribbon.
    • Post: Special Headwear for the Grown-up Lady
  • Turban ($15-$40)
    • An alternative to the hat or bonnet that does not have to be removed when you go indoors.
    • A nice choice for evening wear if you’re unable to create an up-do.
    • Twist 2-3 silk or satin scarves (how-to and video links on this blog), or a length of silk or satin fabric (could be a table or dresser runner, a pashmina, small shawl or wrap) about 15″-20” wide and 40” long about your head behind ringlets; secure with safety pins and bobby pins.
    • A brimless, soft, natural fabric hat with a scarf or fabric wound around its base in textured waves works well also.
    • Fringe or ends with some type of embellishment or trim are recommended, and can be left to droop on one side.
    • Braid or cord can be woven around with turban cloth.
    • Add feathers, foliage, brooch, medallion, hat pin, or similar items.
    • Post: Regency Bad Hair Day? Wrap a Turban!

Jewelry ($0-?)

  • Simplest would be a medium-sized “jeweled” cross on a chain.
  • More elaborate choices include “jeweled” necklaces, armlets, bracelets, brooches, rings, earrings, and combs.
  • Almost all stones are are acceptable, but they should be cut stones. Costume jewelry is fine if it doesn’t look plastic.
  • Cameos and red coral were popular.
  • Drop earrings were on hooks not studs; clasped or open hooks are period.
  • Lover’s eye brooches were fashionable.
  • Post: Shiny things expose my inner crow!
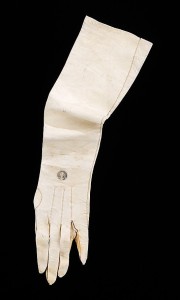
Regency Opera Gloves, kid, Metropolitan Museum of Arts

Regency Opera Gloves, kid, Metropolitan Museum of Arts

Gloves

  • Cotton, silk, or kid leather.
  • Short or optional for day wear ($5-$25).
  • Evening gloves go above the elbow: 24”-31″ (opera-length) with a loose-fitted upper arm are period-correct ($8-$32 for synthetic; $50-$200 for natural materials); 19” minimum.
  • If synthetic opera gloves are worn, buy a matte and not shiny satin finish, as it looks fake.
  • Any colour but black. White and softer colours were most common.
  • Post: I never did mind about the little things…

Fan ($1-$10)

  • Optional, but necessary on a warm day or in a ballroom.
  • Folding hand fan.
  • Avoid plastic and obvious synthetic materials for the sticks and guards.
  • If the fan has any scenes on the leaves, they should be English.
  • Any colour. Trim can include feathers, sequins, metallic, mother-of-pearl.
  • Post: I never did mind about the little things…

Parasol ($20-$200)

  • Optional if your face is protected from the sun by a bonnet or hat, or you are in a ballroom.
  • Eight or fewer ribs is Regency-appropriate, but who’s counting? As long as it’s not a dozen!
  • Pagoda shapes were most common, but round parasols were also in use.
  • A shallow curve is fine, but avoid flat Asian-style parasols.
  • The fabric should look like silk or cotton if possible.
    • Patterns on the fabric itself were rare, and would be a wide stripe or large dot or similar.
    • Fabric on vintage pagoda parasols from the early 20th century might not be very close to a Regency look.
    • Do not buy a Battenburg lace parasol, as they’re Victorian.
  • Most trim was on the periphery of the parasol: fringe (almost any kind), tassels, or lace. Some had embroidery.
  • Any colour but black.
  • Post: I never did mind about the little things…

Reticule ($5-$65)

  • Small drawstring bag (under 8” by 8”).
  • Almost any colour or shape works, in a fine fabric, beaded, netted, or knitted.
  • Avoid printed satin, most open lace or crocheted styles, eyelet lace, or leather.
  • Beads or sequins should not look plastic.
  • No zipper, but metal snap clasp or gate closures are fine.
  • The smooth silk bat-wing or moon reticules on Etsy are overpriced ($15-$22) for what you’re getting. The beaded and embroidered ones are often very good deals.
  • Post: All the pretty little purses

~~~

A few good overview web sites for a Regency costume:

These sites are summaries of what we’ve learned during the 17 previous posts in the Thrift Shop Regency Costume Experiment blog series, and I refer to them regularly myself.

Best site (pdf version) for showing the details one should search for: It’s All in the Details: Making an early 19th Century Ball Gown, by Hope Greenberg.

Best site (pdf version) for applying the other to real life: Miss Lisa Brown’s Guide to Dressing for a Regency Ball—Ladies’ Edition.

Less useful, but detailed, with lots of drawings and paintings is Wikipedia’s 1795-1820 in Western fashion.

An interesting article explaining Regency fashions while referencing the movie adaptations of Pride and Prejudice. Dressing for the Netherfield Ball in Pride and Prejudice: Regency Fashion.

Lots of links for buying stuff new can be found at Regency Attire: Purchasing Your Costume by Regency Dances.org  Not all these items are accurate, as they try to cover numerous costuming situations.

Sites for examples of Regency gowns:

Museum gowns:
Real people wore these, so they’re a bit more accurate than fashion plates such as Ackermann’s Repository for Art, La Belle Assemblée, or Costume Parisién.
The Vintage Thimble tumblr
Kyoto Costume Museum Archives 1800s-1810s

Ideas from others’ modern interpretations:
The JASNA AGM Regency Ball in Brooklyn, 2012. Most of these are probably handmade from modern reproduction patterns. There will be non-Regency clothing represented as well, as not everyone is immune to the marketing of those selling the Titanic/Downton Abbey gowns.
The Jane Austen Festival in Bath is a similar situation.

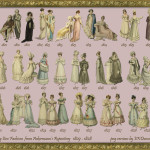
Erica Duncan's montage of Regency fashion plates for each year between 1809 to 1828.  Original art from Ackermann's Repository for Arts. Click on thumbnail for much larger image.

Erica Duncan’s montage of Regency fashion plates for each year between 1809 to 1828.
Original art from Ackermann’s Repository for Arts.
Click on thumbnail for much larger image.

Pinterest has a lot of good images, but I’d suggest searches by clothing article rather than just “Regency,” as the number is overwhelming even then.The site will often offer sub-headings at that point, too. This is an example of a huge board. Take care, as some images are modern and may contain misinformation; that’s why I like to stick to museum examples. But sometimes those are mis-dated by some pinner, too. It won’t be long before you’re picking them out yourself, though, as there’s nothing like 50 Regency gowns compared to one 1830’s gown. Warning: Pinterest is like crack.

Resources for making your own gown if you can sew a bit:

A video tutorial from Follies Past shows how to make a Regency ladies’ gown from a bridesmaid dress, a set of curtains, and a lace blouse. This requires beginner sewing skills.

Old Petticoat Shop offers their Regency Dress Online Class for $97 plus fabric, notions, etc.

My Regency Journey from Tea in a Teacup goes through creation of an entire Regency costume, but made from scratch.

Diary of a Mantua Maker has two tutorials on fitting a Regency gown: the first shows common mistakes and the second, sleeve and bodice fitting.

Sense and Sensibility Patterns has a number of videos with tips on how to fit your gown or modify the design of a pattern, as well as some sewing techniques.

~~~

Update: A nice little summary for evening wear, with some of the wonderful descriptions from The Lady’s Magazine and La Belle Assemblée: Mimi Matthews’ Elizabeth Bennet, La Belle Assemblée, and Early 19th Century Fashion.

~~~

turban 1 croppedNEXT POST: The grand finale! Photos of my completed costume, plus an overview of my learning experience with the “experiment” and brief notes on what the summer bonus posts will look like.

Shiny things expose my inner crow!

I was second last in the gift draw. I took the brown paper bag, reached my hand in, and felt around. Unable to discern by touch what the small items were, I grasped one at random. When I extracted my hand and opened it, I found BIG SPARKLE.

It turned out to be a key chain, roughly four inches long, and gaudy doesn’t begin to communicate its assault on my eyes. About 8 huge plastic gems hung in a cluster from large gold links, and below them dangled a tiny metal purse that would open were it not linked into the rest. When it moved even a tiny bit, it rattled. Yeah, I thought, it should have made the warning sound before I pulled it out of the bag.

I peered at the magnetic post-it grocery list note pad another participant won and felt the world was truly unfair. Yet when I examined the face of every other person, I realized it would not be in good form to say so. No one seemed to think my gift was the most awful, tasteless joke that was ever played upon someone. The sneer twitching at the corner of my lip was held in check, and instead, I said, “Oh, bling!” in an affected tone.

Thing is, I can’t bear to throw the thing away. I keep trying to think of someone to give it to who would appreciate it, or a way to give it some sort of useful employment. It moves from container to container as a “potential” and most recently, wound up in my kit of beads and baubles for my Regency costume. But once again, it’s proven to itself as a useless, gaudy thing. It has a few friends in that bag, but none as sparkly.

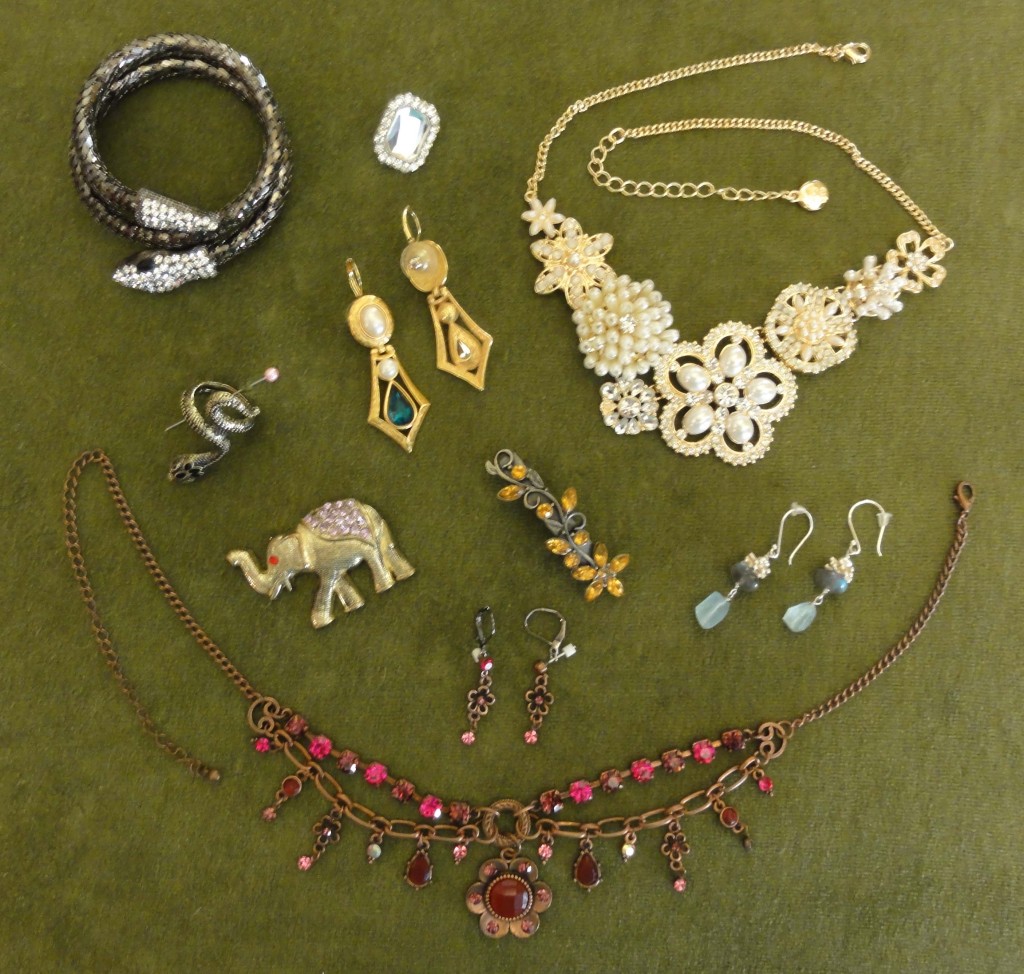
Like the crow, we’re all attracted to sparkly, otherwise there would never have been a gold rush or jewel thieves, and MJ’s glove would be boring. Many like to look at beautiful jewelry but don’t wear it. What I choose tends to be simple but unique. When I checked my own stash for potential items for my Regency costume, I found a few items that looked right to me. Then I did my research, and realized they were close, but some needed help. It was not impossible.my jewelry

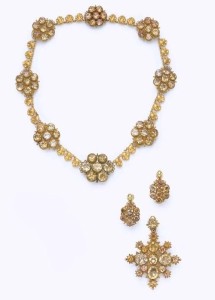
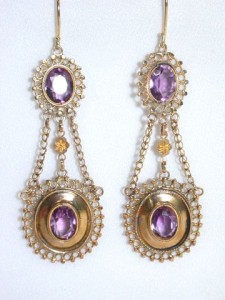
Citrine jewelry 1820

Citrine jewelry 1820

Necklace 41.9 cm long, circa 1810.

Necklace 41.9 cm long, circa 1810.

In addition, I saw things in the period examples that I liked but would not normally consider wearing. Just as I’m not one to wear a hat with feathers, they became desirable when thought of as part of a costume, an act. A sale purchase from Joe Fresh was added to the small group of costume items of my own: a “diamond and freshwater pearl” choker in a floral pattern, as seen at the top of the photo above.

Numerous perusals of discount and second-hand store costume jewelry racks did not offer a suitable pair of ear-bobs to go with it. Anything close was on studs, and in the Regency, stud-backed earrings didn’t exist; they were all hung on wire hooks. I knew a simple way to modify them, and even had the right earring parts—years ago, I made earrings, hence, my experience with cam-shaped circles of metal. But I couldn’t wear the ones in my stash, as they were cheap gold imitations. Like many, I have a nickel allergy, and most inexpensive jewelry contains nickel as a hardener. I can wear costume jewelry for short periods of time, but my skin becomes inflamed easily.

Earrings "The Three Graces" 1810

Earrings “The Three Graces” 1810

Last week, I found some lead and nickel free earring parts on a two-for-one sale at a fabric store. Two pairs of earrings I owned were modified using an earring snap hook and a very small split ring. The split ring is like a super-tiny version of a key ring, and similar to work with, but saves using needle-nose pliers and making a cam out of a loop, or accidentally leaving the tiniest gap and then losing the earring, both of which are my constant experience.

I clamped the earring to the split ring, using a plastic back in one case so it was less visible (I’ve left one loose so you can see the construction), and a large back in the other, due to the weight and shape of the earring. I also have a new pair of labradorite and aquamarine earrings on silver hooks, a gift from my husband that I hoped would be appropriate. However, I could not find any examples of a rough-cut stone, so they won’t be part of the Regency costume. No big deal, since they’ll get plenty of showtime on regular days.

There’s also a leaf-themed barrette and a purple-jewelled elephant that you’ve already seen with turban-making, and they’ve become brooches. The elephant came from a card holder, and is symbolic of the final scene in my latest story (though the blog has been taking my writing time!), Letter from Ramsgate, which will be posted at A Happy Assembly. (If you’ve never been there, it’s a Jane Austen fan site, full of Austen-inspired fiction and discussion threads. Registration is required, but membership is free. Many published authors post their stories there first, and free unedited versions often still remain, alongside many unpublished and often better stories.)

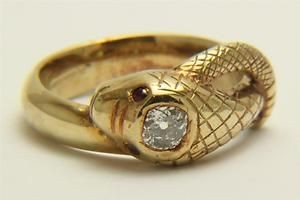
A Magnificent Georgian 0.75ct Old Cut Diamond Snake Ring In 18ct Gold Circa 1800

A Magnificent Georgian 0.75ct Old Cut Diamond Snake Ring In 18ct Gold Circa 1800

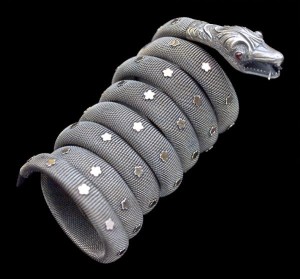
But what’s with the snake stuff in my collection? This was one of the things that I found amazing and fascinating when I started to pay attention to Regency jewelry. As mentioned before, floral patterns were popular, as were crosses made with elongated stones, astronomical symbolism like moon and star themes, and the serpent. Hands on bracelets were another theme that I found unusual. I’ve selected a few examples for you to compare.

My snakes were $1 for the ring at a thrift store and $12 for the bracelet on sale at a drugstore. I used to have a brooch with the moon and stars that I gave to charity years ago, so maybe you still have one lurking about!

Silver mesh snake bracelet with garnet eyes. French c1800. Tadema Gallery.

Silver mesh snake bracelet with garnet eyes. French c1800. Tadema Gallery.

A ninenteenth-century carved coral bracelet, formed as a coiled serpent with gold-set emerald eyes; the snake biting its tail is a symbol of eternity.

A ninenteenth-century carved coral bracelet, formed as a coiled serpent with gold-set emerald eyes; the snake biting its tail is a symbol of eternity.

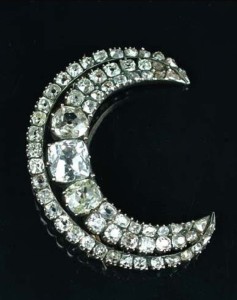
A Georgian diamond crescent brooch, diameter 4.2cm,  circa 1800

A Georgian diamond crescent brooch, diameter 4.2cm, circa 1800

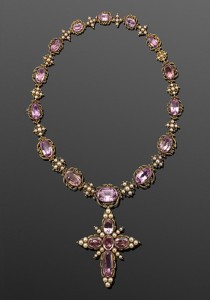
Georgian Foil-backed Pink Topaz and Pearl Riviere with Cross Pendant, circa 1820

Georgian Foil-backed Pink Topaz and Pearl Riviere with Cross Pendant, circa 1820

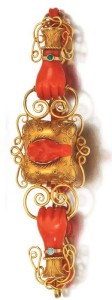
Gold and coral bracelet, length 185mm, early 19th century.

Gold and coral bracelet, length 185mm, early 19th century.


The square-cut stone with its ring of “diamonds” came from a pair of gloves; one was lost, but this one will clamp over my own modest ring. It was not uncommon to wear costume jewelry. Paste and real stones were seen in many shapes, as were pearls of all types. Turquoise and red coral were also popular, the latter seen in one of the snakes and in many bead necklaces of the time. Multiple strands tied together with stones were an interesting design seen on several pieces.

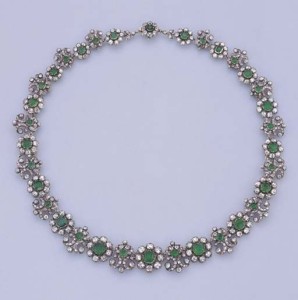
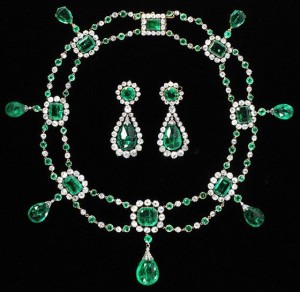
Faceted table-cut emeralds in borders of brilliant-cut diamonds; briolette emerald drops; open-set in gold and silver, 1806

Faceted table-cut emeralds in borders of brilliant-cut diamonds; briolette emerald drops; open-set in gold and silver, 1806

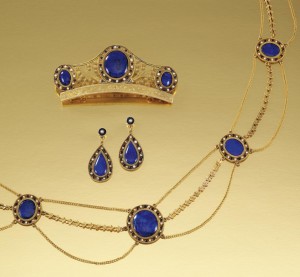
Gold, enamel, seed pearl, and lapis lazuli parure consisting of  comb, three strand necklace, and ear-bobs, circa 1810.

Gold, enamel, seed pearl, and lapis lazuli parure consisting of comb, three strand necklace, and ear-bobs, circa 1810.


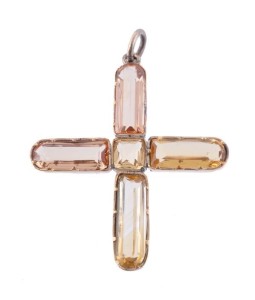
Wealthy women wore more elaborate jewels, and people of more modest means may only wear a pendant on a chain, like the topaz crosses Jane and Cassandra Austen wore, a gift from their sailor brother Charles. In Mansfield Park, Austen included a plot point where Fanny Price is given a similar amber cross from her brother William, and Mary Crawford charms Fanny with a gift of a chain to wear it with. You can read more about it in the article “A Very Pretty Amber Cross.”

Topaz and citrine cross, circa 1820

Topaz and citrine cross, circa 1820

The costumers for the A&E/BBC Pride and Prejudice series in 1995 had Elizabeth and Jane Bennet wearing crosses like Jane and Cassandra Austen’s, but with red stones that many viewers have imagined as garnet or ruby.

When deciding on your jewelry, make sure you’re not wearing a silk gown with no jewels, or a cotton one along with too many large stones.

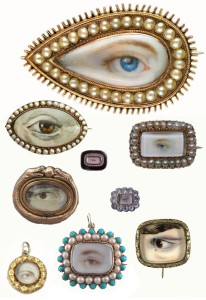
Various "lovers eye" pieces of jewelry.

Various “lovers eye” pieces of jewelry.

Romantic themes were played out in the “lover’s eye,” a miniature painting set in a brooch, pendant, or ring. If you’re an artist, this would be a cool thing to reproduce on an old brooch, locket, compact, etc.

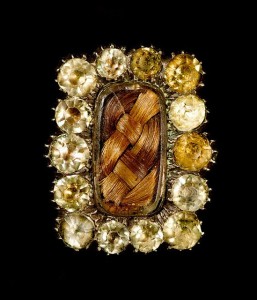
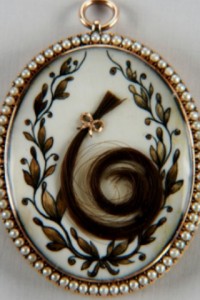
Pieces containing strands of hair were often worn as a sign of mourning.

Mourning brooch with paste jewels, circa 1800

Mourning brooch with paste jewels, circa 1800

Georgian-era seed-pearl-surrounded locket with a lock of hair.

Georgian-era seed-pearl-surrounded locket with a lock of hair.

Pendants, chokers, bracelets, rings, arm-bands, ear-bobs, as well as hair jewelry like combs, tiaras, or diadems would be part of the essential accessories of the costume.

Not for the faint of heart crafter, the Mistress of Disguise shows how to make a Regency diadem from used lamp parts! No sewing necessary, but soldering or hot glue is part of the the process. I’ll pass, but I can look at all the pretty, shiny things!

~~~

NEXT POST: Must-have Regency accessories are gloves, and most ladies want a fan for cooling in a candle- and ton-filled ballroom. To round out that post, because one of my signature expressions is “Parasol in a Ballroom,” I’m including the parasol I purchased, and I’ll try to make all three look Regency. These ones are much harder than some of the others!

~~~

While it has nothing to do with this blog series or the Regency, today I’m giving a shout out to an upcycler from Israel, Urban Raven, who makes jewelry from old phone tokens, computer chips, and many other items.

~~~

I’m looking (cross that out) begging for feedback. If anyone has seen any areas of improvement for this blog series, please forward them to me. As I’ve said on multiple occasions in the past, I’m new to this, and may have mistaken any aspect of the Regency costume based on clues that I misinterpreted. In addition, I may not have communicated something as well as you would have liked. Any help is appreciated!

~~~

I’m officially signed up for the JASNA AGM in Louisville, KY in October! There are still a limited number of registrations left. I’ll have some give-aways to hand out to followers of my blog while I’m there, so pay attention for clues!

Lift and Separate!

Nothing destroys a Regency look faster than droopy boobage—it’s better suited to activities with pot and daisy-weaving involved. The Regency bodice demands softness on top rather than on the bottom, and the opposite will be noticed, because the pretty ribbon you chose for your Regency “waist” will be obscured. Why wear a nice gown and fail to make sure “the girls” sit like queens?

Corsets and Stays:

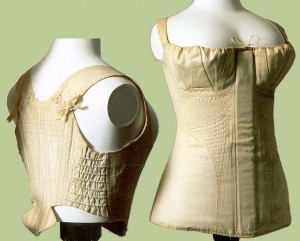
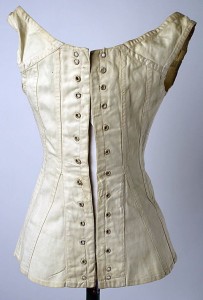
Short stays and corset from the Met museum, courtesy "Jane Austen's World"

Short stays and corset from the Met museum, courtesy “Jane Austen’s World”

This is one of the most important parts of your costume: to get the proper shape under the bodice of those high-waisted, low-cut gowns. You should wear your corset—or whatever alternative you choose—when trying on potential gowns, so this foundation garment is a procurement priority.

The Regency stays or corsets have a very specific goal: elevate. The idea is to get “the girls” so high you’d pass the pencil test with a whole box of HB’s. That’s where the “waistband” and ribbon of your empire gown will fit. The bottom of the breast is slightly flattened, as the softness is transferred to the top.

Many younger women will identify with women’s shapes in Austenesque artwork and movies because they already wear a push-up bra, and recognize the shape the Regency short stays (that fit like a longline bra) or Regency corset (fits to the waist or lower for more support) create. Michele Reed, the publisher of Meryton Press, swears a well-fitted Regency corset is quite comfortable, and if you were leaning in the direction of authenticity, that’s encouraging. If you’re a Nervous Nellie about exposing the tops of “the girls,” have a quick look at the BBC/A&E production of Pride and Prejudice from 1995—it’s a lovely look on anyone!

crossover stays kyoto

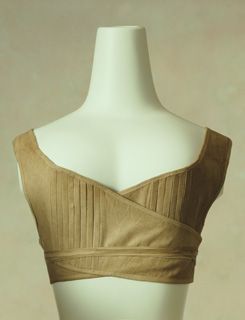
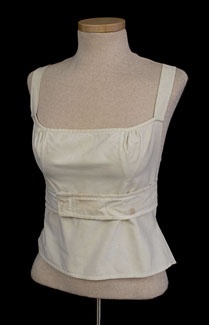
Wrap around brassiere-type Regency stays from the Kyoto museum.

Regency short stays are fine if your bra size is under C cup. At $65 to $170 custom-made, the more costly of these use additional personal measurements for a better fit, use better fabric, have breast gussets and extra boning, and are lined for comfort. The bra-like wrap stays, as seen in the Kyoto museum, can be custom-made for you—at $275! Ouch! I’d rather invest in my gown.

Lower-priced short stays on vendor sites such as Etsy appear well-made, if a simple design, making them a good bargain if your breasts don’t need much support. We’ll discuss the chemise later in the blog, but it can be worn underneath for comfort. A similar alternative is the bodiced petticoat, new and custom-made for $90. This is like simple stays, chemise, and petticoats in one garment.

Front view, 1811 corset, Met Museum

Front view, 1811 corset, Met Museum

Back view, 1811 corset, Met Museum

Back view, 1811 corset, Met Museum

According to Regency undergarment seamstresses, a corset is a better choice if you wear a D cup or larger. A bonus is that a longer line will aid those who are concerned about the appearance of their midriff under the gown’s flat-fronted skirt.

Transitional or long stays, or a Regency corset, will set you back $50 to $375; $75-$330 for plus-sized. Reasons for price variations include the length of the corset—though some transitional corsets are dearer than some longer ones, due to complexity of design—and the comments for stays above. Some cheaper corsets and long stays have boning instead of the important wooden busk, and the differences in boning are far more obvious over the longer length.

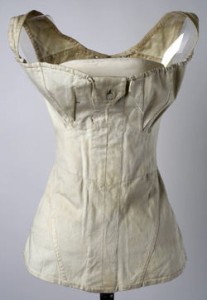
Corset similar to less expensive styles. 1810-20

Corset similar to less expensive styles. 1810-20

If you’re larger, you should count on spending more, because the cheap ones will collapse. Gussets are necessary on a larger breast, and the complex boning of a dearer corset can help a great deal with a slimmer look.

With intermediate sewing skills, you can make your own. Patterns are common at about $20-$30, and kits of the hard-to-find materials are $70, but this is not a beginner sewing project. Some patterns include the important wooden busk (about $7 on its own) that sits along the centre front to separate “the girls;” others have patterns for other Regency undergarments. Vendors for baleen, plastic, or steel boning are available, though heavy cable ties (zip ties) are a good alternative, and you can get them at a hardware or dollar store. Online resources show how to fit a Regency corset. For those wearing a C-cup and lower, the Kyoto museum brassiere-like stays look easier to make.

The Budget Alternatives:

If you balk at the price for proper Regency support, and were tempted to buy a modern busked/boned corset from a lingerie store instead, DON’T. Most are the wrong shape for Regency: too cinched in the waist and wide in the hips and breasts, not enough lift in the breasts, and too much breast coverage!

Consider wearing a bra instead—but only if it provides the right look and fit. The bra must provide super-high lift without cleavage; your breasts must still be separated. To accommodate the wide, low ball gown necklines, the shoulder straps should be wide-spaced across the chest, near the shoulders, and the cups must be low-cut to show a bit of roundness on top. A near-horizontal cup top is necessary if you plan to match a squared off neckline of the P&P era.

ti-amo-light-cream-push-up-bra-by-gorsenia small

lavinia smalllane bryant 3 smallLeonisa-011789-4 small

The balconette (balconet, balcony) bra and many push-up styles of bra have the right shape, plus you’ll have a pretty bra to wear with other things, too! It’s sometimes called a t-shirt bra or demi-bra, but beware, sometimes these don’t have the wide-set straps or lower-cut horizontal tops—they’re just a seamless push-up bra.

I bought a pair of well-fitting balconette bras at an average lingerie store on sale for $55 for both. I wear 32-34F, so this is a good buy compared to a bra in a high-quality brand. The ones in the small photos vary from $17 to $48, the large photo is $64.

How to make sure your bra shape is right for Regency:

If you’ve never been fitted for a bra, get fitted first!* It’s usually free at lingerie and better department stores.

Once you know your size, you could consider trying on a bra one cup or band size smaller to see if you get more lift. You don’t want cleavage or four breasts (where the bra top edge cuts into the breast), just lots of lift. If you don’t like it, go back to your regular size—it didn’t work for me. Once you’ve made your purchase, tighten the straps as much as you can without discomfort.

If you wear a very large cup and/or have bottom-weighted,** menopausal breasts like me, you may still have a bit of softness on the bottom. Midriff shapewear, such as a spandex open bust camisole or waist cincher, can be worn slightly over the base of the breast to flatten, it as well as your midriff. I found a $5.50 straight-sided boned waist shaper from the WiN (Women in Need) charity vintage and thrift store.

Additional choices:

longline balconet from lane bryant smallSome longline bras or bustiers can work, too, if the garment has a lot of lift and breast separation, ideally with boning. You have to be ready to cut off the top half of the cup and finish the cut edge, so the ones in the backs of your drawers are preferable to buying new.***

Make sure the waist is natural and not too cinched, the cup lifts very high and covers just over half your breast, and the straps are set wide. You can remove the straps and safety pin them wider if necessary.

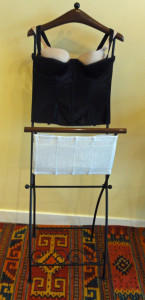
My balconette bra, bustier, and waist cincher.

My balconette bra, bustier, and waist cincher.

I’ve taken a 90’s bustier from before I lost weight, turned the too-large soft cups inside (almost in half) then moved the removable straps. This gave extra lift and opened up the top of the bra portion. I’ll need a light-coloured slip or camisole to cover to hide the black under light dresses, and that’s covered in a later post.

If, after all this, you like your old bra and don’t like shapewear, I understand. Tighten the straps on your old bra; it will help. To manage any bottom softness, when you try on or modify dresses, ensure that the empire “waistline” of your gown is at the lowest point of your breast, rather than under it. You don’t want the ribbon to be hidden or folded.

~~~

Next post: Polyester knits, fitted gores, and spaghetti straps: the problems I had finding a gown, and how to work around them.

~~~

* Many bra sizing charts suggest exhaling deeply and adding 4” to the under bust measurement to get band size. I find that results in too loose a band, so that’s why I recommend this site over others. Bare Necessities Sizing Help.

** From the Blog “Bras I Hate and Love,” Clarifying Breast Shape: Full-on-top vs. Full-on-bottom.

*** For finishing edges or hemming where you have to adjust the product you buy or salvage at home, you can machine sew, hand sew, or use hemming tapes. Hemming tapes come in an iron-on type and a type that’s like double-sided tape, and should not be used where the seam has to carry too much weight. Either turn back the edges slightly wider than the iron-on tape, or use pre-folded bias tape or a 3/4″ or wider ribbon ironed into a fold. Place the fold over the edge and attach to both sides. This latter method is best for thicker fabric.

~~~

Update: A Most Peculiar Mademoiselle‘s blog has a photo series of “Mademoiselle” in a Regency short dress with and without her corset. She’s what I’d call a normal-sized gal, and it’s quite convincing!