Regency men were not sissies, even in blouses and scarves.

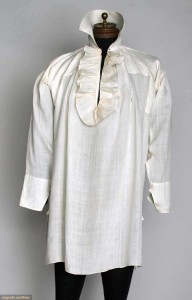
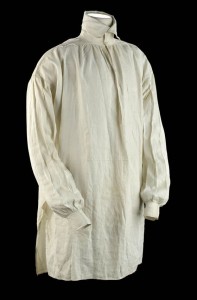
1807 men's shirt from The National Maritime Museum

1807 men’s shirt from The National Maritime Museum.

A poet’s or pirate’s shirt will work well for a Regency man’s shirt, they say. I remember sewing a similar shirt for a boyfriend in the 70’s: long sleeved, loose body, placket at the front. Surely a few vintage versions in a light, flowing fabric still exist!

For months, I searched the thrift and vintage stores for a plain, white, light weight, long-sleeved, wider-collared shirt with a placket-style opening, rather than button-down. Long-sleeved white dress shirts of any type were rare, probably popular for job interviews.

All were button-down. At least half had a subtle pattern woven into the fabric that was non-Regency in appearance. A few had logos emblazoned on the front pockets. Military shirts with epaulets were constructed of mid-weight, crisp fabric, rather than soft and flowing, as were tuxedo shirts with their multiple pleats in front. The odd shirt was collarless, and I needed a collar to stand up and wrap the cravat around.

Man's linen shirt, 1790-1810. Augusta Auctions.

Man’s linen shirt, 1790-1810. Augusta Auctions.

Early on, I expanded my search to ladies’ wear size large and greater for that front placket shirt, but they were rare, and in addition to similar traits to those for men above, often had ¾ sleeves or ruffles in the wrong arrangement. Ruffles aren’t a bad thing, as the neckline of the waistcoat shows off ruffles.

The Blouse

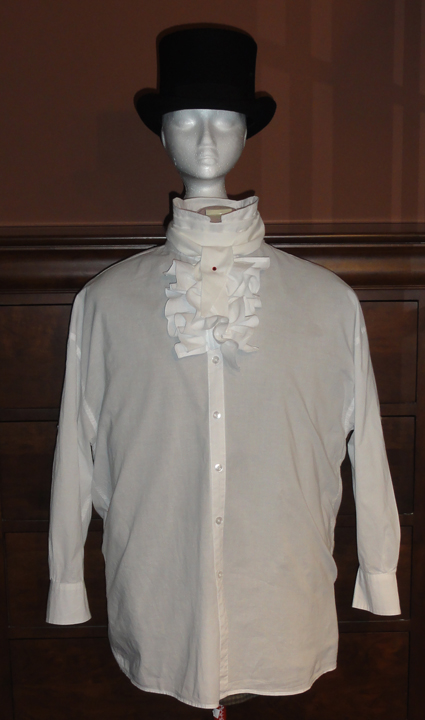
This month, I gave up on the placket front and searched for a white dress shirt in Mr. Suze’s neck size, loose in the body, and simple in design. At Value Village, I found a ladies’ extra-large blouse that looked ¾ sleeved at first, but discovered it had button tabs on the sleeves. The cuffed long sleeves were scrunched up and could be easily let down.

I measured the collar, and it was just short of 17” around, so larger than Mr. Suze’s 15½” shirt size, but my measurement didn’t count overlap for buttoning. To ensure the sleeve was a couple of inches too long for me (the advantage of having borrowed his cool-looking jean and leather jackets in the past is knowing this fact!), I tried on the blouse on over my own t-shirt before purchasing it at $7.99.

It fit Mr. Suze perfectly in the neck and sleeve, and was loose in the body! Hooray!

The shirt was button-down, and Poor Mr. Suze lamented that it buttoned backwards—that’s how he discovered it was a ladies’ blouse upon trying it on. It had no top button, so I attached two 8” ribbons to tie it closed. The Regency shirt would close with laces or a simple set of string ties.

I could have sewn the front panel partly closed to make it emulate a placket-type, but Mr. Suze didn’t mind the buttons too much and, as the shirt was considered underwear in the Regency, no one was allowed to see it. Yes, you heard that right. Underwear.

The main modification to Regency for a plain white shirt is simple: since the collar is to be turned up so it is standing, the front points need to be trimmed back slightly so the line of the collar goes straight across. When purchasing, a wider collar is better so it looks good standing up.

Depending on how the shirt is made, you might be able to push the points into themselves and sew closed with top-stitching near the edge. Because of top-stitching on the blouse collar, I had to open a seam, so I cut the corners back. Don’t forget the seam allowance!

An optional but beneficial modification while you’re at the collar is to cut a slight curve out of the middle back to suit the head of the wearer, so the collar stands up and doesn’t crinkle. My curve was about ⅝” deep in the middle and tapered down, overall about 5” wide. The seam allowances in the curves were clipped and pressed inside. Rather than remove the collar and redo the seam, the opening was top stitched close to the edge, then a second row of top stitching, similar to the original, was added.

Ruffles can be added to the placket area where the shirt shows above the neckline of the gentleman’s waistcoat. A plain, straight piece of light cotton 3”-4” wide, with a simple rolled hem on three sides, will work.

I used scalloped border panels from a white pillow sham (the main area’s lace was for a cap and fichu in previous posts). The scallops had a finished edge, and I made a narrow hem on each end.tsrce shirt showing three ruffles collar reshaping and tiesEach ruffle started as 4” wide and 20” long. I gathered it to 5” long, which was plenty long enough for the V neck on Mr. Suze’s waistcoat. I covered the base of the gathers and sewed that to the button panel. A third ruffle was added later, as two didn’t seem like enough, but when the cravat was added, I realized it fills the centre area, so two would be fine. The finished ruffles should be pressed backwards at ¼” near the bases, so they prefer to stand rather than lay flat along the shirt front.
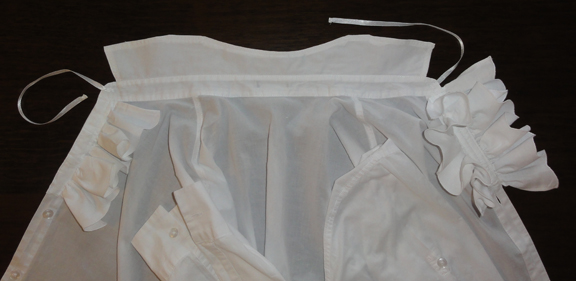
Similar to Regency ladies’ wear, men’s clothing had longer sleeves, extending over the base of the hand. If your Mr.’s tail coat sleeves are not long enough, you can also add a ruffle at the cuff of the shirt. It can be sewn inside the cuff so minimal fussing over finishes is needed.

If you want to use a shirt that will be reverted back to a dress shirt after the Regency occasion, the collar corners can be neatly pinned inside, as the cravat will probably hide the pins, and the back curve ignored. Neckline ruffles can be basted to the inside opening of the waistcoat instead. Sleeve ruffles can also be attached with basting, but make sure the stitches are not obvious on the outside.

The “Scarf”

The mystery of how to make a cravat or neck-cloth covers Regency costuming pages all over the Internet. There are three commonly suggested designs: a rectangle, a rectangle with tapered ends, and a triangle. Most sites explaining the triangle use the same wording, which is so poorly described that people have wound up with huge rectangles instead!

Suggested sizes for a rectangle are 50”-80” long by 4”-10” wide, but I found the finished length should be at least 60”, and the finished width no more than your Mr.’s neck length. Tapered ends on a rectangular shape make the tied cravat tails less bulky.

Another design uses a long, low isosceles triangle. The two short sides are 50” long, and the triangle is 10” high, with rolled hems on the cut edges. To wear, it’s rolled to a width to suit the wearer’s neck length. This is a very long cravat, but well-suited to complex tie styles or multiple wraps, as it has far less bulk at the ends.

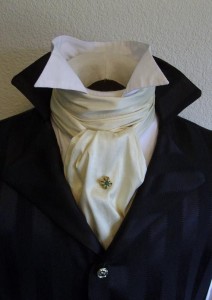
White or off-white were the most common colours for a Regency cravat, and the only colours acceptable for a ball. Various ideas on fabric stiffness abound on the Internet: some say pliable, some suggest starch. From my experience making one cravat, if the fabric can keep a neat shape without collapsing, but not so stiff that it’s uncomfortable or won’t drape a little, it should work.

A Fabricland $1.99 remnant of light but not super-sheer white cotton at 53” wide was the source for Mr. Suze’s cravat. A 9” wide panel was cut the full width of the fabric. It was folded lengthwise and the ends tapered starting 8” back, with the tapers in opposite directions as seen in the photo. A blanket-type seam closed and bound the edges, with a 4” gap left halfway along the taper of one end. The cravat was turned inside out through this gap, pressed flat, and the opening sewn closed. The finished width was just under 4½”, as any wider made no sense with the length of Mr. Suze’s neck. Some sites suggest a rolled hem, which is better for heavier or stiffer fabric, but doubled up has a more finished appearance.tsrce cravatWith a basic tie style, this cravat is barely long enough. If I can find a longer piece of fabric, I’ll make another. This is why I suggest no shorter than 60”!
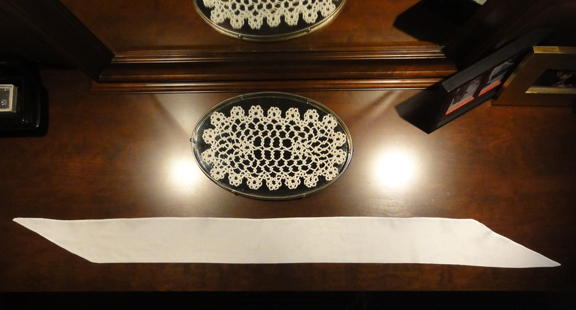
The cravat is tied over the shirt collar but inside the waistcoat collar. The easiest style is to start with the middle of the length of the cravat in front of your neck, cross over at the back and pull forward, cross one end over the other in a half knot in front and snug up, tidying edges around your neck and fluffing folds of the panel that falls down vertical in front. A simple pin can hold the front fall in place.

Tea in a Teapot has a summary from an 1818 satire on the cravat called “Neckclothitania” that appears on several other blogs as well. The complicated tie styles have been attempted by some modern costumers, with varying degrees of success. I think the author would be suitably amused that his work was taken with such a degree of seriousness!

The Art of Tying the Cravat by H. Le Blanc (post-Regency, 1828) is an interesting read via Google books (free e-book). It has additional designs for the neck-cloth knots, and the illustrations are below.plate-b-the-art-of-tying-the-cravatregency cravatYour Mr.’s cravat tie style should be no more complicated than he is comfortable with creating. A man confident in making a full Windsor on a regular basis, or who plays with knots—boat owners often are often hobbyists with knot-making—can fuss all he wants with styles from the links. For the rest, there’s no shame in simplicity.


A gentlemanly way to top off a blouse and scarf

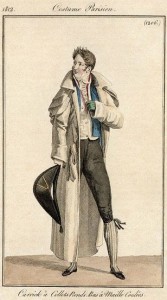
Bicorne hat, Costume Parisien, 1819

Bicorne hat, Costume Parisien, 1819

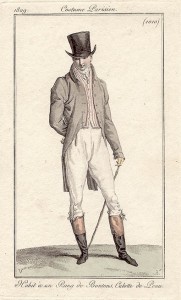
Top hat, Costume Parisien, 1809

Top hat, Costume Parisien, 1809

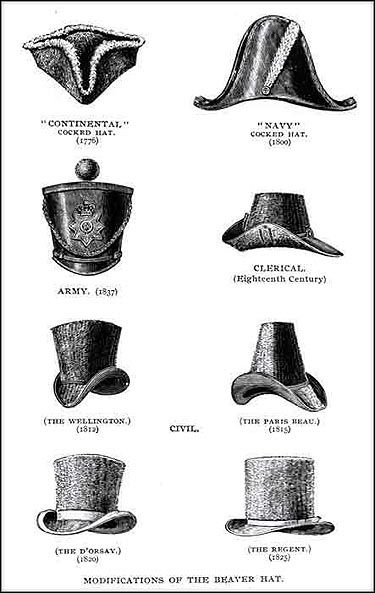
Regency men wore a variety of hat styles, but a simple top hat was most common in art work. The bicorne was also popular, particularly for formal situations like a ball, and is favoured for faux-military costuming.

A top hat can be had for as little as $10 for one-size fuzz-covered plastic at a party store; $25 for a magician’s silk hat or one-size felt coachman’s hat (too tall and costumey) at Dressew; or as much as $200 and up for a vintage collapsible opera hat or actual beaver fur top hat on eBay, and you have to pay over $300 for good condition.

In vintage stores during my shopping trips, I saw two vintage felt top hats. A hat in great condition but a small size was $125, and $165 could get a hat showing a little wear but otherwise in good condition. These had superb shape compared to an inexpensive felt hat, were lined, had hat boxes, and silk hat bands.

Mr. Suze settled for a $35.99 (including shipping) wool felt hat from eBay. The sides of the pipe part are straighter than a milliner’s top hat, but its brim shape is nice, and the quality is excellent for the price. It came in small-medium-large-XL sizes, not one size fits all. It didn’t come with a hat box for that price, so it will go to Louisville in the rectangular box with Styrofoam inserts that it was shipped in. We’ve already accepted the requirement to take the giant suitcase from my set of three, which has only been used once before!

I don’t recommend magician’s collapsing satin hats. Back in May, I purchased one at Dressew as the first item for Mr. Suze’s costume, and presented it to him with an entreaty to consider a costume when he’d been resistant beforehand. The collapsible option seemed practical for travel, and the top hat looked well enough when open. However, it had a heavy metal frame inside to facilitate the collapse and easy “snap of the wrist” restoration of its shape for performance. As a result, it fit small. On my small head, it was acceptable—that is, if you don’t mind having a wire frame in your skull! But the hat perched atop Mr. Suze’s normal-sized head. It was returned the next day.

Beaver hats of the 18th and 19th century.

Beaver hats of the 18th and 19th century.

To show you the results, Millie wore one of Mr. Suze’s blazers, as her shoulders were too narrow for the shirt to hang properly. Mr. Suze is not this big around, as he fits inside the blazer, and the sleeves are also under the shirt! Similarly, Chili has a hat under the top hat.tsrce mens shirt with cravat, crystal stick pin, and top hatI sacrificed a ruby-red Swarovski crystal stick pin I’d used on my turban as it’s perfect for Mr. Suze’s cravat, and none of my other stick pins were right. It was also stunning on the turban, but I have a hat pin I’ll use instead.
Next post: Trousers, boots, and accessories for your Regency beau! Watch for it as a second post this week! YES! Double post week for the Gentleman’s Thrift Shop Regency Costume!

Faking Regency Part One: A modern blazer morphs into a spencer.

This sounds pretty easy, right? Get an old blazer, cut and hem to under-bust length, and Bob’s Your Uncle. Well, not so easy. Unless, of course, you’re super-lucky and find exactly the right blazer.

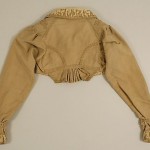
Early 19th century spencer, Metropolitan Museum of Art

Early 19th century spencer, Metropolitan Museum of Art

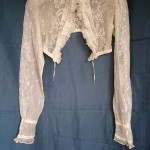
Embroidered muslin bodice or spencer, 1800-1810

Embroidered muslin bodice or spencer, 1800-1810

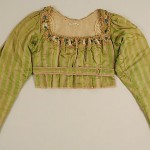
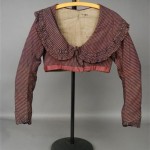
Rose pink striped cotton and silk spencer, early 19th C.

Rose pink striped cotton and silk spencer, early 19th C.

Early 19th Century, Spencer, early 19th century, French, silk, Metropolitan Museum of Art

Early 19th Century, Spencer, early 19th century, French, silk, Metropolitan Museum of Art

Cream silk satin Spencer, c1818. Decorated in imitation of military uniforms. Worthing Museum.

Cream silk satin Spencer, c1818. Decorated in imitation of military uniforms. Worthing Museum.

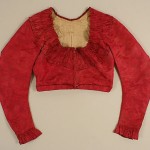
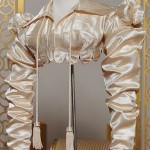
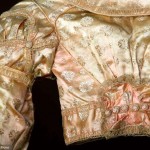
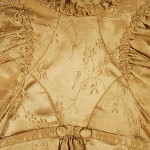
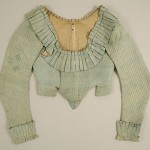
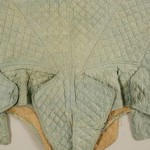
If you hadn’t already figured it out, the Regency spencer is a little, long-sleeved jacket that’s just as long as the bodice of the empire waist gown. One bonus for shopping for a blazer to make into a Regency spencer is that almost any neckline will suit. Click on the thumbnails to see details, including neckline examples.

The difficulties include a requirement for long sleeves (as per usual in the Regency, longer than standard is better), a fitted bodice, fabrics that don’t look modern, colours that are more interesting than black, and a lack of embellishments such as studs, fake pockets on the chest, or jean jacket seams.

The textures and colours of many blazers in my thrift shop visits didn’t work. Black polyester rules, and next to that, corduroy and knits. Every time I saw one I’d consider, it was 3/4 sleeve, the wrong size, or had some detail that screamed the 90’s.

I looked at blouses, too, since some spencers are more blouse-like and some modern blouses are more blazer-like.


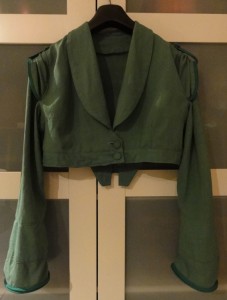
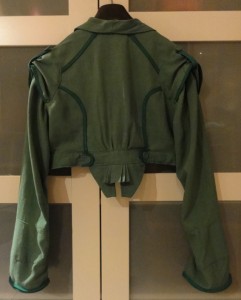
spencerspencer back


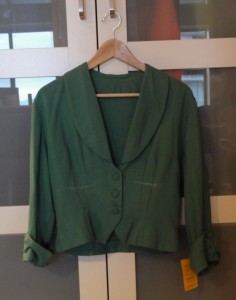
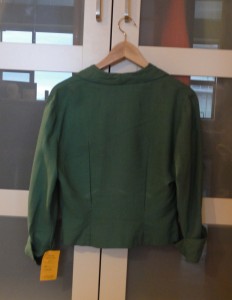
This unlined, fitted, pomona-green jacket will be my spencer. Pomona? I would have called this leaf-green, as it’s fairly bright. (Some of my shots were taken in the evening, and appear darker.) Then I read an article about Ackermann saying Pomona green was the same as apple green and I thought, this is a little darker than apple green, but I’ll check on Google images. Enough of the examples were the same as my blazer for me to confidently say it’s one of the more popular colours of the Regency!

The 3/4 sleeve, linen, shawl-collared blazer was $16.50 at Women in Need Thrift and Vintage. It has unique matching self-covered buttons.

Short sleeved spencer alongside unusual short coat.

Short sleeved spencer alongside unusual short coat.

Sleeve trim idea.

Sleeve trim idea.

The down side of my blazer is the 3/4-length sleeves. At the time I bought it, I didn’t realize that detail wasn’t popular during first 20 years of the 1800s. I looked in vain for examples of Regency spencers with 3/4 sleeves, and though there are a few short-sleeved spencers, I found nothing 3/4 sleeved.

Lucky for me, the flared cuff was long enough to drop to make a long sleeve. I kept looking for a long-sleeved blazer for a spencer. As mentioned before, I saw a blazer with lovely soutache designs, but balked because I worried about how to cut down the blazer at a good point for the soutache. When I decided I could rework the soutache if need be, I returned, but it had been sold. But today, I found a cute, gold silk blazer with a pretty collar, long sleeves, and mother of pearl buttons! The only sad part is a centre-back seam. More on that later.

(An aside: I’ve seen the perfect dress that just needs an empire waist height ribbon to fake Regency on two shopping trips since June, but both times, they were too small for back gathers for me, but would work with a smaller person!)

In most cases, your blazer should be cut to 2-1/2″ longer than the bottom of your bust line, turned under 1/2″, and hemmed 1″. This will stiffen the edge and ensure it fits over your gown bodice, but it won’t be too long. You can see I’ve marked my blazer to spencer length while wearing it. This frees up two buttons from the front for embellishment elsewhere.

If your blazer doesn’t close tightly at the bottom after it’s trimmed to length, there are several possibilities. If there are buttons in the upper portion (part you’re wearing), it’s better to fit the spencer than to ease in fullness. Add darts or gathers under the bust, or pleats or gathers in the mid-back; they’re era-appropriate. Don’t make it too tight, as it must fit over the gathers of your gown.

My blazer was already fitted with six darts in front and two very long back darts (in fact, the back darts were over-sewn longer and deeper than the originals). It was snug across the bustline, so I removed the back darts, washed it so the stitch holes relaxed closed again, and pressed out the remaining dart creases while it was still damp. A few gathers added by hand in the mid-back at the waistline help to fit my slimmer rib-cage under the bust.

If the bottom button is too far from the bottom of the spencer, you can put back a cut-off button and make a buttonhole at the band level, or add hooks and eyes. To fake Regency, buttons should have a Regency look: metal, shell, pearl, mother-of-pearl, fabric-covered, thread-covered (such as Dorset), or corded knot (such as Celtic or Chinese knot or frogs with knots) are best. Since metal buttons were expensive, use them only if your spencer has a rich look with elaborate trim. With corded buttons, your other trim would be best as corded, in fact, a military look to the spencer was popular! Self covered buttons were ubiquitous on mens’ wear, but less so for ladies’.

Spencer jacket, 1790-1815. Note no closure in front.

Spencer jacket, 1790-1815. Note no closure in front.

If there are no buttons, there’s nothing wrong with having a spencer that doesn’t fasten closed, unless you need it for warmth. An example of an open-front spencer can be seen on the left, and others existed in the Regency.

My blazer was unlined, so I chose to use the inside bottom facing from the original blazer on the outside, as a waist band. Bias tape was used to finish it on the inside where it’s not seen. Another option is to add a contrasting band (as on the pink striped blazer above). If you have good sewing skills and choose to add a waist band, it’s an opportunity to put contrasting piping all around it per a tutorial below.

Spencer jacket 1815 (back). This trim is an example of how we plan to fake a Regency diamond back! The real shoulder seam will never be noticed!

Spencer jacket 1815 (back). This trim is an example of how we plan to fake a Regency diamond back! The real shoulder seam will never be noticed!

Since the facing didn’t continue across the buttonhole panel in front of the original blazer, it didn’t go all the way around, so was short for the waist band. To make up for this, I used extra fabric from the cut away parts in front. If you use multiple pieces for the waist band, make sure your seams are at the blazer’s side seams, or at both bottoms of the diamond-back, so they’re less noticeable.

In addition, to fake Regency, some front cut-off material from my blazer made a little skirt-tail in the centre back, similar to the museum examples. See thumbnails below; click to enlarge. Extra self-covered buttons trim the ends of the waist band tabs in back.

Back detail of a spencer, 1813, American or European, Wool and silk, Metropolitan Museum of Art.

Back detail of a spencer, 1813, American or European, Wool and silk, Metropolitan Museum of Art.

To fake Regency, you need do none of the above. Focus on the one detail that’s not too hard to manage: the diamond back.

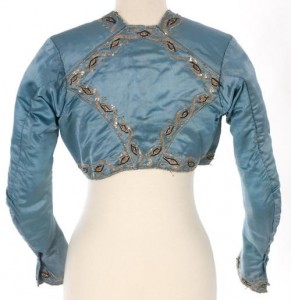
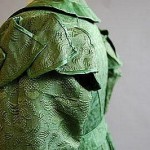
The look was on almost all women’s wear of the period, achieved by a shoulder seam that fell behind, rather than on top of the shoulder, and a pair of side-back seams that curved from the outside edge of the back gathers on gowns to partway up the back of the sleeve. The back of the sleeve fit farther into the back of the bodice than a modern sleeve, too. Click on the thumbnails for examples of the backs of spencers.

Silk spencer, 1810. Augusta Auctions.

Silk spencer, 1810. Augusta Auctions.

A faux-diamond-back can easily be achieved by numerous methods. You can fake the seams with a line of fabric paint or even fine-line permanent marker in a slightly darker colour, a line of top-stitching using hand back-stitching in embroidery thread, or machine top-stitching a double line.

Spencer, early 19th century, American or European, silk. Metropolitan Museum of Art.

Spencer, early 19th century, American or European, silk. Metropolitan Museum of Art.

Better yet,  Regency clothing often had trim over these seams to show off the shape, making them even easier to fake: cording, piping, soutache, braid, narrow ribbon, narrow bias tape, and other similar materials can be attached along the line where the seams would sit.

I got a great deal on a few dozen packages of bias binding tape in multiple colours at Value Village for $3.99, and I’m using a slightly darker green for all my trim, as I have four packages in two sizes. For most of the trim, I’ve just folded 3/4″ bias tape in on itself to the width of the pieces folded behind. This means it has some thickness at 1/4″ wide.

If you’re an experienced sewer, you can make piping or a piped band from purchased bias tape. Links to tutorials are at the end of this post.

When shopping for the blazer, the faux-diamond-back will look better if you buy one that doesn’t have a centre back seam. In fact, many that don’t have the centre back seam have a side panel with a seam similar to the lower curve of some Regency clothing backs, and I’d suggest using that curve, plus faking the shoulder seam that sits two or more inches behind the modern one.

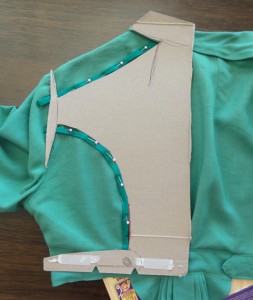
pomona spencer pinning on fake regency diamond backIt’s best to make a pattern for your trim so it’s mirror image both sides. Light cardboard–mine was from a breakfast cereal box–works well. Set it so one side runs along the centre back of your shortened and hemmed blazer, and play with lines and curves in pencil until you see one you like. Mark it with marker and cut out to make a pattern to guide in placement of the trim on each side.

I pinned my trim in place, then put it on a model for a photo. On the model, the fake Regency shoulder seams looked better if dropped down more at the sleeve end, so check before you sew. Attach the trim after you make any adjustments to sleeves, described next.

1810

1810

1815-1820

1815-1820

Modern reproduction.

Modern reproduction.

1815 LACMA

1815 LACMA

1820-25, Metropolitan Museum of Art

1820-25, Metropolitan Museum of Art

1820, Metropolitan Museum of Art

1820, Metropolitan Museum of Art

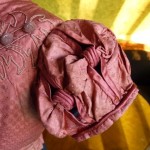
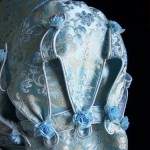
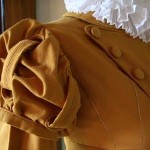
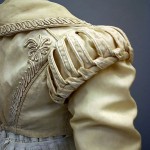
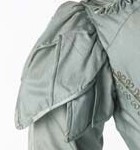
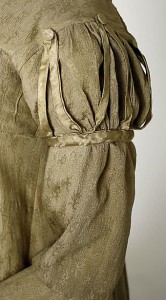
Like gowns, spencers often had puffed sleeves or similar-looking embellishments over a straight sleeve, however, many had a plain sleeve (see some examples above), so faking Regency here is optional.

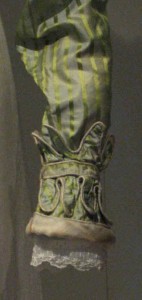
If you prefer a little over-sleeve, examples to the right range from clusters of petal-like fabric to fancy slashed and looped designs. These sleeve examples are on spencers, and more ideas from gowns can be found in the post, “Were Regency gowns worn on the Titanic?

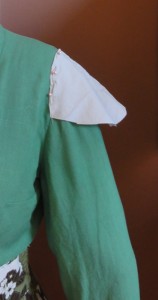
You won’t have enough fabric to make the full sleeve variations, but a simple, small capped, tulip, or shirred cap sleeve, or a rolled tube at the top of the sleeve, can come from the fabric cut from the back of the blazer, or you can utilize sleeves made with coordinating fabric.

There’s a tutorial below for tulip sleeves. If desired, use the same trim you used to fake Regency with your diamond back to attach the new sleeve over the old one at the seam line, or turn under 1/4″ to 1/2″ and top-stitch close to the edge. If it’s possible to hide the ends, make the new sleeve fit an inch or two farther towards the middle of the back of your spencer, so you also have a fake Regency sleeve fit!

pomona spencer gathered cap sleeve mock upFor my fake short over-sleeve, I used the leftover fabric from the back panel. First, I experimented with some cheap fabric from a pair of torn pants to make the best of the small amount of fabric. A piped band (tutorials below) made from 2″ wide bias tape held the gathers, topped with one of the self-covered buttons from the old sleeve cuffs.

1818, Metropolitan Museum of Art

1818, Metropolitan Museum of Art

The simplest fake Regency sleeve topper, to the right, was another option I considered. I could have used the 3/4″ bias tape (sewn closed) and the three buttons from the 3/4 sleeves on each side. This can also be accomplished with ribbon, if the same ribbon is used for the fake Regency diamond back.

Self-covered button kits can be purchased at fabric stores for about $3 a package of 3-6, depending on size (full price, but I got one from Dressew for $0.99!), and they’re easy to make.

Alternatively, matching ribbon or fabric can be stretched over stiff plastic circles with a little glue, then the back fabric stitched in place. It should be slightly more than double the diameter so it closes fully behind the button and there’s something to sew it on with. Important note: the latter is fine for trim but not for actual working buttons.

The finished pomona green spencer, with cap sleeves over long sleeves, tied back with a piped band and button from the original blazer.

Front view of Suzan Lauder’s pomona green spencer, with cap sleeves over long sleeves, tied back with a piped band and button from the original blazer. Long sleeves are trimmed at the bottom with piped band also. An extra button was added to empire waist band, made from original blazer facing.

Back view of Suzan Lauder's pomona green spencer, with Fake Regency diamond back and pleated skirt-like ruffle.

Back view of Suzan Lauder’s pomona green spencer, with Fake Regency diamond back and pleated skirt-like ruffle. Buttons from the original 3/4 sleeve cuffs are used on the tabs at the back of the empire waist band.

This project wasn’t easy for me, though it may be for a more experienced sewer. I hadn’t sewn much for 30 years, except for the odd repair, straight-line window toppers and throw cushions, or slapping together a Hallowe’en costume that was meant to last a few hours. I became good friends with my stitch ripper over the last two weeks and learned a few things along the way.

No-sew iron-on tape would work for simpler modifications to make a spencer, but some of my problems came from construction and developing my own patterns, so they’d occur had I used no-sew tape, too. In addition, it sucks for curves, and you couldn’t have made piped band. Other trims (like in the thumbnails) are fine, and there’s nothing wrong with straight lines for your fake Regency diamond back.

Most of these ideas for faking Regency are applicable to gowns, pelisses, redingcotes, and any other bodiced clothing of the Regency period. Have fun shopping for trim on sale or in grab bags at thrift stores!

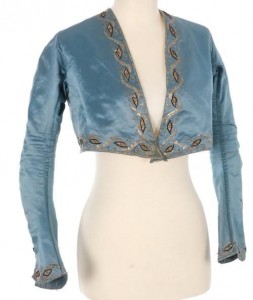
A blue quilted spencer, front. Late 18th early to 19th century, Metropolitan Museum of Art.

A blue quilted spencer, front. Late 18th early to 19th century, Metropolitan Museum of Art.

Spencer, late 18th to early 19th century, French, silk. Note the unusual detail below the centre back.

Spencer, late 18th to early 19th century, French, silk. Note the unusual detail below the centre back.

~~~

Web sites with ideas and tutorials:

Inspiration: So Many Backs from Atelier Nostalgia Though these are gowns, you can see the line of the Regency diamond back you want to emulate, and variations on that design.

Sew Many Seams’ Tulip Sleeve Tutorial  Shows two types of tulip sleeves to make, using a plain sleeve pattern as a guide.

Slashed puffed sleeve from Firefly Path: The inside of the slash can be made from the spare fabric cut from the spencer, and the oversleeve from a complimentary fabric using a regular puffed sleeve pattern. Maybe use that extra cushion cover or dinner napkin! The slashes need not be filled in, either. You can loop trim material from the inside shoulder to outside through each slash. Similarly, a loop can be made from the cuff inside to outside. Very fake Regency!

Sew4Home’s excellent tutorial on how to make your own piping and bias tape.

For the advanced sewer, two choices for instructions for a piped band: Kleidung 1800‘s site is German, but brief descriptions of each step are in English under the photos. Tea in a Teacup has a different way to make the band, and it looks a bit different in the end.

For the ambitious spencer designer, two posts about making soutache designs: The Fashionable Past shows technique while trimming a Victorian coat, and a trick to make the loops easy by Threads.

~~~

Next few posts: I’ve started on projects for Mr. Suze’s costume, and I have a “Grown-up Lady’s Lace Cap” to make as part of the give-away for my guest post on Roof Beam Reader’s blog as part of his Austen in August (#AusteninAugustRBR) reading challenge, and I’ll draft up the cap pattern to share.

~~~

I WON A PRIZE!!! As part of the same reading challenge above, I won JAFF Author Lisa Pliscou‘s Young Jane Austen: Becoming a Writer, which I’ve been coveting since it came out, for its cool illustrations. I’ve entered every contest I’ve seen about this book! HOORAY FOR ME!

~~~

There are still spaces remaining for the Jane Austen Society of North America Annual General Meeting on October 9-11, 2015, my goal destination for the Thrift Shop Regency Costume Experiment series. The conference theme is “Living in Jane Austen’s World,” and the workshops run the gamut (?? who says stuff like that?) from Regency medicine and home remedies, to evaluation of the wealth of Austen’s characters; the influence of India on Regency England; plants and gardens of the Regency (featuring Meryton Press’s Linda Beutler, an international clematis expert!); food, fashion, and social events of the period; and many others! Pre-conference activities start on October 7. Registration deadline is September 1, 2015, so don’t delay!


How-to Times Two: Variations on Dressing up a Bonnet

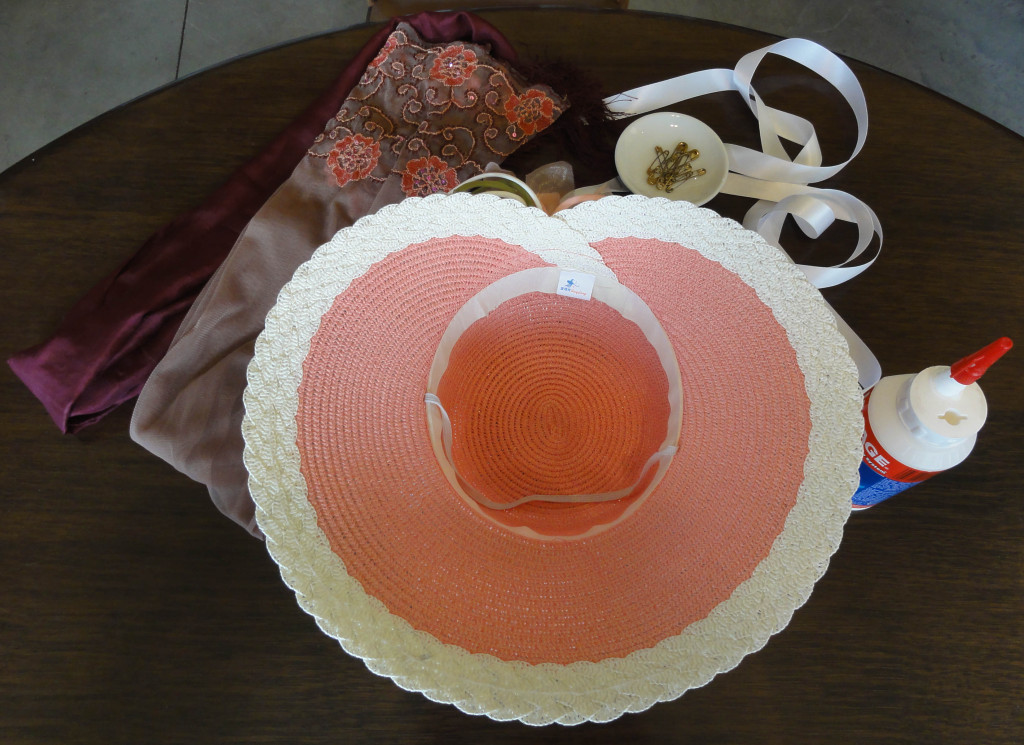
Hat 2 underside and shape

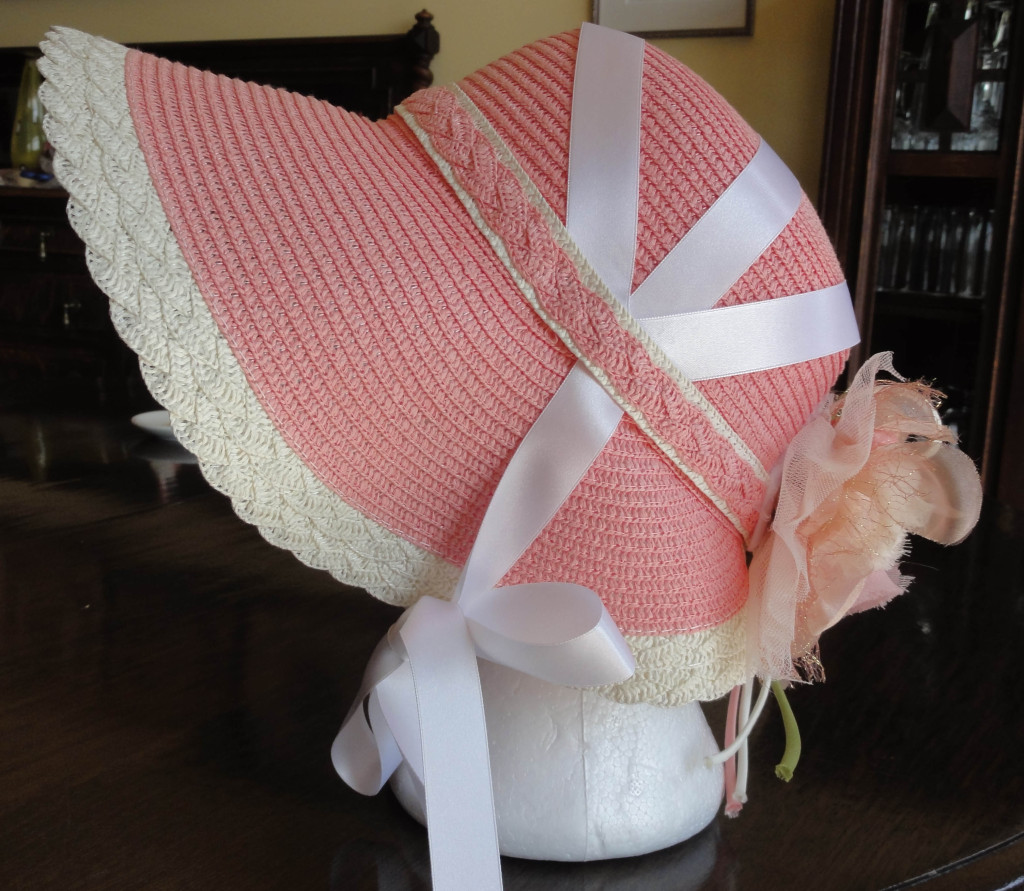
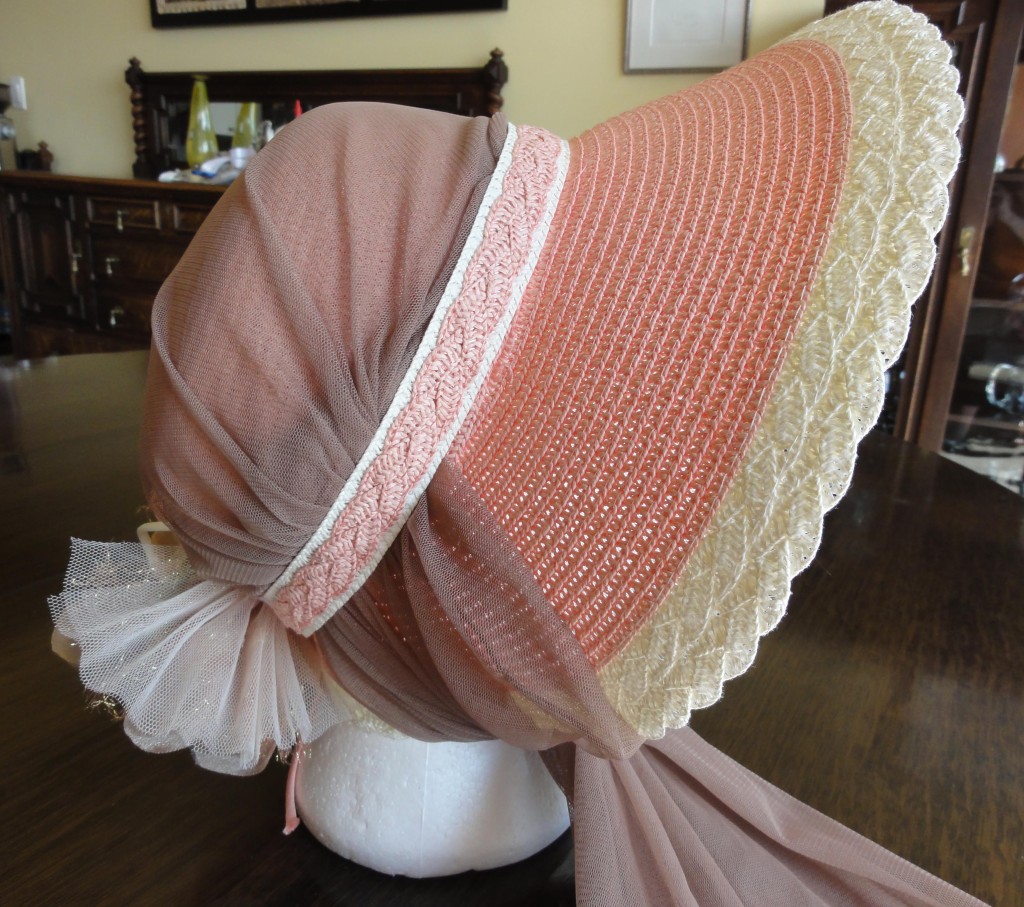
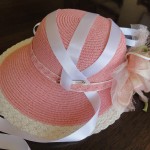
Underside of hat to show brim shape and braided trim.

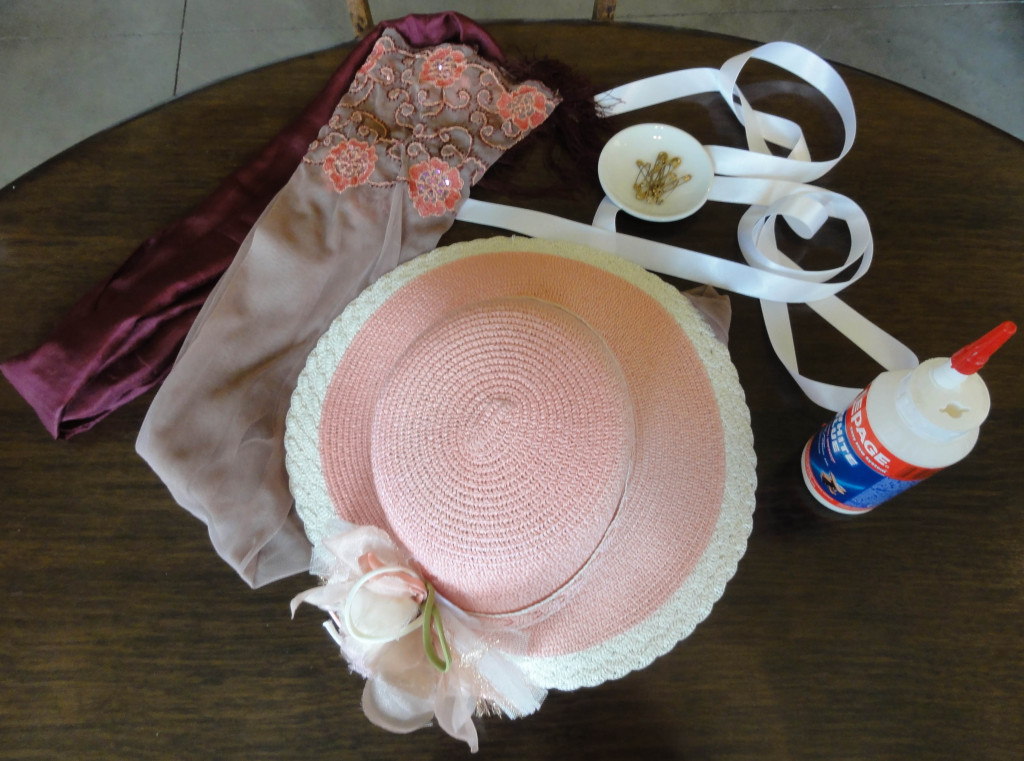
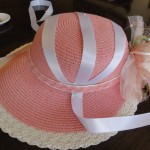
A bit of an impulse buy, as a few of my items were, the Pink Hat has a beautiful, perfect Regency shape and some nice trim. I was so pleased with those aspects, I overlooked the fact that it was overpriced for what it is and for the intention of this experiment, at $25 from a little second-hand store.

It’s so very, very PINK! I almost never wear pink!

I was uncertain whether to include it in this blog. I decided it represented a normal part of this type of project, and if my readership knew I could eat my mistakes, they may have less fear of showing up in an item that was slightly incorrect. The idea worked so well for me that I used the Pink Hat as a bit of a mascot!Hat 2 materials used

This post shares two quick and easy ideas for enhancing this hat and making it appear like a Regency bonnet. The materials for both are in the photos above.

~~~

The Pink Hat Design #1: A three-ribbon design is seen often in Regency hats and hairstyles. (Click on the thumbnails for larger images.)

  • Loosen the existing hat band around the front and sides.Hat 2 loosen band and loop ribbon under
  • Fold a ½” to 1″ wide by 2m long ribbon in half and tuck under the band from below, with the loop heading to the back of the hat.
  • Arrange so the ribbon is at an angle with the tails at the middle of the hat band front to back, and the middle of the ribbon is just barely over the back of the crown of the hat.Hat 2 pin ribbon to band at halfway back both sides and loop over back edge of top where it sits best and smoothest
  • Use the band to help you fold each side of the ribbon up and back over the hat, one going straight across the middle, and the other at a slight angle across the front crown of the hat.Hat 2 fold ribbon up and over top of hat, one end over middle and one over front of hat
  • Each tail can go under the far side of the hat. Adjust so the hatband is down and the ribbons are roughly in the middle, though they won’t be neat at this point.Hat 2 remove pin holding in place and add one at the fold of the ribbon
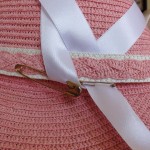
  • Safety pin the ribbon at the “V” made when the ribbon is folding under the hat band (the first fold you made) on each side.
  • Remove the ribbon. Re-install, but this time, do not wrap over band, instead, use the pin to help you place the fold behind the band.
  • Adjust until the bands are equally spaced and smooth over the crown, the hat band is down and in place, and the “V” is hidden.Hat 2 Remove ribbon, then put back in place only under the band, using the pin as a guide as to fold location
  • Pin in place from behind.
  • The ties will come down the middle of the side of the hat to tie under your chin, and the bonnet will sit back of your ringlets.


Additional ideas:

  • If desired, you can flip the front of the bonnet up, using steam to shape it, but be careful of burns.

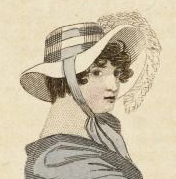
    July 1812

    July 1812

  • I’ve left the existing fabric flowers in back because I like them, and they hide a gap in the brim trim.
  • A strategically placed ostrich feather, curved forward, with some smaller items at its base, would work instead of the fabric flowers.
  • Additional trim is optional, but a ribbon flower, a few clusters of flowers, a medallion, or whatever pleases you can be placed on the joint of the three ribbons. Remember, simple trim means early Regency, and embellishments became more elaborate, especially in the teens. Match to your outfit’s time period.

This bonnet cost about $28, plus any additional trim.

Hat 2 pin in place from behind and trim as desired

Note that a similar hat, in natural straw, without the hatband or trim, is $5 at major craft stores. I’d recommend going that way. A ½” to 1½” wide hatband should be attached at the centre back to facilitate the instructions in this post. Ribbon, braid, beaded band, or similar material can be used.

~~~

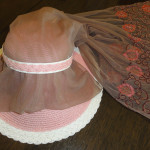
The Pink Hat Design #2: Inspired by hats in the Napoleonic Collection, with a sheer panel of fabric stretched over the hat and tied under the chin.Hat 2 design 2 fold scarf in half and slide under band from rear

  • Fold an oblong scarf (about 5 feet long) in a co-ordinating colour in half. A sheer or solid scarf can be used.
  • Slide down the front of the crown of the hat, under hatband, in a flat position.
  • Adjust so front (folded) edge of scarf is under hatband.Hat 2 design 2 roll edge of scarf and tuck under band
  • Roll up corners and tuck along sides under hatband. Adjust to your choice of fit: tight over crown of hat; with soft, regular folds; or puffed like a Capote hat.Hat 2 design 2 cross ends of scarf over back of hat
  • Pull tail ends of scarves so they cross to opposite sides and the back of the crown of the hat is covered.
  • Tug tail ends of scarf forward under hat band until they are midway between the front and back of hat.Hat 2 design 2 tuck scarf ends under band at about halfway point and adjust to hide extra fabric
  • Adjust folds and edges that are tucked under the band.
  • If necessary, pin, double-sided tape, or glue sections of the scarf under the edge.
  • The existing fabric flowers, with the frayed edges trimmed, are good embellishments for this hat. But each person has their own ideas, so add extra trim as suits your fancy!

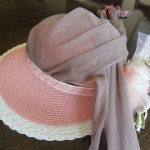
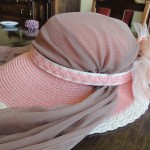
Hat 2 design 2 completedThis bonnet cost about $32, plus any alternative or additional trim the owner selects.

~~~

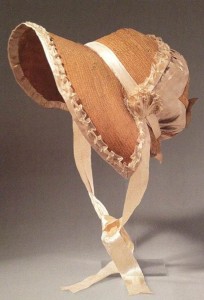
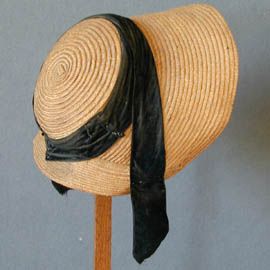
Why are these called bonnets and not hats? The only difference I could figure out between a bonnet and a hat was that a bonnet was tied on and a hat was not. These are called “cottage” bonnets.

Luise Kleider der Konigen 1810

1810

Cottage Bonnet ca 1810, Meg Andrews

1810


 ~~~

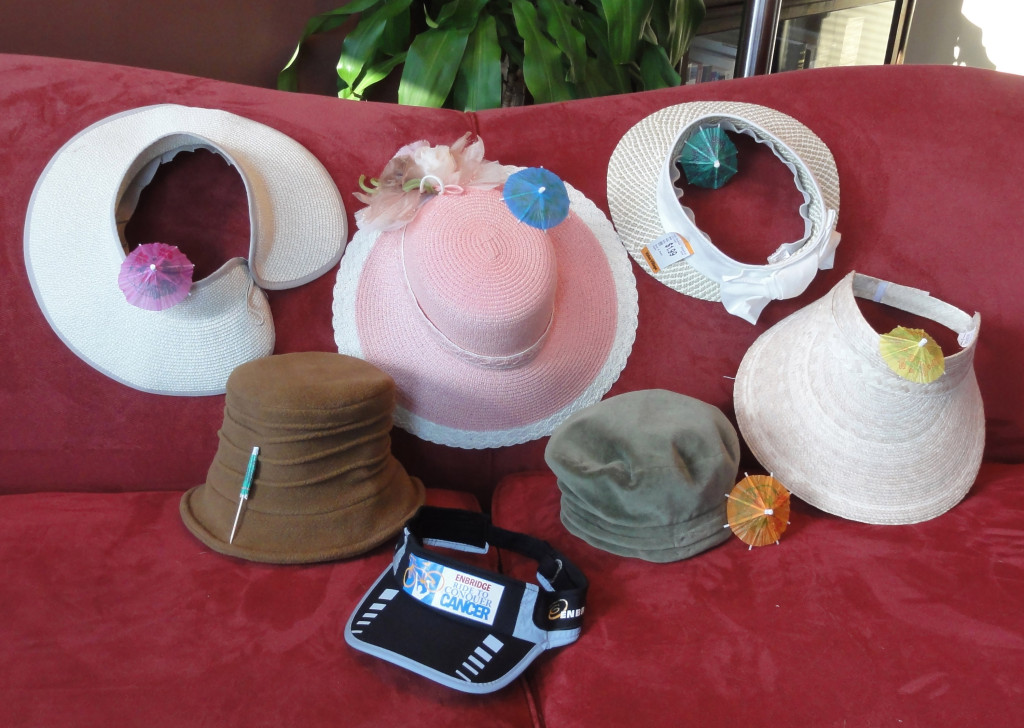
I still have three—count ‘em—three more potential Regency hats/bonnets!hat basicsTwo hats in the original “group of seven” didn’t make the “Okay for Regency” grade indicated by an open parasol: their shapes and fabrics are intended to show contrast.

The brown synthetic fleece hat might be okay as a base, if wrapped with fabric almost like a turban; tulle or net might work.

The sad little baseball cap visor has no parasol, as it’s not worth the effort. Not even a tea cosy will revive it.

Close-up of painting, Portrait of a Woman--François Flameng

Close-up of painting, Portrait of a Woman–François Flameng

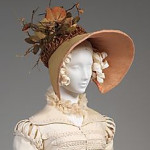
1814, Metropolitan Museum of Art

1814, Metropolitan Museum of Art

I want to make the larger-brimmed visor (far right, $4 from a Wal-Mart in Mazatlán, Mexico) into a Lady Catherine stove-pipe or leghorn bonnet, which involves a curved tube. After a lot of searches, I found a site that gave me an idea how to start it. There will still be lots of trial and error, so I’m leaving it to after the main blog series, in the “bonus” posts. (Click on the thumbnails to see larger images.)

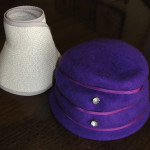
Fez and rollupI’m not sure if I’ll create something with the roll-up hat from the San Diego zoo from 10 or more years ago (upper left), but I bought a little purple felt fez I could prop on top! It would assemble/disassemble well for travel! Hahaha! This hat is also suitable for a Capote-like covering or a tube, just like the other two topless hats. (Hmmm. That sounds nasty.)

The big reveal: the Lydia Bennet special! (Click on thumbnail for larger image.)

Lydia hat before

The “Lydia Bennet” hat, before.

“Look here, I have bought this bonnet. I do not think it is very pretty; but I thought I might as well buy it as not. I shall pull it to pieces as soon as I get home, and see if I can make it up any better.”

And when her sisters abused it as ugly, she added, with perfect unconcern, “Oh! but there were two or three much uglier in the shop; and when I have bought some prettier-coloured satin to trim it with fresh, I think it will be very tolerable.”

—Pride and Prejudice, Chapter 39

French, 1800-1805, Boston Museum of Fine Arts

French, 1800-1805, Boston Museum of Fine Arts

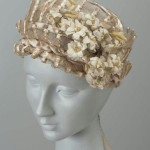
At first glance, this hat is quite pretty. But looks deceive: it has good bones, but requires some serious deconstruction of braided plastic ribbons, then replacement with satin and sheer ribbon in a similar design. You can see the look in these museum hats; that’s why I was drawn to this one.

1820, Augusta Auctions

1820, Augusta Auctions

American, 1810, Metropolitan Museum of Art

American, 1810, Metropolitan Museum of Art


~~~

There are more complicated hats and bonnets you can make, but sewing and more complex craft skills are required.

http://themerrydressmaker.blogspot.ca/2011/08/regency-bonnet-tutorial.html
https://teainateacup.wordpress.com/2011/08/01/how-to-make-a-regency-poke-bonnet-in-ten-steps/?blogsub=confirmed#blog_subscription-3

This video demonstrates the second of the more complicated sites above:
http://oregonregency.blogspot.ca/2008/04/how-to-make-regency-poke-bonnet.html

I can’t quite understand tearing apart a straw hat into its spirals, or cutting off the back half and having to cover it, when it’s more work than is necessary. Regency bonnets came in so many shapes; it’s odd to take a shape that would work, only to change it to another, rather than seek out the second shape in the first place. But these sites have other good ideas.

Modern reproduction Poke bonnet

Modern reproduction Poke bonnet

Even more complicated is a stovepipe bonnet from the late Regency, made with a buckram frame: https://www.youtube.com/watch?v=98vKEHfjOAA

If I do a stovepipe bonnet, I’ll likely use more traditional techniques as in the Regency: cardboard and/or papier maché. It’s not so much that I’m afraid of buckram (maybe I am) or have no clue where to obtain it, but I know my skills with wire, and I’d wind up with a bumpy cam-shaped thing when I need an oval.


~~~

More on my pillowcase cap: A web site with a series of cap patterns for sale included a comment that the more uppercrust caps had more than one style of lace on them, as did the lovely examples in an earlier post. I’d like to find some finer pieces of whitework or lace to fill in some holes, rather than use the plain cotton of the pillow case. Shopping never seems to be done!
~~~

NEXT WEEK’S POST: There’s more to undies than corsets! **Cue tawdry bump-n-grind music!**
~~~