A road trip to Madame Gilflurt’s blog: My guest post on sneaky Regency hands.

I clicked the wrong link. I intended to email the organizer of a Jane Austen ball to tell her about the Thrift Shop Regency Costume Experiment, but I accidentally clicked a link that led me to Madame Gilflurt.

011-Mrs-Robinson-as-Perdita-246x300 as Madame Gilflurt“No problem,” she said, “but would you consider doing a guest post on my blog?”

Of course! I love to hear myself talk, and a busy blog sounded fun. I had an idea for a blog post that came up during my research on Regency gowns, and offered to post it on her blog. She loved the idea. It took a while for me to write the actual text of the post, and by then, Madame Giflurt was in the middle of her own series.

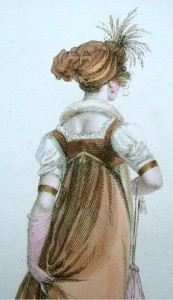
Today, the post is up: The Itch Exposed: A Special Report for the Admirers of Regency and Georgian Fashion. It’s a tongue-in-cheek look at an accidental observation I made while perusing hundreds of Regency gowns in museum pieces, historical paintings, and fashion magazine drawings—the position of some ladies’ hands in drawings from Costume Parisien and other art during the early 1800s. You can read the post at A Covent Garden Gilfllurt’s Guide to Life: Glorious Georgian dispatches from the long 18th century…, Madame Gilflurt’s blog.

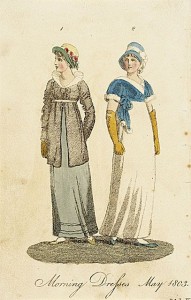
La Miroir de la Mode gown from 1803, the inspiration drawing for Suzan Lauder's January 20, 2016 guest post on "A Covent Garden Gilflurt's Guide to Life" blog.

La Miroir de la Mode gown from 1803, the inspiration drawing for Suzan Lauder’s January 20, 2016 guest post on “A Covent Garden Gilflurt’s Guide to Life” blog.

Madame Gilflurt, also known as Catherine Curzon, blogs about the fascinating personalities of history, focused on the 18th Century and Regency periods. Her lively blog includes a number of interesting guest writers each year. She is also the online host for An Evening with Jane Austen, and may just get to see Adrian Lukis’s (Mr. Wickham from the BBC/A&E 1995 production of Pride and Prejudice) phone number come up on her call display from time-to-time. Madame Gilflurt will join road trips with the redhead for a guest post celebrating the release of her non-fiction book Life in the Georgian Court, which is being published by Pen and Sword books in June 2016.

~~~

A reminder to catch up on chapters of Letter from Ramsgate, now posting at A Happy Assembly! We’re past the bad angst and moving towards mush. The comments thread is as much fun as the story!

Graphic art for signature design by L.L. Diamond using an oil painting by Johannes Vermeer: "A Lady Writing."

Graphic art for signature design by L.L. Diamond using an oil painting by Johannes Vermeer: “A Lady Writing.”

~~~

As can be seen on the sidebar of this blog, Then Comes Winter has been selected as a favourite on three top JAFF book blogs! YAY!

~~~

Please comment on this blog (below) at any time, or for today’s guest post, on Madame Gilflurt’s blog!

The Party Ends with a Splash! #ItsJaneYall

The road trip is over and my “day job” as adorer of two kitties has resumed. I am reminded in bossy purring meows that both deserve extra attention, and I’m rewarded with relentless purring that will extend until the wee hours tonight and over the next several days at least.

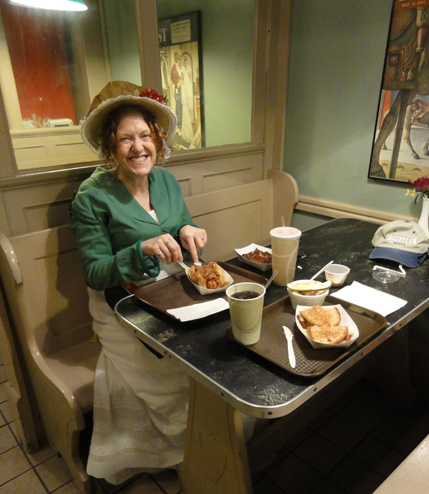
Regency Lady has a Chili Dog: Author Suzan Lauder in Louisville, KY.

Regency Lady has a Chili Dog: Author Suzan Lauder in Louisville, KY.

A final late night involved packing all the gear we brought to the 2015 JASNSA AGM in Louisville, KY. In spite of delays resulting in my husband and I scurrying through to beat the clock at every connection, a re-routed itinerary, and a novice security person confiscating Mr. Suze’s Regency walking stick, we got home after 15 hours of travel in a good mood.

This AGM has been an important goal for almost two years. The event differed from my expectations, and I’m glad I attended, but in some ways, it was an anticlimax. My mixed emotions are yet to become clear, but some conclusions can be shared with the readers of this blog, including my feelings at this point: Relief, regret, and pride.

Relief

Sunday will be the last of two months of a marathon of preparation with many 2am bedtimes, including hand sewing every night of the conference! I won’t miss the stress, exhaustion, and missing out on other things that characterized my life at the end of the Thrift Shop Regency Costume Experiment!

My most substantial relief was measured by repeated expressions of admiration from other JASNA delegates on Friday and Saturday, followed by multiple entreaties to stop every 20 feet so a dozen flashes could go off while people photographed Mr. Suze and I as part of the Grand Promenade. It said the blog goal was successful.

I’m also relieved that people who were less welcoming kept their views to themselves when off Facebook! I’ve avoided mentioning this on the blog to keep things light, but nay-sayers created a huge area of trepidation for me coming up to, and during the conference. It’s difficult enough for anyone to try something new in a public forum, but my fear of failure worsened when I discovered my blog had been an open topic of ridicule in some costuming circles. The funny thing is, these people state hopes to encourage others starting out in costuming, yet their welcome is wanting. No, scratch that. I’m still awaiting the welcome.

old louisville kyRegret

It’s too bad I didn’t have more time to explore more of Louisville, a nice-sized, safe, comfortable, lively town full of welcoming, friendly people. Everywhere we turned, we met and spoke with helpful, smiling locals. Because Mr. Suze explored while I was in seminars all day, he vocalized this opinion strongly.

I looked at lace and ribbons in the shops of the Regency Emporium, as well as actual fashion plates from the Regency (including examples I’ve used here!) for a minimum of 6 separate visits—and I bought only four unrelated books!

I’m sure the shop staff recognized me. I was intimidated and flummoxed because, similar to my experience shopping at home, I could see how lovely these items would be on a costume, but waffled on which to buy and quantities. Did I want to use expensive silk net for sleeves on a polyester gown?

I hope I won’t be too disappointed to have wasted an opportunity to purchase embellishments better than any I’ve ever seen elsewhere!

Contrary to my expectations, I don’t mind too much that I couldn’t bring the planned jonquil gown, as my last-minute compromise with the translucent fuchsia overdress worked well.

I left the AGM uncertain about whether the blog had readers outside of my circle of friends. I’d hoped to have more Janeites approach me for the give-aways, but prizes I’d planned to hand out came home with me.

However, when authors Maria Grace and Linda Beutler both commented, “Is that the spencer from the blog? I love it!” and admired all the details, especially the little skirt detail in back, I was proud, even if the sewing quality is atrocious!

I wish I’d had more time to get to know more people. I did enjoy the company of fellow Meryton Press author Linda Beutler for some events and tourism, and it was sad to split up to go home again. Luckily, there’s AHA Chat and Facebook to remain close to those I met whom I already liked!

Pride

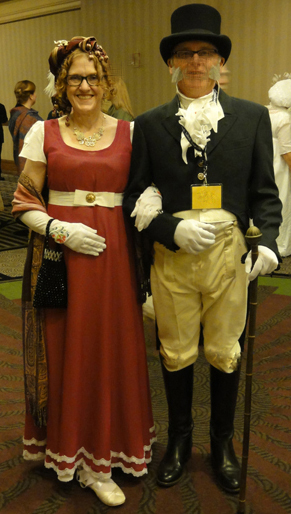
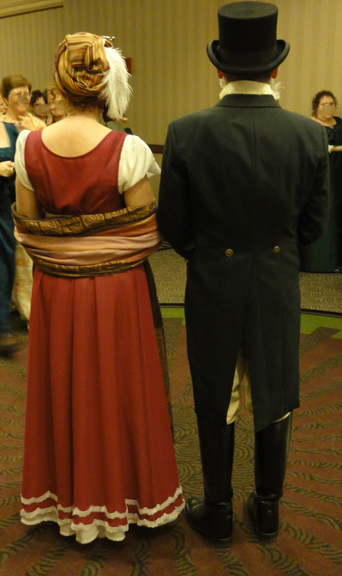
mr suze and suzan lauder at louisville jasna 2015 ball blurredMr. Suze’s costume was right up there with some of the best of the menswear. The cut of the tailcoat and shirt neckline set his apart from amateurish-looking versions, even if we were no more expert than the others! I’d found some brass buttons with a crown-type coat-of-arms on them at 3 packs of 3-4 buttons for 99 cents each at Fabricland that really set off the tailcoat. Louisville has a fantastic gag shop (Caulfield’s Novelty Inc.), where he spent too much on a set of grey sideburns to add a final flourish that got quite a few laughs.

Many ladies’ costumes had breathtaking details in fine silk and fancy lace, with pleated, ruffled, or impossibly swirled trim, soutache and buttons and tassels in just the right places, enormous hats with giant feathers and unique bands, and gowns with professional-looking cut and quality of construction. Though my costumes were simple in comparison, they did the trick well.

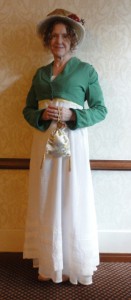
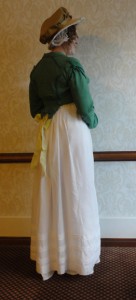
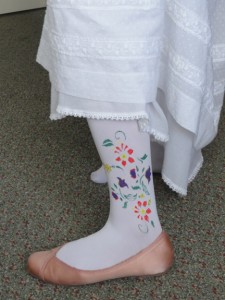
saturday day gown frontsaturday day gown backsaturday stockingsSaturday’s gown from morning through the author signings was the Swiss dotted dress, remade with a Regency-cut skirt, the lace shared over three rows, shorter puffed sleeves, and a real diamond back bodice, as I developed a Regency pattern fitted specifically for myself. The Pomona green spencer was worn all morning, since many others were doing the same, perhaps in response to light-hearted in-character comments by a couple of presenters as they joked about disapproval of married women who wore plain white! I would have added more ribbon to give this lovely gown colour, but time ran out!

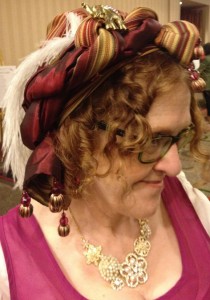
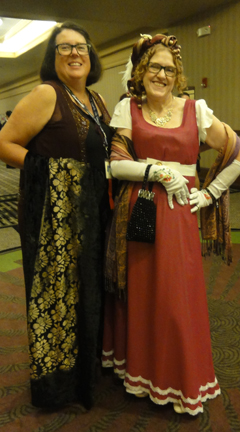
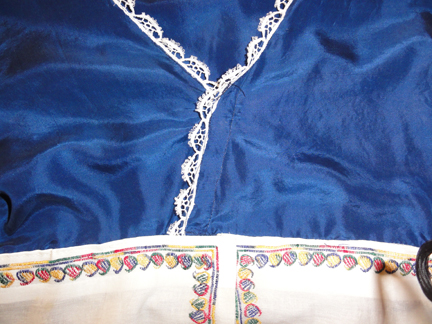
My ball costume was “thrown together” in a few days. Little flourishes, like the painted designs on my opera-length gloves, the way my turban tied in a unique and cheeky way in one go and sported a bejeweled elephant pin and curled ostrich feather on top, and two new rows of lace on the bottom of my improvised gown helped my simple effort look like it belonged there.

I think our smiles made me and the Mr. appear better than many at the ball, as we had a great time among the multitude of amazing costumes.

The visible minority!

turban revisedAbout 20% of the people at the AGM sported Regency costumes the first few days, but I’d guess the proportion was at least 40% at the banquet and ball on Saturday night. Author and organizer Sharon Lathan looked so perfectly ordinary when I first met her that I didn’t realize the pretty blonde woman in glasses and jeans was her! She glowed in her silk ball gown, though!

I wore Regency for two of the four days I was present for activities around the AGM proper, which was 2.5 days long. Others who, like me, were at their first AGM and all smiles in their bold effort at a costume that fit in at the ball, included JAFF authors Linda Thompson and Melanie Schertz, whose service dog, Mr. Darcy, had all the ladies swooning in his cravat!

linda beutler and suzan lauderAmong those who wore something awesome that wasn’t Regency was author Linda Beutler. She shared a table with me for the author signings and banquet wearing a vintage 1920’s beaded gown with exquisite details and accessories. With a break from her normal life of gardens for living, her nails matched her deep maroon gown.

Some participants, like author Syrie James, changed for the ball by simply removing a shawl or fichu from the dress they wore that day. Author Maria Grace sat next to Linda and me for the signing event, and she and her Mr. changed from regular clothes into attractive and well-executed Regency costumes for the evening, then cut up the dance floor like pros!

Sue Forgue of the Regency Encyclopedia turns out to be a bit of a fashion plate. She donned a different gown during the day and evening on Saturday, the former with an amazing floral pattern straight out of the Regency that made me match my spencer in jealousy. Interestingly, the latter was a Pomona green silk! Sue enhanced both gowns with gorgeous matching jewels and reticules! I wish I’d thought of photos, and if I get one, I’ll add it to this post.

The Splash

Not a literal splash, but trip on the Ohio River on a 1914-built steam-engine paddlewheel boat, the Queen of Louisville, was a ticketed event last night to culminate our visit for the AGM.

I doubt that more than 5% were dressed in Regency costume! I think many are more comfortable without a corset, no matter how well it improves one’s posture! I wore a nice modern skirt and blouse for the boat trip. In the daytime, it had been a Jane Austen t-shirt from my local library’s fundraiser paired with Michael Kors skinny denim capris!

The weather was fine, as it had been for the whole trip—in the high 80s, when seasonal normal daytime temperatures are in the low 70s.

The Future for my Regency Costuming

One of Meryton Press’s editors and our unofficial social media marketing coach, Christina Boyd, suggested early on in the Thrift Shop Regency Costume Experiment that the series would make a good book. She’s repeated the sentiment, and it’s tempting, though I’d have a great more due diligence on ensuring permissions for images, making it a big project when I’d like to get back to fiction.

“Encyclopedia Sue,” who adores JASNA as a learning experience, staunchly supports the positive examples that instigated the interest in the Regency and Austen for many (including the BBC/A&E miniseries) and spends a huge amount of time sharing resources to help writers and researchers improve their craft, suggested the blog as a seminar for a future JASNA AGM. Though I admit I had some interesting ideas for topics I’d enjoy presenting for this AGM (and didn’t explore them due to lack of time!), without Sue putting the seed in my mind, I’d have never thought of the TSRCE in a seminar format. I’m tempted!

back view mr suze and suzan lauder louisville jasna ball 2015 others blurredThough I know I’ll continue to make gowns and hats based on the wonderful examples I saw this year, for personal reasons, it’s unlikely I’ll have time to attend next year’s AGM in Washington, DC, but I hope to repeat this, with gowns made well ahead of time, for the Huntington Beach, CA AGM in 2017.

Locally, I’ll wear my costumes to JASNA events along with a dozen or so others who enjoy that aspect of study of Austen and Regency.

On July 8 and 9, 2016, the town of Port Alberni, BC, Canada (about 3 hours from me, on Vancouver Island) is hosting its first Jane Austen Festival, and claims an intention to break the world record for Regency costuming. I’ll be there, and I hope I can throw some of my extra gowns on some friends, including enticing a few from around the world to come visit me while they help Port Alberni with its goal. With vintage dresses and fabric, I have the basics for at least a dozen gowns, never mind that I yearn to tackle fabric and look a little like Sue did on Saturday!

~

Future posts:

  • Side issues and tips related to attending an AGM.
  • Reprint of a Regency-related article I wrote for another web site.
  • A blurb and teaser for my latest novel-length story, Letter from Ramsgate, rated Teen, which will be posted in full at A Happy Assembly. Join us in the group read and story comments! AHA is a members-only web site dedicated to Austen-inspired fiction, research of Austen and Regency topics, and the resulting social interactions. It has over 9000 members worldwide, and 500 completed Austen-inspired stories. Membership is simply to ensure readers are over 18, and your personal information remains as personal as you choose.
  • I have other writing projects underway, and blurbs or excerpts will be shared here in the future!

Pre-JASNA AGM Day trips: New Albany and Jeffersonville, Indiana

I’m truly on holidays. How do I know this? It’s 27C and sunny! (That’s 81F.) Of course, no one expected this summer-like weather in Louisville, KY in October, but they do it right around here!

New Albany and the Harvest Homecoming Festival

After a relaxing morning to compensate for yesterday’s air travel, Mr. Suze and I headed out for an afternoon of tourism. We checked the forecast, and I was glad I’d thrown one pair of shorts into my suitcase, as it was already warm!

Our destination was lunch at the food booths of the Harvest Homecoming, taking place October 3-11 in New Albany, Indiana, across the Ohio River from our hotel. We caught the #71 bus on Jefferson, about 4 blocks from our hotel.

New Albany, IndianaNew Albany, Indiana 3The trouble was, there were no events for the festival today! The food booths and craft fair start tomorrow, when I’m registered in sessions as part of the 2015 JASNA AGM!

We found a great sandwich place (Toast on Market), then enjoyed a long walk along Main Street then back along Spring Street in New Albany to see many fine houses and large commercial buildings from the 19th century in restored condition.New Albany, Indiana 2The Emporium!

Upon our return to Louisville (pronounced Loo’-uh-vull), I met up with Meryton Press Author Linda Beutler during registration for the JASNA AGM. After a chat and introductions to her friends from JASNA SW Washington/NW Oregon, we were about to set off to rest before dinner.

But first, we peeked into the Regency Emporium rooms to see all the goodies that were for sale: gift items with Austen quotes, both modern and Regency jewelry, top hats, hairpieces and wigs, paper products, “grown-up lady’s” caps similar to the John Williams Dress Cap pattern from 1826 in simple muslin, wax bas-relief profiles, books, toys, and more. Fewer than half the booths had merchandise (6pm Wednesday).

Ready-made Regency gowns were for sale for $200-$300 in a rainbow of colours, multiple styles including pre-Regency, and many sizes, mostly larger! The fabrics and finishing details showed off the designer’s ability to make each gown special, and I recognized her from Etsy (I think–if it’s the same person). Her work often has modern flair, but it’s so pretty, only the snottiest costumers will whisper and point. Most JASNA-goers will be pleased to see such a pretty gown!

My author colleague sneaked an early purchase (the Emporium officially opens tomorrow at 8am) of a beautiful shawl at a budget price from a vendor who also sold sari fabric for gowns, many eclectic books, and a few framed Regency fashion magazine prints! She showed us how to wrap a turban in far simpler terms than the videos, and mentioned she’d learned it from a Canadian! My favourite set of items for sale was right up the alley of the Thrift Shop Regency Costume Experiment: her lovely collection of “found” vintage reticules of all types!

On the way to the elevator, we nearly bumped into a pretty natural blond woman, casually dressed, and wearing glasses–OH! Author Sharon Lathan, one of the organizers of the author signing event on Saturday. She looked like an ordinary person! This is a taste of what to expect this weekend!

Pedestrian and cycling bridge between Louisville KY and Jeffersonville IN. The colours of the lights change regularly, and each side has different unique light towers to guide you up the ramps.

Pedestrian and cycling bridge between Louisville KY and Jeffersonville IN. The colours of the lights change regularly, and each side has different unique light towers to guide you up the ramps.

Jeffersonville via the Big Four Bridge

After a rest, my husband and I met Linda to walk over to Jeffersonville, IN for dinner. The paths along the Ohio river iin downtown Louisville are wide and surrounded by park area, and the huge area of bicycle racks for the weekend’s Iron Man Triathlon event was impressive!

Meryton Press Authors Suzan Lauder and Linda Beutler

Meryton Press Authors Suzan Lauder and Linda Beutler

We thought it was a half hour or so walk–but it turned out to take 50 minutes just to get to the footbridge! We were thirsty!

We chose the first restaurant (Red Yeti Brewing Company) we found in Jeffersonville about another half hour later. A prompt delivery of unsweetened iced tea and we were chatting happily as if it had taken 5 minutes to get there. (I like a little sweetening, but most sweet tea is too much for me, and Linda likes her tannins raw!) The memorable food featured yummy details like bacon jam on the brisket sandwich, and we all declared ourselves satisfied!

The rest was sufficient to restore our energy, and we walked back on the “short cut” along city streets instead of along the riverside, which shortened the trip to under an hour.

Tomorrow, Linda and I will let Mr. Suze explore on his own while we haunt the shops of the Emporium until our seminars start.

Give-aways!

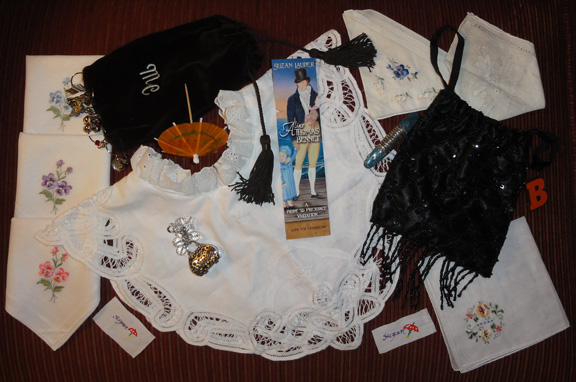
TSRCE Oct 8-12 giveaway itemsRemember, if you’re also here in Louisville with us, and have followed the blog, look out for me so you can meet me to let me know. I’ll be in costume Friday and Saturday, and in regular clothing Thursday and Sunday. The items in the photo will be given away here, a few in each of the next four days.

Linda and I will be signing copies of our books at the author booth on Saturday at 3:45. You can bring your own copy of Alias Thomas Bennet or buy a copy from Jane Austen Books at the AGM (the same for Linda’s 4 JAFF books!), or just stop by to say “Hi!”

For the balance of the followers of my blog, don’t forget to comment, as I’ll be giving away TSRCE prizes to be mailed out to winners of the draw on the blog, too!

UPDATE: Because we’ve had a lot of trouble with spam, some types of email addresses are being blocked by an extra-enthusiastic spam filter. If you’ve had trouble commenting on the blog (get an error message), I encourage you to comment on my Facebook page and mention the difficulties so we know for sure whether our spam blockers are too intense.

On the Road Again, Sans Ball Gown

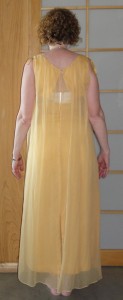
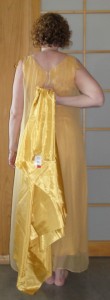
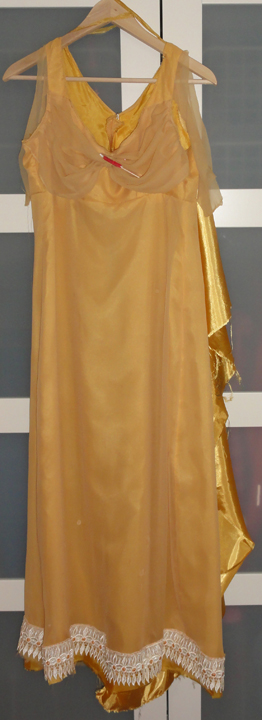
jonquil original frontjonquil original backA sad event took place last Wednesday. I had to abandon efforts to complete my beautiful jonquil ball gown midway through the project.

My setback was part of a chain reaction from washing a panel of matching fabric to be used to line new gathers in back.

It’s best to wash new fabric in case it shrinks. The fabric came out fine.


The Original Plan

jonquil back with faux silk lining shownThe vintage 1960s gown from Women in Need (WiN) Thrift and Vintage Superstore (above and right, before any modifications) would have the following modifications:

  • The back skirt detached from the bodice, the zipper removed, and the center back seam opened.
  • A triangle cut from the former back panels to create Regency side panels 7″ wide at the top and 12″ wide at the bottom.
  • Part of the sheer overdress draping from the original dress, plus matching lining (faux silk from Salvation Army at $2.99 for 2 meters) added as a 24-inch-wide back panel, gathered to six inches wide.
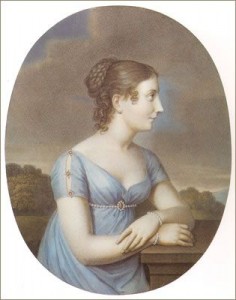
  • The sleeves modified by cutting the overdress draping free at the neckline and reversing it to have a finished look like the artwork below left.
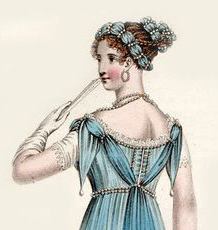
  • Panels from this draping would be finished with beads on the ends like the Regency fashion plate below right.
1815 Stephanie de Beauharnais-Baden wearing pale blue dress by Aloys Keßler after Johann Heinrich Schroeder

1815 Stephanie de Beauharnais-Baden wearing pale blue dress by Aloys Keßler after Johann Heinrich Schroeder


Evening Dress October 1811

Evening Dress October 1811

Indian blouse.

Indian blouse.


  • Lace from the Indian blouse was to run along the skirt bottom to lengthen the gown about 1.5 inches. Removal of this lace took quite a while since it was sewn on with  silver thread, which I wanted to retain to match the 1960s gown’s original waist trim.
  • A shirred panel from the ends of the draping would cover two holes in the bodice.


Disaster hits!

But when I decided to wash the gown along with the new fabric, on a super-delicate cycle, a horrid change took place: pin holes in the sheer fabric enlarged, and the overlay and draping, both from the same sheer material, shrank.

New projects emerged from the fiasco:

  • open the hemline where the overlay was attached to the lining so the fabric would relax before the lace was attached to the bottom of the sheer overlay,
  • cut a new piece from the sheer overdress draping for the back panel as the one previously cut was now too short,
  • re-think the sleeves since I stole the attached fabric for them and the dangly bits to create the second back panel,
  • figure out if I needed to add a panel at the hem for length (Maybe a rouleaux? I know, I keep adding beautiful design details!) now the bottom lace was a little higher,
  • find a way to camouflage the holes on the skirt.


I soldier on!

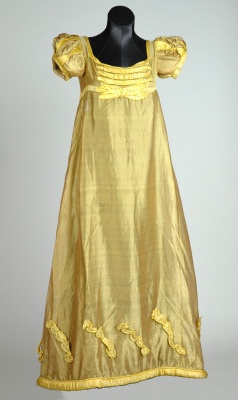
Yellow silk evening dress, 1817, Leeds Costume Collection.

Yellow silk evening dress, 1817, Leeds Costume Collection.

The Thrift Shop Regency Costume Experiment has always been about learning and adapting, and I wasn’t about to abandon this project yet. The back gathered panel, a simple project, turned out well. The gathered bodice overlay was a bit more complicated, but looks pretty.

I patched the holes on the front of the skirt using no-sew tape and tiny pieces of fabric from the overlay, and though they look better, it appears as if I spilled small drops of yogurt on my front!

Museum gowns, period fashion plates and Regency artwork were perused for additional hole camouflage ideas. Due to the location of the holes, I settled on diagonals of shirred fabric to mimic the museum piece on the right. I had plenty left from the Salvation Army piece.


Time is my enemy

It was Wednesday, and I would leave Friday morning for a short trip to celebrate my mother-in-law’s 86th birthday and an early Canadian Thanksgiving, before flying on to Louisville for the 2015 JASNA AGM.

Mother-in-law's 86th birthday and cool fall weather.

Mother-in-law’s 86th birthday in Winnipeg, MB, Canada.

In addition to the sleeves and skirt detail to hide the holes, the ball gown needed other work:

  • install the tapes with hooks and eyes on the back bodice to replace the zipper,
  • re-attach the waistline trim,
  • trim the neckline and sleeves with narrow silver braid to coordinate with the other trim,
  • use the same narrow silver trim to make the faux diamond back.

I was still thinking through the process and finish for the diagonal pieces on the skirt. I estimated this part of the project would take a full day.

The jonquil gown’s sleeves would take yet another day to design, make a pattern and at least one mock-up, and attach. Either of the two ideas that follow would be created with scraps of sheer draping and some of the faux silk.

1810 Ball Gown with pearls.

1810 Ball Gown with pearls.

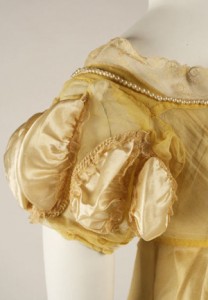
Sleeve detail for 1811 gown, Metropolitan Museum of Art.

Sleeve detail for 1811 gown, Metropolitan Museum of Art.


No way could I finish this gown on time.

On top of those issues, several other machine-sewn projects were required for to the conference:

  • my spencer and the gentleman’s tail coat needed buttonholes–buttons had been temporarily attached to make deadlines for the blog posts!;
  • the white Swiss dot gown needed fake long sleeves, as the originals had been removed and short sleeves added, intended to make the dress flexible for morning or afternoon wear;
  • some pretty sheer fabric with white embroidery would be made into a fichu and, with the addition of some organza lace, a second cap.
  • Mr. Suze broke the cheap plastic belt lining product I’d used for his suspenders, and we had to purchase new banding and attach.
The jonquil ball gown needed too much additional work to earn its full parasol, and time ran out!

The jonquil ball gown needed too much additional work to earn its full parasol, and time ran out!

I also had numerous hand-sewn projects that would be tackled on the trip, such as 14 buttons on Mr. Suze’s tail coat and re-attaching the lining to my hat, which was not staying put with the double-sided tape.

Dozens of bags and containers of project items had to be packed up and stored after all this sewing, and I had to pack for a trip to two climates.

Something had to give, and the jonquil gown was sacrificed. I stopped all work on in mid-day Wednesday.


On to packing– but what to wear for the ball?

I had to quickly re-think possibilities for a ball gown. In a panic, I packed potential items that could be modified by hand, but were the dreaded polyester, and not my colour.

The alternative is the Swiss dotted gown (my original morning gown), but its fabric and style is less formal, better suited to an afternoon or dinner gown in its short-sleeved version.

I was in a terrible rush by the end, and didn’t stop moving from 7am Thursday to 1am Friday. I didn’t have time to make the new cap for day-wear, and have to wear my small-fitting first effort, made from cheap polyester lace at the last minute for my local JASNA’s Jane Austen Tea (an earlier blog post).

After the fact, I thought of a half dozen items that I should also have packed, e.g., my turban was to match the jonquil, and now I have to re-think headwear for the ball. I forgot my Alias Thomas Bennet book bead bracelet, which matches my editor and artists’ versions and would have been perfect for the book signing on Saturday prior to the promenade and ball.

I haven’t decided which way to go for the gown, and the only way to know is to watch my blog!

Next post: Louisville!


***UPDATE! Don’t forget to comment on The Thrift Shop Regency Costume blog posts, or find Author Suzan Lauder at the Louisville KY JASNA AGM for a chance to win items from the Experiment! Daily prizes October 8-12!


Tips for Faking Regency Costume Details #2

Clocked is a strange word. When I was young, when someone said “I clocked him,” I’m pretty sure it meant they hit him hard. I think it meant in the head, but I’m not sure. It’s not a word that I use in everyday conversation.

In Regency fashion, there are clocked stockings. This does not refer to anything resembling a clock as far as I can tell. It means stockings with a design on them.

Faking Regency Designs on Gloves and Stockings

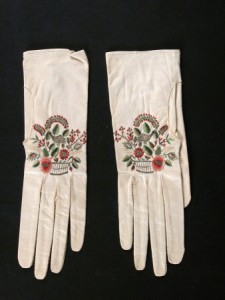
Embroidered kid gloves, 1800-1830, National Trust Museums

Embroidered kid gloves, 1800-1830, National Trust Collections.

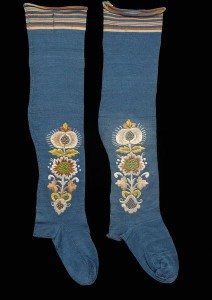
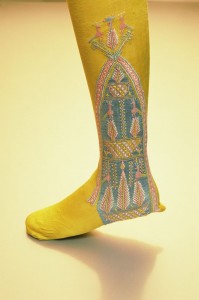
1775-1829 stockings, Victoria and Albert Museum

1775-1829 stockings, Victoria and Albert Museum

Embroidery or painting on stockings and gloves was an embellishment that was enjoyed by at least a few Regency ladies (and men), judging by the museum examples. Interestingly, an etiquette book of the time, Mirror of the Graces, frowns on clocked stockings. It looks like fashion won in consideration of a stuffy old guidebook!

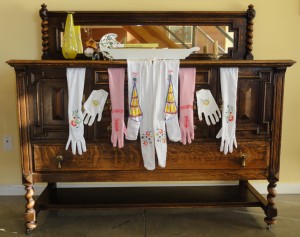
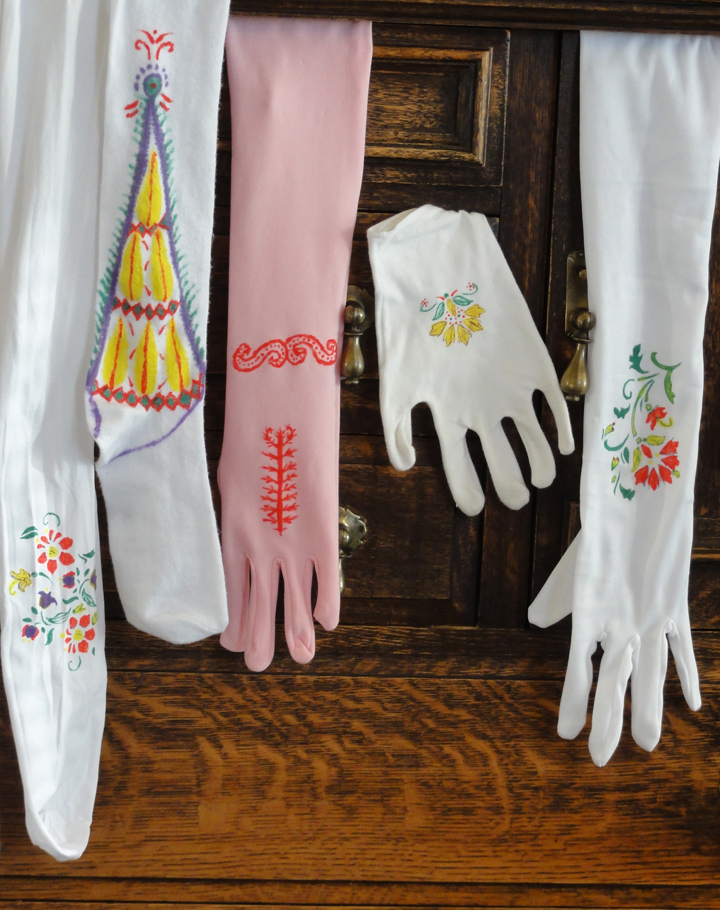
Some of my stockings and gloves got a fake Regency treatment this weekend: I used fabric paint to apply designs. A stencil purchased for half price at Michaels was used in three different ways, by masking some of the areas with packing tape each time. Once I’d done all I could with the stencil, I decided to try a bit of freehand with the four colours of paints I had.painting accessories all

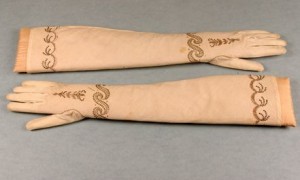
The floral designs on the white tights and the short and long white gloves were made with the stencil. The pink long gloves and the knee-high stockings are my attempt at freehand, loosely referring to photos of existing museum pieces (see below). Not bad for a non-crafty redheaded romance author!

Cotton fabric embroidered gloves, circa 1790-1810, bias cut for stretch, gold and sequinned scrollwork, pale pink, floss silk detailing.

Cotton fabric embroidered gloves, circa 1790-1810, bias cut for stretch, gold and sequinned scrollwork, pale pink, floss silk detailing.

Stockings, early 19th century Cooper Hewitt collection

Stockings, early 19th century, Cooper Hewitt collection.

Stockings, 1810, English, Kyoto Museum

Stockings, 1810, English, Kyoto Museum


painting accessories closeup to show detailI didn’t bother with the coloured tights as for now, the colours don’t suit my gowns.

The pens tended to bleed in the fabric, and the bottled paints were a bit puffy. After the first items, I used the pens for light lines and not fill, and used a Q-tip to apply the paint so it was smoother. If I was doing this again, I’d consider getting additional colours, but these were all I found on sale the day I bought them at Michaels.

~

How to Make Easy Back Gathers on Regency Gowns

One of my favourite tricks for faking Regency is to use drapery tape to make the back gathers for a gown. The tape must be the kind that makes all uniform gathers, and not pinch pleats. I had some 1″ wide tape I got in two meter-long pieces at a thrift store for $1 a long time ago. I used it to make the last-minute “emergency” gown for the JASNA outing I had a few weeks ago. Belt backing tape can be seen for the non-gathered part.gathering tape and waistband material inside paisley embroidered fabric for use as a skirtpaisley fabric gathered using drapery tape

There are two ways to use the drapery tape to make your Regency gathers in the back of the gown.

  1. The simplest is to machine sew the tape onto the gown. Take care not to sew on the strings. Gather using the strings, tie the strings, cut shorter, and leave in place.
  2. The second method allows re-use of the drapery tape and less bulk in the back of the gown. Hand-baste the drapery tape on, but do not lock the end of your basting thread, rather, leave an inch or so free. Once you’ve sewn your skirt to the bodice, the gathers are fixed, and all you need do is tug on the knot on your basting threads to pull them free and remove the drapery tape to use on another skirt.

You want to have at least three times the width of fabric as your final gathered amount, and 4-5 times looks pretty.

Depending on your fabric, you may want to leave a seam allowance above the drapery tape. Because my fabric (above) had a border, I ran the tape at the top edge, then hand-stitched it to the bodice.

If you’re interested in standard methods for gathering fabric, this video from Teach Yourself to Sew shows three different methods.

~

To Zipper or not to Zipper–or To Fake!

When you get a vintage or other type of newer-than-Regency gown and wear it for a Regency gown, to be authentic, you should remove the zipper. Regency alternatives were ties, hooks and eyes, or buttons, or they were pinned closed by a lady’s maid.

In most cases, a replacement closure for the zipper is not necessary on the skirt, as the ribbon or belt holds the top edges together. The skirt is loose due to the gathers, and should overlap. The concern would be to ensure the bodice fit is snug.

There may be gaps between the replacement closures. In the Regency, so many undergarments were worn, the gap was of little consequence; however, some modern women balk at the idea.

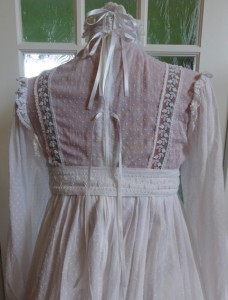
ribbon ties on back of original morning gown suzan lauderMost often, Regency gowns used ties to close at the back, and this is an easy-to-install and inexpensive closure. Discount and craft stores have narrow ribbons in limited colours for under $2 a roll, and attractive cords are under $1 a meter.

In the absence of a lady’s maid, to fake Regency with modern modesty, retain your zipper and add ribbon or light cording ties over it at a couple of locations. At right, two are tied and the lower one is not, so you can see where they’re attached. Care must be taken not to catch the ties when using the zipper.

At 12″, mine were too long; 6″-8″ would suffice.

~

To close the front of the “emergency” gown, I used hooks and eyes. This is not truly faking as they were common on Regency gowns. When hooks and eyes were used, seamstresses weren’t stingy, and used a lot of them.

Packages of individual hooks and eyes are inexpensive, and come in black, white, or steel in most stores, and some stores offer additional colours at a premium. They are fussy to sew on individually but are excellent in some cases, such as holding a short width or edges together.

For ease of installation when multiple hooks and eyes are needed, cotton tape with hooks spaced about every inch, and matching tape with eyes, is sold by the meter. I was lucky to get the tape with hooks on sale, but the tape with eyes was regular price.

An alternative to the tape with eyes (at half the price per meter) is a product intended for long rows of buttons, which looks like woven cording with loops every half inch or so. The loops appeared to align with the hooks, and for short lengths, they’re okay, but they’re just enough out of sync that, for longer lengths, I need to skip an extra one every so often.

As you can see, I used both types: tape on the crossover v-neck and individual hooks on the belt edge of the skirt. The installation was fair to both right and left handed openings!

hooks and eyes on emergency dressemergency dress closure


~

As much as we like buttons these days, they were less common on Regency women’s wear. Jane Austen remarked in a letter to her sister Cassandra that buttons were quite dear. Men’s clothing most often had self-covered buttons, but ladies’ used metal, shell, ivory, stones, gems, and similar materials.

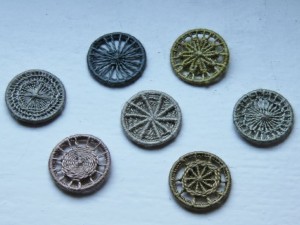
Mother-of-pearl buttons are okay if you can find them, as are buttons made with fine cording such as Dorset buttons. Don’t use plastic buttons unless they are an excellent fake.

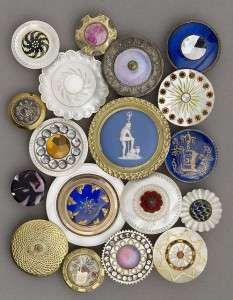
Pearl and metal buttons, 1780 to 1820, Luckcock Collection, Birmingham Museum of Art

Pearl and metal buttons, 1780 to 1820, Luckcock Collection, Birmingham Museum of Art

Dorset buttons

Dorset buttons

You could put fake buttons and loops on the gown just as you did for the ribbon ties, and keep your zipper.

~

Next post: I left all the hand-sewing for items like Mr. Suze’s coat to the last minute, and not much new is happening at the moment! I’ll try to take a photo or two of my ball gown as I complete it this week, but since I’ll be traveling prior to the JASNA AGM in Louisville, Kentucky on October 9-11, 2015, it will be a meager post!

~

The best word EVER: GIVE-AWAYS!

On October 8-11, while I’m in Louisville, there will be a draw for daily prizes from my stash of reticules, Regency accessories, and other goodies. The Regency items are one-of-a-kind. Though they’re hand made by someone who’s not crafty (so less than perfect), I’ve signed each one and added my signature pagoda parasol.

There are two ways to enter:

1) Comment on any Thrift Shop Regency Costume Experiment post on road trips with the redhead, with your email address (username at host dot com), or

2) approach me at the JASNA AGM and ask for a Parasol in a Ballroom. I’ll collect your name and email address.

**The first person who enters either way whose initials are M.C. is an automatic winner of a velvet reticule with your initials embroidered on it!

I’ll attempt to deliver winning prizes from the AGM while I’m there, and blog comment prizes will be mailed. Good luck!

Faking Regency Part One: A modern blazer morphs into a spencer.

This sounds pretty easy, right? Get an old blazer, cut and hem to under-bust length, and Bob’s Your Uncle. Well, not so easy. Unless, of course, you’re super-lucky and find exactly the right blazer.
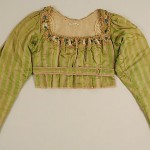
Early 19th century spencer, Metropolitan Museum of Art
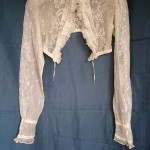
Early 19th century spencer, Metropolitan Museum of Art

Embroidered muslin bodice or spencer, 1800-1810
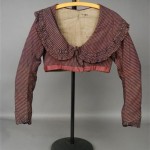
Embroidered muslin bodice or spencer, 1800-1810

Rose pink striped cotton and silk spencer, early 19th C.
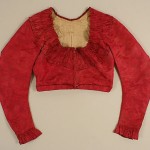
Rose pink striped cotton and silk spencer, early 19th C.

Early 19th Century, Spencer, early 19th century, French, silk, Metropolitan Museum of Art
Early 19th Century, Spencer, early 19th century, French, silk, Metropolitan Museum of Art

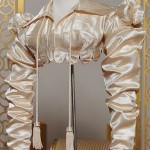
Cream silk satin Spencer, c1818. Decorated in imitation of military uniforms. Worthing Museum.

Cream silk satin Spencer, c1818. Decorated in imitation of military uniforms. Worthing Museum.

If you hadn’t already figured it out, the Regency spencer is a little, long-sleeved jacket that’s just as long as the bodice of the empire waist gown. One bonus for shopping for a blazer to make into a Regency spencer is that almost any neckline will suit. Click on the thumbnails to see details, including neckline examples.

The difficulties include a requirement for long sleeves (as per usual in the Regency, longer than standard is better), a fitted bodice, fabrics that don’t look modern, colours that are more interesting than black, and a lack of embellishments such as studs, fake pockets on the chest, or jean jacket seams.

The textures and colours of many blazers in my thrift shop visits didn’t work. Black polyester rules, and next to that, corduroy and knits. Every time I saw one I’d consider, it was 3/4 sleeve, the wrong size, or had some detail that screamed the 90’s.

I looked at blouses, too, since some spencers are more blouse-like and some modern blouses are more blazer-like.
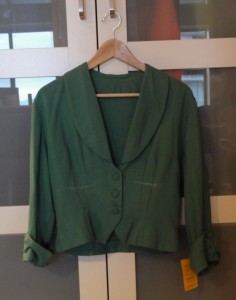


spencerspencer back


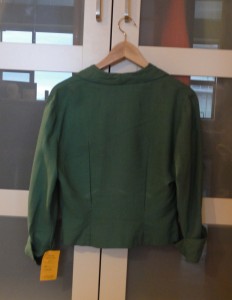
This unlined, fitted, pomona-green jacket will be my spencer. Pomona? I would have called this leaf-green, as it’s fairly bright. (Some of my shots were taken in the evening, and appear darker.) Then I read an article about Ackermann saying Pomona green was the same as apple green and I thought, this is a little darker than apple green, but I’ll check on Google images. Enough of the examples were the same as my blazer for me to confidently say it’s one of the more popular colours of the Regency!

The 3/4 sleeve, linen, shawl-collared blazer was $16.50 at Women in Need Thrift and Vintage. It has unique matching self-covered buttons.
Short sleeved spencer alongside unusual short coat.
Short sleeved spencer alongside unusual short coat.

Sleeve trim idea.

Sleeve trim idea.

The down side of my blazer is the 3/4-length sleeves. At the time I bought it, I didn’t realize that detail wasn’t popular during first 20 years of the 1800s. I looked in vain for examples of Regency spencers with 3/4 sleeves, and though there are a few short-sleeved spencers, I found nothing 3/4 sleeved.

Lucky for me, the flared cuff was long enough to drop to make a long sleeve. I kept looking for a long-sleeved blazer for a spencer. As mentioned before, I saw a blazer with lovely soutache designs, but balked because I worried about how to cut down the blazer at a good point for the soutache. When I decided I could rework the soutache if need be, I returned, but it had been sold. But today, I found a cute, gold silk blazer with a pretty collar, long sleeves, and mother of pearl buttons! The only sad part is a centre-back seam. More on that later.

(An aside: I’ve seen the perfect dress that just needs an empire waist height ribbon to fake Regency on two shopping trips since June, but both times, they were too small for back gathers for me, but would work with a smaller person!)

In most cases, your blazer should be cut to 2-1/2″ longer than the bottom of your bust line, turned under 1/2″, and hemmed 1″. This will stiffen the edge and ensure it fits over your gown bodice, but it won’t be too long. You can see I’ve marked my blazer to spencer length while wearing it. This frees up two buttons from the front for embellishment elsewhere.

If your blazer doesn’t close tightly at the bottom after it’s trimmed to length, there are several possibilities. If there are buttons in the upper portion (part you’re wearing), it’s better to fit the spencer than to ease in fullness. Add darts or gathers under the bust, or pleats or gathers in the mid-back; they’re era-appropriate. Don’t make it too tight, as it must fit over the gathers of your gown.

My blazer was already fitted with six darts in front and two very long back darts (in fact, the back darts were over-sewn longer and deeper than the originals). It was snug across the bustline, so I removed the back darts, washed it so the stitch holes relaxed closed again, and pressed out the remaining dart creases while it was still damp. A few gathers added by hand in the mid-back at the waistline help to fit my slimmer rib-cage under the bust.

If the bottom button is too far from the bottom of the spencer, you can put back a cut-off button and make a buttonhole at the band level, or add hooks and eyes. To fake Regency, buttons should have a Regency look: metal, shell, pearl, mother-of-pearl, fabric-covered, thread-covered (such as Dorset), or corded knot (such as Celtic or Chinese knot or frogs with knots) are best. Since metal buttons were expensive, use them only if your spencer has a rich look with elaborate trim. With corded buttons, your other trim would be best as corded, in fact, a military look to the spencer was popular! Self covered buttons were ubiquitous on mens’ wear, but less so for ladies’.
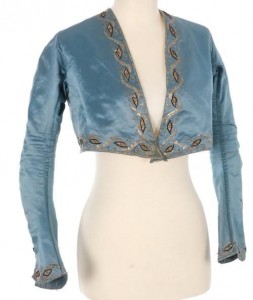
Spencer jacket, 1790-1815. Note no closure in front.

Spencer jacket, 1790-1815. Note no closure in front.

If there are no buttons, there’s nothing wrong with having a spencer that doesn’t fasten closed, unless you need it for warmth. An example of an open-front spencer can be seen on the left, and others existed in the Regency.

My blazer was unlined, so I chose to use the inside bottom facing from the original blazer on the outside, as a waist band. Bias tape was used to finish it on the inside where it’s not seen. Another option is to add a contrasting band (as on the pink striped blazer above). If you have good sewing skills and choose to add a waist band, it’s an opportunity to put contrasting piping all around it per a tutorial below.
Spencer jacket 1815 (back). This trim is an example of how we plan to fake a Regency diamond back! The real shoulder seam will never be noticed!

Spencer jacket 1815 (back). This trim is an example of how we plan to fake a Regency diamond back! The real shoulder seam will never be noticed!

Since the facing didn’t continue across the buttonhole panel in front of the original blazer, it didn’t go all the way around, so was short for the waist band. To make up for this, I used extra fabric from the cut away parts in front. If you use multiple pieces for the waist band, make sure your seams are at the blazer’s side seams, or at both bottoms of the diamond-back, so they’re less noticeable.

In addition, to fake Regency, some front cut-off material from my blazer made a little skirt-tail in the centre back, similar to the museum examples. See thumbnails below; click to enlarge. Extra self-covered buttons trim the ends of the waist band tabs in back.
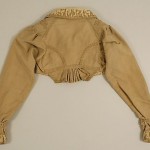
Back detail of a spencer, 1813, American or European, Wool and silk, Metropolitan Museum of Art.

Back detail of a spencer, 1813, American or European, Wool and silk, Metropolitan Museum of Art.

To fake Regency, you need do none of the above. Focus on the one detail that’s not too hard to manage: the diamond back.

The look was on almost all women’s wear of the period, achieved by a shoulder seam that fell behind, rather than on top of the shoulder, and a pair of side-back seams that curved from the outside edge of the back gathers on gowns to partway up the back of the sleeve. The back of the sleeve fit farther into the back of the bodice than a modern sleeve, too. Click on the thumbnails for examples of the backs of spencers.
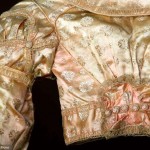
Silk spencer, 1810. Augusta Auctions.

Silk spencer, 1810. Augusta Auctions.

A faux-diamond-back can easily be achieved by numerous methods. You can fake the seams with a line of fabric paint or even fine-line permanent marker in a slightly darker colour, a line of top-stitching using hand back-stitching in embroidery thread, or machine top-stitching a double line.
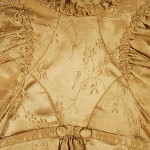
Spencer, early 19th century, American or European, silk. Metropolitan Museum of Art.

Spencer, early 19th century, American or European, silk. Metropolitan Museum of Art.

Better yet,  Regency clothing often had trim over these seams to show off the shape, making them even easier to fake: cording, piping, soutache, braid, narrow ribbon, narrow bias tape, and other similar materials can be attached along the line where the seams would sit.

I got a great deal on a few dozen packages of bias binding tape in multiple colours at Value Village for $3.99, and I’m using a slightly darker green for all my trim, as I have four packages in two sizes. For most of the trim, I’ve just folded 3/4″ bias tape in on itself to the width of the pieces folded behind. This means it has some thickness at 1/4″ wide.

If you’re an experienced sewer, you can make piping or a piped band from purchased bias tape. Links to tutorials are at the end of this post.

When shopping for the blazer, the faux-diamond-back will look better if you buy one that doesn’t have a centre back seam. In fact, many that don’t have the centre back seam have a side panel with a seam similar to the lower curve of some Regency clothing backs, and I’d suggest using that curve, plus faking the shoulder seam that sits two or more inches behind the modern one.
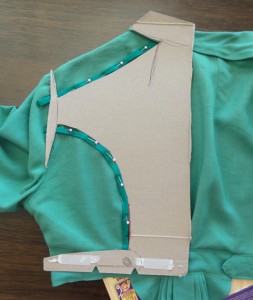
pomona spencer pinning on fake regency diamond backIt’s best to make a pattern for your trim so it’s mirror image both sides. Light cardboard–mine was from a breakfast cereal box–works well. Set it so one side runs along the centre back of your shortened and hemmed blazer, and play with lines and curves in pencil until you see one you like. Mark it with marker and cut out to make a pattern to guide in placement of the trim on each side.

I pinned my trim in place, then put it on a model for a photo. On the model, the fake Regency shoulder seams looked better if dropped down more at the sleeve end, so check before you sew. Attach the trim after you make any adjustments to sleeves, described next.
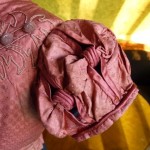
1810
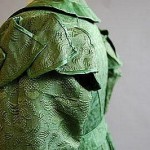
1810

1815-1820

1815-1820

Modern reproduction.

Modern reproduction.

1815 LACMA

1815 LACMA

1820-25, Metropolitan Museum of Art
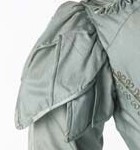
1820-25, Metropolitan Museum of Art

1820, Metropolitan Museum of Art

1820, Metropolitan Museum of Art

Like gowns, spencers often had puffed sleeves or similar-looking embellishments over a straight sleeve, however, many had a plain sleeve (see some examples above), so faking Regency here is optional.

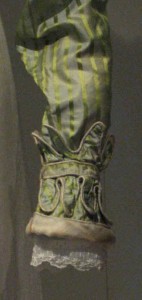
If you prefer a little over-sleeve, examples to the right range from clusters of petal-like fabric to fancy slashed and looped designs. These sleeve examples are on spencers, and more ideas from gowns can be found in the post, “Were Regency gowns worn on the Titanic?

You won’t have enough fabric to make the full sleeve variations, but a simple, small capped, tulip, or shirred cap sleeve, or a rolled tube at the top of the sleeve, can come from the fabric cut from the back of the blazer, or you can utilize sleeves made with coordinating fabric.

There’s a tutorial below for tulip sleeves. If desired, use the same trim you used to fake Regency with your diamond back to attach the new sleeve over the old one at the seam line, or turn under 1/4″ to 1/2″ and top-stitch close to the edge. If it’s possible to hide the ends, make the new sleeve fit an inch or two farther towards the middle of the back of your spencer, so you also have a fake Regency sleeve fit!
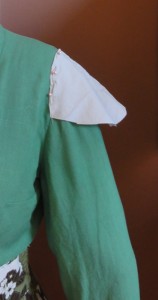
pomona spencer gathered cap sleeve mock upFor my fake short over-sleeve, I used the leftover fabric from the back panel. First, I experimented with some cheap fabric from a pair of torn pants to make the best of the small amount of fabric. A piped band (tutorials below) made from 2″ wide bias tape held the gathers, topped with one of the self-covered buttons from the old sleeve cuffs.
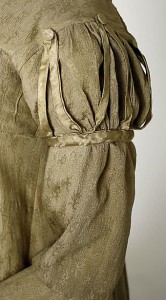
1818, Metropolitan Museum of Art

1818, Metropolitan Museum of Art

The simplest fake Regency sleeve topper, to the right, was another option I considered. I could have used the 3/4″ bias tape (sewn closed) and the three buttons from the 3/4 sleeves on each side. This can also be accomplished with ribbon, if the same ribbon is used for the fake Regency diamond back.

Self-covered button kits can be purchased at fabric stores for about $3 a package of 3-6, depending on size (full price, but I got one from Dressew for $0.99!), and they’re easy to make.

Alternatively, matching ribbon or fabric can be stretched over stiff plastic circles with a little glue, then the back fabric stitched in place. It should be slightly more than double the diameter so it closes fully behind the button and there’s something to sew it on with. Important note: the latter is fine for trim but not for actual working buttons.
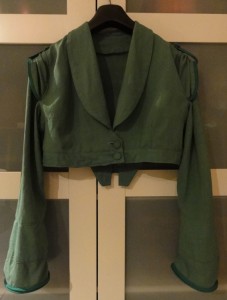
The finished pomona green spencer, with cap sleeves over long sleeves, tied back with a piped band and button from the original blazer.

Front view of Suzan Lauder’s pomona green spencer, with cap sleeves over long sleeves, tied back with a piped band and button from the original blazer. Long sleeves are trimmed at the bottom with piped band also. An extra button was added to empire waist band, made from original blazer facing.
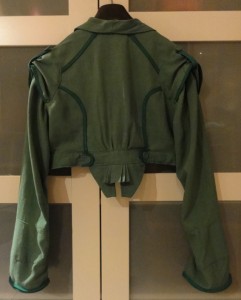
Back view of Suzan Lauder's pomona green spencer, with Fake Regency diamond back and pleated skirt-like ruffle.

Back view of Suzan Lauder’s pomona green spencer, with Fake Regency diamond back and pleated skirt-like ruffle. Buttons from the original 3/4 sleeve cuffs are used on the tabs at the back of the empire waist band.

This project wasn’t easy for me, though it may be for a more experienced sewer. I hadn’t sewn much for 30 years, except for the odd repair, straight-line window toppers and throw cushions, or slapping together a Hallowe’en costume that was meant to last a few hours. I became good friends with my stitch ripper over the last two weeks and learned a few things along the way.

No-sew iron-on tape would work for simpler modifications to make a spencer, but some of my problems came from construction and developing my own patterns, so they’d occur had I used no-sew tape, too. In addition, it sucks for curves, and you couldn’t have made piped band. Other trims (like in the thumbnails) are fine, and there’s nothing wrong with straight lines for your fake Regency diamond back.

Most of these ideas for faking Regency are applicable to gowns, pelisses, redingcotes, and any other bodiced clothing of the Regency period. Have fun shopping for trim on sale or in grab bags at thrift stores!
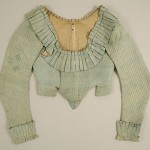
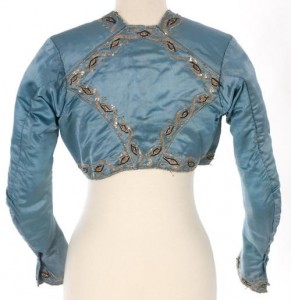
A blue quilted spencer, front. Late 18th early to 19th century, Metropolitan Museum of Art.
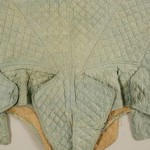
A blue quilted spencer, front. Late 18th early to 19th century, Metropolitan Museum of Art.

Spencer, late 18th to early 19th century, French, silk. Note the unusual detail below the centre back.

Spencer, late 18th to early 19th century, French, silk. Note the unusual detail below the centre back.

~~~

Web sites with ideas and tutorials:

Inspiration: So Many Backs from Atelier Nostalgia Though these are gowns, you can see the line of the Regency diamond back you want to emulate, and variations on that design.

Sew Many Seams’ Tulip Sleeve Tutorial  Shows two types of tulip sleeves to make, using a plain sleeve pattern as a guide.

Slashed puffed sleeve from Firefly Path: The inside of the slash can be made from the spare fabric cut from the spencer, and the oversleeve from a complimentary fabric using a regular puffed sleeve pattern. Maybe use that extra cushion cover or dinner napkin! The slashes need not be filled in, either. You can loop trim material from the inside shoulder to outside through each slash. Similarly, a loop can be made from the cuff inside to outside. Very fake Regency!

Sew4Home’s excellent tutorial on how to make your own piping and bias tape.

For the advanced sewer, two choices for instructions for a piped band: Kleidung 1800‘s site is German, but brief descriptions of each step are in English under the photos. Tea in a Teacup has a different way to make the band, and it looks a bit different in the end.

For the ambitious spencer designer, two posts about making soutache designs: The Fashionable Past shows technique while trimming a Victorian coat, and a trick to make the loops easy by Threads.

~~~

Next few posts: I’ve started on projects for Mr. Suze’s costume, and I have a “Grown-up Lady’s Lace Cap” to make as part of the give-away for my guest post on Roof Beam Reader’s blog as part of his Austen in August (#AusteninAugustRBR) reading challenge, and I’ll draft up the cap pattern to share.
~~~

I WON A PRIZE!!! As part of the same reading challenge above, I won JAFF Author Lisa Pliscou‘s Young Jane Austen: Becoming a Writer, which I’ve been coveting since it came out, for its cool illustrations. I’ve entered every contest I’ve seen about this book! HOORAY FOR ME!

~~~

There are still spaces remaining for the Jane Austen Society of North America Annual General Meeting on October 9-11, 2015, my goal destination for the Thrift Shop Regency Costume Experiment series. The conference theme is “Living in Jane Austen’s World,” and the workshops run the gamut (?? who says stuff like that?) from Regency medicine and home remedies, to evaluation of the wealth of Austen’s characters; the influence of India on Regency England; plants and gardens of the Regency (featuring Meryton Press’s Linda Beutler, an international clematis expert!); food, fashion, and social events of the period; and many others! Pre-conference activities start on October 7. Registration deadline is September 1, 2015, so don’t delay!