This sounds pretty easy, right? Get an old blazer, cut and hem to under-bust length, and Bob’s Your Uncle. Well, not so easy. Unless, of course, you’re super-lucky and find exactly the right blazer.
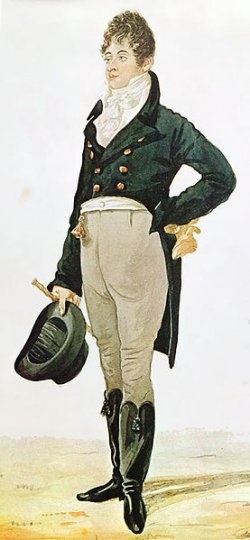
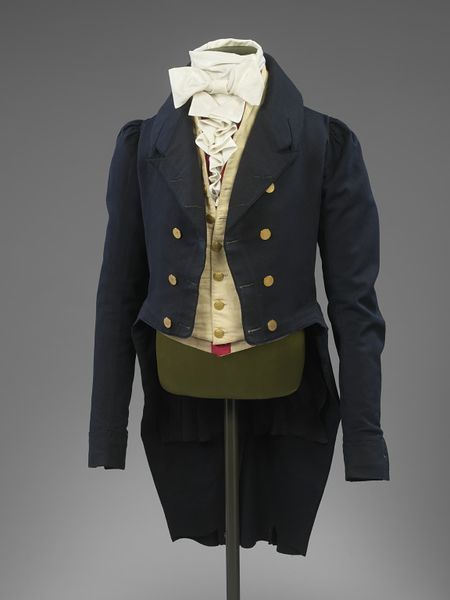
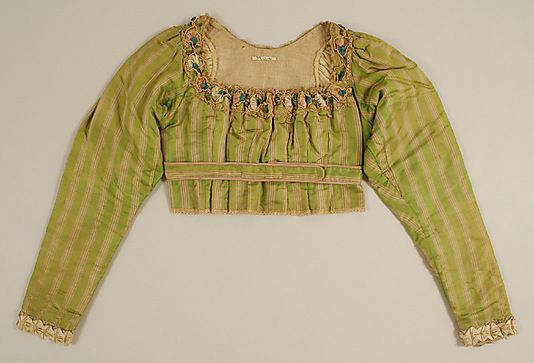
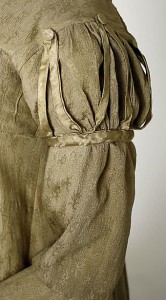
Early 19th century spencer, Metropolitan Museum of Art
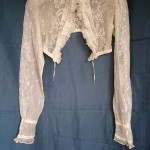
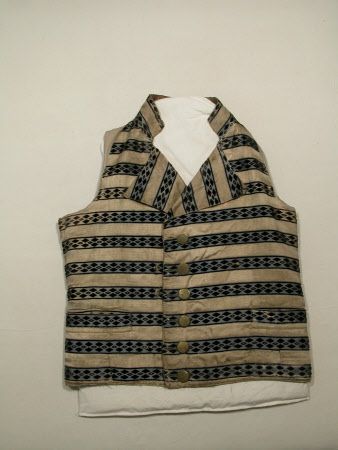
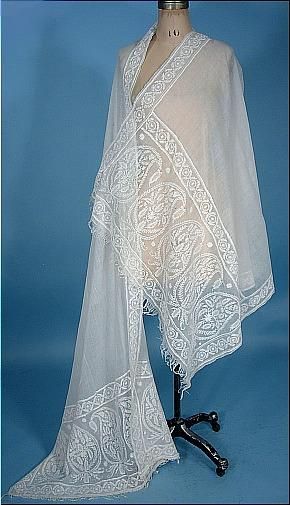
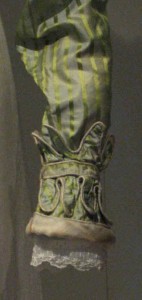
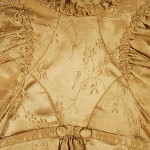
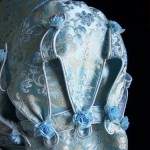
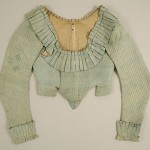
Embroidered muslin bodice or spencer, 1800-1810
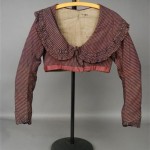
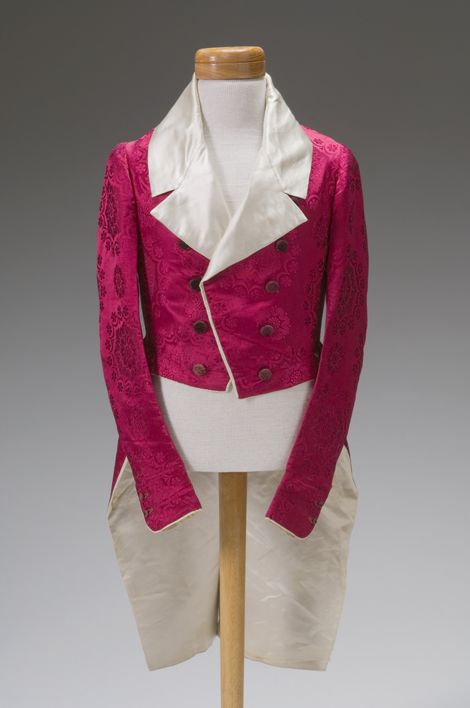
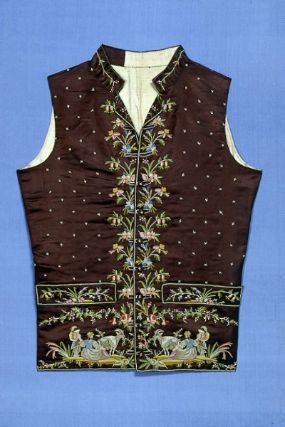
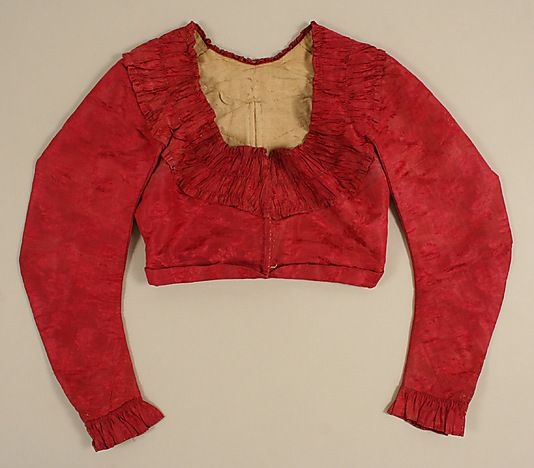
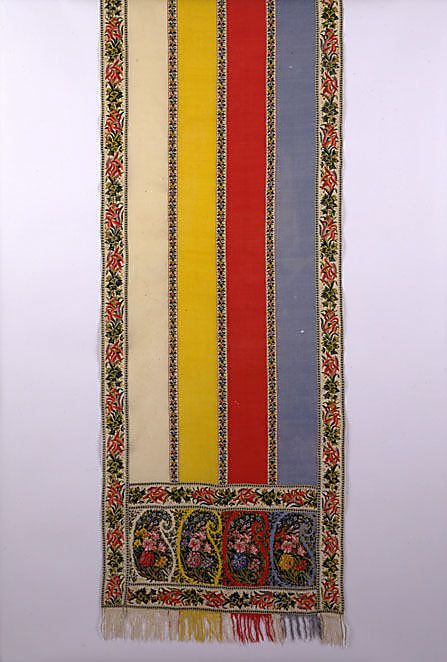
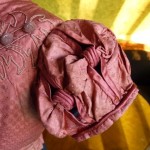
Rose pink striped cotton and silk spencer, early 19th C.
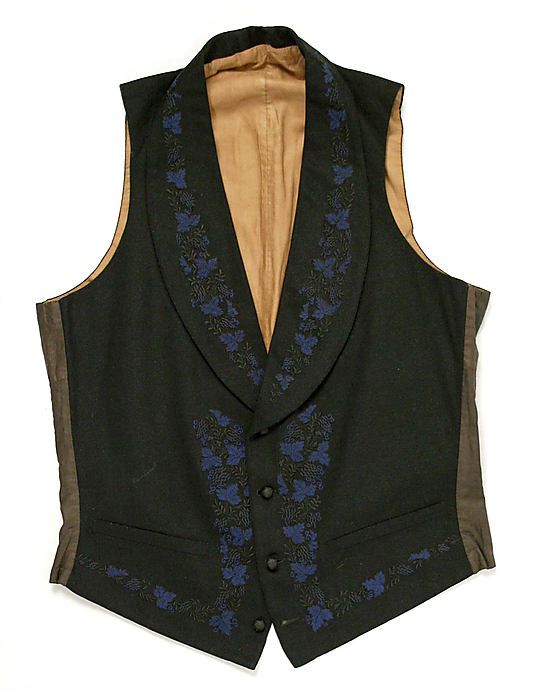
Early 19th Century, Spencer, early 19th century, French, silk, Metropolitan Museum of Art
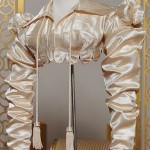
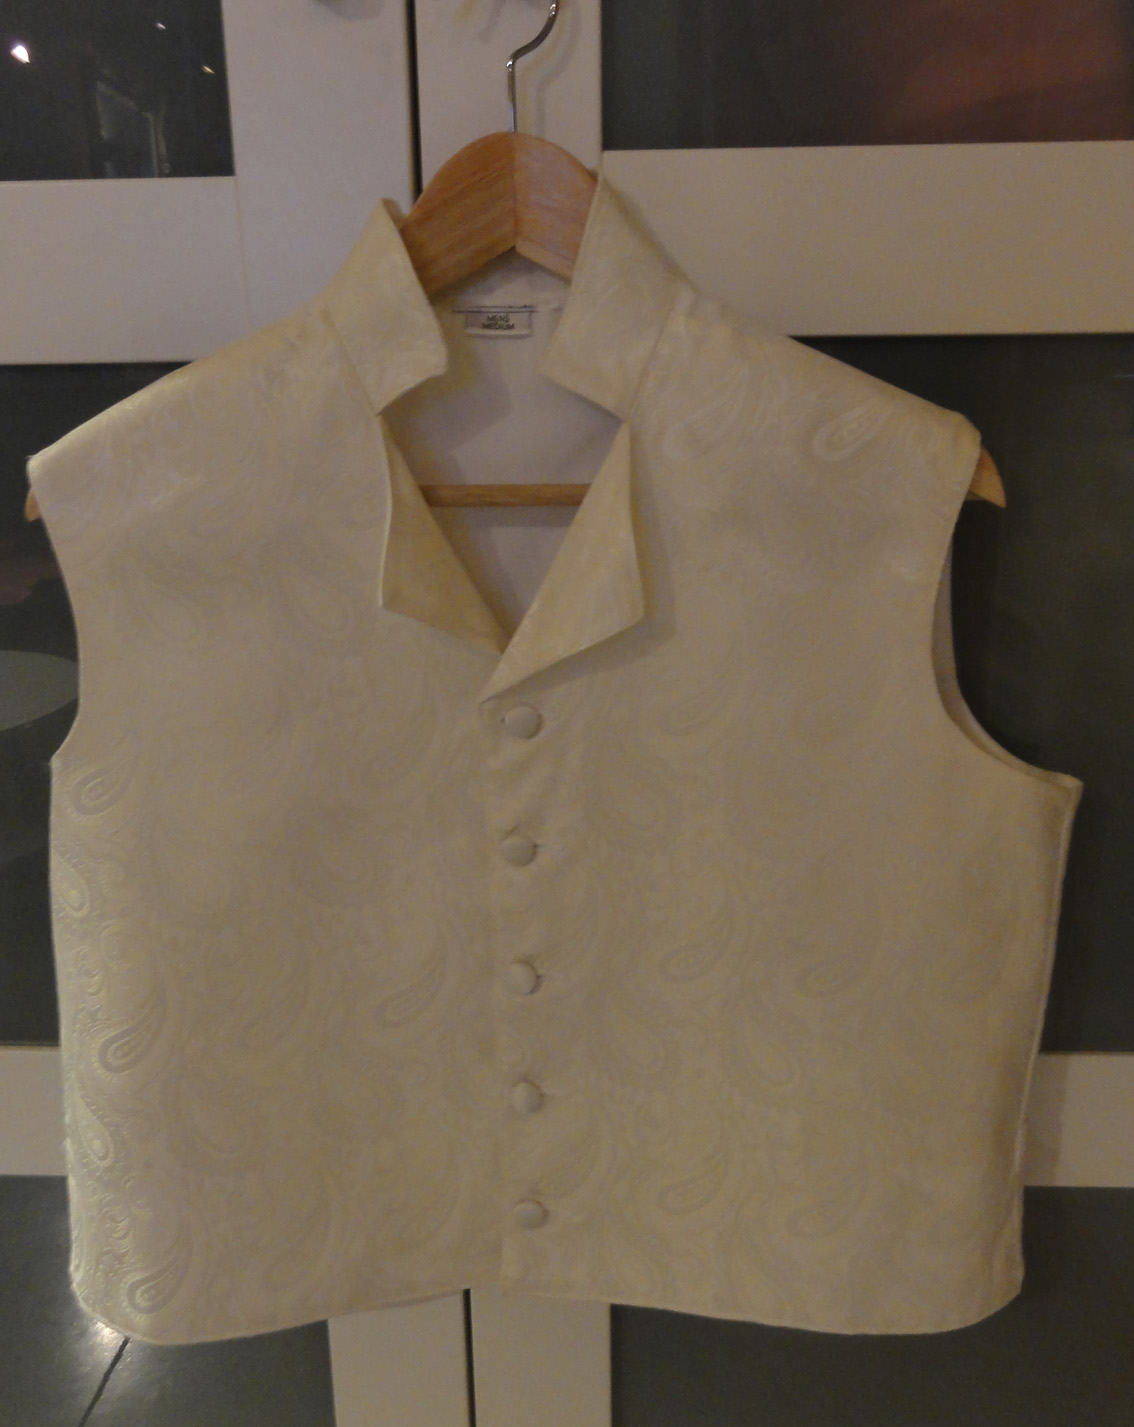
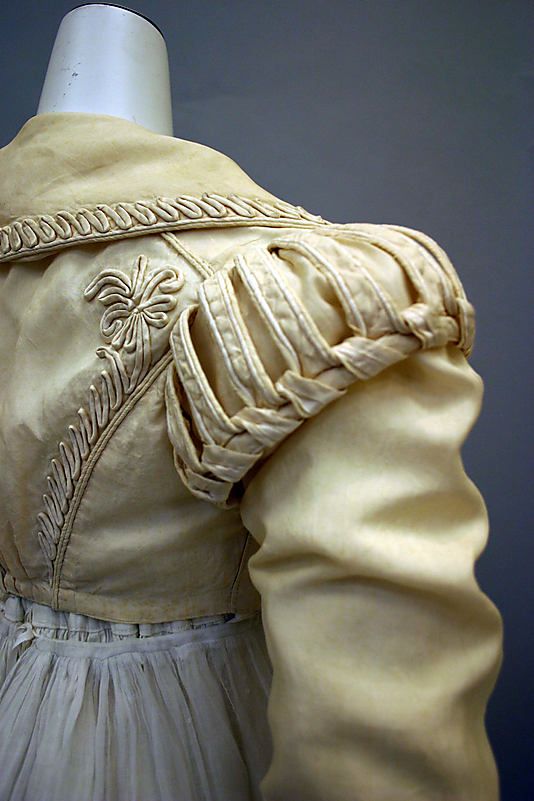
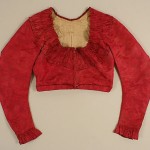
Cream silk satin Spencer, c1818. Decorated in imitation of military uniforms. Worthing Museum.
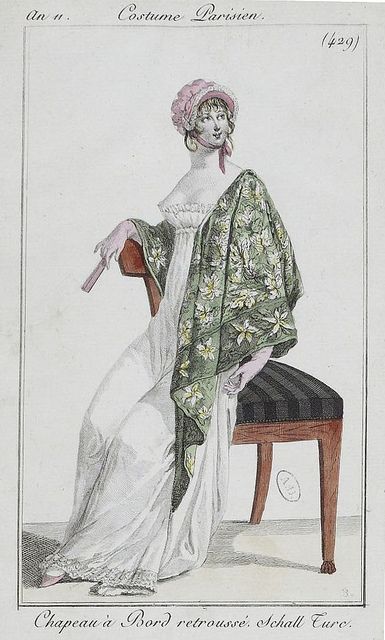
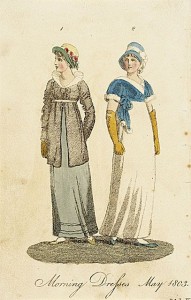
If you hadn’t already figured it out, the Regency spencer is a little, long-sleeved jacket that’s just as long as the bodice of the empire waist gown. One bonus for shopping for a blazer to make into a Regency spencer is that almost any neckline will suit. Click on the thumbnails to see details, including neckline examples.
The difficulties include a requirement for long sleeves (as per usual in the Regency, longer than standard is better), a fitted bodice, fabrics that don’t look modern, colours that are more interesting than black, and a lack of embellishments such as studs, fake pockets on the chest, or jean jacket seams.
The textures and colours of many blazers in my thrift shop visits didn’t work. Black polyester rules, and next to that, corduroy and knits. Every time I saw one I’d consider, it was 3/4 sleeve, the wrong size, or had some detail that screamed the 90’s.
I looked at blouses, too, since some spencers are more blouse-like and some modern blouses are more blazer-like.
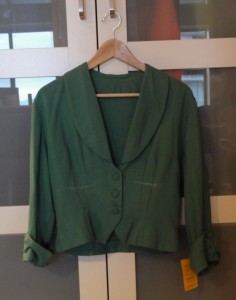
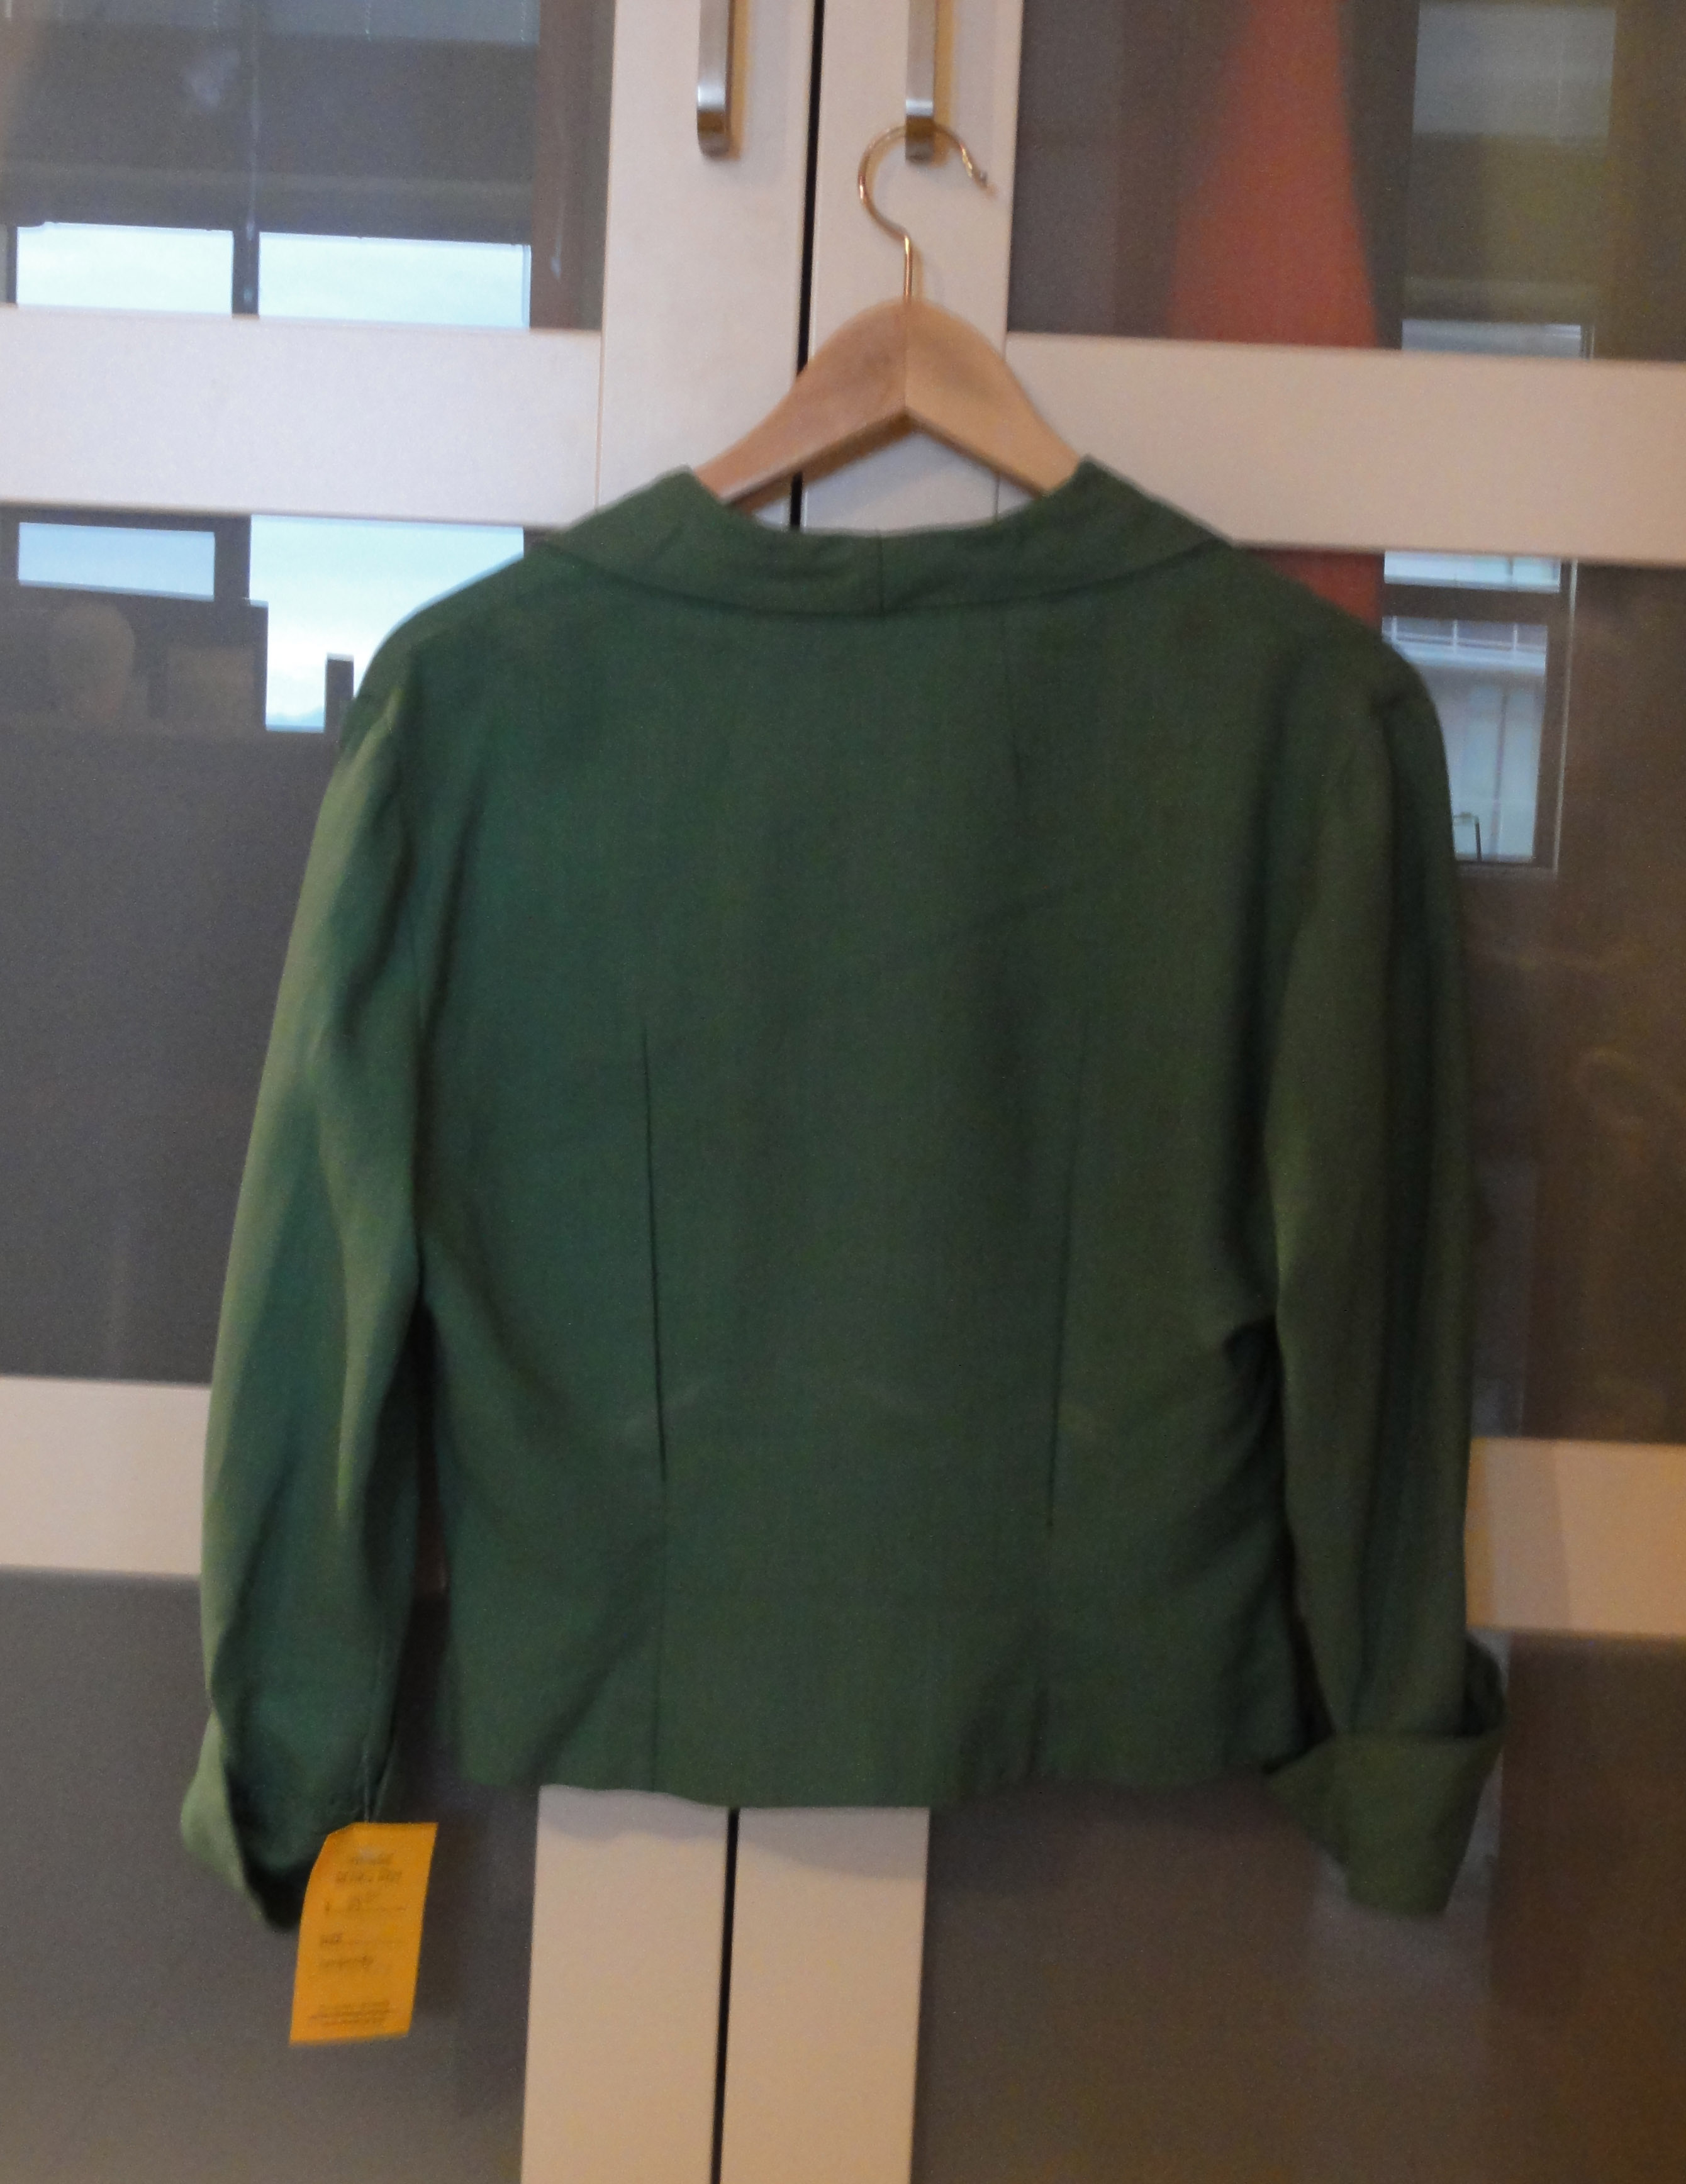
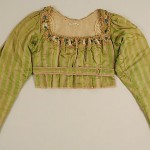
This unlined, fitted, pomona-green jacket will be my spencer. Pomona? I would have called this leaf-green, as it’s fairly bright. (Some of my shots were taken in the evening, and appear darker.) Then I read an article about Ackermann saying Pomona green was the same as apple green and I thought, this is a little darker than apple green, but I’ll check on Google images. Enough of the examples were the same as my blazer for me to confidently say it’s one of the more popular colours of the Regency!
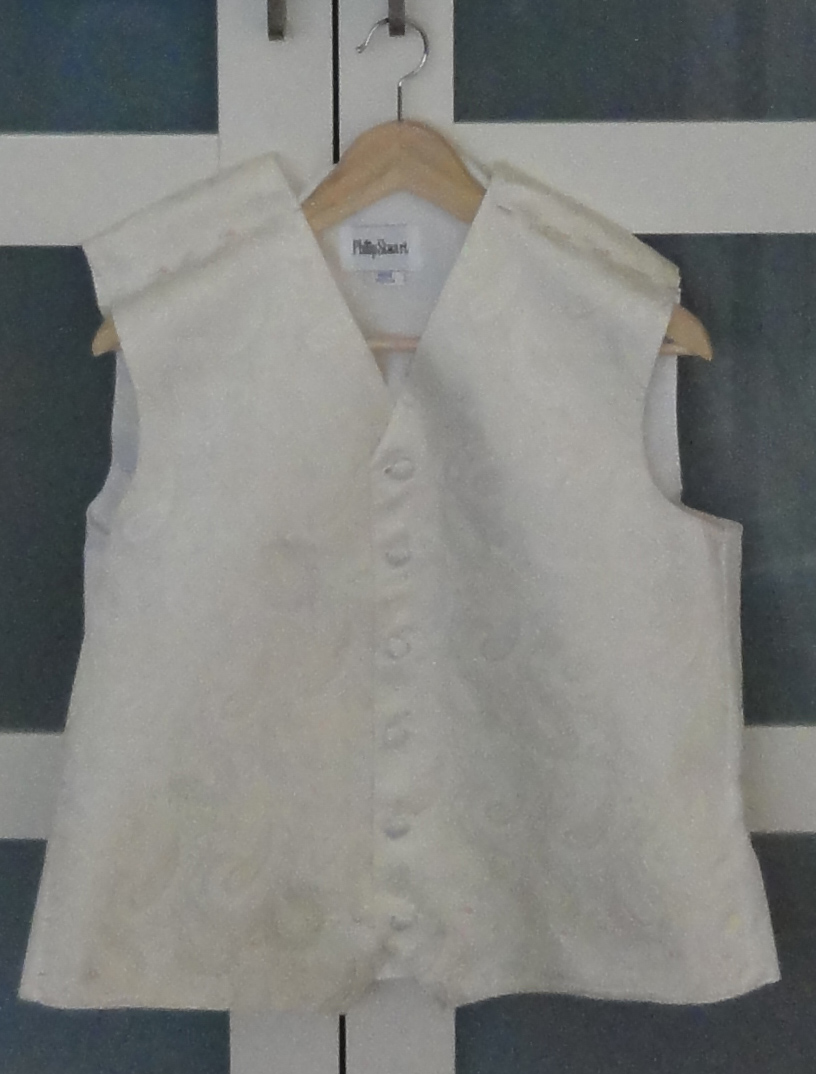
The 3/4 sleeve, linen, shawl-collared blazer was $16.50 at Women in Need Thrift and Vintage. It has unique matching self-covered buttons.
Short sleeved spencer alongside unusual short coat.
Sleeve trim idea.
The down side of my blazer is the 3/4-length sleeves. At the time I bought it, I didn’t realize that detail wasn’t popular during first 20 years of the 1800s. I looked in vain for examples of Regency spencers with 3/4 sleeves, and though there are a few short-sleeved spencers, I found nothing 3/4 sleeved.
Lucky for me, the flared cuff was long enough to drop to make a long sleeve. I kept looking for a long-sleeved blazer for a spencer. As mentioned before, I saw a blazer with lovely soutache designs, but balked because I worried about how to cut down the blazer at a good point for the soutache. When I decided I could rework the soutache if need be, I returned, but it had been sold. But today, I found a cute, gold silk blazer with a pretty collar, long sleeves, and mother of pearl buttons! The only sad part is a centre-back seam. More on that later.
(An aside: I’ve seen the perfect dress that just needs an empire waist height ribbon to fake Regency on two shopping trips since June, but both times, they were too small for back gathers for me, but would work with a smaller person!)
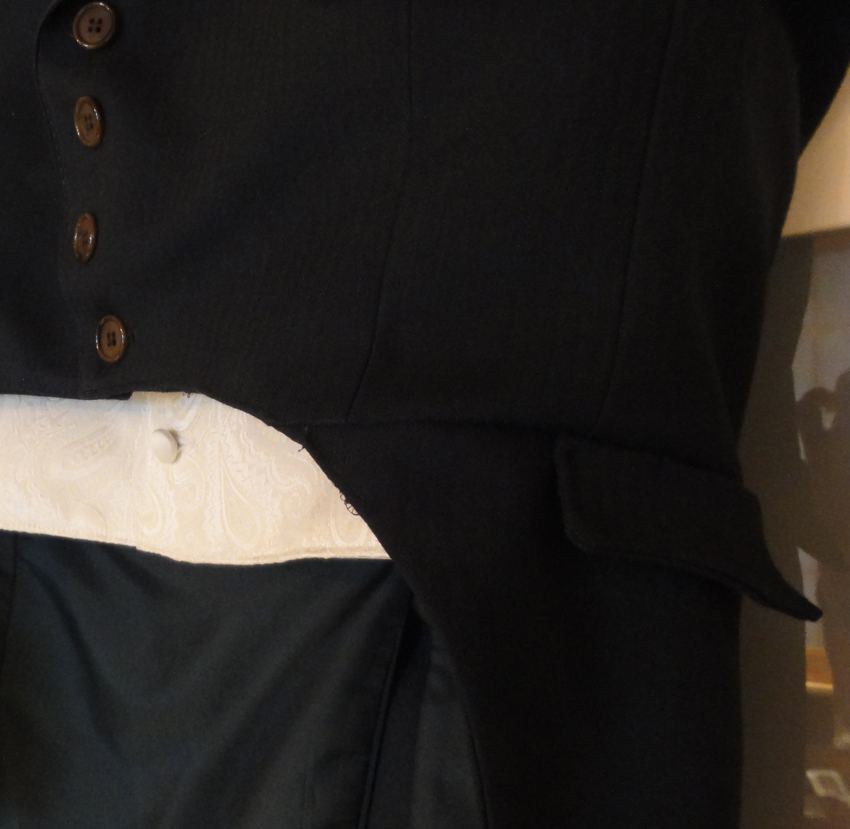
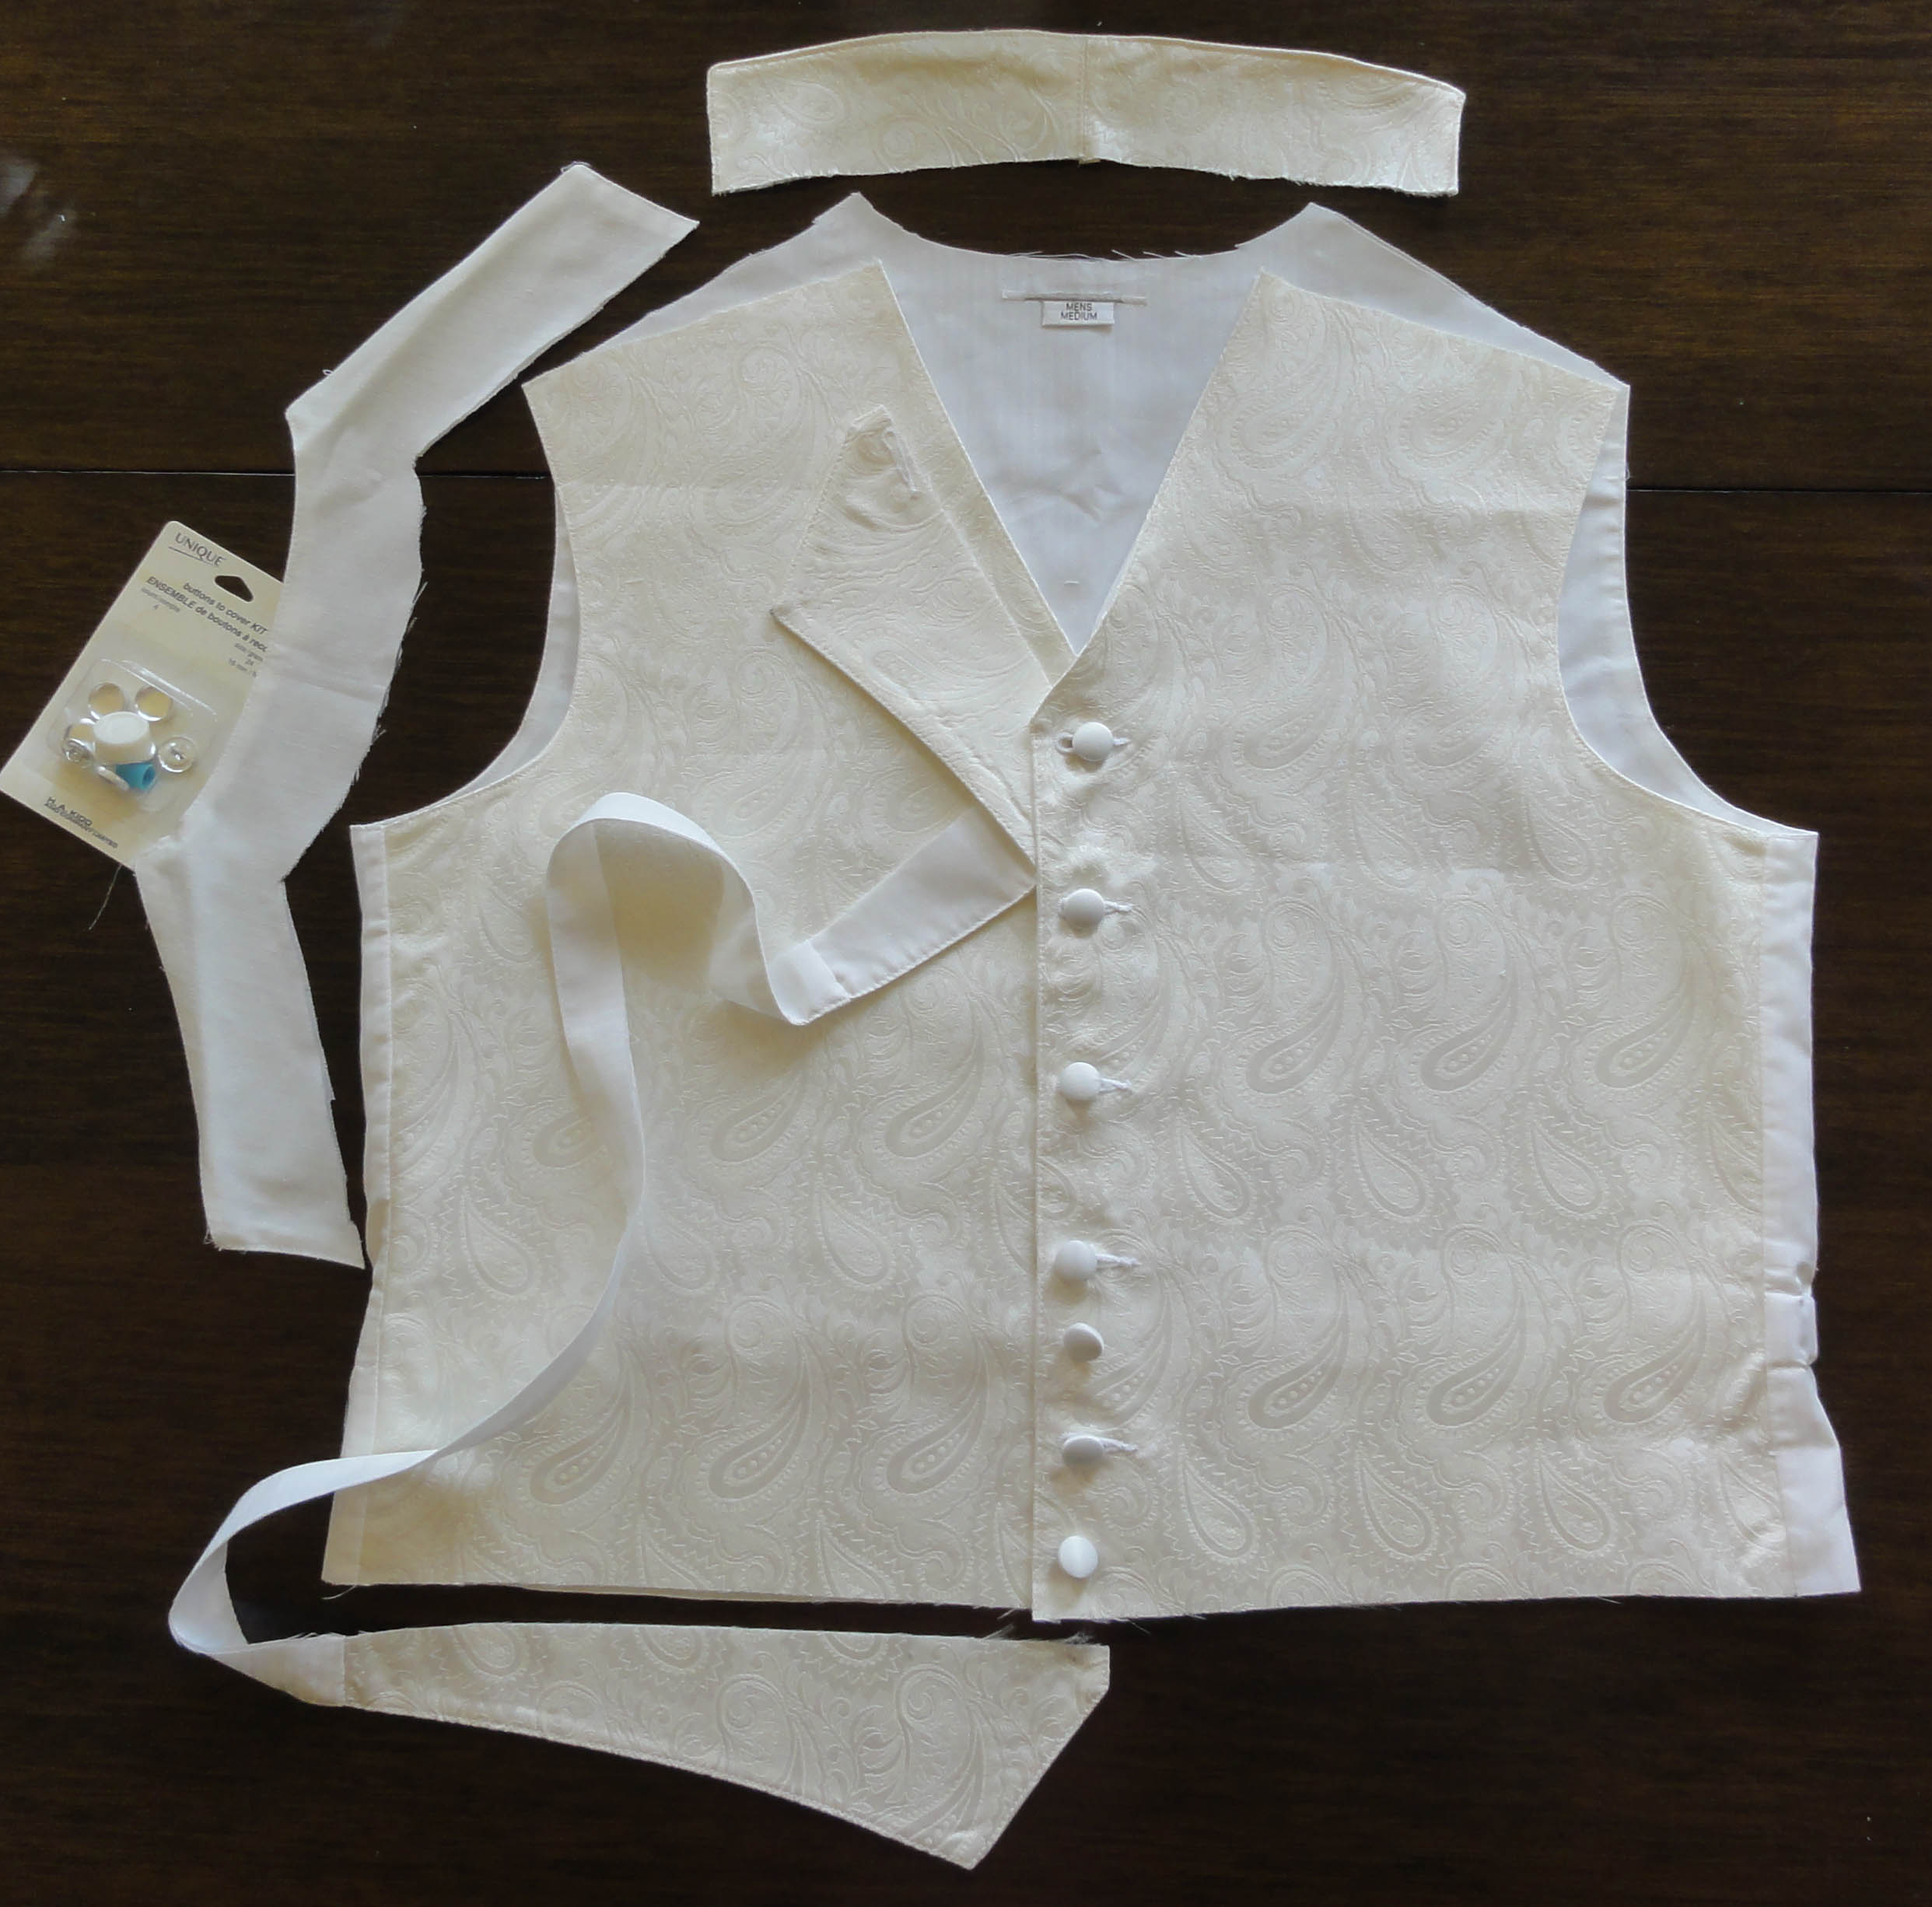
In most cases, your blazer should be cut to 2-1/2″ longer than the bottom of your bust line, turned under 1/2″, and hemmed 1″. This will stiffen the edge and ensure it fits over your gown bodice, but it won’t be too long. You can see I’ve marked my blazer to spencer length while wearing it. This frees up two buttons from the front for embellishment elsewhere.
If your blazer doesn’t close tightly at the bottom after it’s trimmed to length, there are several possibilities. If there are buttons in the upper portion (part you’re wearing), it’s better to fit the spencer than to ease in fullness. Add darts or gathers under the bust, or pleats or gathers in the mid-back; they’re era-appropriate. Don’t make it too tight, as it must fit over the gathers of your gown.
My blazer was already fitted with six darts in front and two very long back darts (in fact, the back darts were over-sewn longer and deeper than the originals). It was snug across the bustline, so I removed the back darts, washed it so the stitch holes relaxed closed again, and pressed out the remaining dart creases while it was still damp. A few gathers added by hand in the mid-back at the waistline help to fit my slimmer rib-cage under the bust.
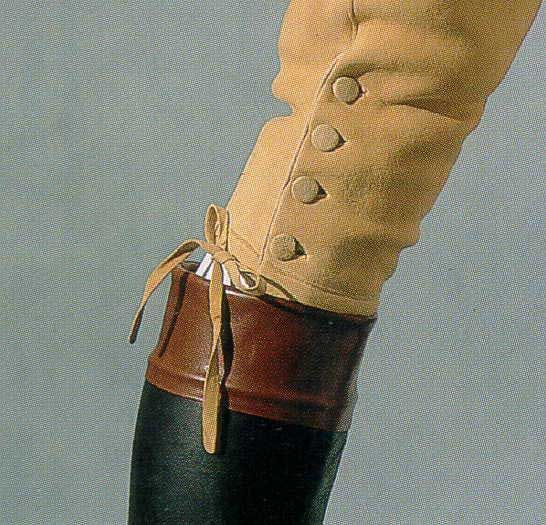
If the bottom button is too far from the bottom of the spencer, you can put back a cut-off button and make a buttonhole at the band level, or add hooks and eyes. To fake Regency, buttons should have a Regency look: metal, shell, pearl, mother-of-pearl, fabric-covered, thread-covered (such as Dorset), or corded knot (such as Celtic or Chinese knot or frogs with knots) are best. Since metal buttons were expensive, use them only if your spencer has a rich look with elaborate trim. With corded buttons, your other trim would be best as corded, in fact, a military look to the spencer was popular! Self covered buttons were ubiquitous on mens’ wear, but less so for ladies’.

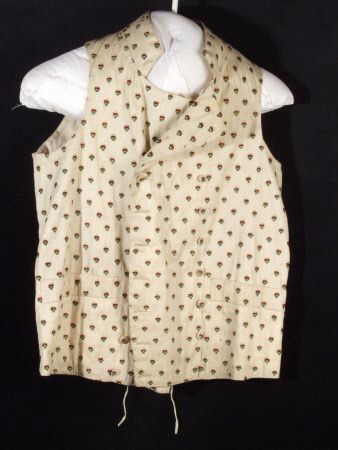
Spencer jacket, 1790-1815. Note no closure in front.
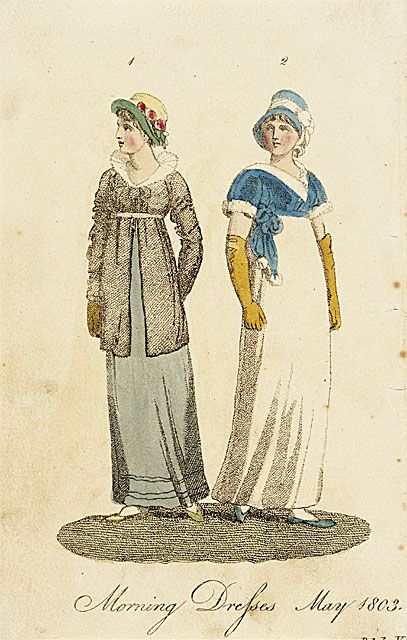
If there are no buttons, there’s nothing wrong with having a spencer that doesn’t fasten closed, unless you need it for warmth. An example of an open-front spencer can be seen on the left, and others existed in the Regency.
My blazer was unlined, so I chose to use the inside bottom facing from the original blazer on the outside, as a waist band. Bias tape was used to finish it on the inside where it’s not seen. Another option is to add a contrasting band (as on the pink striped blazer above). If you have good sewing skills and choose to add a waist band, it’s an opportunity to put contrasting piping all around it per a tutorial below.

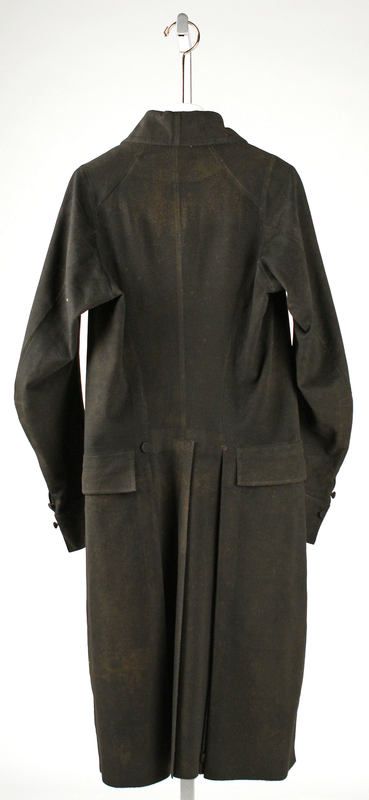
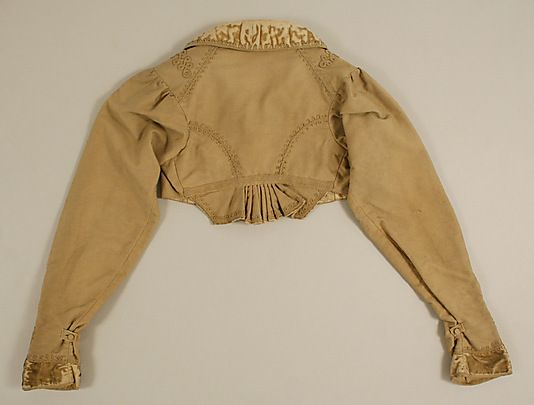
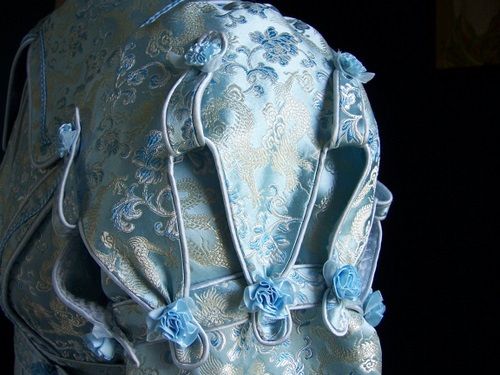
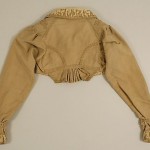
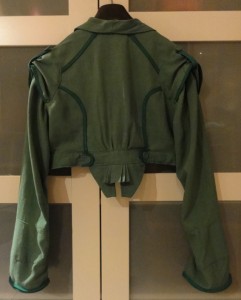
Spencer jacket 1815 (back). This trim is an example of how we plan to fake a Regency diamond back! The real shoulder seam will never be noticed!
Since the facing didn’t continue across the buttonhole panel in front of the original blazer, it didn’t go all the way around, so was short for the waist band. To make up for this, I used extra fabric from the cut away parts in front. If you use multiple pieces for the waist band, make sure your seams are at the blazer’s side seams, or at both bottoms of the diamond-back, so they’re less noticeable.
In addition, to fake Regency, some front cut-off material from my blazer made a little skirt-tail in the centre back, similar to the museum examples. See thumbnails below; click to enlarge. Extra self-covered buttons trim the ends of the waist band tabs in back.
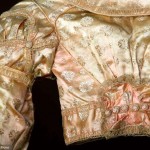
Back detail of a spencer, 1813, American or European, Wool and silk, Metropolitan Museum of Art.
To fake Regency, you need do none of the above. Focus on the one detail that’s not too hard to manage: the diamond back.
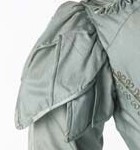
The look was on almost all women’s wear of the period, achieved by a shoulder seam that fell behind, rather than on top of the shoulder, and a pair of side-back seams that curved from the outside edge of the back gathers on gowns to partway up the back of the sleeve. The back of the sleeve fit farther into the back of the bodice than a modern sleeve, too. Click on the thumbnails for examples of the backs of spencers.
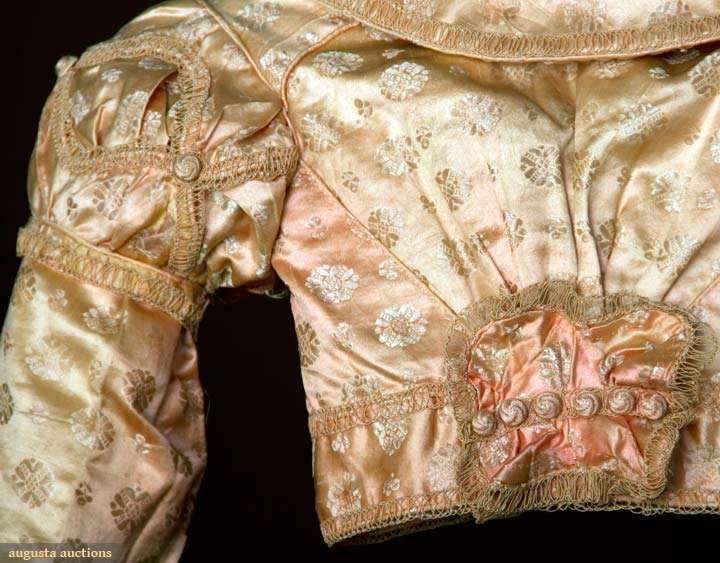
Silk spencer, 1810. Augusta Auctions.
A faux-diamond-back can easily be achieved by numerous methods. You can fake the seams with a line of fabric paint or even fine-line permanent marker in a slightly darker colour, a line of top-stitching using hand back-stitching in embroidery thread, or machine top-stitching a double line.
Spencer, early 19th century, American or European, silk. Metropolitan Museum of Art.
Better yet, Regency clothing often had trim over these seams to show off the shape, making them even easier to fake: cording, piping, soutache, braid, narrow ribbon, narrow bias tape, and other similar materials can be attached along the line where the seams would sit.
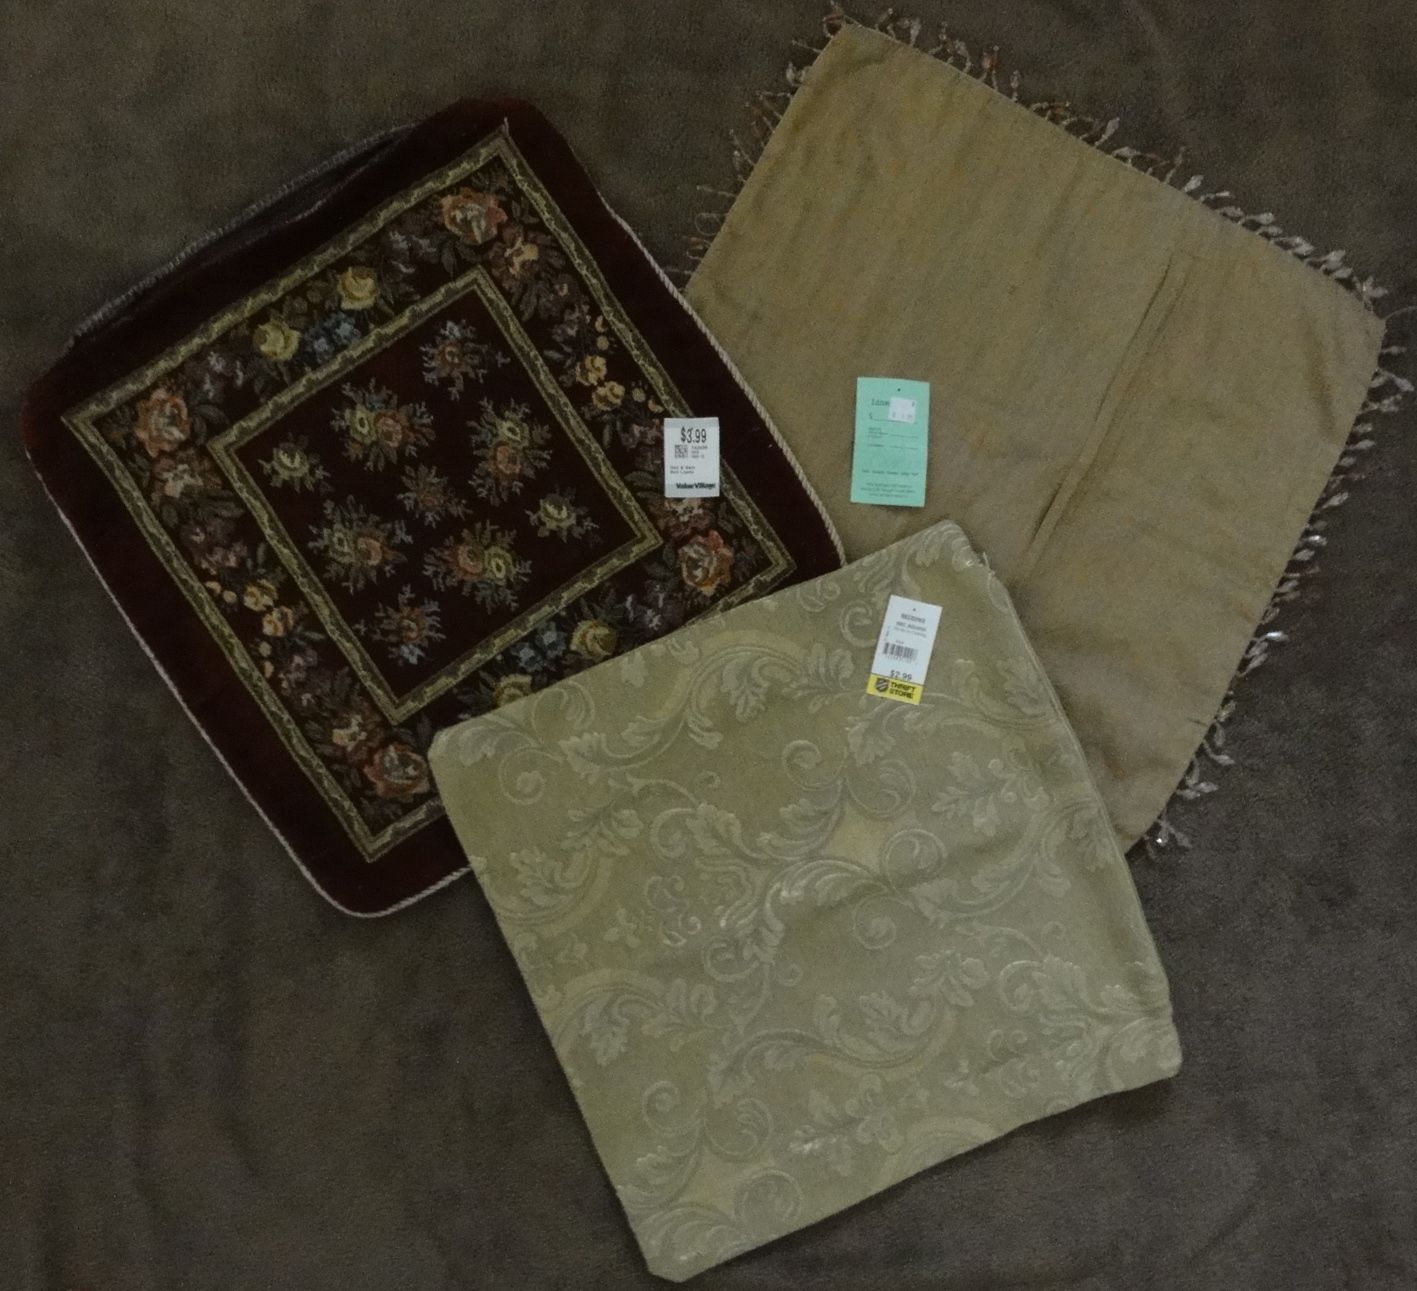
I got a great deal on a few dozen packages of bias binding tape in multiple colours at Value Village for $3.99, and I’m using a slightly darker green for all my trim, as I have four packages in two sizes. For most of the trim, I’ve just folded 3/4″ bias tape in on itself to the width of the pieces folded behind. This means it has some thickness at 1/4″ wide.
If you’re an experienced sewer, you can make piping or a piped band from purchased bias tape. Links to tutorials are at the end of this post.
When shopping for the blazer, the faux-diamond-back will look better if you buy one that doesn’t have a centre back seam. In fact, many that don’t have the centre back seam have a side panel with a seam similar to the lower curve of some Regency clothing backs, and I’d suggest using that curve, plus faking the shoulder seam that sits two or more inches behind the modern one.
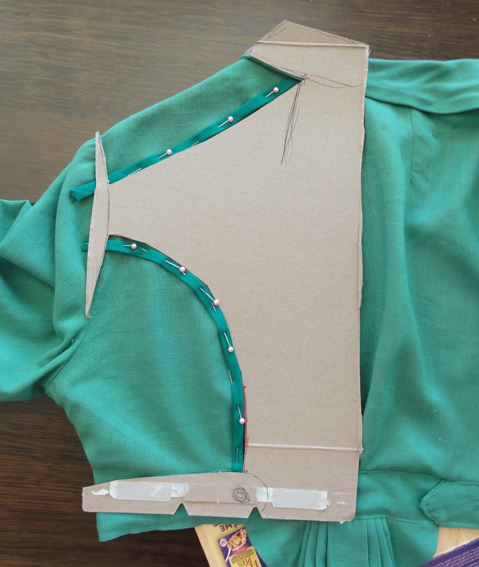
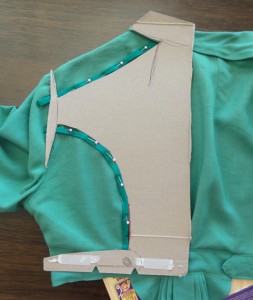 It’s best to make a pattern for your trim so it’s mirror image both sides. Light cardboard–mine was from a breakfast cereal box–works well. Set it so one side runs along the centre back of your shortened and hemmed blazer, and play with lines and curves in pencil until you see one you like. Mark it with marker and cut out to make a pattern to guide in placement of the trim on each side.
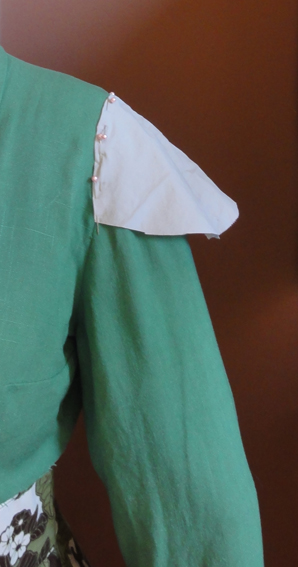
I pinned my trim in place, then put it on a model for a photo. On the model, the fake Regency shoulder seams looked better if dropped down more at the sleeve end, so check before you sew. Attach the trim after you make any adjustments to sleeves, described next.
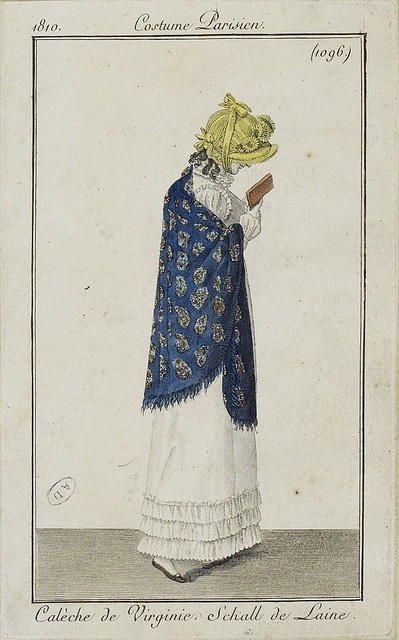
1810
1815-1820
Modern reproduction.
1815 LACMA
1820-25, Metropolitan Museum of Art
1820, Metropolitan Museum of Art
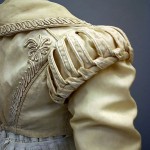
Like gowns, spencers often had puffed sleeves or similar-looking embellishments over a straight sleeve, however, many had a plain sleeve (see some examples above), so faking Regency here is optional.
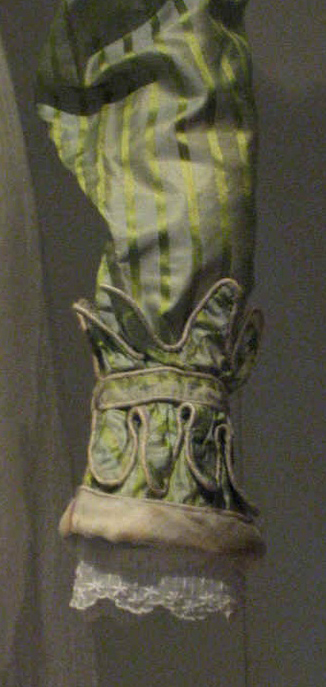
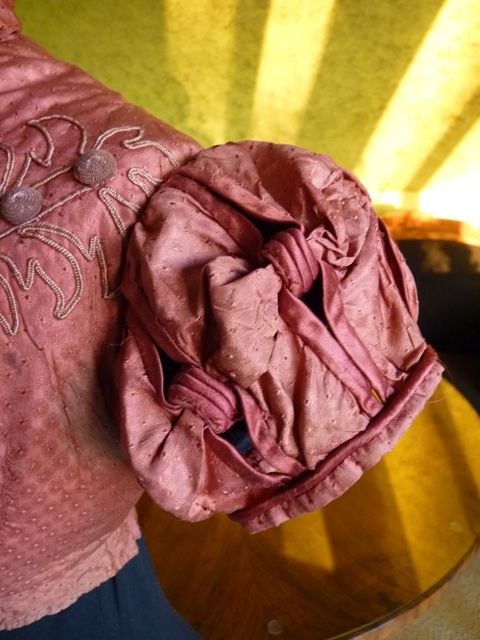
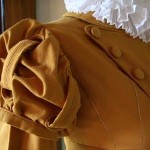
If you prefer a little over-sleeve, examples to the right range from clusters of petal-like fabric to fancy slashed and looped designs. These sleeve examples are on spencers, and more ideas from gowns can be found in the post, “Were Regency gowns worn on the Titanic?”
You won’t have enough fabric to make the full sleeve variations, but a simple, small capped, tulip, or shirred cap sleeve, or a rolled tube at the top of the sleeve, can come from the fabric cut from the back of the blazer, or you can utilize sleeves made with coordinating fabric.
There’s a tutorial below for tulip sleeves. If desired, use the same trim you used to fake Regency with your diamond back to attach the new sleeve over the old one at the seam line, or turn under 1/4″ to 1/2″ and top-stitch close to the edge. If it’s possible to hide the ends, make the new sleeve fit an inch or two farther towards the middle of the back of your spencer, so you also have a fake Regency sleeve fit!
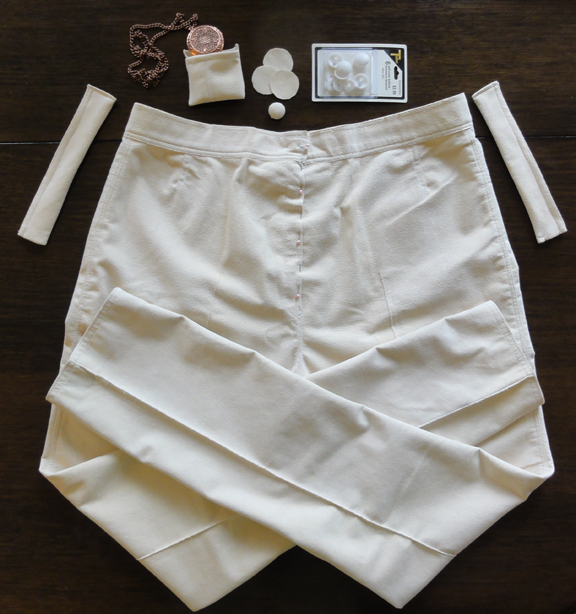
 For my fake short over-sleeve, I used the leftover fabric from the back panel. First, I experimented with some cheap fabric from a pair of torn pants to make the best of the small amount of fabric. A piped band (tutorials below) made from 2″ wide bias tape held the gathers, topped with one of the self-covered buttons from the old sleeve cuffs.
1818, Metropolitan Museum of Art
The simplest fake Regency sleeve topper, to the right, was another option I considered. I could have used the 3/4″ bias tape (sewn closed) and the three buttons from the 3/4 sleeves on each side. This can also be accomplished with ribbon, if the same ribbon is used for the fake Regency diamond back.
Self-covered button kits can be purchased at fabric stores for about $3 a package of 3-6, depending on size (full price, but I got one from Dressew for $0.99!), and they’re easy to make.
Alternatively, matching ribbon or fabric can be stretched over stiff plastic circles with a little glue, then the back fabric stitched in place. It should be slightly more than double the diameter so it closes fully behind the button and there’s something to sew it on with. Important note: the latter is fine for trim but not for actual working buttons.

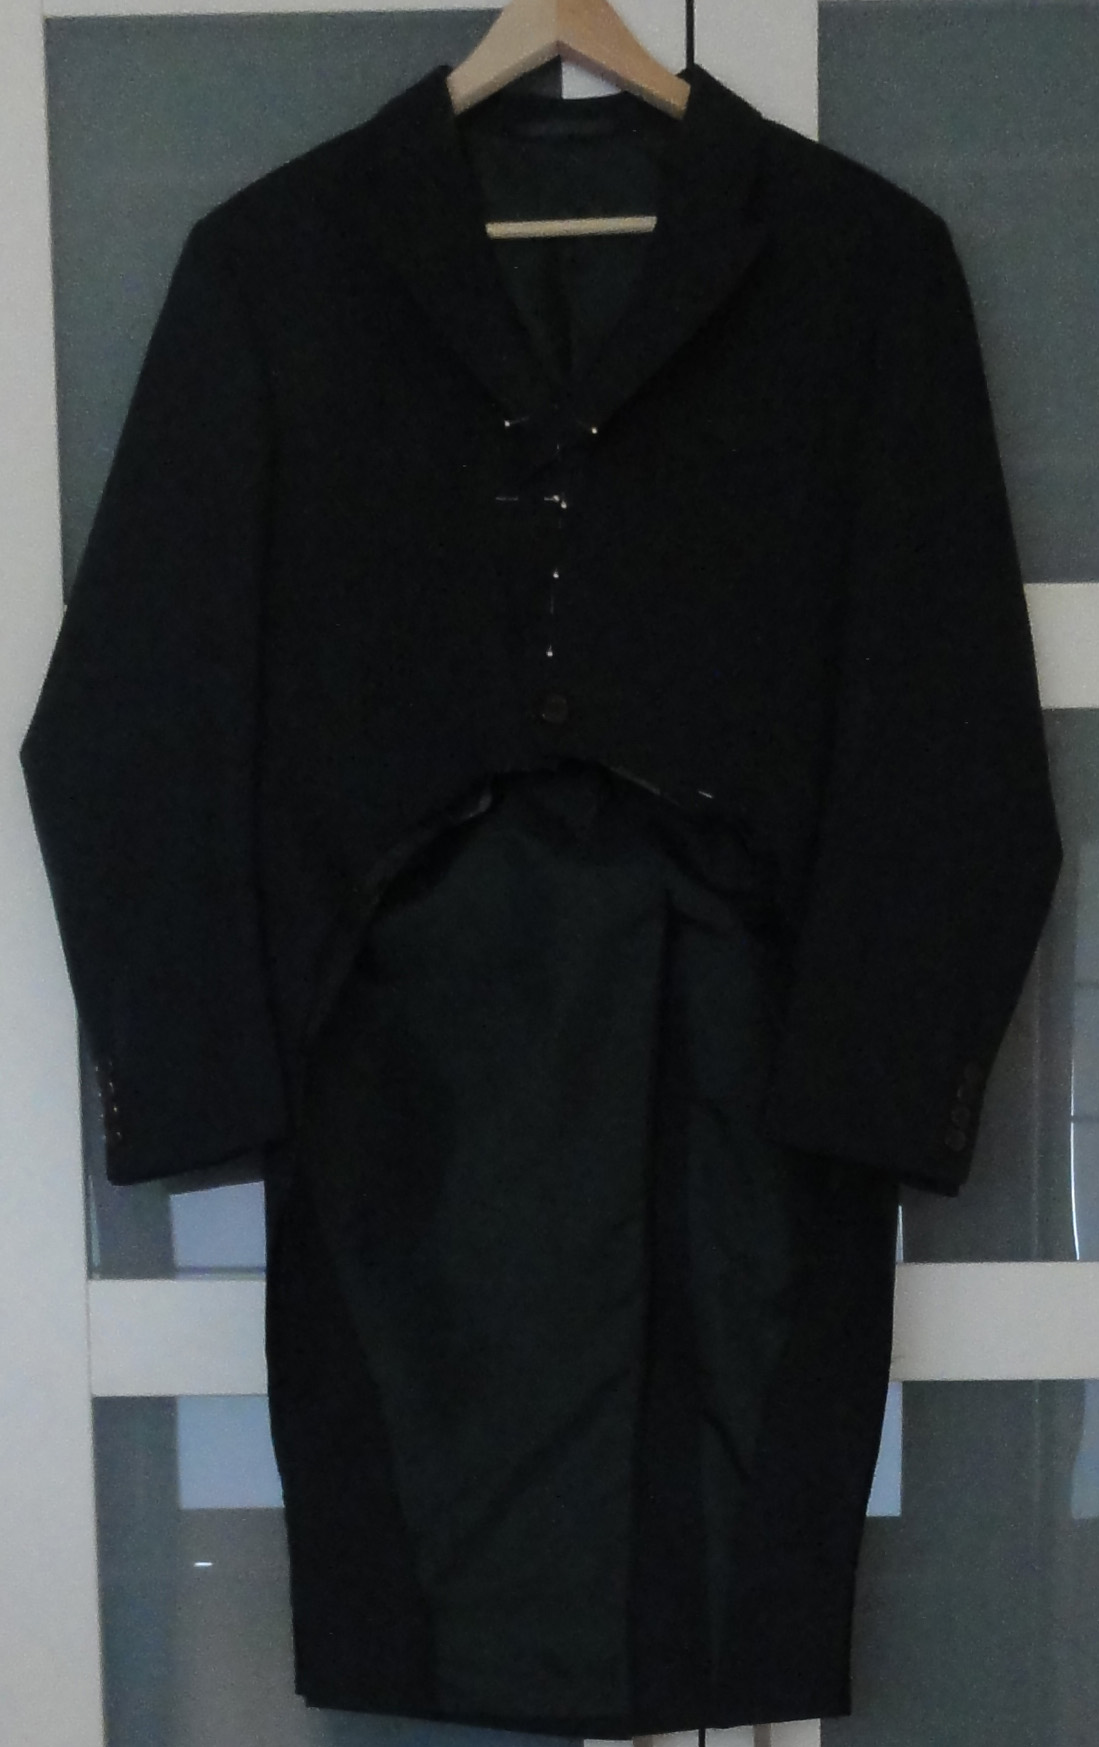
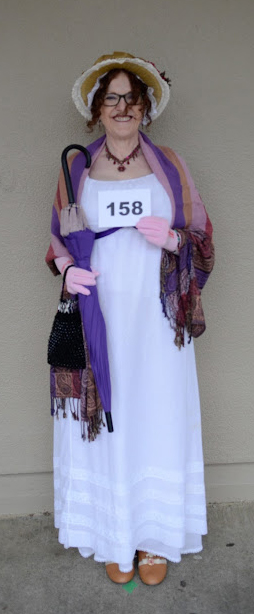
Front view of Suzan Lauder’s pomona green spencer, with cap sleeves over long sleeves, tied back with a piped band and button from the original blazer. Long sleeves are trimmed at the bottom with piped band also. An extra button was added to empire waist band, made from original blazer facing.
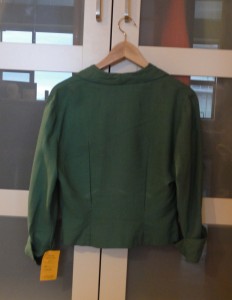
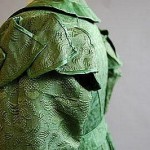
Back view of Suzan Lauder’s pomona green spencer, with Fake Regency diamond back and pleated skirt-like ruffle. Buttons from the original 3/4 sleeve cuffs are used on the tabs at the back of the empire waist band.
This project wasn’t easy for me, though it may be for a more experienced sewer. I hadn’t sewn much for 30 years, except for the odd repair, straight-line window toppers and throw cushions, or slapping together a Hallowe’en costume that was meant to last a few hours. I became good friends with my stitch ripper over the last two weeks and learned a few things along the way.
No-sew iron-on tape would work for simpler modifications to make a spencer, but some of my problems came from construction and developing my own patterns, so they’d occur had I used no-sew tape, too. In addition, it sucks for curves, and you couldn’t have made piped band. Other trims (like in the thumbnails) are fine, and there’s nothing wrong with straight lines for your fake Regency diamond back.
Most of these ideas for faking Regency are applicable to gowns, pelisses, redingcotes, and any other bodiced clothing of the Regency period. Have fun shopping for trim on sale or in grab bags at thrift stores!
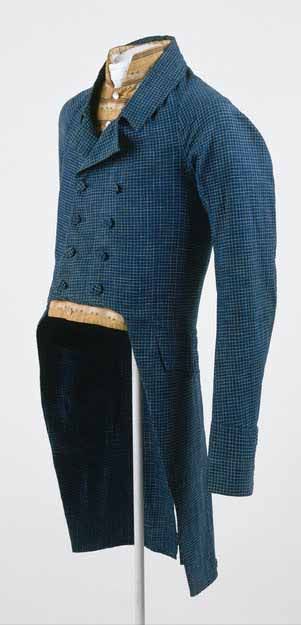
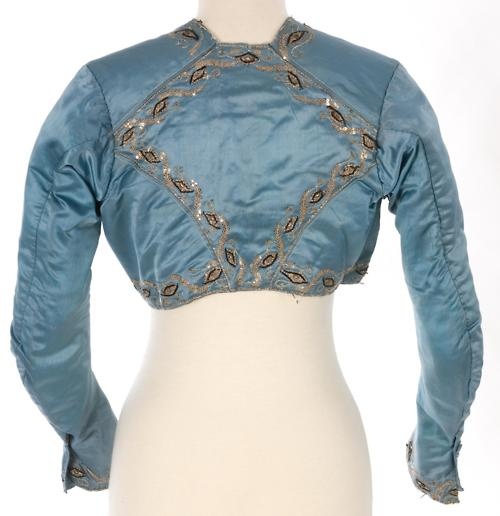
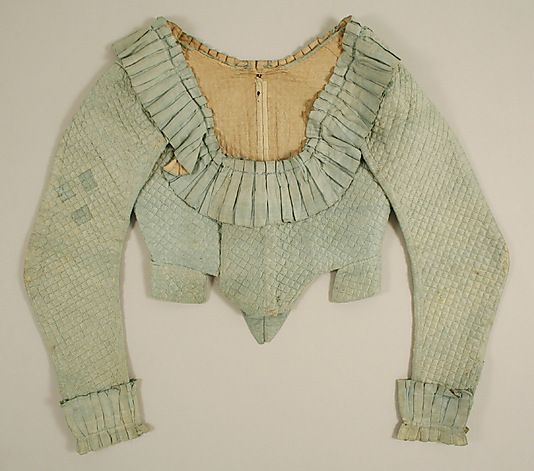
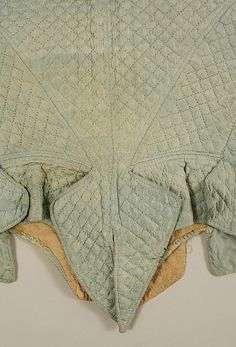
A blue quilted spencer, front. Late 18th early to 19th century, Metropolitan Museum of Art.
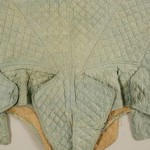
Spencer, late 18th to early 19th century, French, silk. Note the unusual detail below the centre back.
~~~
Web sites with ideas and tutorials:
Inspiration: So Many Backs from Atelier Nostalgia Though these are gowns, you can see the line of the Regency diamond back you want to emulate, and variations on that design.
Sew Many Seams’ Tulip Sleeve Tutorial Shows two types of tulip sleeves to make, using a plain sleeve pattern as a guide.
Slashed puffed sleeve from Firefly Path: The inside of the slash can be made from the spare fabric cut from the spencer, and the oversleeve from a complimentary fabric using a regular puffed sleeve pattern. Maybe use that extra cushion cover or dinner napkin! The slashes need not be filled in, either. You can loop trim material from the inside shoulder to outside through each slash. Similarly, a loop can be made from the cuff inside to outside. Very fake Regency!
Sew4Home’s excellent tutorial on how to make your own piping and bias tape.
For the advanced sewer, two choices for instructions for a piped band: Kleidung 1800‘s site is German, but brief descriptions of each step are in English under the photos. Tea in a Teacup has a different way to make the band, and it looks a bit different in the end.
For the ambitious spencer designer, two posts about making soutache designs: The Fashionable Past shows technique while trimming a Victorian coat, and a trick to make the loops easy by Threads.
~~~
Next few posts: I’ve started on projects for Mr. Suze’s costume, and I have a “Grown-up Lady’s Lace Cap” to make as part of the give-away for my guest post on Roof Beam Reader’s blog as part of his Austen in August (#AusteninAugustRBR) reading challenge, and I’ll draft up the cap pattern to share.
~~~
I WON A PRIZE!!! As part of the same reading challenge above, I won JAFF Author Lisa Pliscou‘s Young Jane Austen: Becoming a Writer, which I’ve been coveting since it came out, for its cool illustrations. I’ve entered every contest I’ve seen about this book! HOORAY FOR ME!
~~~
There are still spaces remaining for the Jane Austen Society of North America Annual General Meeting on October 9-11, 2015, my goal destination for the Thrift Shop Regency Costume Experiment series. The conference theme is “Living in Jane Austen’s World,” and the workshops run the gamut (?? who says stuff like that?) from Regency medicine and home remedies, to evaluation of the wealth of Austen’s characters; the influence of India on Regency England; plants and gardens of the Regency (featuring Meryton Press’s Linda Beutler, an international clematis expert!); food, fashion, and social events of the period; and many others! Pre-conference activities start on October 7. Registration deadline is September 1, 2015, so don’t delay!
Like this:
Like Loading...

 Suzan Lauder’s “Learning from my Mistakes” Lesson #1: As an author, your goal is to provide a reading experience with the greatest level of satisfaction that is within your control.