Example of Regency letter-writing by http://toracellie.blogspot.ca
With 17 verbose posts full of images, the challenge of an Absolute Basic Check List was a bit daunting. How does one summarize a lady’s needs for a full Regency costume suitable to wear at a function where people are knowledgeable about the era? Actually, some of the links shared at the end of this post do a pretty good job of it.
For procuring and creating the costume parts, however, the individual blog posts in the Thrift Shop Regency Costume Experiment series will be of much more use. That’s because of the numerous images of step-by-step construction of the re-purposed or upcycled items, museum examples of actual clothing from the Regency era, period fashion magazine sketches, and paintings of people in the era. There are also topic-specific links and how-to videos in many areas.
This post also has a number of overview links, links with more images of museum and purpose-made Regency wear, and a sort of “next steps” list for some readers: how-to links that require sewing skills.
For the Checklist, I’ve noted price ranges:
- Lowest prices listed are the minimum you would pay for a good-quality finished version of the item (new, gently used, or repurposed/upcycled using minimum crafting or sewing skills), based on my experience with the guidelines set out for the Thrift Shop Regency Costume Experiment.
- If there is a zero instead of a bottom price, it’s because this is an item you’d probably choose only if you already had one, and if purchasing, another choice on the list is preferable.
- Highest prices are for purchase of a period-correct, attractive, good-quality (but not always top end), brand new item from a good vendor, custom-made to fit you in the case of clothing.
- If there is a question mark instead of a price, it means the item is of such a personal nature, the top end cost is based on the buyer’s evaluation.
- If you have the item on hand, it will cost nothing.
- Most items can be obtained in the lower half of the price range.
Footwear
- Simple ballet flats ($5-$20)
- Fully enclosed (pump).
- Round, pointed, or square toe.
- Slim sole, separate heel under 1” high (not wedge), and any heel over ¼” should be a flared kitten heel.
- Silk-look fabric, fine cotton, or soft leather.
- Any colour except for black, dark brown. Wide stripes and large dots are fine.
- No elastic, rubber, jute or coarse cotton, large trim items, folded leather detail, external seams, etc.
- Ribbon ties up the leg with flat soles are optional (good for keeping shoes on while dancing).
- Simple trim is optional.
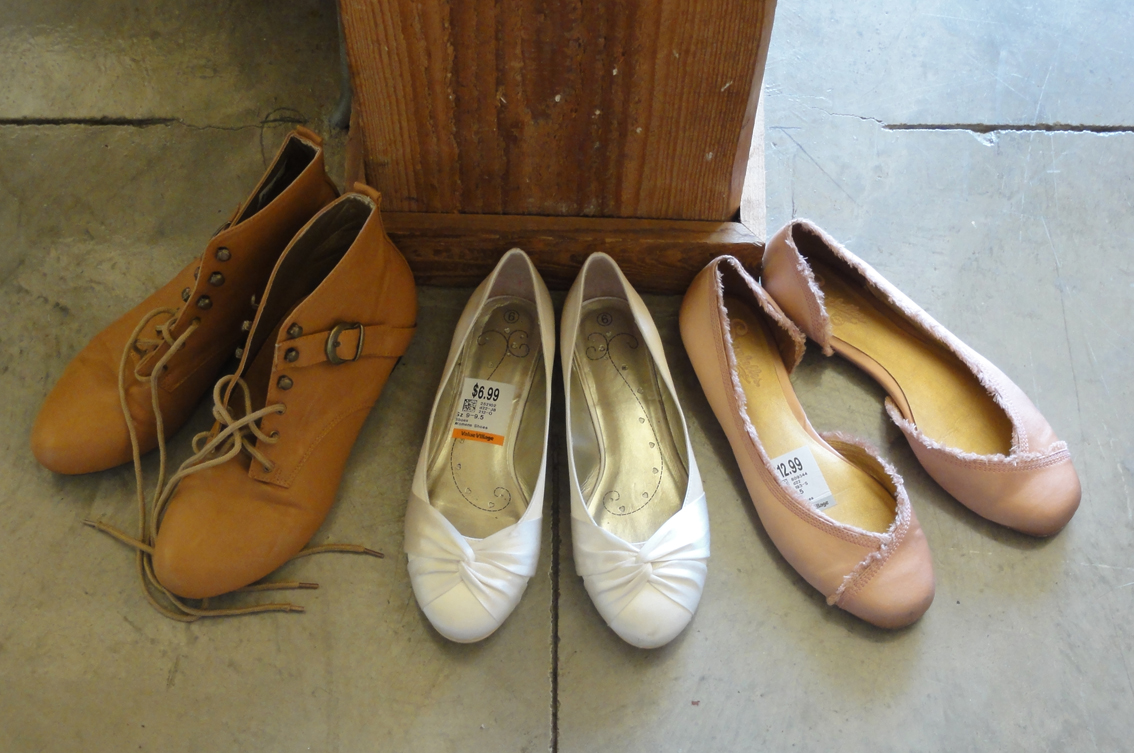
My second set of footwear for potential Regency Costumes: a pair of half-boots and two pairs of satin ballet flat shoes. The boots will have the buckle removed (perhaps for a man’s shoes!) and get dressed up with a ribbon and fabric rose across the base of the toes. The white and pink shoes will be cleaned, then the white will get white ribbons to lace up the legs. The pink shoes will have the fringe covered with a ribbon and the cut-away area disguised.
- For day wear, flat, lace-up half-boots ($18-$155).
- 8′-12″ tall, round toe, slim sole and ¼” heel maximum.
- Light colours.
- Softer leather, cotton, or denim.
- Orthotics may fit if you buy a half size larger than normal.
- Post: Put on Your Dancing Shoes!
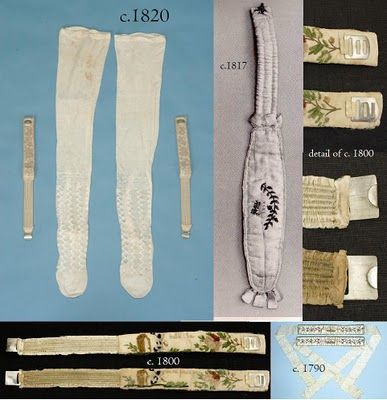
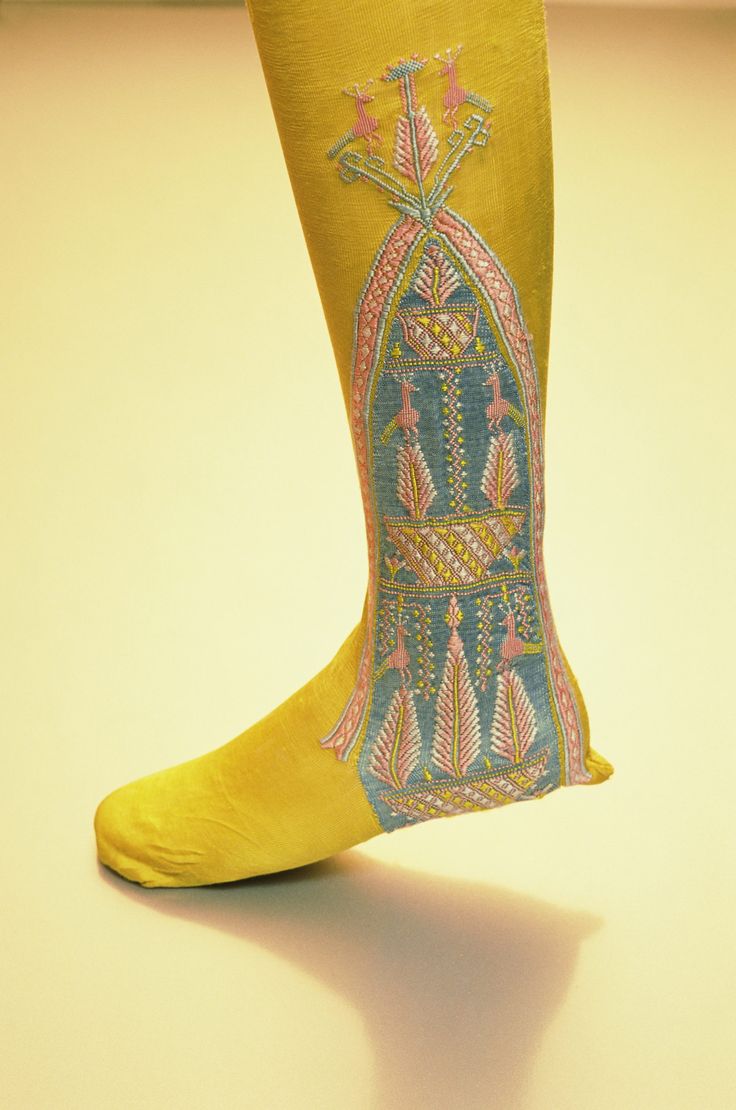
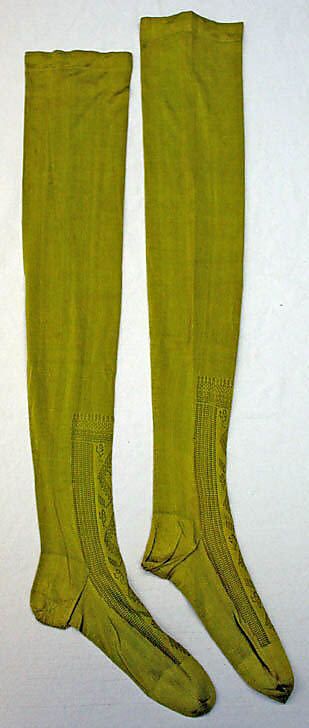
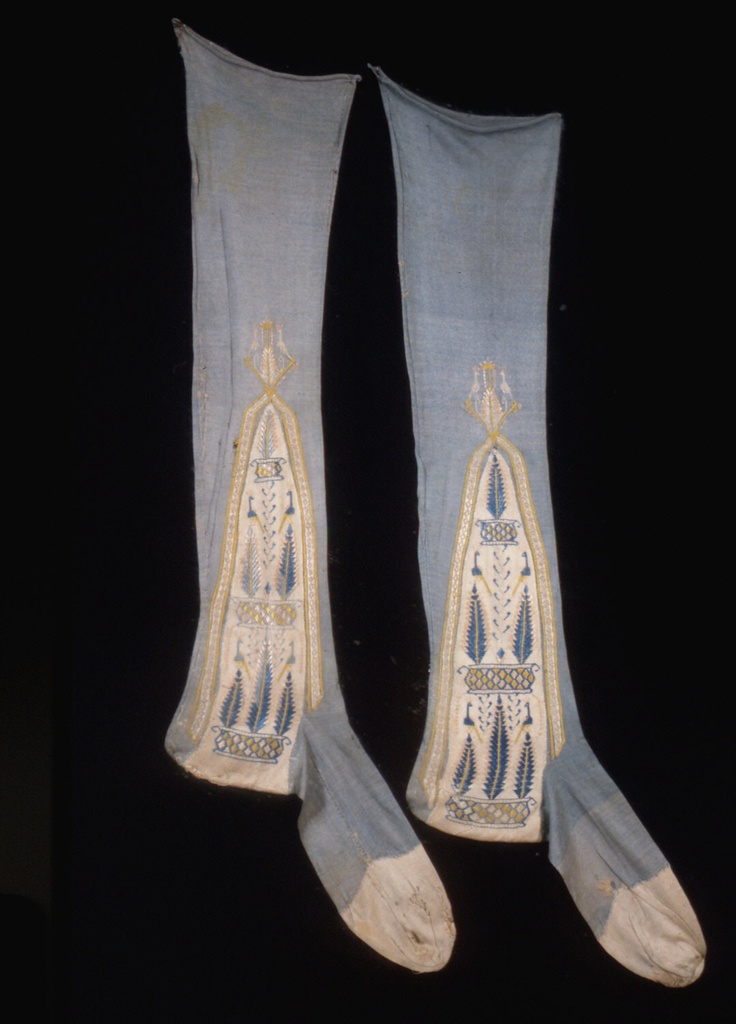
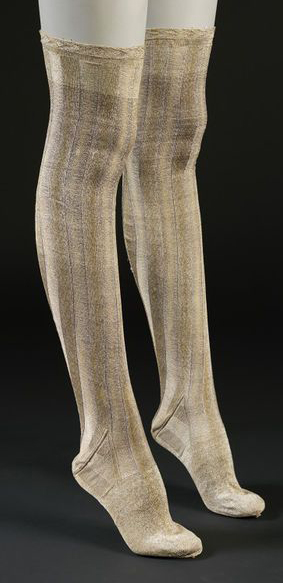
Stockings
- Opaque thigh-highs or tights, any colour but black. ($2-$10), OR
- Historical “clocked” cotton ($15) or silk ($25) stockings from a specialty store, with ribbon ties.
- Post: Twenty Layers of Unmentionables and no Panties!
High-lift foundation garment for “the girls”
- Custom made Regency short stays ($70-$190), for C cup and under, OR
- Custom made Regency full corset ($95-$380), for D cup and higher, OR
- Push-up bustier or modern corset that’s low cut and not too cinched in the waist ($0-?), OR
- Well-fitted (or slightly small) demi-cup, push-up bra, such as a Balconette. ($20-$?), plus a waist cincher if needed for extra lift.
- Post: Lift and Separate!
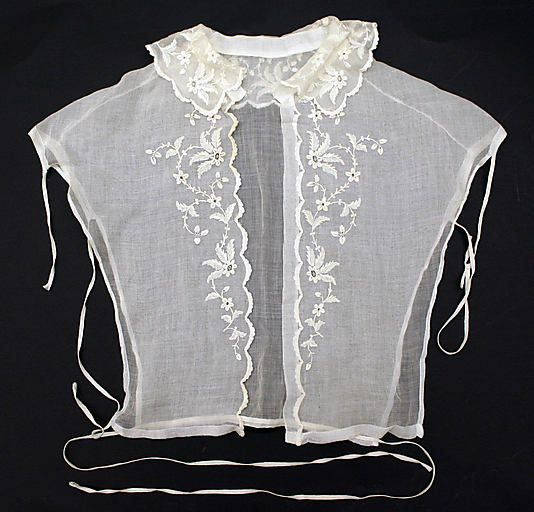
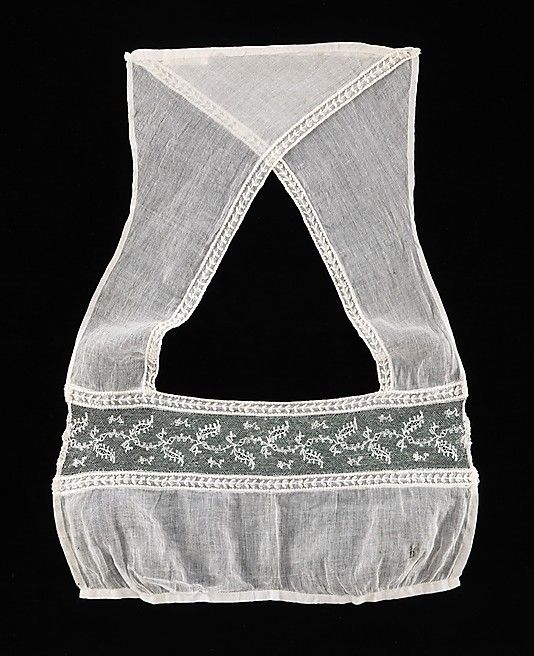
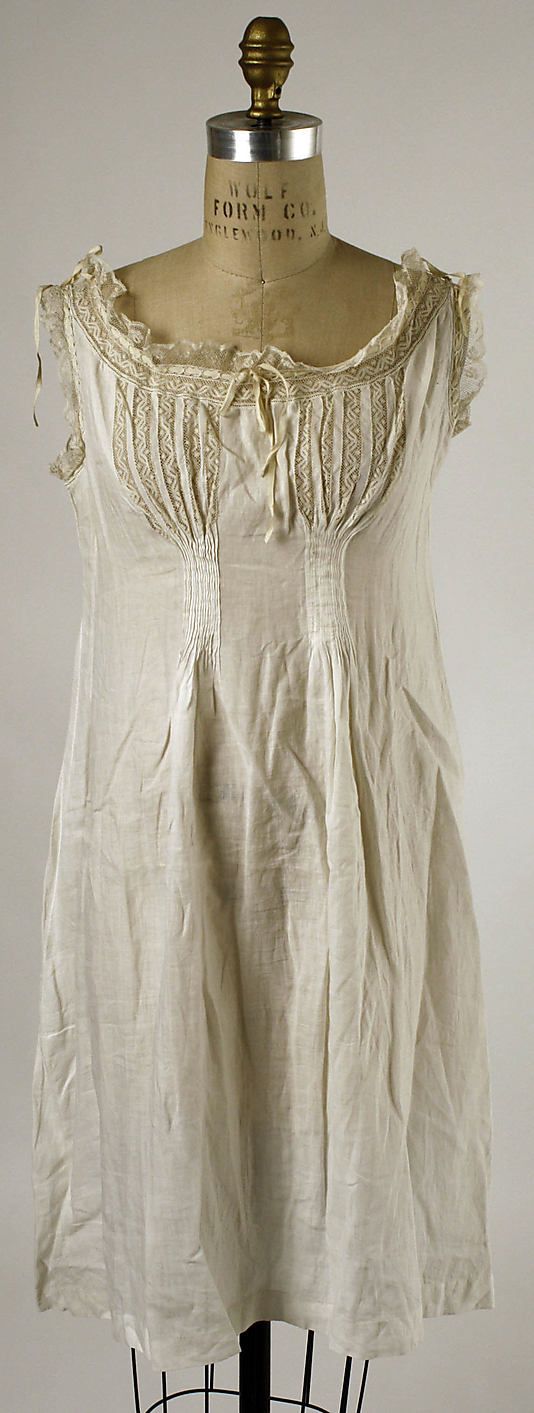
Chemise and petticoats or pantalettes
- Authentic, custom-made, new, Regency undergarments from specialty stores or Etsy:

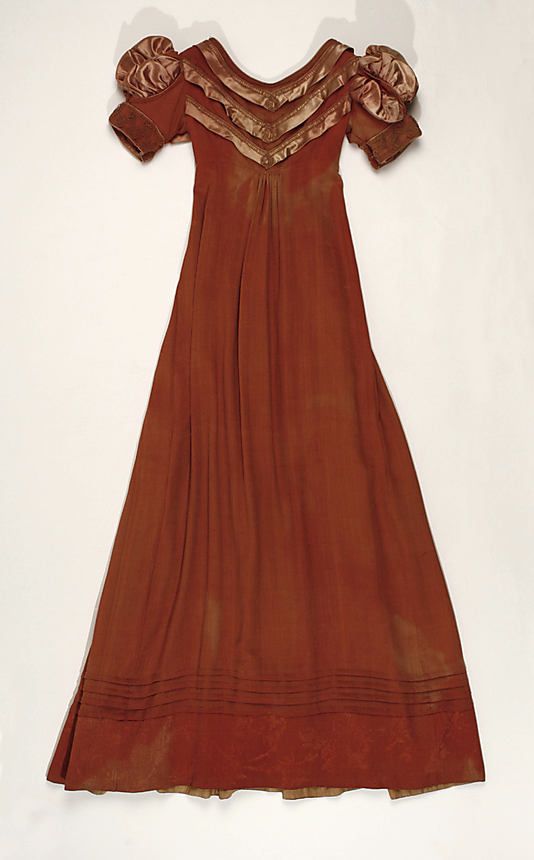
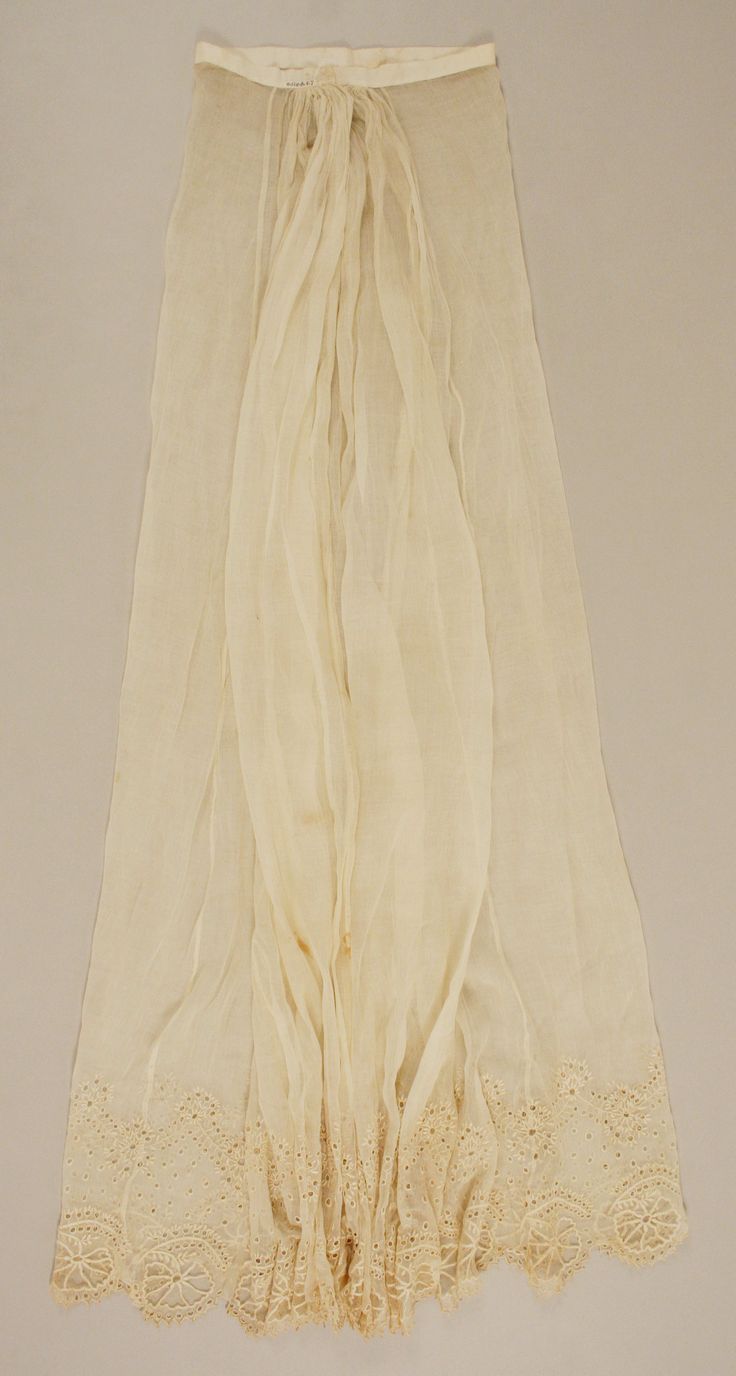
Petticoat, early 19th c, American, Boston Museum of Fine Arts
- Chemise ($45-$100) (worn under the corset for comfort), and
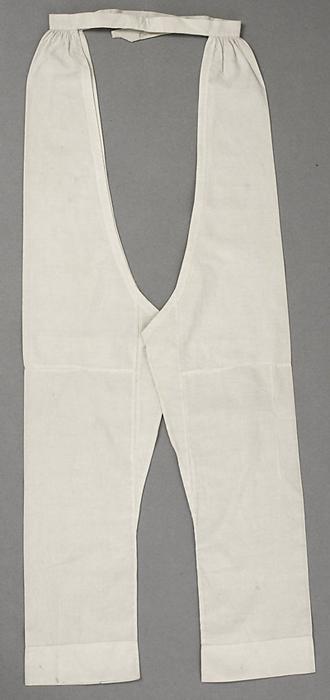
- Petticoats ($35-90) or pantalettes ($35) (to “fluff out” the gown so it won’t stick between your legs), OR
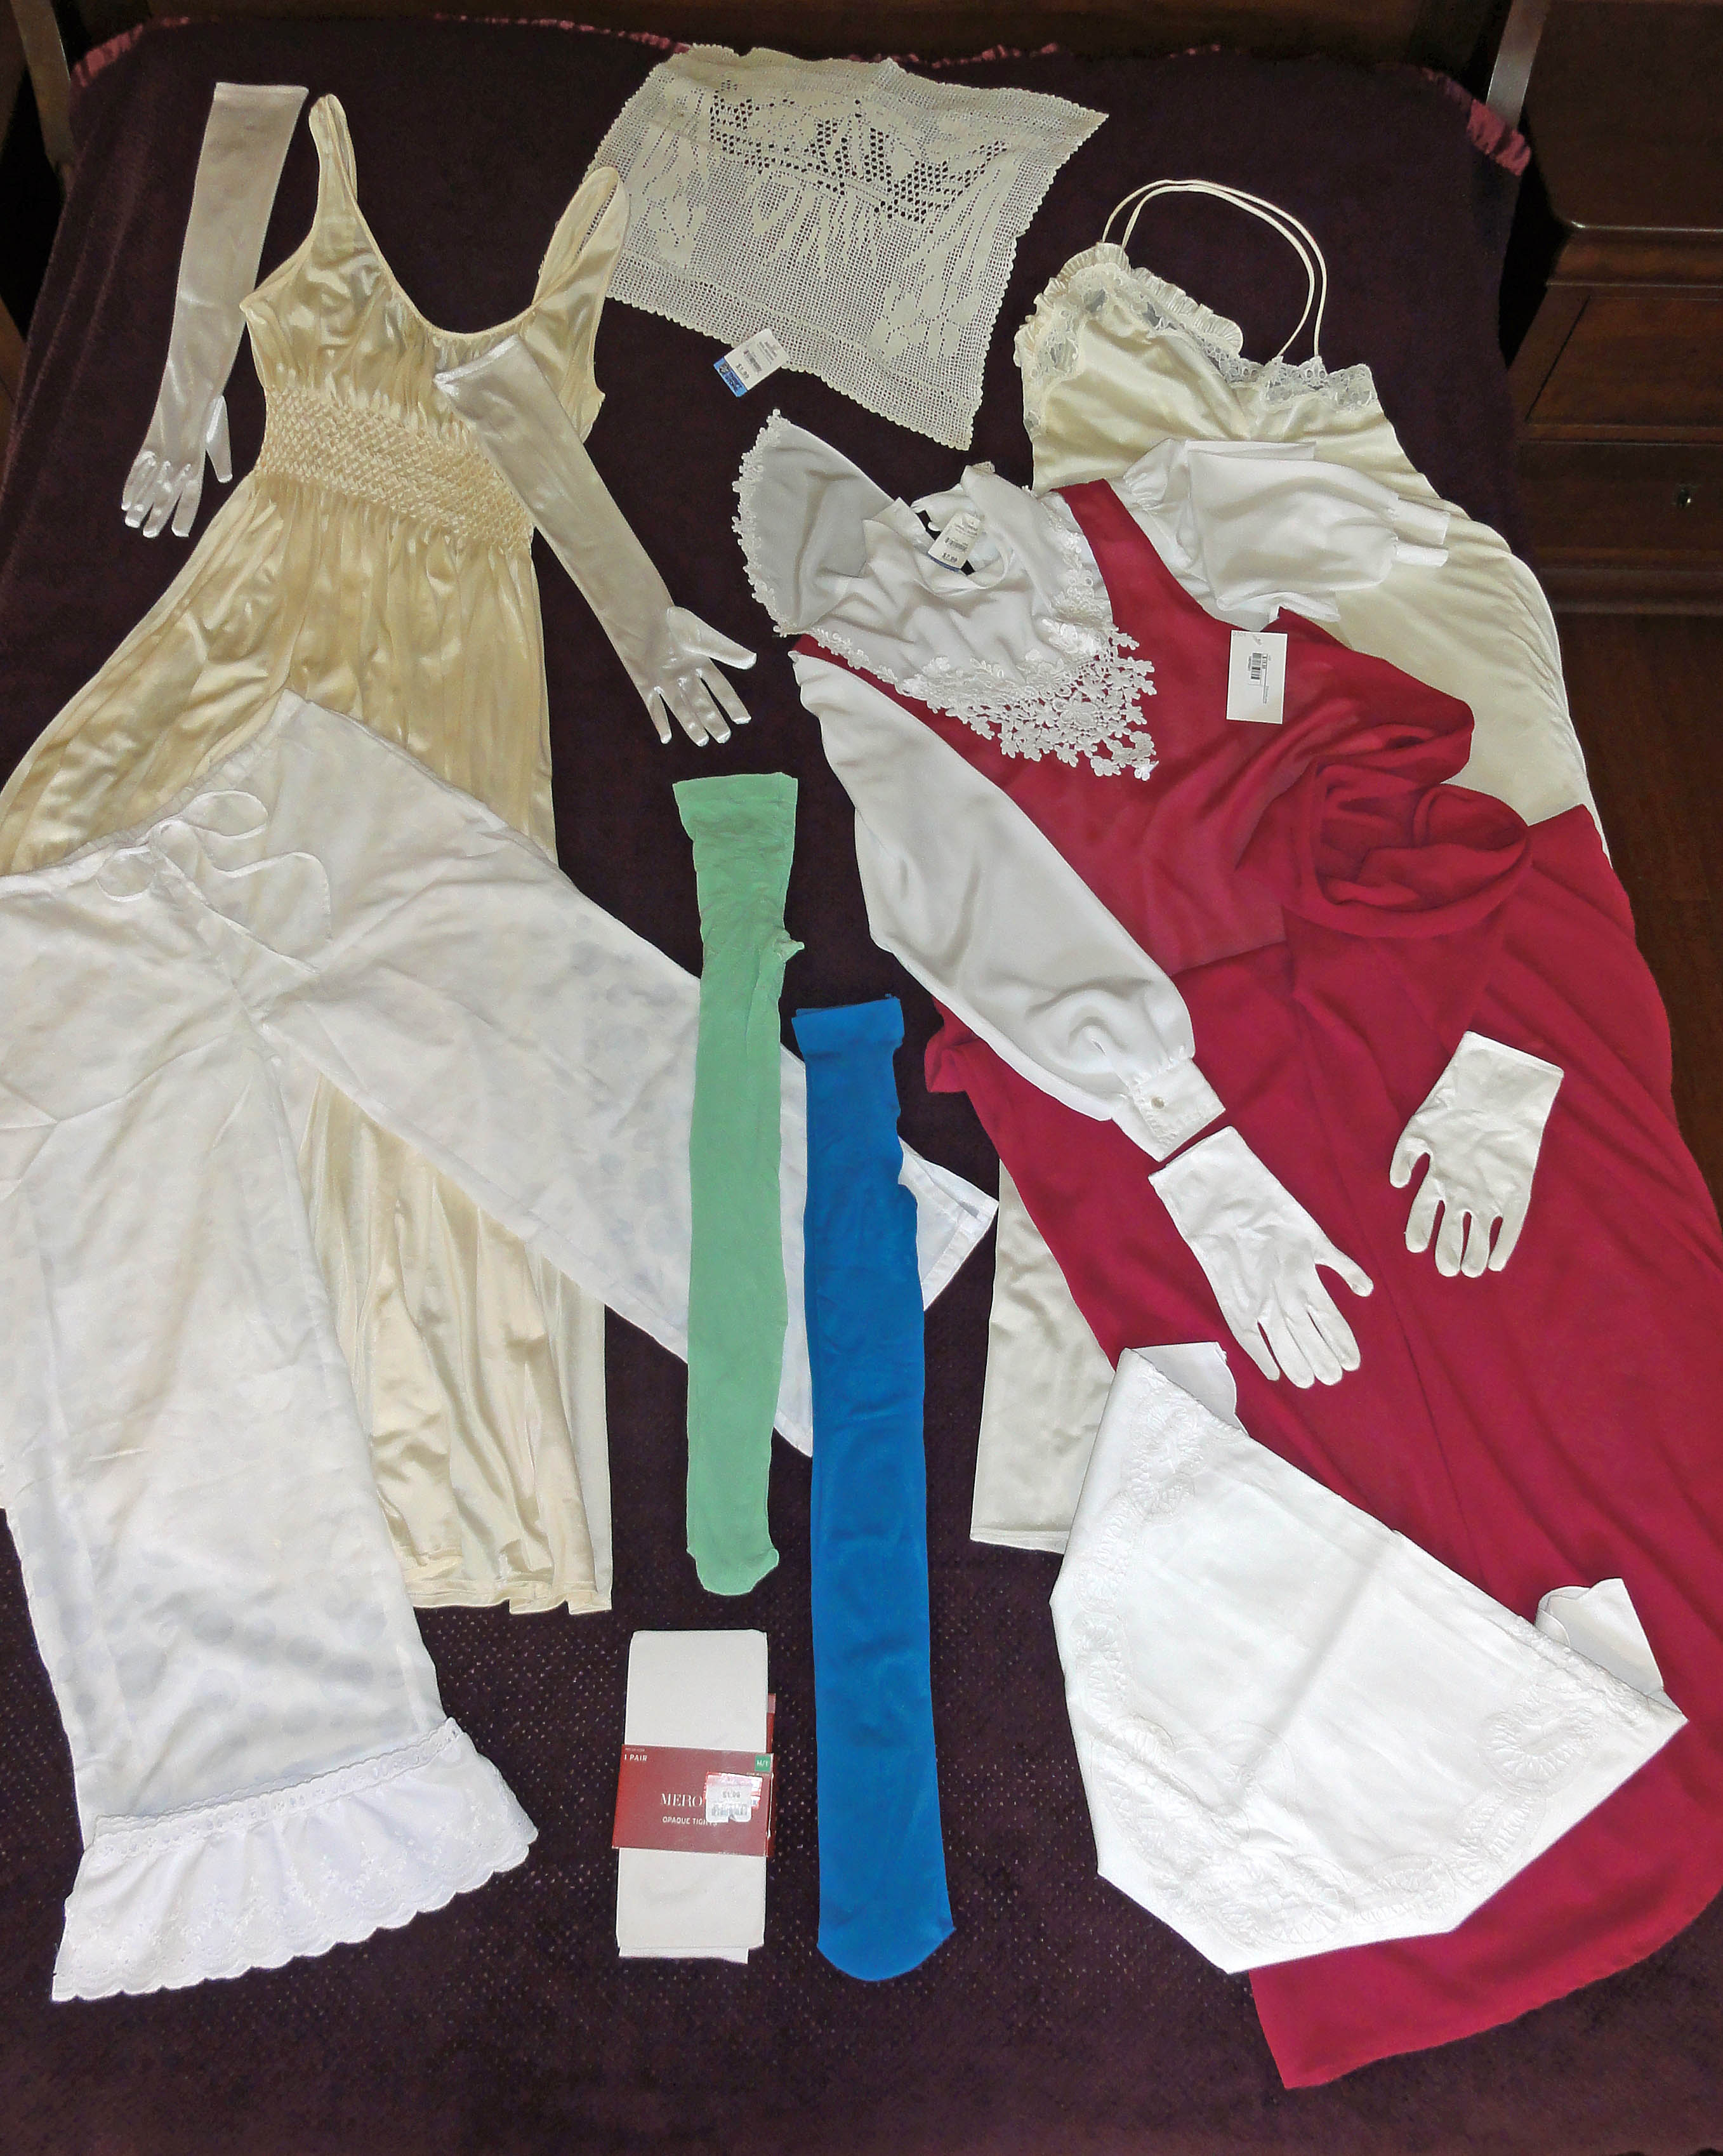
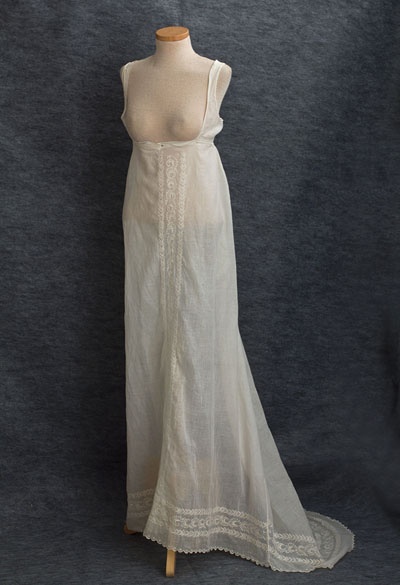
- In place of all of the above:
- A floor-length full slip or nightgown, deep cut to match neckline of stays/corset/bra ($7-$38), or
- A floor-length half-slip pinned to base of bra ($7-$20), or
- Plain, lightweight, light-coloured cotton capris or pajama pants, or pants liners. ($5-$20), and
- A low-cut camisole if needed with the last two items ($5-$25).
- Super-fine woven cotton is best for comfort, but polyester will work.
- Post: Twenty Layers of Unmentionables and no Panties!

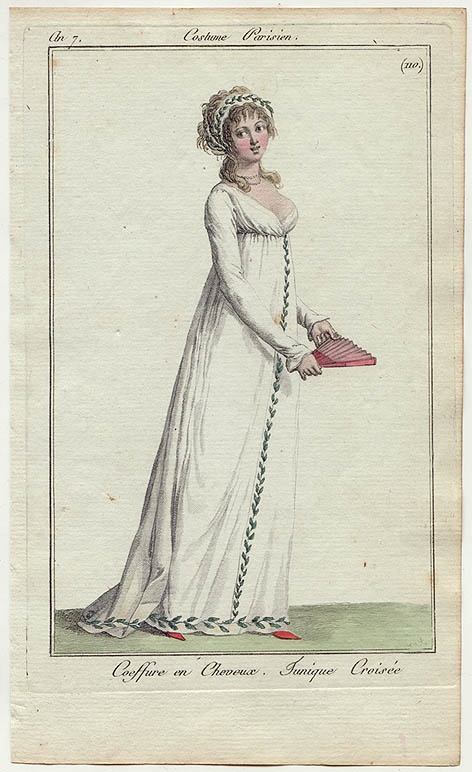
Basic empire waist gown ($38-$400)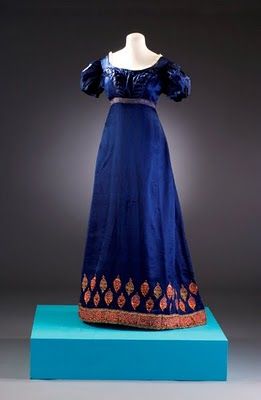
- Floor length, empire waist.
- Straight (non-fitted) skirt, flat in front and gathered in back.
- Short, puffed sleeves and wide, low neckline for a dinner/evening/ball gown; long sleeves and high neckline for morning gown (to 4pm).
- Simple-print finely-woven cotton, linen, or percale (not black-based), smooth silk, organdy, or synthetics that are good facsimiles.
- 2m (6’-7’) by 1”-2” ribbon tied under the bust.
- Don’t buy a pre-made “Regency” gown for under $100 on Etsy, as most are terrible!
- $200-$400 should buy a nice, authentic, custom-made gown.

- Posts: Floor length, Empire waist, and what else? Anne Shirley? (description of a Regency gown and examples); A Morning Gown plus some Frankenstein Gown Parts (what aspects of vintage gown styles to avoid; my gown purchases; morning gown modification from 80’s vintage); Were Regency gowns worn on the Titanic? (purchase tips for new handmade Regency gown; what to look for in a vintage gown to re-purpose).
Regency Hair Style
- Centre parted, with ringlets around the face; fancy up-do with bun and curls or braids, worn close to the head. (How-to and video links in posts.)
- If hair is too short for a fancy up-do, a hairpiece (bun maker, bun hair, and 1-3 braids for $10-$30), fall ($0-$50), wig ($0-$92), or a turban are options.
- Ringlets can be purchased or taken from a doll or fall ($7-$60) and held on by a bandeau, or flat pin curls can be made.
- For very short hair, comb forward in a “Titus” and hold in place with a ribbon, bandeau, or similar decorative item.
- If desired, trim with ribbon, lace, bandeau, braided fillet, small silk flowers, feathers, tiara, diadem, combs, etc. ($0-?)
- Posts: Faking Purdy Locks: The Modern Hairstyle goes Regency;
Regency Bad Hair Day? Wrap a Turban! (my clip-on fall in an updo at end of post).
Headwear
- Bonnet or hat ($6-$70)
- Preferable if your hair looks nice when you remove your hat indoors.
- Brim is sturdy, not floppy, and straw or satin-type fabric.
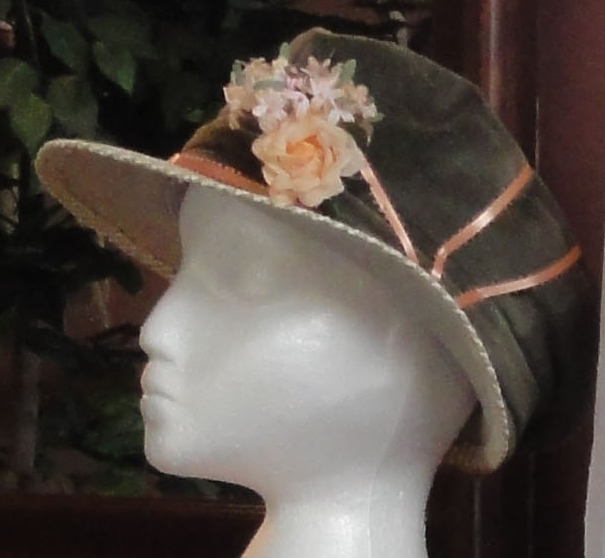
- Capote hat or bonnet can be made from a wrap-around straw visor or hat, a 20” diameter simple, smooth, silk-like fabric cover, and a ribbon.
- A good hat base is the narrower brim straw picture hat at Michaels, $5.
- Add 1.5′-2.5′ of 1″-1.5” ribbon to make ties for a bonnet.
- If desired, trim with several bunches of small fabric flowers and greenery; larger fabric roses; an ostrich, peacock, or other feather and brooch/medallion; hat pin; or combination, or other designs based on Regency sketches.

Mock up of design of green and straw visor with green velvet cap.
- A nice range of new items can be found at the upper half of the price range above. Fancy items are double the top price listed here.
- Posts: The Thrifty Regency Hat-trick! (Capote hat from visor and dinner napkin for under $10); How-to Times Two: Variations on Dressing up a Bonnet (The Pink Hat); Special Headwear for the Grown-up Lady (museum hat examples at the end of the post).
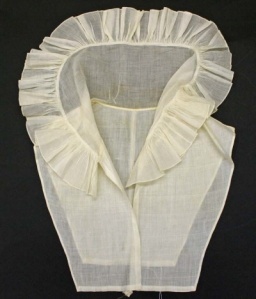
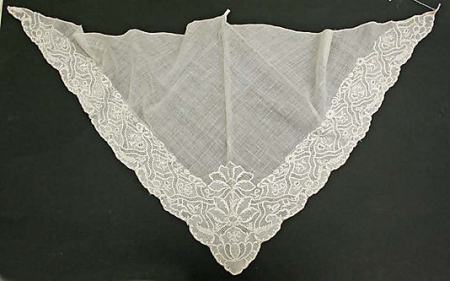
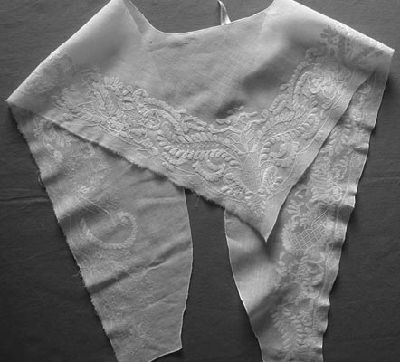
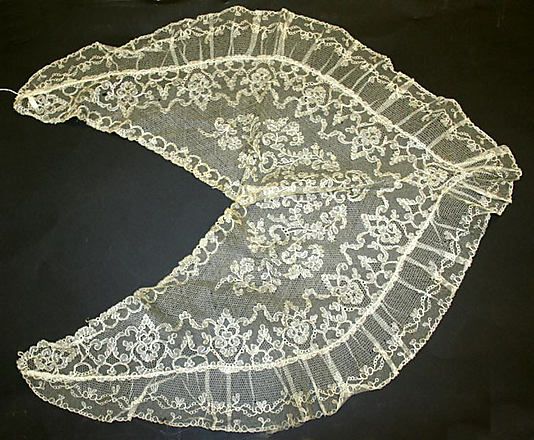
- Lace cap ($2-$40)
- Optional; for married or single-and-proud-of-it women only.
- Similar to the idea of a turban, this will hide hair for women who can’t manage a Regency hair style and will be indoors where they must remove their hat.
- Can be made from super-fine white cotton and/or fine whitework lace items such as doilies, handkerchiefs, curtains, cushion/pillow covers, or purchased applique items and ribbon.
- Post: Special Headwear for the Grown-up Lady
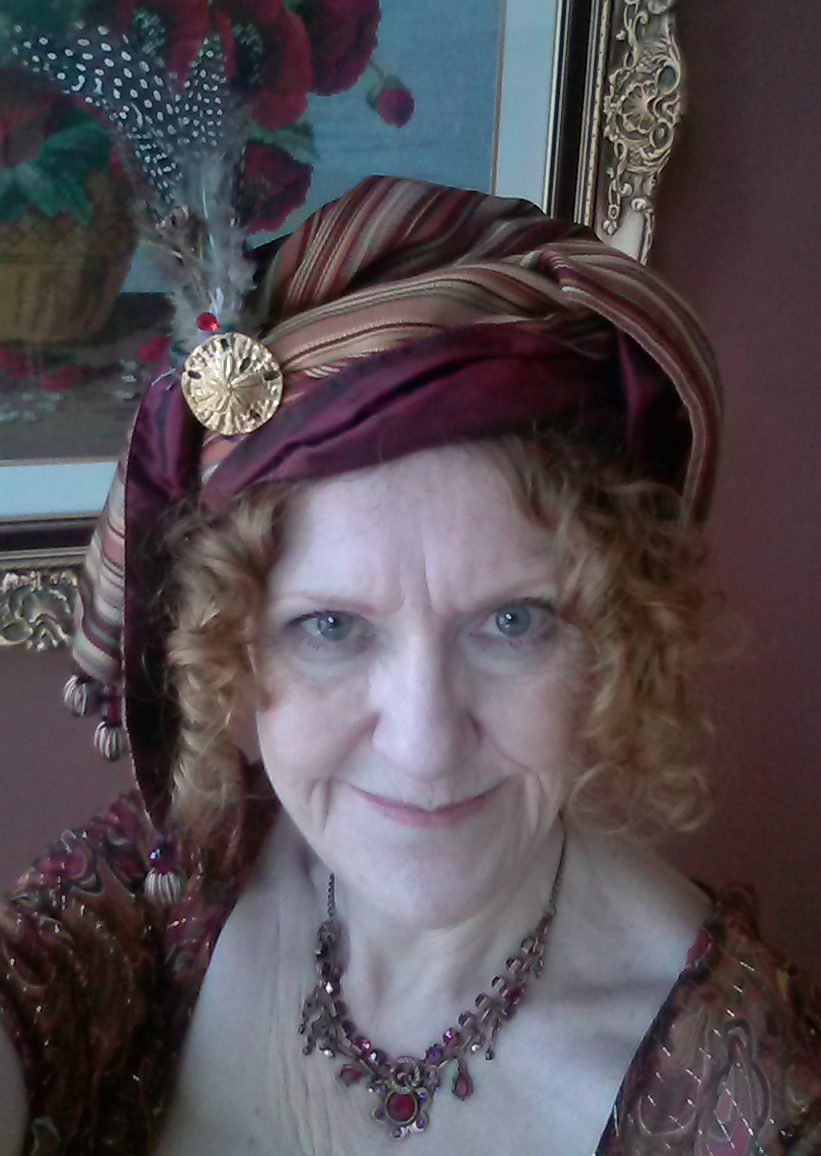
- Turban ($15-$40)
- An alternative to the hat or bonnet that does not have to be removed when you go indoors.
- A nice choice for evening wear if you’re unable to create an up-do.
- Twist 2-3 silk or satin scarves (how-to and video links on this blog), or a length of silk or satin fabric (could be a table or dresser runner, a pashmina, small shawl or wrap) about 15″-20” wide and 40” long about your head behind ringlets; secure with safety pins and bobby pins.
- A brimless, soft, natural fabric hat with a scarf or fabric wound around its base in textured waves works well also.
- Fringe or ends with some type of embellishment or trim are recommended, and can be left to droop on one side.
- Braid or cord can be woven around with turban cloth.
- Add feathers, foliage, brooch, medallion, hat pin, or similar items.
- Post: Regency Bad Hair Day? Wrap a Turban!
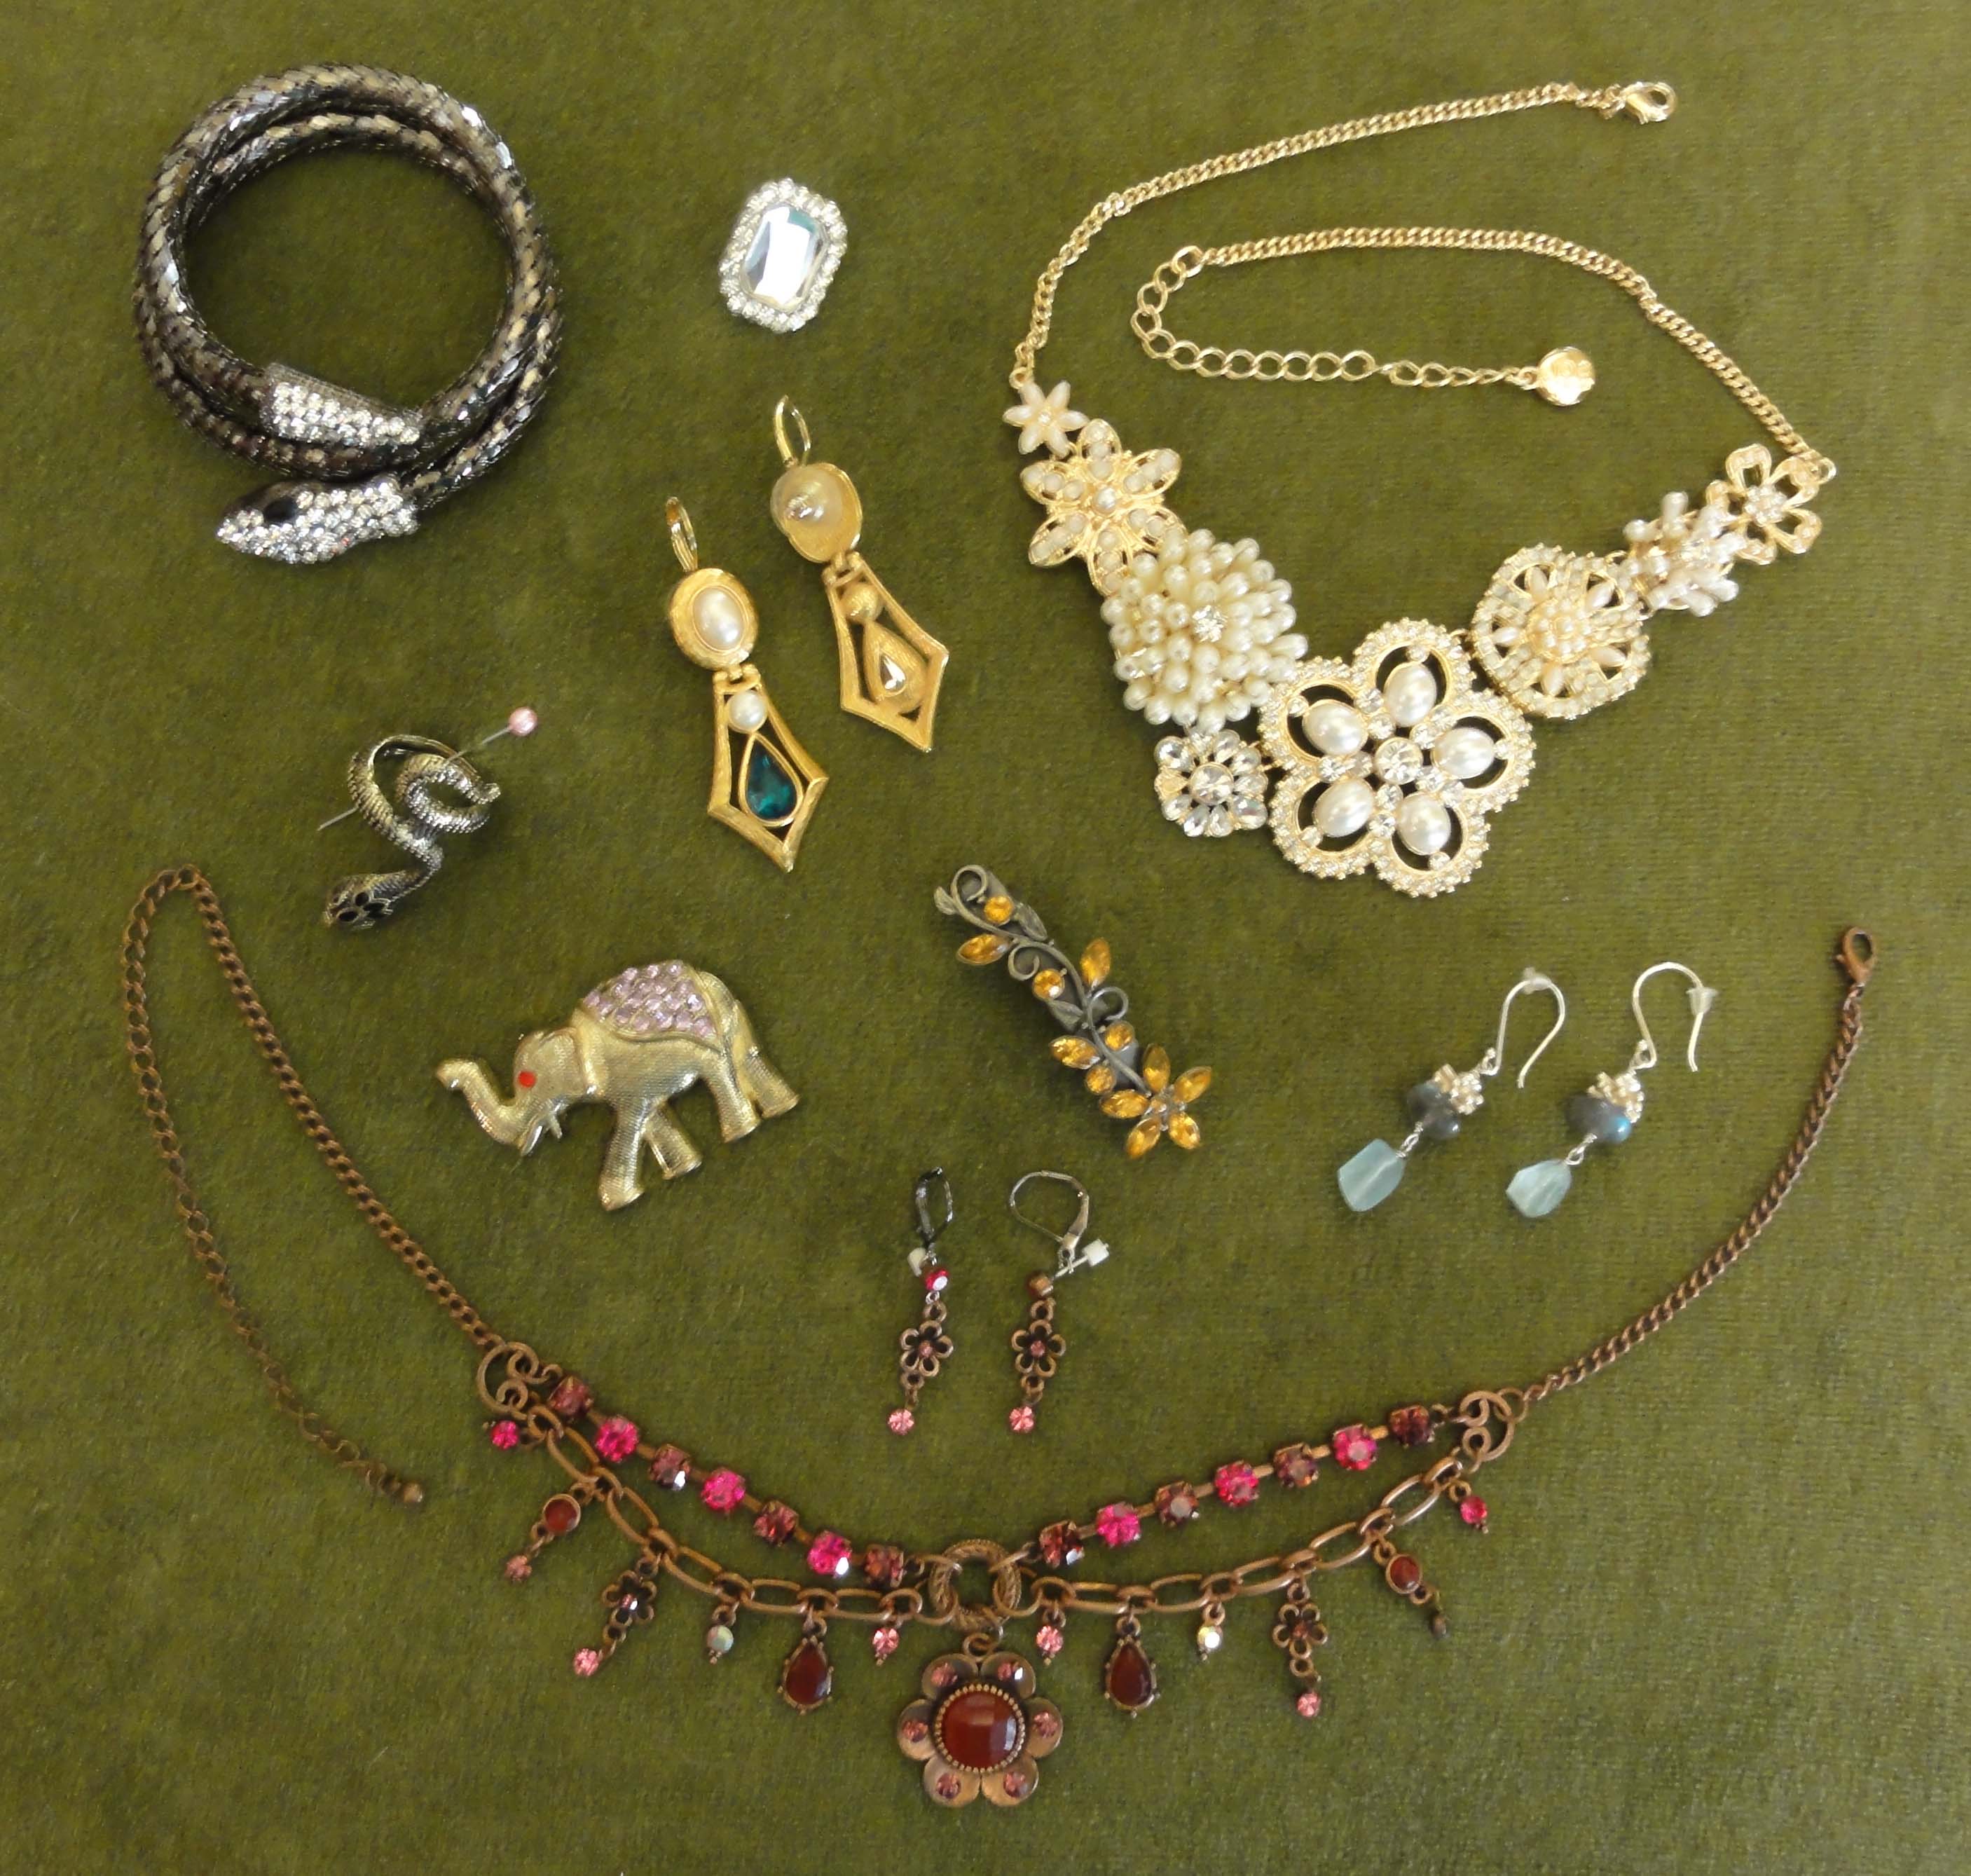
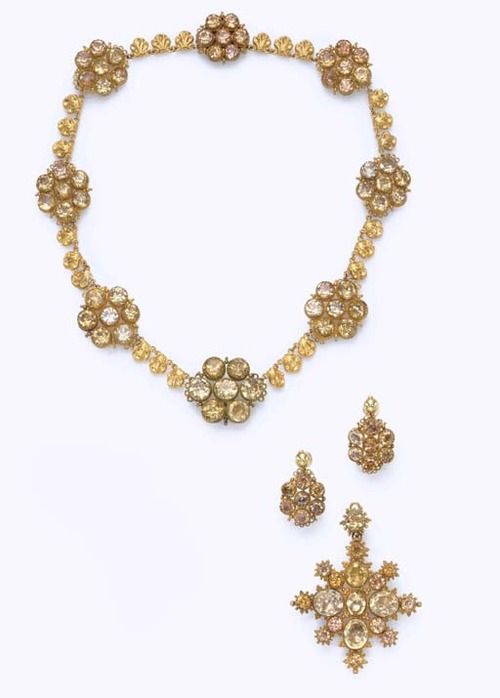
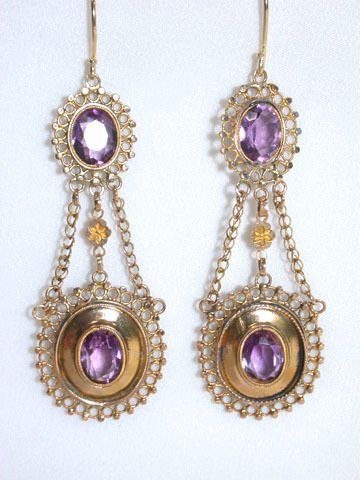
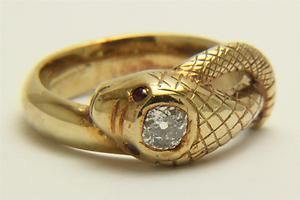
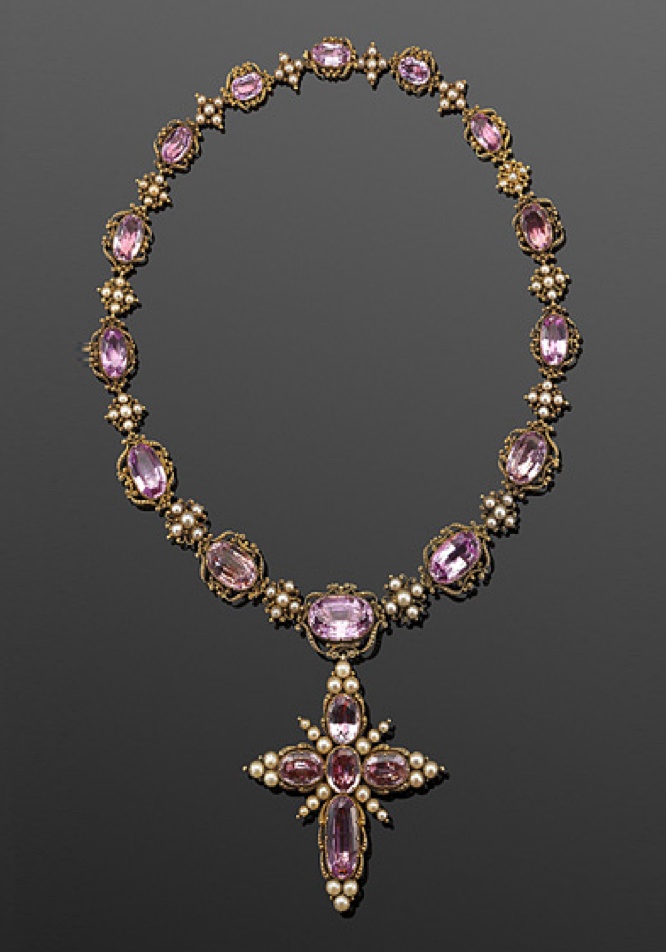
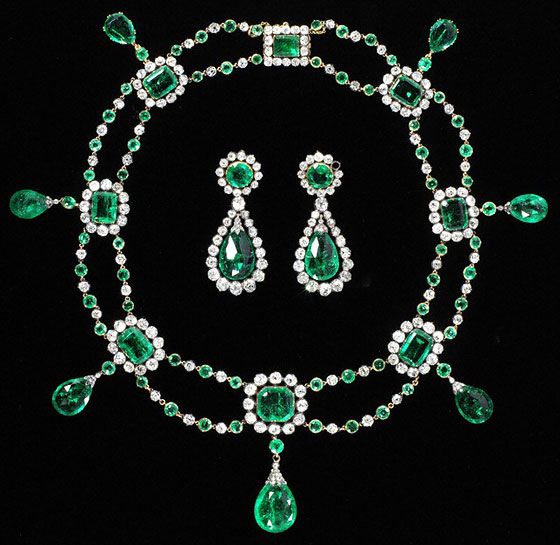
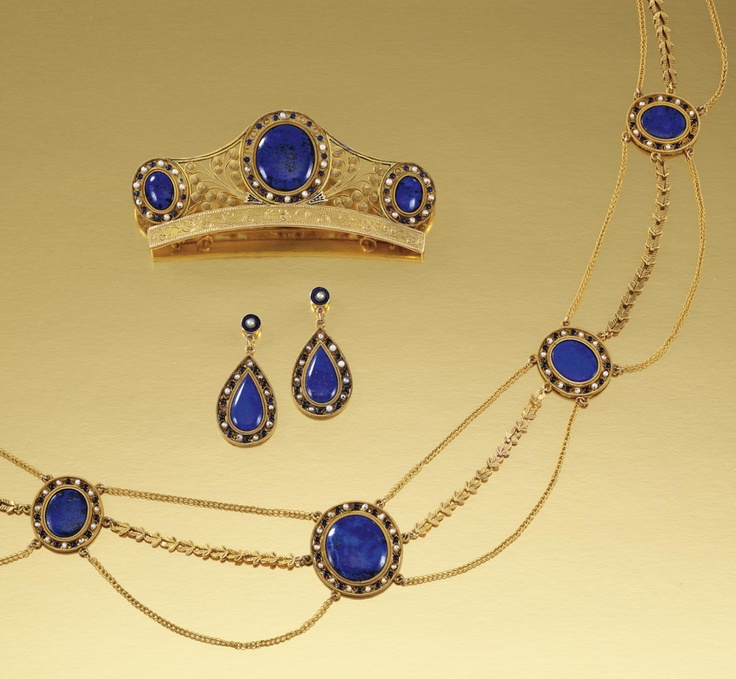
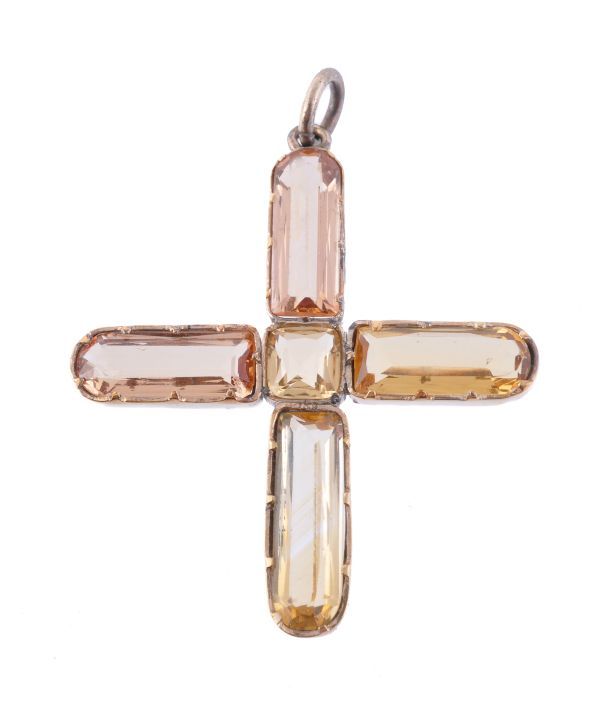
Jewelry ($0-?)
- Simplest would be a medium-sized “jeweled” cross on a chain.
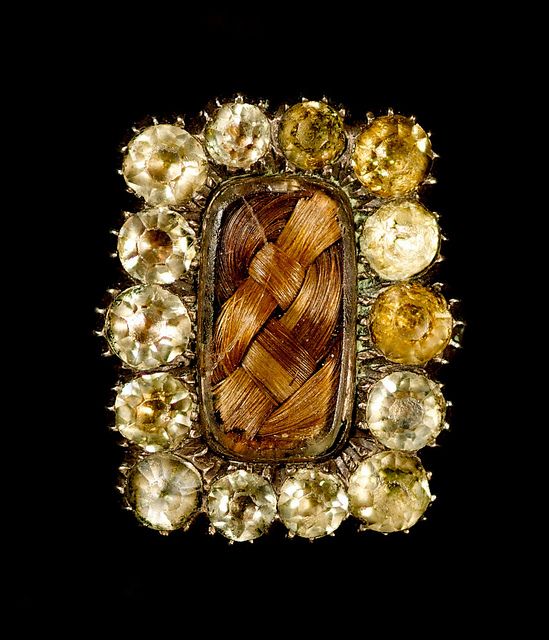
- More elaborate choices include “jeweled” necklaces, armlets, bracelets, brooches, rings, earrings, and combs.
- Almost all stones are are acceptable, but they should be cut stones. Costume jewelry is fine if it doesn’t look plastic.
- Cameos and red coral were popular.
- Drop earrings were on hooks not studs; clasped or open hooks are period.
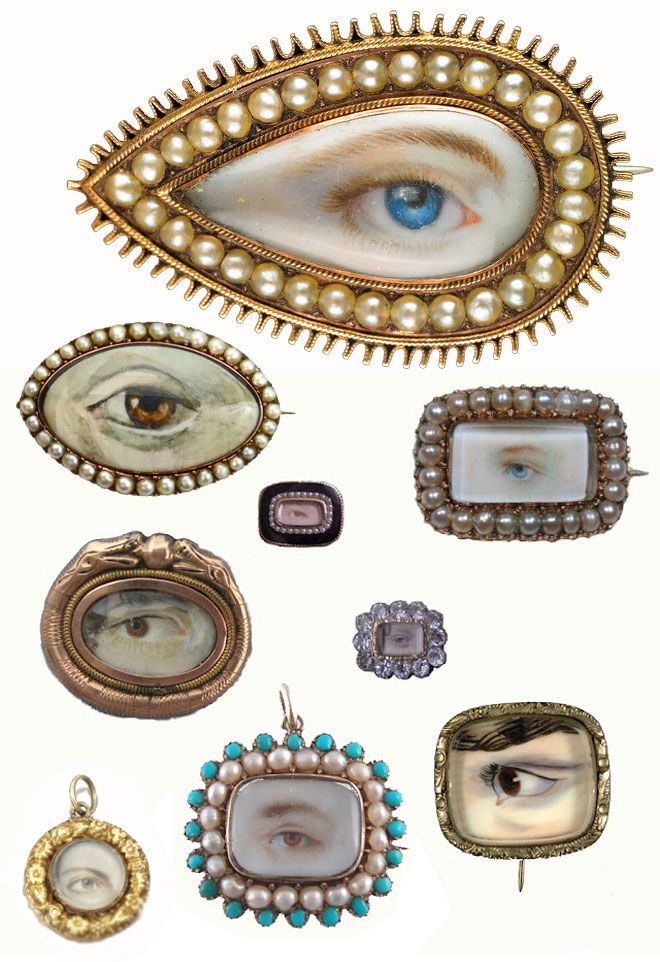
- Lover’s eye brooches were fashionable.
- Post: Shiny things expose my inner crow!
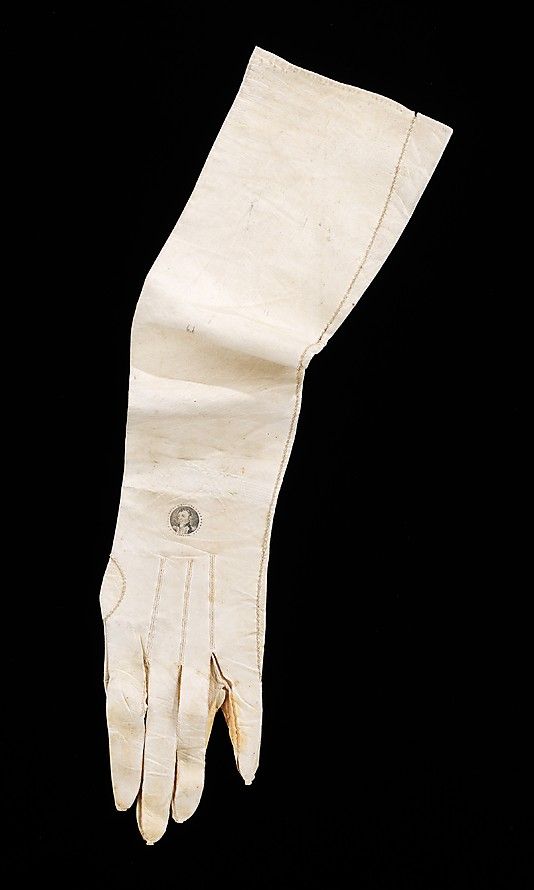
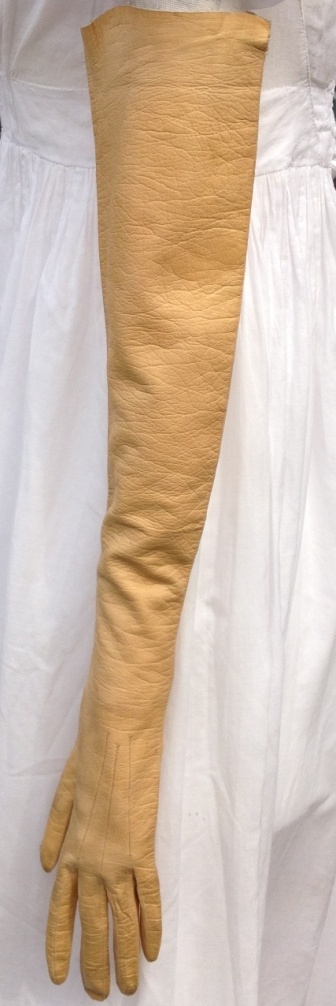
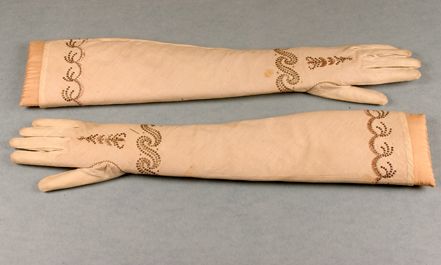
Regency Opera Gloves, kid, Metropolitan Museum of Arts
Gloves
- Cotton, silk, or kid leather.
- Short or optional for day wear ($5-$25).
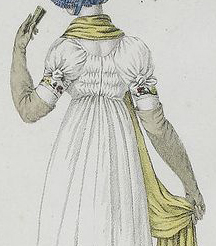
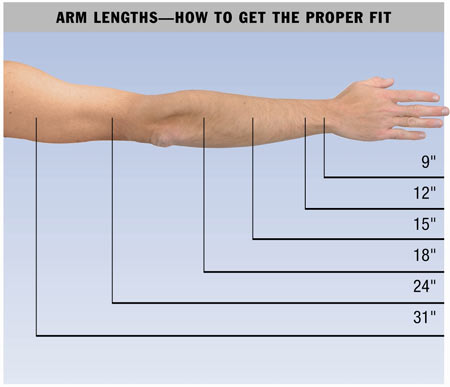
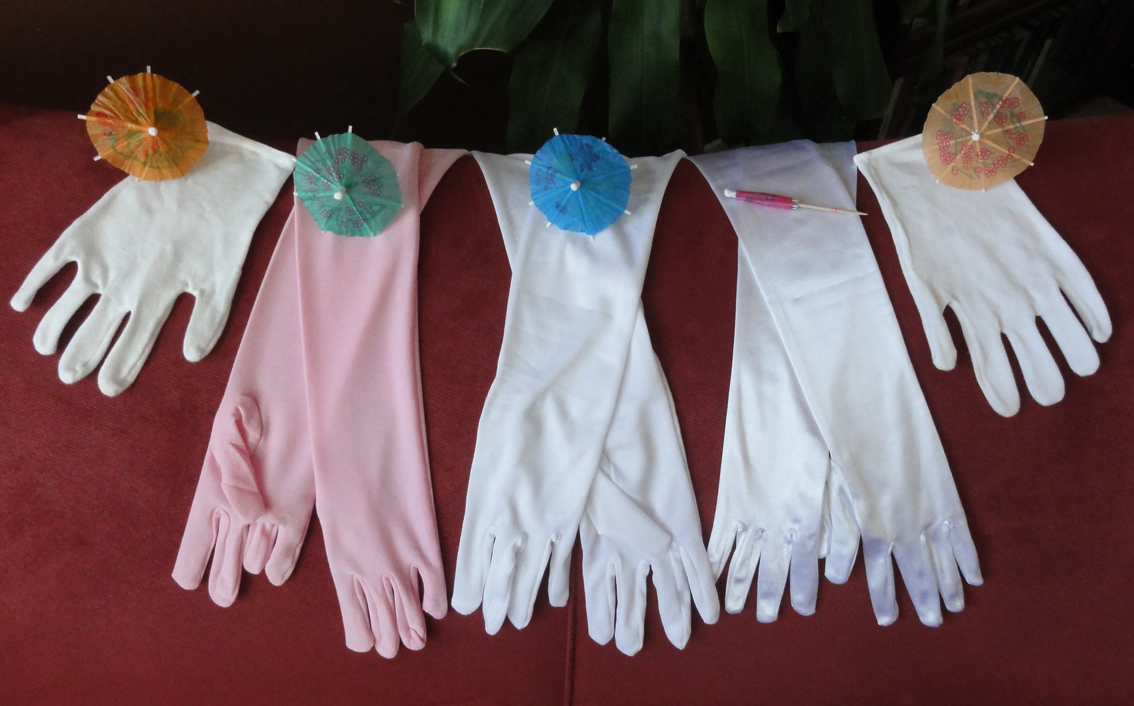
- Evening gloves go above the elbow: 24”-31″ (opera-length) with a loose-fitted upper arm are period-correct ($8-$32 for synthetic; $50-$200 for natural materials); 19” minimum.
- If synthetic opera gloves are worn, buy a matte and not shiny satin finish, as it looks fake.
- Any colour but black. White and softer colours were most common.
- Post: I never did mind about the little things…
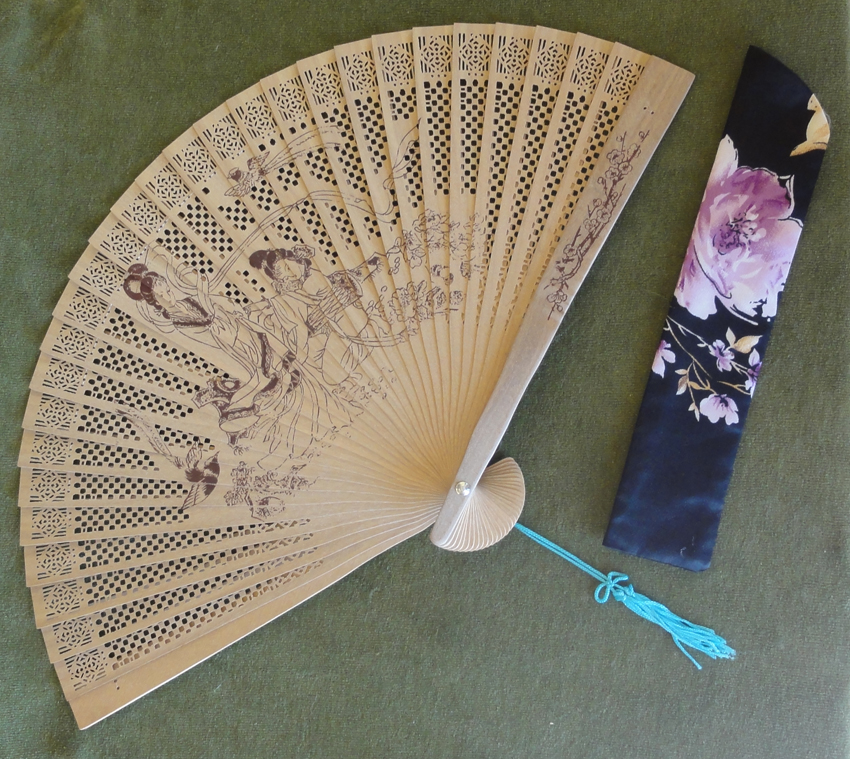
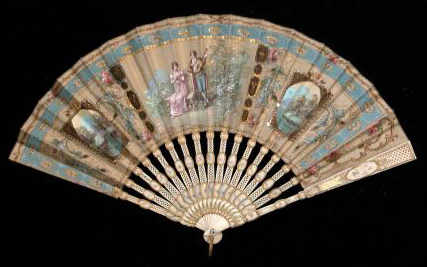
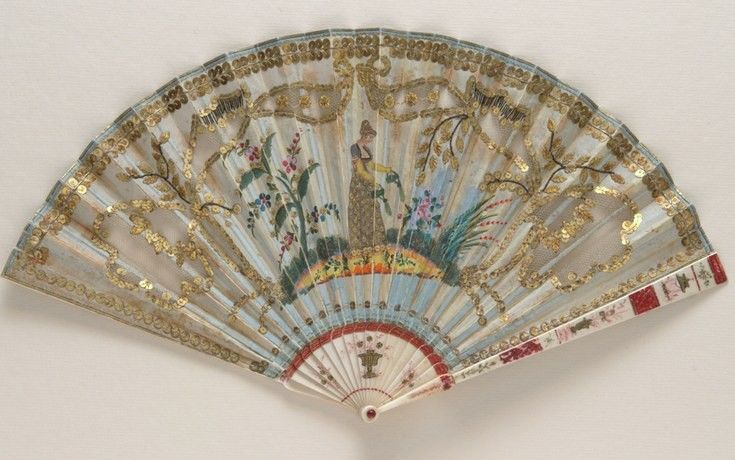
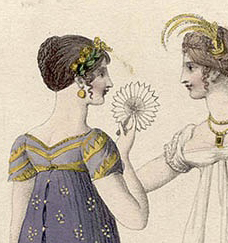
Fan ($1-$10)
- Optional, but necessary on a warm day or in a ballroom.
- Folding hand fan.
- Avoid plastic and obvious synthetic materials for the sticks and guards.
- If the fan has any scenes on the leaves, they should be English.
- Any colour. Trim can include feathers, sequins, metallic, mother-of-pearl.
- Post: I never did mind about the little things…
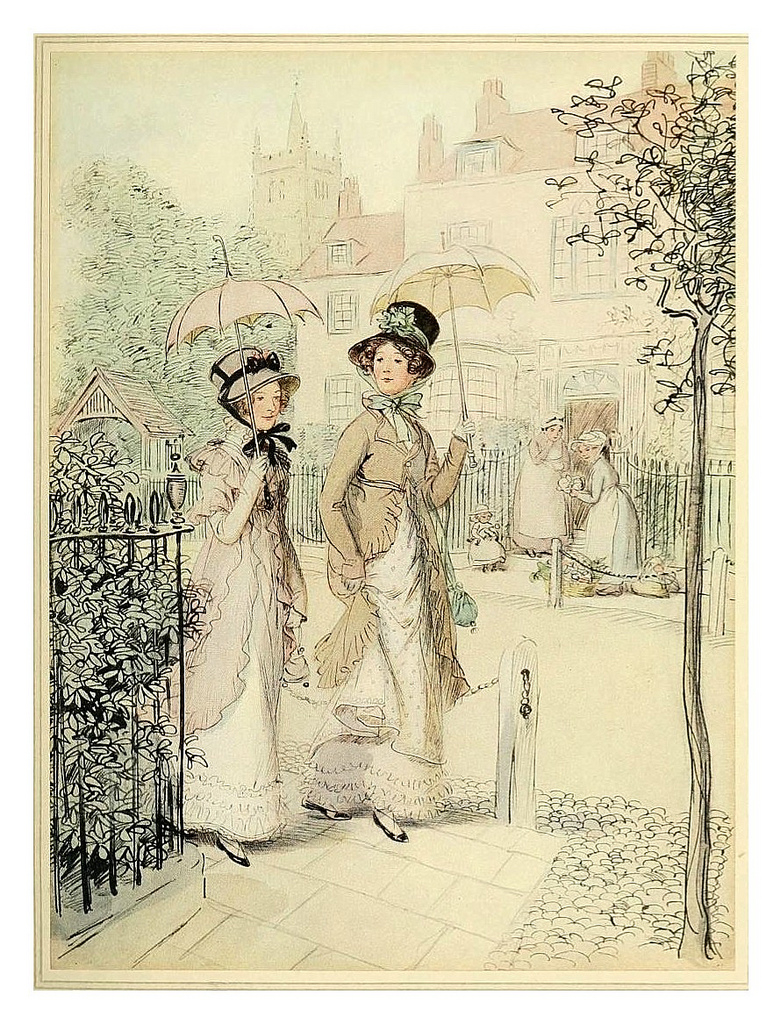
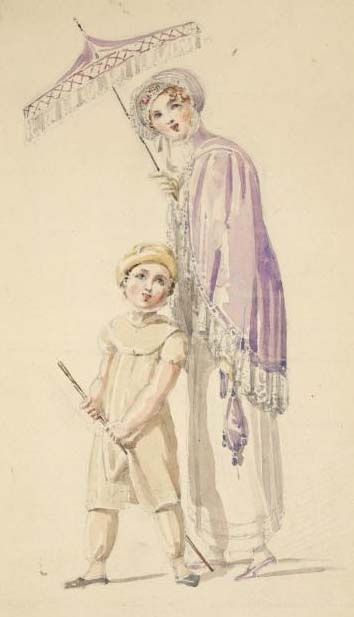
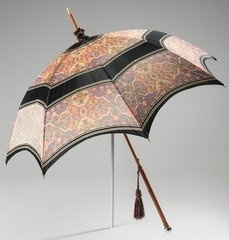
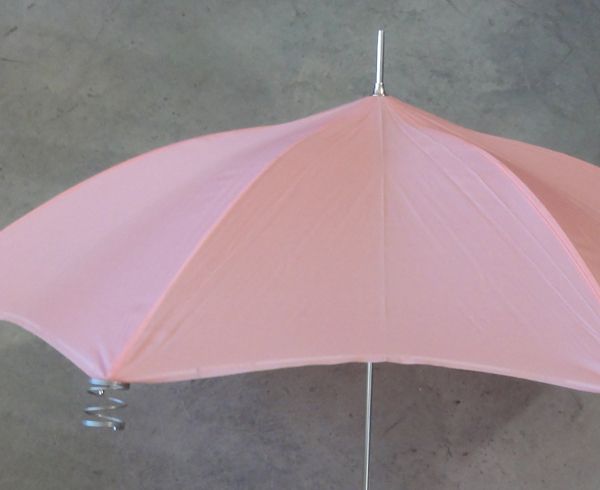
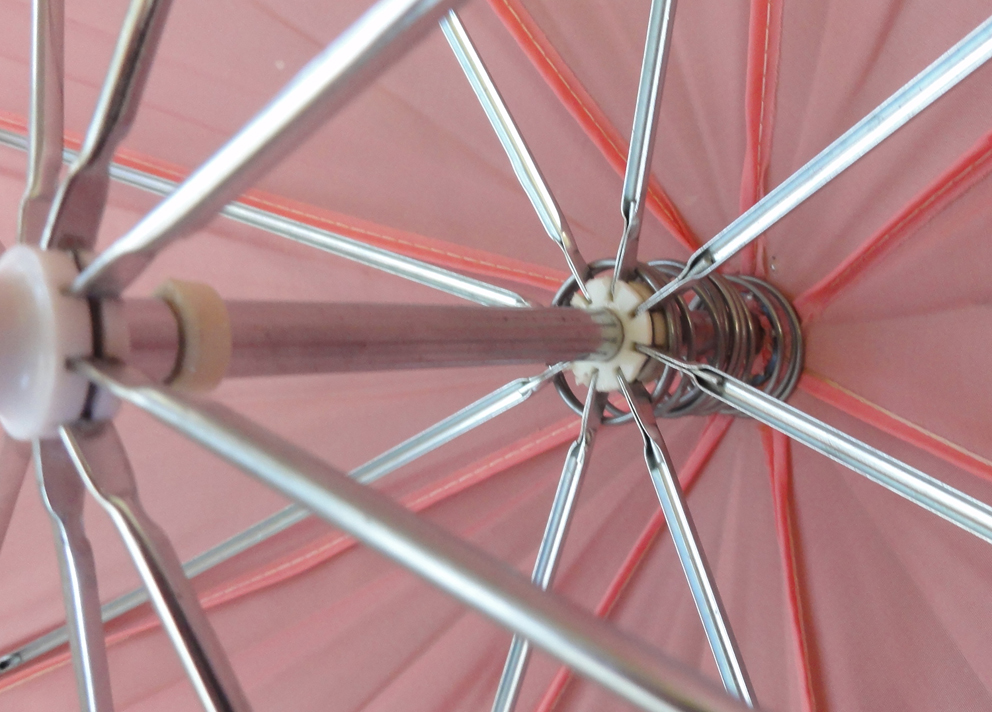
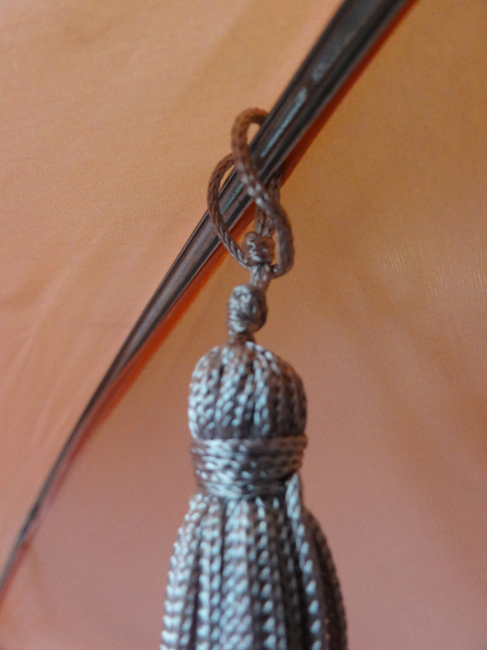
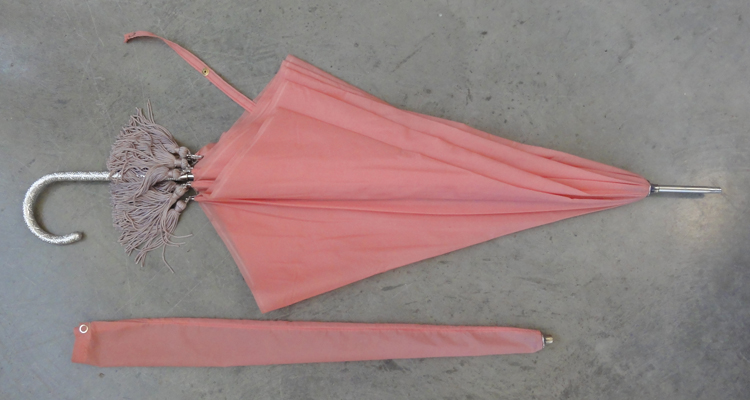
Parasol ($20-$200)
- Optional if your face is protected from the sun by a bonnet or hat, or you are in a ballroom.
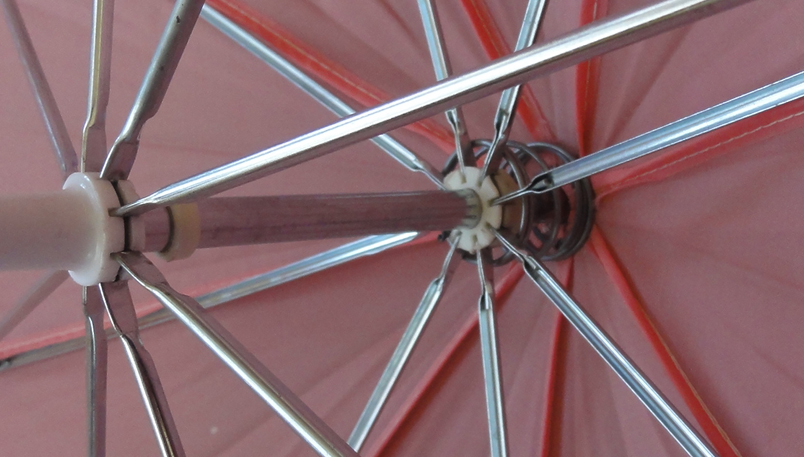
- Eight or fewer ribs is Regency-appropriate, but who’s counting? As long as it’s not a dozen!
- Pagoda shapes were most common, but round parasols were also in use.
- A shallow curve is fine, but avoid flat Asian-style parasols.
- The fabric should look like silk or cotton if possible.
- Patterns on the fabric itself were rare, and would be a wide stripe or large dot or similar.
- Fabric on vintage pagoda parasols from the early 20th century might not be very close to a Regency look.
- Do not buy a Battenburg lace parasol, as they’re Victorian.
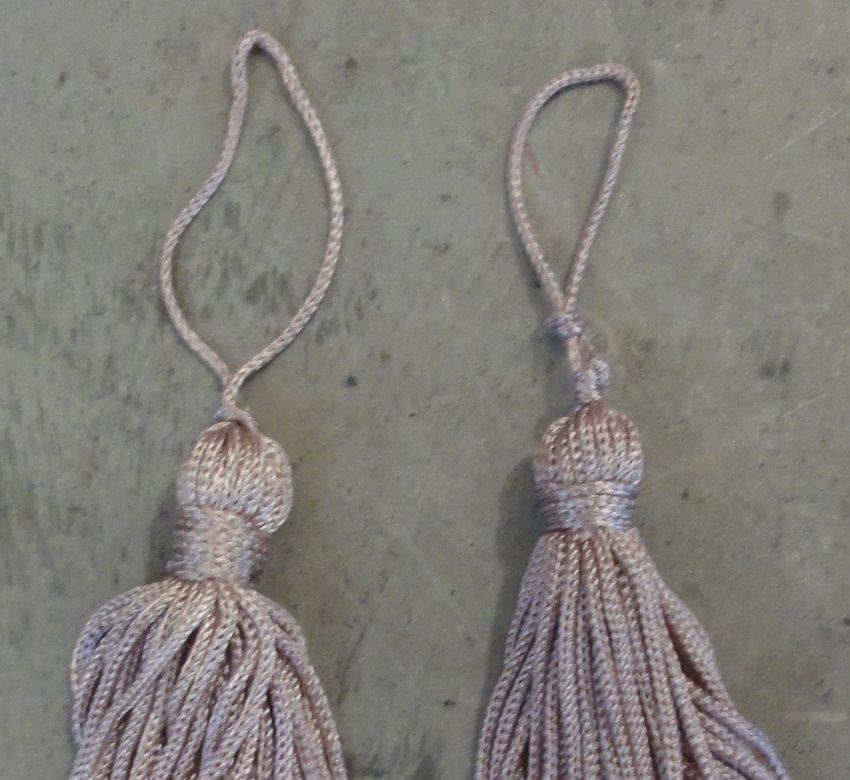
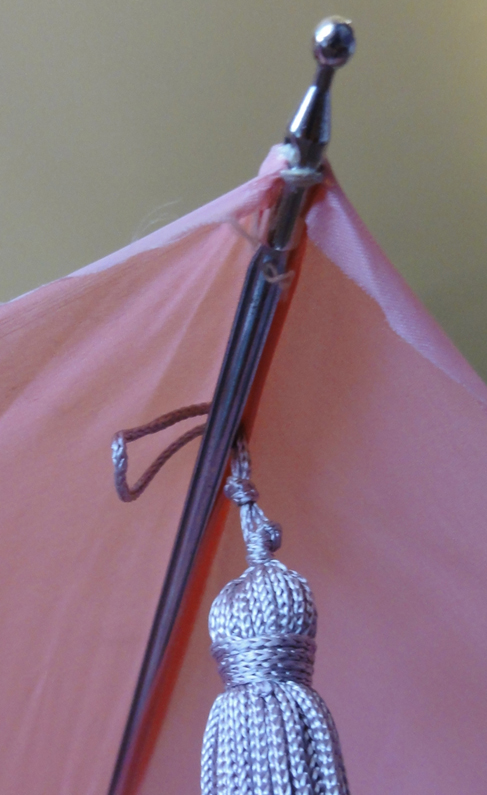
- Most trim was on the periphery of the parasol: fringe (almost any kind), tassels, or lace. Some had embroidery.
- Any colour but black.
- Post: I never did mind about the little things…
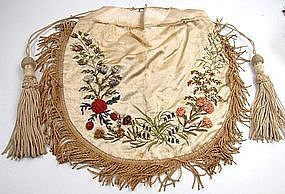
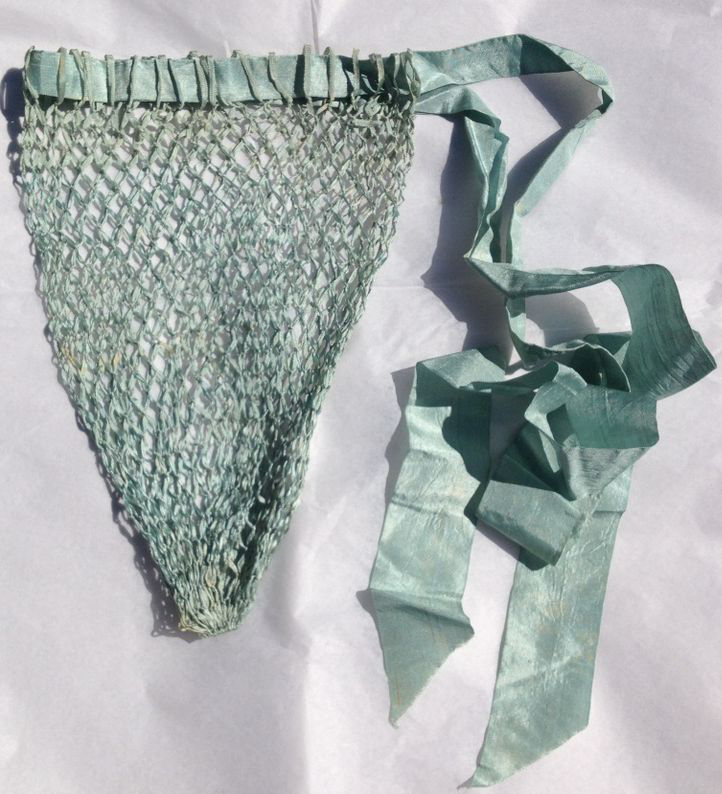
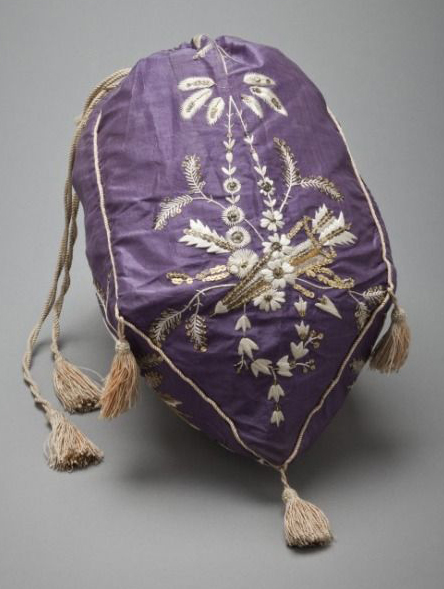
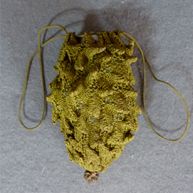
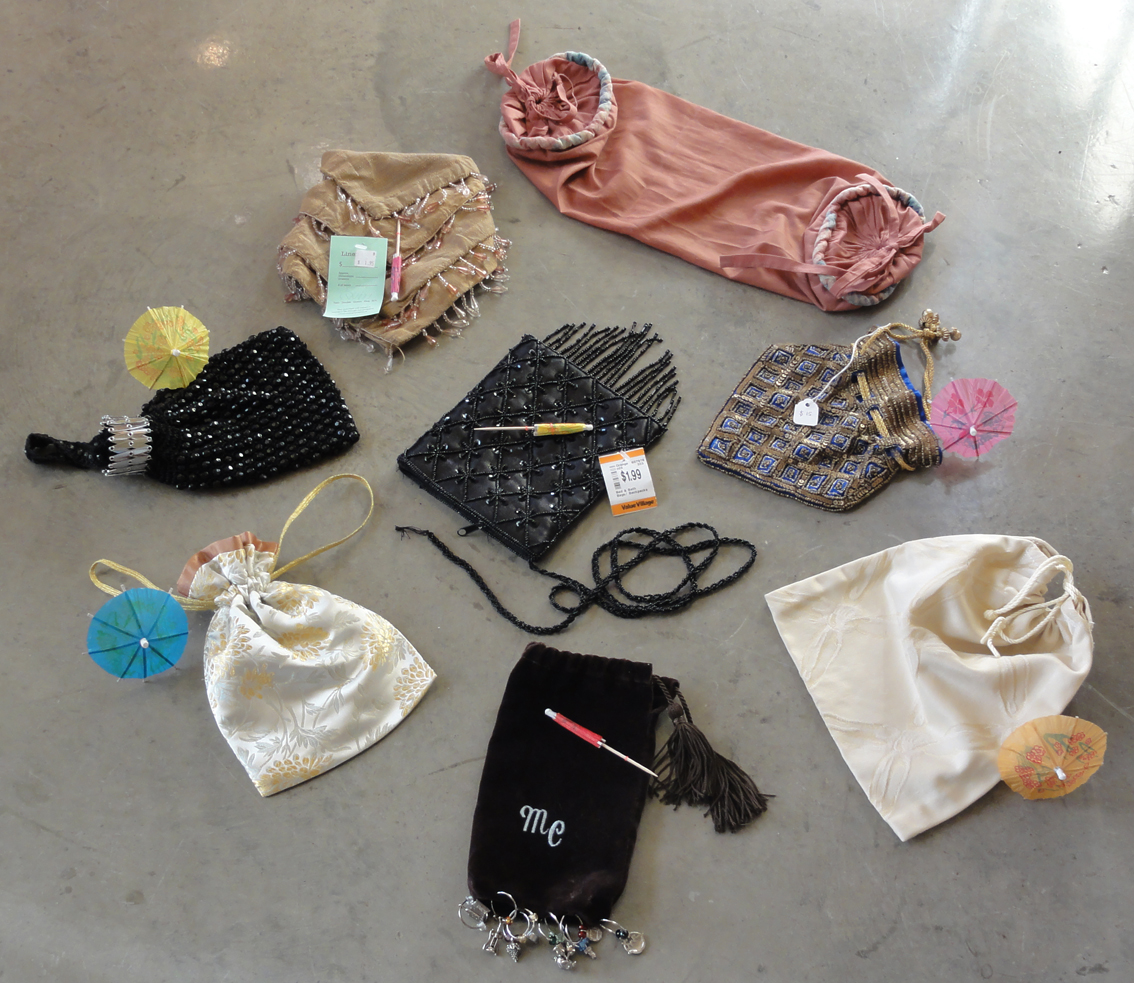
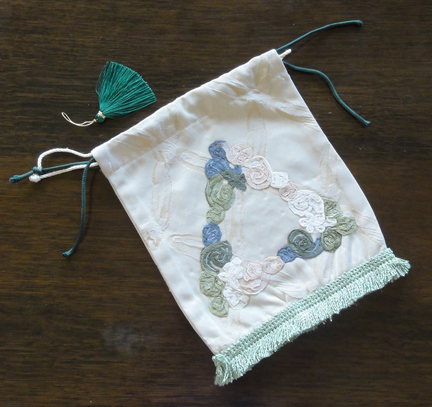
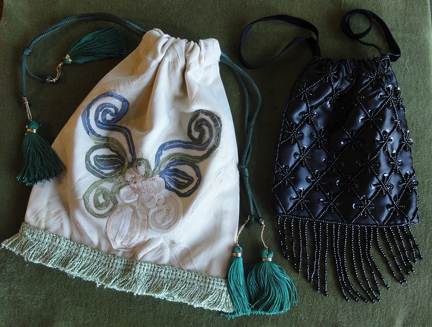
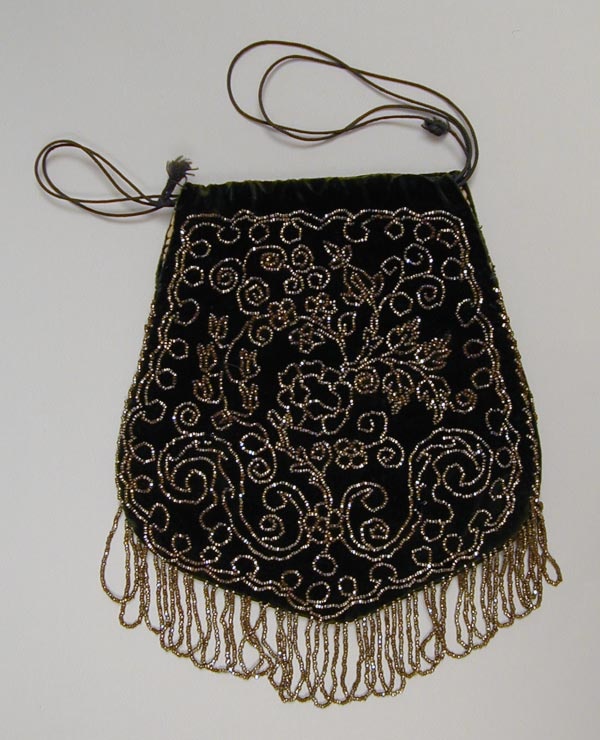
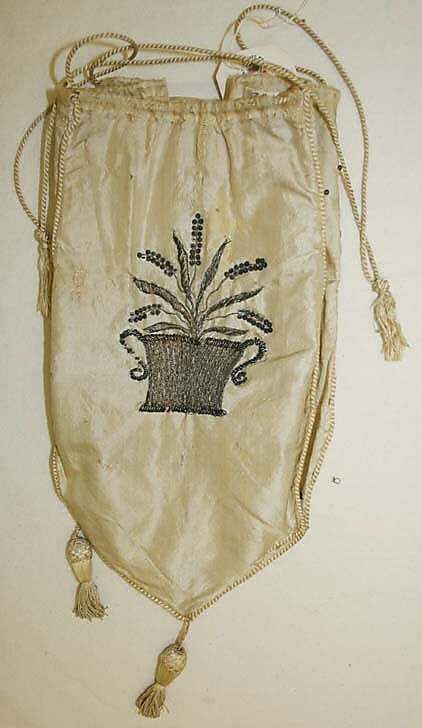
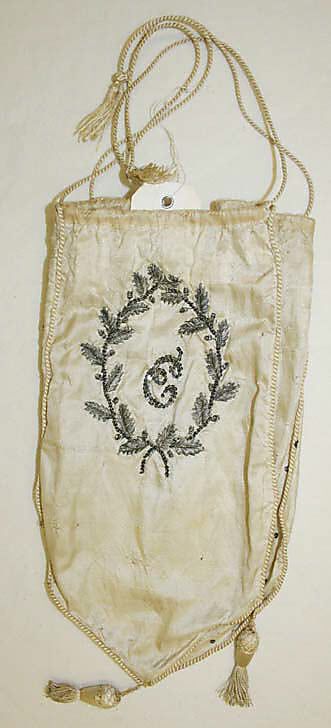
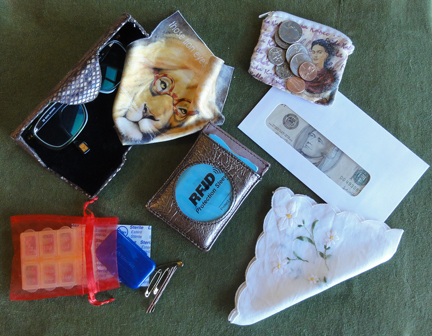
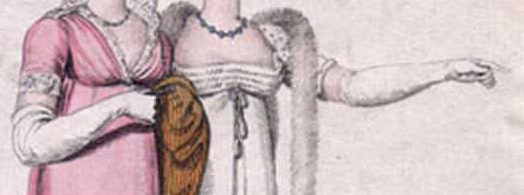
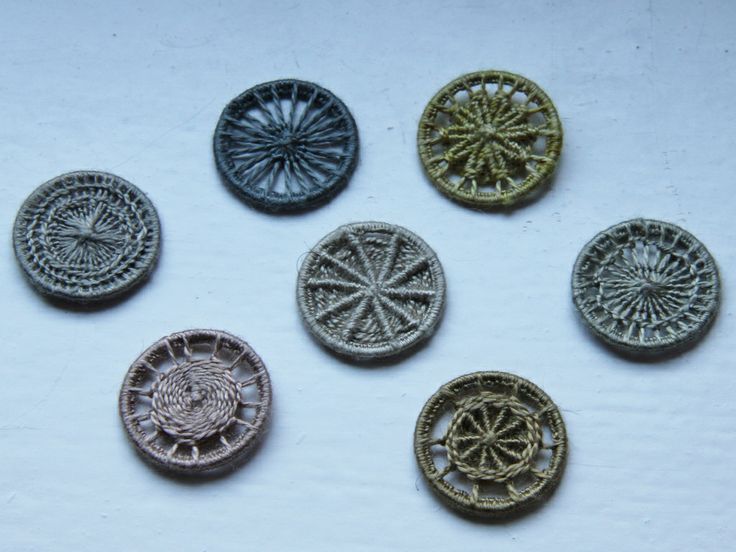
Reticule ($5-$65)
- Small drawstring bag (under 8” by 8”).
- Almost any colour or shape works, in a fine fabric, beaded, netted, or knitted.
- Avoid printed satin, most open lace or crocheted styles, eyelet lace, or leather.
- Beads or sequins should not look plastic.
- No zipper, but metal snap clasp or gate closures are fine.
- The smooth silk bat-wing or moon reticules on Etsy are overpriced ($15-$22) for what you’re getting. The beaded and embroidered ones are often very good deals.
- Post: All the pretty little purses
~~~
A few good overview web sites for a Regency costume:
These sites are summaries of what we’ve learned during the 17 previous posts in the Thrift Shop Regency Costume Experiment blog series, and I refer to them regularly myself.
Best site (pdf version) for showing the details one should search for: It’s All in the Details: Making an early 19th Century Ball Gown, by Hope Greenberg.
Best site (pdf version) for applying the other to real life: Miss Lisa Brown’s Guide to Dressing for a Regency Ball—Ladies’ Edition.
Less useful, but detailed, with lots of drawings and paintings is Wikipedia’s 1795-1820 in Western fashion.
An interesting article explaining Regency fashions while referencing the movie adaptations of Pride and Prejudice. Dressing for the Netherfield Ball in Pride and Prejudice: Regency Fashion.
Lots of links for buying stuff new can be found at Regency Attire: Purchasing Your Costume by Regency Dances.org Not all these items are accurate, as they try to cover numerous costuming situations.
Sites for examples of Regency gowns:
Museum gowns:
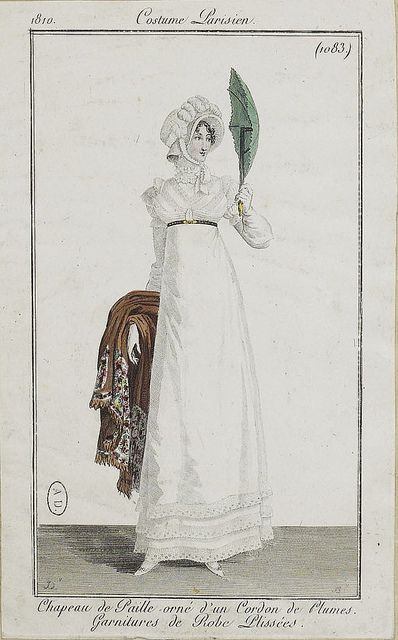
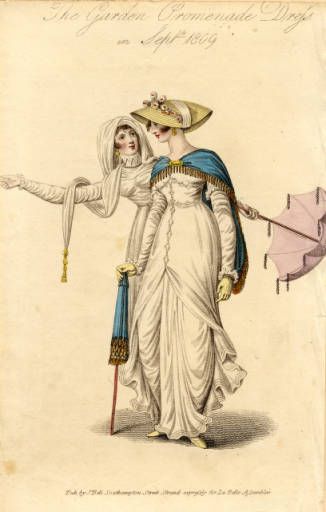
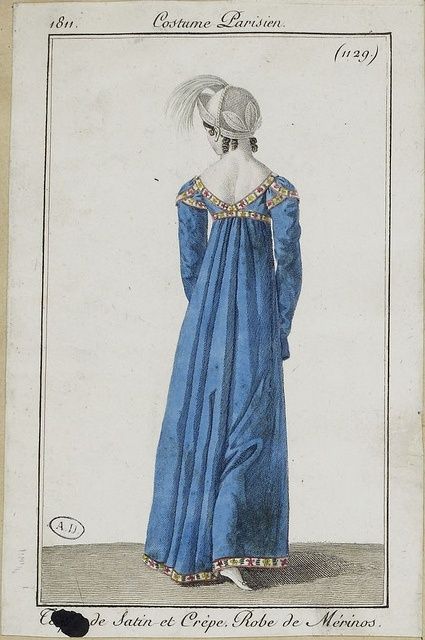
Real people wore these, so they’re a bit more accurate than fashion plates such as Ackermann’s Repository for Art, La Belle Assemblée, or Costume Parisién.
The Vintage Thimble tumblr
Kyoto Costume Museum Archives 1800s-1810s
Ideas from others’ modern interpretations:
The JASNA AGM Regency Ball in Brooklyn, 2012. Most of these are probably handmade from modern reproduction patterns. There will be non-Regency clothing represented as well, as not everyone is immune to the marketing of those selling the Titanic/Downton Abbey gowns.
The Jane Austen Festival in Bath is a similar situation.
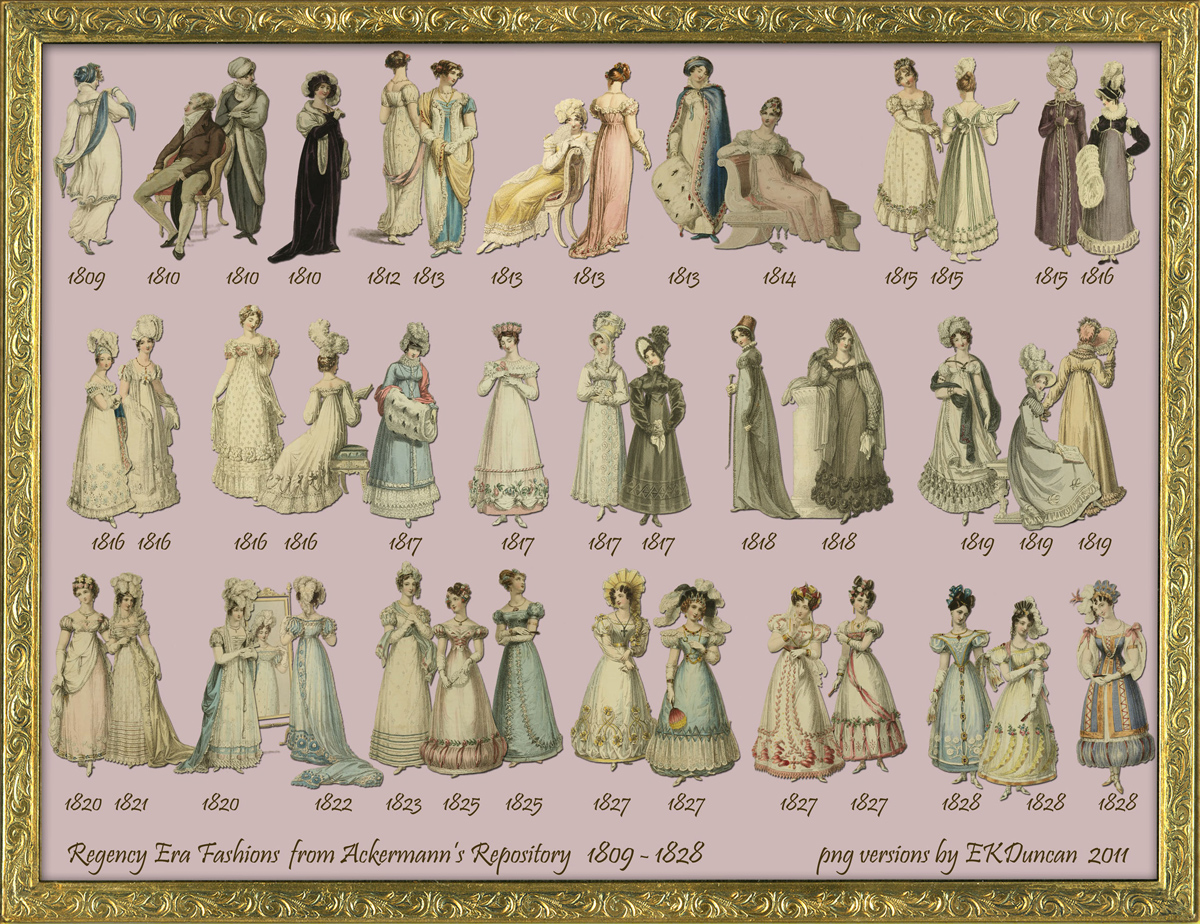
Erica Duncan’s montage of Regency fashion plates for each year between 1809 to 1828.
Original art from Ackermann’s Repository for Arts.
Click on thumbnail for much larger image.
Pinterest has a lot of good images, but I’d suggest searches by clothing article rather than just “Regency,” as the number is overwhelming even then.The site will often offer sub-headings at that point, too. This is an example of a huge board. Take care, as some images are modern and may contain misinformation; that’s why I like to stick to museum examples. But sometimes those are mis-dated by some pinner, too. It won’t be long before you’re picking them out yourself, though, as there’s nothing like 50 Regency gowns compared to one 1830’s gown. Warning: Pinterest is like crack.
Resources for making your own gown if you can sew a bit:
A video tutorial from Follies Past shows how to make a Regency ladies’ gown from a bridesmaid dress, a set of curtains, and a lace blouse. This requires beginner sewing skills.
Old Petticoat Shop offers their Regency Dress Online Class for $97 plus fabric, notions, etc.
My Regency Journey from Tea in a Teacup goes through creation of an entire Regency costume, but made from scratch.
Diary of a Mantua Maker has two tutorials on fitting a Regency gown: the first shows common mistakes and the second, sleeve and bodice fitting.
Sense and Sensibility Patterns has a number of videos with tips on how to fit your gown or modify the design of a pattern, as well as some sewing techniques.
~~~
Update: A nice little summary for evening wear, with some of the wonderful descriptions from The Lady’s Magazine and La Belle Assemblée: Mimi Matthews’ Elizabeth Bennet, La Belle Assemblée, and Early 19th Century Fashion.
~~~
 NEXT POST: The grand finale! Photos of my completed costume, plus an overview of my learning experience with the “experiment” and brief notes on what the summer bonus posts will look like.