A Morning Gown plus some Frankenstein Gown Parts

Poll time: Another instructional post on what to buy, or The Big Reveal: my Regency gown purchases to date? Okay, here’s the boring list… just kidding!

I started shopping for my costume for the 2015 JASNA AGM in July 2014. Early on, I decided my top dollar was $100 for a gown that required almost no modification to make it Regency-appropriate.

My second and third purchase for this blog, along with a $3.99 reticule, was a dove grey coat dress (far right) for $49.95 at Value Village, the most expensive item I’ve purchased to date. The pelisse-like style of this dress could not be passed up: the bodice has a double-lapelled crossover in front while the skirt has a faux front opening. It was intentionally purchased 4 sizes too large to allow modification for gathering in back. In the photo, the skirt is turned back so you can see it’s fully-lined.initial thrift shop gown set reduced
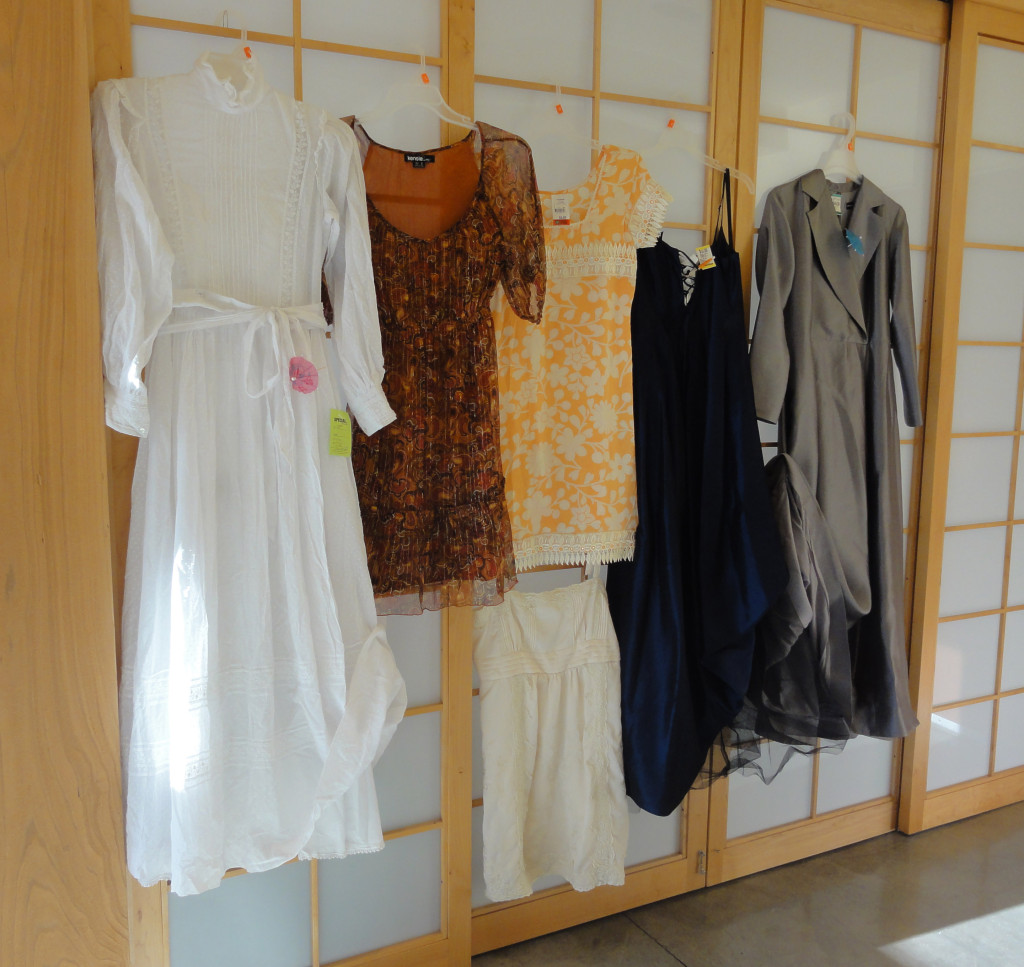
I consider this purchase a bit of a mistake that I hope I can wiggle my way out of! Even with the large size, it has minimal additional fabric at the under-bust level. The bodice is huge, and since the front opening is faked, it has an invisible zipper in back to make additional reworking complicated!

The skirt is flared, so between it and the bodice, there’s plenty of extra fabric to make a faux-puffed sleeve atop the long, straight sleeves. However, this flared skirt will look odd with the tiny amount of gathering. To make the grey dress into a pelisse that fits will be a lot of  work—and might not even be possible.

A navy blue strapless gown was purchased at Value Village for $19.95. The generous skirt has a pocket-pleated top edge that sits just above natural waist, so it’s about 2” too short for floor length at empire waist. This is easily remedied with a bit of lace at the hem. The bodice is tight, fitted and spaghetti-strapped, laced in back in a V-shape. The skirt has an underskirt; the top half is lining fabric that’s not an exact match to the gown, with the bottom two feet in black net crinoline (see photo above). These can be used to make sleeves and modify the bodice to attach them.

Unless I find a simpler solution, the blue gown will be my evening/ball gown; however, this gown will need to be almost entirely remade: remove the skirt at the top pleat cuts, then reattach with a flat front and back gathers, add lace to the bottom, add about two inches to the bodice to close the V-lacing for my comfort, make shoulder straps to attach sleeves, and make sleeves trimmed to disguise the fabric mismatch.

I made a bit of a panic decision when I bought it, as it seemed I’d never find anything suitable, it was cheap and had lots of fabric, and I had just realized my parking meter was expired! But completed, it will be unique!

My collection includes three short dresses for “spare parts” hence, the Frankenstein reference. I bought two garments for their trim from the Salvation Army Thrift Store. I spent $14.95 for the cream silk mini-dress, which has fabulous embroidered panels (perhaps instead of the lining and black net for sleeves and bodice trim on the navy gown!) as well as enough Vandyke (pointed) lace for a good-sized skirt bottom (navy, navy, navy!). The orange silk Indian blouse has elaborate pointed lace for $6.95. The fabric won’t work for anything Regency.

I already owned a multi-coloured paisley print silk dress with gold thread, a potential bodice and trim for a ball gown. I’m watching for a nightgown or slip dress in one of the main colours.

The star of the show is my most prized purchase: a white Swiss-dotted lightweight cotton 1980’s “Prairie dress” vintage wedding dress (on the left). This gown was $33.95 at WiN (Women in Need) Vintage and Thrift Superstore. I found it just after I had the difficult episode of social anxiety described in an earlier blog post, and it perked me up!

It features a lace-trimmed high neck; long, puffed sleeves with matching lace on the cuffs; lace-edged petticoats attached with the skirt (see photo above), and a separate, plain camisole. There are lovely lace insets and narrow pleats for subtle detail. The skirt is at the natural waist level, and well-gathered all around.

The dress fits well except for a tight bust area, and it’s back zippered, which means if I remove the zipper, the resulting relaxation of the fabric over “the girls” will result in a gap in back. I’m torn between being more Regency-correct and the work involved in figuring out a way to modify the bodice without too much work.

This is intended for my morning gown or day/walking dress. I’ve shown the simplest modification.white gown pinned up first example
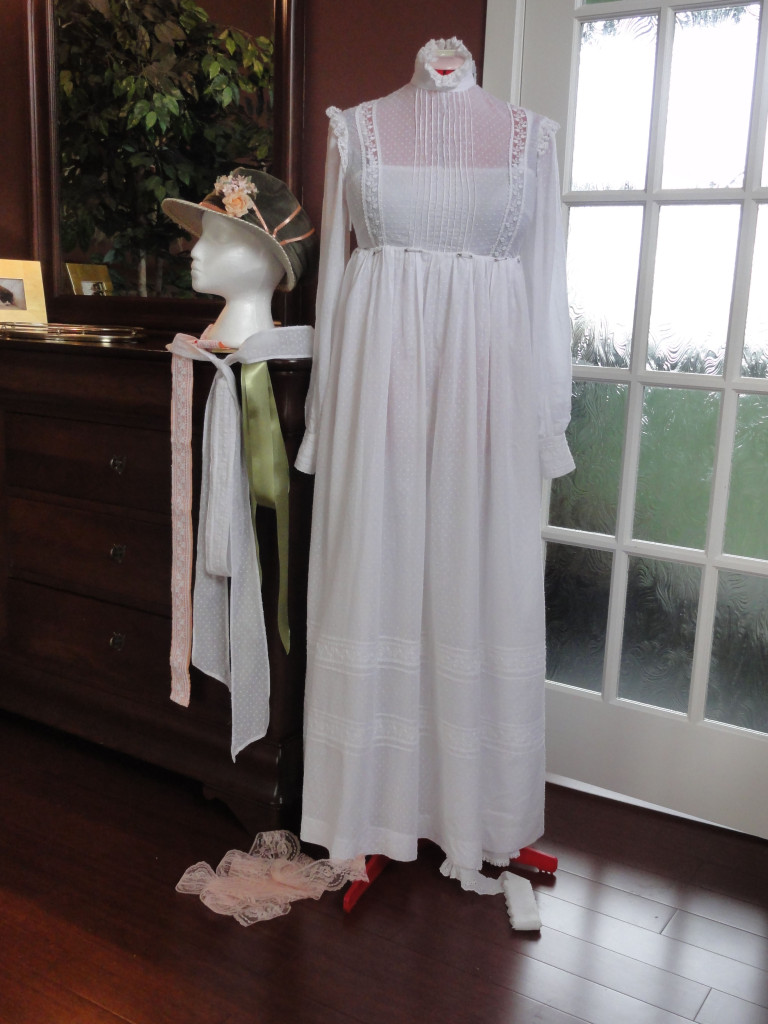
The skirt was raised without removing it, and re-attached to the under-bust. I’ve safety pinned it every three inches or so, and when covered by the matching white waistband with ties (left of dress) or a ribbon for colour, it becomes a close enough facsimile to a Regency gown.
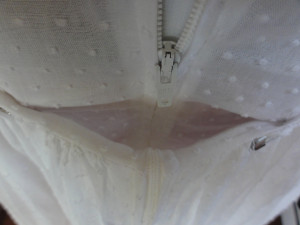
white gown showing folded zipperFor a neater finish than safety pins, no-sew fabric tape alone will not suffice, as it is not strong enough. The skirt can be tacked in place with the fabric tape, then either machine sewn or whip-stitched for strength.

No matter how the skirt is attached, if you keep the zipper, you must leave a width equal to the depth of the pocket of the zipper on each side, so you can operate it. I’ve propped it open for the photo, but it doesn’t droop since the zipper is stiff. I’ve been told you can hide the zipper with a shawl!
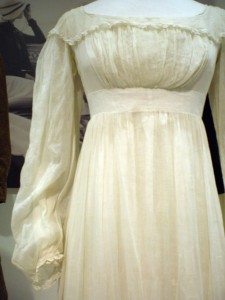
bath muslin 1815

1815 muslin morning gown, Bath Fashion Museum. Note the gathered skirt front that fits at the bottom of the waistband rather than at the underbust.

If raising the skirt makes it too short, you can add lace to the bottom of the dress or the petticoats as shown above, and/or raise the top edge of the skirt to a position where its top edge would be at the bottom of the matching waistband, as in the 1815 gown. However, around 1815, gowns were shorter!
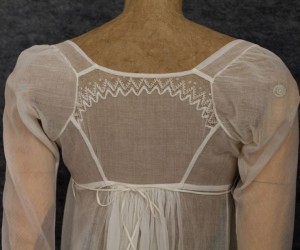
bodice back

Detail of the back of a Regency gown bodice, showing shoulder seams several inches behind the top of the shoulder, diagonal seams to help fit the bodice, and sleeves fitted much farther back than a modern gown. This creates the a classic “diamond back” shape typical of the era.

A great deal more could be done with this dress: the skirt could be removed and all the gathering moved to the back, and at the same time, the petticoats could be attached to the camisole to make a separate garment that can be used elsewhere. The sleeves can be modified to look like a top puffed sleeve over a straight sleeve, from as simple as attaching a ribbon level with the bottom of the bodice, to as complex as adding lace panels to make them longer, with a slimmer cuff, which is more Regency. I mentioned the zipper earlier. Dare I go whole-hog and make a classic diamond-back? Yikes!

The thing is, the dress is close enough, in my estimation, with perhaps the exception of that zipper. What’s a Frankenstein without a zipper somewhere?


Newsflash:
Since I prepared the photos for this post, I bought a 1960’s jonquil dress (such a popular Regency colour!) that may need less work than the navy! Woo-Hoo!

Trouble is the bodice fits perfectly, but the skirt is 2” too tight—everywhere! I know! Who is built like that?

Good thing is a ton of sheer overlay plus a cape-like draping begging to be made into back gathers. I can put a period-style decorative panel along the centre front to accommodate my tummy and butt—I hope I can find the right fabric!

Also, I bought a cool hat, thinking it looked a lot like museum Regency ones, then realized the nice square-woven sections between the swirly fabric parts were made of synthetic ribbons—pretty much plastic! So I’m Lydia, with a very ugly bonnet that I’m going to rip apart as soon as I get home. Good bones, though.


NEXT POST: THE LAST IN THE THREE-PART INITIAL SERIES ON GOWNS WILL DISCUSS THE VALUE OF PURCHASING A CUSTOM-MADE REGENCY GOWN, AND WHAT TO LOOK FOR WHEN SHOPPING FOR A USED GOWN TO BE RE-PURPOSED FOR YOUR UNIQUE REGENCY GOWN. THERE WILL BE MORE GOWN POSTS IN JUNE TO SHOW THE FINAL PRODUCT AND SOME EASY TRIM TECHNIQUES TO MAKE YOUR GOWN SPECIAL AND FAKE SOME REGENCY DETAILS. BUT WE MUST MOVE ON TO HEADWEAR AND HAIR, RETICULES, JEWELRY, AND MORE UNDERWEAR KIND-OF-STUFF IN BETWEEN!

 

Floor length, Empire waist, and what else? Anne Shirley?

A summary of a Regency gown is like a list of what constitutes a good car. Past a few key items, it starts to become possible for variations too complicated for a simple post.

I don’t know how I decided upon my version of the simplest summary of the elements key to a Regency gown. I suppose I read enough different accounts by others, then looked at enough fashion plates, paintings, and photos of actual museum pieces from the era and formed an opinion. That’s what you do when you buy a used car, right? Preferences figure into it, but there are only so many cars around, and we don’t hitch horses to them or fly them.

I’m not an expert, but I’ve tried to learn as much as I can, and that’s what I’m passing on in this blog. A warning: I’ll overlook some construction details until later, since they won’t be found in a modern gown.

Elements of a simple and respectable gown for an 1811-1820 Costume:

Floor length. Surprise, surprise! Toes of shoes can be shown for early Regency; the entire shoe and even a bit of ankle in the late teens.
Empire waist: The skirt of the dress starts just below the bosom.*
Fitted bodice (see neckline for different dresses below).
A ribbon or narrow panel of dress fabric may be added at the high waist.

Skirt shape:
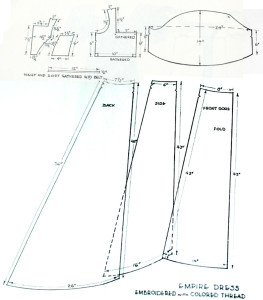
dresspatternembroid•  Not fitted too close to the body’s curves.
•  Front is one flat panel, with perhaps some easing, but front gathering is rare.**
•  Rectangular shaped front panel, sometimes with a slight flare at the hemline.
•  Front and sides fall straight to the floor, just large enough to skim past any wider parts.
•  Back may also be based on a flat rectangle but tends to be flared, sometimes into a slight train for early Regency.
•   Back is heavily gathered between the two diagonal back seams (back darts for a re-purposed gown) or full width.
•   No flounces; they didn’t come into vogue until into the 1820’s.

Some gowns had overlays:
•  A slip dress with the above dress as a sheer overlay for a ball gown.
•  Robes that look like floor-length vests, worn over a plain gown.
•  Sleeves could be part of the overdress or the underdress.
•  Skirt overlays, if any, are never diagonal, draped, pleated, ruched, etc.

grade 4Sleeves and bodice for “full dress”: an evening or ball gown:

Short sleeves:
•  I love a puffed sleeve! It must be an Anne of Green Gables thing. After all, I had red braids until grade 3, when Mom had three little ones to get ready before she went to work. I got a Pixie cut and cat’s eye glasses that year!
•  It pleases me to say the most common shape in a Regency evening gown sleeve is a short, puffed sleeve with length to match the high waist, and a narrow cuff.
•  Sleeve puffs have gathers at top and bottom, and go straight out, not up or droopy.

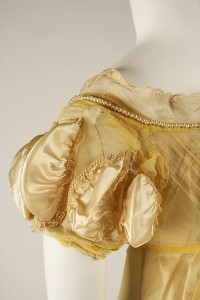
1811 Silk evening gown sleeve detail, Metropolitan Museum of Art

1811 Silk evening gown sleeve detail, Metropolitan Museum of Art

•  Especially in the later Regency, ball gown sleeves had keyholes, insets, scallops, loops, layers, knots, bows, braiding, petals, piped fabric, self-covered buttons, beads, gemstones, etc., as well as ribbons, lace and embroidery! I’m out of breath reciting that list!
•  Short, straight, fitted sleeves or very short cap-like puffed sleeves were less common. Sheer, long Juliet sleeves were sometimes seen below the top puff.
•  Sleeves just to above the elbow with a slight puff, or straight and slightly wide (similar to the sleeve opening), are early 1800’s.

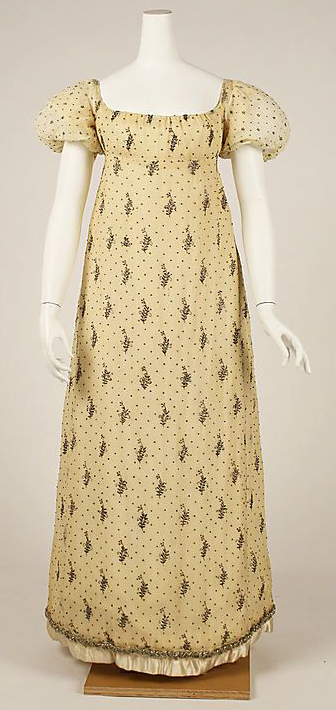
1805-10 met front for good general example cropped

1805-1810 patterned evening gown, Metropolitan Museum of Art

Bodice:
•  Very low cut in front and slightly low in back.
•  The opening is wide, to the point of almost no shoulder straps in some cases.
•  Many shapes are acceptable for the top front bodice, but most common is square or near-square. Princess and halter are not seen.


Sleeves and bodice for “undress”: a morning gown or day dress:

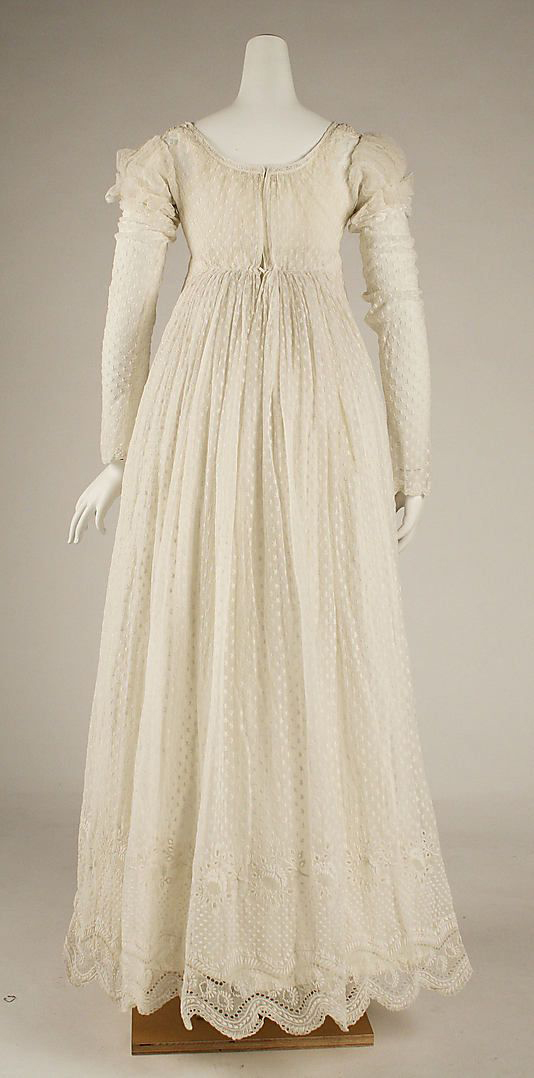
1814 swiss dotted back resized

1814 Swiss dotted morning gown, back view to show ties and gathers.

Long sleeves:
•  Most common is a Juliet sleeve: a long, straight, fitted sleeve to past the wrist, with a short, puffed sleeve over it (or a similar look).
•  Other styles for long sleeves may be peasant (long puffed top and bottom with cuff), fitted, or shirred (multiple puffs along the length).
•  Length can be ¾ to so long they scrunch up the arms and end at the base of the fingers.

Bodice is simple and neckline is high: from a few inches from base of neck, to high-necked or, in the later teens, rows of ruffle up the neck. We’ll talk about “Regency dickies,” in a future post.

Fabric:

•  Fine, sheer or near sheer cottons and linens, gauze, voile, broadcloth, sari fabric (without heavy sequins), heavy but smooth silks, taffeta, organza, polyesters that look like silk or satin. Fine rayon may work to mimic muslin or silk.
•  Almost all colours were stylish at one time or another in 1811-1820, from vibrant to muted, earth tones, and lots of pink. Avoid black as it was solely for mourning. Lavender or grey were used for half-mourning, but also show up in fashion colour palettes. Obviously fluorescents are out of the question, but not acid green!
•  For day dresses, prints or embroidered patterns should be small and widely-spaced White-on-white was common, as was a coordinating print on colours. Avoid prints that scream modern. An article in “Jane Austen’s World” has some examples.
•  Some patterns work for a ball gown, but it’s safer to go one colour. White-on-white fine cottons or similar; or solid, rich-coloured silks.
•  Striped cottons for day wear; sheer striped overdresses or monotone stripes for ball gowns are fine. Stripes are always vertical on the skirt.

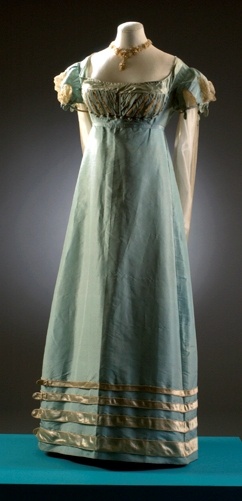
bath fashion museum 1817-1821

1817-1821, from the Bath Fashion Museum

Trim:

Early Regency:
•  Trim was minimal.
•  On the main field of the skirt, embroidery patterns were no more than a wide pattern of a small size.
•  More elaborate trim would be at or near the bottom border of the skirt, on short sleeves, and all over the bodice.
•  Does not have to match the gown, though that was common.
Later Regency:
• Trim was more obvious, and there was just more of it!
•  An optional line of trim down the centre front of the skirt.
•  Skirt bottom trim may be as wide as one foot, in large patterns.
•  May include large fabric flowers, ribbon, lace, embroidery, piping, chenille, Vandyke (triangular points), pleating (both horizontal and bound vertical), piping, ruching, beadwork, ball fringe, etc.

Aspects of vintage gowns that will not work:
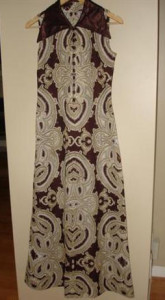
bad gown 1bad gown 4•  Knits, coarse cottons or linens, loud geometrics, fuzzy textures, obvious polyesters, leather, corduroy, raw or coarse silk (duponi), lamé.
•  Large prints, dark prints, animal prints, random geometrics, patchwork or multiple print panels.
•  Sewn-in details that would be hard to remove without leaving a shadow (e.g., long darts, long pin-tucks, studs) or without a lot of work (lots of sequins).
•  Large buttonhole fronts, either partway or all the way.
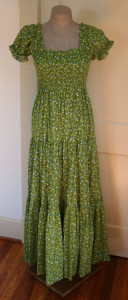
•  Lapels, cowl or boat necks.peasant dress cropped
•  Fitted and flared multi-panel skirts. This is the most common problem with modern empire gowns: there is not enough fabric for the gathers in back, even if you buy many sizes too large. You need lots of fabric in the bra line to waist area.
•  Pleated skirts, drop skirts, uneven skirt bottoms, flounces.
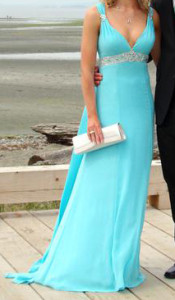
•  Low cut backs.
•  Ruching or draping of additional fabric on the skirt. If you can get beneath all this stuff, the dress usually is too fitted for the back gathers. Regency skirts are dead plain. Yes, they can have overlays, but they’re fairly simple until the hemline.

Compromises if all other aspects of the Regency gown are met:
•  Raglan sleeves are not the right shape, but okay if not too noticeable
•  Too-short skirts: up to 4 inches can be added with trims
•  Avoid sleeveless. You can add sleeves, but it’s just as hard to find a puffed sleeve blouse as it is to find a puffed sleeve dress, and it’s ten times as hard when you’re trying to match them.
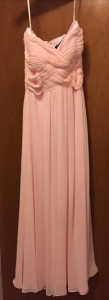
bad gown 2•  Halter bra or brief spaghetti strap bodices require not only sleeves, but shoulder straps and either an entire bodice or significant modification. If the skirt is not too closely fitted and has enough fabric for gathers behind, plus extra fabric or great details, it may be worth it, but it could be a huge sewing project.


NEXT POST: ELEMENTS TO LOOK FOR WHEN SALVAGING A GOWN, AND THE GOWNS I’VE PURCHASED SO FAR!


* Between the last decade of the 18th century and 1810, the line between skirt and bodice (“waistline”) of gowns rose from the natural waist to close under the bust and stayed high. The neckline dropped as well, so in the late 10’s, the bodice tended to be what Austen called “abbreviated.” The waistline dropped again in the early 20’s. There were exceptions during that period, but this blog will only focus on the high empire waist most characteristic of 1811-1820.

** Gathered-front gowns started to fall out of style by the late 1700’s, and by the Regency were uncommon. Even though most Regency gowns had a flat skirt front with the gathering behind, some examples can be found with gathers all around. This blog will focus on the flat-fronted gown, but recognize that if a gathered-front gown is found, it does not have to be made over.

A follow-up to last week’s post:  How to fit Regency corsets and stays, by the Oregon Regency Society.

A Footnote:  Lucy Maud Montgomery’s Anne Shirley wanted to become a writer, and so did I for most of my youth. Sometime in my teens, someone told me it would be too hard and would never pay the bills, and I was uncertain of my ability. My path took me down the road less traveled for a while, but I finally made the detour and came back around to the busy intersection where I belong!

Gratefully, Suzan Lauder