Floor length, Empire waist, and what else? Anne Shirley?

A summary of a Regency gown is like a list of what constitutes a good car. Past a few key items, it starts to become possible for variations too complicated for a simple post.

I don’t know how I decided upon my version of the simplest summary of the elements key to a Regency gown. I suppose I read enough different accounts by others, then looked at enough fashion plates, paintings, and photos of actual museum pieces from the era and formed an opinion. That’s what you do when you buy a used car, right? Preferences figure into it, but there are only so many cars around, and we don’t hitch horses to them or fly them.

I’m not an expert, but I’ve tried to learn as much as I can, and that’s what I’m passing on in this blog. A warning: I’ll overlook some construction details until later, since they won’t be found in a modern gown.

Elements of a simple and respectable gown for an 1811-1820 Costume:

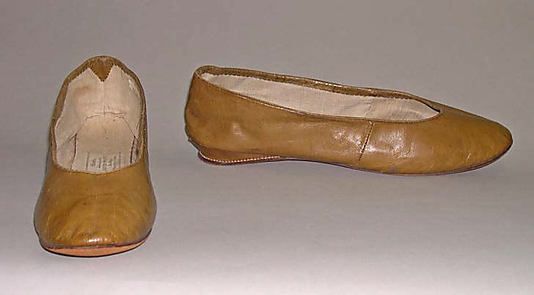
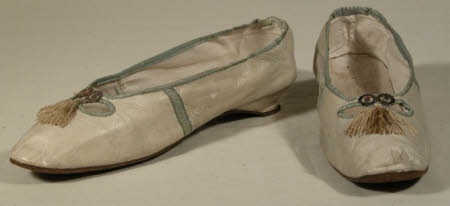
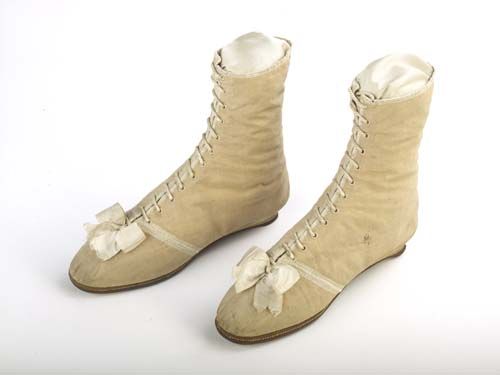
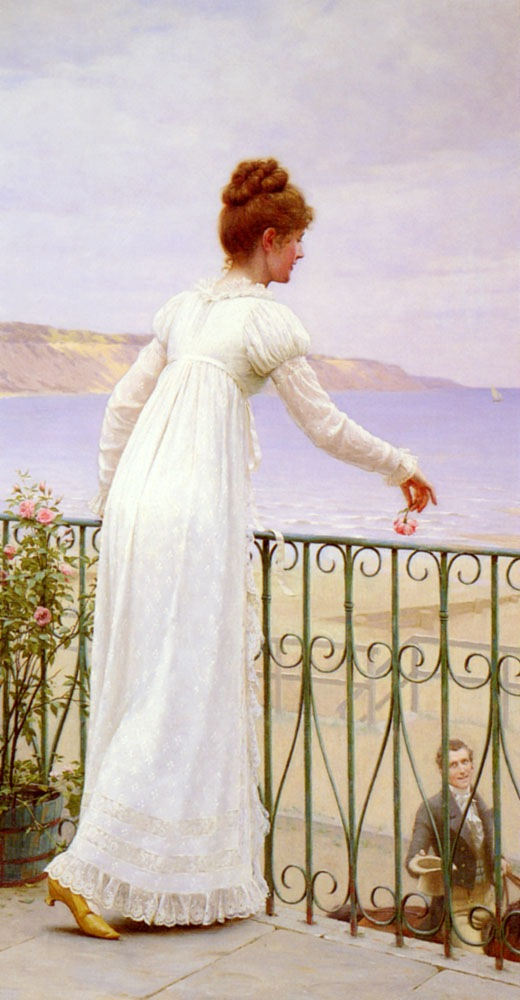
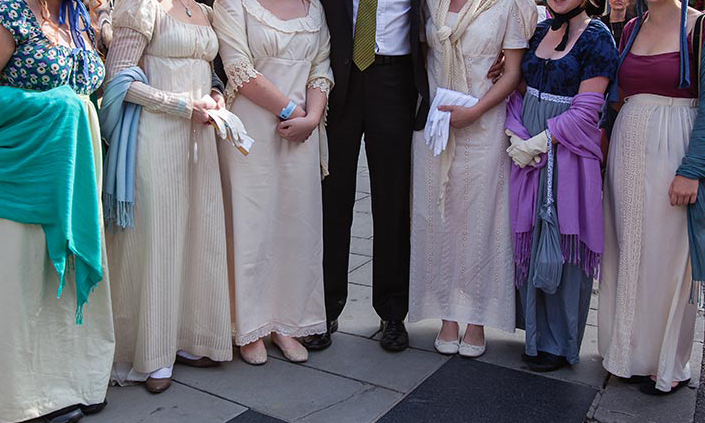
Floor length. Surprise, surprise! Toes of shoes can be shown for early Regency; the entire shoe and even a bit of ankle in the late teens.
Empire waist: The skirt of the dress starts just below the bosom.*
Fitted bodice (see neckline for different dresses below).
A ribbon or narrow panel of dress fabric may be added at the high waist.

Skirt shape:
dresspatternembroid
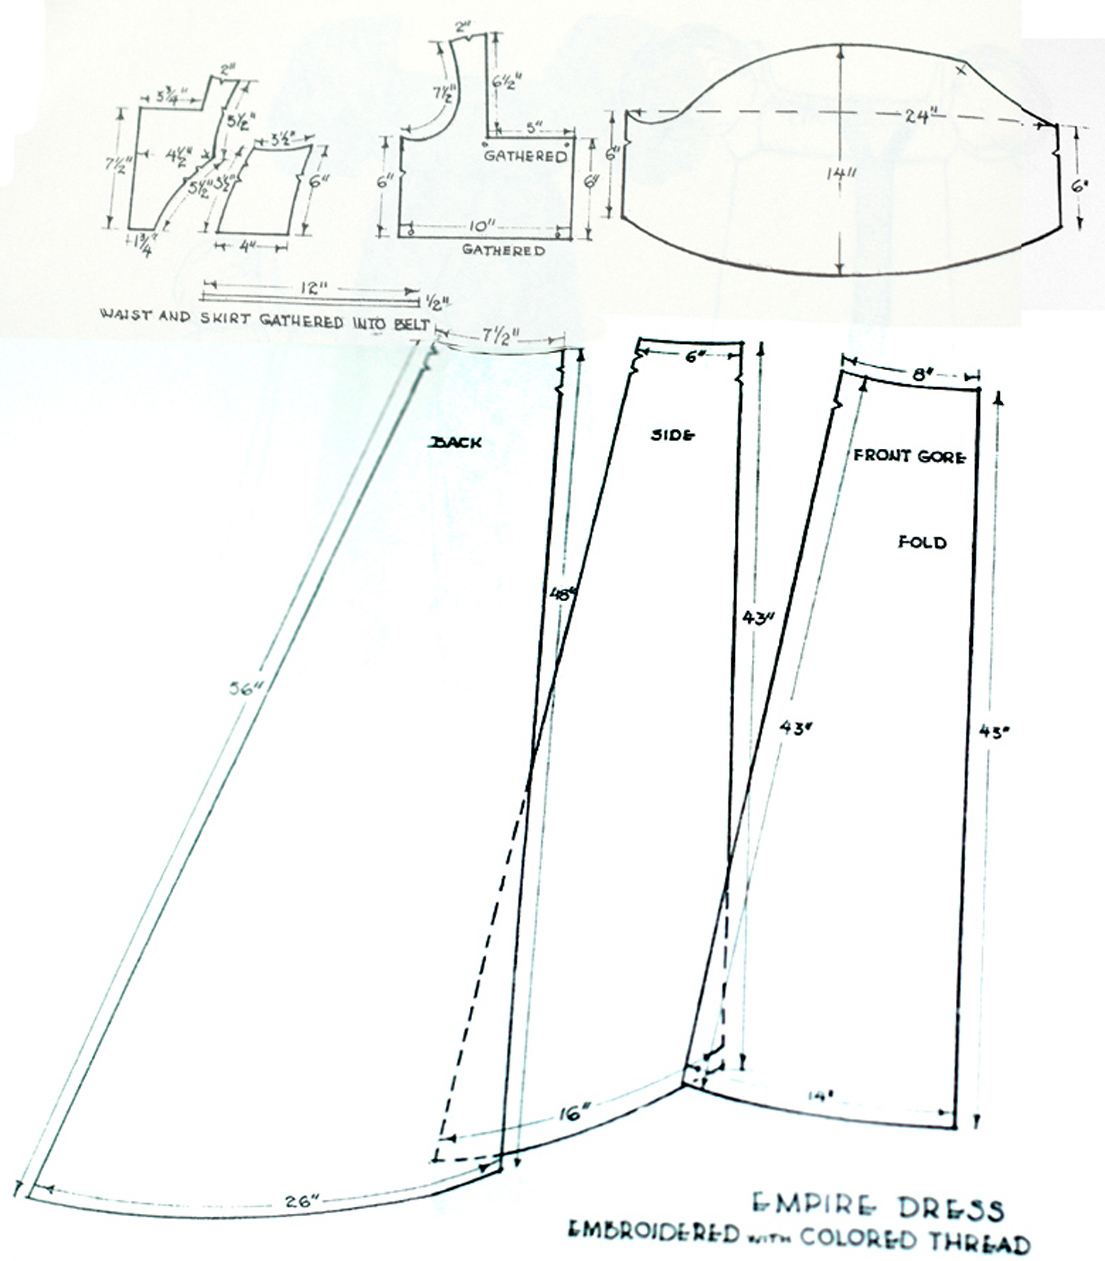
•  Not fitted too close to the body’s curves.
•  Front is one flat panel, with perhaps some easing, but front gathering is rare.**
•  Rectangular shaped front panel, sometimes with a slight flare at the hemline.
•  Front and sides fall straight to the floor, just large enough to skim past any wider parts.
•  Back may also be based on a flat rectangle but tends to be flared, sometimes into a slight train for early Regency.
•   Back is heavily gathered between the two diagonal back seams (back darts for a re-purposed gown) or full width.
•   No flounces; they didn’t come into vogue until into the 1820’s.

Some gowns had overlays:
•  A slip dress with the above dress as a sheer overlay for a ball gown.
•  Robes that look like floor-length vests, worn over a plain gown.
•  Sleeves could be part of the overdress or the underdress.
•  Skirt overlays, if any, are never diagonal, draped, pleated, ruched, etc.

grade 4
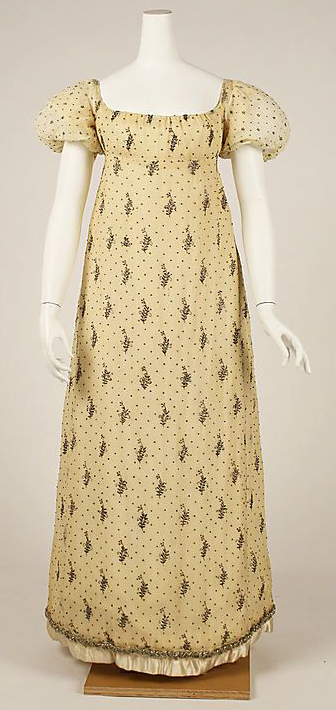
Sleeves and bodice for “full dress”: an evening or ball gown:

Short sleeves:
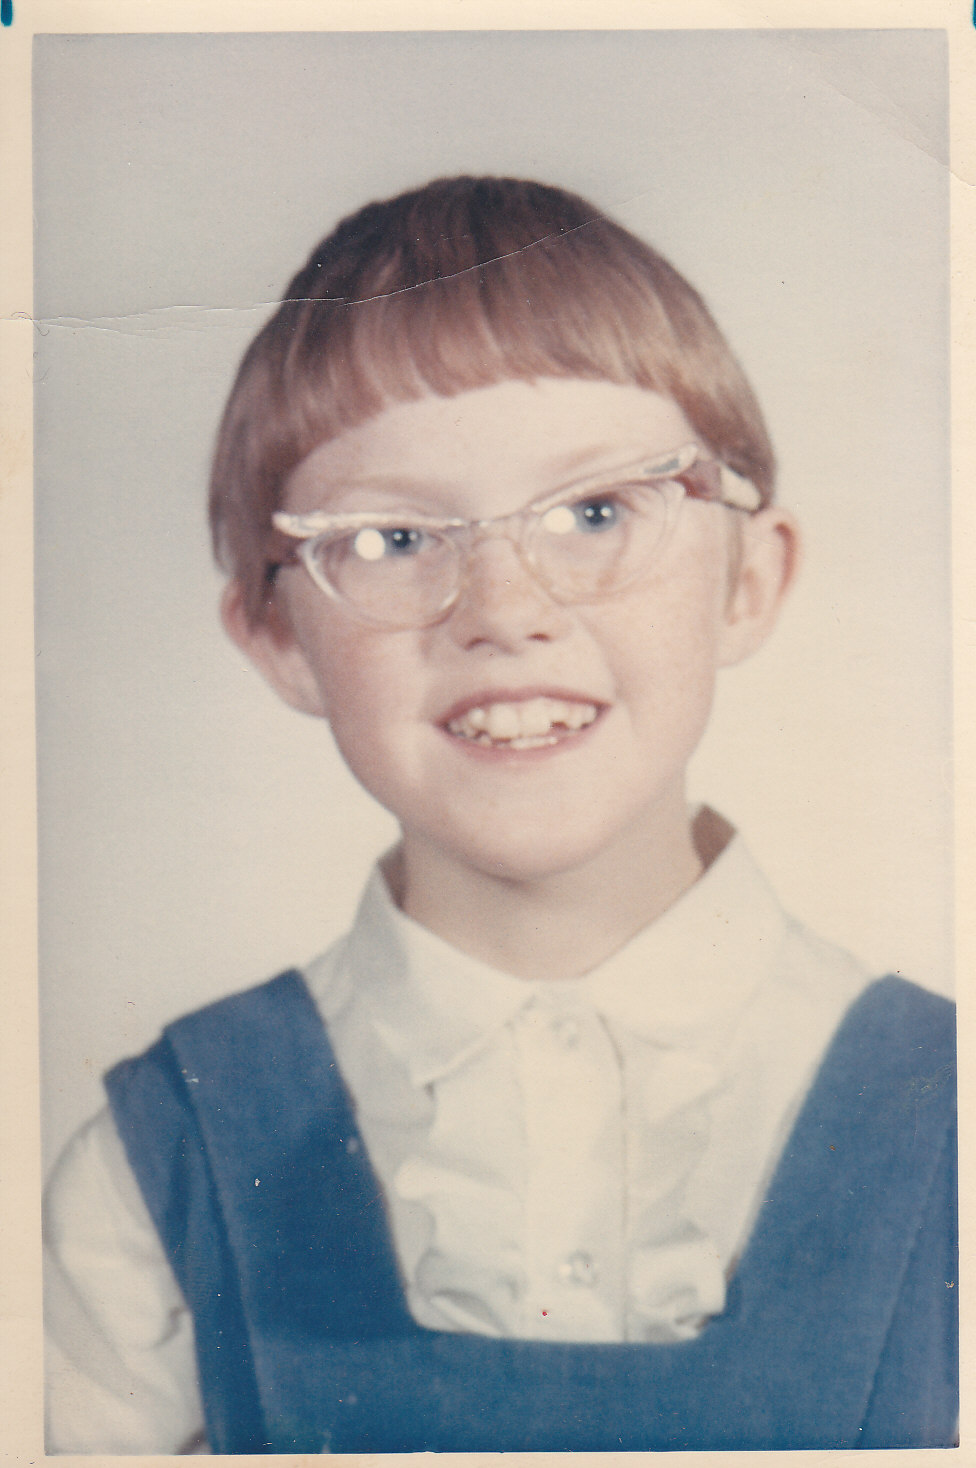
•  I love a puffed sleeve! It must be an Anne of Green Gables thing. After all, I had red braids until grade 3, when Mom had three little ones to get ready before she went to work. I got a Pixie cut and cat’s eye glasses that year!
•  It pleases me to say the most common shape in a Regency evening gown sleeve is a short, puffed sleeve with length to match the high waist, and a narrow cuff.
•  Sleeve puffs have gathers at top and bottom, and go straight out, not up or droopy.

1811 Silk evening gown sleeve detail, Metropolitan Museum of Art

1811 Silk evening gown sleeve detail, Metropolitan Museum of Art

•  Especially in the later Regency, ball gown sleeves had keyholes, insets, scallops, loops, layers, knots, bows, braiding, petals, piped fabric, self-covered buttons, beads, gemstones, etc., as well as ribbons, lace and embroidery! I’m out of breath reciting that list!
•  Short, straight, fitted sleeves or very short cap-like puffed sleeves were less common. Sheer, long Juliet sleeves were sometimes seen below the top puff.
•  Sleeves just to above the elbow with a slight puff, or straight and slightly wide (similar to the sleeve opening), are early 1800’s.

1805-10 met front for good general example cropped

1805-1810 patterned evening gown, Metropolitan Museum of Art

Bodice:
•  Very low cut in front and slightly low in back.
•  The opening is wide, to the point of almost no shoulder straps in some cases.
•  Many shapes are acceptable for the top front bodice, but most common is square or near-square. Princess and halter are not seen.


Sleeves and bodice for “undress”: a morning gown or day dress:

1814 swiss dotted back resized

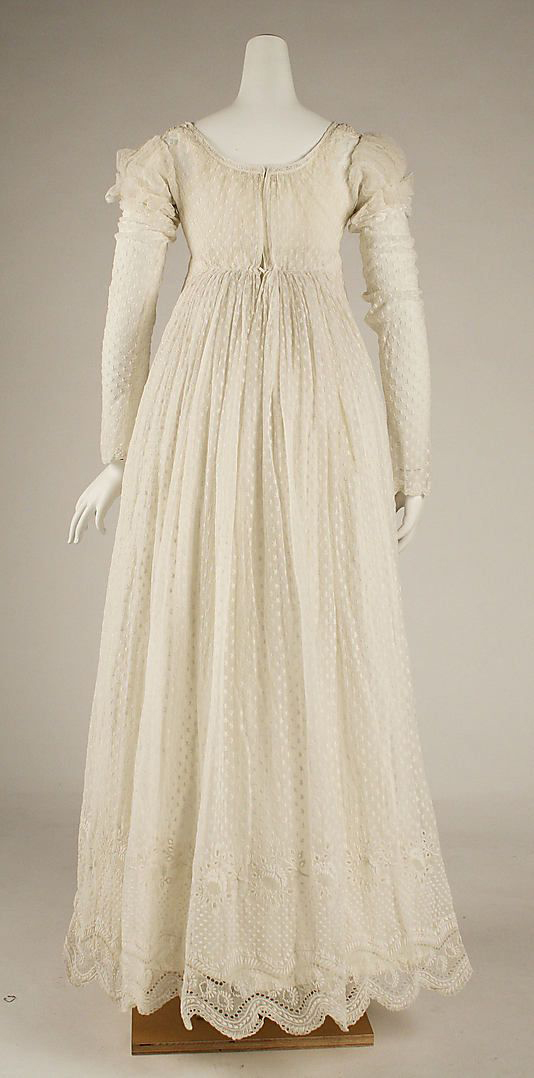
1814 Swiss dotted morning gown, back view to show ties and gathers.

Long sleeves:
•  Most common is a Juliet sleeve: a long, straight, fitted sleeve to past the wrist, with a short, puffed sleeve over it (or a similar look).
•  Other styles for long sleeves may be peasant (long puffed top and bottom with cuff), fitted, or shirred (multiple puffs along the length).
•  Length can be ¾ to so long they scrunch up the arms and end at the base of the fingers.

Bodice is simple and neckline is high: from a few inches from base of neck, to high-necked or, in the later teens, rows of ruffle up the neck. We’ll talk about “Regency dickies,” in a future post.

Fabric:

•  Fine, sheer or near sheer cottons and linens, gauze, voile, broadcloth, sari fabric (without heavy sequins), heavy but smooth silks, taffeta, organza, polyesters that look like silk or satin. Fine rayon may work to mimic muslin or silk.
•  Almost all colours were stylish at one time or another in 1811-1820, from vibrant to muted, earth tones, and lots of pink. Avoid black as it was solely for mourning. Lavender or grey were used for half-mourning, but also show up in fashion colour palettes. Obviously fluorescents are out of the question, but not acid green!
•  For day dresses, prints or embroidered patterns should be small and widely-spaced White-on-white was common, as was a coordinating print on colours. Avoid prints that scream modern. An article in “Jane Austen’s World” has some examples.
•  Some patterns work for a ball gown, but it’s safer to go one colour. White-on-white fine cottons or similar; or solid, rich-coloured silks.
•  Striped cottons for day wear; sheer striped overdresses or monotone stripes for ball gowns are fine. Stripes are always vertical on the skirt.

bath fashion museum 1817-1821

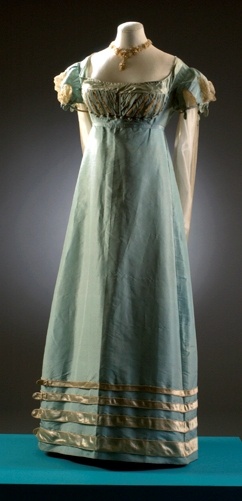
1817-1821, from the Bath Fashion Museum

Trim:

Early Regency:
•  Trim was minimal.
•  On the main field of the skirt, embroidery patterns were no more than a wide pattern of a small size.
•  More elaborate trim would be at or near the bottom border of the skirt, on short sleeves, and all over the bodice.
•  Does not have to match the gown, though that was common.
Later Regency:
• Trim was more obvious, and there was just more of it!
•  An optional line of trim down the centre front of the skirt.
•  Skirt bottom trim may be as wide as one foot, in large patterns.
•  May include large fabric flowers, ribbon, lace, embroidery, piping, chenille, Vandyke (triangular points), pleating (both horizontal and bound vertical), piping, ruching, beadwork, ball fringe, etc.

Aspects of vintage gowns that will not work:
bad gown 1bad gown 4•  Knits, coarse cottons or linens, loud geometrics, fuzzy textures, obvious polyesters, leather, corduroy, raw or coarse silk (duponi), lamé.
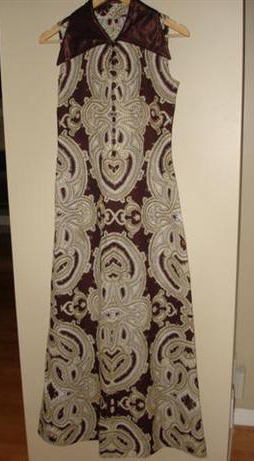
•  Large prints, dark prints, animal prints, random geometrics, patchwork or multiple print panels.
•  Sewn-in details that would be hard to remove without leaving a shadow (e.g., long darts, long pin-tucks, studs) or without a lot of work (lots of sequins).
•  Large buttonhole fronts, either partway or all the way.
•  Lapels, cowl or boat necks.peasant dress cropped
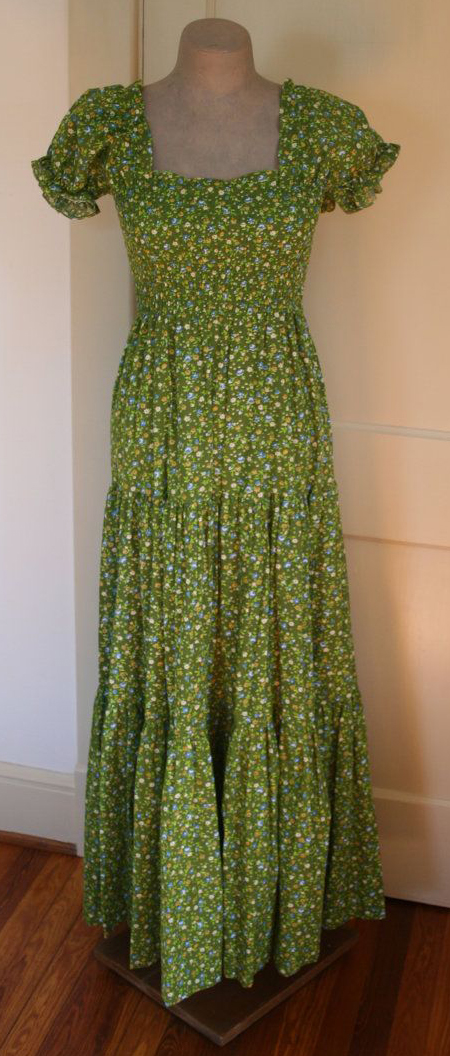
•  Fitted and flared multi-panel skirts. This is the most common problem with modern empire gowns: there is not enough fabric for the gathers in back, even if you buy many sizes too large. You need lots of fabric in the bra line to waist area.
•  Pleated skirts, drop skirts, uneven skirt bottoms, flounces.
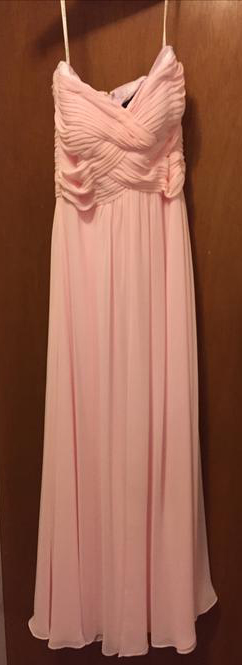
•  Low cut backs.
•  Ruching or draping of additional fabric on the skirt. If you can get beneath all this stuff, the dress usually is too fitted for the back gathers. Regency skirts are dead plain. Yes, they can have overlays, but they’re fairly simple until the hemline.

Compromises if all other aspects of the Regency gown are met:
•  Raglan sleeves are not the right shape, but okay if not too noticeable
•  Too-short skirts: up to 4 inches can be added with trims
•  Avoid sleeveless. You can add sleeves, but it’s just as hard to find a puffed sleeve blouse as it is to find a puffed sleeve dress, and it’s ten times as hard when you’re trying to match them.
bad gown 2
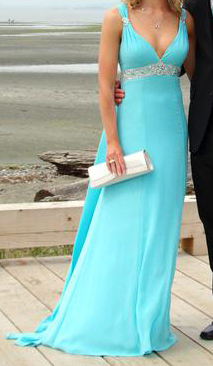
•  Halter bra or brief spaghetti strap bodices require not only sleeves, but shoulder straps and either an entire bodice or significant modification. If the skirt is not too closely fitted and has enough fabric for gathers behind, plus extra fabric or great details, it may be worth it, but it could be a huge sewing project.


NEXT POST: ELEMENTS TO LOOK FOR WHEN SALVAGING A GOWN, AND THE GOWNS I’VE PURCHASED SO FAR!


* Between the last decade of the 18th century and 1810, the line between skirt and bodice (“waistline”) of gowns rose from the natural waist to close under the bust and stayed high. The neckline dropped as well, so in the late 10’s, the bodice tended to be what Austen called “abbreviated.” The waistline dropped again in the early 20’s. There were exceptions during that period, but this blog will only focus on the high empire waist most characteristic of 1811-1820.

** Gathered-front gowns started to fall out of style by the late 1700’s, and by the Regency were uncommon. Even though most Regency gowns had a flat skirt front with the gathering behind, some examples can be found with gathers all around. This blog will focus on the flat-fronted gown, but recognize that if a gathered-front gown is found, it does not have to be made over.

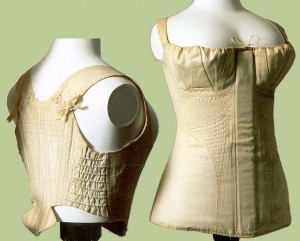
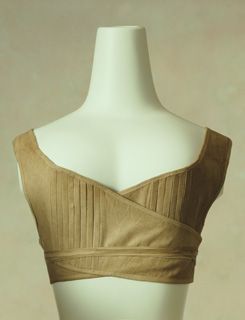
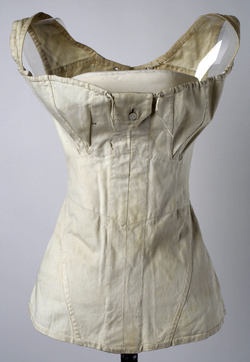
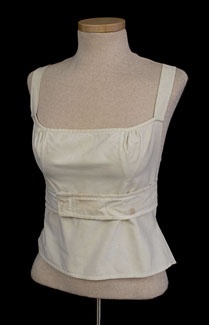
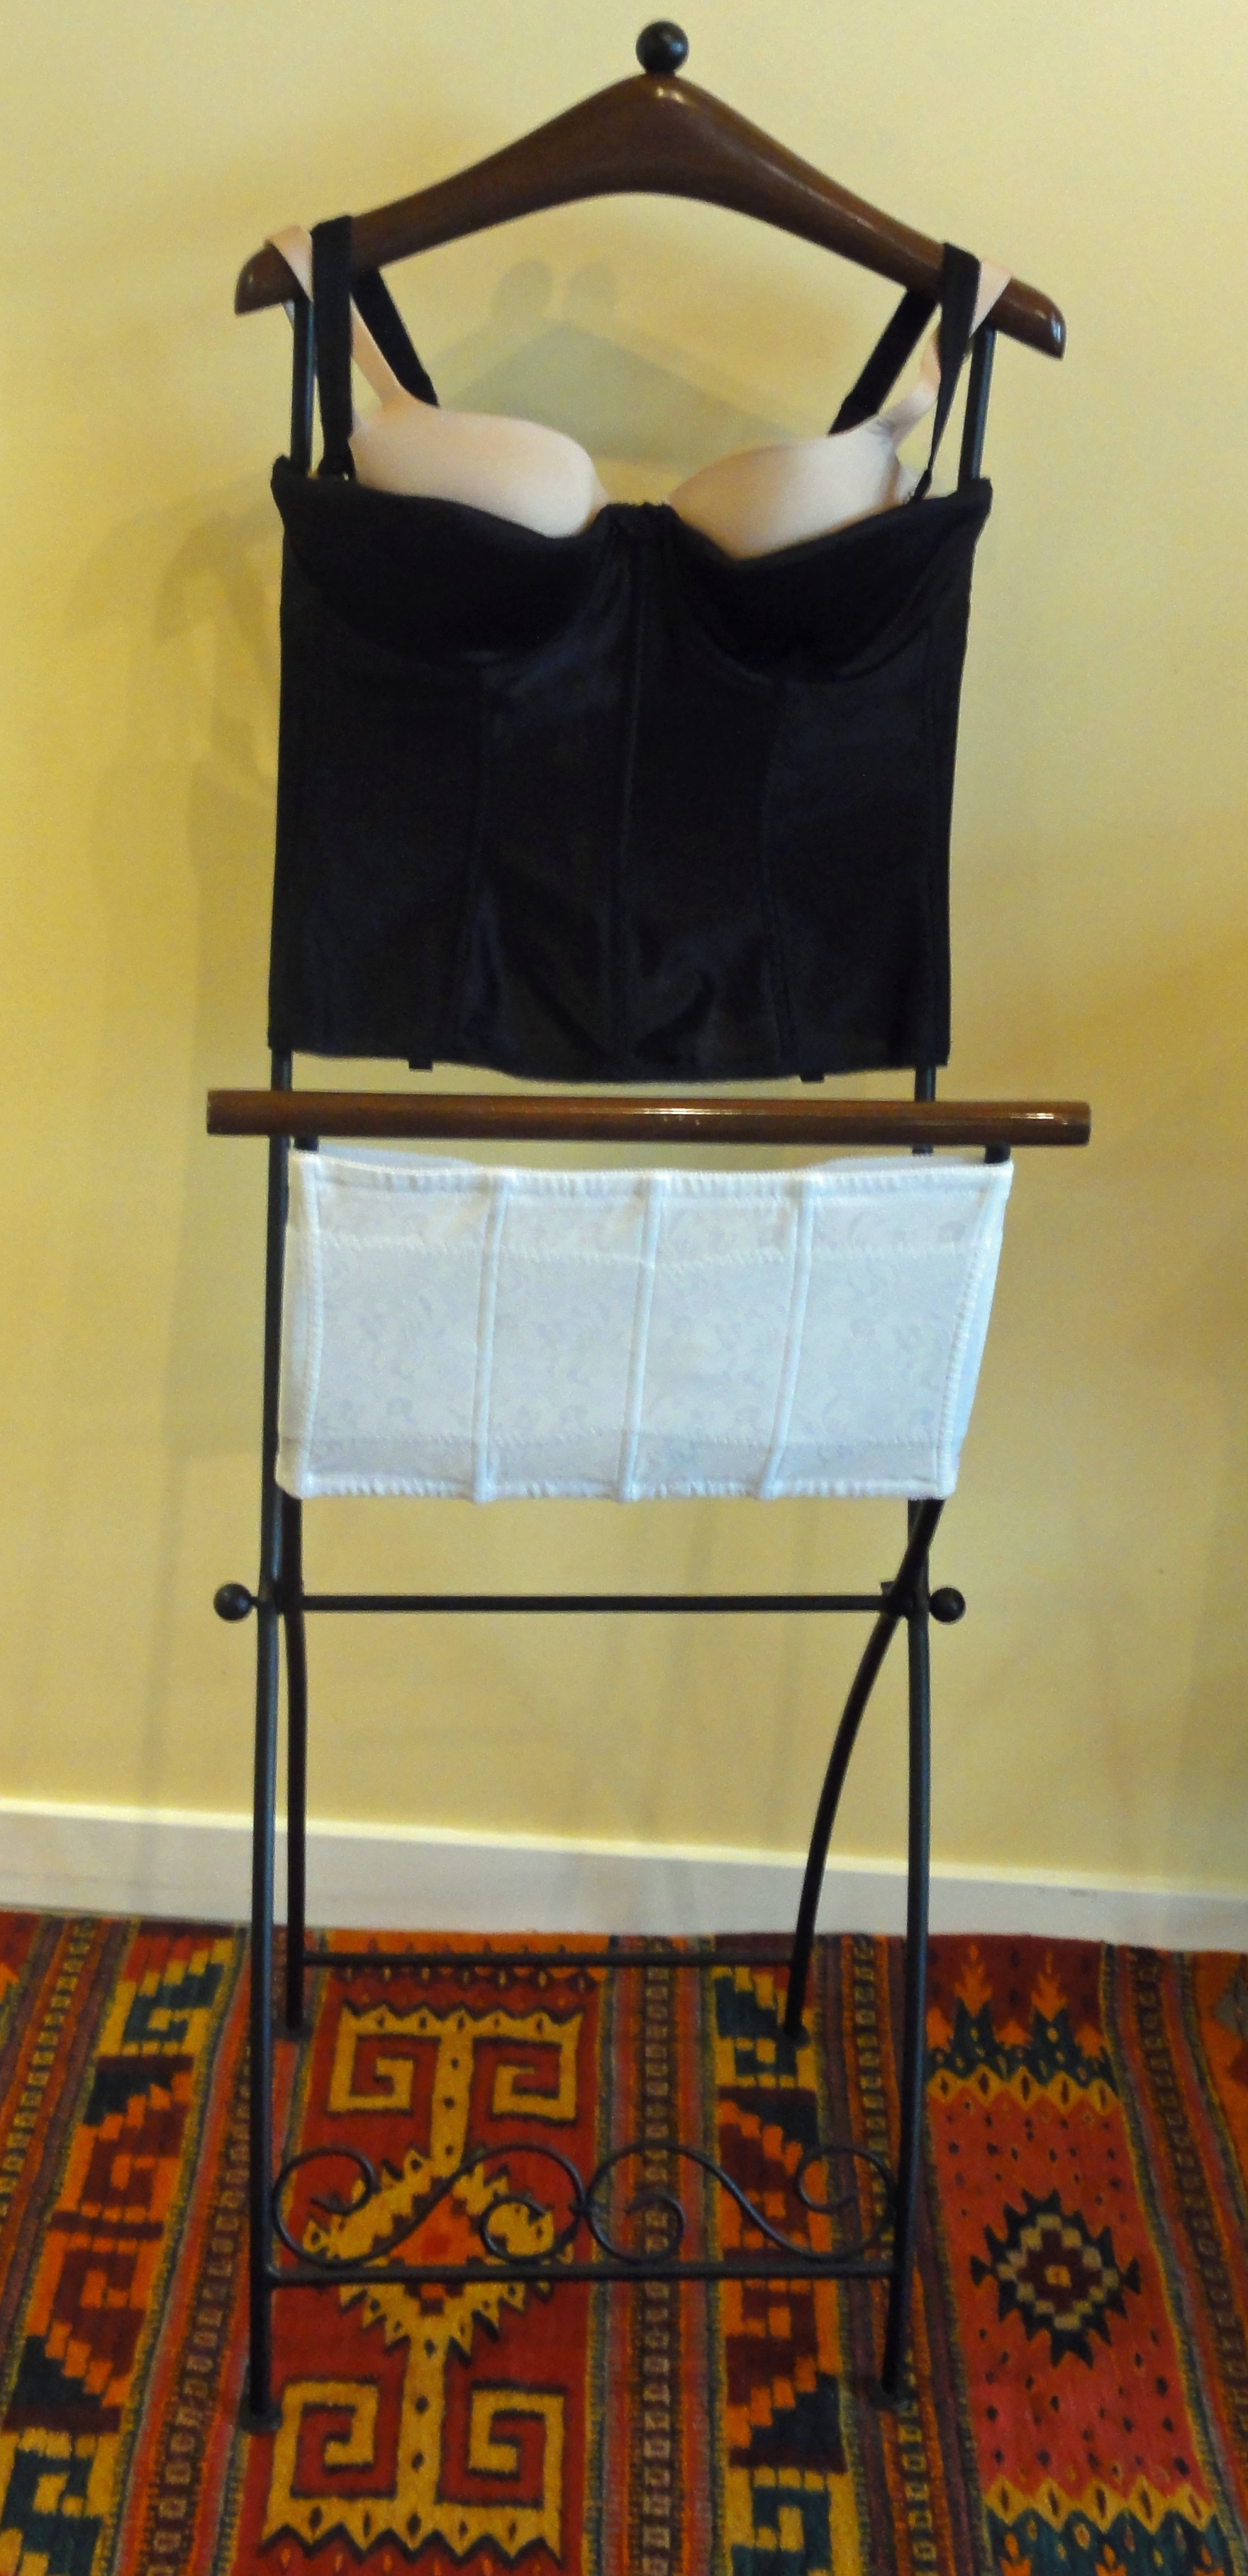
A follow-up to last week’s post:  How to fit Regency corsets and stays, by the Oregon Regency Society.

A Footnote:  Lucy Maud Montgomery’s Anne Shirley wanted to become a writer, and so did I for most of my youth. Sometime in my teens, someone told me it would be too hard and would never pay the bills, and I was uncertain of my ability. My path took me down the road less traveled for a while, but I finally made the detour and came back around to the busy intersection where I belong!

Gratefully, Suzan Lauder

Lift and Separate!

Nothing destroys a Regency look faster than droopy boobage—it’s better suited to activities with pot and daisy-weaving involved. The Regency bodice demands softness on top rather than on the bottom, and the opposite will be noticed, because the pretty ribbon you chose for your Regency “waist” will be obscured. Why wear a nice gown and fail to make sure “the girls” sit like queens?

Corsets and Stays:

Short stays and corset from the Met museum, courtesy "Jane Austen's World"

Short stays and corset from the Met museum, courtesy “Jane Austen’s World”

This is one of the most important parts of your costume: to get the proper shape under the bodice of those high-waisted, low-cut gowns. You should wear your corset—or whatever alternative you choose—when trying on potential gowns, so this foundation garment is a procurement priority.

The Regency stays or corsets have a very specific goal: elevate. The idea is to get “the girls” so high you’d pass the pencil test with a whole box of HB’s. That’s where the “waistband” and ribbon of your empire gown will fit. The bottom of the breast is slightly flattened, as the softness is transferred to the top.

Many younger women will identify with women’s shapes in Austenesque artwork and movies because they already wear a push-up bra, and recognize the shape the Regency short stays (that fit like a longline bra) or Regency corset (fits to the waist or lower for more support) create. Michele Reed, the publisher of Meryton Press, swears a well-fitted Regency corset is quite comfortable, and if you were leaning in the direction of authenticity, that’s encouraging. If you’re a Nervous Nellie about exposing the tops of “the girls,” have a quick look at the BBC/A&E production of Pride and Prejudice from 1995—it’s a lovely look on anyone!

crossover stays kyoto

Wrap around brassiere-type Regency stays from the Kyoto museum.

Regency short stays are fine if your bra size is under C cup. At $65 to $170 custom-made, the more costly of these use additional personal measurements for a better fit, use better fabric, have breast gussets and extra boning, and are lined for comfort. The bra-like wrap stays, as seen in the Kyoto museum, can be custom-made for you—at $275! Ouch! I’d rather invest in my gown.

Lower-priced short stays on vendor sites such as Etsy appear well-made, if a simple design, making them a good bargain if your breasts don’t need much support. We’ll discuss the chemise later in the blog, but it can be worn underneath for comfort. A similar alternative is the bodiced petticoat, new and custom-made for $90. This is like simple stays, chemise, and petticoats in one garment.

Front view, 1811 corset, Met Museum

Front view, 1811 corset, Met Museum

Back view, 1811 corset, Met Museum

Back view, 1811 corset, Met Museum

According to Regency undergarment seamstresses, a corset is a better choice if you wear a D cup or larger. A bonus is that a longer line will aid those who are concerned about the appearance of their midriff under the gown’s flat-fronted skirt.

Transitional or long stays, or a Regency corset, will set you back $50 to $375; $75-$330 for plus-sized. Reasons for price variations include the length of the corset—though some transitional corsets are dearer than some longer ones, due to complexity of design—and the comments for stays above. Some cheaper corsets and long stays have boning instead of the important wooden busk, and the differences in boning are far more obvious over the longer length.

Corset similar to less expensive styles. 1810-20

Corset similar to less expensive styles. 1810-20

If you’re larger, you should count on spending more, because the cheap ones will collapse. Gussets are necessary on a larger breast, and the complex boning of a dearer corset can help a great deal with a slimmer look.

With intermediate sewing skills, you can make your own. Patterns are common at about $20-$30, and kits of the hard-to-find materials are $70, but this is not a beginner sewing project. Some patterns include the important wooden busk (about $7 on its own) that sits along the centre front to separate “the girls;” others have patterns for other Regency undergarments. Vendors for baleen, plastic, or steel boning are available, though heavy cable ties (zip ties) are a good alternative, and you can get them at a hardware or dollar store. Online resources show how to fit a Regency corset. For those wearing a C-cup and lower, the Kyoto museum brassiere-like stays look easier to make.

The Budget Alternatives:

If you balk at the price for proper Regency support, and were tempted to buy a modern busked/boned corset from a lingerie store instead, DON’T. Most are the wrong shape for Regency: too cinched in the waist and wide in the hips and breasts, not enough lift in the breasts, and too much breast coverage!

Consider wearing a bra instead—but only if it provides the right look and fit. The bra must provide super-high lift without cleavage; your breasts must still be separated. To accommodate the wide, low ball gown necklines, the shoulder straps should be wide-spaced across the chest, near the shoulders, and the cups must be low-cut to show a bit of roundness on top. A near-horizontal cup top is necessary if you plan to match a squared off neckline of the P&P era.

ti-amo-light-cream-push-up-bra-by-gorsenia small

lavinia smalllane bryant 3 smallLeonisa-011789-4 small

The balconette (balconet, balcony) bra and many push-up styles of bra have the right shape, plus you’ll have a pretty bra to wear with other things, too! It’s sometimes called a t-shirt bra or demi-bra, but beware, sometimes these don’t have the wide-set straps or lower-cut horizontal tops—they’re just a seamless push-up bra.

I bought a pair of well-fitting balconette bras at an average lingerie store on sale for $55 for both. I wear 32-34F, so this is a good buy compared to a bra in a high-quality brand. The ones in the small photos vary from $17 to $48, the large photo is $64.

How to make sure your bra shape is right for Regency:

If you’ve never been fitted for a bra, get fitted first!* It’s usually free at lingerie and better department stores.

Once you know your size, you could consider trying on a bra one cup or band size smaller to see if you get more lift. You don’t want cleavage or four breasts (where the bra top edge cuts into the breast), just lots of lift. If you don’t like it, go back to your regular size—it didn’t work for me. Once you’ve made your purchase, tighten the straps as much as you can without discomfort.

If you wear a very large cup and/or have bottom-weighted,** menopausal breasts like me, you may still have a bit of softness on the bottom. Midriff shapewear, such as a spandex open bust camisole or waist cincher, can be worn slightly over the base of the breast to flatten, it as well as your midriff. I found a $5.50 straight-sided boned waist shaper from the WiN (Women in Need) charity vintage and thrift store.

Additional choices:

longline balconet from lane bryant smallSome longline bras or bustiers can work, too, if the garment has a lot of lift and breast separation, ideally with boning. You have to be ready to cut off the top half of the cup and finish the cut edge, so the ones in the backs of your drawers are preferable to buying new.***

Make sure the waist is natural and not too cinched, the cup lifts very high and covers just over half your breast, and the straps are set wide. You can remove the straps and safety pin them wider if necessary.

My balconette bra, bustier, and waist cincher.

My balconette bra, bustier, and waist cincher.

I’ve taken a 90’s bustier from before I lost weight, turned the too-large soft cups inside (almost in half) then moved the removable straps. This gave extra lift and opened up the top of the bra portion. I’ll need a light-coloured slip or camisole to cover to hide the black under light dresses, and that’s covered in a later post.

If, after all this, you like your old bra and don’t like shapewear, I understand. Tighten the straps on your old bra; it will help. To manage any bottom softness, when you try on or modify dresses, ensure that the empire “waistline” of your gown is at the lowest point of your breast, rather than under it. You don’t want the ribbon to be hidden or folded.

~~~

Next post: Polyester knits, fitted gores, and spaghetti straps: the problems I had finding a gown, and how to work around them.

~~~

* Many bra sizing charts suggest exhaling deeply and adding 4” to the under bust measurement to get band size. I find that results in too loose a band, so that’s why I recommend this site over others. Bare Necessities Sizing Help.

** From the Blog “Bras I Hate and Love,” Clarifying Breast Shape: Full-on-top vs. Full-on-bottom.

*** For finishing edges or hemming where you have to adjust the product you buy or salvage at home, you can machine sew, hand sew, or use hemming tapes. Hemming tapes come in an iron-on type and a type that’s like double-sided tape, and should not be used where the seam has to carry too much weight. Either turn back the edges slightly wider than the iron-on tape, or use pre-folded bias tape or a 3/4″ or wider ribbon ironed into a fold. Place the fold over the edge and attach to both sides. This latter method is best for thicker fabric.

~~~

Update: A Most Peculiar Mademoiselle‘s blog has a photo series of “Mademoiselle” in a Regency short dress with and without her corset. She’s what I’d call a normal-sized gal, and it’s quite convincing!

Put on Your Dancing Shoes!

Grandma Lauder’s eulogy ended with: “And girls—you can never have too many pairs of shoes!” No wonder a pair of light green flats were my first purchase for The Thrift Shop Regency Costume Experiment! They have a smoking slipper shape, slightly pointed toes, 1/8” heel, gold thread embroidery, and a small medallion. They were $7.99 from Value Village and, because of the lack of scratches on the soles, I think they’re new.

This part of the costume should be the easiest to obtain for two reasons: the little ballet flats that are in fashion right now tend to be close enough to the Regency look that they’ll do quite well, and low, flared-kitten-heel shoes with pointed toes from a few years back will work well, too. So raid your closet!

1812

1812

The ideal ballet flat will be a fully-closed shoe with a longer toe box, in materials not too far away from the texture of silk or kid, with minimal embellishment and no cut-outs or cut-aways. I got a pair of simple burgundy-coloured fabric ones on sale for $5 at Walmart. They’re fine plain, but appropriate bold dots and stripes work. Almost any colour will do—shoes and stockings tended to be colourful against the white gowns of the Regency!

When exactly was the Regency Period that these styles come from? There are a number of considerations to answer that question. The broadest application is 1795-1820, which includes the Directoire and Empire periods as well, because social customs and clothing conventions were similar, compared to neighbouring times. The true Regency was from 1811-1820, from the time the Prince Regent was put in place as the monarch of England on behalf of his insane father, King George III, until the father died and the prince became George IV. Some people like to narrow their costumes to the Austenesque time period of 1811-1817, when Jane Austen’s books were published, and some aim for 1811-1812, when Pride and Prejudice was set.

Heels (An open parasol indicates a good Regency shape.)

Heels (An open parasol indicates a good Regency shape.)

I’ve taken a few of my own stash to demonstrate shoe shape. The shoes with an open parasol in the photos are good Regency look-alikes for the aspect of the photo; those with closed parasols are acceptable, but have flaws, and no parasol indicates the shoe won’t work.

Before 1800, shoes had higher heels, and around 1810, heels began to go flat. Any heel much over 1/2” should be a spread kitten heel, and it should not be much higher than 1”. After about 1812, a look like a real ballet flat is best, including leg ties, but early Regency ones tended to have a thin heel. An ideal heel (and sole) would be leather, but we’re accommodating and allow synthetics if they aren’t too obvious. As you can see, the rubbery sports heels are a no-go. I’ve approved the low kitten heel for its shape only.

1795-1810

1795-1810

1810-30

1810-30

The toe can have almost any shape, but won’t have raised seams as on moccasin loafers or Toms. Sharp points to rounded and square toes are fine, and even pointed with a slight upward curve. Sharp points are the older style from the late 1700’s to 1800. Squared and softer points are seen as the fashionable shoe changes to include rounded toes until the clear preference is a rounded ballet toe by about 1815.


In the examples from my closet for toe shape, all but the sandal are a reasonable shape. The shoes below with an obvious left and right foot are compromises, as Regency shoes were both the same, and had to be worn to shape to the foot. The pointy-toed patent leather shoes have been ruled out due to their material and the elastic at the toe.

Toe shape and material

Toe shape and material

Materials of construction are important: no heavy leather, patent leather, printed leather, animal print, fur, canvas or coarse woven fabrics, hemp/jute, or metallic. I’ve seen snakeskin, cotton, and lace slippers from the extended Regency period, though most are fine leather (kid being the most popular) or silk.

English olive leather, 1800-1810

1800-1810

Decoration before 1810 included printed fabrics or solids with elaborate embroidery and gathered ribbon and lace on the toe, but after that, it became minimal, with no decoration behind the side seam (which was sometimes covered with contrasting narrow trim) other than the print of the shoe fabric, and sometimes narrow trim around the top opening. Simple trim on the toe could be a ribbon bow, fringe, tassels, or feathers, perhaps with a smaller medallion or similar object. Ribbon straps up the legs were seen on many round-toed shoes.

There were no heavy embellishments, e.g., no large buckles, studs and the like, and no heavy leather straps, leather fringe, or shaped leather designs. Elastic and usable rubber had not been invented yet. Cut-outs or cut-aways were not used. The full foot was covered, thus the sandal, sling-backs, or mules, won’t work. I did see a Van Dyke cut smoking slipper front on one shoe, and a narrow Mary Jane strap near the toe of another, though, so some leeway must be allowed for the fact that originality has always been part of fashion.Shoes: final choices

As you can see by the parasol party, I’ve narrowed down the shoes to the two pairs I bought! I apologise that the photo makes the green shoes look tan and the burgundy look grape; they’re a very soft sage and a pinot noir!

The reason I showed four other pairs of shoes as possibilities when they have strong non-Regency features is because some people need certain attributes in their shoes, and shoes similar to the four shown would be a reasonable compromise, with a little more work.

The Mary Janes are expensive walking shoes, and people who need support or wear orthotics shouldn’t feel they can’t wear these, just know the heavy cut, type of leather, and sports sole are a compromise. Since mine are porous enough leather, it may be possible to paint them to look prettier. The lime green Aerosoles fall into the same comfort category, and the colour is okay, so they could be treated just like the other ballet flats, and the rubber sole and hole pattern forgiven. In fact, the visible part of the rubber soles could be painted black (a felt marker works for this) to camouflage them.

A shorter person who likes their heels might decide to paint the leather strips on the toes of the 1-1/2” kitten-heeled shoes so they look like ribbons, or glue ribbons over them in the same pattern, leaving a loose bow. Similarly, some wearers need a low but not flat heel, yet balk at the narrowness of even the kitten heel. The patent leather part on the loafer could be covered or painted, and the button disguised with a ribbon bow or medallion of sorts. To be truly authentic, the suede could be covered, too, but it can remain as a compromise. In both cases, care would need to be taken to keep the covering from being too bulky-looking.

You can cover a simple-shaped, smooth shoe that’s made from the wrong sort of material if you can cut neat lines and have a steady hand to glue heavy silk fabric on smoothly. The fabric would be cut to align with the sole, with a side seam (see examples). The extra would then be tucked over and cut off at the top, then trimmed with narrow braid or ribbon.

1800-30

1800-30

Spray-on glue is good for this. You can spray each surface and let them dry separately, then do a test run, because it works like Post-it notes when dry. If you’re satisfied with the outline of your fabric, you can re-spray and then align the fabric on the shoe at the sole. Be sure to use lots of newspaper in the area where you’re working, and use it to mask off the sole or any area you’re not covering. Note that the Regency shoe has a side seam rather than a back seam, and it’s a desirable look to attach trim over that seam and at the top of the shoe, just not at the base.

1815

1815

Another shoe option is the half-boot, which became popular during the Regency. I have not been able to find any boots with light enough soles and leather to be used.

There are certain new shoes available on the Internet that claim they are a Regency style. The ads compare 2000s shoes to Regency shoes, and then claim their shoe design has filled the gaps and is a Regency-correct shoe. In all honesty, these shoes still look like 2000s pumps, and are a rip-off. Closer matches can be purchased at regular stores for less than half the price, including kitten-heeled pumps with a more authentic-looking toe shape.

I went to work at making my two pairs of shoes look Regency. The sage shoes need no additional trim. Martha Stewart types will roll their eyes at my attempts to decorate the two Wal-mart shoes, but I’m not crafty!shoes decorated feb 28 reduced

It looked like it wouldn’t be easy to remove the little bows cleanly, so I left them on. I took advantage of it on one shoe, threading goose feathers into the loops. The bag of maybe 25 goose feathers was $1.99. I added a clip-on earring from a set that sold for $3 at Salvation Army.

To decorate the shoe on the left, I used a short length of ribbon I already had at home, and a pierced earring from a $1 Salvation Army pair . Pretty ugly as earrings, but not bad on a Regency shoe!

I didn’t permanently attach these details yet, as I want to decide which dress I wear with which shoes first, and then work with trim colour to coordinate with the dress. I’ll use double-sided tape to attach the trim. I might try a folded ribbon effect for the final shoe. It would have to be sewn before attaching it to the shoe, or iron-on fabric tape used in lieu of sewing to keep the folds in place.

To see an excellent selection of Regency shoes, go to the Metropolitan Museum of Art searchable web site.

Next post: Propping up the Girls: Ideas for foundation wear on a budget.


Social Anxiety and the Reality of Louisville JASNA

“Elizabeth could bear it no longer. She got up and ran out of the room…”

“…Elizabeth was forced to put it out of her power by running away.”

Years ago, I was a leader in my profession. I spoke at national conferences, local reporters sought me out for a quick comment every month or two, and important policy-making groups invited me to join as an active and knowledgeable board member. I sat at the best tables at local fundraisers, was selected to represent my profession in a nomination for a local YM-YWCA award, and lost out to Bill Nye, the Science guy for a prestigious national award in STEM (Science, Technology, Engineering, and Mathematics) awareness! During that time, I still personally facilitated STEM  awareness activities with grade 5 classes a couple of times a year, just for fun.

I was terrified in casual social situations with larger groups of people, therefore, at the multitude of social events that required my face, I fortified myself with wine ahead of time and during the event. You see, added to the mix of mental health acronyms I have been labelled with is Social Anxiety Disorder.

When serious mental illness took over my life (treatment-resistant depression and PTSD, among others), I was no longer able to participate in most mainstream activities, and my involvement in my profession and related volunteer activities ramped down quickly. Alcohol and caffeine hinder the efficacy of more appropriate medications, so I chose to eliminate them in favour of getting well. Even though I’ve been treated with CBT (Cognitive-Behavioral Therapy) with exposures for the social anxiety, I still find myself frozen in new social situations.

Fast-forward to my enjoyment of all things Austen, and my intent to attend the JASNA AGM in Louisville this fall to absorb the intellectual side of my fascination. The trouble is, I know only three people who also plan to attend, and I’ve have only met one of them in real life. Of course I’m more than a bit nervous! It only got worse after an experience of last weekend.

I went to my local JASNA meeting on Saturday in hopes of meeting more than the three people I interact with on Facebook. I had forgotten the meeting, and saw the reminder on FB ninety minutes before, just as I was about to eat lunch. I barely had enough time to change my clothes and drive over.

They ask for $5 and some treats from those attending, but obviously, I had no time to bake something. Last time, I had missed the fine print about the treats, yet I ate enough for three Suzans while I sat by myself, watched everyone else chat, and longed to join them. I very nearly decided not to go this time because I would once again be empty-handed.

I thought of an alternate offering, and poor DH watched me tear apart my house and almost destroy a cherished painting in the box that also holds extra copies of “the book” (my novel, Alias Thomas Bennet). I wrote a cute note inside and signed it, intending to throw it in with the door prizes as my offering in lieu of treats.

On the way, I contemplated stopping at Walmart and snagging some Little Debbie’s, but I was late already, and uncertain of the route. JASNA events are usually held in a church hall near the intersection of Cedar Hill Road and Cedar Hill Cross Road. Yup. No chance of confusion there. There are few other roads that intersect for a shortcut, as there’s a small mountain in the way. I stressed over getting lost, as well as about being caught putting my earrings on at red lights, as the local police have ramped up their distracted driving campaign. Of course, the backs never want to meet the posts when you’re in a rush.

The presentations had started when I entered, so I missed the chance to talk to the lady who organizes the door prizes (one of the three I “sort of” know). She was in the middle of the room, which was full of chairs wall-to-wall, and I wound up on a sofa off to one side, by myself. I enjoyed the talks on members’ varying experiences at JASNA Montreal, and one lady promoted her own newly-published novel, so I felt better about bringing mine.

Yet, when the time came to draw for door prizes, I froze. I couldn’t offer to add “the book” in front of everyone!–How would that make me look? I couldn’t even drum up the courage to collect my draw ticket when they offered them to latecomers!

Watching the draws relaxed me a bit. It was fun to see the Jane Austen toothpaste and other items distributed. Then, it was announced that the treats would come out, and we could socialize. The major fear and anxiety that had gripped me returned, but it ramped up even more. I couldn’t handle this!

I sought out The Door Prize Lady. As soon as she finished speaking to another lady, I shoved the brown-paper envelope with “the book” into her hands and said “someone” donated it for a door prize for next time. I didn’t even wait for her to peek inside, just turned to leave. She asked if I could stay, and I said I had a lot of commitments (which is totally true–I’m so over-committed, it’s eating up my soul).

The other lady I knew was busy in the kitchen making dainty trays. (I suspect she’s appointed herself The Boss of Food because she’s shy, too.) As I passed by the kitchen on my way out, she stopped me to ask about The Thrift Shop Regency Costume Experiment blog, and I babbled on uselessly for a minute, then bolted again.

I don’t know how I’m going to handle Louisville. When I first announced I was going, a number of Chat Chits said they’d join me, but reality set in for them. I’ll keep you up-to-date on whether I can be comfortable with that, or take a cue from Elizabeth, and run away, like I did last weekend.

I apologize to those who expected a post on shoes. The project will continue, whether or not I can find a place I’m actually comfortable wearing the costume. I’m having a great deal of fun creating it, though juggling my time has been taxing. The good news is, I found “The Dress!”

day dress

The Rules, uhm, vague guidelines for my Regency costume: #ThriftyRegency

I can sew well, but I hate it. It gives me back cramps. Worse, I’m cheap. If I find an item I like, but it’s too dear, I often seek an acceptable alternate. This posed a huge problem when I decided to attend the Jane Austen Society of North America Annual General Meeting (JASNA AGM) in Louisville, KY in October, 2015.

About a year and a half ago, when I finally got up the nerve to attend one of these annual gatherings for scholarly pursuits related to Austen, I knew I wanted to dress up. My friends, the Chat Chits at A Happy Assembly, joined me in perusing Ebay and Etsy for Regency gowns and bonnets.

Though prices started at just under $100, the cheap dresses were, well, cheap. A decent but simple dress could be bought for $150-250, most ball gowns were $250-$400, with higher prices for the couture models. The one I liked best was at the top of the range, as expected.

“Sew it yourself,” said one of the Chits, who owns a serger. I’ve found that those who own a serger think anyone can sew anything.

The gowns in so many of the photos of JASNA AGM, the Bath Festival, the Jane Austen Festival, and similar events have been painstakingly hand-sewn by their owners or someone like the vendors on Etsy. The big problem is that most are based on the same pattern from Simplicity. It has a lovely neckline, square with rounded corners.

TRTSE-2-1 Simplicity4055TTSRCE-2-6TTSRCE-2-7But I want something different. I follow several Pinterest collections with actual Regency gowns from museums, and the necklines are all over the map. From those plates, I noticed that many of the outfits I’d seen at Austen events had aspects from the Victorian era, and the owner had been duped by sellers who called them Regency. Some vendors will advertise Regency/Jane Austen/Victorian/Steampunk/Pioneer/Medieval/Fantasy/Titanic for the same gown! When I read more, some sites suggested purchasing a vintage gown from the ‘80’s, which are supposedly close to the right design.

While looking at gowns, I also saw various recommendations on other parts of the Regency ensemble. I decided to put together an outfit from items not purpose-made for Regency costumes, rather, I would find clothing articles and accessories that would suit with a bit of modification. I would also aim for minimal need for crafting or sewing skills, since some sites were daunting because of phrases like “Buckram molding.”

TTSRCE-2-4I made myself a rough set of “rules” for The Thrift Shop Regency Costume Experiment (tTSRCE). Okay, rules are meant to be broken, and it may happen, but for now I have restricted myself to these guidelines for procurement of raw materials:

  • Things I find around the house.
  • Thrift store items, not just clothing, but trims, fabric, etc.
  • Similarly, vintage store items.
  • Free stuff from others.
  • New items on sale.

We moved to a smaller home a few years ago, and performed several iterations of radical de-cluttering, so most of the raw materials I could have used have already gone to charity. All my dated or ill-fitting clothing, old shoes, Hallowe’en costumes and materials, linens, fabric scraps, even patterns! I never anticipated this costume, and decided I had no need for them.

TTSRCE-2-2I started shopping last summer, and the photos here are some of the items I have procured so far, as well as ones I found in my own home, for example, the hat and earrings above. I found some items were easy to match to the styles from the Metropolitan Museum of Art; Boston Museum of Fine Arts; McCord; Victoria and Albert; Brooklyn; Swansea; and similar costume museums, and some more difficult.

TTSRCE-2-3I’m going to start the blog with a couple of easy, ones, so anyone who wants to do this will feel encouraged. But I’ll also address the difficult ones early, and return to them in later posts, to give readers time to find them.

  1. I’ll include photos for ideas.
  2. There is a scene in my next novel that involves a parasol, so I will be grading possible purchases or finds with a parasol.
    1. An open parasol means it’s an acceptable choice for your Regency outfit.
    2. A closed parasol means it’s a compromise because of at least one important feature, or more than one minor mismatch to Regency, but not terrible. It’s offered because I think some readers need a wider choice than a strict match.
    3. No parasol means the item is not a good choice, for a number of reasons, which I’ll list. It’s like a parasol in a ballroom: it may be pretty, but will be out of place. Even parasols will get parasol grades! Properties such as unreasonable cost, obvious synthetics that can’t be disguised, and post-1820 or pre-1795 Georgian fashion will fall into this category.
  3. There will be lots of links to help with areas that others have already done well.
  4. I’ll also offer a “Quick Checklist” to help a person who wants to assemble an outfit super-quickly, but not spend too much.
  5. I plan to post a completed gown and coordinating outfit by the end of June 2015. However, the accessories posts will each cover a broad range of situations, and with any luck I’ll have both a morning/day gown and evening/ball gown completed by the end of June. Outerwear and bonus items will follow.

TTSRCE-2-5UP NEXT: Shoes!

December 4, 2014: The Cost of a Pedicab for a Chat Chit in San Diego

She was standing on the doorstep waiting for me by the time I was halfway down the front walk. Gail Warner is not the type to wait for the doorbell and answer as if your arrival is a surprise when she’s eager to meet the last of her authors in person (me!). I’d seen photos of her, and that smile says it all. She’s warm, intelligent, and has a fantastic sense of humour. I think of her as “my Gail,” and the other authors she’s edited for feel likewise.

 photo 20140917_091851_zps36e47336.jpg

The day was as warm as Gail, perfect for the drive along the ocean from Orange County to San Diego that morning. We chatted like old friends, which I suppose in a way we were, after the close nature of our work on Alias Thomas Bennet gave us a bond like no other. Gail is keen to get her hands on my current work, Letter from Ramsgate, and I hope she’s pleasantly surprised by how much my writing and editing have improved from the rough work she helped me refine last spring. Of course, I learned from the best!

I could have stayed and talked all day, but I’d planned to meet the instigator of the AHA San Diego Meet-Up at the airport. I tease her by calling her “Birdie,” but defiantfalcon is her A Happy Assembly (AHA) username, and it suits. I knew she was small, but it was still a surprise because she’s so decisive and assertive. She walked up to the hotel desk and greeted them with all the polite manners of a southern lady before she stated her needs as if she would brook no opposition.

She’s been my rock over the last few years, excellent support when I was ill, and as the plot beta (similar to a developmental editor) for Letter from Ramsgate. When she told me a plot twist was an unnecessary distraction that added nothing to the story’s flow, I cut the chapter. Next, my clever scene for reunification of Darcy and Elizabeth had too many contrivances, and I had to think of a new scenario. The sweet and funny epilogue was too much of a change from the tone of the story. I didn’t realize it until defiantfalcon pointed it out.

We went for lunch and talked away, again like old friends. Job, family, pets. The day was heating up, but she’s a southern gal and used to it, and there was a nice breeze. We were both tired, and separated to rest up for the “main event.”

The AHA San Diego Meet-Up was set for a seafood restaurant on the Embarcadero, with views to the bay. Gail joked that when she arrived, she realized she knew one person, and didn’t know if I was there yet. I walked from Little Italy and thought I couldn’t find the restaurant. I was just texting defiantfalcon when I passed the USS Midway and there it was! We had a chatty seafood meal, discussing all kinds of Austen topics: the cool details in the books, the stories on AHA, the dynamics of the members, and the men! We all knew each other from AHA Chat, but to chat in person, and laugh together, was a wonderful extension of our relationships.

Afterward, we checked out the statue “The Kiss” or “Unconditional Surrender,” and the bronze installation to Bob Hope. As much as we enjoyed each other’s “real” company, it was time to head back to our hotels. When we had arrived, the place was alive with cabs, yet now a pair of pedicabs were parked near the door. After a short wait, we ambled out to the street, stopping to admire the bronze plaques that honoured past leaders of the US Navy. Pedicab after pedicab went by, but nothing else. Since three were headed one way, and my hotel was in the opposite direction, they encouraged me to take one. I thought it would be fun, but the driver was in a horrible mood.

And worse yet, I made the mistake travelers around the world make: I failed to agree on a fare ahead of time. He demanded double what I had expected based on cab rides in the city earlier! I argued for a few minutes, but it was hopeless. Much like Elizabeth in the scene in my July blog post, it was all the cash I had, but Mr. Suze wasn’t a surprise.

The next day, several of us enjoyed the San Diego Zoo’s Wildlife Safari, a large park full of African and Asian animals. I’m not well, and the day before had used up all my energy resources. DH suggested I stay back and rest, but I protested: I wanted to see the four baby lions. We were in luck! When we inquired as we paid our admission, we found they had been out where the public could see them for the first time yesterday, and maybe would be again today, at 9am. As an unadvertised item, there were few people there. Mama paced, agitated about the safety of her young, and the little ones rolled around and played lazily.

lionsWe sat back and relaxed as defiantfalcon clicked away. Her hobby is zoo photography, and she’s good: her home zoo uses some of her work for their promotional material. When she had her fill at that exhibit, we took a tram around the park to discover that many of the other animals had new babies, too: giraffes, elephants, hippos, to name a few. The facility exists to breed and protect species, and it has one rhino who will be the last of his kind. It was fun to watch the baby elephants at play. One pushed its sibling into the pond, and the wet elephant made the best of it and had a bath.

I saw the highlights before I ran out of steam, and we left the others mid-afternoon. In spite of drinking about 2 litres of water with salts, as I got to the car, I was lightheaded and had to sit. The car thermometer said it was 112oF (44oC)! However, as we descended to the city, it cooled nicely. Later, when the others were driving back, a heavy rain obscured the highway and caused flash floods.

brunch 3 resizedThe next morning, the group was joined by josurinu for breakfast, who had driven from LA early that morning. A few years ago, josurinu, defiantfalcon, and I worked together on her two Austen-inspired modern romances, Someone Like You and spin-off Someone Like Me, my first experience as a story beta (line edit), and we call each other Team SLY. She would join Lalita and defiantfalcon to the San Diego Zoo and Sea World, where the latter two had booked a swim with the dolphins. But DH and I had seen many of the tourist attractions on a previous visit to San Diego, so we were on the road again. Besides, I had run out of copies of Alias Thomas Bennet to sign and give away!

We took three days to drive home, as expected. Friends recommended Highway 99 in California instead of the I-5, and it was a great choice: less traffic, more scenic. We uncovered the identity of the mystery trees along the road—walnuts—which I don’t recommend eating green. We lamented the fact that the Shasta Lakes were almost dry: easily 20 feet low. We revisited Cottage Grove, OR and discovered a thriving old town main street with a great used book store and coffee shop in an old theatre, where I bought a reticule. (If you’ve never been to that area of Oregon, it’s worth the trip to see the dozens of covered wood bridges.) The next day, I found the funkiest vintage story ever in Portland, OR, with 50’s cowgirl dresses among the other classic selections.

But in order to close this tale, I must back up.

Our last stop in California was to return to a location we had found on the way down, in Red Bluff. I may have mentioned once or twice that DH and I have a bit of a ritual in our U.S. travels. So it’s fitting that we end this story of the AHA San Diego Meet-Up with that fine aspect of American culture: PIE.

piePhotos by dogpoundphoto and Chaotic Her