The Regency Gentleman and his Cravat

The Regency neck-cloth could never be called humble, even if its life begins as a simple strip of cloth. Instead, it’s an embellishment that can add drama and interest to the gentleman’s costume.

tsrce cravatThe cravat, or neck-cloth, was described in the popular post, Regency men were not sissies, even in blouses and scarves, along with the shirt (which was considered an undergarment) and the Regency man’s hat. The post was part of the Thrift Shop Regency Costume Experiment blog series. There, we noted I. E. Scottsdale’s Necklothitania, a satire on the elaborate styles used by Beau Brummel and his followers, and H. LeBlanc’s The Art of Tying a Cravat, as Regency documents that showed some of the many different tie styles possible.

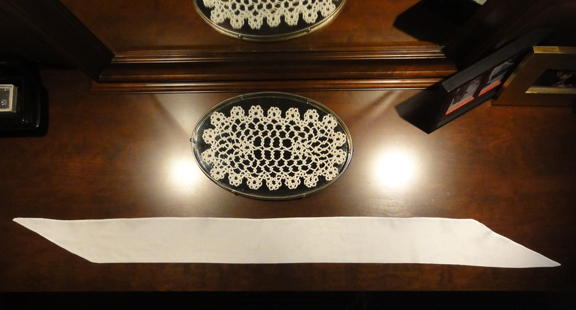
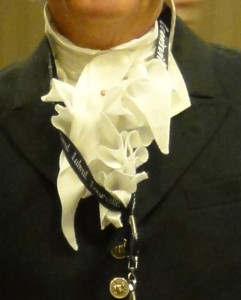
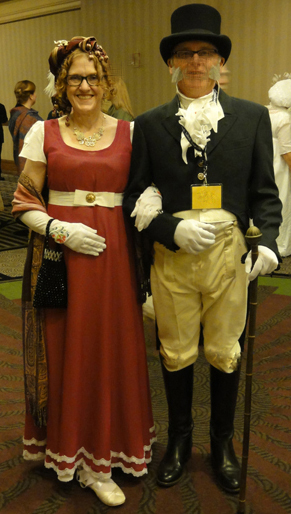
mr suze cravatMy husband, Mr. Suze, used the simplest arrangement when he dressed for October’s JASNA AGM dinner and ball with a 52 inch long neck cloth. Recall that this is on the short side for the cloth, which is 4-10″ wide and 50-100″ long. Elaborate styles tend to require longer fabric.

To accomplish this simple style of cravat tie, the following steps are taken by the gentleman:

  • Fold the centre 12-18″ of the length of the fabric as needed so the width is equal to the length of the man’s neck.
  • Hold this section of the cloth in front of you draw the neck cloth across the front of the neck.
  • Wrap the two halves round the sides of your neck and slide your hands along it to cross over each other at the centre back, then pull the ends forward again.
  • Tug the ends snug around your neck.
  • Tie a simple half knot (one end around the other once) in front to hold in place so it’s comfortable with no gaps. A good test is for size is just snug enough that you can just barely slip two fingers under the top edge.
  • Adjust the fabric all around with gentle folds so it’s neck height at the crossover and has no bunching or drooping along the sides.
  • Straighten the lay of the tied part so the top of the half knot is parallel to the edges of the wrapped cravat, and arrange the ends to the wearer’s preference.
  • Secure the ends in a neat position using a pin of some sort.

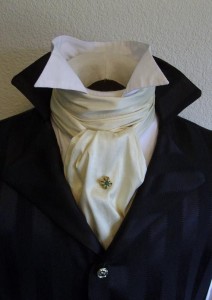
Mr. Suze commandeered my “ruby” Swarovski crystal stick pin, which is a bit hard to see because the conference lanyard has messed with the tie ends. The pin looked fantastic. A similar style of tying the cravat, with no ruffles on the shirt front, is seen below.regency cravatI would guess this example uses a longer or wider cloth due to the folds. With a longer cloth, the ends can be tucked as seen for this style, and if very long, the gentleman will start wrapping from behind rather than in front.

For a lovely array of neck cloth tie styles, not just Regency, you can enjoy a video with nearly 10 minutes of styles from movies and mini-series period dramas: The Cravat in Period Drama. The handsome actors will please you as well as the costumes!

Please check out the link, as I guarantee it’s well done and striking.

~~~

A reminder that my latest Austen-inspired Regency story, Letter from Ramsgate #XPressLetter, is posting at #AHA (free, no ads), with a new chapter each Wednesday afternoon.

Soon, posting frequency will doubled! The second day each week will be either Monday or Saturday, whichever has the least other stories posting. Readers can elect to follow the topic on the upper right-hand corner of the story page, which sets up an automatic email for each new chapter, saving the trouble of remembering the schedule or watching and waiting for each post. This story is rated PG for implied off-screen sexual situations.

LfR has no violence, but it does have some chapters with extra dramatic tension.

The comments thread can be just as interesting as the story, so join in the fun reader reactions as our protagonists misunderstand each other, aided by well-meaning characters as well as slightly shady ones.

Graphic art for signature design by L.L. Diamond using an oil painting by Johannes Vermeer: "A Lady Writing."

Graphic art for signature design by L.L. Diamond using an oil painting by Johannes Vermeer: “A Lady Writing.”

~~~

Feedback on this post will be appreciated as well, so let me know how you feel about men in cravats by replying below!


The Party Ends with a Splash! #ItsJaneYall

The road trip is over and my “day job” as adorer of two kitties has resumed. I am reminded in bossy purring meows that both deserve extra attention, and I’m rewarded with relentless purring that will extend until the wee hours tonight and over the next several days at least.

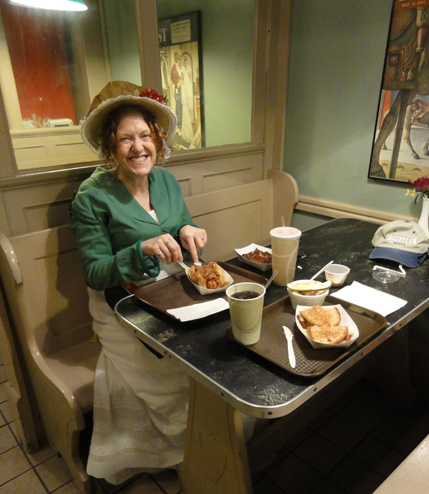
Regency Lady has a Chili Dog: Author Suzan Lauder in Louisville, KY.

Regency Lady has a Chili Dog: Author Suzan Lauder in Louisville, KY.

A final late night involved packing all the gear we brought to the 2015 JASNSA AGM in Louisville, KY. In spite of delays resulting in my husband and I scurrying through to beat the clock at every connection, a re-routed itinerary, and a novice security person confiscating Mr. Suze’s Regency walking stick, we got home after 15 hours of travel in a good mood.

This AGM has been an important goal for almost two years. The event differed from my expectations, and I’m glad I attended, but in some ways, it was an anticlimax. My mixed emotions are yet to become clear, but some conclusions can be shared with the readers of this blog, including my feelings at this point: Relief, regret, and pride.

Relief

Sunday will be the last of two months of a marathon of preparation with many 2am bedtimes, including hand sewing every night of the conference! I won’t miss the stress, exhaustion, and missing out on other things that characterized my life at the end of the Thrift Shop Regency Costume Experiment!

My most substantial relief was measured by repeated expressions of admiration from other JASNA delegates on Friday and Saturday, followed by multiple entreaties to stop every 20 feet so a dozen flashes could go off while people photographed Mr. Suze and I as part of the Grand Promenade. It said the blog goal was successful.

I’m also relieved that people who were less welcoming kept their views to themselves when off Facebook! I’ve avoided mentioning this on the blog to keep things light, but nay-sayers created a huge area of trepidation for me coming up to, and during the conference. It’s difficult enough for anyone to try something new in a public forum, but my fear of failure worsened when I discovered my blog had been an open topic of ridicule in some costuming circles. The funny thing is, these people state hopes to encourage others starting out in costuming, yet their welcome is wanting. No, scratch that. I’m still awaiting the welcome.

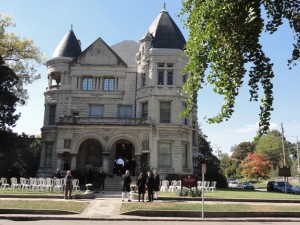
old louisville kyRegret

It’s too bad I didn’t have more time to explore more of Louisville, a nice-sized, safe, comfortable, lively town full of welcoming, friendly people. Everywhere we turned, we met and spoke with helpful, smiling locals. Because Mr. Suze explored while I was in seminars all day, he vocalized this opinion strongly.

I looked at lace and ribbons in the shops of the Regency Emporium, as well as actual fashion plates from the Regency (including examples I’ve used here!) for a minimum of 6 separate visits—and I bought only four unrelated books!

I’m sure the shop staff recognized me. I was intimidated and flummoxed because, similar to my experience shopping at home, I could see how lovely these items would be on a costume, but waffled on which to buy and quantities. Did I want to use expensive silk net for sleeves on a polyester gown?

I hope I won’t be too disappointed to have wasted an opportunity to purchase embellishments better than any I’ve ever seen elsewhere!

Contrary to my expectations, I don’t mind too much that I couldn’t bring the planned jonquil gown, as my last-minute compromise with the translucent fuchsia overdress worked well.

I left the AGM uncertain about whether the blog had readers outside of my circle of friends. I’d hoped to have more Janeites approach me for the give-aways, but prizes I’d planned to hand out came home with me.

However, when authors Maria Grace and Linda Beutler both commented, “Is that the spencer from the blog? I love it!” and admired all the details, especially the little skirt detail in back, I was proud, even if the sewing quality is atrocious!

I wish I’d had more time to get to know more people. I did enjoy the company of fellow Meryton Press author Linda Beutler for some events and tourism, and it was sad to split up to go home again. Luckily, there’s AHA Chat and Facebook to remain close to those I met whom I already liked!

Pride

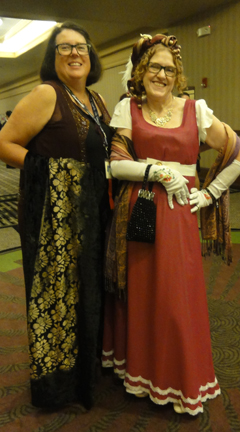
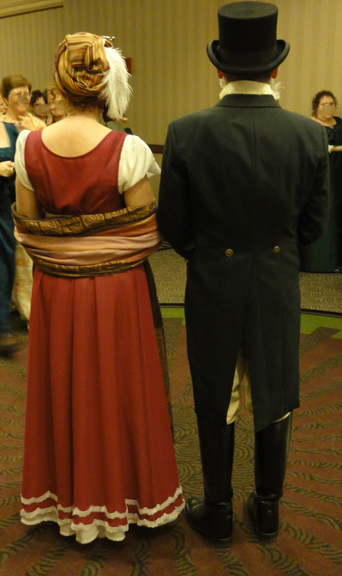
mr suze and suzan lauder at louisville jasna 2015 ball blurredMr. Suze’s costume was right up there with some of the best of the menswear. The cut of the tailcoat and shirt neckline set his apart from amateurish-looking versions, even if we were no more expert than the others! I’d found some brass buttons with a crown-type coat-of-arms on them at 3 packs of 3-4 buttons for 99 cents each at Fabricland that really set off the tailcoat. Louisville has a fantastic gag shop (Caulfield’s Novelty Inc.), where he spent too much on a set of grey sideburns to add a final flourish that got quite a few laughs.

Many ladies’ costumes had breathtaking details in fine silk and fancy lace, with pleated, ruffled, or impossibly swirled trim, soutache and buttons and tassels in just the right places, enormous hats with giant feathers and unique bands, and gowns with professional-looking cut and quality of construction. Though my costumes were simple in comparison, they did the trick well.

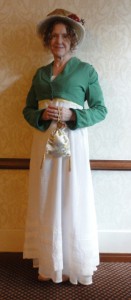
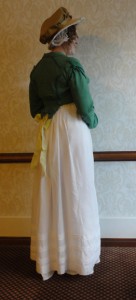
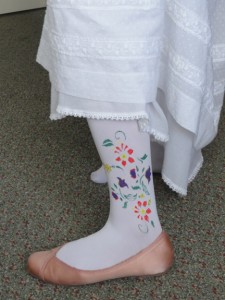
saturday day gown frontsaturday day gown backsaturday stockingsSaturday’s gown from morning through the author signings was the Swiss dotted dress, remade with a Regency-cut skirt, the lace shared over three rows, shorter puffed sleeves, and a real diamond back bodice, as I developed a Regency pattern fitted specifically for myself. The Pomona green spencer was worn all morning, since many others were doing the same, perhaps in response to light-hearted in-character comments by a couple of presenters as they joked about disapproval of married women who wore plain white! I would have added more ribbon to give this lovely gown colour, but time ran out!

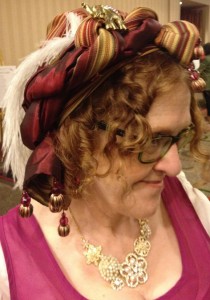
My ball costume was “thrown together” in a few days. Little flourishes, like the painted designs on my opera-length gloves, the way my turban tied in a unique and cheeky way in one go and sported a bejeweled elephant pin and curled ostrich feather on top, and two new rows of lace on the bottom of my improvised gown helped my simple effort look like it belonged there.

I think our smiles made me and the Mr. appear better than many at the ball, as we had a great time among the multitude of amazing costumes.

The visible minority!

turban revisedAbout 20% of the people at the AGM sported Regency costumes the first few days, but I’d guess the proportion was at least 40% at the banquet and ball on Saturday night. Author and organizer Sharon Lathan looked so perfectly ordinary when I first met her that I didn’t realize the pretty blonde woman in glasses and jeans was her! She glowed in her silk ball gown, though!

I wore Regency for two of the four days I was present for activities around the AGM proper, which was 2.5 days long. Others who, like me, were at their first AGM and all smiles in their bold effort at a costume that fit in at the ball, included JAFF authors Linda Thompson and Melanie Schertz, whose service dog, Mr. Darcy, had all the ladies swooning in his cravat!

linda beutler and suzan lauderAmong those who wore something awesome that wasn’t Regency was author Linda Beutler. She shared a table with me for the author signings and banquet wearing a vintage 1920’s beaded gown with exquisite details and accessories. With a break from her normal life of gardens for living, her nails matched her deep maroon gown.

Some participants, like author Syrie James, changed for the ball by simply removing a shawl or fichu from the dress they wore that day. Author Maria Grace sat next to Linda and me for the signing event, and she and her Mr. changed from regular clothes into attractive and well-executed Regency costumes for the evening, then cut up the dance floor like pros!

Sue Forgue of the Regency Encyclopedia turns out to be a bit of a fashion plate. She donned a different gown during the day and evening on Saturday, the former with an amazing floral pattern straight out of the Regency that made me match my spencer in jealousy. Interestingly, the latter was a Pomona green silk! Sue enhanced both gowns with gorgeous matching jewels and reticules! I wish I’d thought of photos, and if I get one, I’ll add it to this post.

The Splash

Not a literal splash, but trip on the Ohio River on a 1914-built steam-engine paddlewheel boat, the Queen of Louisville, was a ticketed event last night to culminate our visit for the AGM.

I doubt that more than 5% were dressed in Regency costume! I think many are more comfortable without a corset, no matter how well it improves one’s posture! I wore a nice modern skirt and blouse for the boat trip. In the daytime, it had been a Jane Austen t-shirt from my local library’s fundraiser paired with Michael Kors skinny denim capris!

The weather was fine, as it had been for the whole trip—in the high 80s, when seasonal normal daytime temperatures are in the low 70s.

The Future for my Regency Costuming

One of Meryton Press’s editors and our unofficial social media marketing coach, Christina Boyd, suggested early on in the Thrift Shop Regency Costume Experiment that the series would make a good book. She’s repeated the sentiment, and it’s tempting, though I’d have a great more due diligence on ensuring permissions for images, making it a big project when I’d like to get back to fiction.

“Encyclopedia Sue,” who adores JASNA as a learning experience, staunchly supports the positive examples that instigated the interest in the Regency and Austen for many (including the BBC/A&E miniseries) and spends a huge amount of time sharing resources to help writers and researchers improve their craft, suggested the blog as a seminar for a future JASNA AGM. Though I admit I had some interesting ideas for topics I’d enjoy presenting for this AGM (and didn’t explore them due to lack of time!), without Sue putting the seed in my mind, I’d have never thought of the TSRCE in a seminar format. I’m tempted!

back view mr suze and suzan lauder louisville jasna ball 2015 others blurredThough I know I’ll continue to make gowns and hats based on the wonderful examples I saw this year, for personal reasons, it’s unlikely I’ll have time to attend next year’s AGM in Washington, DC, but I hope to repeat this, with gowns made well ahead of time, for the Huntington Beach, CA AGM in 2017.

Locally, I’ll wear my costumes to JASNA events along with a dozen or so others who enjoy that aspect of study of Austen and Regency.

On July 8 and 9, 2016, the town of Port Alberni, BC, Canada (about 3 hours from me, on Vancouver Island) is hosting its first Jane Austen Festival, and claims an intention to break the world record for Regency costuming. I’ll be there, and I hope I can throw some of my extra gowns on some friends, including enticing a few from around the world to come visit me while they help Port Alberni with its goal. With vintage dresses and fabric, I have the basics for at least a dozen gowns, never mind that I yearn to tackle fabric and look a little like Sue did on Saturday!

~

Future posts:

  • Side issues and tips related to attending an AGM.
  • Reprint of a Regency-related article I wrote for another web site.
  • A blurb and teaser for my latest novel-length story, Letter from Ramsgate, rated Teen, which will be posted in full at A Happy Assembly. Join us in the group read and story comments! AHA is a members-only web site dedicated to Austen-inspired fiction, research of Austen and Regency topics, and the resulting social interactions. It has over 9000 members worldwide, and 500 completed Austen-inspired stories. Membership is simply to ensure readers are over 18, and your personal information remains as personal as you choose.
  • I have other writing projects underway, and blurbs or excerpts will be shared here in the future!

Mr. Darcy in the making: The Thrifty Regency Gentleman’s Costume

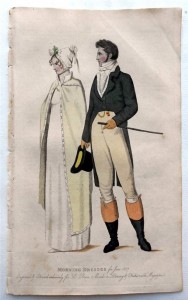
Beau Monde, 1807, Morning Dress

Beau Monde, 1807, Morning Dress

Mr. Suze used to bug me to let him read my Regency writing. I told him he’d have to read Jane Austen’s Pride and Prejudice first, so he’d understand it better. I didn’t expect him to actually read my favourite novel, but he did! What choice did I have but to share Alias Thomas Bennet with him? I was preparing to submit it to Meryton Press at the time, and he was a good final cold reader.

He became a big fan of my writing, and joined me to watch the A&E/BBC 1995 production of Pride and Prejudice. A good sport, he went along with me on half a dozen meet-ups of my online friends from A Happy Assembly while we were on vacation in Washington, Oregon, and California over several road trips.

When I told him I wanted to go to Louisville, KY for the JASNA AGM, he said I could go on my own; he’d had enough of Jane Austen events. Over time, he softened to say he’d join me and enjoy the city on his own while I was at the conference, and later, he agreed to dress in a Regency costume for the Saturday festivities. In May, my vintage and thrift shop trips to finalize my own costume included searches for his items. I quickly got the lay of the land.

For this post, I’ll speak to two items: the tailcoat and waistcoat. The rest of the costume will be seen in future posts.

I saw only three tailcoats in vintage and thrift stores, at $65 and $35, but two were too large and one, too small. There were no suitable vests for a waistcoat, even if I looked at size extra-large in Ladies’ wear. Mr. Suze is not a large man, and I thought if I did a good job, he’d be okay with this.

Please note these are sewing projects. The same result will not be easy to achieve with no-sew iron-on tape, and the fabric is too heavy for that product in any case.

Upcycling a garment into a Regency tailcoat
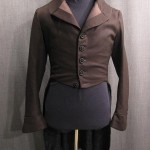
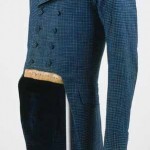
Coat, 1810, dark brown herringbone.
Coat, 1810, dark brown herringbone.

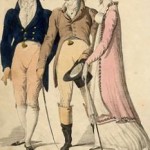
Le Beau Monde, 1807
Le Beau Monde, 1807

Regency tailcoat 1815, Metropolitan Museum of Art
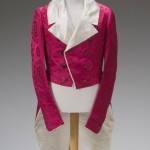
Regency tailcoat 1815, Metropolitan Museum of Art

Post-Regency example for fun! 1825-1830 dress coat

Post-Regency example for fun! 1825-1830 dress coat

Regency tailcoats were by no means all the same. They came in many colours, and some had interesting textures, as shown in these thumbnails, which can be enlarged if you click on them.
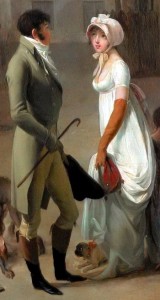
 

Louis-Léopold Boilly - The Arrival of a Stage-coach in the Courtyard of the Messageries (Detail), 1803.

Louis-Léopold Boilly – The Arrival of a Stage-coach in the Courtyard of the Messageries (Detail), 1803.

Both single and double-breasted designs were stylish, but double-breasted appears more frequently in the examples I could find, and I’ve been told they outnumbered single-breasted by about 2:1. Lapels tended to be wider, and the opening quite high in comparison to modern menswear.

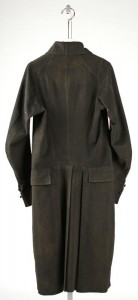
Many modern tuxedo tailcoats require slight modifications to straighten the bottom front to match the style of the early 19th Century. The Regency tailcoat has no back waist seams: each panel is one piece of fabric, whereas post-Regency, the seam at the waistline came into play, and continues in modern tailcoats.

Because I couldn’t easily find a used tailcoat in thrift shops, I looked to the Internet, where previous rental tuxedo coats are readily available at under $100. Problems that rule out some modern tuxedo tailcoats include trim such as velvet or satin that do not look Regency. Shawl collars or narrow lapels are common. Most are black, white, or grey. Black would do for a court suit or a formal ball, but the other two would not work, unless I decided to buy a white one and dye it the popular dark blue of the Regency.
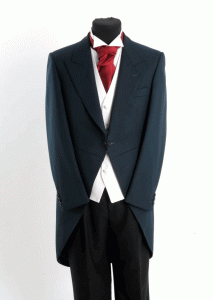
Modern morning coat, dark green wool, herringbone.
Modern morning coat, dark green wool, herringbone.

Back view of Regency tail coat to show the single panels of fabric, with no waist seams.

Back view of Regency tail coat to show the single panels of fabric, with no waist seams.

A wool morning coat in dark green, with a fine herringbone pattern and slightly wider lapels, caught my eye and got approval from Mr. Suze. Of course, he doesn’t know that Jane Austen fans love the idea of a green coat ever since Andrew Davies had Colin Firth choose it to ride into Lambton the day Elizabeth got her fateful letter from Jane!

This coat appeared to have no back waist seam in the photos online, but when it arrived, it did. Also, the collar was not self-lined, so it would have to stay down. Oh, well, we knew we were not going to be perfect by any stretch of the imagination, and it fit well, so that was a huge relief. It was advertised on eBay at £25, or $80 with shipping.
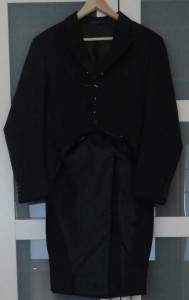
Green tailcoat after first cut of shape of front opening and tails.
Green tailcoat after first cut of shape of front opening and tails.

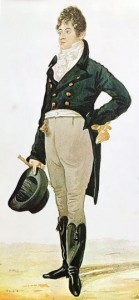
George "Beau" Brummell, watercolor by Richard Dighton, 1805.

George “Beau” Brummell, watercolor by Richard Dighton, 1805.

Mr. Suze is a bit particular about his clothing. His father was a menswear tailor at the Canadian institution of high-class shopping: Eaton’s. My husband is accustomed to a well-fitted, flattering suit in quality fabric, and that was my goal for the Regency tailcoat. We looked at numerous examples from museum pieces and fashion pages like Ackermann’s, and decided on a full curve at the waist, as opposed to a straighter line. A painting of Beau Brummel served as reference. The line was pinned while “my Beau” wore the coat, and the future wearer did a mirror check to approve it. To further achieve a Regency look, the lapels were pressed higher, and extra buttons are needed to suit this modification. The front of the cut coat is shown above, on the left.

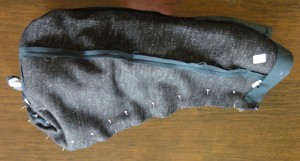
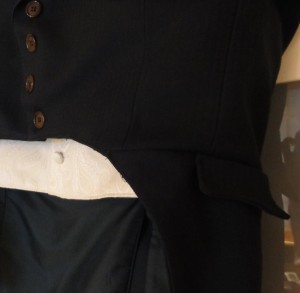
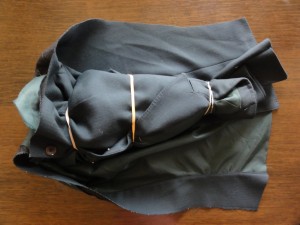
I re-applied the matching fabric facings to the underside of the new shape of the tails. To sew the new contour front edges together, I thought about pinning them under and top-stitching, but I opted to sew a normal seam with the fabric pinned right sides together. That meant I had to turn half the jacket inside out.folded and tied with elastics to sew right sides togetherpinned for sewing, all inside the taildetail of fake side pocket
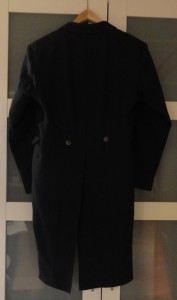
Green tailcoat, back, final except buttons.

Green tailcoat, back, final except buttons.

I tied the upper portion together with elastic bands as shown and laid it inside along the length of the tail, where I’d opened the bottom hem. The tail was pinned right sides together over it all, and sewn with a 1/2″ seam. It was turned it right side out again by pulling it through the open bottom of the tail.

I did a test run with the narrower side before I was brave enough to photograph it for this blog!

I used scraps of fabric to fake Regency by putting flaps that look like pockets at the sides of the jacket. Regency coats sometimes had a cuff, so if your modification allows more fabric, that’s another way to make it more authentic in appearance. Mine did not.

The Regency coat design didn’t always close, but boasted decorative buttons, and men wore them buttoned or unbuttoned, though I’d assume formal circumstances would demand a tightly-buttoned look. The buttons are plastic, and I have yet to purchase proper buttons for the tailcoat. As mentioned earlier, Regency menswear often had fabric-covered buttons in the same colour, though not always the same fabric as the garment. Regency coat fronts have buttons closer together, so my mockup has 4 buttons where the original suit had one.

My intention was self-covered buttons with a brass ring trim from Dressew, and I had enough extra fabric left for them. But I didn’t have enough buttons of the right size, and none of the stores in my city have the snap-on brass trim. I won’t be able to get to Dressew (in Vancouver, BC) prior to the JASNA conference, so I can’t use these buttons at this time.
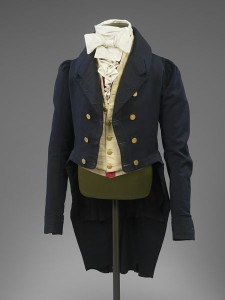
Suit, 1815-1820, The Victoria & Albert Museum.

Suit, 1815-1820, The Victoria & Albert Museum.

The alternatives are thread buttons, which are a lot of work I don’t have time for, and metallic buttons. Brass buttons were a must on blue coats in the Regency, and seen on other colours sometimes, too. The estimated cost for this tailcoat is $20 on sale. Some attractive steel buttons with an insignia will cost about $7 at Fabricland, so next shopping trip, I’ll purchase them.

Making a modern vest into a Regency waistcoat

The modification of a vest into a nice facsimile of a Regency waistcoat was an easy sewing project, once I found the suitable vest. Strange, since I was lamenting that I’d have to make this item from scratch!
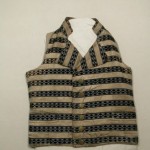
Waistcoat, 1810-20, National Trust Collections
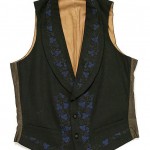
Waistcoat, 1810-20, National Trust Collections

Waistcoat, early 19th century, British, wool and silk. 21" by 33", Metropolitan Museum of Art.

Waistcoat, early 19th century, British, wool and silk. 21″ by 33″, Metropolitan Museum of Art.

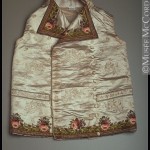
It’s not that Regency waistcoats are so limited in design that it’s impossible to find them: this clothing item was the pizazz in the man’s outfit. Almost limitless possibilities existed for colour and pattern, as seen in the set of thumbnails. Click to see larger images.

The most common fabric was silk, but cotton and linen were worn as well. Some boasted gorgeous detailed embroidery. Similar to the tailcoat, the waistcoat could be single- or double-breasted.
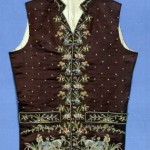
Waistcoat French or English, 1790–1810, Brooklyn Museum of Fine Arts. Note the detailed embroidery.
Waistcoat French or English, 1790–1810, Brooklyn Museum of Fine Arts. Note the detailed embroidery.

Waistcoat, 1805-1810, Mccord Museum, Montreal. Note the embroidery.

Waistcoat, 1805-1810, Mccord Museum, Montreal. Note the embroidery.

The trouble with modern vests is their simplicity. Plain, pin-striped, or herringbone wool or wool-like synthetics are as good as it gets for suit vests, which are difficult to find. Most thrift shop vests are casual, with zippers and fleece and plaid and quilting and such.

Regency vests usually had stand-up collars and lapels, too, which modern vests lack. The balance is that Regency vests were straight across at the bottom, so I knew I had a fabric source for the collar and/or lapels: that double V-shape on a dressy modern vest.
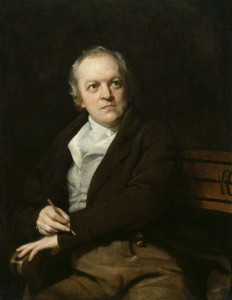
William Blake, by Thomas Phillips, oil on canvas, 1807.

William Blake, by Thomas Phillips, oil on canvas, 1807.

The internet, and used tuxedo rentals, offered more options in terms of colour and pattern, and the satin vests mimic the look of silk. Mr. Suze and I agreed on a paisley pattern for a fullback vest. It cost $11.99, and included a matching bow tie; the total was $25 by the time we paid for shipping.

He selected ivory since it best suited the green coat, compared to the bright colour palette otherwise available. The other colours would be great with a black or blue tailcoat. We had also noted that many of the waistcoats in paintings were white or ivory.

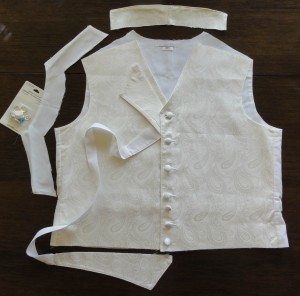
The vest was a bit on the big side, and I realized I could use that to my advantage, as I pinned it up at the shoulders to get extra fabric to make a short stand-up collar, plus raise the V of the neckline higher, to make it more Regency in appearance. The photos show it pinned up before the cut (left) and after the collar is made, but not attached, and the bottom is trimmed (right). Two extra buttons are on the bottom in the photo on the right, to show how it would look if more were added.Ivory paisley waistcoat, pinned for the cuts to the shouldersIvory paisley waistcoat, collar made, showing cut and location for lapel
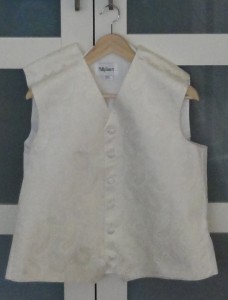


Waistcoat, National Trust Inventory, 1790 - 1810, Cotton and silk, Chastleton House, Oxfordshire.

Waistcoat, National Trust Inventory, 1790 – 1810, Cotton and silk, Chastleton House, Oxfordshire.

Regency waistcoats sometimes had distinct lapels, but more often, the front panel rose to the collar above the button line, and that upper portion was propped open by the cravat. Unfortunately, when I removed the two Vs from the vest’s bottom front to straighten the line for a Regency look, I couldn’t put it on like the latter design, as it was lined in herringbone, the same as the back panel of the vest. The option was a small lapel.
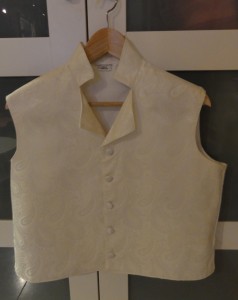
Ivory paisley waistcoat, final


If you have additional fabric, a detail that appears on some, but not all Regency waistcoats is a small pocket on each side, which can be faked with a piece of finished size of about 1-1/2″ by 5″. I tried to make them with what I had left, but they were too small.

This vest had matching satin-covered buttons, perfect for Regency. One was cut off with the bottom V, and there was one spare. Because Regency had lots of buttons, I’ll add more in between the current buttons if I have time after my other projects are complete for Louisville.

The two pieces put together look nice! There’s about 2″-3″ of waistcoat showing below the bottom of the waistline of the tailcoat, a fashionable length. The small lapel on the waistcoat fits neatly into the higher opening at the collar of the tailcoat. We’ll see the shirt ruffles and cravat fill that space in a future post!
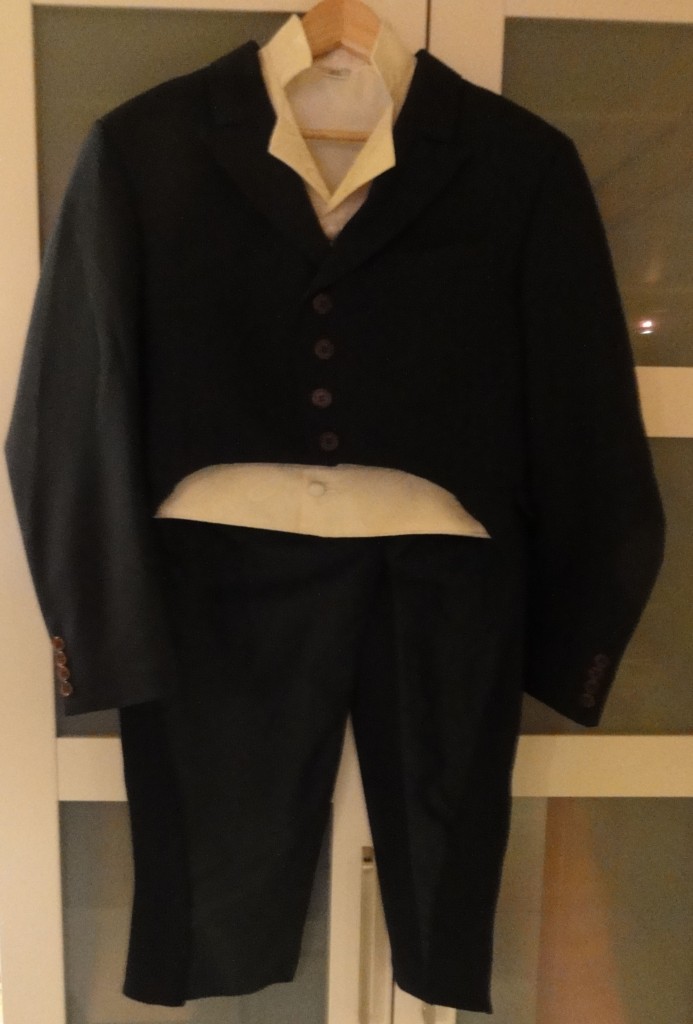
TSRCE for Gentlemen: Green herringbone tailcoat and ivory paisley waistcoat.
TSRCE for Gentlemen: Green herringbone tailcoat and ivory paisley waistcoat.
Next post: Who knows? My time has become filled with editing for myself and a fellow author, fitness programs that stopped for August, as well as new activities.

I’m scrambling to complete the most important Regency costume projects now, as time is running out. The balance of Mr. Suze’s costume will come some time this month, and I have lots of little projects I want to finish for Louisville. If I can manage to write something to accompany photos, that will be the topic for upcoming posts!

Fun with Reticules: The first half-dozen designs!

One cushion cover down, two to go! My favourite, the silk with strands of beads about every half inch along the edge, was the one to start with. Recall that it was $1.99 from Women in Need (WiN). A back zipper limited the use with my standard designs, which yield for four reticules from one cushion, two of each of two designs. Instead, I still used the first design, but made two from the wider section, after which I stared at the leftover panel for a while.

Two small square reticules could be made, but the beads were on two sides of each half. I decided on a three-sided reticule with the row of beads at the top, below a ruffle.

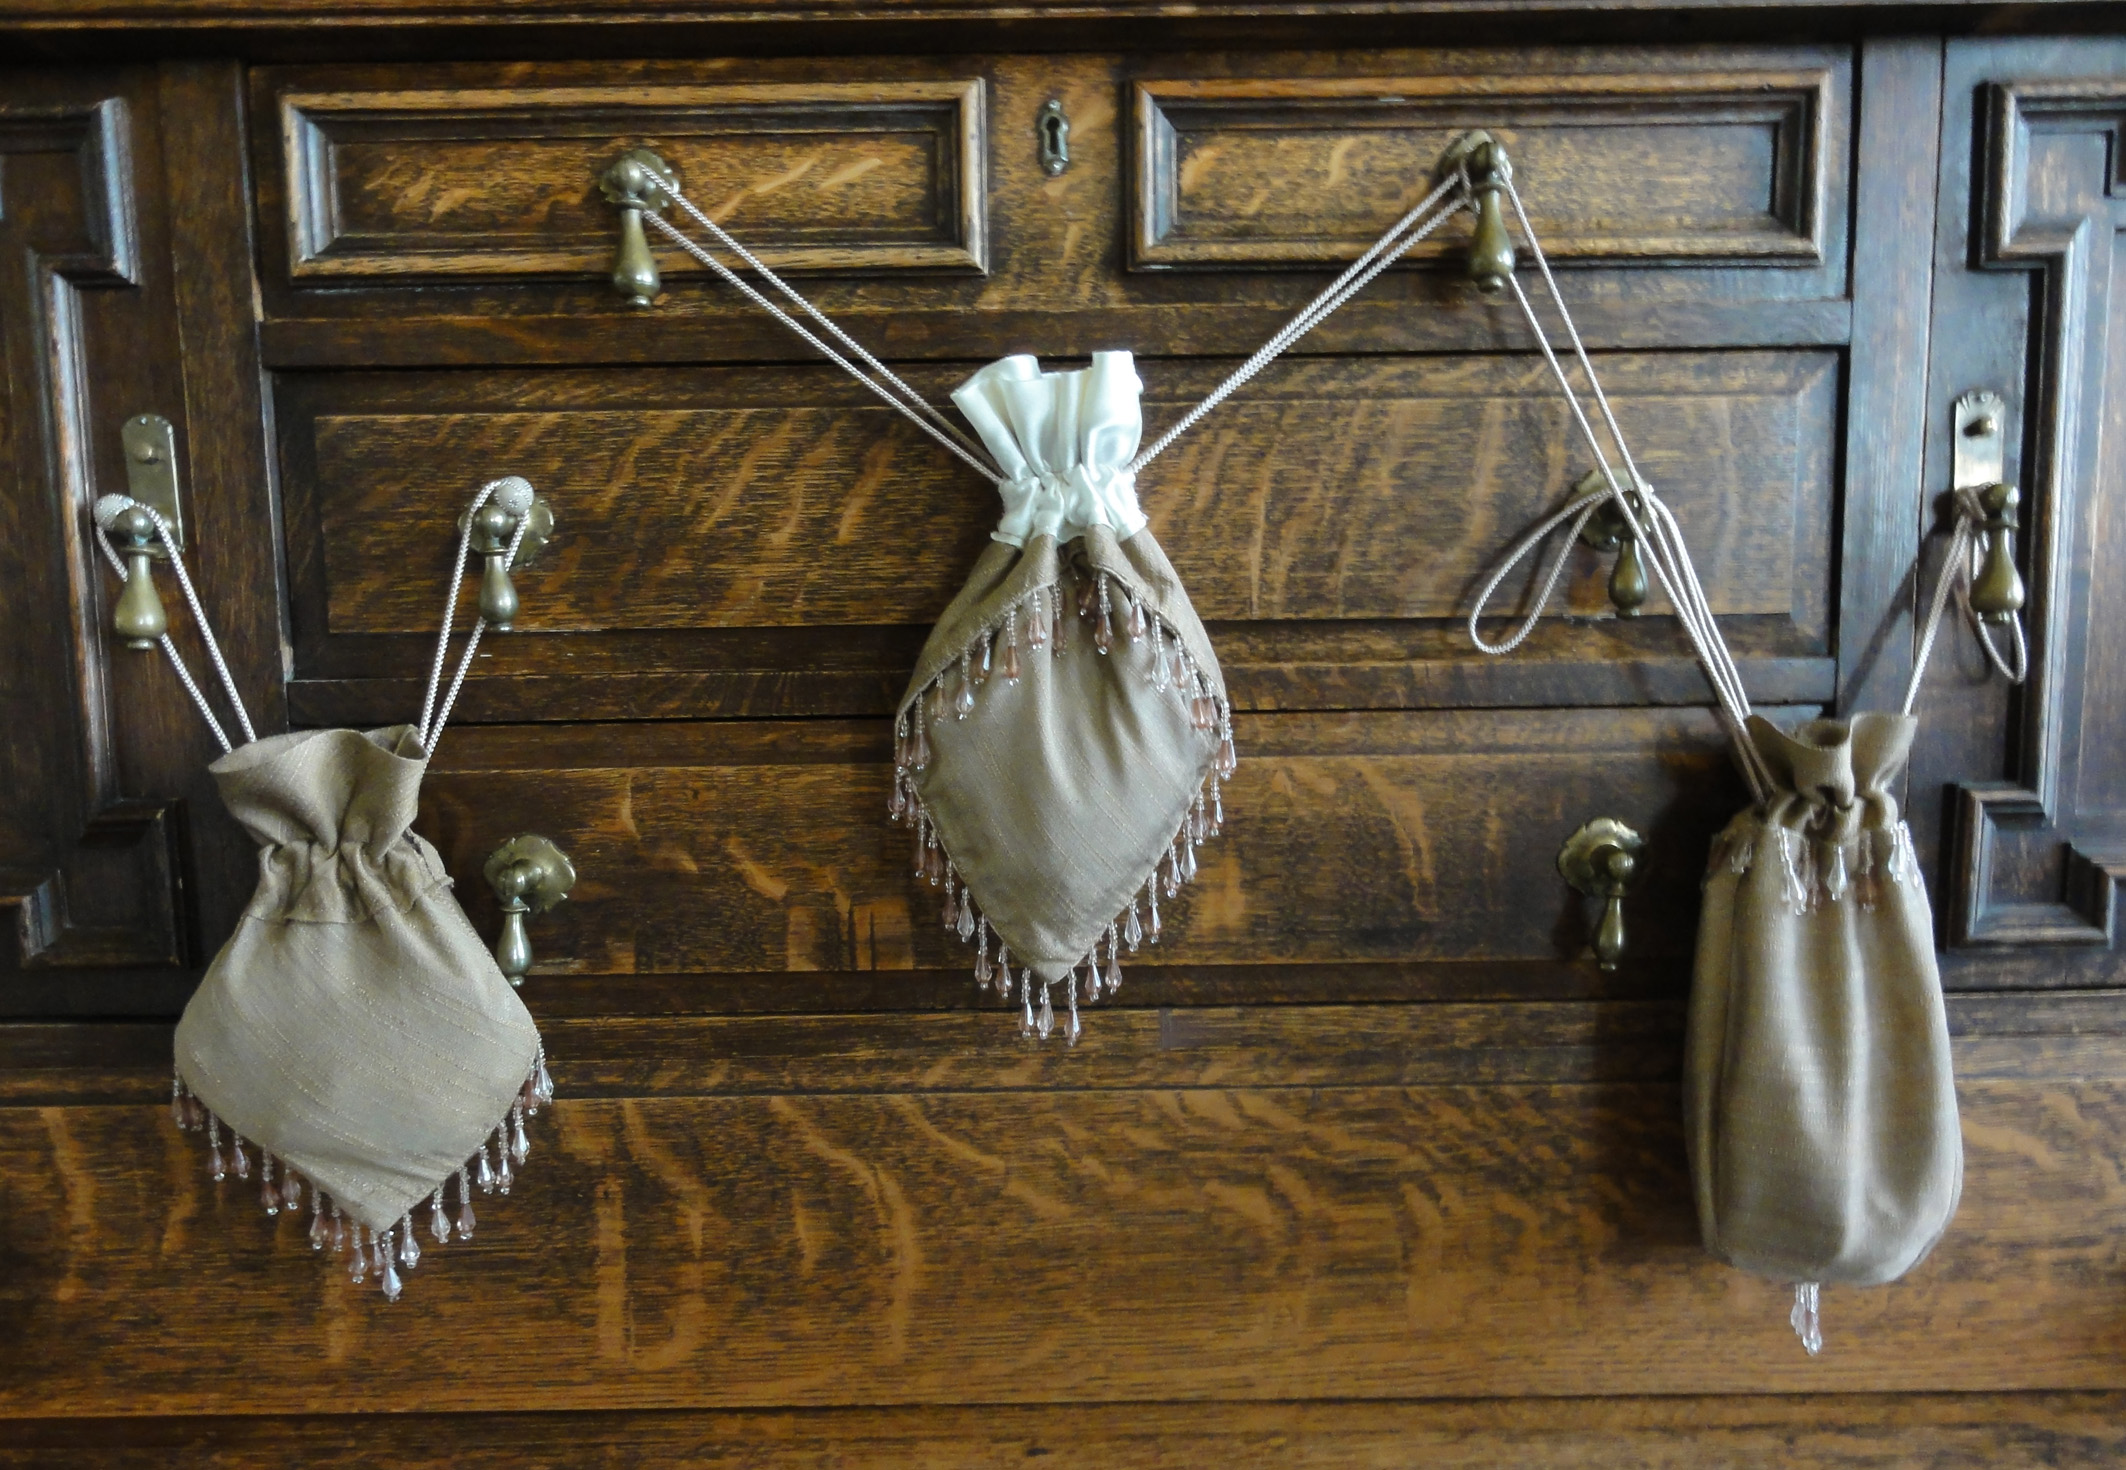
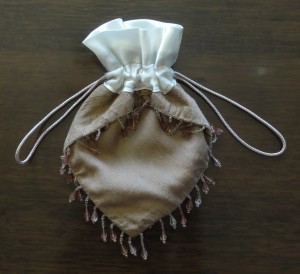
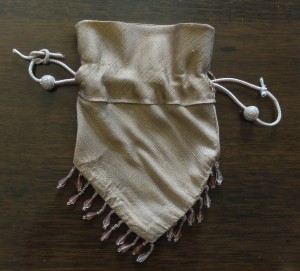
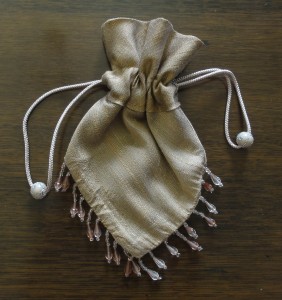
Beaded cushion cover reticules: Design #1, Design #2, and "Bonus Reticule," similar to Design #5 ("The American Girl's Book" Three-Sided Reticule).

Beaded cushion cover reticules: Design #1, Design #2, and “Bonus Reticule,” similar to Design #5 (“The American Girl’s Book” Three-Sided Reticule).

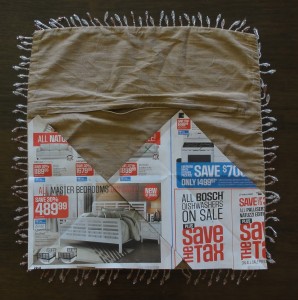
I started by cutting a square piece of newspaper the size of my cushion cover, then folding it on the diagonal and marking the centre. The cushion cover had a zipper about 2/3 of the way across the back, so I cut the pattern to the size of the largest back panel. I realized I’d only get two reticules made from this piece.

Appended to this post are two pdfs: one for the reticules and one for trim. The first has the main patterns for 6 different reticules, the instructions on how to sew the reticules, including special no-sew iron-on tape instructions, and a bonus design for leftover panels. A second pdf describes how to run and trim drawstrings, decorating the reticule body, several ways to line a reticule, and the installation of tassels and other hanging baubles.

with pattern pieces for #1 and #2This cushion cover made Reticule #1 and Reticule #2 (with exposed lining). I marked the design on my newspaper, cut each pattern out, pinned it on the fabric, cut the fabric, and assembled each according to the instructions.

I added beads to the loops of the drawstrings of Reticule #1 because it was simpler in appearance than the other. You could add a lot more decoration to either if desired.beaded cushion cover reticule #1 thread beads and tie with reef knot

Suzan Lauder's Cushion Cover Reticules, Design #1

Suzan Lauder’s Cushion Cover Reticules, Design #1

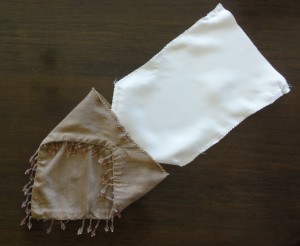
Suzan Lauder's Cushion Cover Reticules, Design #2, "The Envelope Reticule."

Suzan Lauder’s Cushion Cover Reticules, Design #2, “The Envelope Reticule.”

#2 lining goes in wrong side out with outer part right side out


#3 cuts


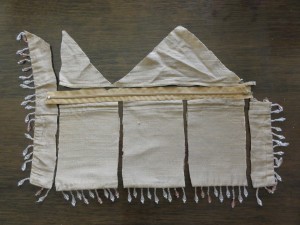
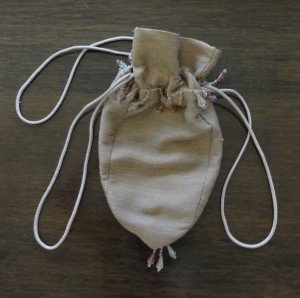
I removed the zipper from the leftover panel and cut the fabric into three strips, then opened them up to make panels for the final reticule. The beads that were on the end wound up at the top of the reticule, since the section below them became the body and the section above, the drawstring casing and a ruffle. This is shown as a “Bonus Reticule on the pdf, which has patterns and instructions for Reticules #1 through #6.

In retrospect, I wish I’d left the row of beads halfway down instead of at the top–in other words, shortened the lower portion rather than trimming the upper portion prior to sewing. I could have used the beads cut off from the sides and tucked them under the edge of the drawstring casing for double the beads.

I also had some difficulty with this one since I made it on the fly, where I’d carefully written the instructions for the others first, made them, then updated the instructions for the learning experience. I found it awkward to sew the beads at the base, and next time, I’ll just re-thread them and hand-sew them on at the end.

Note that similar reticules on Etsy start at $15, and cheap-looking bat-wing ones sell in the $25 range!

Bonus Reticule, similar to Reticule #5.

Bonus Reticule, similar to Reticule #5.

#3 three panels spread out


PDFs for this post:
Cushion Cover Reticule Patterns 1 to 6 by Suzan Lauder
Drawstrings, Trim, Linings, and Tassels for Reticules by Suzan Lauder

~~~

Additional reticule designs for the other two cushions will be shown in a few weeks, and two more pdf’s will be added with that post. The main hangup is I don’t like the designs I have for the next two cushions. A paper fill inside the cording of one swelled when I washed it, so the look of the threads has deteriorated where the brown shows through. I can’t use it where I’d planned: Reticule #6. In addition, the woven pattern on its fabric wouldn’t be shown off to its best in a petal reticule. The other has no trim and is a bit bland, but may turn into a pineapple yet! It would be great if I could find one more.

But do I need to make more reticules to test my patterns and show off my designs? I’m running out of time before the Louisville JASNA AGM. Instead of shopping for more for myself, as I need to sew my last items, and Mr. Suze needs a costume! I’ll post about the Gentleman’s Thrift Shop Regency Costume as I progress.

I’ll divulge that I’m happy with four purchases for my husband’s costume so far:

  • New black leather dressage riding boots for $65 via a local “used items for sale by owner” web site. The fellow bought them for over $200 for a very tall daughter, who didn’t like them. DH will spend $40 to have them cut down 2″, rather than risk blisters behind his knees. From what I can see on the Internet, that’s a huge bargain! DH has hard-to-fit feet, and boots will be easier to fit than dance slippers.
  • Buff-coloured, slim-fitting, fine, faux-suede trousers for $6.99 from The Salvation Army will be made into breeches, with part of a leg used to make the front flap. I already have some nice knee buckles from an old visit to Dressew. They were $1 each.
  • A dark green, wool, cutaway morning coat for $65 (including shipping) from an online seller of former rental tuxedos on eBay. The front bottom edge will be cut to a Regency line, and the lapels tacked a bit higher if possible.
  • An ivory, paisley, satin waistcoat from a different online seller of used tuxedos, for $25 (including shipping), which comes with a matching bow tie! All the men’s vests I saw at local thrift stores were wool, and I was even looking at ladies’, just in case. I’ll cut the modern bottom edge straight across and use the extra pieces to make a collar. The buttons will be replaced with self-covered ones, perhaps using that bow tie. I already have two packs of four self-covered button kits, plus brass trim rings, from Dressew for $0.25 a package!

~~~

Next Post: Faking Regency #1, using my spencer and some artwork and museum pieces for ideas.

~~~

RETICULE GIVE-AWAYS! I’ll be giving away one reticule as part of my upcoming guest post on Austen in August, on August 24, 2015. It will be chosen from the two I improved for the “All the Pretty Little Purses” post (below), and perhaps one or more of the cushion cover reticules from today, or any I make before then! Of course, they’re handmade by a non-crafty person, so there are flaws, but I’ve signed each one inside.

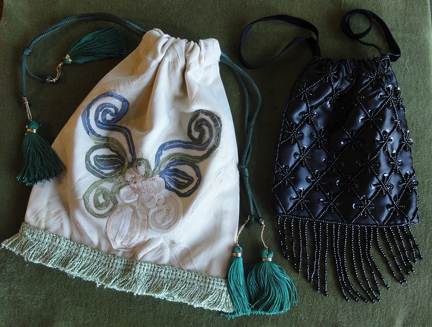
The completed green and black reticules. Note that with the black one, I tied the  loose ends of the velvet ribbon together firmly, and slid them into the ribbon sleeve, rather than add tassels as on the green cord. (The black ribbon was not long enough.) You could also thread beads and sew them onto the ends instead of tassels.

Suzan Lauder’s Thrift Shop Regency Costume Experiment: The completed green and black reticules.