A road trip to Madame Gilflurt’s blog: My guest post on sneaky Regency hands.

I clicked the wrong link. I intended to email the organizer of a Jane Austen ball to tell her about the Thrift Shop Regency Costume Experiment, but I accidentally clicked a link that led me to Madame Gilflurt.

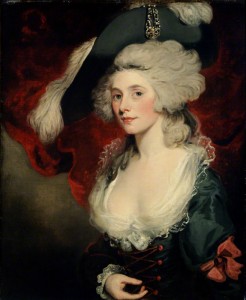
011-Mrs-Robinson-as-Perdita-246x300 as Madame Gilflurt“No problem,” she said, “but would you consider doing a guest post on my blog?”

Of course! I love to hear myself talk, and a busy blog sounded fun. I had an idea for a blog post that came up during my research on Regency gowns, and offered to post it on her blog. She loved the idea. It took a while for me to write the actual text of the post, and by then, Madame Giflurt was in the middle of her own series.

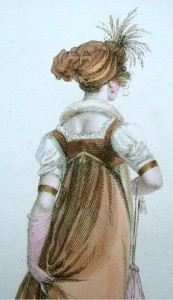
Today, the post is up: The Itch Exposed: A Special Report for the Admirers of Regency and Georgian Fashion. It’s a tongue-in-cheek look at an accidental observation I made while perusing hundreds of Regency gowns in museum pieces, historical paintings, and fashion magazine drawings—the position of some ladies’ hands in drawings from Costume Parisien and other art during the early 1800s. You can read the post at A Covent Garden Gilfllurt’s Guide to Life: Glorious Georgian dispatches from the long 18th century…, Madame Gilflurt’s blog.

La Miroir de la Mode gown from 1803, the inspiration drawing for Suzan Lauder's January 20, 2016 guest post on "A Covent Garden Gilflurt's Guide to Life" blog.

La Miroir de la Mode gown from 1803, the inspiration drawing for Suzan Lauder’s January 20, 2016 guest post on “A Covent Garden Gilflurt’s Guide to Life” blog.

Madame Gilflurt, also known as Catherine Curzon, blogs about the fascinating personalities of history, focused on the 18th Century and Regency periods. Her lively blog includes a number of interesting guest writers each year. She is also the online host for An Evening with Jane Austen, and may just get to see Adrian Lukis’s (Mr. Wickham from the BBC/A&E 1995 production of Pride and Prejudice) phone number come up on her call display from time-to-time. Madame Gilflurt will join road trips with the redhead for a guest post celebrating the release of her non-fiction book Life in the Georgian Court, which is being published by Pen and Sword books in June 2016.

~~~

A reminder to catch up on chapters of Letter from Ramsgate, now posting at A Happy Assembly! We’re past the bad angst and moving towards mush. The comments thread is as much fun as the story!

Graphic art for signature design by L.L. Diamond using an oil painting by Johannes Vermeer: "A Lady Writing."

Graphic art for signature design by L.L. Diamond using an oil painting by Johannes Vermeer: “A Lady Writing.”

~~~

As can be seen on the sidebar of this blog, Then Comes Winter has been selected as a favourite on three top JAFF book blogs! YAY!

~~~

Please comment on this blog (below) at any time, or for today’s guest post, on Madame Gilflurt’s blog!

Two Road Trips for Then Comes Winter (and one for the redhead)

Blog tours are de rigeur for book releases these days. “Flat Stanley” circular tours in three countries–not so common! But Then Comes Winter, the newest offering from Meryton Press, is an unusual book with an unusual team!

Holiday romance anthologies and Austen-inspired anthologies come and go, but this compilation isn’t your standard bundle of specific-era themed short stories or Pride and Prejudice variations. The variety is evident when the only Austen novel missing is Emma, and of the P&P stories, half are loose P&P-esque modern romances with original plot lines. Reviews are coming in with good things to say about every story in the book.

The launch events for this book have been fantastic. A week of quizzes and dozens of prizes just wrapped up, and now a particularly special event has begun for this book.

Author and blogger Natalie Richards suggested we mail a copy of the anthology around and have each author sign her story so in the end, we have a copy of the book signed by all authors and the anthology editor for a give-away. We each have an opportunity to put in a little extra gift for the prize winner before we pass it on.

The "Flat Stanley" book tour route for "Then Comes Winter," the Meryton Press holiday anthology for 2015.

The “Flat Stanley” book tour route for “Then Comes Winter,” the Meryton Press holiday anthology for 2015.

The book’s adventures start and end with our editor, Christina Boyd. The anthology will travel across Canada and into New England, with a virtual trip to Romania before it returns to the US South. It goes cross-country again to work its way up the Pacific coast. The idea was nicknamed “Flat Stanley” after the elementary school activity where children mail a paper doll that travels to family and friends, who photograph themselves with it. Meryton Press will share the progress of the book on A Then Comes Winter Road Trip.

Our “Flat Stanley” left NW Washington on November 25, 2015 and arrived in Victoria, BC, Canada on November 26.

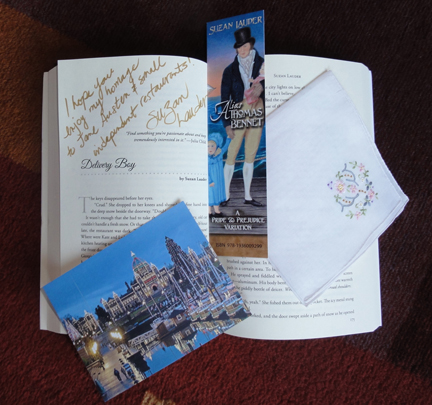
A Victoria, BC postcard, a bookmark for "Alias Thomas Bennet" by Suzan Lauder, and an embroidered handkerchief in honour of the Thrift Shop Regency Costume Experiment are tucked into "Then Comes Winter" at Suzan Lauder's "Delivery Boy" for the Flat Stanley Book Tour.

A Victoria, BC postcard, a bookmark for “Alias Thomas Bennet” by Suzan Lauder, and an embroidered handkerchief in honour of the “Thrift Shop Regency Costume Experiment” are tucked into “Then Comes Winter” at Suzan Lauder’s “Delivery Boy” for the “Flat Stanley” Book Tour.

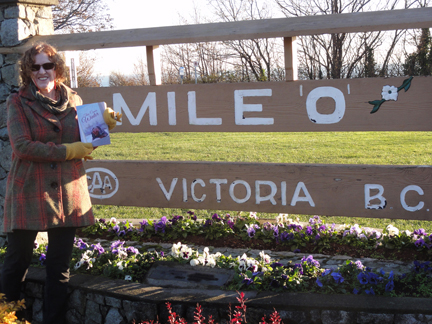
"Then Comes Winter" stops at Mile Zero of the Trans-Canada Highway on November 28, 2015 as part of the "Flat Stanley" book tour. Author Suzan Lauder, with the strait of Georgia in the background.

“Then Comes Winter” stops at Mile Zero of the Trans-Canada Highway on November 28, 2015 as part of the “Flat Stanley” book tour. Author Suzan Lauder, with the Strait of Georgia in the background.

Victoria is the capital city of British Columbia, Canada, and is in a micro-climate at the southeastern tip of Vancouver Island, which means its weather is significantly milder than the rest of Canada and much dryer than the nearby cities of Vancouver, BC, Seattle, WA, or Portland, OR. The island is about the size of the US state of Maryland or 1/4 the size of England. Most of the population is in the southeastern quarter; the Capital Regional District is home to 360,000 people. About three million passengers per year travel to or from the island by ferry or air, including a float plane landing strip in the downtown inner harbour.

Author Suzan Lauder and "Then Comes Winter" anthology at the Terry Fox memorial statue in Victoria, BC, Canada on November 28, 2015 for the "Flat Stanley" book tour.

Author Suzan Lauder and “Then Comes Winter” anthology at the Terry Fox memorial statue in Victoria, BC, Canada on November 28, 2015 for the “Flat Stanley” book tour.

At Mile Zero of the Trans-Canada Highway, we posed with the statue of Terry Fox, a Canadian hero who attempted to run across Canada in 1980 to raise awareness for cancer–and he had one leg. In those days, prosthetics were nowhere as advanced as they are today, so he had a painful, limping sort of gait. He ran into atrocious weather, drivers who ran his group off the road, blisters, shin splints, and language difficulties, but awareness for his Marathon of Hope ramped up as he continued to run. Unfortunately, he was hospitalized with a return of his cancer at about midway across the country and was unable to finish. He passed away just short of his 23rd birthday, after raising an unprecedented $1 for every Canadian, a total of $24M, and facilitating a huge increase in awareness of the need for funding cancer research. The annual Terry Fox Run is now the world’s largest single-day cancer fundraising event.

After its stop with Terry Fox, the book was mailed to Alberta, Canada and author Melanie Stanford of Becoming Fanny, one of the nods to Mansfield Park in the anthology. Watch our A Then Comes Winter Road Trip page and social media for her photos!

~~~

While “Flat Stanley” is in the land of grain fields, dinosaurs, and oil wells, the authors are having yet another party–uh, road trip. Excellent daily activities are planned for the “Then Comes Winter” blog tour. Yeah, we don’t quit having fun for this book!

tcwhorizontalbannerFor my part, I’ve arranged to have a little fictional vignette on Janet Taylor’s More Agreeably Engaged: an interview with the “Delivery Boy,” Billy, from my short story in the anthology.

MAE blog graphic no words n darcy3You may recall that my first guest blog was an author interview with Janet just over two years ago, and she’s the artist who turned her modern, bearded son and toddler granddaughter into the Regency cover of Alias Thomas Bennet! (About half way down.) This visit to her blog on December 2, 2015 will also feature a draw for a copy of the anthology for those who comment on the interview.

Nineteen stops are featured on this blog tour, enough for an editor and 12 authors, plus a few reviews thrown in just for fun, and quite a few chances for give-aways!

~~~

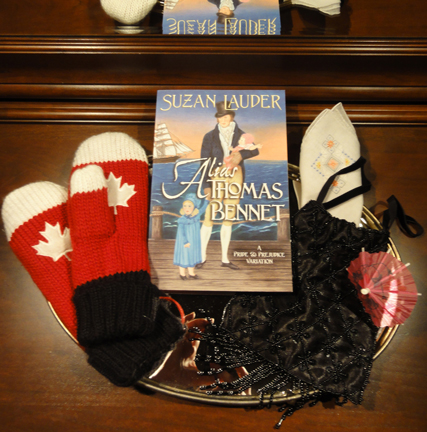
Speaking of prizes, we had a great time during my turn as quizmaster for the Then Comes Winter Launch party, and Lisa Angel won the prize I donated, consisting of nice, warm, Canadian flag mittens, a signed copy of Alias Thomas Bennet, and a signed Regency Reticule from the Thrift Shop Regency Costume Experiment.

Then Comes Winter Launch Party giveaway Suzan Lauder1Kirk Companion won the choice of any Meryton Press book in a random draw for participants in my quiz. Congrats, all those who won prizes, and thanks to all those who participated in the activities all week. I sure had fun!

~~~

I’m going on a little road trip of my own soon: another vacation to Mexico! I’ll still be posting Letter from Ramgate at AHA while I’m away, and I hope to join a local writer’s group, and maybe even make some progress on that new Regency comedy I have in my head!

Wish me “bon voyage!”

Better yet, enter the draw for the “Flat Stanley” book signed by all 13 of us, join in the comments on the blog tour, and comment below on this post! Thanks!

~

January 11, 2016 Update: Keep following the progress of the Then Comes Winter Road Trip on the Meryton Press Blog! It’s has made its way to Bucharest, Romania and MP author Lory Lilian as of this date! Enter the draw for the whole package: the traveling book signed by editor Christina Boyd and all 12 authors plus all the cool gifts Christina and each author have added along the way. The draw is open until Valentine’s Day!


Mr. Darcy in the making: The Thrifty Regency Gentleman’s Costume

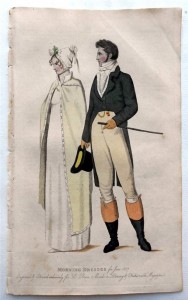
Beau Monde, 1807, Morning Dress

Beau Monde, 1807, Morning Dress

Mr. Suze used to bug me to let him read my Regency writing. I told him he’d have to read Jane Austen’s Pride and Prejudice first, so he’d understand it better. I didn’t expect him to actually read my favourite novel, but he did! What choice did I have but to share Alias Thomas Bennet with him? I was preparing to submit it to Meryton Press at the time, and he was a good final cold reader.

He became a big fan of my writing, and joined me to watch the A&E/BBC 1995 production of Pride and Prejudice. A good sport, he went along with me on half a dozen meet-ups of my online friends from A Happy Assembly while we were on vacation in Washington, Oregon, and California over several road trips.

When I told him I wanted to go to Louisville, KY for the JASNA AGM, he said I could go on my own; he’d had enough of Jane Austen events. Over time, he softened to say he’d join me and enjoy the city on his own while I was at the conference, and later, he agreed to dress in a Regency costume for the Saturday festivities. In May, my vintage and thrift shop trips to finalize my own costume included searches for his items. I quickly got the lay of the land.

For this post, I’ll speak to two items: the tailcoat and waistcoat. The rest of the costume will be seen in future posts.

I saw only three tailcoats in vintage and thrift stores, at $65 and $35, but two were too large and one, too small. There were no suitable vests for a waistcoat, even if I looked at size extra-large in Ladies’ wear. Mr. Suze is not a large man, and I thought if I did a good job, he’d be okay with this.

Please note these are sewing projects. The same result will not be easy to achieve with no-sew iron-on tape, and the fabric is too heavy for that product in any case.

Upcycling a garment into a Regency tailcoat
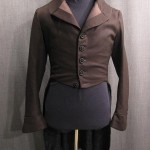
Coat, 1810, dark brown herringbone.
Coat, 1810, dark brown herringbone.

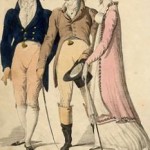
Le Beau Monde, 1807
Le Beau Monde, 1807

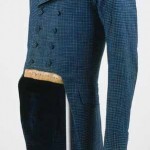
Regency tailcoat 1815, Metropolitan Museum of Art
Regency tailcoat 1815, Metropolitan Museum of Art

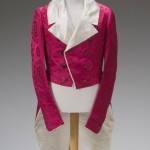
Post-Regency example for fun! 1825-1830 dress coat

Post-Regency example for fun! 1825-1830 dress coat

Regency tailcoats were by no means all the same. They came in many colours, and some had interesting textures, as shown in these thumbnails, which can be enlarged if you click on them.
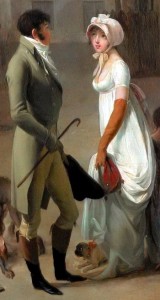
 

Louis-Léopold Boilly - The Arrival of a Stage-coach in the Courtyard of the Messageries (Detail), 1803.

Louis-Léopold Boilly – The Arrival of a Stage-coach in the Courtyard of the Messageries (Detail), 1803.

Both single and double-breasted designs were stylish, but double-breasted appears more frequently in the examples I could find, and I’ve been told they outnumbered single-breasted by about 2:1. Lapels tended to be wider, and the opening quite high in comparison to modern menswear.

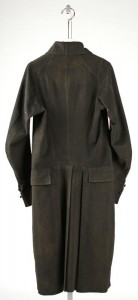
Many modern tuxedo tailcoats require slight modifications to straighten the bottom front to match the style of the early 19th Century. The Regency tailcoat has no back waist seams: each panel is one piece of fabric, whereas post-Regency, the seam at the waistline came into play, and continues in modern tailcoats.

Because I couldn’t easily find a used tailcoat in thrift shops, I looked to the Internet, where previous rental tuxedo coats are readily available at under $100. Problems that rule out some modern tuxedo tailcoats include trim such as velvet or satin that do not look Regency. Shawl collars or narrow lapels are common. Most are black, white, or grey. Black would do for a court suit or a formal ball, but the other two would not work, unless I decided to buy a white one and dye it the popular dark blue of the Regency.
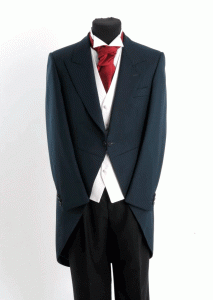
Modern morning coat, dark green wool, herringbone.
Modern morning coat, dark green wool, herringbone.

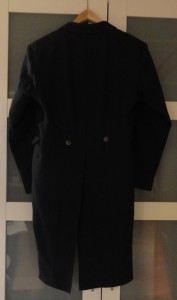
Back view of Regency tail coat to show the single panels of fabric, with no waist seams.

Back view of Regency tail coat to show the single panels of fabric, with no waist seams.

A wool morning coat in dark green, with a fine herringbone pattern and slightly wider lapels, caught my eye and got approval from Mr. Suze. Of course, he doesn’t know that Jane Austen fans love the idea of a green coat ever since Andrew Davies had Colin Firth choose it to ride into Lambton the day Elizabeth got her fateful letter from Jane!

This coat appeared to have no back waist seam in the photos online, but when it arrived, it did. Also, the collar was not self-lined, so it would have to stay down. Oh, well, we knew we were not going to be perfect by any stretch of the imagination, and it fit well, so that was a huge relief. It was advertised on eBay at £25, or $80 with shipping.
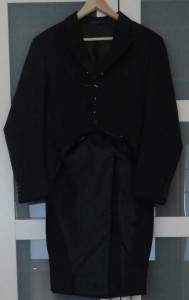
Green tailcoat after first cut of shape of front opening and tails.
Green tailcoat after first cut of shape of front opening and tails.

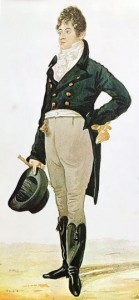
George "Beau" Brummell, watercolor by Richard Dighton, 1805.

George “Beau” Brummell, watercolor by Richard Dighton, 1805.

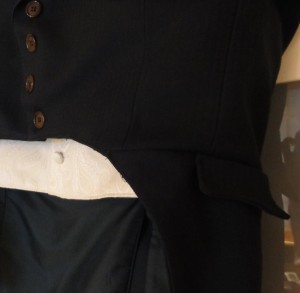
Mr. Suze is a bit particular about his clothing. His father was a menswear tailor at the Canadian institution of high-class shopping: Eaton’s. My husband is accustomed to a well-fitted, flattering suit in quality fabric, and that was my goal for the Regency tailcoat. We looked at numerous examples from museum pieces and fashion pages like Ackermann’s, and decided on a full curve at the waist, as opposed to a straighter line. A painting of Beau Brummel served as reference. The line was pinned while “my Beau” wore the coat, and the future wearer did a mirror check to approve it. To further achieve a Regency look, the lapels were pressed higher, and extra buttons are needed to suit this modification. The front of the cut coat is shown above, on the left.

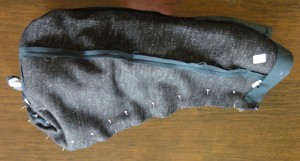
I re-applied the matching fabric facings to the underside of the new shape of the tails. To sew the new contour front edges together, I thought about pinning them under and top-stitching, but I opted to sew a normal seam with the fabric pinned right sides together. That meant I had to turn half the jacket inside out.folded and tied with elastics to sew right sides togetherpinned for sewing, all inside the taildetail of fake side pocket
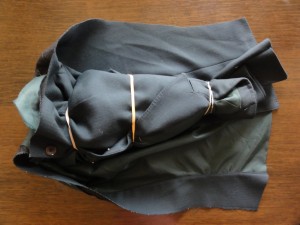
Green tailcoat, back, final except buttons.

Green tailcoat, back, final except buttons.

I tied the upper portion together with elastic bands as shown and laid it inside along the length of the tail, where I’d opened the bottom hem. The tail was pinned right sides together over it all, and sewn with a 1/2″ seam. It was turned it right side out again by pulling it through the open bottom of the tail.

I did a test run with the narrower side before I was brave enough to photograph it for this blog!

I used scraps of fabric to fake Regency by putting flaps that look like pockets at the sides of the jacket. Regency coats sometimes had a cuff, so if your modification allows more fabric, that’s another way to make it more authentic in appearance. Mine did not.

The Regency coat design didn’t always close, but boasted decorative buttons, and men wore them buttoned or unbuttoned, though I’d assume formal circumstances would demand a tightly-buttoned look. The buttons are plastic, and I have yet to purchase proper buttons for the tailcoat. As mentioned earlier, Regency menswear often had fabric-covered buttons in the same colour, though not always the same fabric as the garment. Regency coat fronts have buttons closer together, so my mockup has 4 buttons where the original suit had one.

My intention was self-covered buttons with a brass ring trim from Dressew, and I had enough extra fabric left for them. But I didn’t have enough buttons of the right size, and none of the stores in my city have the snap-on brass trim. I won’t be able to get to Dressew (in Vancouver, BC) prior to the JASNA conference, so I can’t use these buttons at this time.
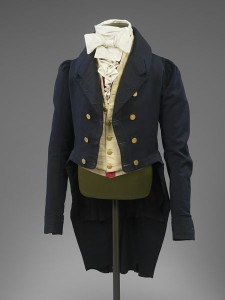
Suit, 1815-1820, The Victoria & Albert Museum.

Suit, 1815-1820, The Victoria & Albert Museum.

The alternatives are thread buttons, which are a lot of work I don’t have time for, and metallic buttons. Brass buttons were a must on blue coats in the Regency, and seen on other colours sometimes, too. The estimated cost for this tailcoat is $20 on sale. Some attractive steel buttons with an insignia will cost about $7 at Fabricland, so next shopping trip, I’ll purchase them.

Making a modern vest into a Regency waistcoat

The modification of a vest into a nice facsimile of a Regency waistcoat was an easy sewing project, once I found the suitable vest. Strange, since I was lamenting that I’d have to make this item from scratch!
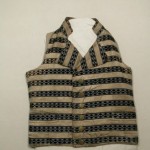
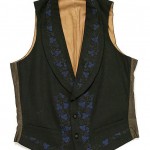
Waistcoat, 1810-20, National Trust Collections
Waistcoat, 1810-20, National Trust Collections

Waistcoat, early 19th century, British, wool and silk. 21" by 33", Metropolitan Museum of Art.

Waistcoat, early 19th century, British, wool and silk. 21″ by 33″, Metropolitan Museum of Art.

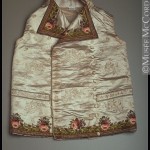
It’s not that Regency waistcoats are so limited in design that it’s impossible to find them: this clothing item was the pizazz in the man’s outfit. Almost limitless possibilities existed for colour and pattern, as seen in the set of thumbnails. Click to see larger images.

The most common fabric was silk, but cotton and linen were worn as well. Some boasted gorgeous detailed embroidery. Similar to the tailcoat, the waistcoat could be single- or double-breasted.
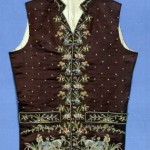
Waistcoat French or English, 1790–1810, Brooklyn Museum of Fine Arts. Note the detailed embroidery.
Waistcoat French or English, 1790–1810, Brooklyn Museum of Fine Arts. Note the detailed embroidery.

Waistcoat, 1805-1810, Mccord Museum, Montreal. Note the embroidery.

Waistcoat, 1805-1810, Mccord Museum, Montreal. Note the embroidery.

The trouble with modern vests is their simplicity. Plain, pin-striped, or herringbone wool or wool-like synthetics are as good as it gets for suit vests, which are difficult to find. Most thrift shop vests are casual, with zippers and fleece and plaid and quilting and such.

Regency vests usually had stand-up collars and lapels, too, which modern vests lack. The balance is that Regency vests were straight across at the bottom, so I knew I had a fabric source for the collar and/or lapels: that double V-shape on a dressy modern vest.
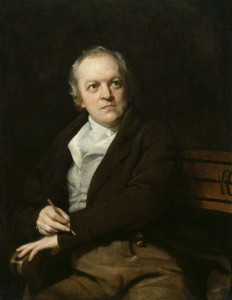
William Blake, by Thomas Phillips, oil on canvas, 1807.

William Blake, by Thomas Phillips, oil on canvas, 1807.

The internet, and used tuxedo rentals, offered more options in terms of colour and pattern, and the satin vests mimic the look of silk. Mr. Suze and I agreed on a paisley pattern for a fullback vest. It cost $11.99, and included a matching bow tie; the total was $25 by the time we paid for shipping.

He selected ivory since it best suited the green coat, compared to the bright colour palette otherwise available. The other colours would be great with a black or blue tailcoat. We had also noted that many of the waistcoats in paintings were white or ivory.

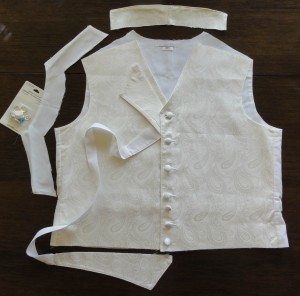
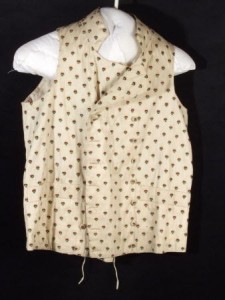
The vest was a bit on the big side, and I realized I could use that to my advantage, as I pinned it up at the shoulders to get extra fabric to make a short stand-up collar, plus raise the V of the neckline higher, to make it more Regency in appearance. The photos show it pinned up before the cut (left) and after the collar is made, but not attached, and the bottom is trimmed (right). Two extra buttons are on the bottom in the photo on the right, to show how it would look if more were added.Ivory paisley waistcoat, pinned for the cuts to the shouldersIvory paisley waistcoat, collar made, showing cut and location for lapel
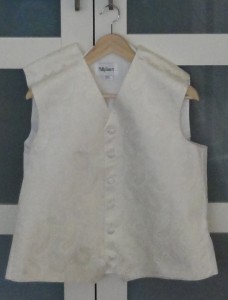


Waistcoat, National Trust Inventory, 1790 - 1810, Cotton and silk, Chastleton House, Oxfordshire.

Waistcoat, National Trust Inventory, 1790 – 1810, Cotton and silk, Chastleton House, Oxfordshire.

Regency waistcoats sometimes had distinct lapels, but more often, the front panel rose to the collar above the button line, and that upper portion was propped open by the cravat. Unfortunately, when I removed the two Vs from the vest’s bottom front to straighten the line for a Regency look, I couldn’t put it on like the latter design, as it was lined in herringbone, the same as the back panel of the vest. The option was a small lapel.
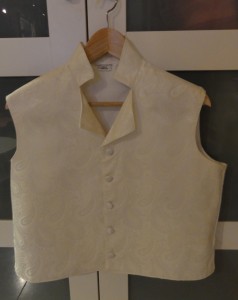
Ivory paisley waistcoat, final


If you have additional fabric, a detail that appears on some, but not all Regency waistcoats is a small pocket on each side, which can be faked with a piece of finished size of about 1-1/2″ by 5″. I tried to make them with what I had left, but they were too small.

This vest had matching satin-covered buttons, perfect for Regency. One was cut off with the bottom V, and there was one spare. Because Regency had lots of buttons, I’ll add more in between the current buttons if I have time after my other projects are complete for Louisville.

The two pieces put together look nice! There’s about 2″-3″ of waistcoat showing below the bottom of the waistline of the tailcoat, a fashionable length. The small lapel on the waistcoat fits neatly into the higher opening at the collar of the tailcoat. We’ll see the shirt ruffles and cravat fill that space in a future post!
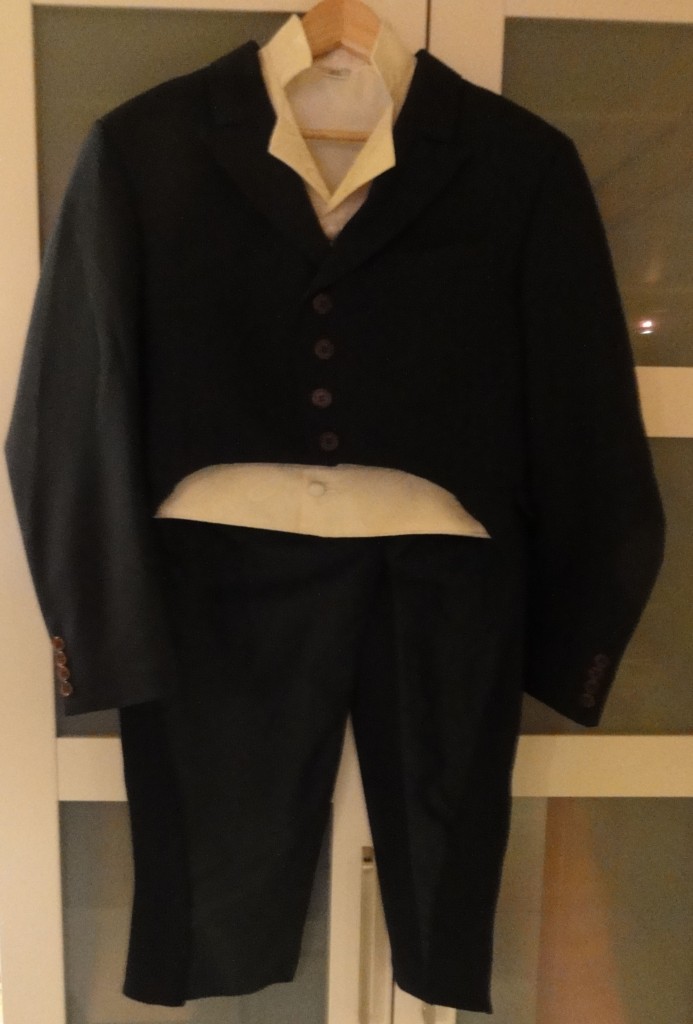
TSRCE for Gentlemen: Green herringbone tailcoat and ivory paisley waistcoat.

TSRCE for Gentlemen: Green herringbone tailcoat and ivory paisley waistcoat.

Next post: Who knows? My time has become filled with editing for myself and a fellow author, fitness programs that stopped for August, as well as new activities.

I’m scrambling to complete the most important Regency costume projects now, as time is running out. The balance of Mr. Suze’s costume will come some time this month, and I have lots of little projects I want to finish for Louisville. If I can manage to write something to accompany photos, that will be the topic for upcoming posts!

Book Club Questions for “Alias Thomas Bennet”
Who would expect heavy rains to be so welcome? After the recent extended drought in Los Angeles and Orange County, California, my home-away-from home again this weekend, it makes sense. My Chat Chit friends’ gardens will green up! Of course, I attribute it to the engineer friend who passed away this week: he’s up there above us, and repaired the systems!

The last time I was here, I was part of a “Meet the Author” event with “The Real Orange County Book Club.” I enjoyed meeting another of their members yesterday. Her enthusiasm about my book and writing inspired me to share the Book Club Questions I wrote for their use when my novel, Alias Thomas Bennet, was their monthly read for September 2014.

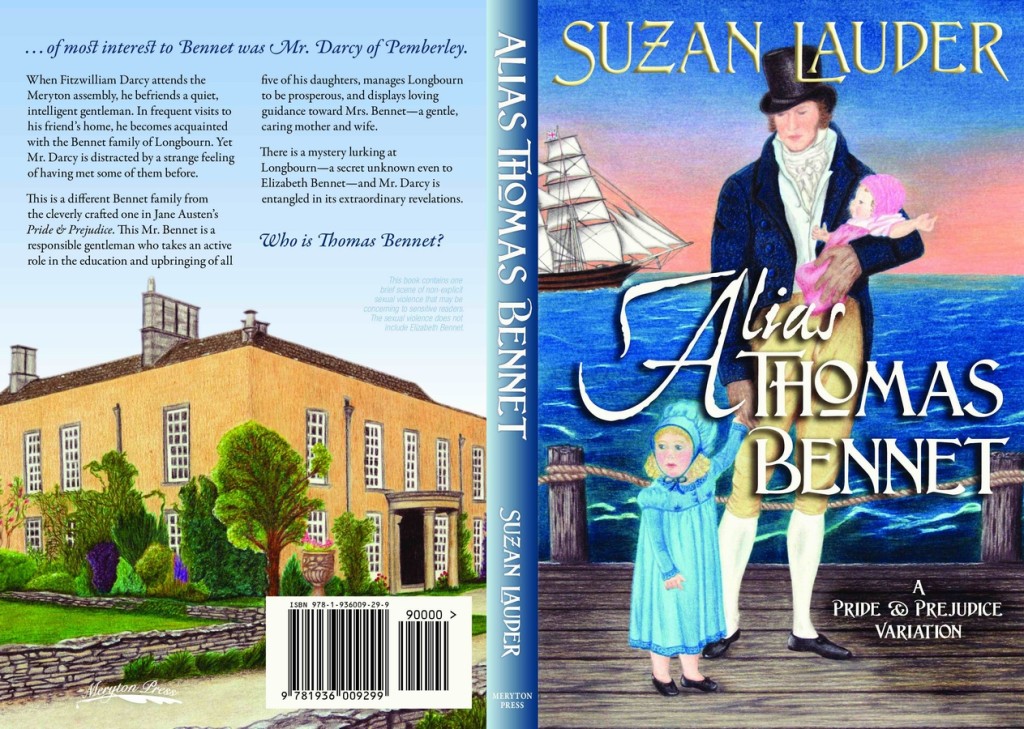
Alias Thomas Bennet 1263 x 900Alias Thomas Bennet by Suzan Lauder
Book Club Questions

1. Alias Thomas Bennet is inspired by Jane Austen’s Pride and Prejudice and follows its general plot line, which in Fan Fiction is referred to as “canon.” Discuss the differences between “canon” and Alias Thomas Bennet. Do you agree with how the changes have been made? What could be done differently?

2. Outside of this book, Fan Fiction encompasses almost every area of storytelling in our culture: from The X Files to Mulan, Little Women to Wolverine, the online community of re-writes is immense. Discuss your familiarity and reactions to the idea of Fan Fiction. What other examples of Fan Fiction are you aware of? (Hint: famous trilogy based on Twilight!)

3. Maria Lucas is a minor character in the original Pride and Prejudice. What do you think of her role in Alias Thomas Bennet? Discuss her motivation and the societal aspects that compelled her.

4. A mature scene told from Darcy’s point of view has been controversial with readers. How would this differ if it was presented by an omniscient narrator as in most mature novels? Do you think it would be different if it was not a fantasy, but a sex scene? What is your reaction to the concept that Darcy ultimately decided to propose because of his desire? Do you think there might be some element of that in Pride and Prejudice?

5. The story begins with a series of flashbacks. Talk about your reaction to the exposure of information in the flashbacks, your understanding of them, and your suspicions as they evolved with the information in each vignette. Discuss how close your conjecture was to the exposé in chapter 8 and 9.

6. Wickham is a particularly evil villain in this adaptation. Some might criticise this as a ploy to victimize the heroine in order to add importance to the role of the hero. What is your view? What do you think about the outcome for him in this book? What do you think about Elizabeth’s reactions?

7. What is your impression of Fanny and Thomas Bennet/Lord Shelton? Do you think they are over-played, and the story should be more about Elizabeth and Darcy, as in Pride and Prejudice? Why?

8. In canon, Fanny Bennet is flighty and distractible. In Alias Thomas Bennet, it’s implied she suffers from PTSD. What do you think of this possibility? Why or why not is it a plausible explanation for her canon personality?

9. Discuss what life would have been like on a sailing ship for a month with small children, eating only hard tack (cracker-like bread) and gruel.

10. Some readers love the gown descriptions, and some hate them. What do you think?

11. Discuss what it might have felt like for Elizabeth and Jane to suddenly become the focus of society, when before, they were unknown. What do you think of this class structure issue? How does it compare with how people are judged today? What are the similarities and differences?

12. What did you like best about this novel? What would you change?

~~~

Please share any special thoughts that came up as you read this list, as I love feedback, and other readers would love to hear about it as well!

Shiny things expose my inner crow!

I was second last in the gift draw. I took the brown paper bag, reached my hand in, and felt around. Unable to discern by touch what the small items were, I grasped one at random. When I extracted my hand and opened it, I found BIG SPARKLE.

It turned out to be a key chain, roughly four inches long, and gaudy doesn’t begin to communicate its assault on my eyes. About 8 huge plastic gems hung in a cluster from large gold links, and below them dangled a tiny metal purse that would open were it not linked into the rest. When it moved even a tiny bit, it rattled. Yeah, I thought, it should have made the warning sound before I pulled it out of the bag.

I peered at the magnetic post-it grocery list note pad another participant won and felt the world was truly unfair. Yet when I examined the face of every other person, I realized it would not be in good form to say so. No one seemed to think my gift was the most awful, tasteless joke that was ever played upon someone. The sneer twitching at the corner of my lip was held in check, and instead, I said, “Oh, bling!” in an affected tone.

Thing is, I can’t bear to throw the thing away. I keep trying to think of someone to give it to who would appreciate it, or a way to give it some sort of useful employment. It moves from container to container as a “potential” and most recently, wound up in my kit of beads and baubles for my Regency costume. But once again, it’s proven to itself as a useless, gaudy thing. It has a few friends in that bag, but none as sparkly.

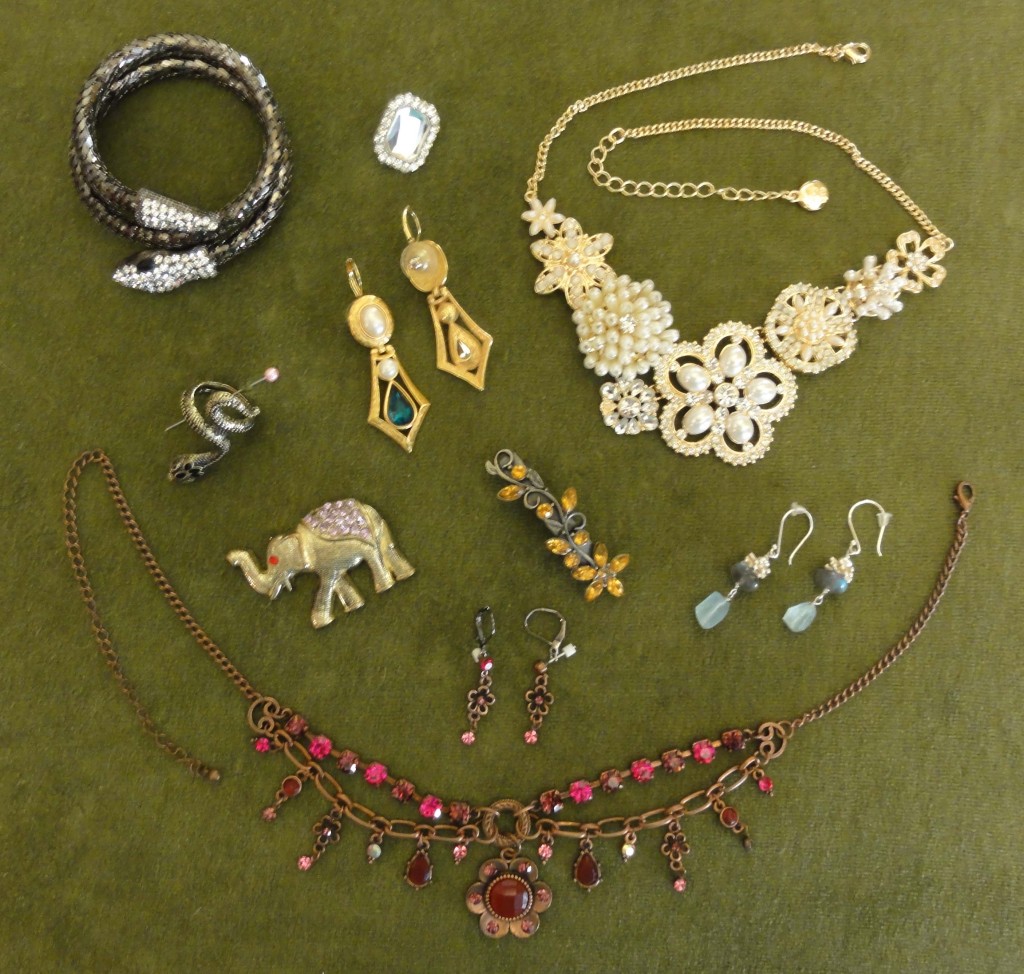
Like the crow, we’re all attracted to sparkly, otherwise there would never have been a gold rush or jewel thieves, and MJ’s glove would be boring. Many like to look at beautiful jewelry but don’t wear it. What I choose tends to be simple but unique. When I checked my own stash for potential items for my Regency costume, I found a few items that looked right to me. Then I did my research, and realized they were close, but some needed help. It was not impossible.my jewelry

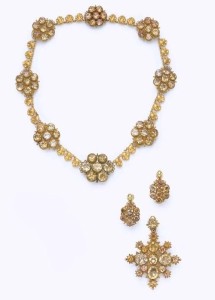
Citrine jewelry 1820

Citrine jewelry 1820

Necklace 41.9 cm long, circa 1810.

Necklace 41.9 cm long, circa 1810.

In addition, I saw things in the period examples that I liked but would not normally consider wearing. Just as I’m not one to wear a hat with feathers, they became desirable when thought of as part of a costume, an act. A sale purchase from Joe Fresh was added to the small group of costume items of my own: a “diamond and freshwater pearl” choker in a floral pattern, as seen at the top of the photo above.

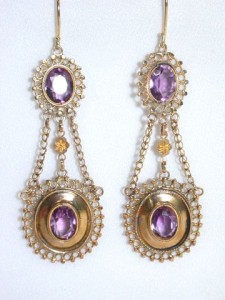
Numerous perusals of discount and second-hand store costume jewelry racks did not offer a suitable pair of ear-bobs to go with it. Anything close was on studs, and in the Regency, stud-backed earrings didn’t exist; they were all hung on wire hooks. I knew a simple way to modify them, and even had the right earring parts—years ago, I made earrings, hence, my experience with cam-shaped circles of metal. But I couldn’t wear the ones in my stash, as they were cheap gold imitations. Like many, I have a nickel allergy, and most inexpensive jewelry contains nickel as a hardener. I can wear costume jewelry for short periods of time, but my skin becomes inflamed easily.

Earrings "The Three Graces" 1810

Earrings “The Three Graces” 1810

Last week, I found some lead and nickel free earring parts on a two-for-one sale at a fabric store. Two pairs of earrings I owned were modified using an earring snap hook and a very small split ring. The split ring is like a super-tiny version of a key ring, and similar to work with, but saves using needle-nose pliers and making a cam out of a loop, or accidentally leaving the tiniest gap and then losing the earring, both of which are my constant experience.

I clamped the earring to the split ring, using a plastic back in one case so it was less visible (I’ve left one loose so you can see the construction), and a large back in the other, due to the weight and shape of the earring. I also have a new pair of labradorite and aquamarine earrings on silver hooks, a gift from my husband that I hoped would be appropriate. However, I could not find any examples of a rough-cut stone, so they won’t be part of the Regency costume. No big deal, since they’ll get plenty of showtime on regular days.

There’s also a leaf-themed barrette and a purple-jewelled elephant that you’ve already seen with turban-making, and they’ve become brooches. The elephant came from a card holder, and is symbolic of the final scene in my latest story (though the blog has been taking my writing time!), Letter from Ramsgate, which will be posted at A Happy Assembly. (If you’ve never been there, it’s a Jane Austen fan site, full of Austen-inspired fiction and discussion threads. Registration is required, but membership is free. Many published authors post their stories there first, and free unedited versions often still remain, alongside many unpublished and often better stories.)

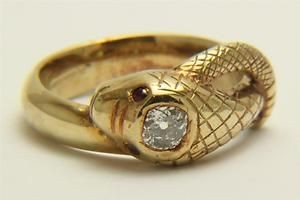
A Magnificent Georgian 0.75ct Old Cut Diamond Snake Ring In 18ct Gold Circa 1800

A Magnificent Georgian 0.75ct Old Cut Diamond Snake Ring In 18ct Gold Circa 1800

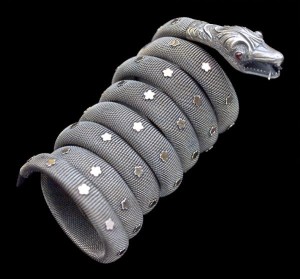
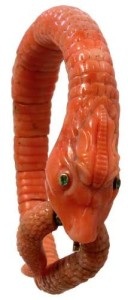
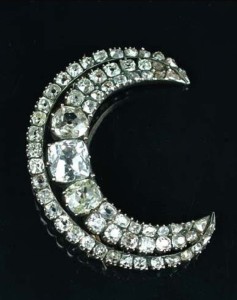
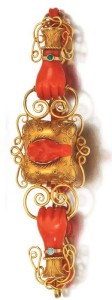
But what’s with the snake stuff in my collection? This was one of the things that I found amazing and fascinating when I started to pay attention to Regency jewelry. As mentioned before, floral patterns were popular, as were crosses made with elongated stones, astronomical symbolism like moon and star themes, and the serpent. Hands on bracelets were another theme that I found unusual. I’ve selected a few examples for you to compare.

My snakes were $1 for the ring at a thrift store and $12 for the bracelet on sale at a drugstore. I used to have a brooch with the moon and stars that I gave to charity years ago, so maybe you still have one lurking about!

Silver mesh snake bracelet with garnet eyes. French c1800. Tadema Gallery.

Silver mesh snake bracelet with garnet eyes. French c1800. Tadema Gallery.

A ninenteenth-century carved coral bracelet, formed as a coiled serpent with gold-set emerald eyes; the snake biting its tail is a symbol of eternity.

A ninenteenth-century carved coral bracelet, formed as a coiled serpent with gold-set emerald eyes; the snake biting its tail is a symbol of eternity.

A Georgian diamond crescent brooch, diameter 4.2cm,  circa 1800

A Georgian diamond crescent brooch, diameter 4.2cm, circa 1800

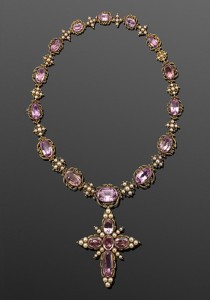
Georgian Foil-backed Pink Topaz and Pearl Riviere with Cross Pendant, circa 1820

Georgian Foil-backed Pink Topaz and Pearl Riviere with Cross Pendant, circa 1820

Gold and coral bracelet, length 185mm, early 19th century.

Gold and coral bracelet, length 185mm, early 19th century.


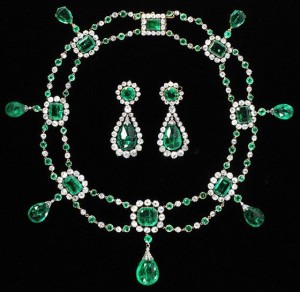
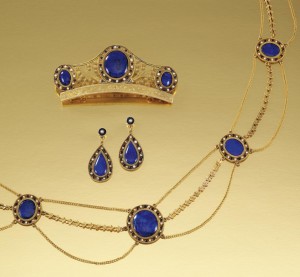
The square-cut stone with its ring of “diamonds” came from a pair of gloves; one was lost, but this one will clamp over my own modest ring. It was not uncommon to wear costume jewelry. Paste and real stones were seen in many shapes, as were pearls of all types. Turquoise and red coral were also popular, the latter seen in one of the snakes and in many bead necklaces of the time. Multiple strands tied together with stones were an interesting design seen on several pieces.

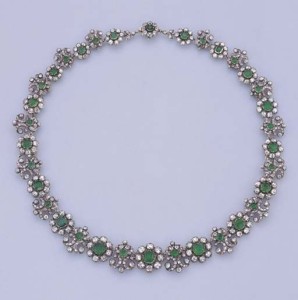
Faceted table-cut emeralds in borders of brilliant-cut diamonds; briolette emerald drops; open-set in gold and silver, 1806

Faceted table-cut emeralds in borders of brilliant-cut diamonds; briolette emerald drops; open-set in gold and silver, 1806

Gold, enamel, seed pearl, and lapis lazuli parure consisting of  comb, three strand necklace, and ear-bobs, circa 1810.

Gold, enamel, seed pearl, and lapis lazuli parure consisting of comb, three strand necklace, and ear-bobs, circa 1810.


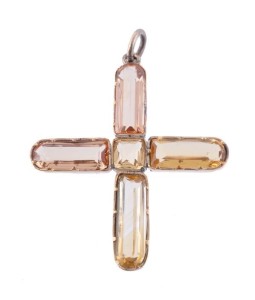
Wealthy women wore more elaborate jewels, and people of more modest means may only wear a pendant on a chain, like the topaz crosses Jane and Cassandra Austen wore, a gift from their sailor brother Charles. In Mansfield Park, Austen included a plot point where Fanny Price is given a similar amber cross from her brother William, and Mary Crawford charms Fanny with a gift of a chain to wear it with. You can read more about it in the article “A Very Pretty Amber Cross.”

Topaz and citrine cross, circa 1820

Topaz and citrine cross, circa 1820

The costumers for the A&E/BBC Pride and Prejudice series in 1995 had Elizabeth and Jane Bennet wearing crosses like Jane and Cassandra Austen’s, but with red stones that many viewers have imagined as garnet or ruby.

When deciding on your jewelry, make sure you’re not wearing a silk gown with no jewels, or a cotton one along with too many large stones.

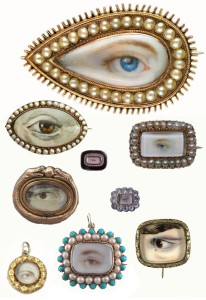
Various "lovers eye" pieces of jewelry.

Various “lovers eye” pieces of jewelry.

Romantic themes were played out in the “lover’s eye,” a miniature painting set in a brooch, pendant, or ring. If you’re an artist, this would be a cool thing to reproduce on an old brooch, locket, compact, etc.

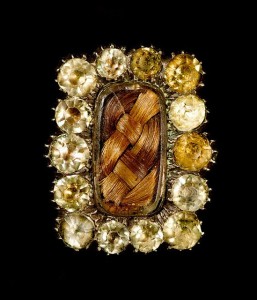
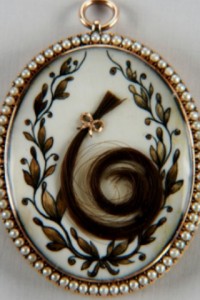
Pieces containing strands of hair were often worn as a sign of mourning.

Mourning brooch with paste jewels, circa 1800

Mourning brooch with paste jewels, circa 1800

Georgian-era seed-pearl-surrounded locket with a lock of hair.

Georgian-era seed-pearl-surrounded locket with a lock of hair.

Pendants, chokers, bracelets, rings, arm-bands, ear-bobs, as well as hair jewelry like combs, tiaras, or diadems would be part of the essential accessories of the costume.

Not for the faint of heart crafter, the Mistress of Disguise shows how to make a Regency diadem from used lamp parts! No sewing necessary, but soldering or hot glue is part of the the process. I’ll pass, but I can look at all the pretty, shiny things!

~~~

NEXT POST: Must-have Regency accessories are gloves, and most ladies want a fan for cooling in a candle- and ton-filled ballroom. To round out that post, because one of my signature expressions is “Parasol in a Ballroom,” I’m including the parasol I purchased, and I’ll try to make all three look Regency. These ones are much harder than some of the others!

~~~

While it has nothing to do with this blog series or the Regency, today I’m giving a shout out to an upcycler from Israel, Urban Raven, who makes jewelry from old phone tokens, computer chips, and many other items.

~~~

I’m looking (cross that out) begging for feedback. If anyone has seen any areas of improvement for this blog series, please forward them to me. As I’ve said on multiple occasions in the past, I’m new to this, and may have mistaken any aspect of the Regency costume based on clues that I misinterpreted. In addition, I may not have communicated something as well as you would have liked. Any help is appreciated!

~~~

I’m officially signed up for the JASNA AGM in Louisville, KY in October! There are still a limited number of registrations left. I’ll have some give-aways to hand out to followers of my blog while I’m there, so pay attention for clues!

How-to Times Two: Variations on Dressing up a Bonnet

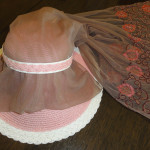
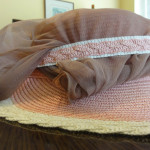
Hat 2 underside and shape

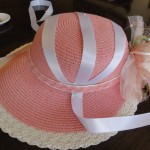
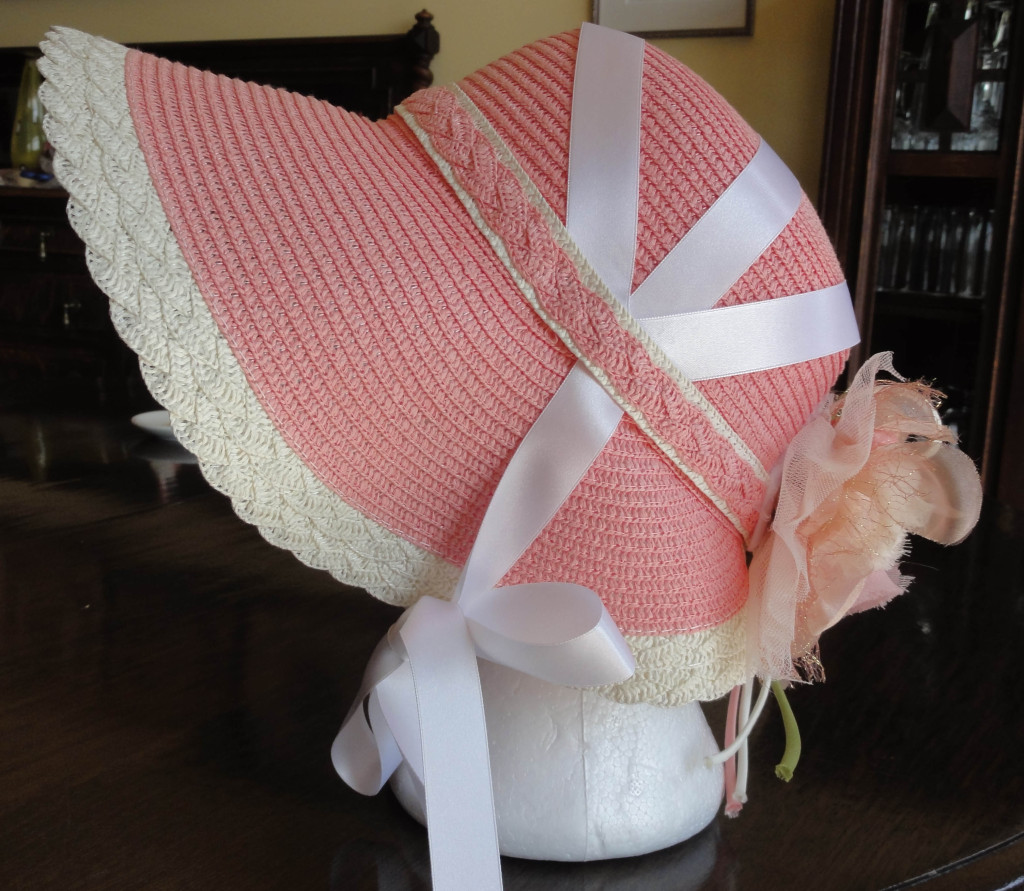
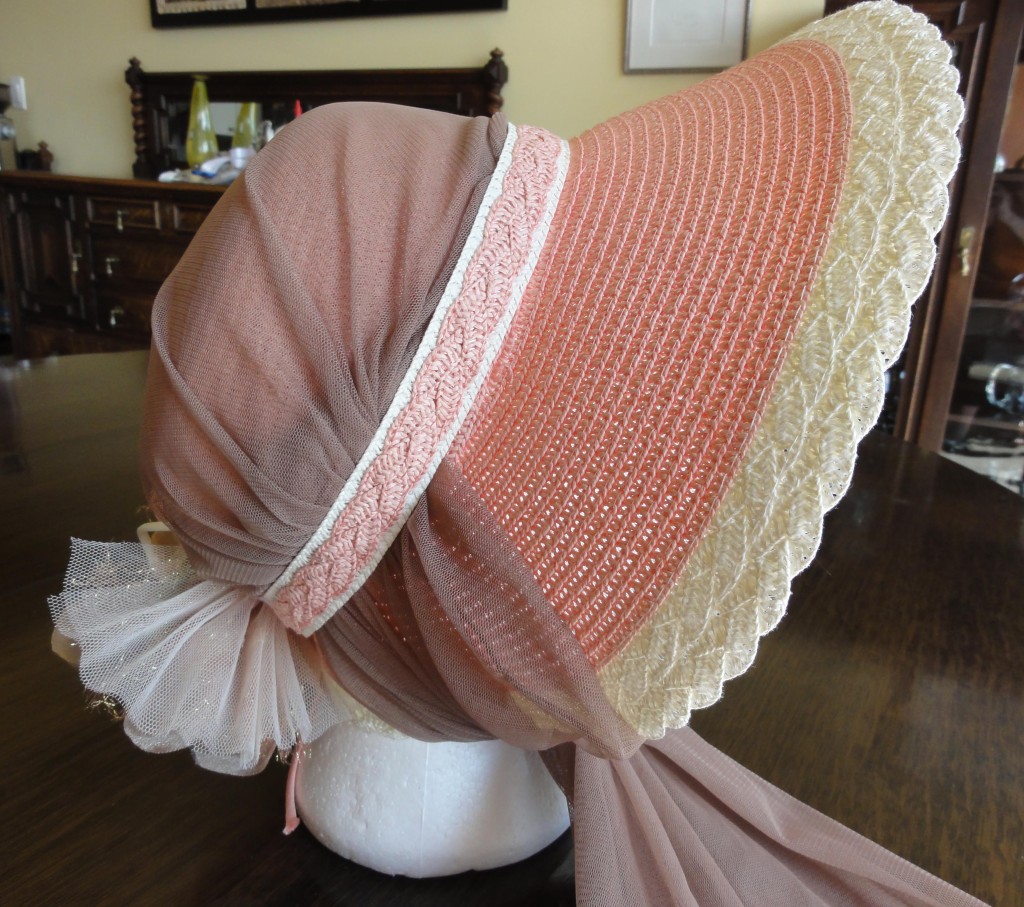
Underside of hat to show brim shape and braided trim.

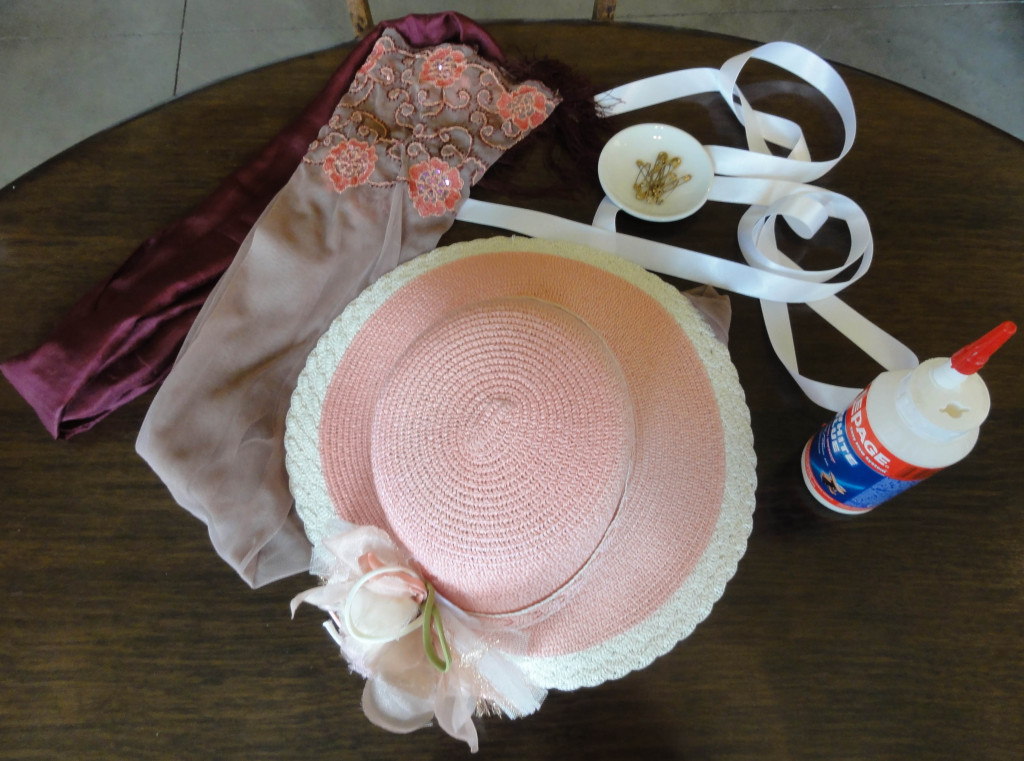
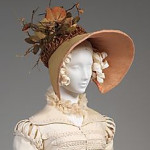
A bit of an impulse buy, as a few of my items were, the Pink Hat has a beautiful, perfect Regency shape and some nice trim. I was so pleased with those aspects, I overlooked the fact that it was overpriced for what it is and for the intention of this experiment, at $25 from a little second-hand store.

It’s so very, very PINK! I almost never wear pink!

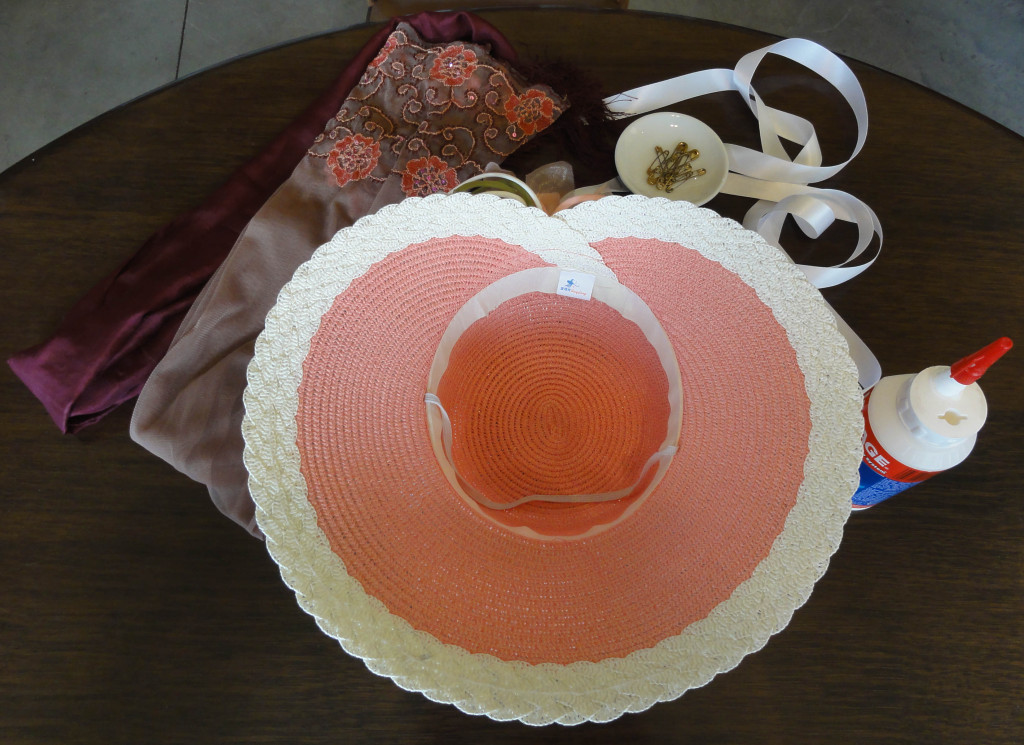
I was uncertain whether to include it in this blog. I decided it represented a normal part of this type of project, and if my readership knew I could eat my mistakes, they may have less fear of showing up in an item that was slightly incorrect. The idea worked so well for me that I used the Pink Hat as a bit of a mascot!Hat 2 materials used

This post shares two quick and easy ideas for enhancing this hat and making it appear like a Regency bonnet. The materials for both are in the photos above.

~~~

The Pink Hat Design #1: A three-ribbon design is seen often in Regency hats and hairstyles. (Click on the thumbnails for larger images.)

  • Loosen the existing hat band around the front and sides.Hat 2 loosen band and loop ribbon under
  • Fold a ½” to 1″ wide by 2m long ribbon in half and tuck under the band from below, with the loop heading to the back of the hat.
  • Arrange so the ribbon is at an angle with the tails at the middle of the hat band front to back, and the middle of the ribbon is just barely over the back of the crown of the hat.Hat 2 pin ribbon to band at halfway back both sides and loop over back edge of top where it sits best and smoothest
  • Use the band to help you fold each side of the ribbon up and back over the hat, one going straight across the middle, and the other at a slight angle across the front crown of the hat.Hat 2 fold ribbon up and over top of hat, one end over middle and one over front of hat
  • Each tail can go under the far side of the hat. Adjust so the hatband is down and the ribbons are roughly in the middle, though they won’t be neat at this point.Hat 2 remove pin holding in place and add one at the fold of the ribbon
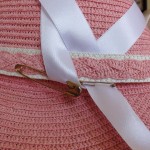
  • Safety pin the ribbon at the “V” made when the ribbon is folding under the hat band (the first fold you made) on each side.
  • Remove the ribbon. Re-install, but this time, do not wrap over band, instead, use the pin to help you place the fold behind the band.
  • Adjust until the bands are equally spaced and smooth over the crown, the hat band is down and in place, and the “V” is hidden.Hat 2 Remove ribbon, then put back in place only under the band, using the pin as a guide as to fold location
  • Pin in place from behind.
  • The ties will come down the middle of the side of the hat to tie under your chin, and the bonnet will sit back of your ringlets.


Additional ideas:

  • If desired, you can flip the front of the bonnet up, using steam to shape it, but be careful of burns.

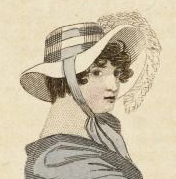
    July 1812

    July 1812

  • I’ve left the existing fabric flowers in back because I like them, and they hide a gap in the brim trim.
  • A strategically placed ostrich feather, curved forward, with some smaller items at its base, would work instead of the fabric flowers.
  • Additional trim is optional, but a ribbon flower, a few clusters of flowers, a medallion, or whatever pleases you can be placed on the joint of the three ribbons. Remember, simple trim means early Regency, and embellishments became more elaborate, especially in the teens. Match to your outfit’s time period.

This bonnet cost about $28, plus any additional trim.

Hat 2 pin in place from behind and trim as desired

Note that a similar hat, in natural straw, without the hatband or trim, is $5 at major craft stores. I’d recommend going that way. A ½” to 1½” wide hatband should be attached at the centre back to facilitate the instructions in this post. Ribbon, braid, beaded band, or similar material can be used.

~~~

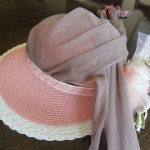
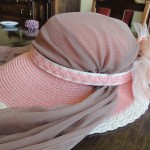
The Pink Hat Design #2: Inspired by hats in the Napoleonic Collection, with a sheer panel of fabric stretched over the hat and tied under the chin.Hat 2 design 2 fold scarf in half and slide under band from rear

  • Fold an oblong scarf (about 5 feet long) in a co-ordinating colour in half. A sheer or solid scarf can be used.
  • Slide down the front of the crown of the hat, under hatband, in a flat position.
  • Adjust so front (folded) edge of scarf is under hatband.Hat 2 design 2 roll edge of scarf and tuck under band
  • Roll up corners and tuck along sides under hatband. Adjust to your choice of fit: tight over crown of hat; with soft, regular folds; or puffed like a Capote hat.Hat 2 design 2 cross ends of scarf over back of hat
  • Pull tail ends of scarves so they cross to opposite sides and the back of the crown of the hat is covered.
  • Tug tail ends of scarf forward under hat band until they are midway between the front and back of hat.Hat 2 design 2 tuck scarf ends under band at about halfway point and adjust to hide extra fabric
  • Adjust folds and edges that are tucked under the band.
  • If necessary, pin, double-sided tape, or glue sections of the scarf under the edge.
  • The existing fabric flowers, with the frayed edges trimmed, are good embellishments for this hat. But each person has their own ideas, so add extra trim as suits your fancy!

Hat 2 design 2 completedThis bonnet cost about $32, plus any alternative or additional trim the owner selects.

~~~

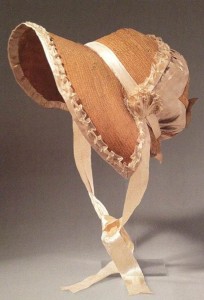
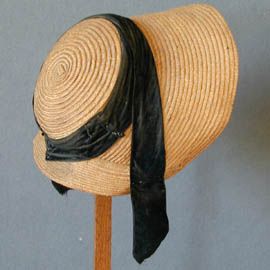
Why are these called bonnets and not hats? The only difference I could figure out between a bonnet and a hat was that a bonnet was tied on and a hat was not. These are called “cottage” bonnets.

Luise Kleider der Konigen 1810

1810

Cottage Bonnet ca 1810, Meg Andrews

1810


 ~~~

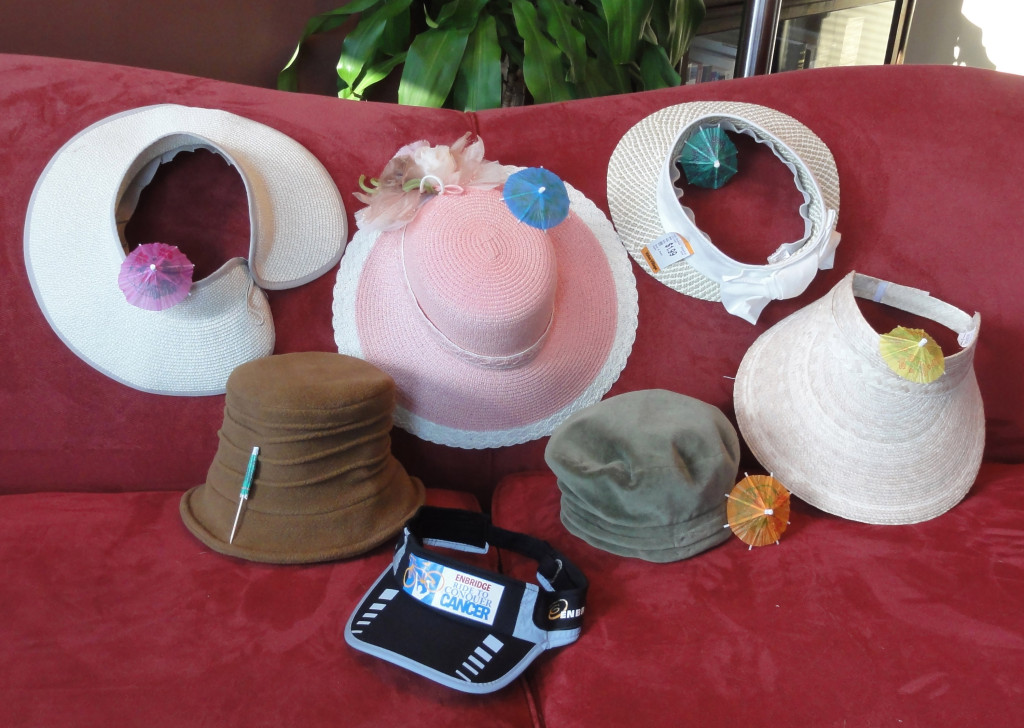
I still have three—count ‘em—three more potential Regency hats/bonnets!hat basicsTwo hats in the original “group of seven” didn’t make the “Okay for Regency” grade indicated by an open parasol: their shapes and fabrics are intended to show contrast.

The brown synthetic fleece hat might be okay as a base, if wrapped with fabric almost like a turban; tulle or net might work.

The sad little baseball cap visor has no parasol, as it’s not worth the effort. Not even a tea cosy will revive it.

Close-up of painting, Portrait of a Woman--François Flameng

Close-up of painting, Portrait of a Woman–François Flameng

1814, Metropolitan Museum of Art

1814, Metropolitan Museum of Art

I want to make the larger-brimmed visor (far right, $4 from a Wal-Mart in Mazatlán, Mexico) into a Lady Catherine stove-pipe or leghorn bonnet, which involves a curved tube. After a lot of searches, I found a site that gave me an idea how to start it. There will still be lots of trial and error, so I’m leaving it to after the main blog series, in the “bonus” posts. (Click on the thumbnails to see larger images.)

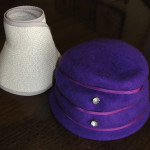
Fez and rollupI’m not sure if I’ll create something with the roll-up hat from the San Diego zoo from 10 or more years ago (upper left), but I bought a little purple felt fez I could prop on top! It would assemble/disassemble well for travel! Hahaha! This hat is also suitable for a Capote-like covering or a tube, just like the other two topless hats. (Hmmm. That sounds nasty.)

The big reveal: the Lydia Bennet special! (Click on thumbnail for larger image.)

Lydia hat before

The “Lydia Bennet” hat, before.

“Look here, I have bought this bonnet. I do not think it is very pretty; but I thought I might as well buy it as not. I shall pull it to pieces as soon as I get home, and see if I can make it up any better.”

And when her sisters abused it as ugly, she added, with perfect unconcern, “Oh! but there were two or three much uglier in the shop; and when I have bought some prettier-coloured satin to trim it with fresh, I think it will be very tolerable.”

—Pride and Prejudice, Chapter 39

French, 1800-1805, Boston Museum of Fine Arts

French, 1800-1805, Boston Museum of Fine Arts

At first glance, this hat is quite pretty. But looks deceive: it has good bones, but requires some serious deconstruction of braided plastic ribbons, then replacement with satin and sheer ribbon in a similar design. You can see the look in these museum hats; that’s why I was drawn to this one.

1820, Augusta Auctions

1820, Augusta Auctions

American, 1810, Metropolitan Museum of Art

American, 1810, Metropolitan Museum of Art


~~~

There are more complicated hats and bonnets you can make, but sewing and more complex craft skills are required.

http://themerrydressmaker.blogspot.ca/2011/08/regency-bonnet-tutorial.html
https://teainateacup.wordpress.com/2011/08/01/how-to-make-a-regency-poke-bonnet-in-ten-steps/?blogsub=confirmed#blog_subscription-3

This video demonstrates the second of the more complicated sites above:
http://oregonregency.blogspot.ca/2008/04/how-to-make-regency-poke-bonnet.html

I can’t quite understand tearing apart a straw hat into its spirals, or cutting off the back half and having to cover it, when it’s more work than is necessary. Regency bonnets came in so many shapes; it’s odd to take a shape that would work, only to change it to another, rather than seek out the second shape in the first place. But these sites have other good ideas.

Modern reproduction Poke bonnet

Modern reproduction Poke bonnet

Even more complicated is a stovepipe bonnet from the late Regency, made with a buckram frame: https://www.youtube.com/watch?v=98vKEHfjOAA

If I do a stovepipe bonnet, I’ll likely use more traditional techniques as in the Regency: cardboard and/or papier maché. It’s not so much that I’m afraid of buckram (maybe I am) or have no clue where to obtain it, but I know my skills with wire, and I’d wind up with a bumpy cam-shaped thing when I need an oval.


~~~

More on my pillowcase cap: A web site with a series of cap patterns for sale included a comment that the more uppercrust caps had more than one style of lace on them, as did the lovely examples in an earlier post. I’d like to find some finer pieces of whitework or lace to fill in some holes, rather than use the plain cotton of the pillow case. Shopping never seems to be done!

~~~

NEXT WEEK’S POST: There’s more to undies than corsets! **Cue tawdry bump-n-grind music!**

~~~