Tips for Faking Regency Costume Details #2

Clocked is a strange word. When I was young, when someone said “I clocked him,” I’m pretty sure it meant they hit him hard. I think it meant in the head, but I’m not sure. It’s not a word that I use in everyday conversation.

In Regency fashion, there are clocked stockings. This does not refer to anything resembling a clock as far as I can tell. It means stockings with a design on them.

Faking Regency Designs on Gloves and Stockings

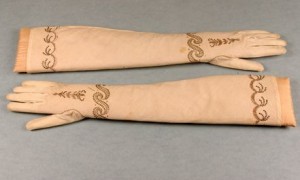
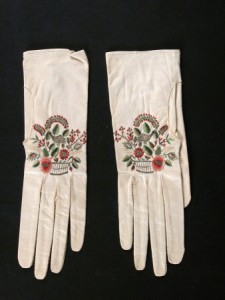
Embroidered kid gloves, 1800-1830, National Trust Museums

Embroidered kid gloves, 1800-1830, National Trust Collections.

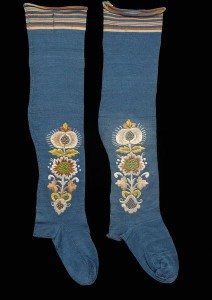
1775-1829 stockings, Victoria and Albert Museum

1775-1829 stockings, Victoria and Albert Museum

Embroidery or painting on stockings and gloves was an embellishment that was enjoyed by at least a few Regency ladies (and men), judging by the museum examples. Interestingly, an etiquette book of the time, Mirror of the Graces, frowns on clocked stockings. It looks like fashion won in consideration of a stuffy old guidebook!

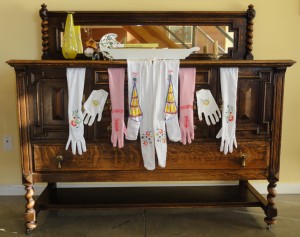
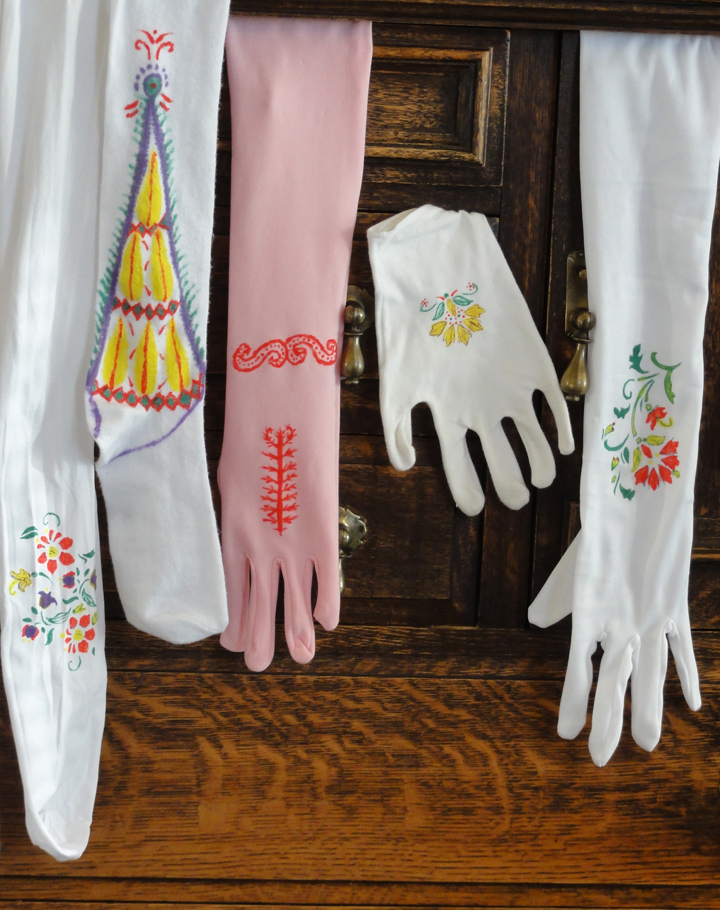
Some of my stockings and gloves got a fake Regency treatment this weekend: I used fabric paint to apply designs. A stencil purchased for half price at Michaels was used in three different ways, by masking some of the areas with packing tape each time. Once I’d done all I could with the stencil, I decided to try a bit of freehand with the four colours of paints I had.painting accessories all

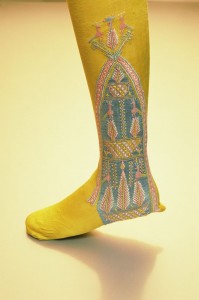
The floral designs on the white tights and the short and long white gloves were made with the stencil. The pink long gloves and the knee-high stockings are my attempt at freehand, loosely referring to photos of existing museum pieces (see below). Not bad for a non-crafty redheaded romance author!

Cotton fabric embroidered gloves, circa 1790-1810, bias cut for stretch, gold and sequinned scrollwork, pale pink, floss silk detailing.

Cotton fabric embroidered gloves, circa 1790-1810, bias cut for stretch, gold and sequinned scrollwork, pale pink, floss silk detailing.

Stockings, early 19th century Cooper Hewitt collection

Stockings, early 19th century, Cooper Hewitt collection.

Stockings, 1810, English, Kyoto Museum

Stockings, 1810, English, Kyoto Museum


painting accessories closeup to show detailI didn’t bother with the coloured tights as for now, the colours don’t suit my gowns.

The pens tended to bleed in the fabric, and the bottled paints were a bit puffy. After the first items, I used the pens for light lines and not fill, and used a Q-tip to apply the paint so it was smoother. If I was doing this again, I’d consider getting additional colours, but these were all I found on sale the day I bought them at Michaels.

~

How to Make Easy Back Gathers on Regency Gowns

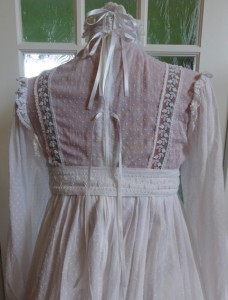
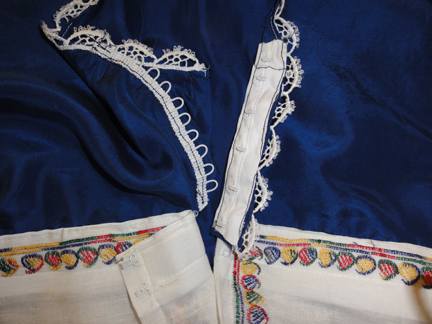
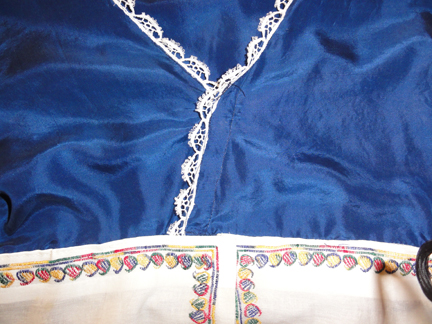
One of my favourite tricks for faking Regency is to use drapery tape to make the back gathers for a gown. The tape must be the kind that makes all uniform gathers, and not pinch pleats. I had some 1″ wide tape I got in two meter-long pieces at a thrift store for $1 a long time ago. I used it to make the last-minute “emergency” gown for the JASNA outing I had a few weeks ago. Belt backing tape can be seen for the non-gathered part.gathering tape and waistband material inside paisley embroidered fabric for use as a skirtpaisley fabric gathered using drapery tape

There are two ways to use the drapery tape to make your Regency gathers in the back of the gown.

  1. The simplest is to machine sew the tape onto the gown. Take care not to sew on the strings. Gather using the strings, tie the strings, cut shorter, and leave in place.
  2. The second method allows re-use of the drapery tape and less bulk in the back of the gown. Hand-baste the drapery tape on, but do not lock the end of your basting thread, rather, leave an inch or so free. Once you’ve sewn your skirt to the bodice, the gathers are fixed, and all you need do is tug on the knot on your basting threads to pull them free and remove the drapery tape to use on another skirt.

You want to have at least three times the width of fabric as your final gathered amount, and 4-5 times looks pretty.

Depending on your fabric, you may want to leave a seam allowance above the drapery tape. Because my fabric (above) had a border, I ran the tape at the top edge, then hand-stitched it to the bodice.

If you’re interested in standard methods for gathering fabric, this video from Teach Yourself to Sew shows three different methods.

~

To Zipper or not to Zipper–or To Fake!

When you get a vintage or other type of newer-than-Regency gown and wear it for a Regency gown, to be authentic, you should remove the zipper. Regency alternatives were ties, hooks and eyes, or buttons, or they were pinned closed by a lady’s maid.

In most cases, a replacement closure for the zipper is not necessary on the skirt, as the ribbon or belt holds the top edges together. The skirt is loose due to the gathers, and should overlap. The concern would be to ensure the bodice fit is snug.

There may be gaps between the replacement closures. In the Regency, so many undergarments were worn, the gap was of little consequence; however, some modern women balk at the idea.

ribbon ties on back of original morning gown suzan lauderMost often, Regency gowns used ties to close at the back, and this is an easy-to-install and inexpensive closure. Discount and craft stores have narrow ribbons in limited colours for under $2 a roll, and attractive cords are under $1 a meter.

In the absence of a lady’s maid, to fake Regency with modern modesty, retain your zipper and add ribbon or light cording ties over it at a couple of locations. At right, two are tied and the lower one is not, so you can see where they’re attached. Care must be taken not to catch the ties when using the zipper.

At 12″, mine were too long; 6″-8″ would suffice.

~

To close the front of the “emergency” gown, I used hooks and eyes. This is not truly faking as they were common on Regency gowns. When hooks and eyes were used, seamstresses weren’t stingy, and used a lot of them.

Packages of individual hooks and eyes are inexpensive, and come in black, white, or steel in most stores, and some stores offer additional colours at a premium. They are fussy to sew on individually but are excellent in some cases, such as holding a short width or edges together.

For ease of installation when multiple hooks and eyes are needed, cotton tape with hooks spaced about every inch, and matching tape with eyes, is sold by the meter. I was lucky to get the tape with hooks on sale, but the tape with eyes was regular price.

An alternative to the tape with eyes (at half the price per meter) is a product intended for long rows of buttons, which looks like woven cording with loops every half inch or so. The loops appeared to align with the hooks, and for short lengths, they’re okay, but they’re just enough out of sync that, for longer lengths, I need to skip an extra one every so often.

As you can see, I used both types: tape on the crossover v-neck and individual hooks on the belt edge of the skirt. The installation was fair to both right and left handed openings!

hooks and eyes on emergency dressemergency dress closure


~

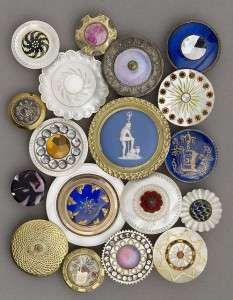
As much as we like buttons these days, they were less common on Regency women’s wear. Jane Austen remarked in a letter to her sister Cassandra that buttons were quite dear. Men’s clothing most often had self-covered buttons, but ladies’ used metal, shell, ivory, stones, gems, and similar materials.

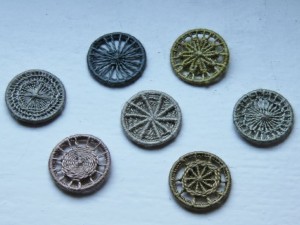
Mother-of-pearl buttons are okay if you can find them, as are buttons made with fine cording such as Dorset buttons. Don’t use plastic buttons unless they are an excellent fake.

Pearl and metal buttons, 1780 to 1820, Luckcock Collection, Birmingham Museum of Art

Pearl and metal buttons, 1780 to 1820, Luckcock Collection, Birmingham Museum of Art

Dorset buttons

Dorset buttons

You could put fake buttons and loops on the gown just as you did for the ribbon ties, and keep your zipper.

~

Next post: I left all the hand-sewing for items like Mr. Suze’s coat to the last minute, and not much new is happening at the moment! I’ll try to take a photo or two of my ball gown as I complete it this week, but since I’ll be traveling prior to the JASNA AGM in Louisville, Kentucky on October 9-11, 2015, it will be a meager post!

~

The best word EVER: GIVE-AWAYS!

On October 8-11, while I’m in Louisville, there will be a draw for daily prizes from my stash of reticules, Regency accessories, and other goodies. The Regency items are one-of-a-kind. Though they’re hand made by someone who’s not crafty (so less than perfect), I’ve signed each one and added my signature pagoda parasol.

There are two ways to enter:

1) Comment on any Thrift Shop Regency Costume Experiment post on road trips with the redhead, with your email address (username at host dot com), or

2) approach me at the JASNA AGM and ask for a Parasol in a Ballroom. I’ll collect your name and email address.

**The first person who enters either way whose initials are M.C. is an automatic winner of a velvet reticule with your initials embroidered on it!

I’ll attempt to deliver winning prizes from the AGM while I’m there, and blog comment prizes will be mailed. Good luck!

Regency men were not sissies, even in blouses and scarves.

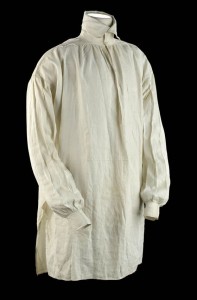
1807 men's shirt from The National Maritime Museum

1807 men’s shirt from The National Maritime Museum.

A poet’s or pirate’s shirt will work well for a Regency man’s shirt, they say. I remember sewing a similar shirt for a boyfriend in the 70’s: long sleeved, loose body, placket at the front. Surely a few vintage versions in a light, flowing fabric still exist!

For months, I searched the thrift and vintage stores for a plain, white, light weight, long-sleeved, wider-collared shirt with a placket-style opening, rather than button-down. Long-sleeved white dress shirts of any type were rare, probably popular for job interviews.

All were button-down. At least half had a subtle pattern woven into the fabric that was non-Regency in appearance. A few had logos emblazoned on the front pockets. Military shirts with epaulets were constructed of mid-weight, crisp fabric, rather than soft and flowing, as were tuxedo shirts with their multiple pleats in front. The odd shirt was collarless, and I needed a collar to stand up and wrap the cravat around.

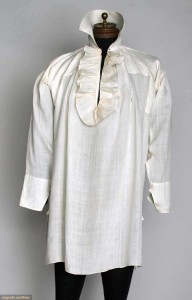
Man's linen shirt, 1790-1810. Augusta Auctions.

Man’s linen shirt, 1790-1810. Augusta Auctions.

Early on, I expanded my search to ladies’ wear size large and greater for that front placket shirt, but they were rare, and in addition to similar traits to those for men above, often had ¾ sleeves or ruffles in the wrong arrangement. Ruffles aren’t a bad thing, as the neckline of the waistcoat shows off ruffles.

The Blouse

This month, I gave up on the placket front and searched for a white dress shirt in Mr. Suze’s neck size, loose in the body, and simple in design. At Value Village, I found a ladies’ extra-large blouse that looked ¾ sleeved at first, but discovered it had button tabs on the sleeves. The cuffed long sleeves were scrunched up and could be easily let down.

I measured the collar, and it was just short of 17” around, so larger than Mr. Suze’s 15½” shirt size, but my measurement didn’t count overlap for buttoning. To ensure the sleeve was a couple of inches too long for me (the advantage of having borrowed his cool-looking jean and leather jackets in the past is knowing this fact!), I tried on the blouse on over my own t-shirt before purchasing it at $7.99.

It fit Mr. Suze perfectly in the neck and sleeve, and was loose in the body! Hooray!

The shirt was button-down, and Poor Mr. Suze lamented that it buttoned backwards—that’s how he discovered it was a ladies’ blouse upon trying it on. It had no top button, so I attached two 8” ribbons to tie it closed. The Regency shirt would close with laces or a simple set of string ties.

I could have sewn the front panel partly closed to make it emulate a placket-type, but Mr. Suze didn’t mind the buttons too much and, as the shirt was considered underwear in the Regency, no one was allowed to see it. Yes, you heard that right. Underwear.

The main modification to Regency for a plain white shirt is simple: since the collar is to be turned up so it is standing, the front points need to be trimmed back slightly so the line of the collar goes straight across. When purchasing, a wider collar is better so it looks good standing up.

Depending on how the shirt is made, you might be able to push the points into themselves and sew closed with top-stitching near the edge. Because of top-stitching on the blouse collar, I had to open a seam, so I cut the corners back. Don’t forget the seam allowance!

An optional but beneficial modification while you’re at the collar is to cut a slight curve out of the middle back to suit the head of the wearer, so the collar stands up and doesn’t crinkle. My curve was about ⅝” deep in the middle and tapered down, overall about 5” wide. The seam allowances in the curves were clipped and pressed inside. Rather than remove the collar and redo the seam, the opening was top stitched close to the edge, then a second row of top stitching, similar to the original, was added.

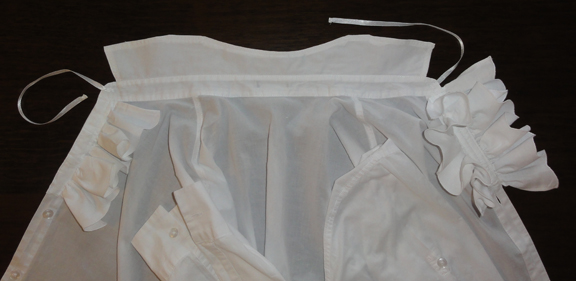
Ruffles can be added to the placket area where the shirt shows above the neckline of the gentleman’s waistcoat. A plain, straight piece of light cotton 3”-4” wide, with a simple rolled hem on three sides, will work.

I used scalloped border panels from a white pillow sham (the main area’s lace was for a cap and fichu in previous posts). The scallops had a finished edge, and I made a narrow hem on each end.tsrce shirt showing three ruffles collar reshaping and tiesEach ruffle started as 4” wide and 20” long. I gathered it to 5” long, which was plenty long enough for the V neck on Mr. Suze’s waistcoat. I covered the base of the gathers and sewed that to the button panel. A third ruffle was added later, as two didn’t seem like enough, but when the cravat was added, I realized it fills the centre area, so two would be fine. The finished ruffles should be pressed backwards at ¼” near the bases, so they prefer to stand rather than lay flat along the shirt front.

Similar to Regency ladies’ wear, men’s clothing had longer sleeves, extending over the base of the hand. If your Mr.’s tail coat sleeves are not long enough, you can also add a ruffle at the cuff of the shirt. It can be sewn inside the cuff so minimal fussing over finishes is needed.

If you want to use a shirt that will be reverted back to a dress shirt after the Regency occasion, the collar corners can be neatly pinned inside, as the cravat will probably hide the pins, and the back curve ignored. Neckline ruffles can be basted to the inside opening of the waistcoat instead. Sleeve ruffles can also be attached with basting, but make sure the stitches are not obvious on the outside.

The “Scarf”

The mystery of how to make a cravat or neck-cloth covers Regency costuming pages all over the Internet. There are three commonly suggested designs: a rectangle, a rectangle with tapered ends, and a triangle. Most sites explaining the triangle use the same wording, which is so poorly described that people have wound up with huge rectangles instead!

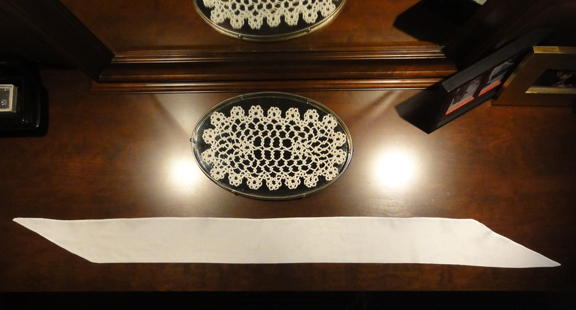
Suggested sizes for a rectangle are 50”-80” long by 4”-10” wide, but I found the finished length should be at least 60”, and the finished width no more than your Mr.’s neck length. Tapered ends on a rectangular shape make the tied cravat tails less bulky.

Another design uses a long, low isosceles triangle. The two short sides are 50” long, and the triangle is 10” high, with rolled hems on the cut edges. To wear, it’s rolled to a width to suit the wearer’s neck length. This is a very long cravat, but well-suited to complex tie styles or multiple wraps, as it has far less bulk at the ends.

White or off-white were the most common colours for a Regency cravat, and the only colours acceptable for a ball. Various ideas on fabric stiffness abound on the Internet: some say pliable, some suggest starch. From my experience making one cravat, if the fabric can keep a neat shape without collapsing, but not so stiff that it’s uncomfortable or won’t drape a little, it should work.

A Fabricland $1.99 remnant of light but not super-sheer white cotton at 53” wide was the source for Mr. Suze’s cravat. A 9” wide panel was cut the full width of the fabric. It was folded lengthwise and the ends tapered starting 8” back, with the tapers in opposite directions as seen in the photo. A blanket-type seam closed and bound the edges, with a 4” gap left halfway along the taper of one end. The cravat was turned inside out through this gap, pressed flat, and the opening sewn closed. The finished width was just under 4½”, as any wider made no sense with the length of Mr. Suze’s neck. Some sites suggest a rolled hem, which is better for heavier or stiffer fabric, but doubled up has a more finished appearance.tsrce cravatWith a basic tie style, this cravat is barely long enough. If I can find a longer piece of fabric, I’ll make another. This is why I suggest no shorter than 60”!

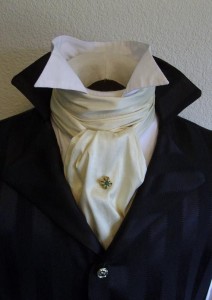
The cravat is tied over the shirt collar but inside the waistcoat collar. The easiest style is to start with the middle of the length of the cravat in front of your neck, cross over at the back and pull forward, cross one end over the other in a half knot in front and snug up, tidying edges around your neck and fluffing folds of the panel that falls down vertical in front. A simple pin can hold the front fall in place.

Tea in a Teapot has a summary from an 1818 satire on the cravat called “Neckclothitania” that appears on several other blogs as well. The complicated tie styles have been attempted by some modern costumers, with varying degrees of success. I think the author would be suitably amused that his work was taken with such a degree of seriousness!

The Art of Tying the Cravat by H. Le Blanc (post-Regency, 1828) is an interesting read via Google books (free e-book). It has additional designs for the neck-cloth knots, and the illustrations are below.plate-b-the-art-of-tying-the-cravatregency cravatYour Mr.’s cravat tie style should be no more complicated than he is comfortable with creating. A man confident in making a full Windsor on a regular basis, or who plays with knots—boat owners often are often hobbyists with knot-making—can fuss all he wants with styles from the links. For the rest, there’s no shame in simplicity.


A gentlemanly way to top off a blouse and scarf

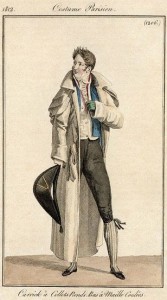
Bicorne hat, Costume Parisien, 1819

Bicorne hat, Costume Parisien, 1819

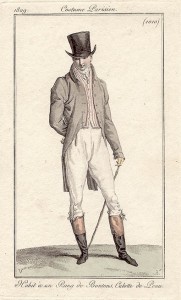
Top hat, Costume Parisien, 1809

Top hat, Costume Parisien, 1809

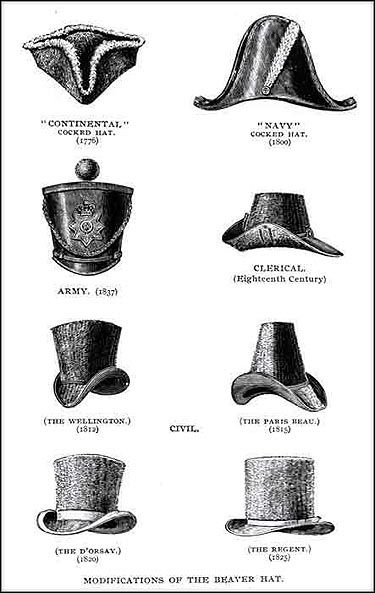
Regency men wore a variety of hat styles, but a simple top hat was most common in art work. The bicorne was also popular, particularly for formal situations like a ball, and is favoured for faux-military costuming.

A top hat can be had for as little as $10 for one-size fuzz-covered plastic at a party store; $25 for a magician’s silk hat or one-size felt coachman’s hat (too tall and costumey) at Dressew; or as much as $200 and up for a vintage collapsible opera hat or actual beaver fur top hat on eBay, and you have to pay over $300 for good condition.

In vintage stores during my shopping trips, I saw two vintage felt top hats. A hat in great condition but a small size was $125, and $165 could get a hat showing a little wear but otherwise in good condition. These had superb shape compared to an inexpensive felt hat, were lined, had hat boxes, and silk hat bands.

Mr. Suze settled for a $35.99 (including shipping) wool felt hat from eBay. The sides of the pipe part are straighter than a milliner’s top hat, but its brim shape is nice, and the quality is excellent for the price. It came in small-medium-large-XL sizes, not one size fits all. It didn’t come with a hat box for that price, so it will go to Louisville in the rectangular box with Styrofoam inserts that it was shipped in. We’ve already accepted the requirement to take the giant suitcase from my set of three, which has only been used once before!

I don’t recommend magician’s collapsing satin hats. Back in May, I purchased one at Dressew as the first item for Mr. Suze’s costume, and presented it to him with an entreaty to consider a costume when he’d been resistant beforehand. The collapsible option seemed practical for travel, and the top hat looked well enough when open. However, it had a heavy metal frame inside to facilitate the collapse and easy “snap of the wrist” restoration of its shape for performance. As a result, it fit small. On my small head, it was acceptable—that is, if you don’t mind having a wire frame in your skull! But the hat perched atop Mr. Suze’s normal-sized head. It was returned the next day.

Beaver hats of the 18th and 19th century.

Beaver hats of the 18th and 19th century.

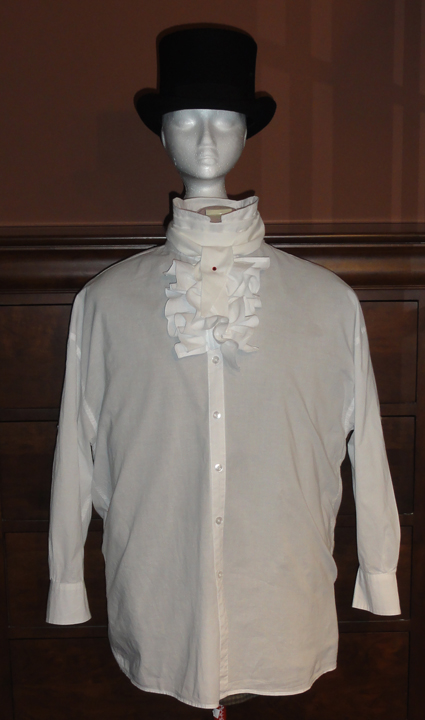
To show you the results, Millie wore one of Mr. Suze’s blazers, as her shoulders were too narrow for the shirt to hang properly. Mr. Suze is not this big around, as he fits inside the blazer, and the sleeves are also under the shirt! Similarly, Chili has a hat under the top hat.tsrce mens shirt with cravat, crystal stick pin, and top hatI sacrificed a ruby-red Swarovski crystal stick pin I’d used on my turban as it’s perfect for Mr. Suze’s cravat, and none of my other stick pins were right. It was also stunning on the turban, but I have a hat pin I’ll use instead.

Next post: Trousers, boots, and accessories for your Regency beau! Watch for it as a second post this week! YES! Double post week for the Gentleman’s Thrift Shop Regency Costume!

A Grown-Up Lady Brings Tea Cakes to a Tea Party

I tore apart all my gowns. Not all, but the ones not torn apart need to be torn apart to be Regency. My ball gown is nearly completed, and some adjustments were planned for my morning gown, but I was better with the stitch ripper than concrete finished designs when I decided it would be fun to dress up for my local JASNA’s Jane Austen Regency Tea Party last Saturday.

I quickly faked Regency. So quickly, I forgot to take photos of much of the construction for this blog! The finished product will have to do!

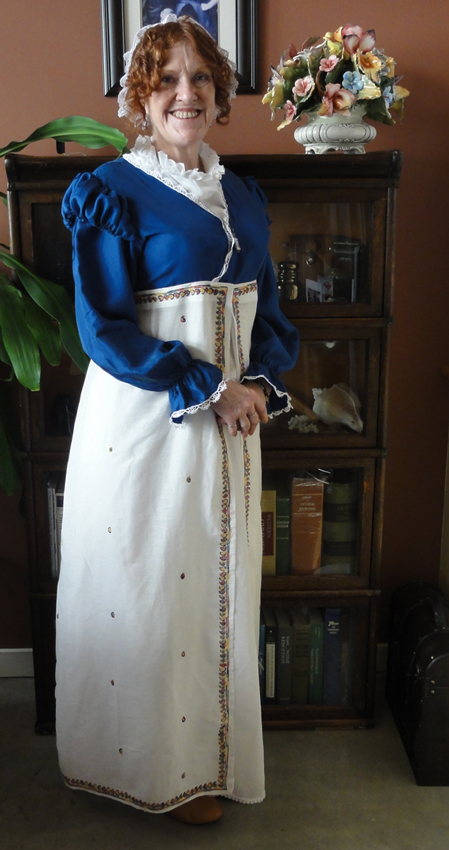
Suzan Lauder costume JASNA tea Sept 15My Emergency Regency gown:

A Value Village purchase, a $7.99 length of paisley-embroidered super-fine cotton  targeted to eventually become an entire gown, became a skirt by gathering one long side at the centre (back). It was left open in front as it had trim along all four edges, so this was a Regency look I desired. The petticoats skirt from my morning gown was worn under it, as other possible underskirts were coloured with no trim, and this one was white with lace trim along the bottom, again, looking quite Regency! Coloured with lace would have been pretty.

A $9.99 navy silk blouse from Value Village was hemmed to bodice-size (like making a spencer). The ruffle at the neckline was used to make puffs at the tops of the long sleeves, and a front opening was added. I sewed a rolled edge on the neckline, but it  wasn’t pretty, so some sale Venetian lace from Dressew ($0.50 per meter) was added to the neckline. I liked it enough to add more to the sleeve bottoms.

The bodice was sewn to the skirt, except at the gathers, where I pinned, as it was too heavy for my machine. Hooks and eyes were used to close the front (more about that in a later post).

I also wore a fichu (the event was 2pm-4pm, still “morning” for Regency, hence arms and chest are covered), pantalets rather than another slip (the petticoats are sheer, but it was a warm day), and got away with my black bustier due to the navy bodice. The bustier gave a much better Regency silhouette than did the Balconet bra and waist cincher I wore to the Jane Austen Tea at Starling Winery in June. My half-boots and the first Capote hat I made for the Thrift Shop Regency Costume Experiment were also included, as was the Moorish-looking reticule and brisé fan.

I’ll have to rip the skirt apart again, but the top was planned to go with another skirt from a spaghetti strapped evening gown skirt with tons of fabric, so it got me ahead on another project. This project took about two days, much faster than assembling either of the other gowns, due to lace issues, and scissors that Mr. Suze used that now need to be sharpened, and it’s a long story.

I also made a Regency snack in that time! The 1820 cookbook I have on Google Books wasn’t too useful, so I cheated, but I’m sure this type of tea-cake is time-tested before Austen’s era. Here is the recipe:

Tea Cakes, from A New System of Domestic Cookery by A Lady (Maria Eliza Ketelby Rundell), 1833

Rub fine four ounces of butter into eight ounces of flour (I interpreted this as cutting unsalted butter into all purpose flour with my pastry cutter); mix eight ounces of currants (I only had 5, but it was plenty!) and six of fine Lisbon sugar (Whoa! Schweeet! I used regular granulated sugar.), two yolks and one white of eggs (I beat them slightly first), and a spoonful of brandy (What size spoon? Muahaha! Tablespoon!). Roll the paste (I worked with my hands to mix first) the thickness of an Oliver biscuit (Who?) and cut with a wine-glass. You may beat the other white and wash over them; and either dust sugar, or not, as you like. (I like! A big pinch per cookie.)

That’s it, the whole recipe, plus my comments, of course! I guessed, and baked them at 350F for 10 minutes. I got a couple more than two dozen, which allowed for taste testing! They were a bit more browned than I’d like, but the taste and texture were very nice! In retrospect, I’d make them a bit thicker (they were the thickness of a thick cookie) and bake at 325F for 8-10 minutes.

As for the mystery of how thick to roll them, one of our gentleman Janeites brought Bath Olivers! Oliver was a doctor in Bath, and invented Oliver buns, but found his patients gained weight from eating them. He developed Oliver biscuits for weight loss. They’re like a thick, doughy water cracker, to be eaten with cheese.

Other members brought sweets like Regency-style gingerbread cake, plum cake, pound cake, custard, jam tarts with a lard-based recipe for the crust, Regency-style tiny chocolate tarts, caraway-seed cookies, and Jane Austen’s silhouette-shaped sugar cookies. We tried Regency beverages including negus, spruce beer (non-alcoholic, like root beer, and in cans, from Montreal!), ginger beer, lemonade made the way Jane Austen would have made it, and elderflower cordial. There was a savoury mixed-meatball that sounded a bit gross, some Stilton, and other Regency treats on hand, as well as modern additions of tea sandwiches, devilled eggs, and chocolate cookies. I ate a salad for dinner that night!

In addition to the clothing mentioned above, I was the only one who wore a lace cap, or as christened in an earlier post, Special Headwear for the Grown-Up Lady, which details the Regency cap and shows some pretty museum examples.

The Lace Cap, Measured in Nails

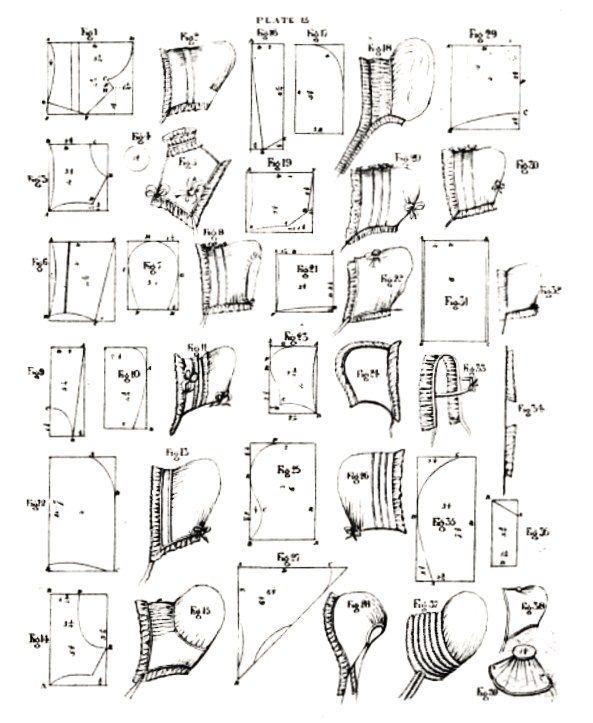
The cap pattern was from The Workwoman’s Guide, by a lady, available on Google books; it’s worth having a peruse through for all the interesting information, including cuts of meat, carpentry, and other household knowledge. Descriptions are in the text of the book, but drawings are at the end.Bonnet Diagrams from The Workwoman's GuideMy cap for the Tea in June was made from Fig. 6 through Fig. 8, Simple Dress Cap or Bonnet, since it looks like many Regency bonnets. The instructions use nails as a measurement. My head circumference in comparison to the drawings suggested 1-3/4 inches per nail. I tend to wear small hats, and I have short hair. I made a little mock-up to be sure, and the length of the back panel was reduced to remove an ugly poof and allow gathering per the original pattern.

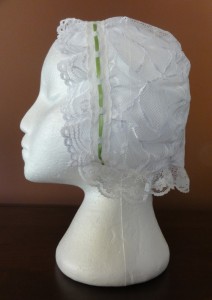
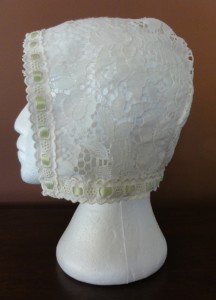
Last week, I made another to see how big one would be if it were made using two inch nails (somehow there’s a joke in there!). Without lace ruffles at the edge, it’s big on me, so I feel two-inch nails is size large. You can see the difference below in the fit on the wig head.

Lace cap, 1.75 inch nails (size small) with lace edge trim.

Lace cap, 1.75 inch nails (size small) with lace edge trim.

Lace cap, 2 inch nails, no lace edge trim, so fits medium to large.

Lace cap, 2 inch nails, no lace edge trim, so fits medium to large.


To make it easier for others, I drafted the adjusted pattern with notes, and the pdf is for anyone’s use: Simple Dress Cap or Bonnet Adapted from The Workwoman’s Guide (1840) by Author Suzan Lauder

Next post: Probably more of Mr. Suze’s costume: In addition to last week’s post, his boots, top hat, watch, and walking stick are ready to go. I have materials for trousers/breeches, shirt, cravat, and whiskers, all easy to make. We’re searching for a watch fob and he’s done! My lace issues may mean it takes longer for my gowns! Getting down to the wire for Louisville!

Faking Regency Part One: A modern blazer morphs into a spencer.

This sounds pretty easy, right? Get an old blazer, cut and hem to under-bust length, and Bob’s Your Uncle. Well, not so easy. Unless, of course, you’re super-lucky and find exactly the right blazer.
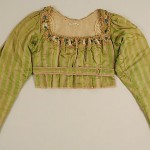
Early 19th century spencer, Metropolitan Museum of Art
Early 19th century spencer, Metropolitan Museum of Art

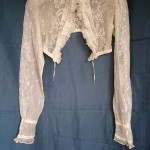
Embroidered muslin bodice or spencer, 1800-1810
Embroidered muslin bodice or spencer, 1800-1810

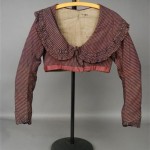
Rose pink striped cotton and silk spencer, early 19th C.
Rose pink striped cotton and silk spencer, early 19th C.

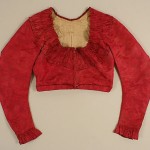
Early 19th Century, Spencer, early 19th century, French, silk, Metropolitan Museum of Art
Early 19th Century, Spencer, early 19th century, French, silk, Metropolitan Museum of Art

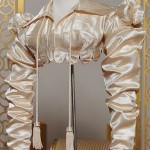
Cream silk satin Spencer, c1818. Decorated in imitation of military uniforms. Worthing Museum.

Cream silk satin Spencer, c1818. Decorated in imitation of military uniforms. Worthing Museum.

If you hadn’t already figured it out, the Regency spencer is a little, long-sleeved jacket that’s just as long as the bodice of the empire waist gown. One bonus for shopping for a blazer to make into a Regency spencer is that almost any neckline will suit. Click on the thumbnails to see details, including neckline examples.

The difficulties include a requirement for long sleeves (as per usual in the Regency, longer than standard is better), a fitted bodice, fabrics that don’t look modern, colours that are more interesting than black, and a lack of embellishments such as studs, fake pockets on the chest, or jean jacket seams.

The textures and colours of many blazers in my thrift shop visits didn’t work. Black polyester rules, and next to that, corduroy and knits. Every time I saw one I’d consider, it was 3/4 sleeve, the wrong size, or had some detail that screamed the 90’s.

I looked at blouses, too, since some spencers are more blouse-like and some modern blouses are more blazer-like.
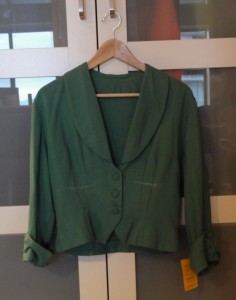
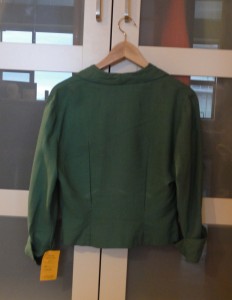


spencerspencer back


This unlined, fitted, pomona-green jacket will be my spencer. Pomona? I would have called this leaf-green, as it’s fairly bright. (Some of my shots were taken in the evening, and appear darker.) Then I read an article about Ackermann saying Pomona green was the same as apple green and I thought, this is a little darker than apple green, but I’ll check on Google images. Enough of the examples were the same as my blazer for me to confidently say it’s one of the more popular colours of the Regency!

The 3/4 sleeve, linen, shawl-collared blazer was $16.50 at Women in Need Thrift and Vintage. It has unique matching self-covered buttons.
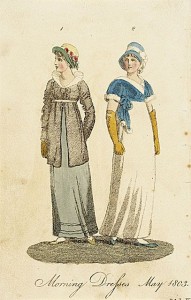
Short sleeved spencer alongside unusual short coat.
Short sleeved spencer alongside unusual short coat.

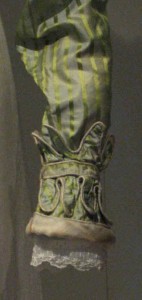
Sleeve trim idea.

Sleeve trim idea.

The down side of my blazer is the 3/4-length sleeves. At the time I bought it, I didn’t realize that detail wasn’t popular during first 20 years of the 1800s. I looked in vain for examples of Regency spencers with 3/4 sleeves, and though there are a few short-sleeved spencers, I found nothing 3/4 sleeved.

Lucky for me, the flared cuff was long enough to drop to make a long sleeve. I kept looking for a long-sleeved blazer for a spencer. As mentioned before, I saw a blazer with lovely soutache designs, but balked because I worried about how to cut down the blazer at a good point for the soutache. When I decided I could rework the soutache if need be, I returned, but it had been sold. But today, I found a cute, gold silk blazer with a pretty collar, long sleeves, and mother of pearl buttons! The only sad part is a centre-back seam. More on that later.

(An aside: I’ve seen the perfect dress that just needs an empire waist height ribbon to fake Regency on two shopping trips since June, but both times, they were too small for back gathers for me, but would work with a smaller person!)

In most cases, your blazer should be cut to 2-1/2″ longer than the bottom of your bust line, turned under 1/2″, and hemmed 1″. This will stiffen the edge and ensure it fits over your gown bodice, but it won’t be too long. You can see I’ve marked my blazer to spencer length while wearing it. This frees up two buttons from the front for embellishment elsewhere.

If your blazer doesn’t close tightly at the bottom after it’s trimmed to length, there are several possibilities. If there are buttons in the upper portion (part you’re wearing), it’s better to fit the spencer than to ease in fullness. Add darts or gathers under the bust, or pleats or gathers in the mid-back; they’re era-appropriate. Don’t make it too tight, as it must fit over the gathers of your gown.

My blazer was already fitted with six darts in front and two very long back darts (in fact, the back darts were over-sewn longer and deeper than the originals). It was snug across the bustline, so I removed the back darts, washed it so the stitch holes relaxed closed again, and pressed out the remaining dart creases while it was still damp. A few gathers added by hand in the mid-back at the waistline help to fit my slimmer rib-cage under the bust.

If the bottom button is too far from the bottom of the spencer, you can put back a cut-off button and make a buttonhole at the band level, or add hooks and eyes. To fake Regency, buttons should have a Regency look: metal, shell, pearl, mother-of-pearl, fabric-covered, thread-covered (such as Dorset), or corded knot (such as Celtic or Chinese knot or frogs with knots) are best. Since metal buttons were expensive, use them only if your spencer has a rich look with elaborate trim. With corded buttons, your other trim would be best as corded, in fact, a military look to the spencer was popular! Self covered buttons were ubiquitous on mens’ wear, but less so for ladies’.
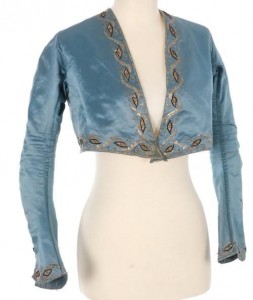
Spencer jacket, 1790-1815. Note no closure in front.

Spencer jacket, 1790-1815. Note no closure in front.

If there are no buttons, there’s nothing wrong with having a spencer that doesn’t fasten closed, unless you need it for warmth. An example of an open-front spencer can be seen on the left, and others existed in the Regency.

My blazer was unlined, so I chose to use the inside bottom facing from the original blazer on the outside, as a waist band. Bias tape was used to finish it on the inside where it’s not seen. Another option is to add a contrasting band (as on the pink striped blazer above). If you have good sewing skills and choose to add a waist band, it’s an opportunity to put contrasting piping all around it per a tutorial below.
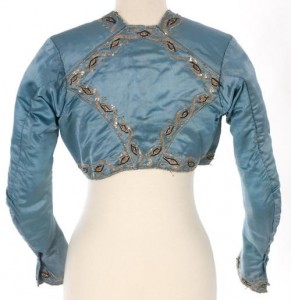
Spencer jacket 1815 (back). This trim is an example of how we plan to fake a Regency diamond back! The real shoulder seam will never be noticed!

Spencer jacket 1815 (back). This trim is an example of how we plan to fake a Regency diamond back! The real shoulder seam will never be noticed!

Since the facing didn’t continue across the buttonhole panel in front of the original blazer, it didn’t go all the way around, so was short for the waist band. To make up for this, I used extra fabric from the cut away parts in front. If you use multiple pieces for the waist band, make sure your seams are at the blazer’s side seams, or at both bottoms of the diamond-back, so they’re less noticeable.

In addition, to fake Regency, some front cut-off material from my blazer made a little skirt-tail in the centre back, similar to the museum examples. See thumbnails below; click to enlarge. Extra self-covered buttons trim the ends of the waist band tabs in back.
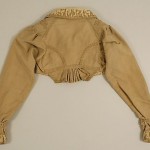
Back detail of a spencer, 1813, American or European, Wool and silk, Metropolitan Museum of Art.

Back detail of a spencer, 1813, American or European, Wool and silk, Metropolitan Museum of Art.

To fake Regency, you need do none of the above. Focus on the one detail that’s not too hard to manage: the diamond back.

The look was on almost all women’s wear of the period, achieved by a shoulder seam that fell behind, rather than on top of the shoulder, and a pair of side-back seams that curved from the outside edge of the back gathers on gowns to partway up the back of the sleeve. The back of the sleeve fit farther into the back of the bodice than a modern sleeve, too. Click on the thumbnails for examples of the backs of spencers.
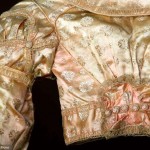
Silk spencer, 1810. Augusta Auctions.

Silk spencer, 1810. Augusta Auctions.

A faux-diamond-back can easily be achieved by numerous methods. You can fake the seams with a line of fabric paint or even fine-line permanent marker in a slightly darker colour, a line of top-stitching using hand back-stitching in embroidery thread, or machine top-stitching a double line.
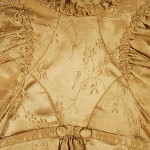
Spencer, early 19th century, American or European, silk. Metropolitan Museum of Art.

Spencer, early 19th century, American or European, silk. Metropolitan Museum of Art.

Better yet,  Regency clothing often had trim over these seams to show off the shape, making them even easier to fake: cording, piping, soutache, braid, narrow ribbon, narrow bias tape, and other similar materials can be attached along the line where the seams would sit.

I got a great deal on a few dozen packages of bias binding tape in multiple colours at Value Village for $3.99, and I’m using a slightly darker green for all my trim, as I have four packages in two sizes. For most of the trim, I’ve just folded 3/4″ bias tape in on itself to the width of the pieces folded behind. This means it has some thickness at 1/4″ wide.

If you’re an experienced sewer, you can make piping or a piped band from purchased bias tape. Links to tutorials are at the end of this post.

When shopping for the blazer, the faux-diamond-back will look better if you buy one that doesn’t have a centre back seam. In fact, many that don’t have the centre back seam have a side panel with a seam similar to the lower curve of some Regency clothing backs, and I’d suggest using that curve, plus faking the shoulder seam that sits two or more inches behind the modern one.
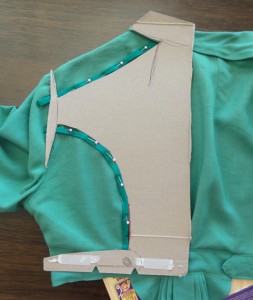
pomona spencer pinning on fake regency diamond backIt’s best to make a pattern for your trim so it’s mirror image both sides. Light cardboard–mine was from a breakfast cereal box–works well. Set it so one side runs along the centre back of your shortened and hemmed blazer, and play with lines and curves in pencil until you see one you like. Mark it with marker and cut out to make a pattern to guide in placement of the trim on each side.

I pinned my trim in place, then put it on a model for a photo. On the model, the fake Regency shoulder seams looked better if dropped down more at the sleeve end, so check before you sew. Attach the trim after you make any adjustments to sleeves, described next.
1810
1810

1815-1820

1815-1820

Modern reproduction.

Modern reproduction.

1815 LACMA

1815 LACMA

1820-25, Metropolitan Museum of Art
1820-25, Metropolitan Museum of Art

1820, Metropolitan Museum of Art

1820, Metropolitan Museum of Art

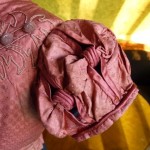
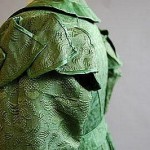
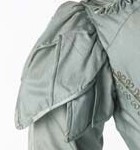
Like gowns, spencers often had puffed sleeves or similar-looking embellishments over a straight sleeve, however, many had a plain sleeve (see some examples above), so faking Regency here is optional.

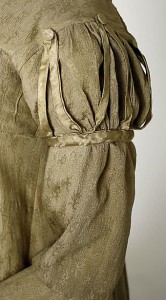
If you prefer a little over-sleeve, examples to the right range from clusters of petal-like fabric to fancy slashed and looped designs. These sleeve examples are on spencers, and more ideas from gowns can be found in the post, “Were Regency gowns worn on the Titanic?

You won’t have enough fabric to make the full sleeve variations, but a simple, small capped, tulip, or shirred cap sleeve, or a rolled tube at the top of the sleeve, can come from the fabric cut from the back of the blazer, or you can utilize sleeves made with coordinating fabric.

There’s a tutorial below for tulip sleeves. If desired, use the same trim you used to fake Regency with your diamond back to attach the new sleeve over the old one at the seam line, or turn under 1/4″ to 1/2″ and top-stitch close to the edge. If it’s possible to hide the ends, make the new sleeve fit an inch or two farther towards the middle of the back of your spencer, so you also have a fake Regency sleeve fit!
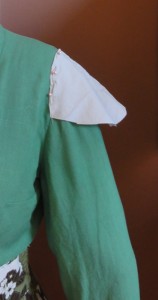
pomona spencer gathered cap sleeve mock upFor my fake short over-sleeve, I used the leftover fabric from the back panel. First, I experimented with some cheap fabric from a pair of torn pants to make the best of the small amount of fabric. A piped band (tutorials below) made from 2″ wide bias tape held the gathers, topped with one of the self-covered buttons from the old sleeve cuffs.
1818, Metropolitan Museum of Art

1818, Metropolitan Museum of Art

The simplest fake Regency sleeve topper, to the right, was another option I considered. I could have used the 3/4″ bias tape (sewn closed) and the three buttons from the 3/4 sleeves on each side. This can also be accomplished with ribbon, if the same ribbon is used for the fake Regency diamond back.

Self-covered button kits can be purchased at fabric stores for about $3 a package of 3-6, depending on size (full price, but I got one from Dressew for $0.99!), and they’re easy to make.

Alternatively, matching ribbon or fabric can be stretched over stiff plastic circles with a little glue, then the back fabric stitched in place. It should be slightly more than double the diameter so it closes fully behind the button and there’s something to sew it on with. Important note: the latter is fine for trim but not for actual working buttons.
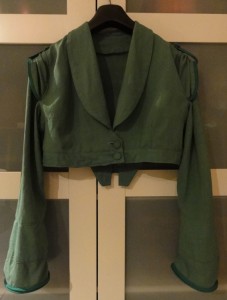
The finished pomona green spencer, with cap sleeves over long sleeves, tied back with a piped band and button from the original blazer.

Front view of Suzan Lauder’s pomona green spencer, with cap sleeves over long sleeves, tied back with a piped band and button from the original blazer. Long sleeves are trimmed at the bottom with piped band also. An extra button was added to empire waist band, made from original blazer facing.
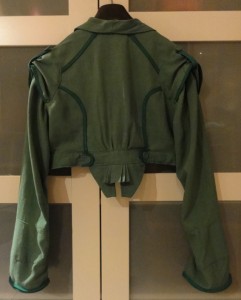
Back view of Suzan Lauder's pomona green spencer, with Fake Regency diamond back and pleated skirt-like ruffle.

Back view of Suzan Lauder’s pomona green spencer, with Fake Regency diamond back and pleated skirt-like ruffle. Buttons from the original 3/4 sleeve cuffs are used on the tabs at the back of the empire waist band.

This project wasn’t easy for me, though it may be for a more experienced sewer. I hadn’t sewn much for 30 years, except for the odd repair, straight-line window toppers and throw cushions, or slapping together a Hallowe’en costume that was meant to last a few hours. I became good friends with my stitch ripper over the last two weeks and learned a few things along the way.

No-sew iron-on tape would work for simpler modifications to make a spencer, but some of my problems came from construction and developing my own patterns, so they’d occur had I used no-sew tape, too. In addition, it sucks for curves, and you couldn’t have made piped band. Other trims (like in the thumbnails) are fine, and there’s nothing wrong with straight lines for your fake Regency diamond back.

Most of these ideas for faking Regency are applicable to gowns, pelisses, redingcotes, and any other bodiced clothing of the Regency period. Have fun shopping for trim on sale or in grab bags at thrift stores!
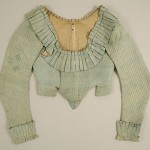
A blue quilted spencer, front. Late 18th early to 19th century, Metropolitan Museum of Art.
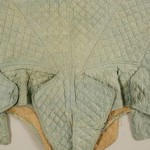
A blue quilted spencer, front. Late 18th early to 19th century, Metropolitan Museum of Art.

Spencer, late 18th to early 19th century, French, silk. Note the unusual detail below the centre back.

Spencer, late 18th to early 19th century, French, silk. Note the unusual detail below the centre back.

~~~

Web sites with ideas and tutorials:

Inspiration: So Many Backs from Atelier Nostalgia Though these are gowns, you can see the line of the Regency diamond back you want to emulate, and variations on that design.

Sew Many Seams’ Tulip Sleeve Tutorial  Shows two types of tulip sleeves to make, using a plain sleeve pattern as a guide.

Slashed puffed sleeve from Firefly Path: The inside of the slash can be made from the spare fabric cut from the spencer, and the oversleeve from a complimentary fabric using a regular puffed sleeve pattern. Maybe use that extra cushion cover or dinner napkin! The slashes need not be filled in, either. You can loop trim material from the inside shoulder to outside through each slash. Similarly, a loop can be made from the cuff inside to outside. Very fake Regency!

Sew4Home’s excellent tutorial on how to make your own piping and bias tape.

For the advanced sewer, two choices for instructions for a piped band: Kleidung 1800‘s site is German, but brief descriptions of each step are in English under the photos. Tea in a Teacup has a different way to make the band, and it looks a bit different in the end.

For the ambitious spencer designer, two posts about making soutache designs: The Fashionable Past shows technique while trimming a Victorian coat, and a trick to make the loops easy by Threads.

~~~

Next few posts: I’ve started on projects for Mr. Suze’s costume, and I have a “Grown-up Lady’s Lace Cap” to make as part of the give-away for my guest post on Roof Beam Reader’s blog as part of his Austen in August (#AusteninAugustRBR) reading challenge, and I’ll draft up the cap pattern to share.

~~~

I WON A PRIZE!!! As part of the same reading challenge above, I won JAFF Author Lisa Pliscou‘s Young Jane Austen: Becoming a Writer, which I’ve been coveting since it came out, for its cool illustrations. I’ve entered every contest I’ve seen about this book! HOORAY FOR ME!

~~~

There are still spaces remaining for the Jane Austen Society of North America Annual General Meeting on October 9-11, 2015, my goal destination for the Thrift Shop Regency Costume Experiment series. The conference theme is “Living in Jane Austen’s World,” and the workshops run the gamut (?? who says stuff like that?) from Regency medicine and home remedies, to evaluation of the wealth of Austen’s characters; the influence of India on Regency England; plants and gardens of the Regency (featuring Meryton Press’s Linda Beutler, an international clematis expert!); food, fashion, and social events of the period; and many others! Pre-conference activities start on October 7. Registration deadline is September 1, 2015, so don’t delay!


Fun with Reticules: The first half-dozen designs!

One cushion cover down, two to go! My favourite, the silk with strands of beads about every half inch along the edge, was the one to start with. Recall that it was $1.99 from Women in Need (WiN). A back zipper limited the use with my standard designs, which yield for four reticules from one cushion, two of each of two designs. Instead, I still used the first design, but made two from the wider section, after which I stared at the leftover panel for a while.

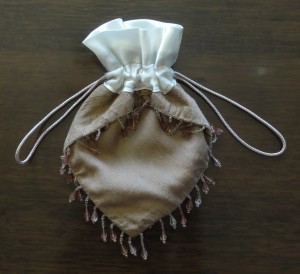
Two small square reticules could be made, but the beads were on two sides of each half. I decided on a three-sided reticule with the row of beads at the top, below a ruffle.

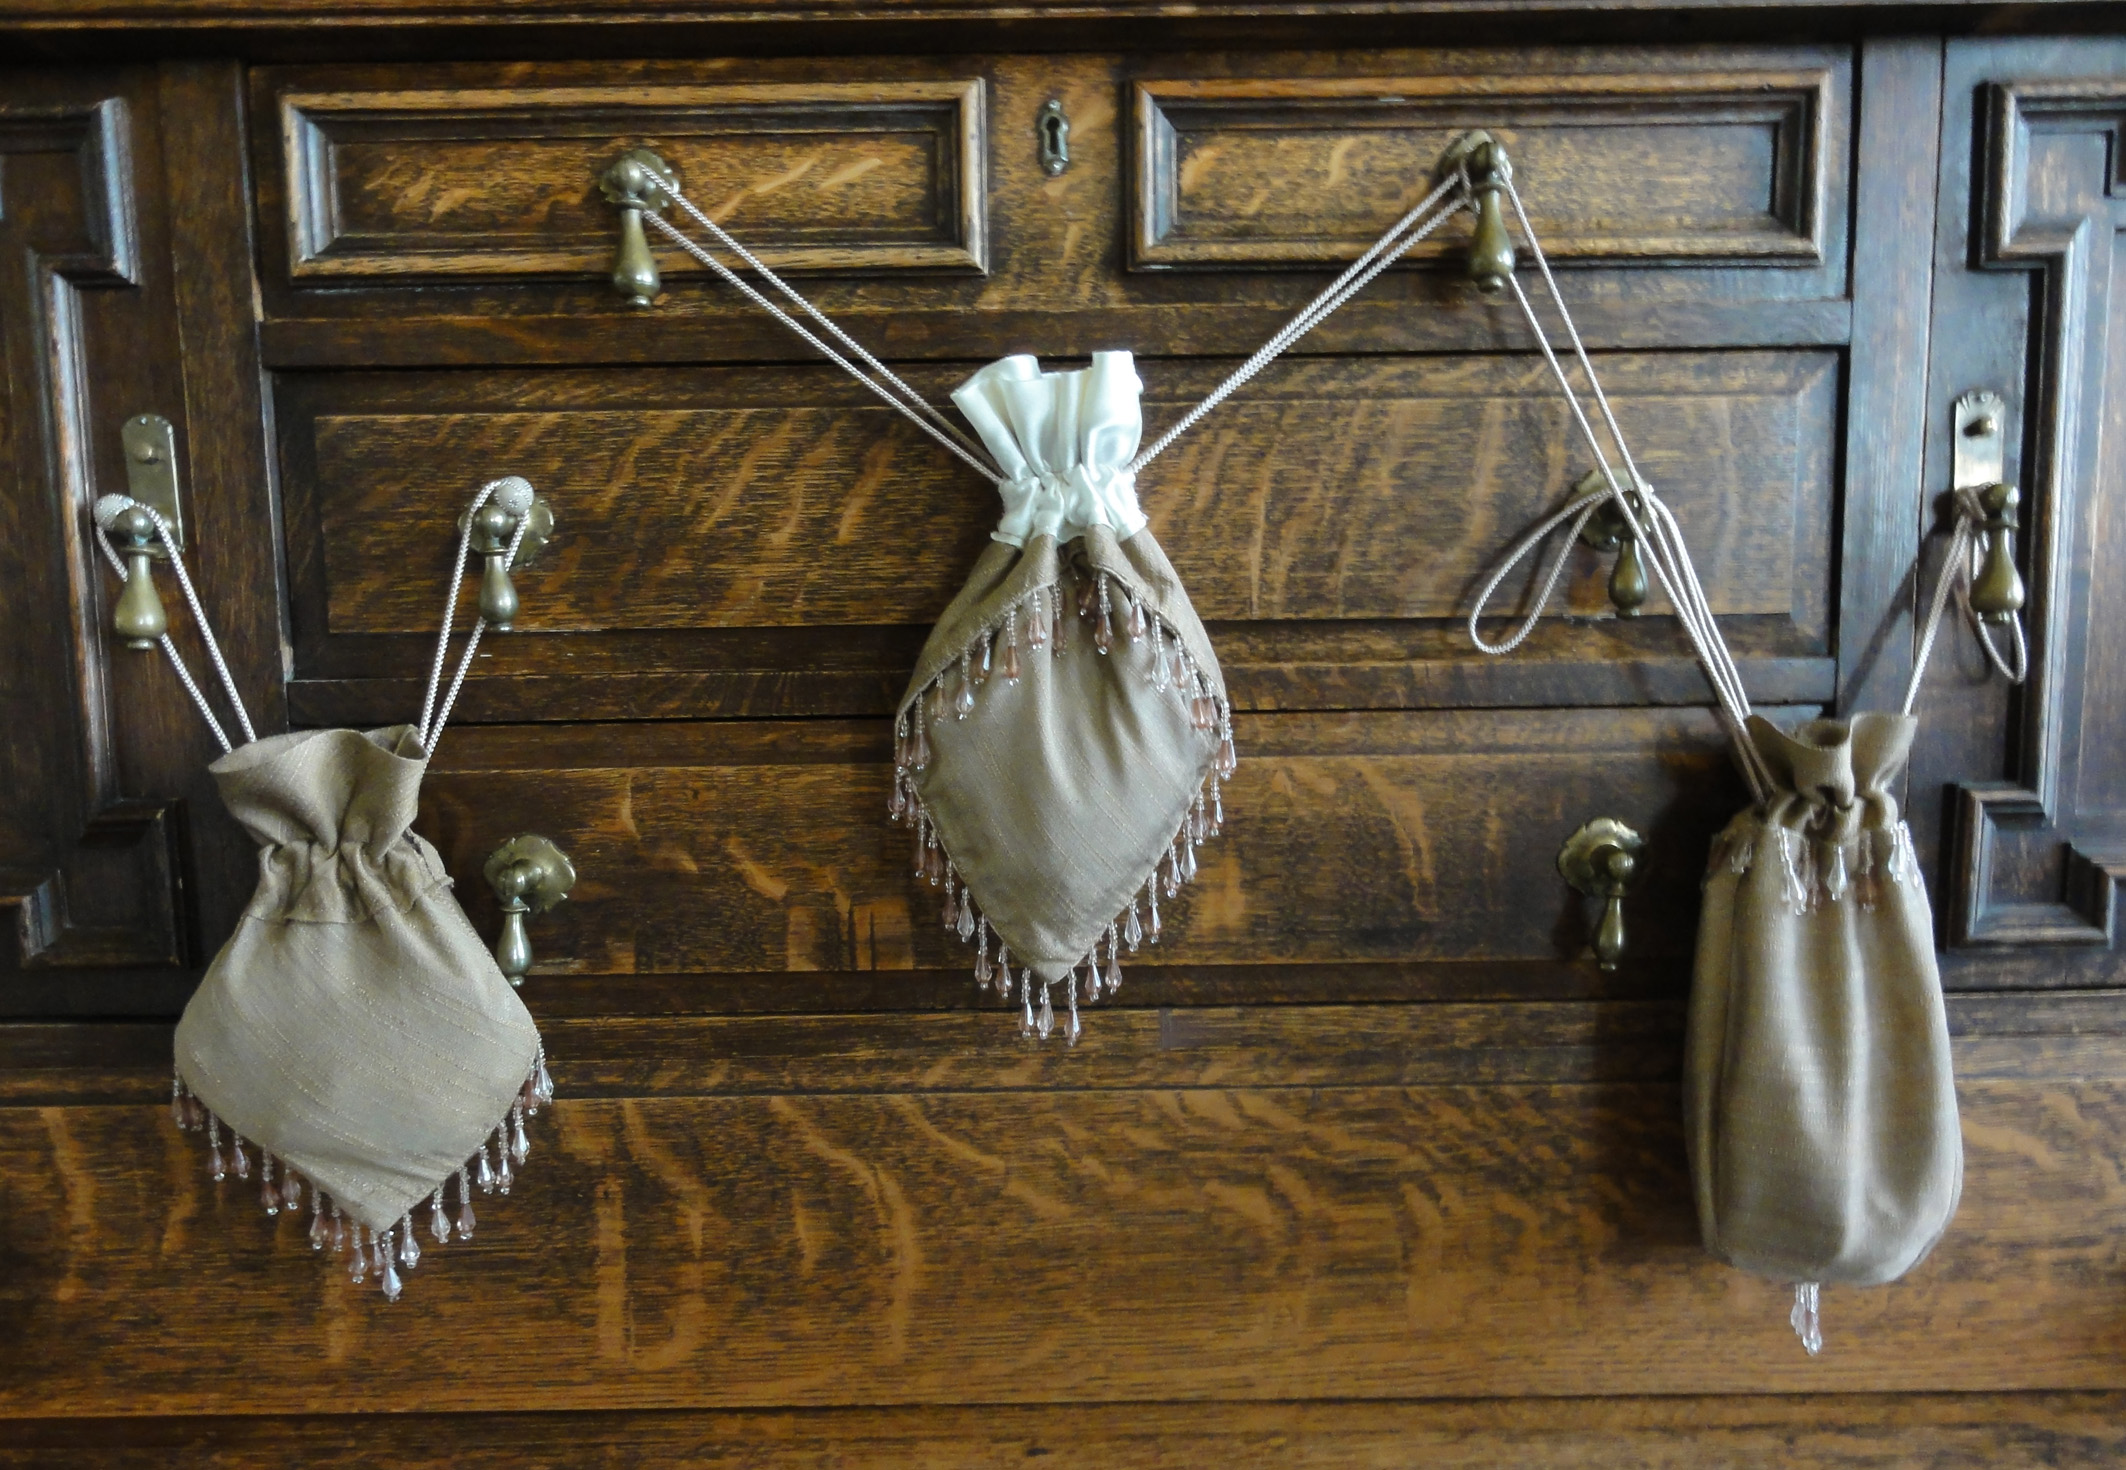
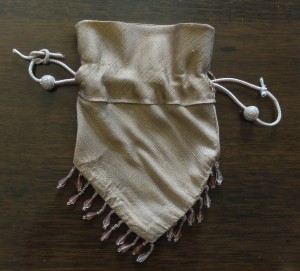
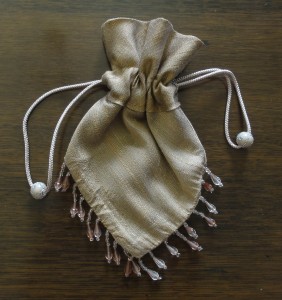
Beaded cushion cover reticules: Design #1, Design #2, and "Bonus Reticule," similar to Design #5 ("The American Girl's Book" Three-Sided Reticule).

Beaded cushion cover reticules: Design #1, Design #2, and “Bonus Reticule,” similar to Design #5 (“The American Girl’s Book” Three-Sided Reticule).

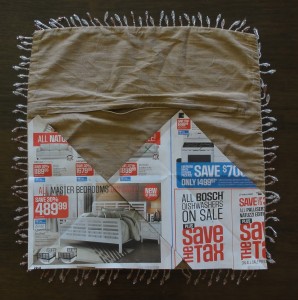
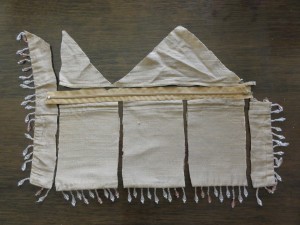
I started by cutting a square piece of newspaper the size of my cushion cover, then folding it on the diagonal and marking the centre. The cushion cover had a zipper about 2/3 of the way across the back, so I cut the pattern to the size of the largest back panel. I realized I’d only get two reticules made from this piece.

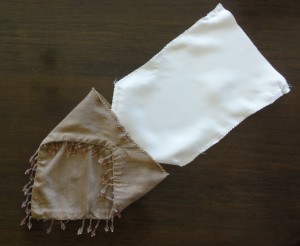
Appended to this post are two pdfs: one for the reticules and one for trim. The first has the main patterns for 6 different reticules, the instructions on how to sew the reticules, including special no-sew iron-on tape instructions, and a bonus design for leftover panels. A second pdf describes how to run and trim drawstrings, decorating the reticule body, several ways to line a reticule, and the installation of tassels and other hanging baubles.

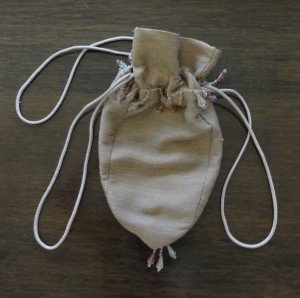
with pattern pieces for #1 and #2This cushion cover made Reticule #1 and Reticule #2 (with exposed lining). I marked the design on my newspaper, cut each pattern out, pinned it on the fabric, cut the fabric, and assembled each according to the instructions.

I added beads to the loops of the drawstrings of Reticule #1 because it was simpler in appearance than the other. You could add a lot more decoration to either if desired.beaded cushion cover reticule #1 thread beads and tie with reef knot

Suzan Lauder's Cushion Cover Reticules, Design #1

Suzan Lauder’s Cushion Cover Reticules, Design #1

Suzan Lauder's Cushion Cover Reticules, Design #2, "The Envelope Reticule."

Suzan Lauder’s Cushion Cover Reticules, Design #2, “The Envelope Reticule.”

#2 lining goes in wrong side out with outer part right side out


#3 cuts


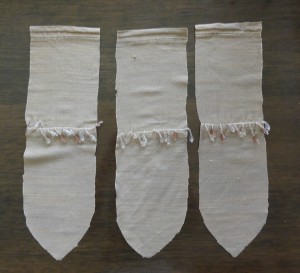
I removed the zipper from the leftover panel and cut the fabric into three strips, then opened them up to make panels for the final reticule. The beads that were on the end wound up at the top of the reticule, since the section below them became the body and the section above, the drawstring casing and a ruffle. This is shown as a “Bonus Reticule on the pdf, which has patterns and instructions for Reticules #1 through #6.

In retrospect, I wish I’d left the row of beads halfway down instead of at the top–in other words, shortened the lower portion rather than trimming the upper portion prior to sewing. I could have used the beads cut off from the sides and tucked them under the edge of the drawstring casing for double the beads.

I also had some difficulty with this one since I made it on the fly, where I’d carefully written the instructions for the others first, made them, then updated the instructions for the learning experience. I found it awkward to sew the beads at the base, and next time, I’ll just re-thread them and hand-sew them on at the end.

Note that similar reticules on Etsy start at $15, and cheap-looking bat-wing ones sell in the $25 range!

Bonus Reticule, similar to Reticule #5.

Bonus Reticule, similar to Reticule #5.

#3 three panels spread out


PDFs for this post:
Cushion Cover Reticule Patterns 1 to 6 by Suzan Lauder
Drawstrings, Trim, Linings, and Tassels for Reticules by Suzan Lauder

~~~

Additional reticule designs for the other two cushions will be shown in a few weeks, and two more pdf’s will be added with that post. The main hangup is I don’t like the designs I have for the next two cushions. A paper fill inside the cording of one swelled when I washed it, so the look of the threads has deteriorated where the brown shows through. I can’t use it where I’d planned: Reticule #6. In addition, the woven pattern on its fabric wouldn’t be shown off to its best in a petal reticule. The other has no trim and is a bit bland, but may turn into a pineapple yet! It would be great if I could find one more.

But do I need to make more reticules to test my patterns and show off my designs? I’m running out of time before the Louisville JASNA AGM. Instead of shopping for more for myself, as I need to sew my last items, and Mr. Suze needs a costume! I’ll post about the Gentleman’s Thrift Shop Regency Costume as I progress.

I’ll divulge that I’m happy with four purchases for my husband’s costume so far:

  • New black leather dressage riding boots for $65 via a local “used items for sale by owner” web site. The fellow bought them for over $200 for a very tall daughter, who didn’t like them. DH will spend $40 to have them cut down 2″, rather than risk blisters behind his knees. From what I can see on the Internet, that’s a huge bargain! DH has hard-to-fit feet, and boots will be easier to fit than dance slippers.
  • Buff-coloured, slim-fitting, fine, faux-suede trousers for $6.99 from The Salvation Army will be made into breeches, with part of a leg used to make the front flap. I already have some nice knee buckles from an old visit to Dressew. They were $1 each.
  • A dark green, wool, cutaway morning coat for $65 (including shipping) from an online seller of former rental tuxedos on eBay. The front bottom edge will be cut to a Regency line, and the lapels tacked a bit higher if possible.
  • An ivory, paisley, satin waistcoat from a different online seller of used tuxedos, for $25 (including shipping), which comes with a matching bow tie! All the men’s vests I saw at local thrift stores were wool, and I was even looking at ladies’, just in case. I’ll cut the modern bottom edge straight across and use the extra pieces to make a collar. The buttons will be replaced with self-covered ones, perhaps using that bow tie. I already have two packs of four self-covered button kits, plus brass trim rings, from Dressew for $0.25 a package!

~~~

Next Post: Faking Regency #1, using my spencer and some artwork and museum pieces for ideas.

~~~

RETICULE GIVE-AWAYS! I’ll be giving away one reticule as part of my upcoming guest post on Austen in August, on August 24, 2015. It will be chosen from the two I improved for the “All the Pretty Little Purses” post (below), and perhaps one or more of the cushion cover reticules from today, or any I make before then! Of course, they’re handmade by a non-crafty person, so there are flaws, but I’ve signed each one inside.

The completed green and black reticules. Note that with the black one, I tied the  loose ends of the velvet ribbon together firmly, and slid them into the ribbon sleeve, rather than add tassels as on the green cord. (The black ribbon was not long enough.) You could also thread beads and sew them onto the ends instead of tassels.

Suzan Lauder’s Thrift Shop Regency Costume Experiment: The completed green and black reticules.

A pretty wrap to keep out the chill: Regency shawls.

Shawl, muslin cotton, white embroidery. Made in India, 1806- 1814.

Shawl, muslin cotton, white embroidery. Made in India, 1806- 1814.

Whitework Shawl, 1810-1820

Whitework Shawl, 1810-1820

The first Regency shawls I saw were summer-weight, wispy things, mostly white-on-white and all lacy-looking. Thus, I purchased a sheer Indian shawl, as it was as close as I could get. Made of fine net in a seafoam colour with silver embroidery, it was a compromise, but I knew silver embroidery was popular on clothing in the Regency period. (Click on thumbnails for larger images.)

Shawl, cashmere and silk, 1800–1820, Metropolitan Museum of Art

Shawl, cashmere and silk, 1800–1820, Metropolitan Museum of Art

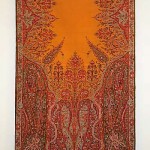
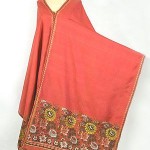
At some point, I saw other shawls, and realized these delicate ones were the minority. The majority were the  Kashmiri shawls, with their ubiquitous wide paisley panel at the ends and a border along the sides. Paisley, paisley, paisley. Most were cashmere, some with silk for a magnificent sheen. Wool, silk, or blends were also seen.

Shawl, Spitalfields. Silk, England 1810 -1815. The workers of the silk weaving district in London were French Huguenot silk workers who had fled to England to escape a religious purge.

Shawl, Spitalfields. Silk, England 1810 -1815. The workers of the silk weaving district in London were French Huguenot silk workers who had fled to England to escape a religious purge.

Shawl, wool and silk, Scotland, 1815.

Shawl, wool and silk, Scotland, 1815.

Shawl. Silk and wool. England, circa 1815.

Shawl. Silk and wool. England, circa 1815.


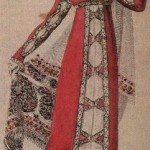
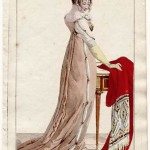
1812, Costume Parisien.

1812, Costume Parisien.

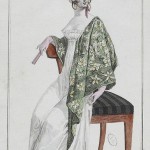
1811, Costume Parisien

1811, Costume Parisien

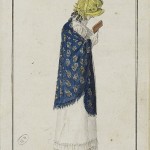
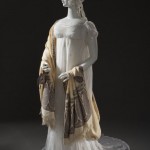
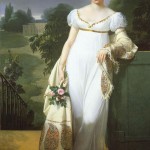
The love affair with Kashmiri textiles went to gowns, too. You can see how they were matched.


1810, Costume Parisien.

1810, Costume Parisien.

1810, LACMA collections.

1810, LACMA collections.

Felicite de Durfort von Merry-Joseph Blondel, 1808

Felicite de Durfort von Merry-Joseph Blondel, 1808

What’s with the paisley? The bent teardrop was a popular “Tree of Life” design in Persia. When Scotland became a leader in the production of textiles, the town of Paisley became the place where cashmere shawls were made. In England, the design became named after the town.

I was ecstatic when I found two paisley Pashmina shawls at Value Village for $7.99. This turned into a facepalm moment in my shopping history. I chose the one I liked best, that would go best with my outfits, and set aside the other. The next day, I realized these shawls were uncommon, and I could have given the second to a friend, or even sold it to someone assembling a Regency costume. But when I went back, the second one was gone.


While paisley was popular, Regency shawls used other designs, in all the colours of the rainbow!

1801, Costume Parisien

1801, Costume Parisien

Shawl, silk and cotton, English, 1800-50, Metropolitan Museum of Art

Shawl, silk and cotton, English, 1800-50, Metropolitan Museum of Art

1802, Journal des Dames et des Modes

1802, Journal des Dames et des Modes

Spitalfields rectangular silk shawl with Chinoiserie borders, c.1810

Spitalfields rectangular silk shawl with Chinoiserie borders, c.1810

La Belle Assemblée, February 1811.

La Belle Assemblée, February 1811.

Silk shawl by Spitalfields, London, 1810-1815.

Silk shawl by Spitalfields, London, 1810-1815.


The fiber Kashmir, or cashmere, is made from the down hairs of Nepalese capra hircus goats, also called Cashmere goats or Pashmina goats. The Pashmina shawl is the modern equivalent of the Kashmiri shawl, and they’re ubiquitous once again, but in different designs. Pashmina is a high-level cashmere, made from the thinnest threads.

However, most modern shawls labelled “Pashmina” have no Pashmina hair in them, but unlike the word “cashmere,” there is no regulation of the term. The best knock-offs are made from cashmere and silk and cost around $100; the cheapest are $20 for viscose and/or wool. The latter textiles may keep you warm, but don’t have the light weight of the fibers they’re mimicking. Real cashmere will pill with wear, and doesn’t have sheen or create static electricity.

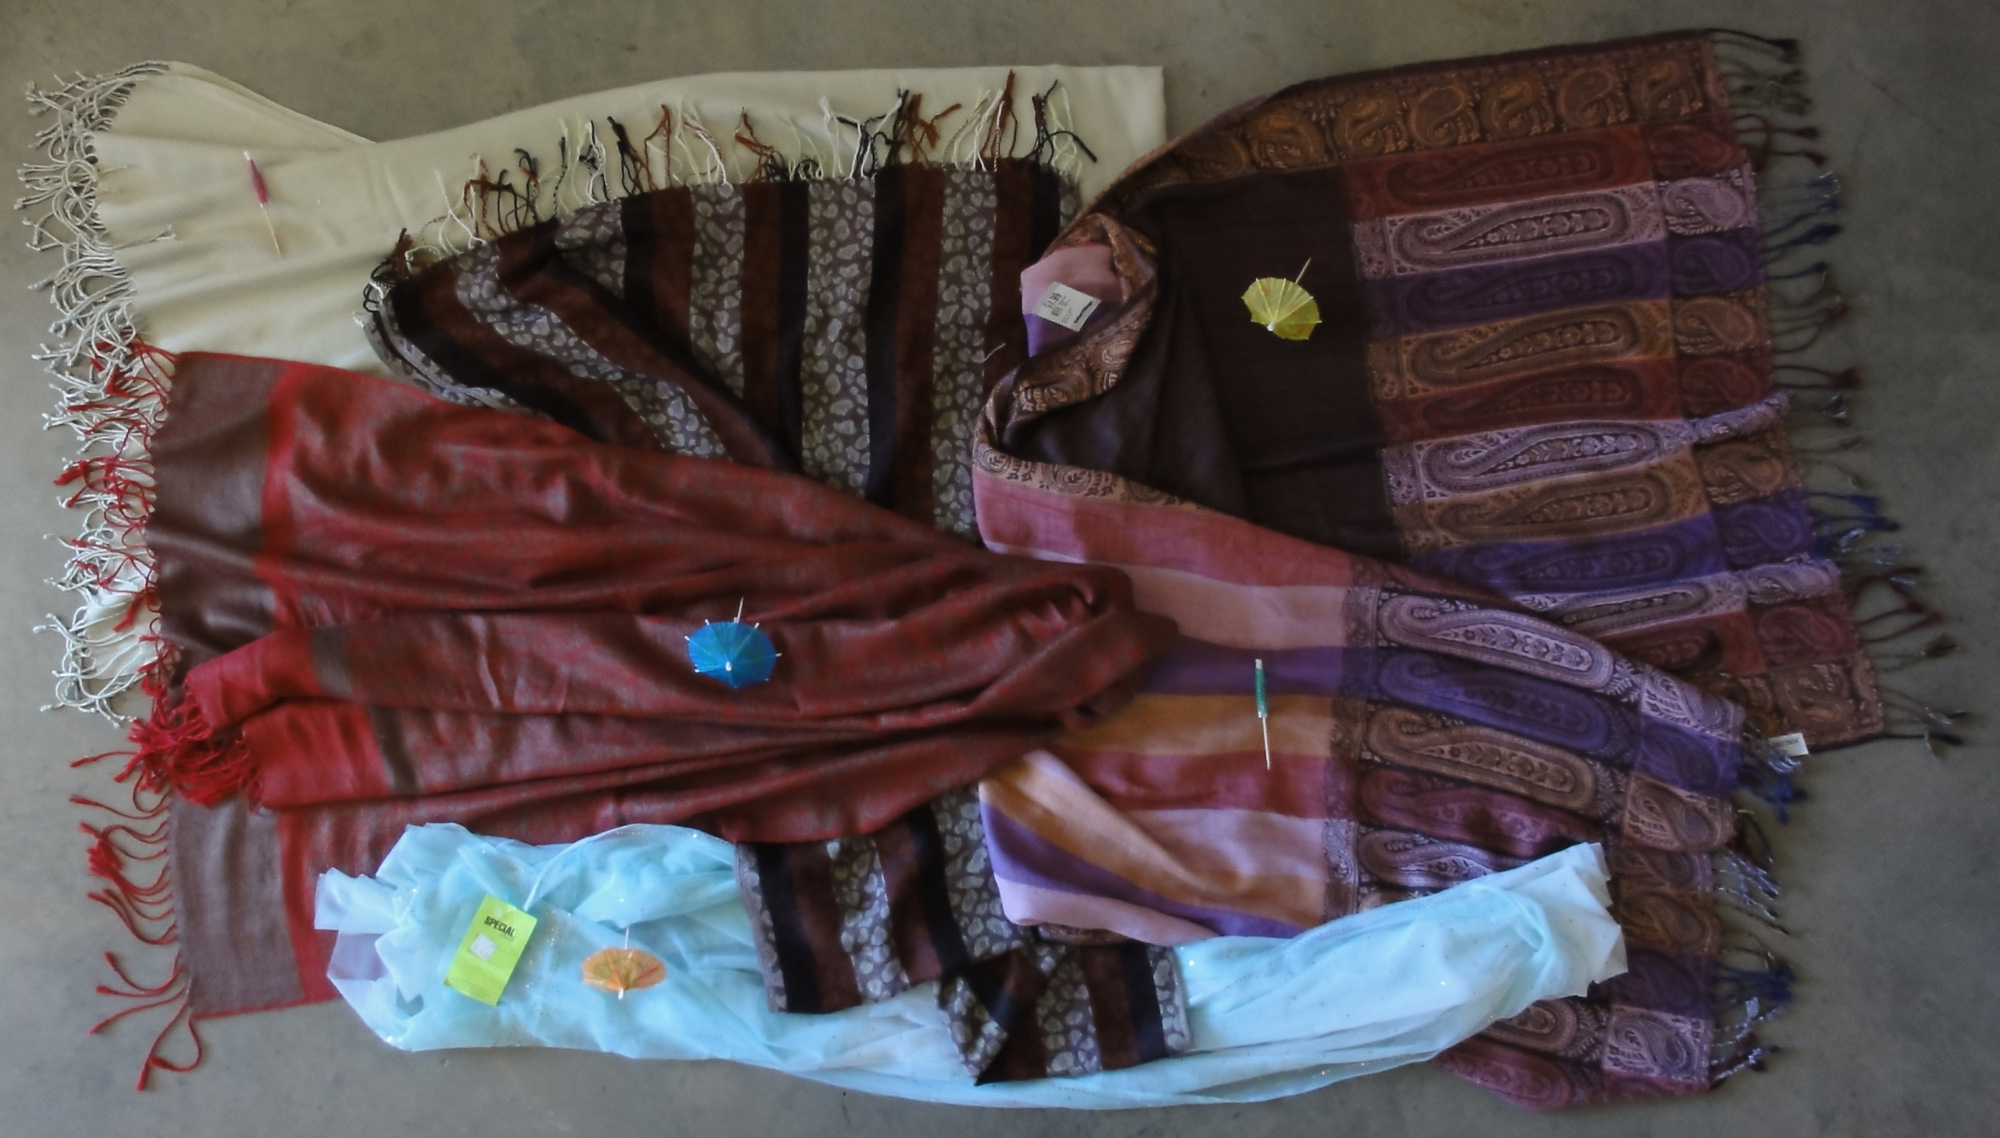
I bought a real Pashmina in Turkey in 2001, and since have acquired two knock-offs. Below are my shawls. They’re folded in half both so you can see their true size in comparison with one another, except the Value Village shawl is scrunched a bit to flip it over so you can the pattern on each side.My shawlsThe parasol ratings show the real Pashmina (pale green) with a closed umbrella, meaning it’s okay, but not the best choice. There are almost no shawls in my Regency image collection that are plain with no pattern. Its large size and light weight in comparison to its warmth is great, though. It’s my airplane blanket!

The red and brown “Pashmina” is as soft and has a nice silk-like glow, but its perpetually smooth texture and $19.99 price make me believe it’s viscose. The pattern and the stripe near the ends make this shawl reasonable in a Regency costume.

The brown striped “Pashmina” with animal spots was a gift. It’s small for a shawl: I use it as a large scarf. The fabric is coarse and probably contains a fair bit of sheep’s or regular goat’s wool. Though this scarf goes well with many of my winter clothes, the pattern eliminates it from my Regency wardrobe, so no parasol.

The previously mentioned seafoam net with silver is like an evening gown wrap, and that will be its best use at any Regency event I’ll attend.

Shawl c.1820

Shawl c.1820

The Value Village shawl is two-sided, with the centre area having bold stripes on one side and a dark grey main field opposite. When I took the photograph, I had not recalled any Regency shawls with a bold stripe in the main field, and thought I’d use what is likely intended as the back as the outside of the shawl. When I gathered photos for this post, I found an historical example similar to the side of the thrift store shawl that got a closed parasol! The sun came out, so we need to open that little parasol perched on the stripes!

Shawl, British, silk c.1822, Metropolitan Museum of Art

An interesting historical shawl is one that has no paisley and uses a different traditional design altogether: tartan. It’s a pity the only piece of Lauder tartan I own is a small scarf! I’d love to find a way to work it into one of the costumes without cutting it up or modifying it. It would be lame as a turban. These days, over the shoulder and tucked into the belt is reasonable, but I’ve yet to see a Regency outfit with tartan in this way. Do any of you know?


More shawls: Though mostly post-Regency, Mimi Matthews’ blog has a selection of beautiful 19th century artwork with shawls.

~~~

I’d planned to do a cushion reticule post today, but I haven’t made the last reticule for the set, and I had company this weekend from two different cities! Neither stayed with us, but my house needed to be tidied, and after that, our time was full with brunch, and The Bug Zoo, and skinny, former opium den streets, and other such tourist attractions!

I decided to do this shawl blog post first, as it was quick and easy. I know you don’t mind!

Next post: A twist added another design to my reticule arsenal, and three different designs will be shown, plus I hope to have the pdf’s ready for the patterns and instructions. After that, I still have at least three other designs I want to try making, but I may take a reticule break and show some of the “Faking Regency” tips.